According to W3Techs, WordPress powers over 43.4% of all websites on the internet. This means a massive 61.2% of the total market share. That’s not just huge, it indicates how popular WordPress CMS is at the moment. And guess what? The usage is continuously growing.
Let me tell you something that might make you drop your jaw. If you thought this usage is for the basic bloggers and casual sites, you’re absolutely wrong. It includes well established companies to popular eCommerce stores. Even major agencies are moving to WordPress just for its ease of use.
WordPress has become the go-to content management system (CMS) for everyone. The professionals, developers, designers, freelancers, and business owners and the list is forever increasing. It’s flexible, scalable, and user-friendly. Once you know your way around WordPress, you’ll never move to any other CMS.
So, if you’ve just installed WordPress or want to start using it chances are you want to know your way around the admin dashboard (Admin panel) before you start.
I’ve talked with many users who don’t have any prior knowledge and told me it's a bit intimidating at first. It’s packed with menus, settings, and features that aren’t immediately self-explanatory.
And that’s exactly why I’ve thought of writing this guide. To help out users and make the process very easy for you.
No matter you’re just starting out, want to use WordPress or returned after a long time, this guide will teach you:
- What each key section of the admin panel does
- How to navigate and customize your dashboard
- Which settings matter most when getting started
- How to streamline your workflow with plugins like WP Adminify
So if you're here because you searched for something like “how to use the WordPress admin panel” or “WordPress dashboard tutorial,” you’re in the right place. Let me help you explore and understand the WordPress Admin Panel without unnecessary information.
What is the WordPress Admin Panel? A Complete Guide of the WordPress Admin Dashboard
The WordPress Admin dashboard is often referred to as the WordPress panel. It is the central control centre of your website. It’s where all the magic happens behind the scenes.
From here, you can publish content, manage media, install plugins, customize your site’s appearance, and configure all the settings of your website.
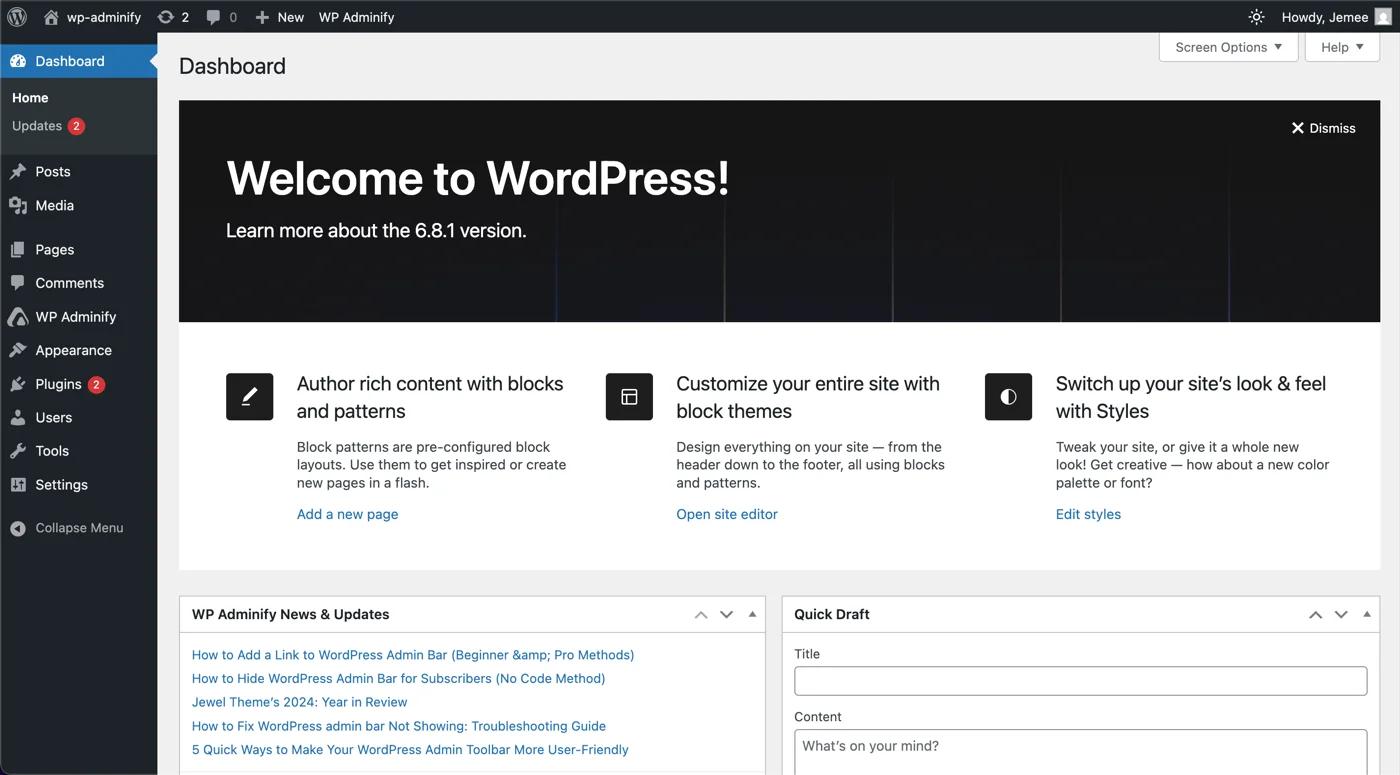
After you log in to your website, the first thing you see is the Dashboard. From here, you can access everything on your website.
Core Items of the WordPress Admin Panel
The left navigation menu you see is called the Admin Sidebar. Here’s a closer look at the key sections you’ll see here:
Dashboard: A quick overview of recent activity, site health status, and WordPress news.
- Home: The main dashboard screen showing an overview of your site’s activity and important updates.
- Updates: Here, you can see if there are any updates available for WordPress core, themes, or plugins.
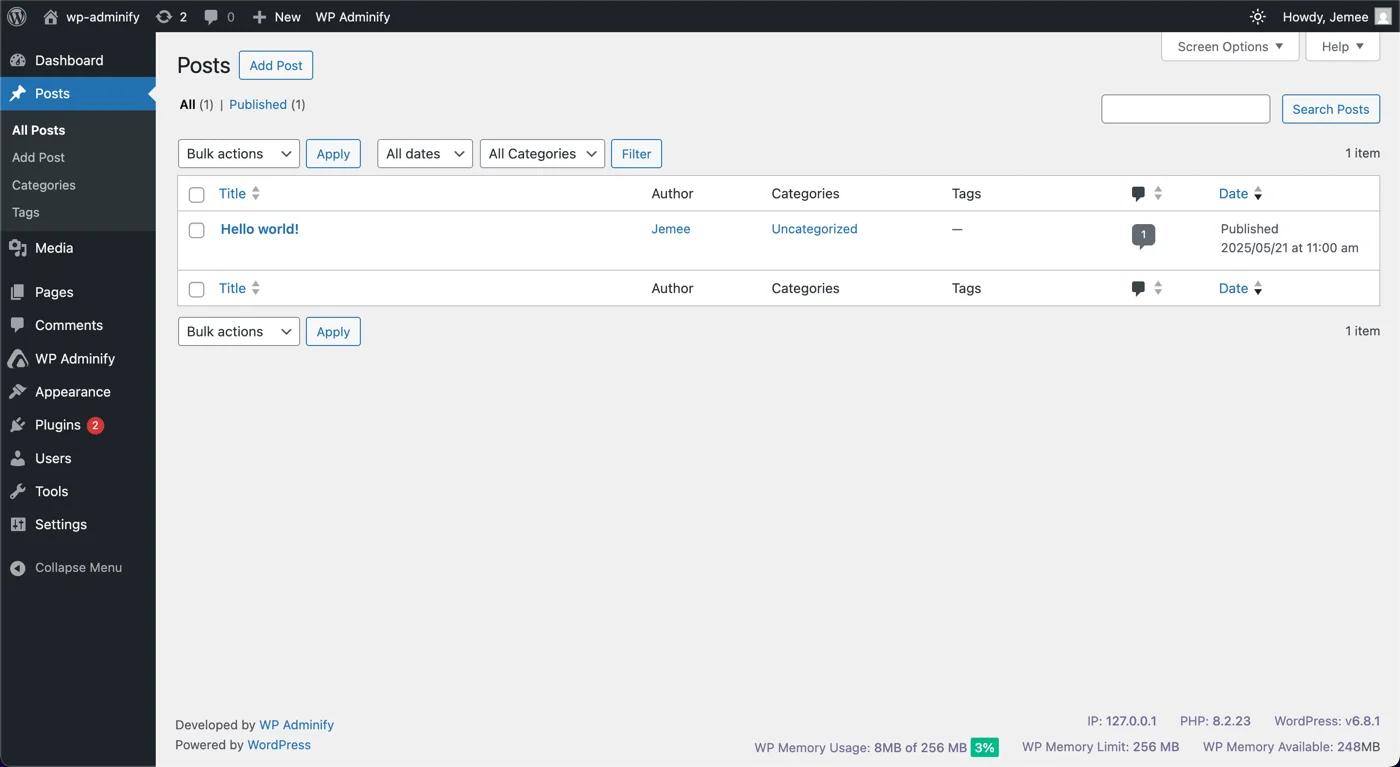
Posts: Create, edit, and delete posts. Includes categories and tags for better content structure.
- All Posts: Manage all your blog posts here. You can edit, delete, and view your posts.
- Add New: Create a new blog post.
- Categories: Organize your posts by creating and managing categories.
- Tags: Add and manage tags for your posts to improve searchability.
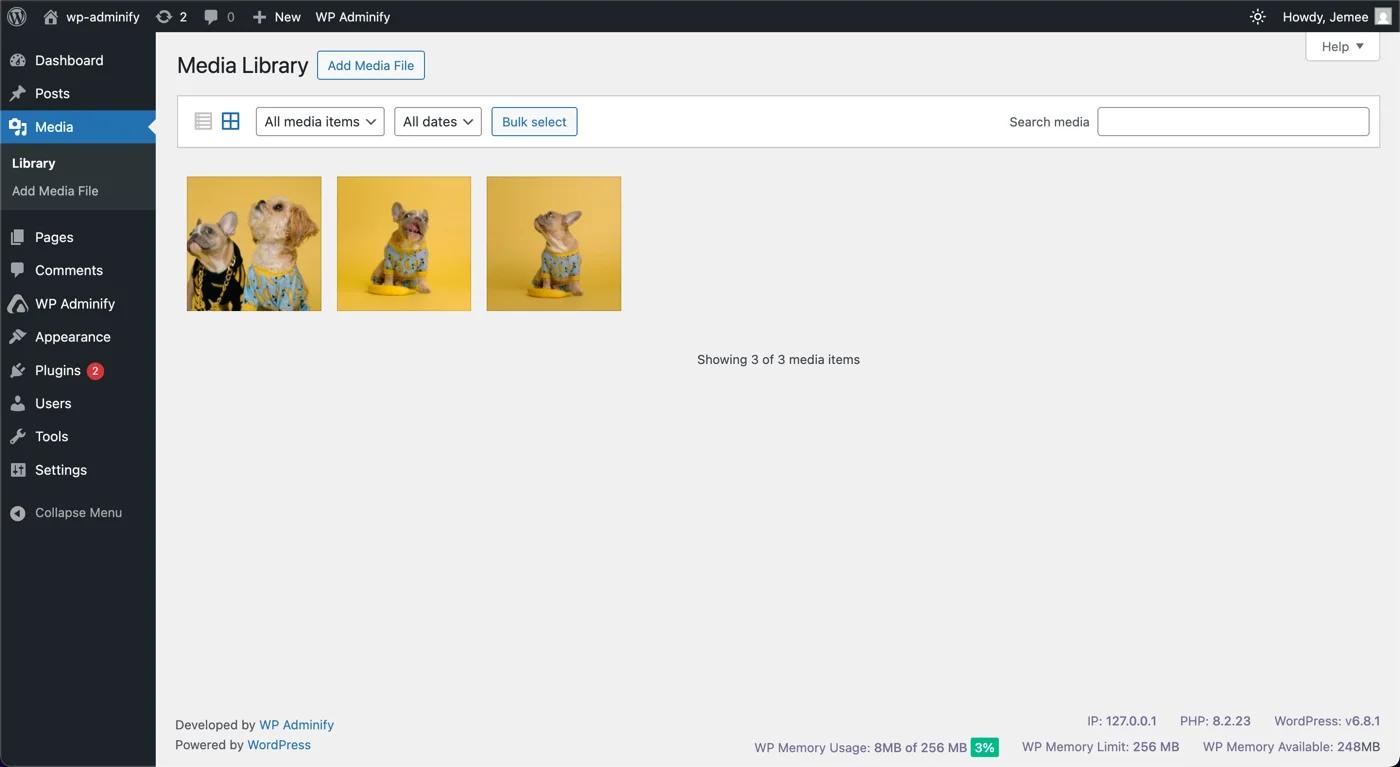
Media: Your media library to upload images, videos, PDFs, and other files.
- Library: This is where all your uploaded images, videos, and other media files are stored.
- Add New: Upload new media files.
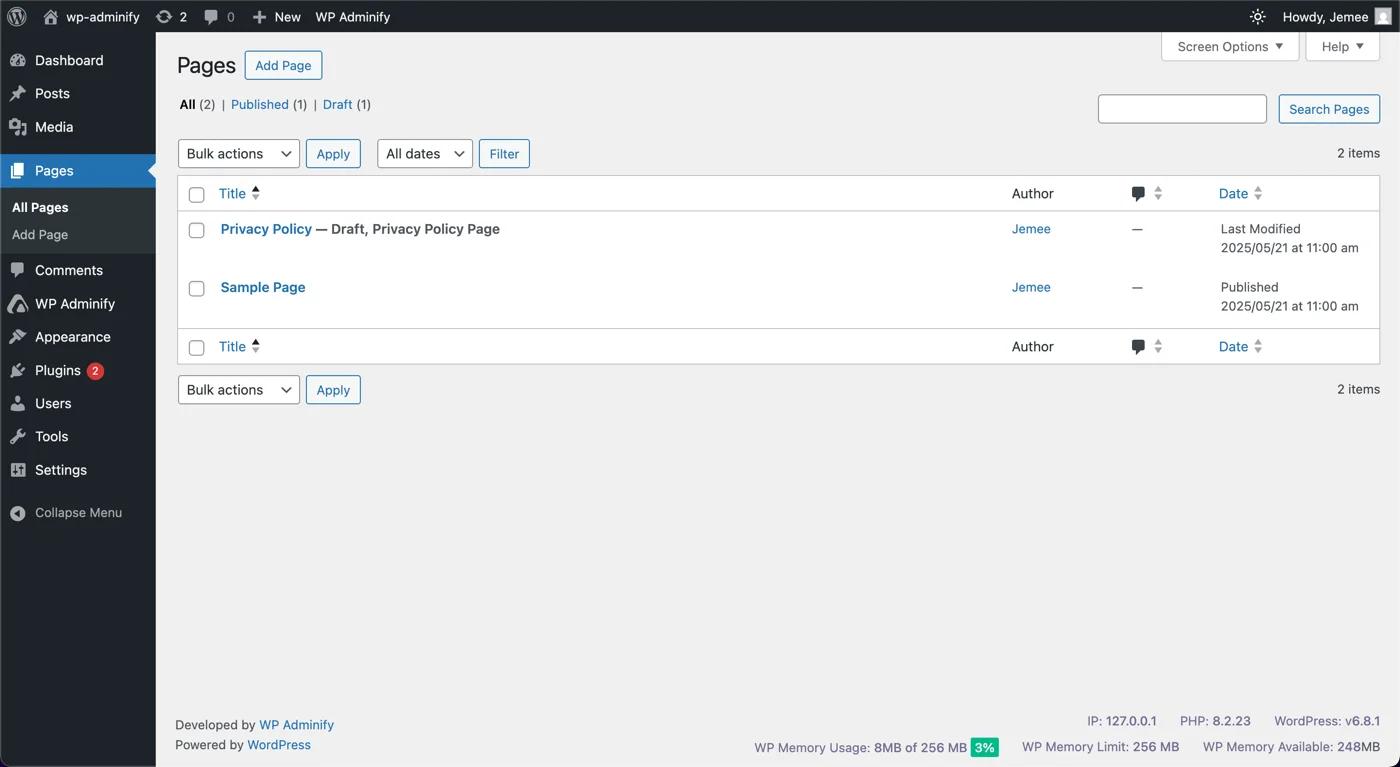
Pages: Create, edit, and delete pages.
- All Pages: Manage all the static pages on your site, like your About and Contact pages.
- Add New: Create a new page.
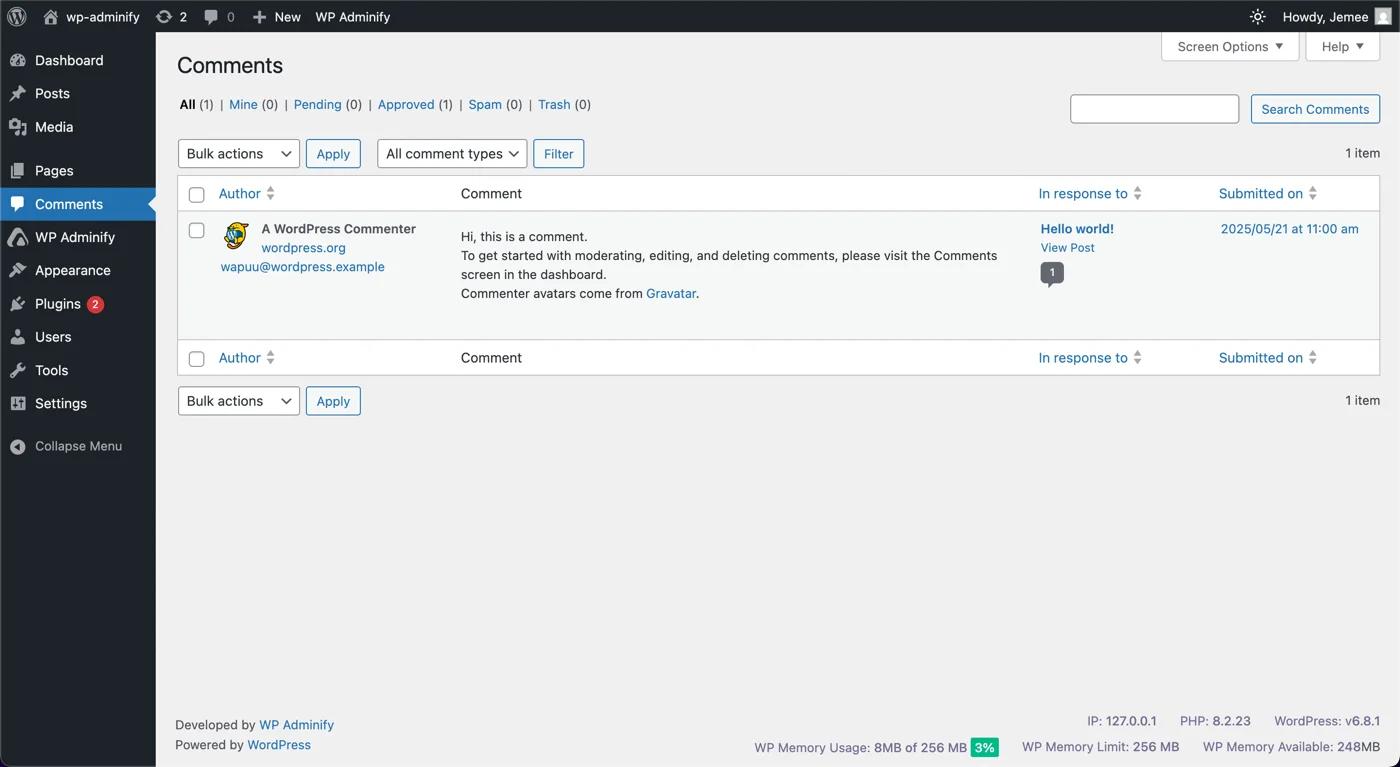
Comments: See the replies in your post and reply or delete them.
Appearance: Customize your theme, menus, widgets, and site identity.
- Themes: Change the design of your site by selecting a new theme.
- Editor: Access the theme customizer to make changes to your site’s appearance, like colors and fonts.
Plugins: Add or delete plugins to extend your site’s functionality.
- Installed Plugins: View and manage all the plugins installed on your site.
- Add New: Install new plugins to add functionality to your site.
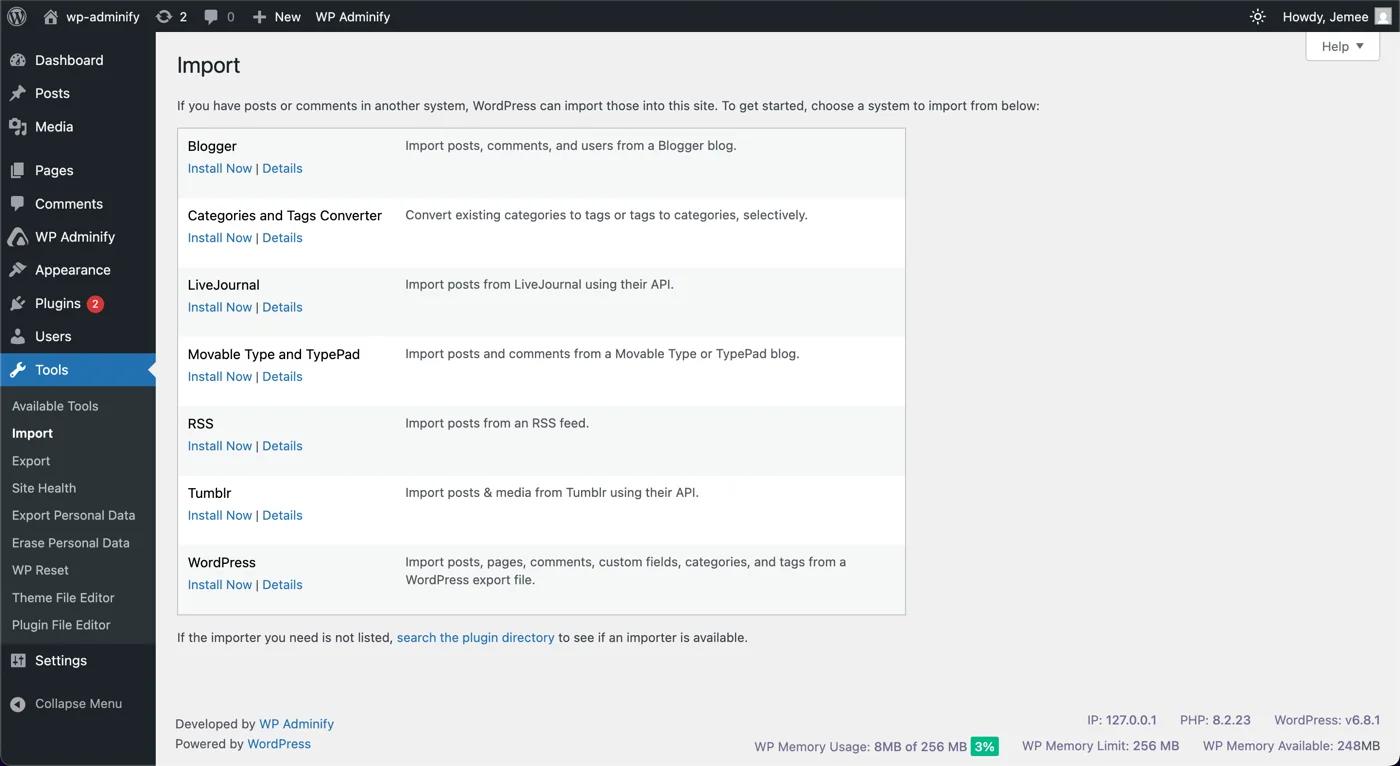
Tools: Useful for importing/exporting data or checking your site’s health.
- Available Tools: Access various tools for managing your site.
- Import: Import content from other platforms.
- Export: Export your site’s content.
- Site Health: Check your site’s health status and get recommendations for improvement.
Users: Manage users, user roles and permissions.
- All Users: Manage all user accounts on your site.
- Add New: Create a new user account.
- Profile: Edit your own user profile.
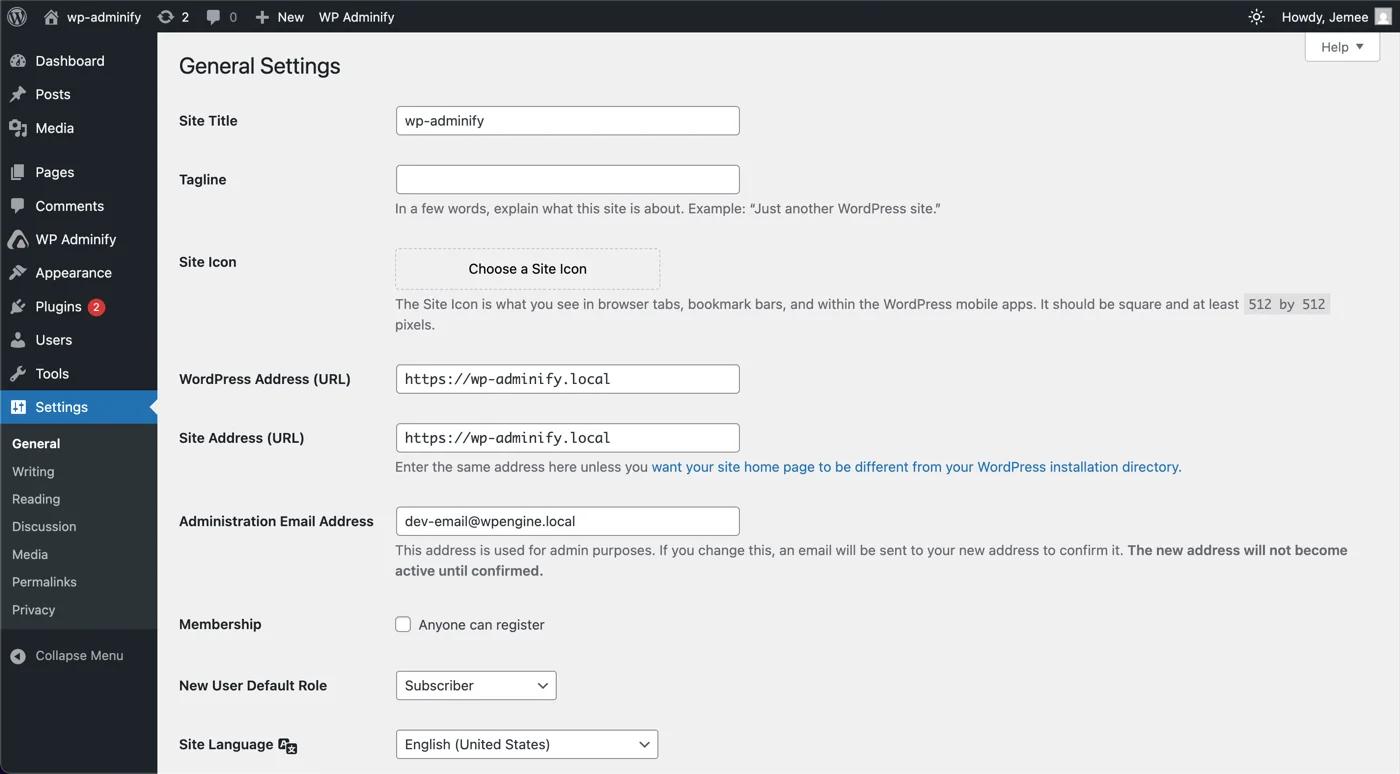
Settings: Adjust core settings of your website.
- General: Configure basic settings like your site title, tagline, and timezone.
- Writing: Manage settings related to writing posts.
- Reading: Control how your site’s content is displayed.
- Discussion: Configure settings for comments and discussions.
- Media: Set default sizes for your media files.
- Permalinks: Change the URL structure of your posts.
- Privacy: Configure the privacy settings on your website.
What Are the Default WordPress Dashboard Widgets?
When you land on wp-admin, the first screen you see is the Dashboard home, and it is built from stackable panels called dashboard widgets. The official WordPress documentation lists five by default — At a Glance, Activity, Quick Draft, WordPress Events and News, and Welcome — alongside the Site Health Status panel.
- Welcome — Shortcut links for the most common tasks when setting up a new site. Most people hide this once the site is live.
- At a Glance — A count of your posts, pages, and comments, plus the WordPress version and active theme you are running.
- Activity — Scheduled posts, recently published posts, and your latest comments, which you can moderate without leaving the screen.
- Quick Draft — A title and content box for jotting down a post idea and saving it as a draft on the spot.
- WordPress Events and News — Upcoming WordPress events near you and the newest posts from the official WordPress blog.
- Site Health Status — An overview of your site's current state, flagging anything that needs improvement.
This is the part of the WordPress admin dashboard most guides skip past. It is also the part you have the most control over — every widget here can be moved, hidden, or replaced with one of your own.
How Do You Hide Dashboard Widgets You Do Not Need?
Click the Screen Options tab in the top-right corner of the Dashboard home screen and untick any widget you would rather not see. The setting saves per user, so hiding the Events and News panel on your own account will not change what your editors or clients see. Drag a widget by its title bar to reorder whatever is left.
Screen Options only toggles what already exists. If you want to put your own content on the dashboard home — a client welcome note, support details, or live stats — you will need to add a custom dashboard widget instead.
What Is the Difference Between the Admin Panel and the Admin Dashboard?
People use both terms interchangeably, but they are not the same thing. The admin panel is the entire WordPress administration area at /wp-admin — every screen in the sidebar. The Dashboard is one screen inside it: the home page at /wp-admin/index.php where those widgets live. Every dashboard is part of the admin panel; not every admin panel screen is the dashboard.
Why Does Your Dashboard Look Different?
Your WordPress admin dashboard might look a bit different. This might happen due to different hosting providers, pre-installed plugins or themes.
- Pre-installed plugins/themes by hosting providers
- Custom themes that add admin menu items
- Admin customization plugins like WP Adminify
- Website created with help of agencies
Also, in some cases, managed WordPress hostings bundle performance plugins to enhance security or speed. And that’s how you might see a new Admin Bar item named WP Adminify.
What is WP Adminify?
Let me give you a short introduction of WP Adminify.
WP Adminify is a lightweight, performance-focused plugin designed to customize the WordPress admin panel. If your goal is to make the backend of WordPress faster, easier to navigate, and rebranding, it’s an excellent choice.
Till then you can: Try WP Adminify | Check Live Demo
How to Access the WordPress Admin Panel?
Getting to your WordPress admin panel is simple. You’ll need your login credentials, which are usually set up during the installation process.
First, navigate to your login page. Usually, this is [yoursitename].com/wp-admin. Type this into your browser’s address bar.
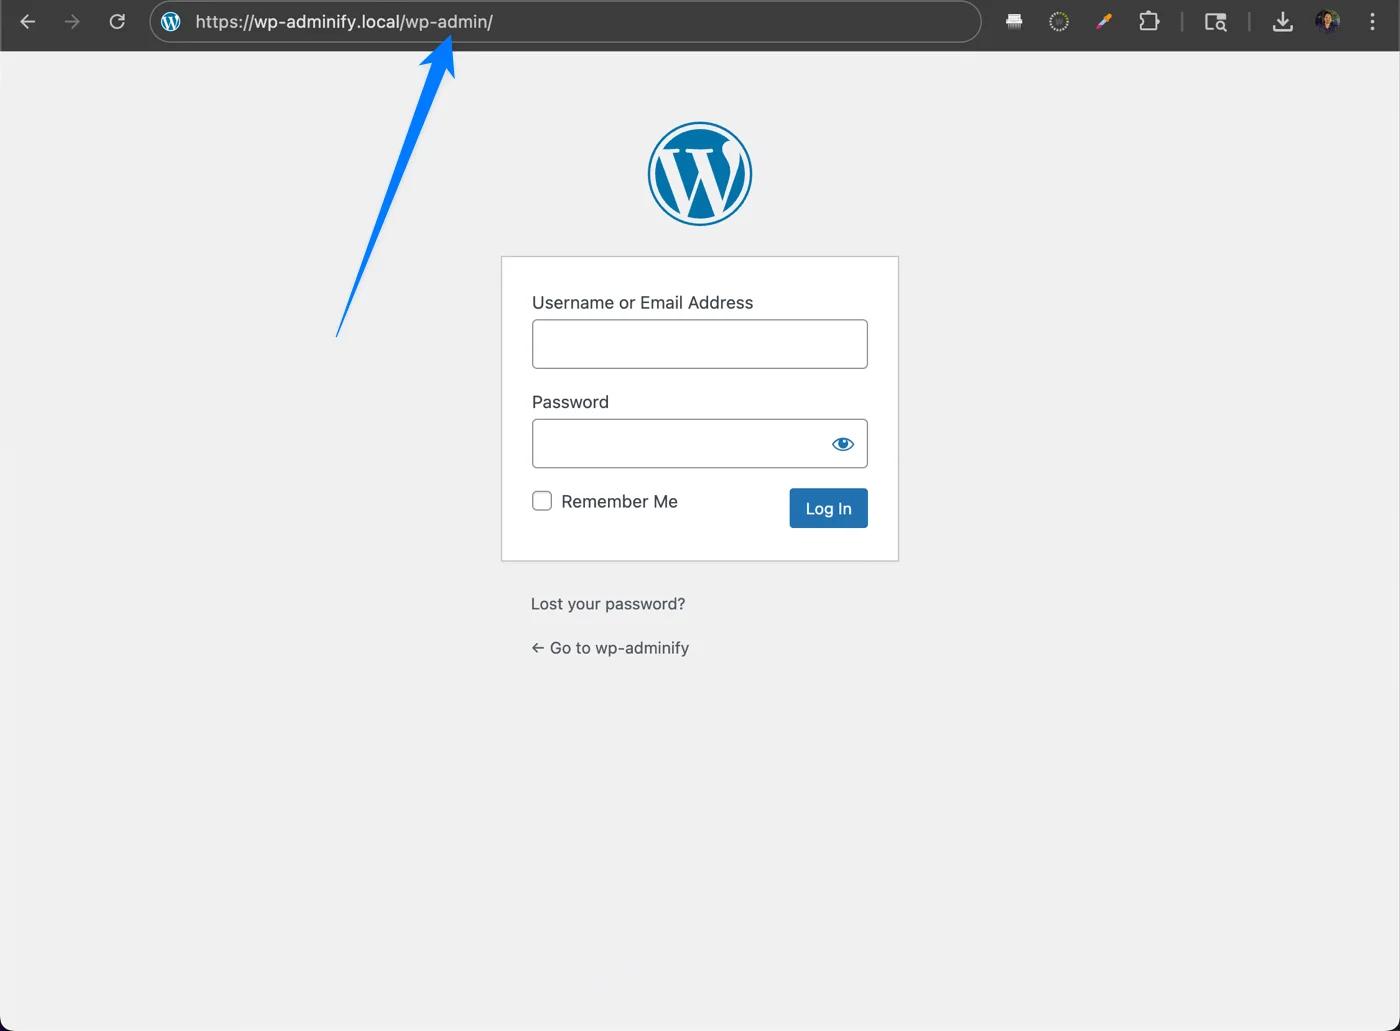
Now, you can enter your username and password. You must use the credentials you created when you installed WordPress. Then, click "Log In" to access your WordPress admin panel
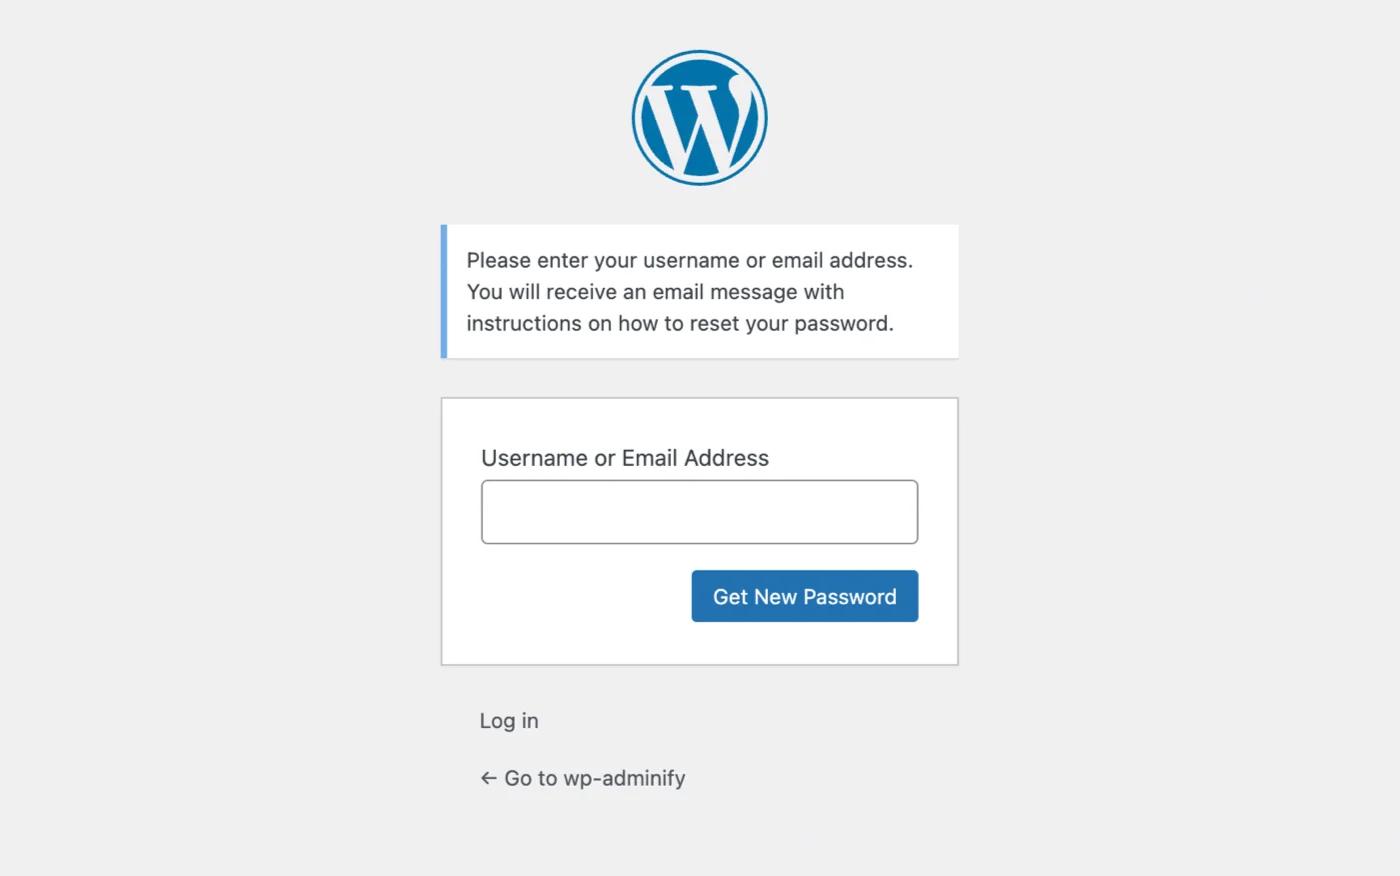
If you forget your password, don't panic. Click the “Lost your password?” link on the login page to reset it.
If you want to change your login page URL it is possible. But you need to use a plugin to do so. You can use plugins like WP Adminify to change the login page URL.
Now, let’s get into more details.
User Management
If you want to create a website, initially you don’t need to worry about users. But, if you want to start a business you’ll need team members. Hence you need some users and user roles to manage your site. And that’s where user management comes in.
Let me show you how you can manage your users, from adding new users to managing existing ones.
How to Add New Users in WordPress
If you want to allow other people to access your WordPress site, you'll need to create user accounts for them. Here's how to do it.
First, navigate to the users section. You’ll find it on the admin bar. Click on Users, then select Add New. Now, all you need to do is to fill out the details.
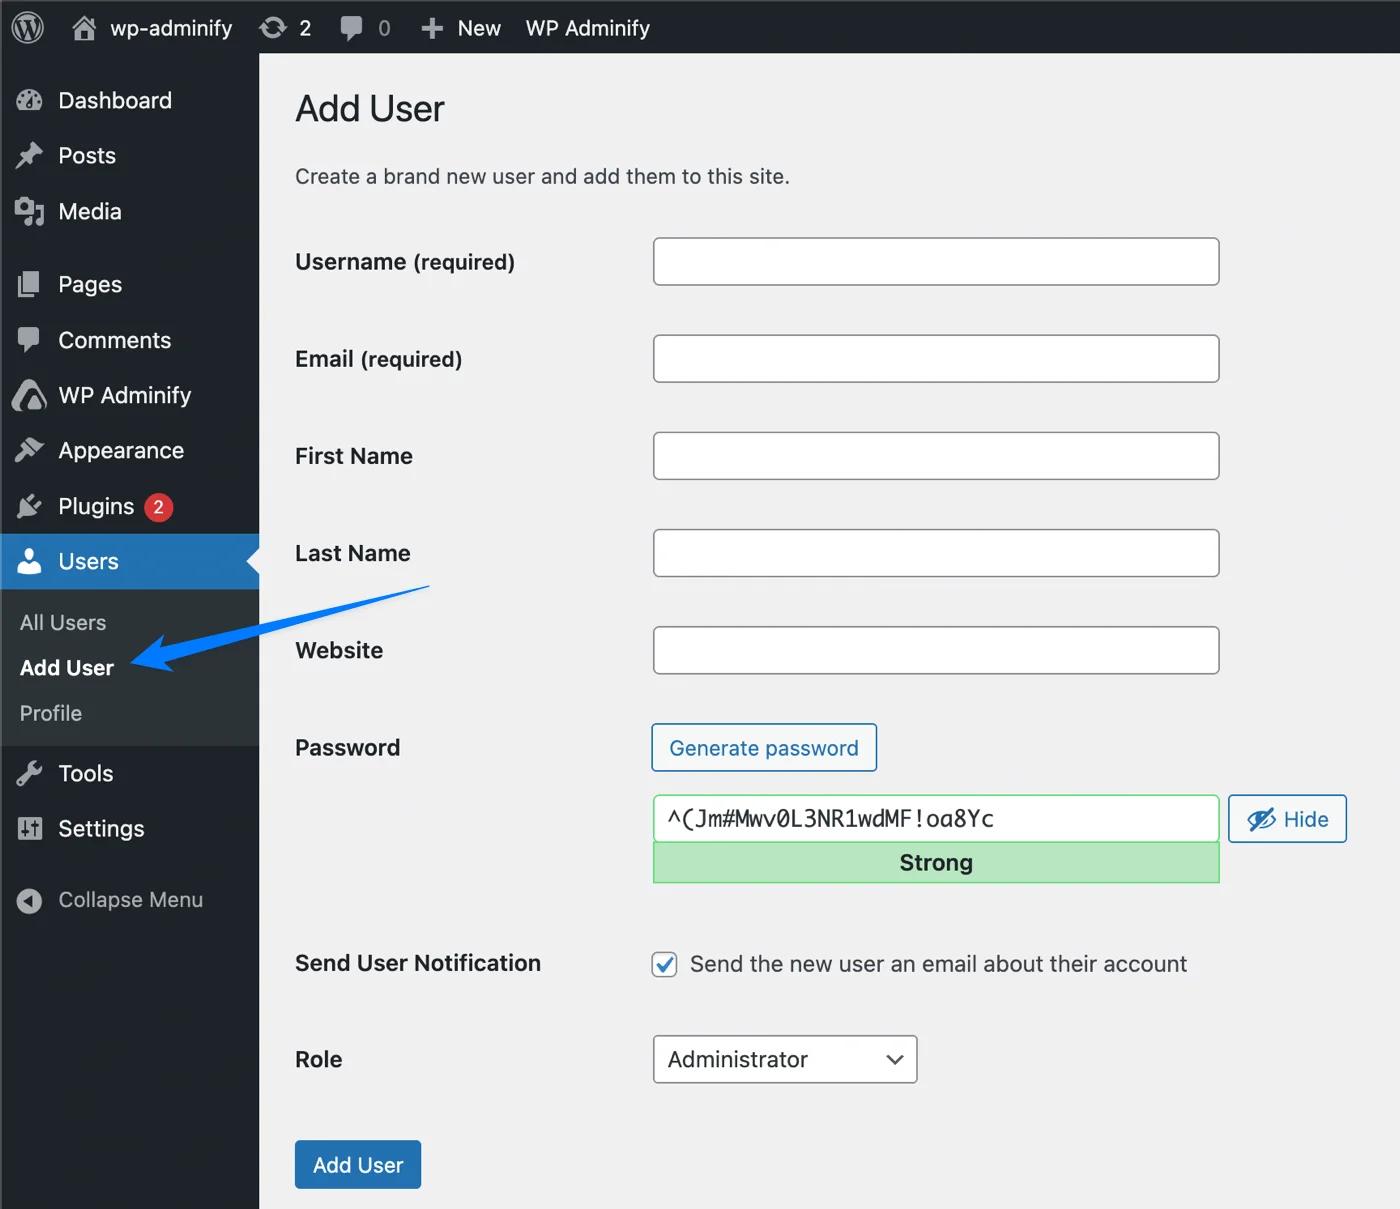
Here are the details you might need to put in:
- Username: This will be the user’s login name. It must be unique.
- Email: The user’s email address.
- First Name and Last Name: This is optional. But it helps for easier identification.
- Website: Optional field for the user’s website.
- Password: You should set a strong password. You can use the suggested password or create your own.
- Send User Notification: Check this box if you want to send the user an email about their account.
- Role: Select a role for the new user.
How to Select a User Role in WordPress
User roles define what a user can and cannot do on your site. Here are the default roles:
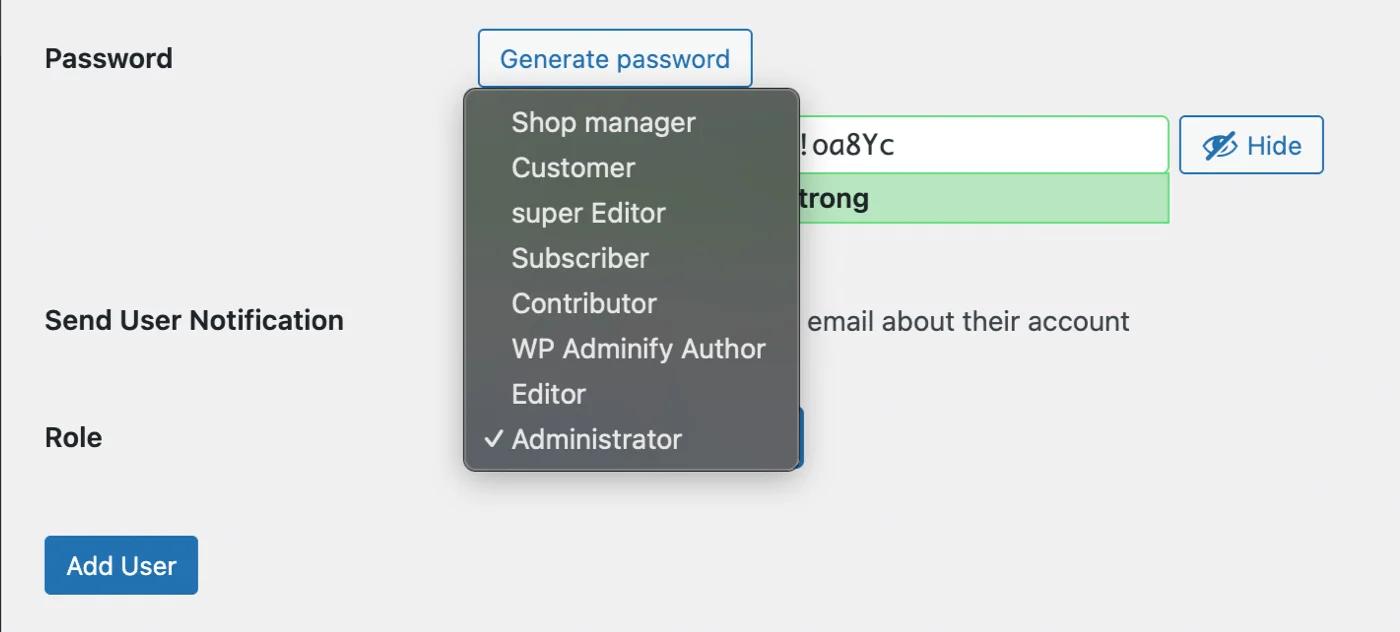
- Subscriber: Manages their own profile.
- Contributor: Write and manage their own posts but cannot publish them.
- Author: Publish and manage their own posts.
- Editor: Manage and publish posts, including posts of other users.
- Administrator: Full control over the site.
Once you’ve entered all the details, click the Add New User button. The new user will now appear in the user list.
How to Manage Existing Users in WordPress
Managing users is very easy in WordPress. Here’s how you can do it:
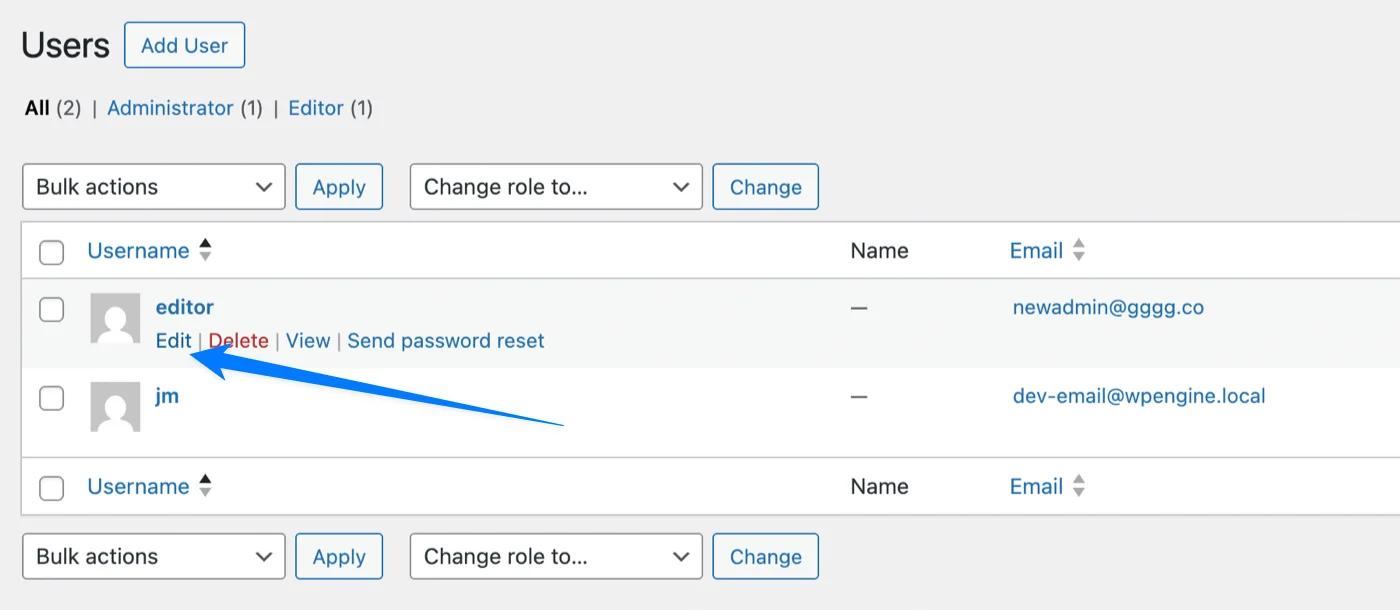
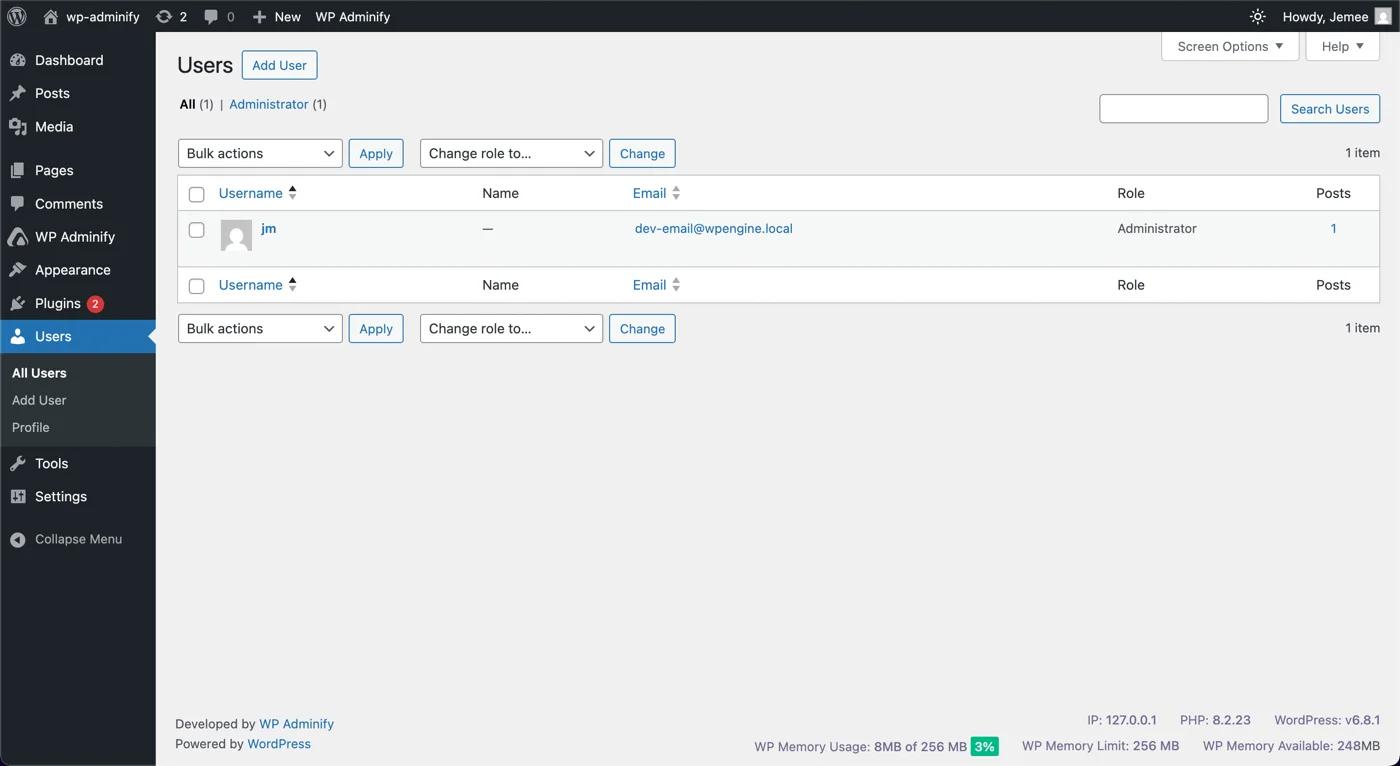
First, navigate to All Users. Then click on Users from the admin bar and select All Users. You’ll see a list of all the users available on your site. And from here you can manage your existing users.
How to Edit User Profiles in WordPress
To edit a user’s profile, hover over their name and click on Edit. Here, you can change their details, such as name, email, and role. You can also generate a new password for the user if they’ve forgotten their password.
[image]
How to Change User Roles
To change a user’s role, go to their profile by clicking Edit. Then you can scroll down to the Role dropdown menu and select the new role. After selection, click Update User to save the changes.
How to Delete Users in WordPress
To delete a user, hover over their name and click on Delete. You’ll be asked what you want to do with their content. You can either delete all content created by this user or attribute it to another user.
[image]
Tips for WordPress User Security
This is a no-brainer that you must take precautions to keep your site secure. And this is evidently more important if you have multiple users with different roles and capabilities.
However, your site will be at risk if any users do not have proper security. A backdoor entry or hack can be made to potentially destroy your whole site. And that will hamper your business. And worse you might have to shut down your whole business because of the lost reputation.
Here’s a few tips to increase your WordPress user security.
Strong Passwords: Ensure strong passwords for each user. A strong password can be a mix of uppercase and lower-case letters, numbers, and special characters.
Some sites by default display a notice of doing so. Also, you can keep your password at least 8 characters long to get protection from unauthorized hacks.
Limit User Roles: Give proper permission for each user. Maintain the role capabilities properly and maintain it. Change user roles or capabilities whenever it's needed.
Note: Don’t forget to delete users or change their roles if a user is not working for your website. This is help you from unauthorized access and data theft.
Regularly Review User Access: Do a regular checkup on your list of users. This will ensure that everyone has proper access and capabilities on your site. You can do this quite easily using the RoleMaster Suite plugin.
Let me tell you a little bit about the RoleMaster Suite.
RoleMaster Suite Features
RoleMaster Suite helps you control user access and capabilities. You can create custom user roles, give specific permissions, and manage them from a user-friendly interface.
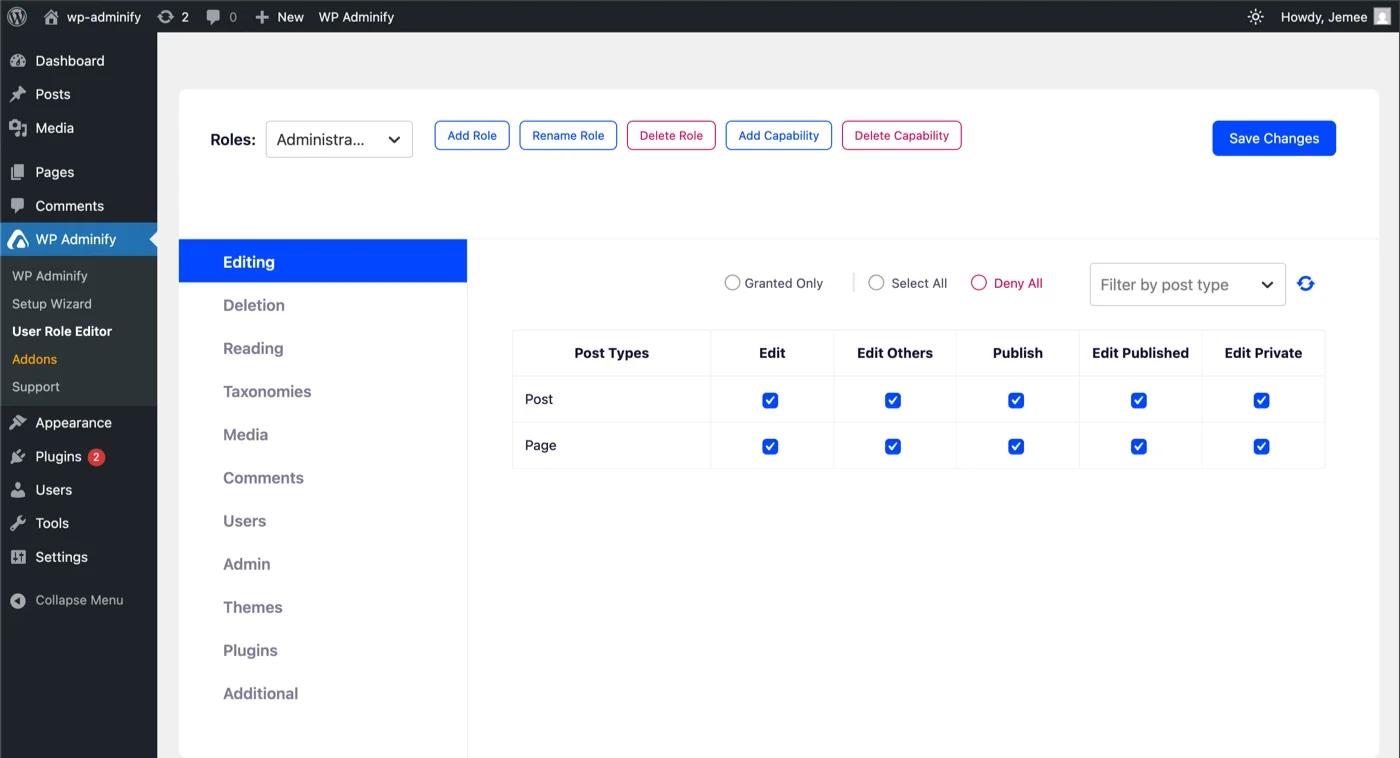
Here’s what RoleMaster Suite can do for you:
- Granular Control: Fine-tune user roles and capabilities to match your requirements.
- Effortless Role Creation & Editing: Easily create new user roles, customize existing ones, or remove roles that are no longer needed.
- Streamlined Workflow: Assign users to the appropriate role with a single click.
- Enhanced Security: Maintain a secure and organized site structure with proper user access.
RoleMaster Suite is made for sites with specific user access requirements, like online stores or membership sites.
Download Rolemaster Suite for Free
How Manage Contents in WordPress
Now your website will need content, right? You aren’t just going to put up a static site and hope for the best that’s for sure. So it’s safe to say content is the heart of your WordPress site.
Whether you’re writing blog posts, creating pages, or managing media files, WordPress makes it easy to handle all types of content.
Let's check out how you can create and manage content in a way that's simple and easy to understand.
How to Create and Manage Posts in WordPress
Posts are the primary content type in WordPress. These are typically used for blog entries. Here’s how to create posts:
First, you need to navigate to Posts by clicking it from the admin bar. You’ll see all your blog posts here.
Now, time to create a new post in WordPress:
First, click the Add New under the Posts menu. You’ll be redirected to the post editor. Here, you can enter your post title and start writing your content in the main editor area.
Currently, WordPress uses a block-based editor called Gutenberg. Each piece of content (paragraphs, images, videos) is a block. You can click the + button to add new blocks.
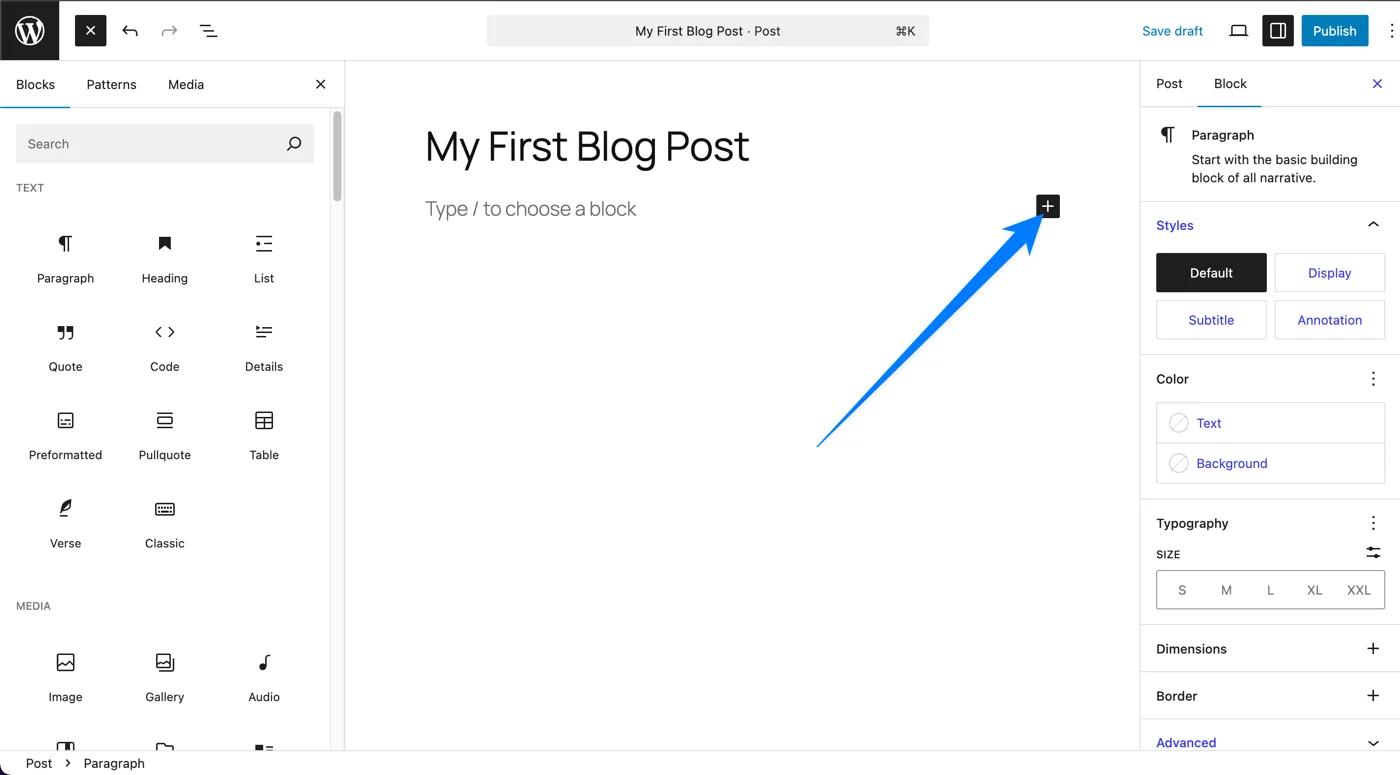
On the right side, you can assign categories and tags to your post to organize your content. Categories are hierarchical and broad. Meanwhile tags are non-hierarchical and more specific.
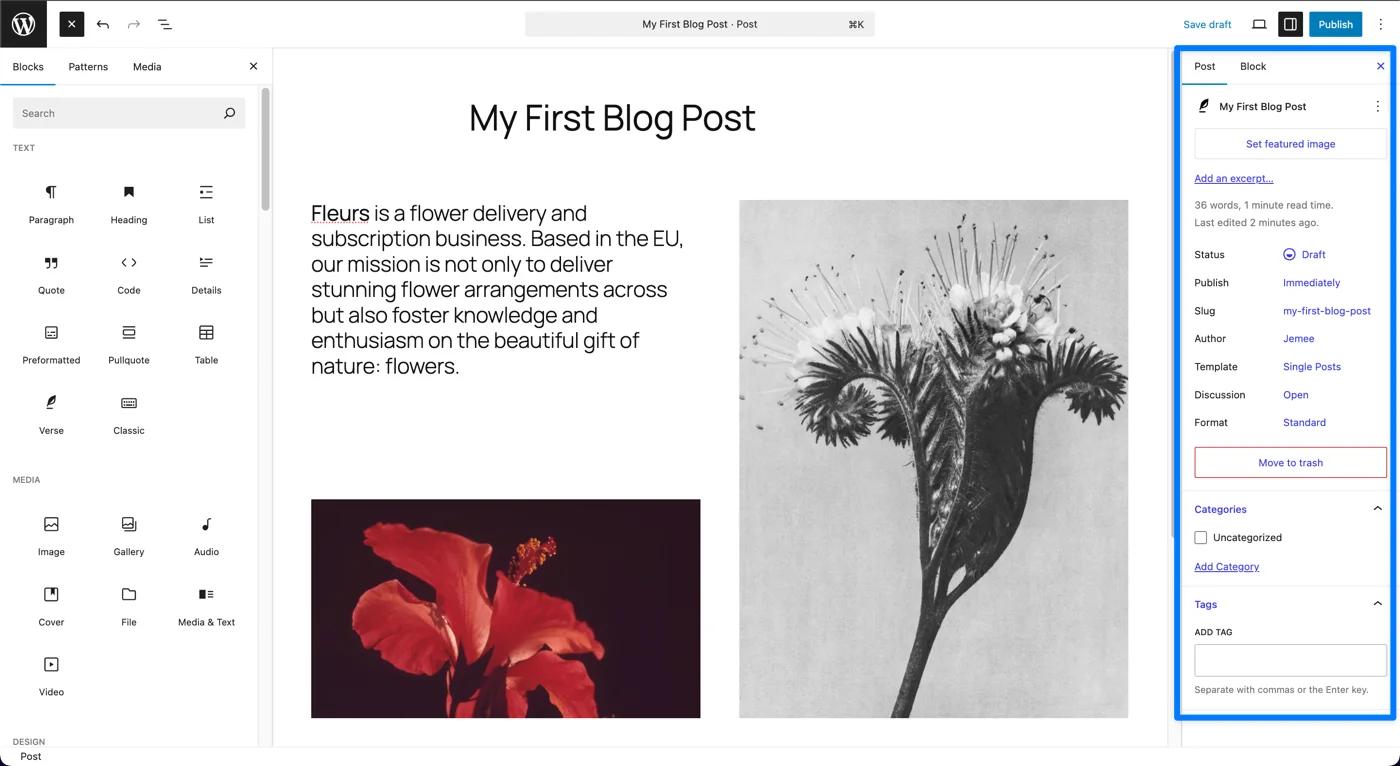
You can also set a featured image for your post. This Image will appear at the top of the post and in excerpts.
Note: The featured image will be the open graph image (Images that shows when you embed a link) by default. But you can change the open graph image manually.
When you’re done with the content, click Publish to make your post live. You can also schedule it to be published at a later date or save it as a draft to continue working on it later.
Now, let me show you how you can manage your posts.
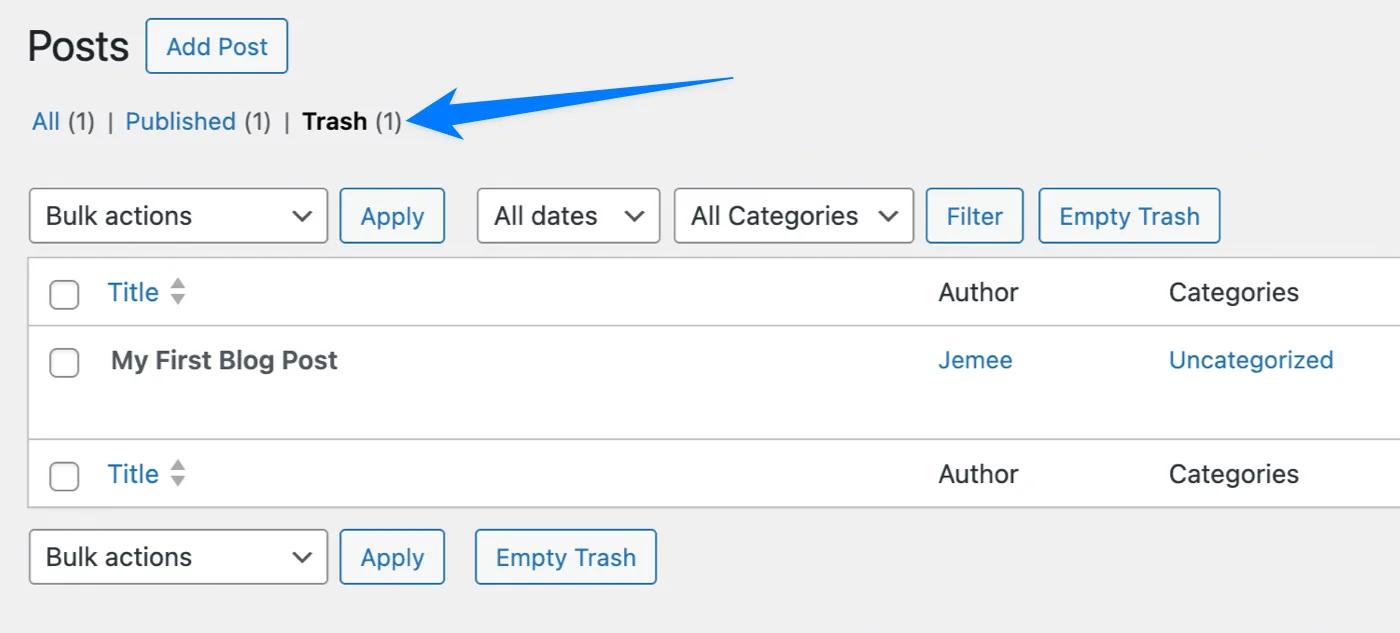
To do this, Click All Posts to see a list of all your blog posts. Here, you can edit, delete, or view your posts. Hover over a post title and click Quick Edit to make quick changes like title, categories, and tags without opening the full editor.
To delete a post, hover over the post title and click Trash. You can restore it from the Trash if you change your mind.
How to Create and Manage Pages in WordPress
Pages are similar to posts but are used for static contents like landing page, pricing page, etc.
To create a page Click on Pages from the admin bar to see all of your pages (If created earlier).
Now to create a New Page, Click Add New under the Pages menu.You’ll be taken to the page editor, which works similarly to the post editor.
Some themes come with different templates for pages (like a full-width page). On the right side, you can choose a template under Page Summary. Once you’re done, click Publish to make your page live.
Managing Pages is also the same as posts.
Click All Pages to see a list of all your pages. You can edit, delete, or view your pages. Hover over a page title and click Quick Edit to make quick changes like title and status without opening the full editor.
To delete a page, hover over the page title and click Trash. You can restore it from the Trash if needed.
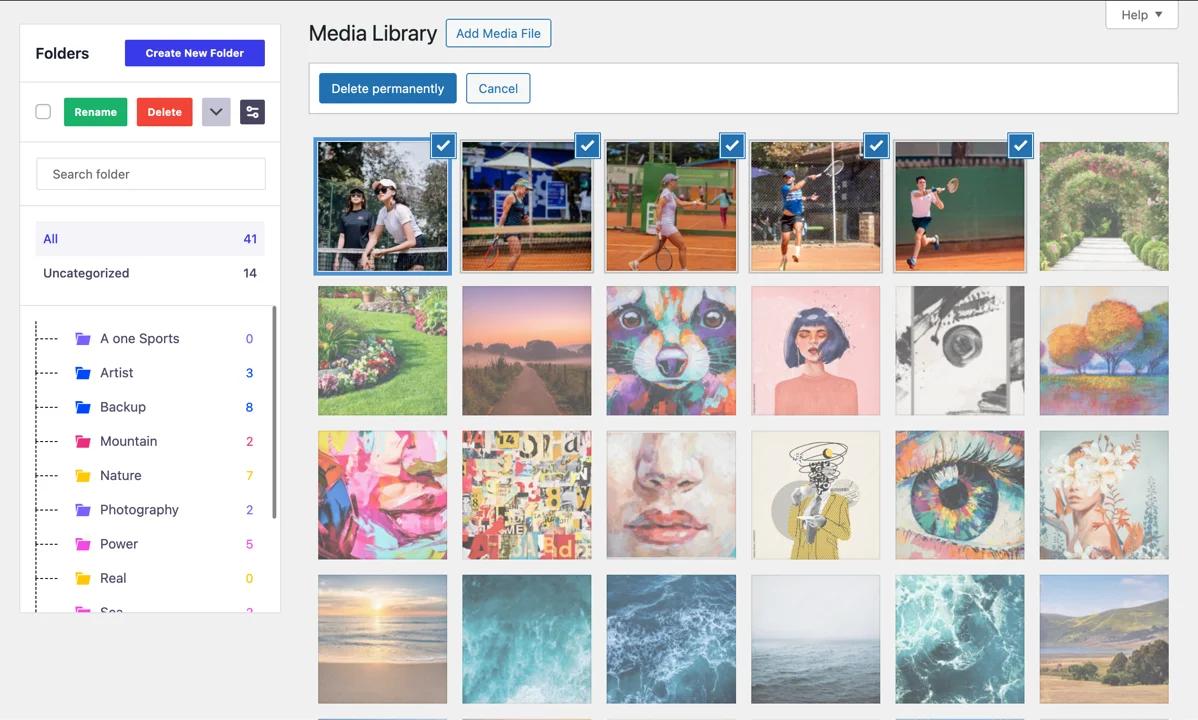
How to Manage Media in WordPress
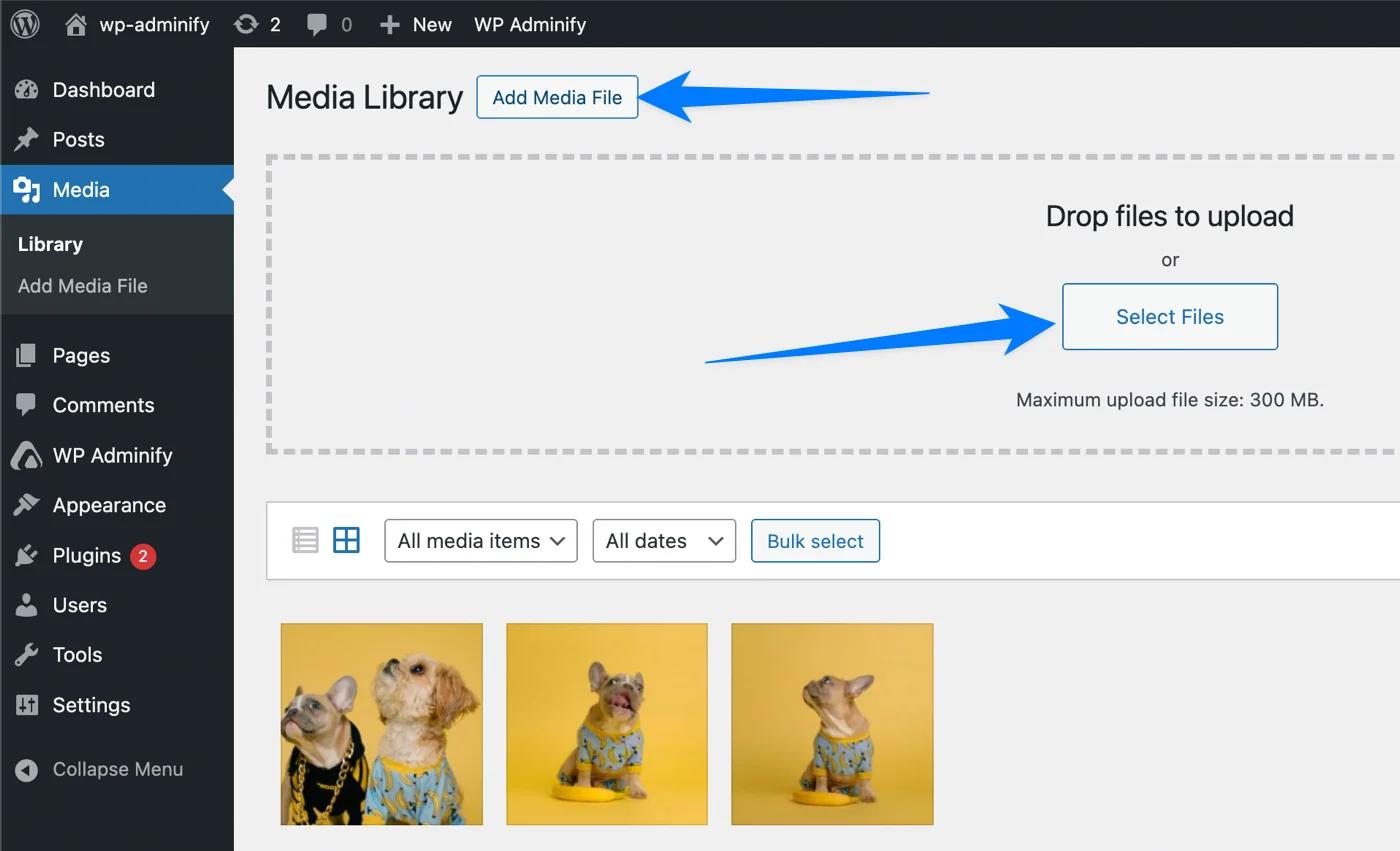
Your media library is where all your uploaded images, videos, and other media files are stored. Here’s how to manage your media files.
First, Click on Media from the admin bar to access the media library. Then, Click Add New to upload new files. You can drag and drop files into the upload area or click Select Files to choose files from your computer.
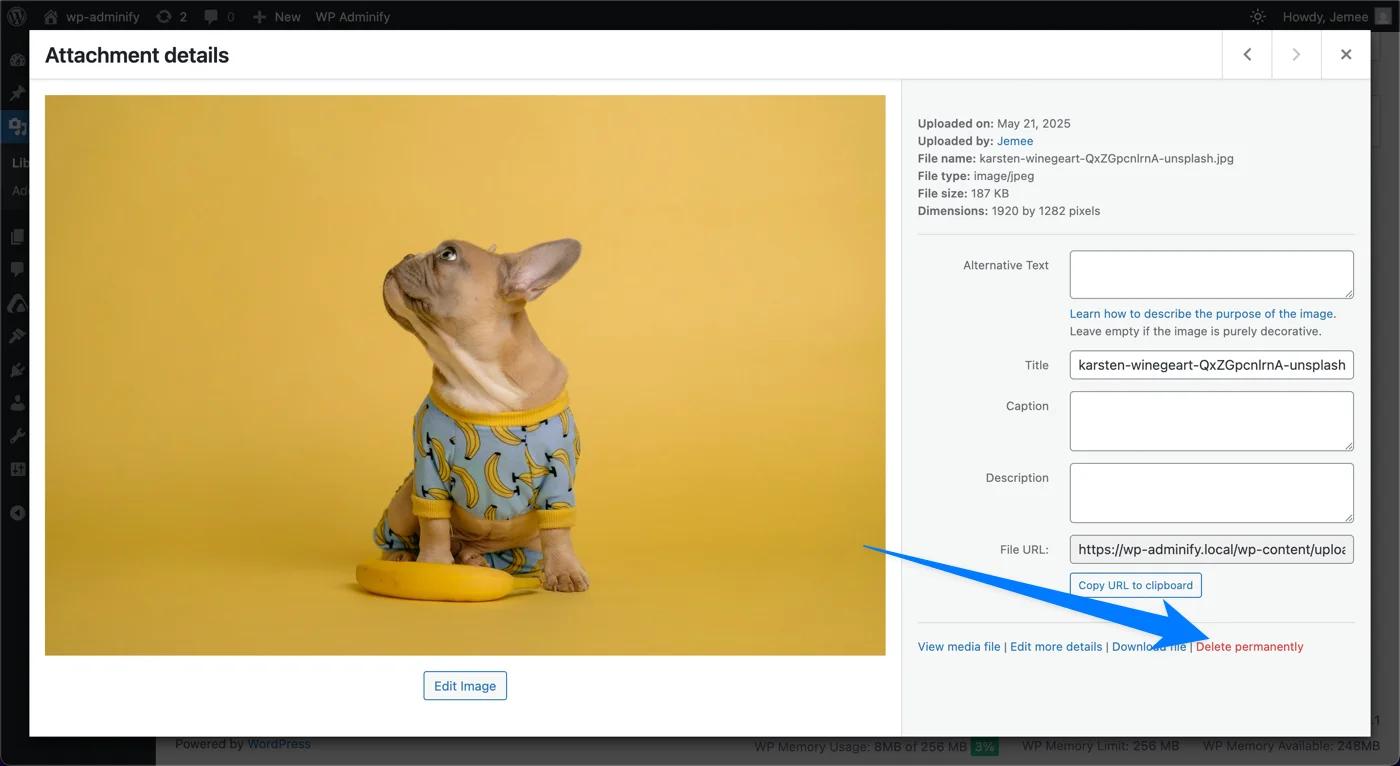
You can manage media in WordPress easily. In the media library, you’ll see all your uploaded files. You can view them in a grid or list format. Click on a file to edit the details. You can also change the title, caption, alt text, and description. You can also edit your uploaded image to crop and resize them.
To delete a file, click over it and click Delete Permanently. Be careful, as this action cannot be undone.
Tips for Media Optimization
- Optimize Images: Upload optimized images to improve your site’s loading speed. Sites like TinyPNG can help compress images without losing quality.
- Use Alt Text: Always add descriptive alt text to images. It helps with SEO and rank your content better.
- Organize Media: Use proper file names and organize your uploads to easily find the media contents. WP Adminify has a Media Folder Management feature that will help you to create separate media folders.
WP Adminify's Media Folders feature lets you create unlimited folders and subfolders. You can keep all your media files perfectly organized with proper names and colors.
Appearance and Customization
Making your WordPress site look exactly how you want is one of the most exciting parts of using WordPress.
An excellent looking website always captures the attention of the users. You can give your WordPress websites a very exciting look with themes.
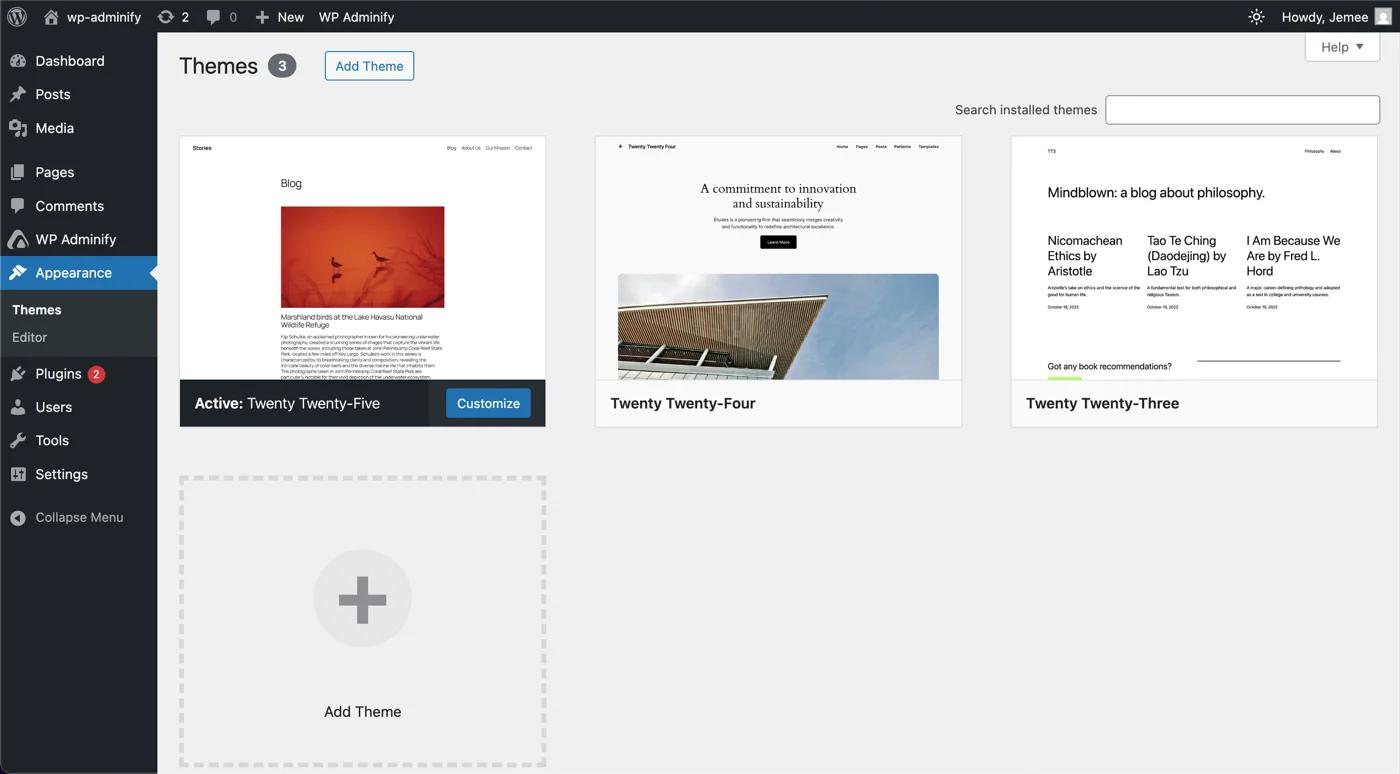
How to Install Themes in WordPress
Themes control the overall design and layout of your WordPress site.
To install a theme, you need to navigate to Appearance > Themes. Then, click Add New at the top of the Themes page. You’ll see a list of available themes. You can also use the search bar if you want specific themes to install.
Once you select a theme you like, click Install. After the theme is installed, click Activate to make it your site’s active theme.
How to Customize Themes in WordPress
To customize your active theme, click on Customize under the Appearance menu. This opens the Theme Customizer, where you can make various changes and see a live preview.
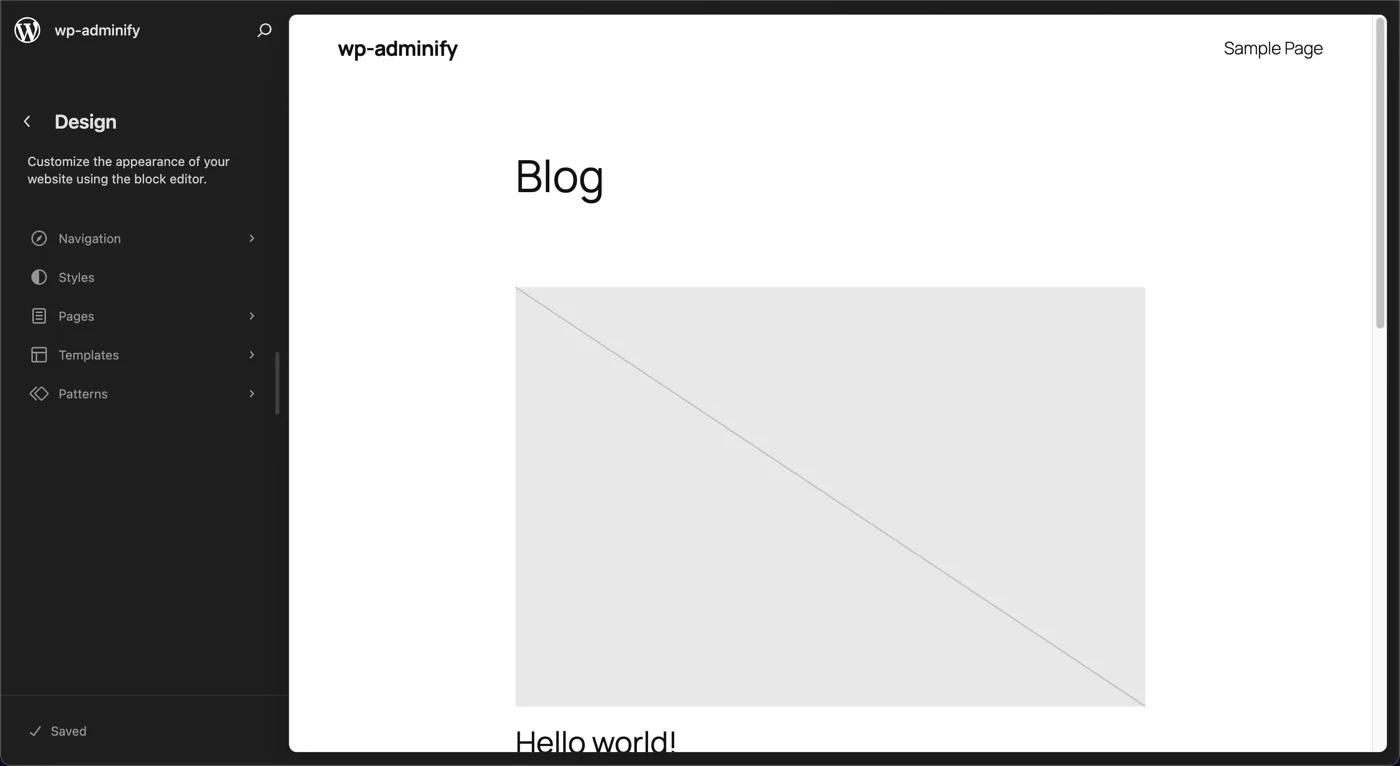
Common customization options include changing the site title and tagline. Also, modifying colors and fonts, adding a logo is kind of the first thing every site owner does. After you’re happy with your changes, click Publish to save them.
WordPress by default gives you notices if a theme has any updates. But, sometimes it might break your current site and you don’t want to update the theme. So, you can hide this update notice in WordPress.
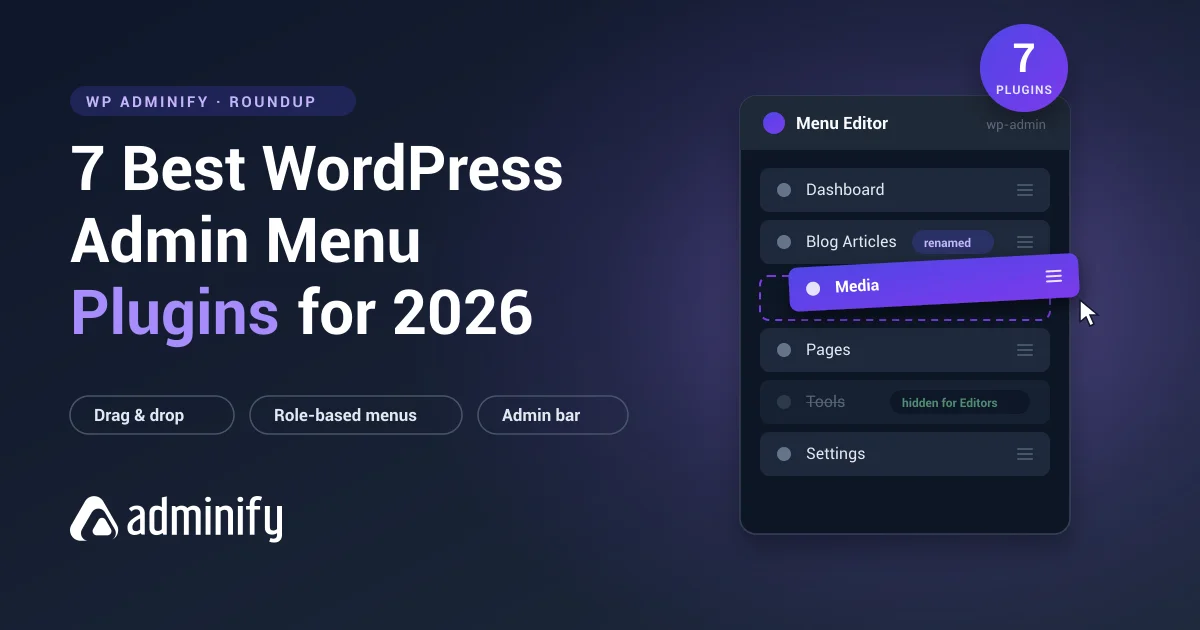
How to Create and Manage Menu in WordPress
Menus are essential for site navigation. Here’s how to create and manage them. Let me tell you a secret: you can create custom menus in WordPress Dashboard.
First, you need to navigate to Menus. To do so, click on Appearance from the admin bar and select Menus.
Now, click on Create a new menu. Give your menu a name and click Create Menu. Add items to your menu by selecting pages, posts, categories, or custom links.
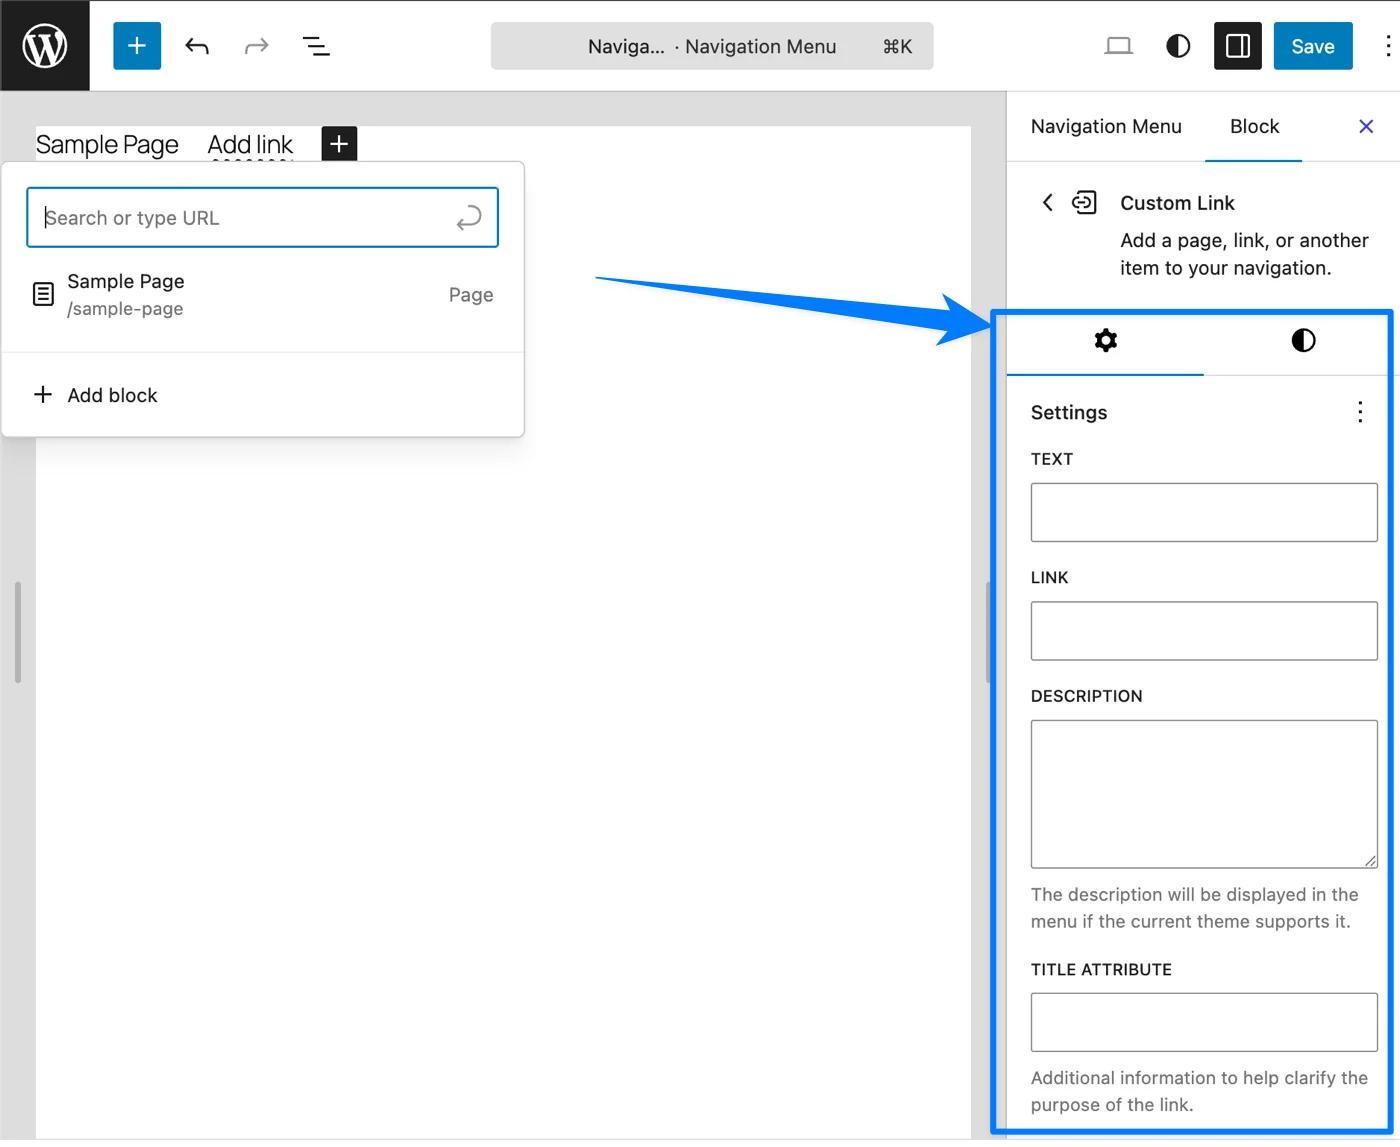
Now, to manage menus in WordPress, drag and drop menu items to rearrange them. Create sub-menus by dragging an item slightly to the right under another item. Click the arrow next to a menu item to edit its details or remove it from the menu.
Use the WP Adminify menu duplicator to easily clone your entire menu or specific menu items.
How to Install Plugins in WordPress
You can’t build a house without tools. Similarly you can’t build a good WordPress website without plugins.
Plugins are powerful additions that extend the functionality of your WordPress site. With plugins, you can add new features, enhance security, improve performance, and much more.
Let me tell you all about it.
What are Plugins?
Plugins are pieces of software that add specific features to your WordPress site. Think of them as apps for your website.
Suppose you want to create a site, then you’ll definitely need a page builder. For the contact page you’ll need a contact form plugin. And similarly for every aspect you’ll need plugins that help you with those specific sections for your site.
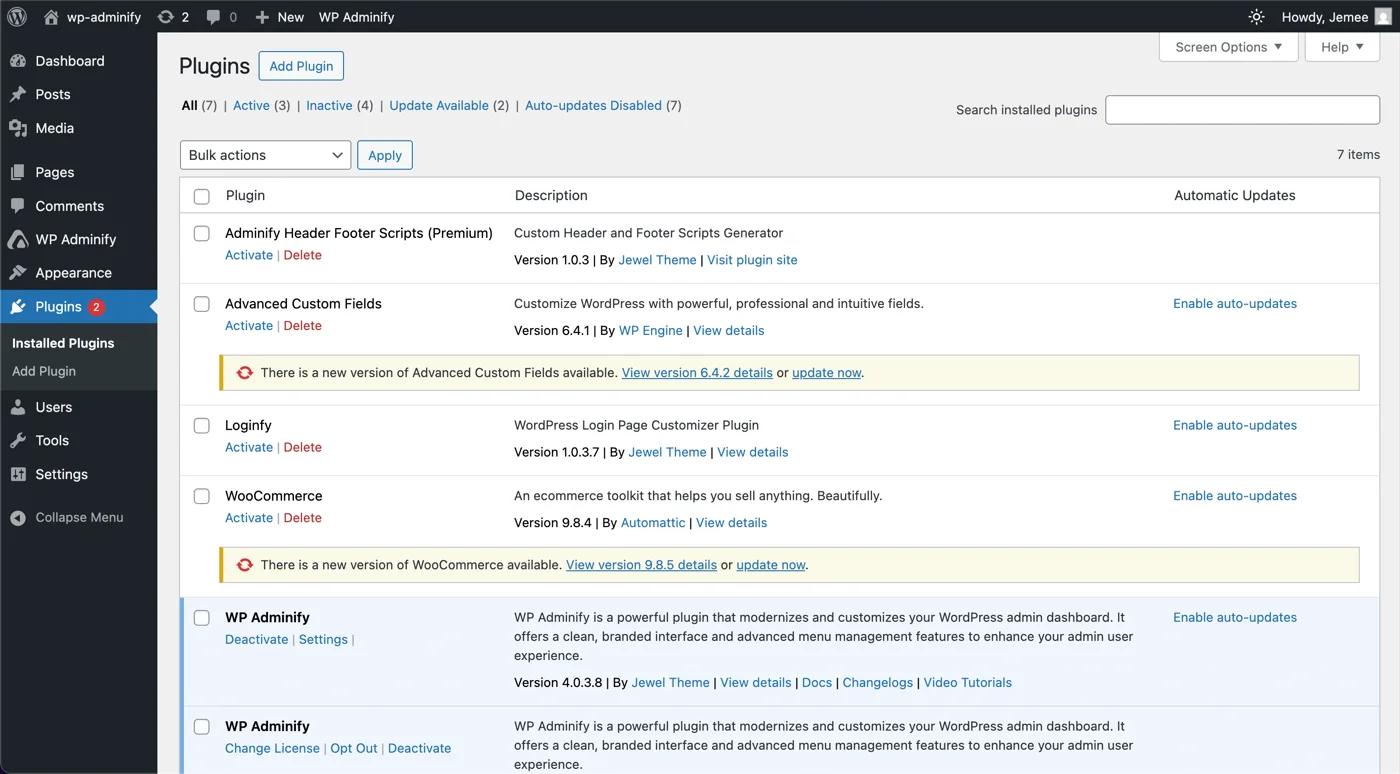
Installing Plugins in WordPress
First things first, here’s how you can easily install a plugin in your Wordpress website.
You need to navigate to the plugins section. Click on Plugins from the admin bar and select Add New.
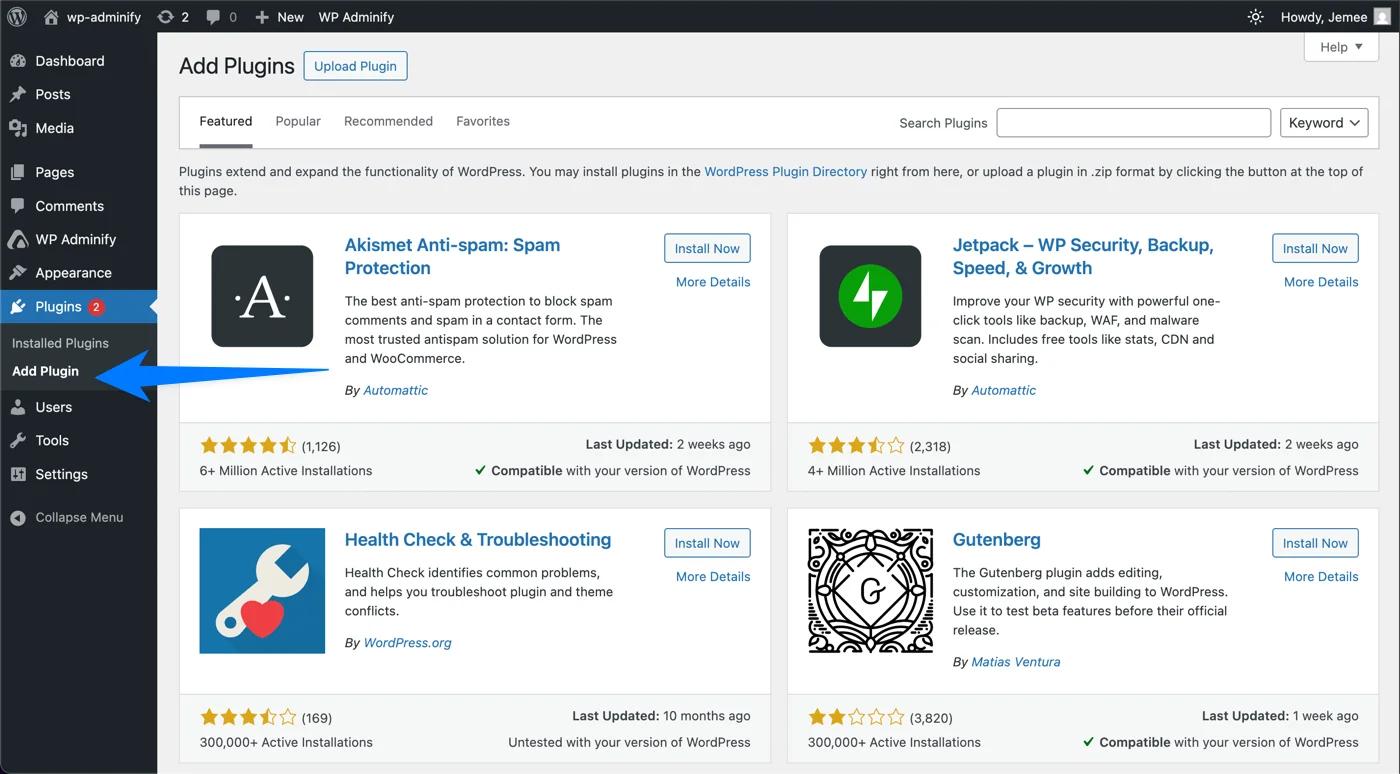
You’ll see a search bar at the top right. Type in keywords related to the features you need. You’ll see a lot of plugins available for the feature. You can browse through the results to make your pick. Each plugin has a short description, user ratings, and details about its last update.
Once you find a plugin you want to use, click Install Now. The button will change to Activate once the installation is complete. Click Activate to enable the plugin on your site.
How to Manage Plugins in WordPress?
After you complete the installation, you can manage your plugins from the Plugins page.
To see installed plugins, click on Plugins > Installed Plugins to see a list of all the plugins currently active on your site.
How to Deactivate Plugins in WordPress?
To deactivate a plugin, click Deactivate below the plugins name. Deactivating a plugin doesn’t delete it; it simply turns off its functionality.
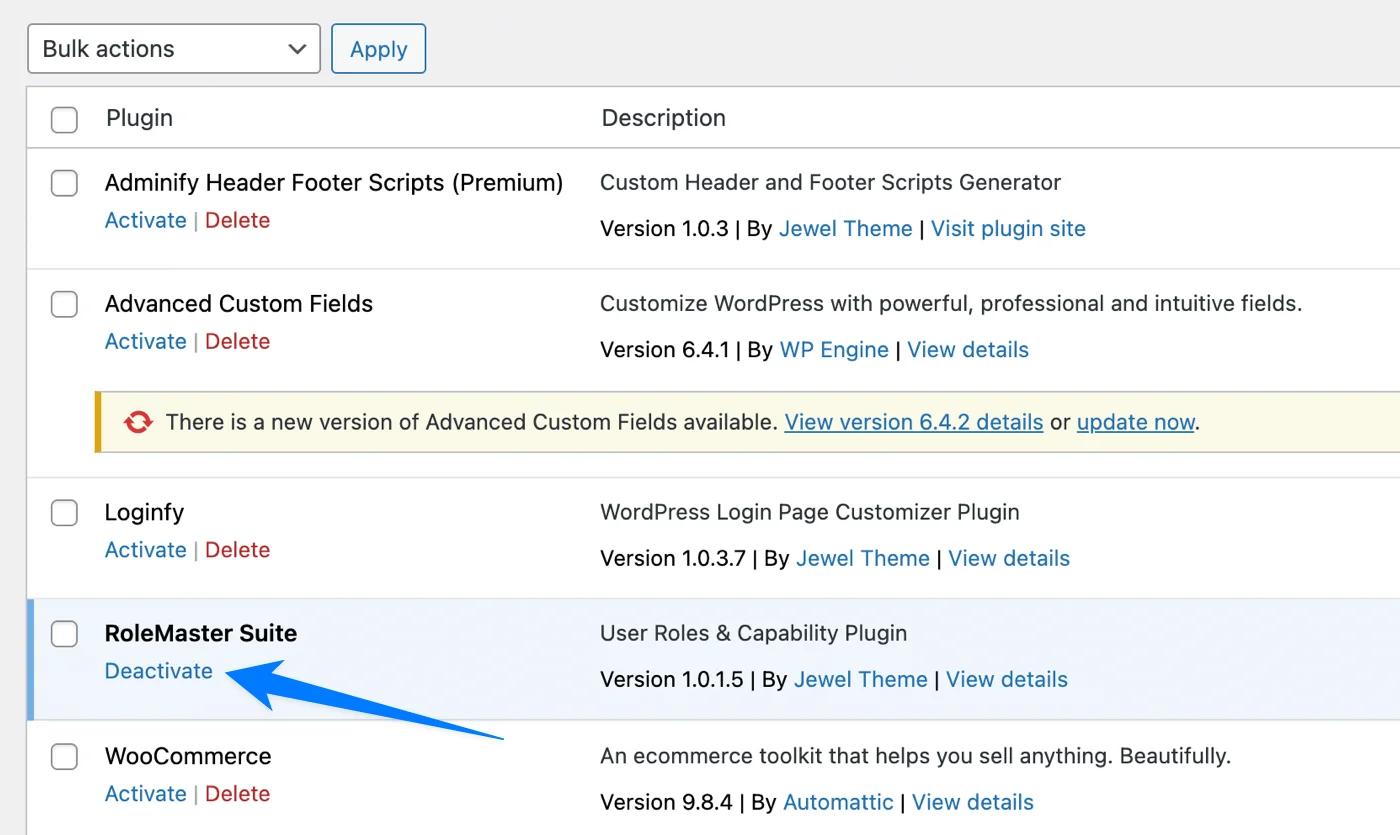
You can reactivate a plugin by clicking the Activate button below its name.
How to Update Plugins in WordPress?
Make sure to update your plugins every now and then. It helps fix bugs and glitches. Also, it improves the security and performance. You’ll see a notification in the admin bar when updates are available.
To update a plugin, go to Plugins > Installed Plugins. Now, you’ll see a Update Now button below the plugin that needs updating. Click on it to update your plugin.
How to Delete Plugins in WordPress?
To delete a plugin you need to deactivate it first. Then, click Delete below its name on the Installed Plugins page. You’ll see a prompt to confirm this for extra safety or misclick. So, if you think you don;t need the plugin anymore, confirm the deletion prompt.
This will delete the plugin and its data. You can Reinstall the plugin from the plugin directory mentioned earlier.
How to Update WordPress
Keeping WordPress updated is vital for security and performance. Here’s how to handle updates:
Just like themes and plugins, WordPress cores also come with regular updates. It gives you performance updates, bug fixes and new features. So, updating it can be a great way.
Note: Please make sure to keep backup of your data before handling core updates. Otherwise you might lose your data or the site might break due to update glitches.
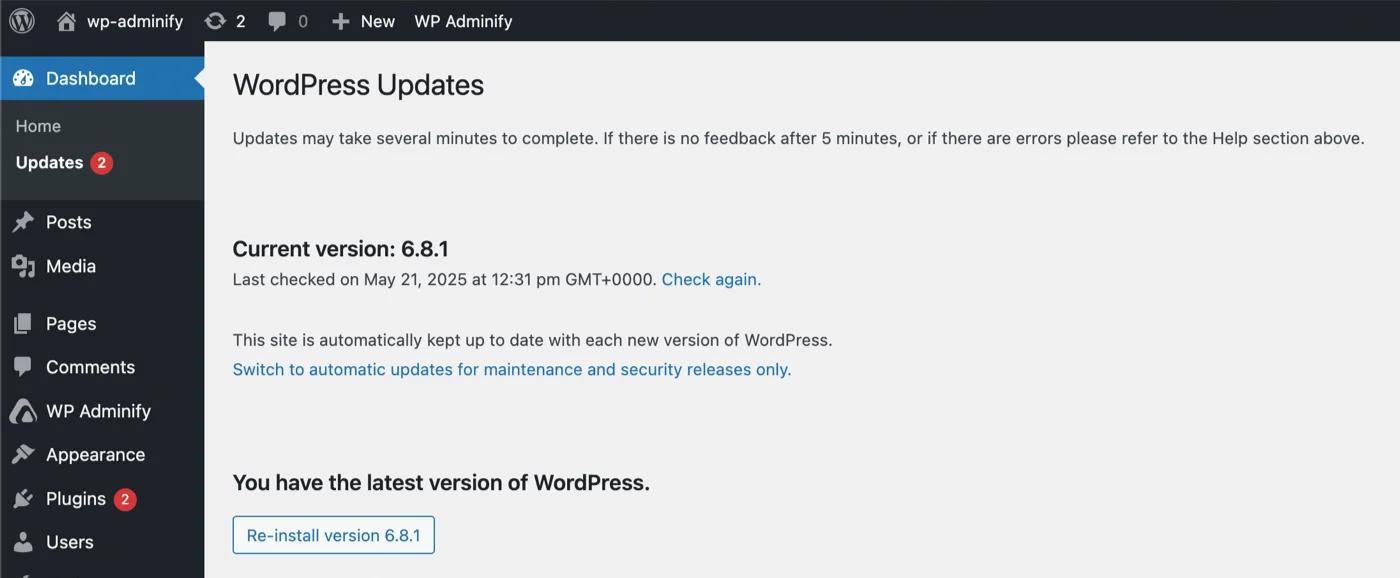
To update WordPress code, you need to navigate to Dashboard > Updates. If a new version of WordPress is available, you’ll see a notification here. Click Update Now to start the update process.
WordPress Admin Panel — FAQs
What is the admin panel in WordPress?
The WordPress admin panel is the password-protected back end of your site at yourdomain.com/wp-admin. It is where you write posts and pages, upload media, install plugins and themes, manage users, and change every site setting. Visitors never see it — only logged-in users with the right role can open it.
How do I access the WP admin panel?
Type yourdomain.com/wp-admin into your browser and log in with the username and password you set during installation. WordPress then drops you on the Dashboard home screen. If you have forgotten your password, use the Lost your password link on the login page to reset it by email.
What is the difference between the admin panel and the admin dashboard?
They get used interchangeably, but they are not identical. The admin panel is the whole administration area at /wp-admin — every screen in the sidebar. The Dashboard is a single screen inside it, the home page at /wp-admin/index.php where your widgets sit. The dashboard is part of the admin panel, not the other way round.
What are the default WordPress dashboard widgets?
WordPress ships five by default — At a Glance, Activity, Quick Draft, WordPress Events and News, and Welcome — plus the Site Health Status panel. At a Glance counts your content, Activity shows recent posts and comments, and Site Health flags configuration problems worth fixing.
Can I customize the WordPress admin panel without code?
Yes. Screen Options handles basic show-and-hide for free, and a dashboard plugin covers the rest — reordering or hiding admin menu items per user role, swapping in your own widgets, applying your branding, and changing colours. None of it requires editing functions.php or touching core files.
Why does my WordPress admin panel look different from the screenshots?
Hosting providers often pre-install plugins that add their own menu items, and themes, page builders, and admin customization plugins all add screens of their own. A WooCommerce site, for instance, gains entire sections for products and orders. The core screens are still there — there is simply more sitting beside them.
Conclusion
Kudos to you! You’ve reached the end of this article. I’ve tried to cover all the basics you’ll ever need to know to use WordPress.
In case you think I've missed something, please let me know in the comment below. And I will definitely add them in the article for others to help.
Just like you, there are a lot of people trying to get help. And all I’ve tried is to help you and others understand how easy it is to use WordPress.
If you think I’ve done a good job, don’t forget to share it with your friends or someone you know who might get help from this article.
You can further customize the WordPress admin Panel with an all-in-one solution like WP Adminify. Please check it out. It will definitely help you customize your WordPress admin dashboard like a dream.
Be confident when working in WordPress, and we are all here to help you out. Cheers!
Next Step: Make the Admin Panel Yours
Once you know your way around wp-admin, the next step is shaping it to your workflow. The complete guide to customizing the WordPress dashboard covers menus, widgets, branding, dark mode and login page customization — no code required.
Where to go next
Once the admin panel stops feeling unfamiliar, the next question is usually how to bend it to your own workflow — hiding the menus you never open, replacing the default widgets, and giving clients a screen that shows only what they need. Our WordPress dashboard customization guide covers every method for that, plugin and no-plugin alike. If the menu itself is what feels cluttered, the admin menu editor is the quickest place to start.