
As a website owner, you want to reflect your branding in your website login page. Instead of the default login screen, using custom logos, colors, backgrounds, and fonts can increase your brand identity.
Not only for branding, but also a Custom WordPress Login Page is necessary for better security. It’s a good choice to integrate reCAPTCHA in your login page, which can protect you from brute force attacks.
Customizing the default WordPress login page is easy if you follow the proper guidelines. To make it easier, I will break down this blog post into a few steps. First, I am going to clarify each step, then I will share the necessary tools and code that will assist you in creating a custom branded Login Page.
Before beginning, I would like to share this WordPress custom client Dashboard resource. Open this link in a new tab and learn how you can create a custom WordPress Dashboard. For now, let’s focus on creating a personalized login page.
Creating a Custom WordPress Login Page
I have tried to break down this blog post into four different parts. You can skip any part if you think it’s not relevant to you. But most people like me prefer to implement all of my mentioned 4 points in a WordPress login page.
If you have any extra customization ideas on your mind, please comment below, and I will highly appreciate your time and will definitely update this blog post with your suggestions.
Branding with Visual Design
As a freelancer and agency owner, my priority is branding. Changing logo, Colors, Background, and Typography customization is enough for a visual branding.
User Experience and error notice
Adding a warm welcome message within a short title can add a personal touch to your login page. Customizing the default error messages and showing all necessary links inside the login page will help you connect with your users.
Security enhancements
Changing the default WordPress login URL (/wp-admin/) and redirecting all visitors to a custom link who are trying to login via /wp-admin/ will help you add a layer to your security. But that’s not the end, you should integrate reCAPTCHA in your login form to prevent bot login.
Advanced Functional Customizations
If you are running a business that needs users login to your WordPress site, then social media login integration is a must. It can help you generate more conversions. Social login reduces the vulnerabilities from weak password practices. To add more extra touch in customization, you can redirect different types of users to a specific URL after successful login.
Rebrand Your WordPress Login Page
For creating a Custom WordPress Login Page, I will use the Loginfy plugin. Loginfy offers so many features in the free version that no other plugin offers at this time. You can try the Loginfy Pro to get more advanced customization.
Free Download | Get loginfy PRO
Check the installation and activation guidelines from Loginfy and let’s begin our customization journey now.
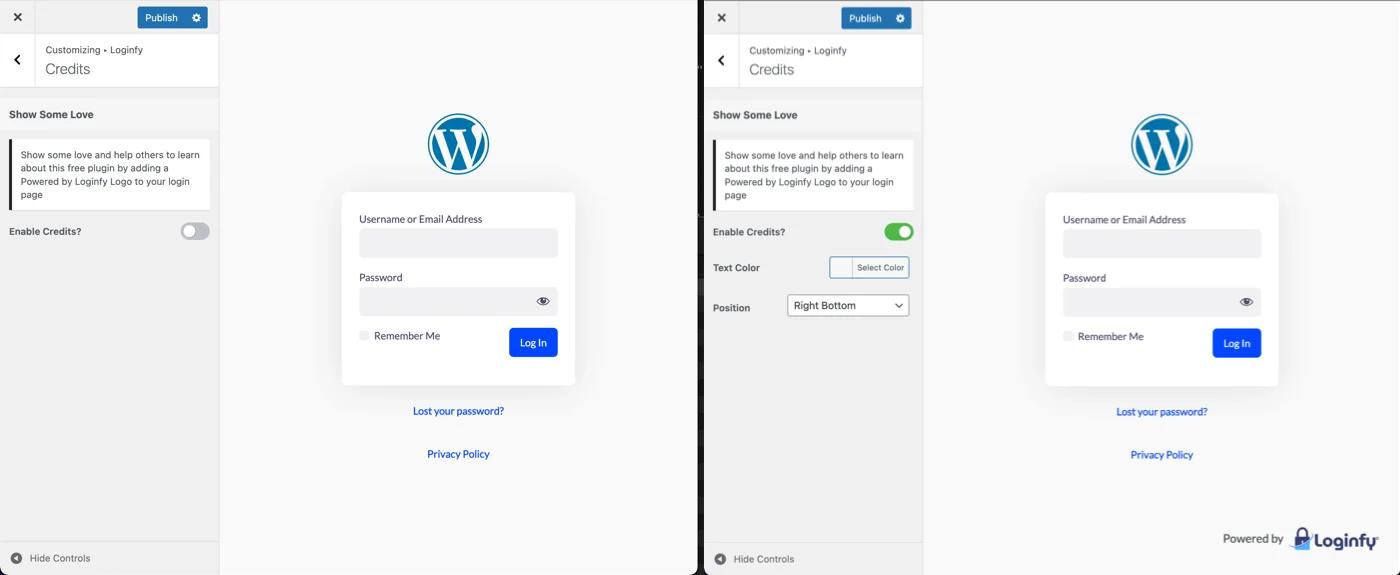
When I navigate to the login customizer page, my first option is to disable the credit. It will remove the Powered by Loginfy credit from the login page. Navigate to Loginfy> Customizer > Credit > Disable credit.
Replace the default WordPress logo
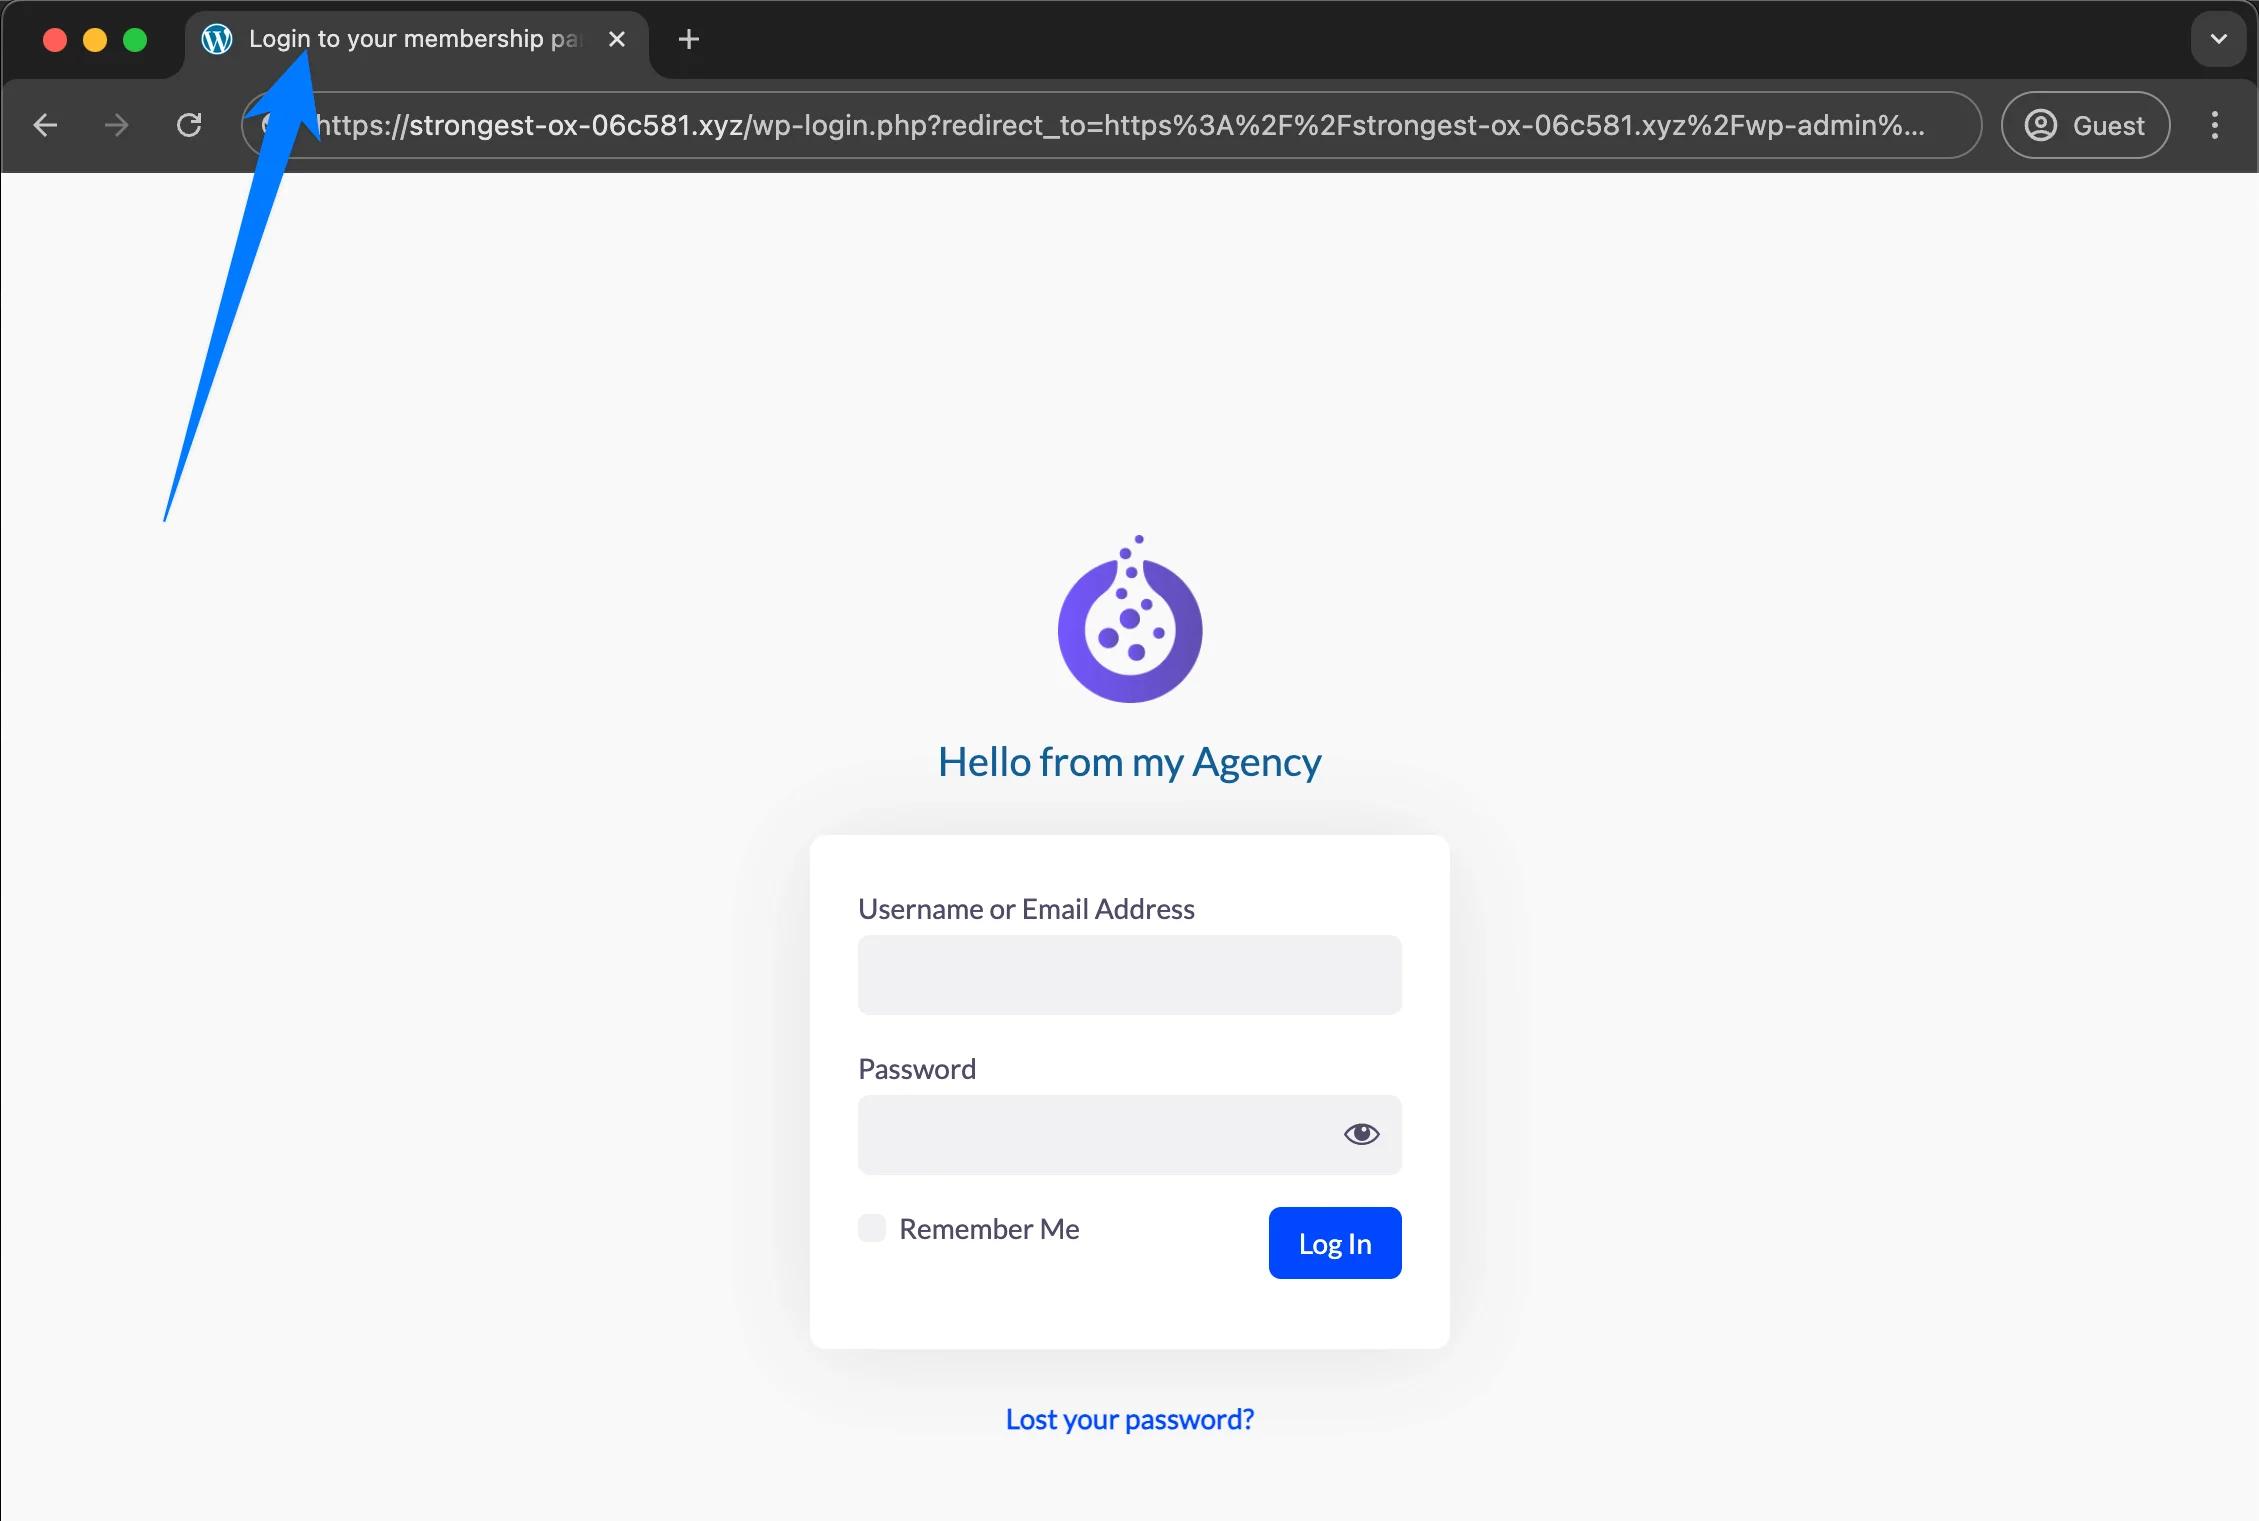
Navigate to Loginfy> Customizer> Logo. If you like the add a warm welcome message with your logo, then select Image and text. Upload your logo, then write anything inside the text field.
Bonus: You can also change the login page title. Generally, it’s not visible inside your login page content, but it provides a personal touch to your audience.
Change the Background color or add an image
Navigate to Loginfy> Customizer > Background. You can add color/image, Video, and Slideshow in your login page background. If you choose the color that is by default selected, then you will get two options called color and gradient. Inside the default color option, you will notice an image uploader option. Just upload your image, and this will be your background image.
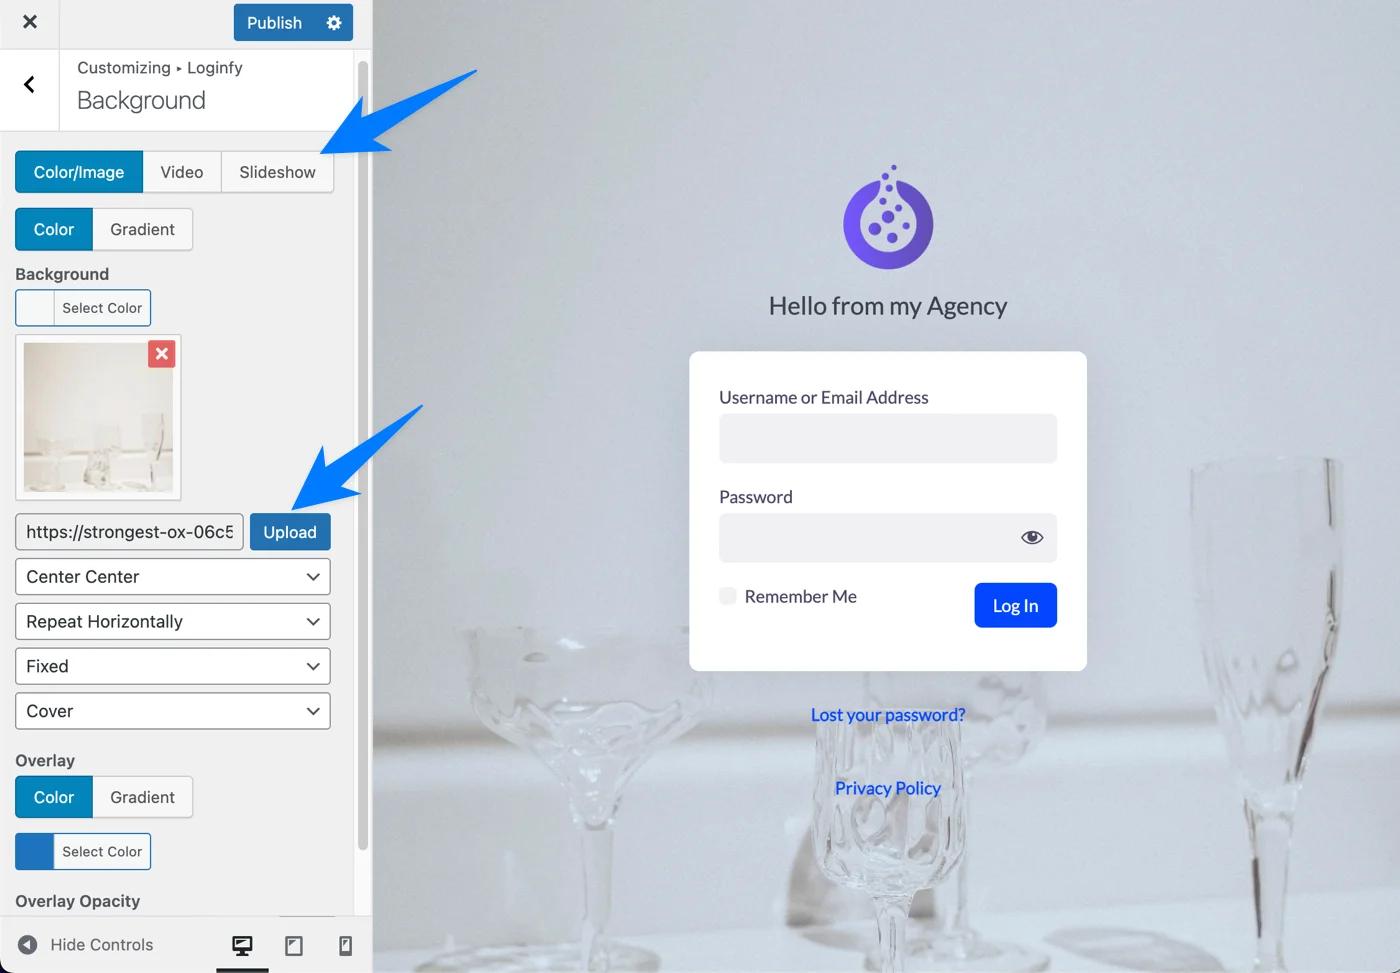
Bonus: You can select an overlay color or a gradient and control the opacity for your overlay. Proper customization of the overlay can provide you with extra beauty in the login page.
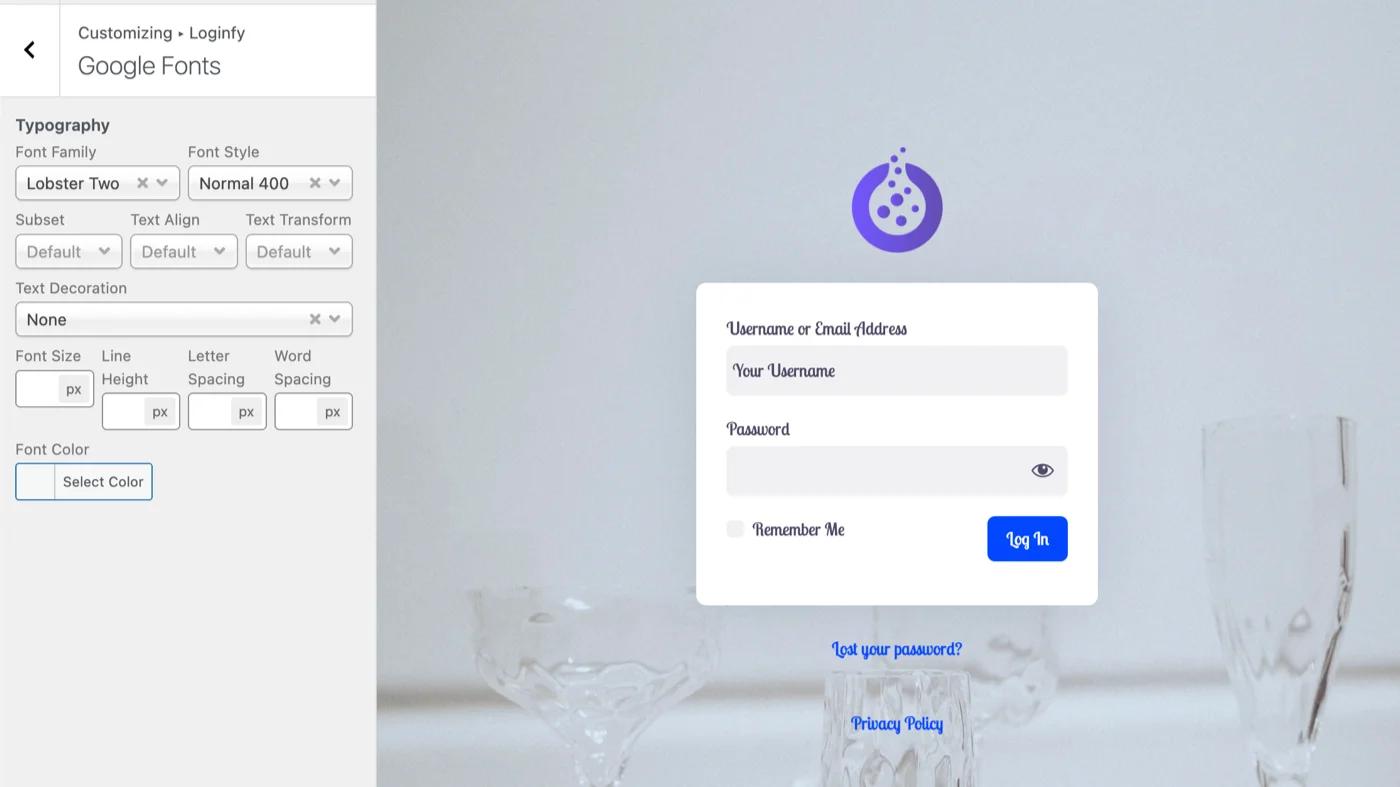
Change WordPress login page font
Every website has a font that represents the brand to its audience. If font matters too much for your front end, then why not the login page? Navigate to Loginfy> Customizer > Google fonts and select a suitable font that expresses your brand.
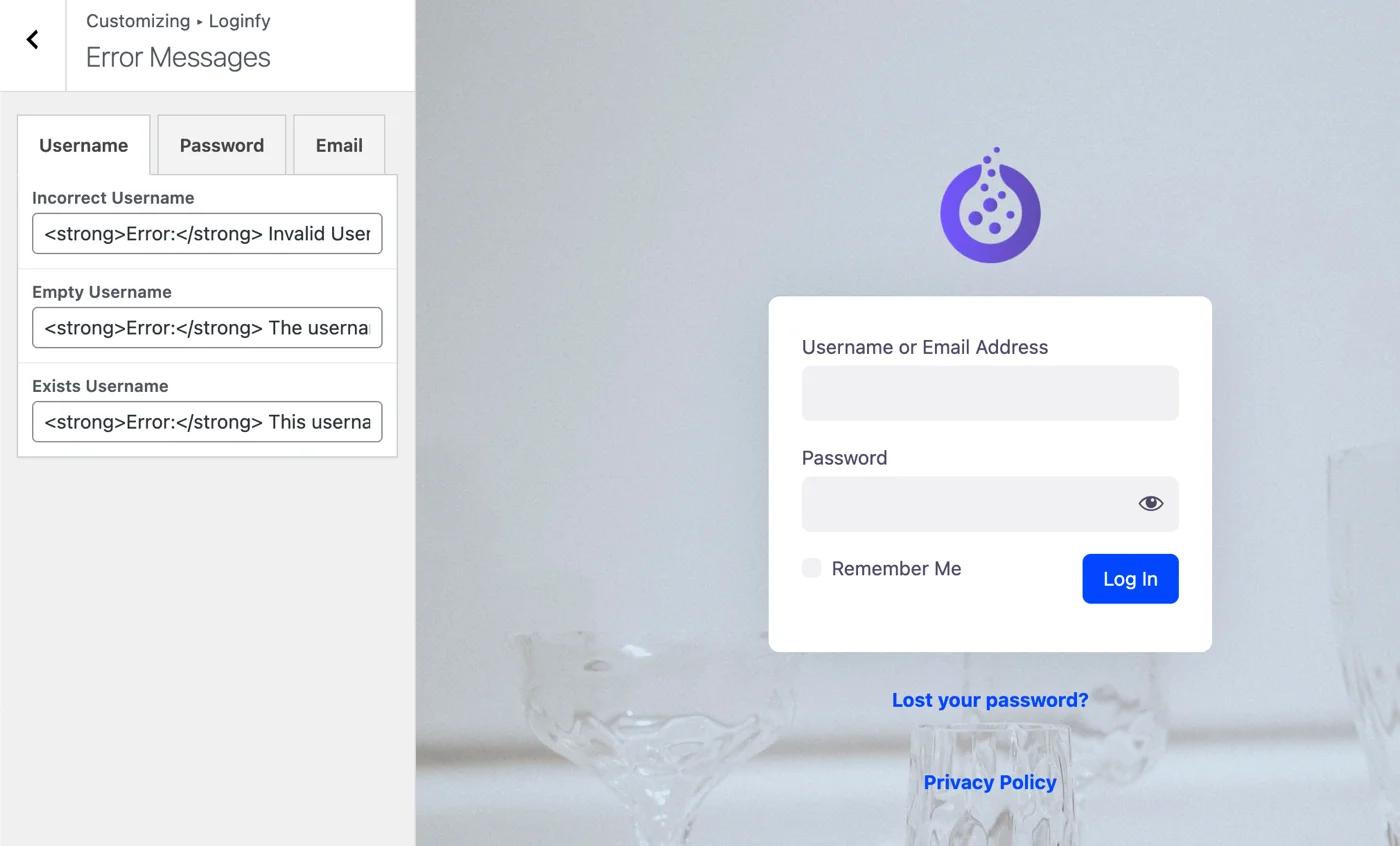
Enhance UX and Modify Error messages
I have already mentioned how you can add a warm welcome note in the logo changing option. Now I will share the customization of Error messages in your default WordPress login page. Navigate to Loginfy > Customizer > Error Messages option. Here you will notice 3 different tabs for different types of notices called Username, Password, and Email. Click on each tab and customize its error messages.
Change Login URL & Add reCAPTCHA for Security
This gonna be a little critical and needs basic coding knowledge. I am going to use the WP Adminify plugin to change the login URL, this will be the easiest way to change the login page URL. For the reCAPTCHA, I will share a code and steps that you should follow to configure the reCAPTCHA in your login page.
Free Download | Get WP Adminify PRO
Make sure to install the WP Adminify plugin PRO properly, and feel free to comment if you face any issues. There was a simple code snippet that worked to change the login URL before, but in the latest version of 6.8+, that code doesn’t work.
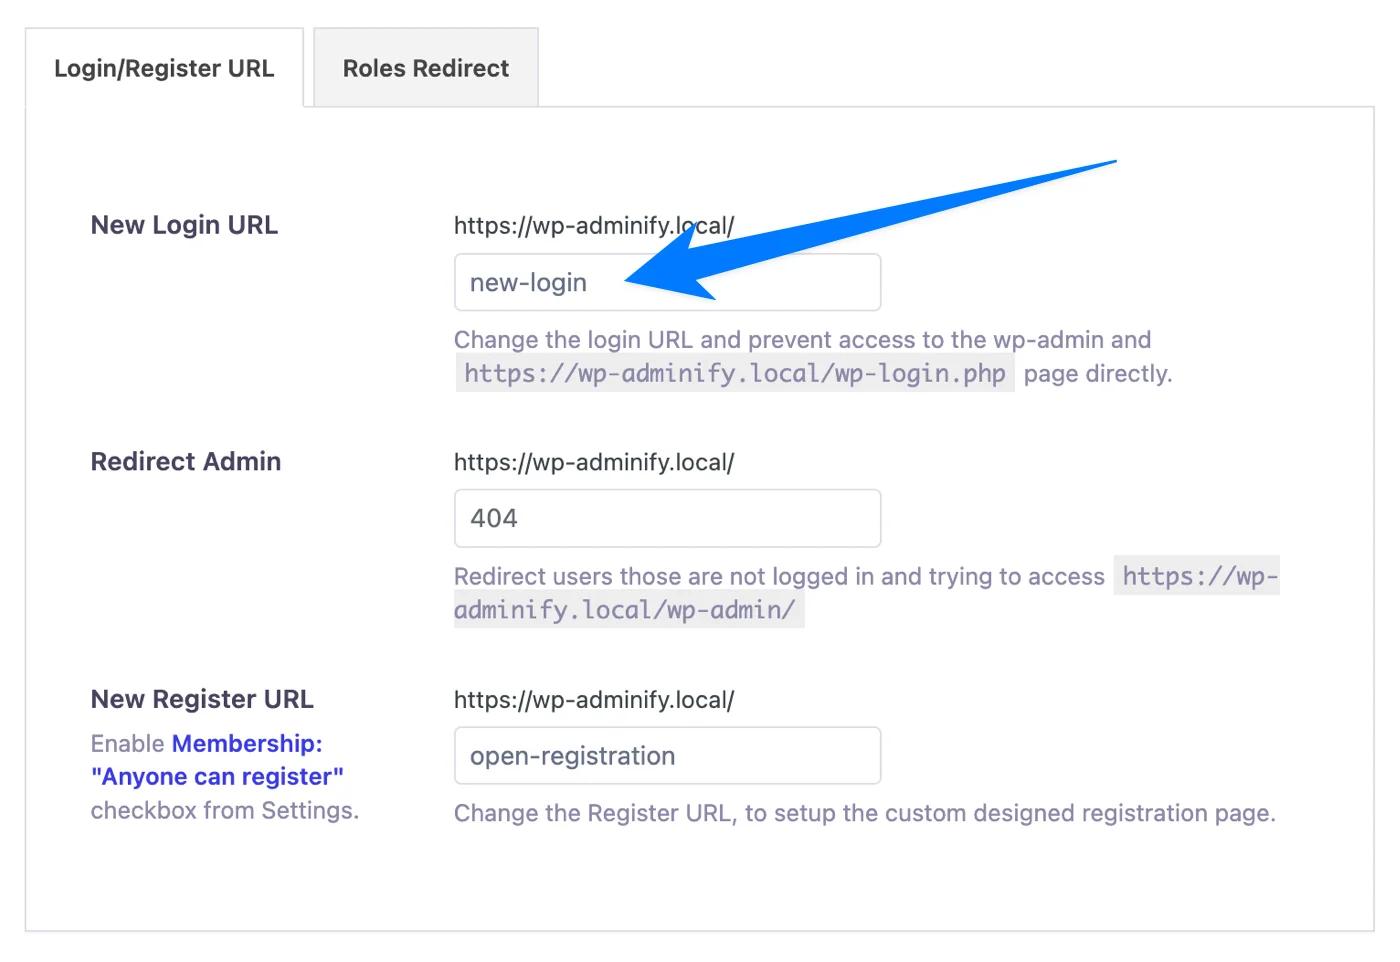
Change the default WordPress login URL
In short, navigate to WP Adminify > Security > Enable Redirect URLs > type the new login page URL. If you have WP Adminify installed, then inside the security option, you will get a new login URL option. Just type your preferred text here for the new login URL and save the settings.
To learn more about the feature, you can read this how to change WordPress login page URL.
Enhance Security with reCAPTCHA
As I mentioned, this is going to be technical. But tie up your seat belt and follow my steps properly, this is gonna be super easy.
Adding reCAPTCHA to your WordPress login page provides a personal touch and reduces the risk of brute-force attacks or other vulnerabilities.
To configure Google reCAPTCHA, visit the Google reCAPTCHA Admin page and register a new website. Make sure to provide a proper website URL without https://.
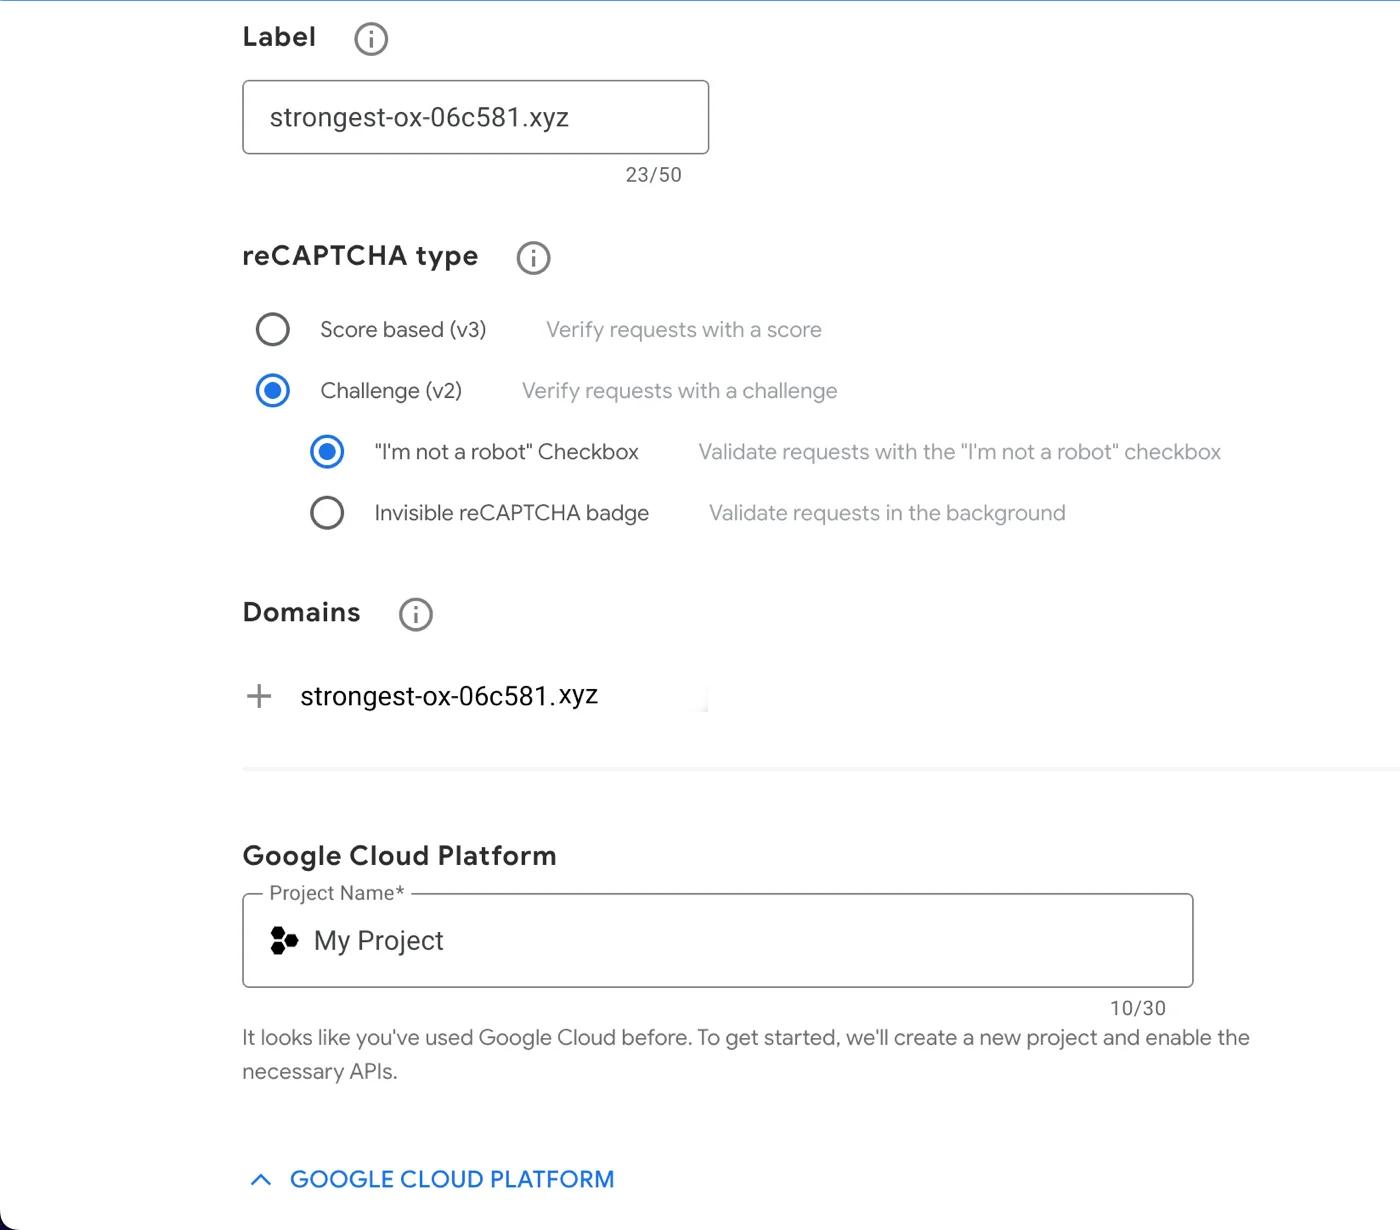
When you click on the submit button after providing all necessary information, it will redirect you to a page containing your site key and your secret key.
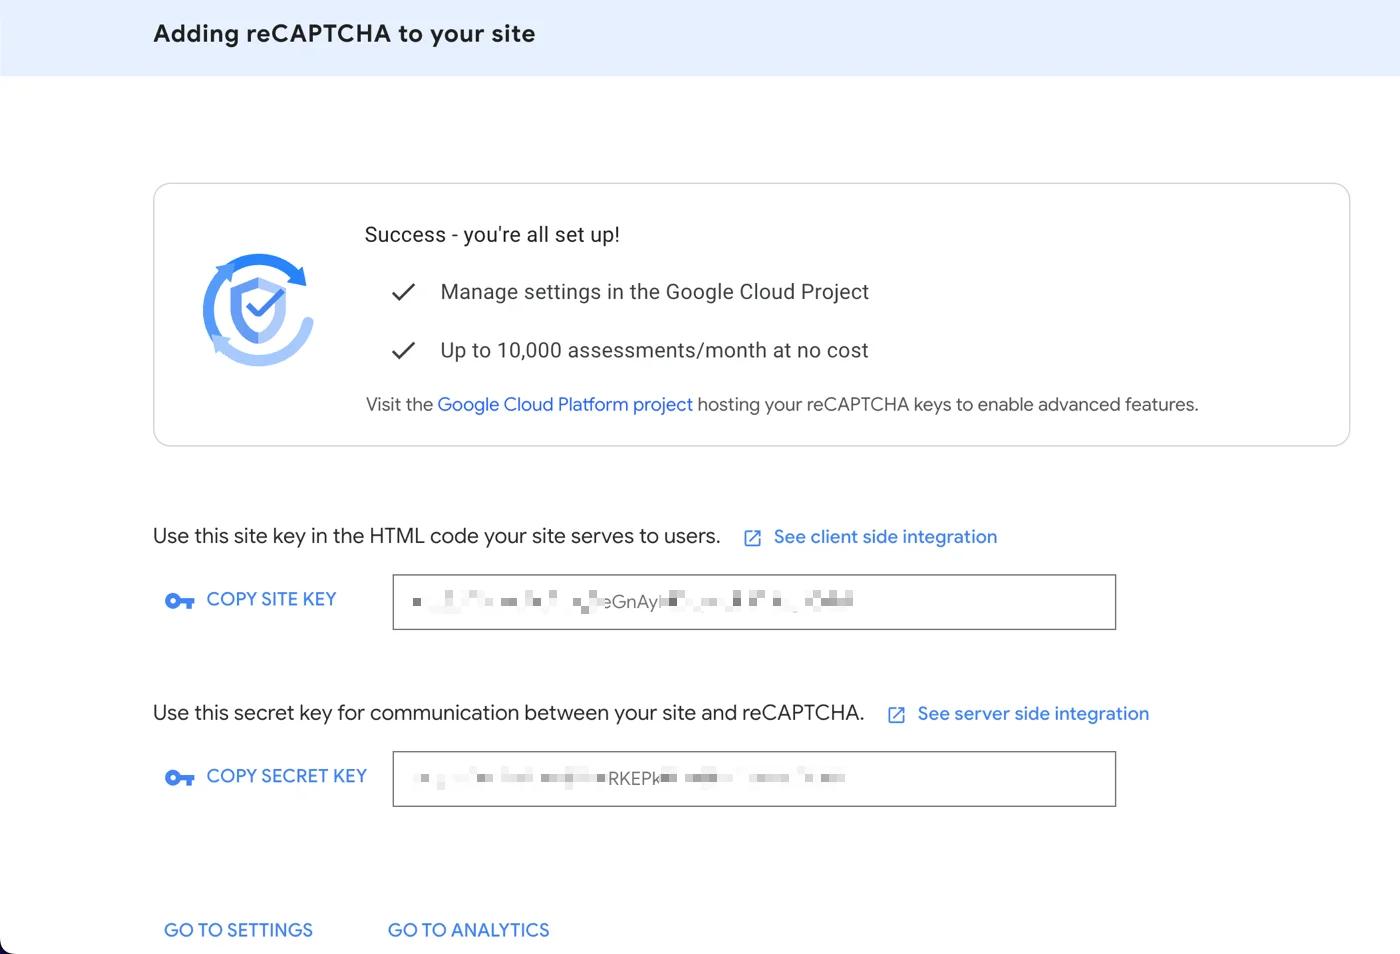
Now, copy the following code and paste it into your functions.php file. All you have to do is replace your_site_key and your_secret_key with the actual keys that you have received from Google.
// Enqueue the Google reCAPTCHA API script on the login page.
function enqueue_recaptcha_script() {
   wp_enqueue_script( 'google-recaptcha', 'https://www.google.com/recaptcha/api.js' );
}
add_action( 'login_enqueue_scripts', 'enqueue_recaptcha_script' );


// Display the reCAPTCHA widget on the login form.
function display_recaptcha_on_login() {
   // Replace 'your_site_key' with your actual Site Key from Google reCAPTCHA.
   echo '<div class="g-recaptcha" data-sitekey="your_site_key"></div>';
}
add_action( 'login_form', 'display_recaptcha_on_login' );


// Verify the reCAPTCHA response during user authentication.
function verify_recaptcha_response( $user, $username, $password ) {
   // Check if the reCAPTCHA response is submitted.
   if ( isset( $_POST['g-recaptcha-response'] ) && ! empty( $_POST['g-recaptcha-response'] ) ) {
       $recaptcha_response = sanitize_text_field( $_POST['g-recaptcha-response'] );
       $secret_key = 'your_secret_key'; // Replace with your actual Secret Key from Google reCAPTCHA.

       // Send the request to Google for verification.
       $response = wp_remote_post(
           'https://www.google.com/recaptcha/api/siteverify',
           array(
               'body' => array(
                   'secret'   => $secret_key,
                   'response' => $recaptcha_response,
                   'remoteip' => $_SERVER['REMOTE_ADDR']
               )
           )
       );

       $result = json_decode( wp_remote_retrieve_body( $response ), true );

       // If verification failed, return a WP_Error which stops the login.
       if ( ! isset( $result['success'] ) || true !== $result['success'] ) {
           return new WP_Error( 'recaptcha_invalid', __( '<strong>ERROR</strong>: reCAPTCHA verification failed. Please try again.' ) );
       }
   } else {
       // If there's no reCAPTCHA response, return an error.
       return new WP_Error( 'recaptcha_empty', __( '<strong>ERROR</strong>: Please verify that you are not a robot.' ) );
   }

   return $user;
}
add_filter( 'authenticate', 'verify_recaptcha_response', 21, 3 );
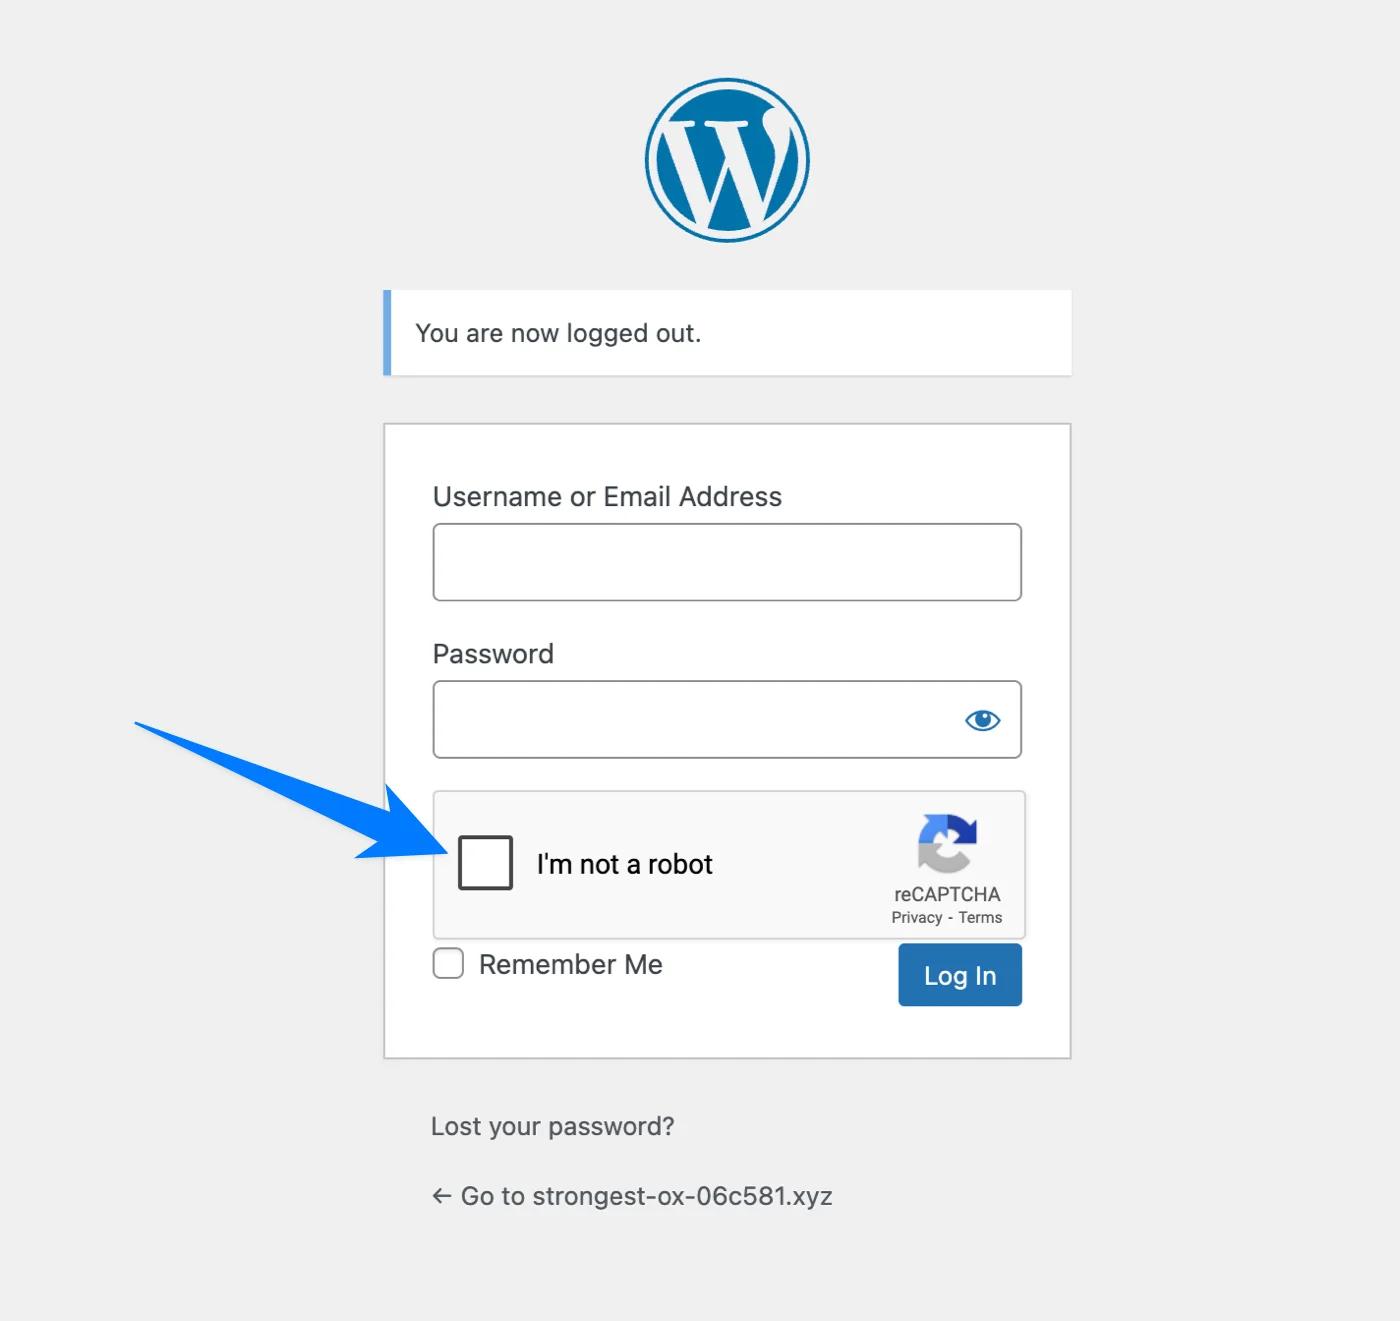
Now save your functions.php file. Before saving, make sure there is no issue in the code; otherwise, it may result in a critical error on your website. If everything is fine, you will get this type of reCAPTCHA in your WordPress login page.
NOTE: 2 factor authentication can increase your website security. You may checkout how to enable two factor authentication post.
Advanced Customizations on the login page
This is optional, but useful if you consider user experience. Enabling social login on your WordPress login page can be hassle-free for your users. Personally, I also don’t prefer to note down my password and prefer a social login system. After a successful login, a user expects you to redirect to a special page that is only designed for him/her. I will cover these two options in this section.
Enable social login on the WordPress login page
To enable social login, I will use the Nextend Social Login and Register plugin. Install this plugin like you have installed Loginfy and WP Adminify in your WordPress Dashboard. You will get Facebook, Google, X (formerly Twitter) for free.
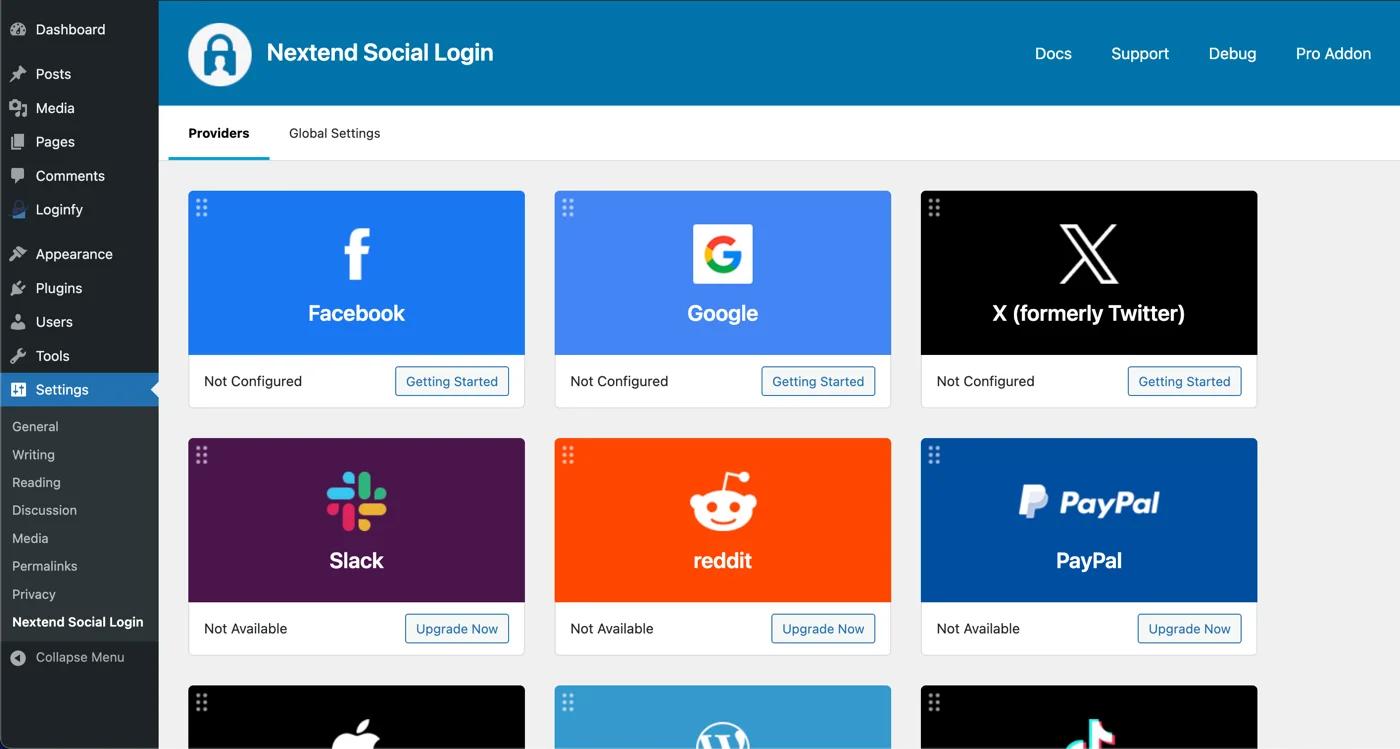
Just click on the Getting Started button beside your preferred social media icon and do all the configuration properly. These settings are very basic and I don’t want to explain each step in this blog post. But if you face any problem, feel free to comment and I will try to assist you.
Redirect users while log in and log out
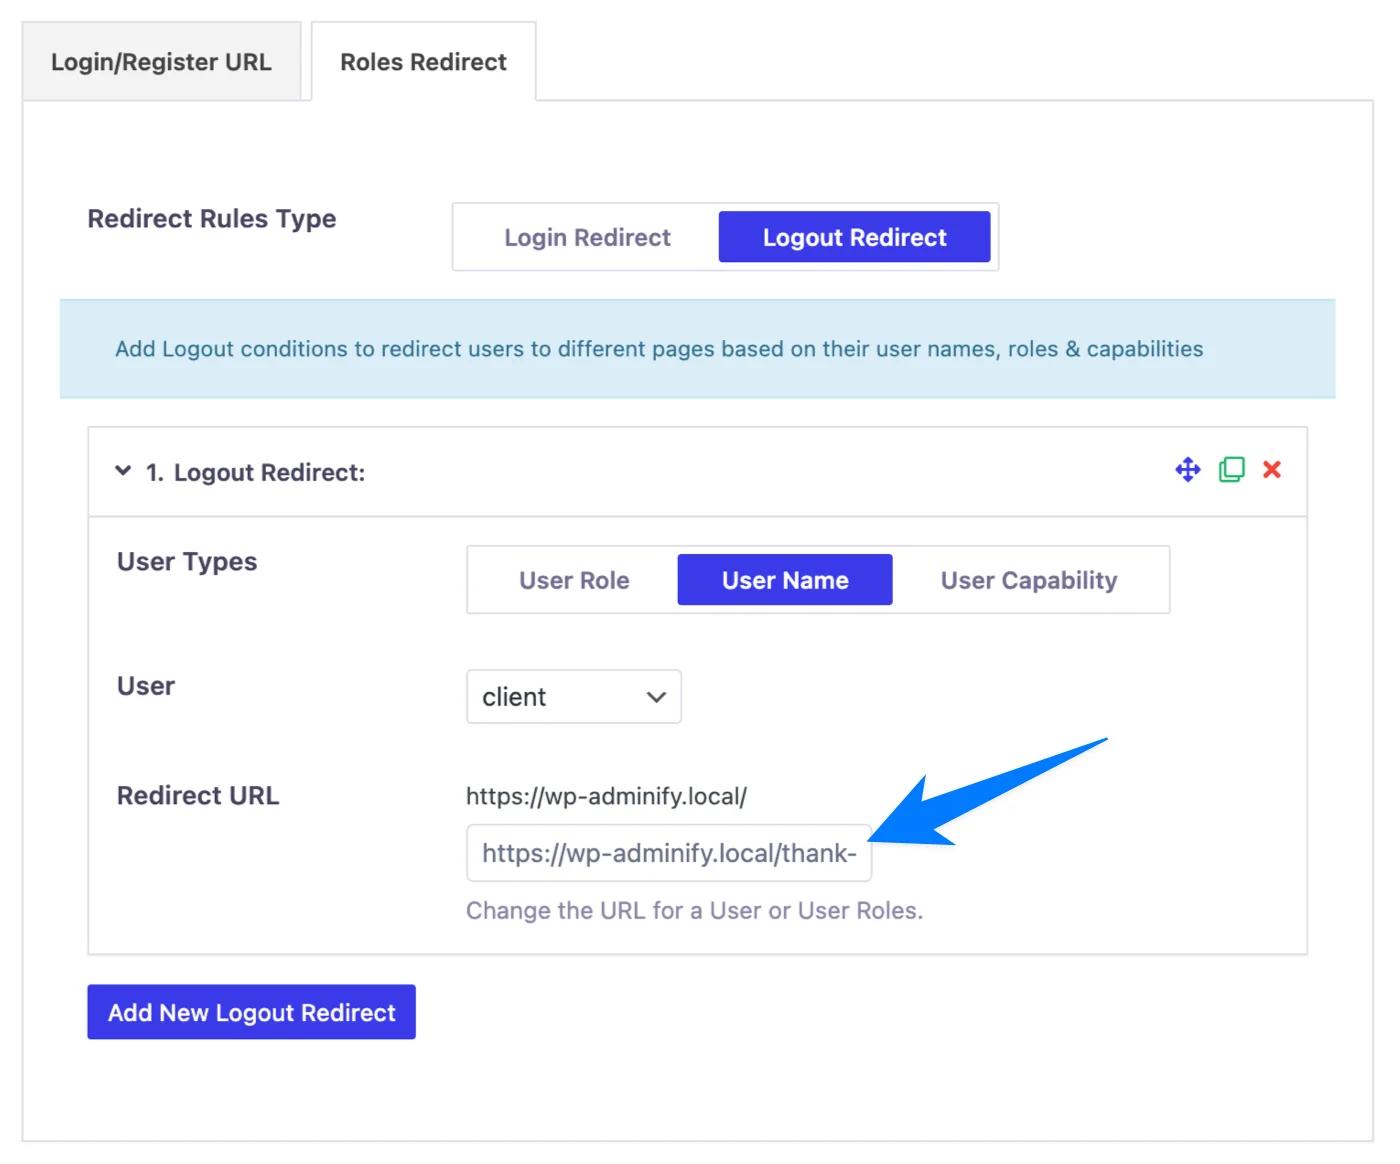
This is another interesting part for user experience. You can track users when they log in and based on user roles or user name, you can redirect them to a specific URL. Not only for login but also when someone log out, instead of showing them the default login page, you can set a URL where you want to redirect your users when they log out.
Navigate to WP Adminify > Security > Enable Redirect URLs > Roles Redirect > Add new login redirect button.
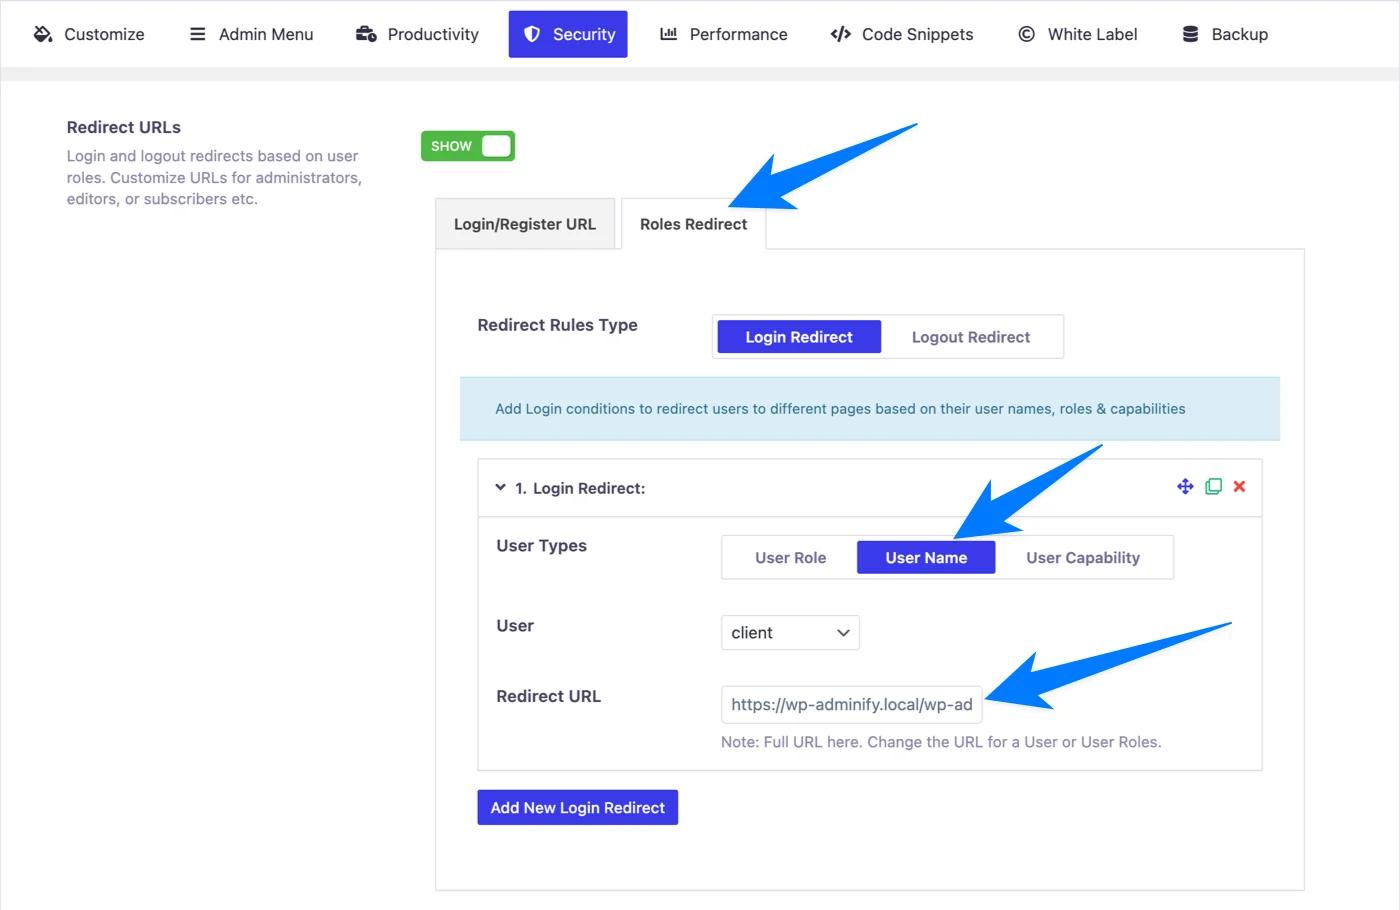
Just input any URL (Support both backend and frontend) and set the user role or user name condition properly. Play the following video and you will get a clear idea on how this works.
Just like login redirection, you can apply log out redirection too. Click on the Logout Redirect tab and add new log out redirect.
Here is a video preview for you -
Let’s Wrap UP!
That’s all about creating a custom WordPress login page. If you consider the design of your login page, Loginfy offers 16 pre-built templates with multiple layout options. You can position the login form anywhere in the login page and many more.
Start using Loginfy and the WP Adminify plugin, and I am pretty sure you will love it. If you face any problem while using the plugin, feel free to get in touch or comment below and I will try my best to respond to your comment.

Leave a Comment
Your email address will not be published