



Key Takeaways
- WordPress has no built-in button to export users: the Users screen bulk actions do not include an export option, and Tools > Export only exports content such as posts, pages and media.
- Tools > Export Personal Data is a privacy tool that builds a file for one person after an email confirmation, so it cannot export a list of all WordPress users.
- The free plugin Import and export users and customers (70,000+ active installs on WordPress.org) adds an Export tab under Tools that filters users by role or registration date and downloads a CSV.
- The WP-CLI command wp user list --format=csv exports WordPress users in one line, and the --role and --fields options limit the file to one role or a few columns.
- Password hashes should stay out of a user export, because the WP-CLI import command gives each new account a random password and users then set their own.
To export WordPress users, you need either a plugin or WP-CLI, because WordPress 7.1 has no export button on the Users screen. A plugin gives you a form with filters and a Download button, and WP-CLI produces the same CSV file from one command. Both are free, and either one takes a few minutes.
Below you will find what a user export contains, both methods step by step, and how to load the file into another site. Roles and wordpress capabilities matter when you move users, because a role must exist on the new site before anyone can be given it. If you build custom roles with WP Adminify's RoleMaster Suite, the same steps apply.
What Data Gets Exported?
A WordPress user export usually contains each account's ID, username, email, display name, registration date and role. Most export tools can also add user meta, such as first name, last name, website or data from WooCommerce. Passwords are stored as hashes, so they should not be moved between sites.
WordPress keeps user data in two database tables:
| Table | What it holds | Examples |
|---|---|---|
wp_users | Core account fields | ID, user_login, user_email, user_url, user_registered, display_name, password hash |
wp_usermeta | Extra fields for each user | first_name, last_name, nickname, the user's role (stored in wp_capabilities), plugin data such as billing address |
The table prefix may differ on your site. Decide which fields you need before you export: a newsletter tool may only need email and name, while a site move needs username, email, display name and role.
Can You Export Users Without a Plugin?
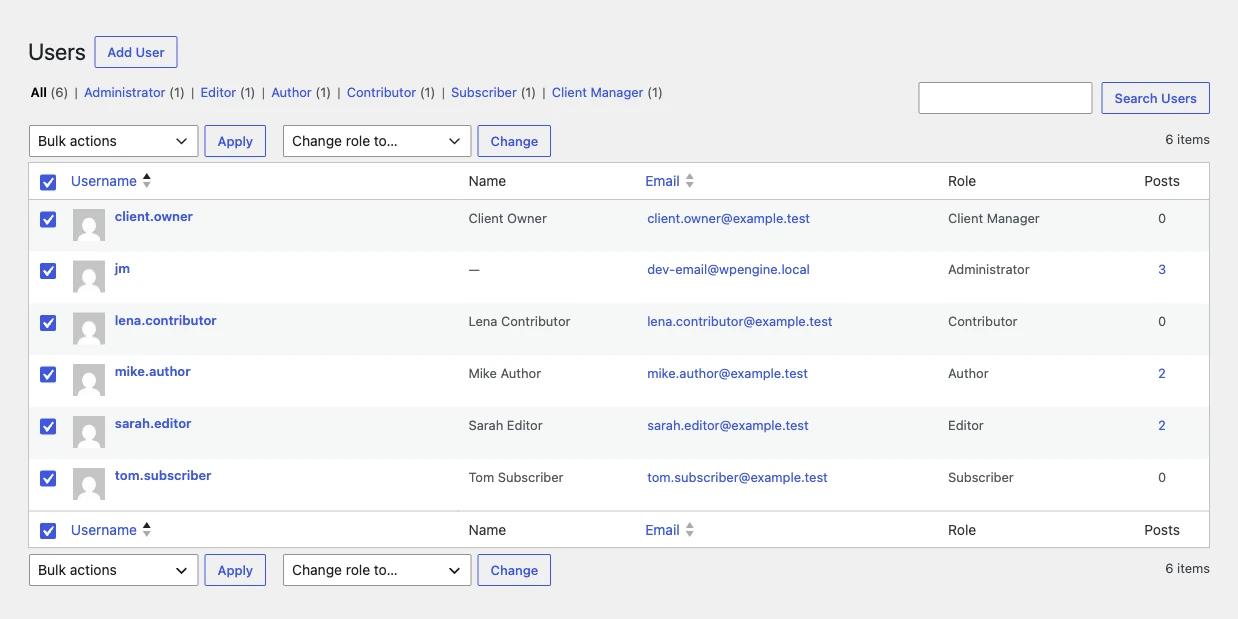
In the WordPress admin, no. The Users screen lets you select users and run bulk actions, but export is not one of them. Tools > Export works on content, and Tools > Export Personal Data handles one person's privacy request at a time. Without a plugin, WP-CLI is the only standard way to export users.
A common mistake is to try Tools > Export Personal Data. That screen asks for one username or email, sends a confirmation request to that person, and then builds a file with that person's data. It was made for privacy law requests and only ever handles one person.
Method 1: Export Users with a Free Plugin
The simplest plugin for this job is Import and export users and customers, which has 70,000+ active installs on WordPress.org. It adds a screen under Tools with an Export tab. You choose a role, a date range and the columns you want, then click Download to get a CSV file.
- Go to Plugins > Add New, search for Import and export users and customers, then install and activate it. You can also get it from its WordPress.org page.
- Open Tools > Import and export users and customers and click the Export tab.
- In Role, pick one role or leave it empty to export everyone.
- Use User created to limit the export to users who registered between two dates.
- In Columns, list the fields you want in order, or leave it empty to export all columns.
- Check Delimiter. A comma works for most tools. Excel in some regions expects a semicolon.
- Click Download. The plugin builds the CSV in steps, so large sites may take a moment.
The plugin also exports user meta. That helps on WooCommerce stores, where billing and shipping fields live in user meta. You can use the same plugin to import the file on the new site.
Method 2: Export Users with WP-CLI
If you have SSH access, WP-CLI exports users with one command: wp user list --format=csv > users.csv. The file includes ID, username, display name, email, registration date and roles by default. Add --role to export one role and --fields to choose the columns.
Export all users with the default columns:
1
2wp user list --format=csv > users.csv
3
Export only the columns you need for a site move:
1
2wp user list --fields=user_login,user_email,display_name,roles --format=csv > users.csv
3
The default columns are ID, user_login, display_name, user_email, user_registered and roles. Optional fields include user_url, user_nicename and user_status. The full list is in the wp user list documentation. On multisite, add --url= with the subsite address to export that subsite's users.
Export users by role
The --role option filters the export to one role. It uses the role ID, not the display name:
1
2wp user list --role=editor --format=csv > editors.csv
3wp user list --role=client_manager --format=csv > client-managers.csv
4
Custom roles work like built-in ones. On our test site, client_manager is a "Client Manager" role cloned from Editor. To find a role's ID, run wp role list. If you add roles with a user role editor such as RoleMaster Suite, you choose the ID yourself in the Role name (ID) field.
Import the Users into Another Site
To import users, create any custom roles on the new site first, then load the CSV with the same plugin or with wp user import-csv. WP-CLI reads the user_login, user_email, display_name and roles columns, updates users who already exist, and gives new users a random password.
- Create the roles first. If the CSV has a role that does not exist on the new site, WP-CLI warns that the user "has an invalid role". Rebuild custom roles before you import. Our guide to a wordpress custom user role shows how.
- Import the file:
wp user import-csv users.csv - Skip existing accounts if needed. Add
--skip-updateso users who already exist (matched by email or username) are not changed. - Let users set new passwords. New accounts get a random password. Add
--send-emailto email account details, or ask users to click "Lost your password?" on the login screen.
Leave the ID column out of the import file. The new site gives each user its own ID.
Keep Exported User Data Safe
A user CSV holds names and email addresses, which count as personal data. Keep the file only as long as you need it and keep it out of public folders. It is also worth checking whether your live site shows user data to strangers.
- Run the WP-CLI export from your home folder, outside the site's public folder, so nobody can download
users.csvfrom a browser. - Delete the file from the server when the job is done.
- The REST API endpoint
/wp-json/wp/v2/userslists users who have published posts to anyone who asks. WP Adminify Admin Security can disable REST API access for visitors who are not logged in, from Adminify > Security.
Frequently Asked Questions
How do I export WordPress users to Excel?
Export the users to a CSV file with a plugin or WP-CLI, then open the file in Excel. If all data lands in one column, the delimiter does not match your Excel settings. Export again with a semicolon delimiter, or use Excel's Data tab to import the CSV and pick the comma as the separator.
Can I export only users with one role?
Yes. In the Import and export users and customers plugin, pick the role in the Role field on the Export tab. With WP-CLI, add the role ID to the command, for example wp user list --role=subscriber --format=csv. Custom roles work too, as long as you use the role ID.
Does a user export include passwords?
WordPress stores passwords as hashes, not as plain text, so no export can show the real passwords. The WP-CLI export leaves the hash out unless you request the user_pass field. It is safer to move users without passwords and let them set a new one with the Lost your password link.
Is Tools > Export in WordPress enough to move users?
No. Tools > Export creates a file for posts, pages and media. When you import that file, WordPress lets you map or create authors, but it does not move all user accounts, their roles or their profile data. Use a user export plugin or WP-CLI for that.
Does WP Adminify export users?
WP Adminify 4.3.4 does not include a user export feature, so use the free plugin or the WP-CLI method in this guide. For the roles your users belong to, WP Adminify has the RoleMaster Suite addon.
Final Thoughts
To export WordPress users, use the Export tab of the free Import and export users and customers plugin, or run wp user list --format=csv. Add --role when you only want one role, and leave password hashes out of the file. On the new site, create any custom roles first, then import with wp user import-csv and delete the CSV afterwards.
To understand which roles your users have and what each one can do, read WordPress User Roles and Capabilities.



Your email address will not be published