Your clients don’t hate WordPress - they hate confusing admin screens that feel like they were built for developers, not for them. When you turn the default backend into a focused, client-friendly admin, you can quietly cut support tickets while making your service look premium.
Why your WordPress client dashboard is generating support tickets
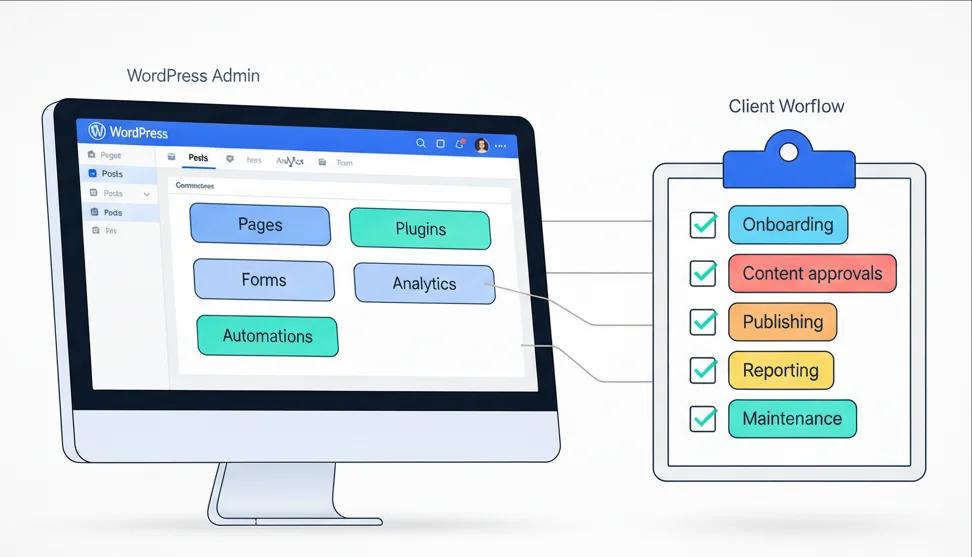
Most WordPress client dashboards are accidental: you install a theme, add a few plugins, and let everything show up in the admin as it wants. That’s how you end up with menus, widgets, notices, and toolbars designed around plugins - not around how your client actually works day to day.
Common ticket triggers you probably recognize:
- Where do I edit my homepage again?
- Why does my dashboard look broken today?
- Is it safe to click this update button?
Underneath, the problem is almost always the same: there’s no intentional client-friendly admin that hides complexity and highlights only the 5–7 tasks this specific client actually does. When you design a WordPress client dashboard on purpose - with tools like WP Adminify, Admin Bar Editor, and Loginfy—you stop answering the same questions and start preventing them.
Principle: one dashboard per client workflow
Before you touch any settings, define what “success” looks like for this client inside WordPress. A salon owner, an online course creator, and an eCommerce brand should not see the same backend.
For most small business sites, daily and weekly workflows boil down to:
- Adding or editing pages or blog posts
- Uploading images and documents
- Managing bookings, products, or services
- Checking a few key stats and forms
Everything else - plugins, tools, system settings, advanced appearance options - belongs to you as the agency or developer. Your job is to design a client admin interface that reflects those real workflows and hides or demotes everything that feels like infrastructure.
That’s exactly where a dashboard customizer like WP Adminify, a toolbar controller like Admin Bar Editor, and a login customizer like Loginfy work together: they let you build one coherent experience instead of a pile of plugin settings screens.
8 client dashboard customizations that reduce tickets
In this section, you’ll see eight practical changes you can implement on any client site. Each one is designed to remove a specific type of support ticket, not just make the dashboard “look cool.”
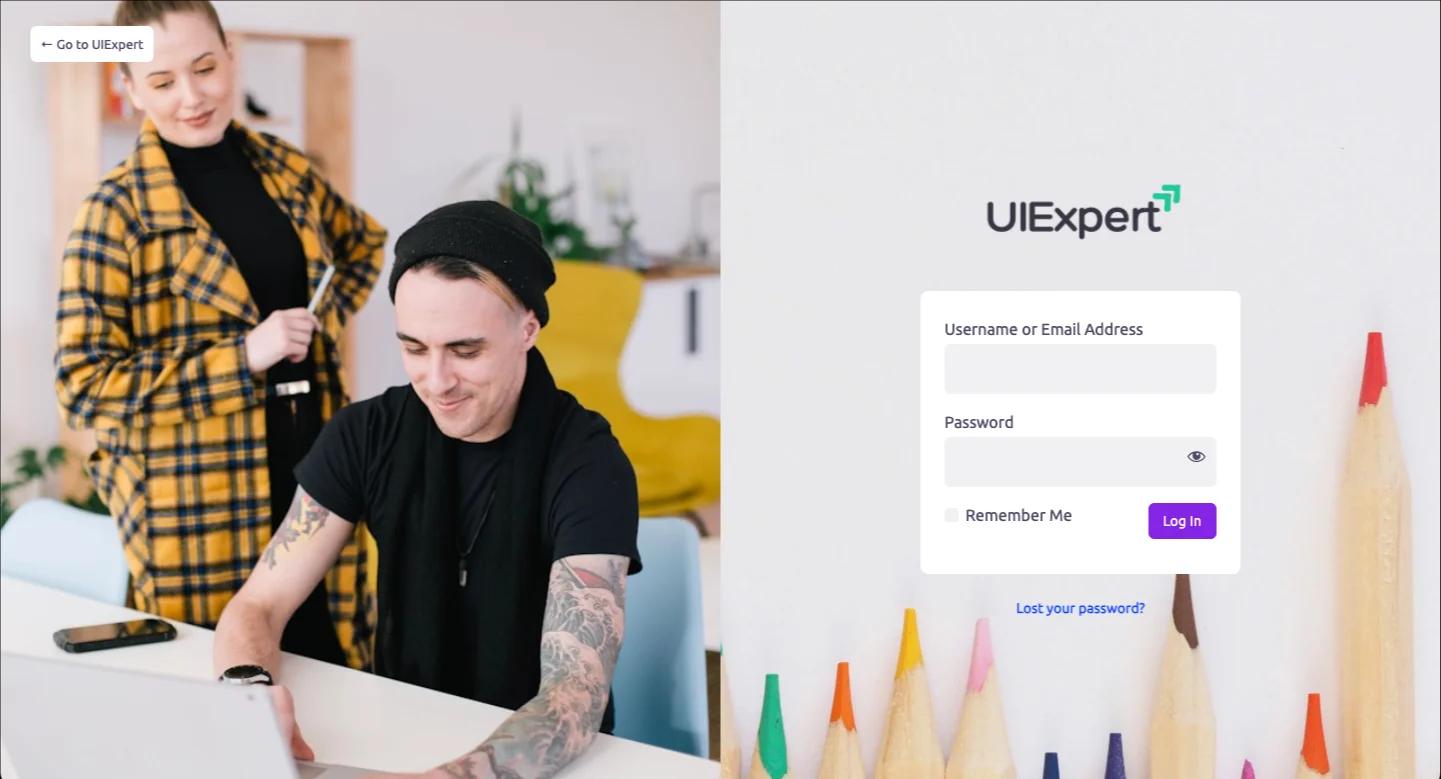
1) Simplified, branded login experience (Loginfy)
For many clients, “WordPress” means the login screen and the first dashboard page they see after login. If the login is generic, cluttered, or looks different from their site, you’ve already added friction.
With the Loginfy addon for WP Adminify, you can transform wp-login.php into a polished, on‑brand experience:
- Replace the WordPress logo with the client’s logo and favicon.
- Apply their brand colors, gradients, and background image so it feels like part of the site, not a separate system.
- Adjust typography and layout using the Live Customizer so you can preview changes in real time.
- Add a short, friendly note below the form like “Need help? Email support@youragency.com” to deflect basic access questions before they become tickets.
You can also combine this with security best practices like changing the login URL, adding reCAPTCHA, and limiting attempts, so clients see a professional, safe entry point instead of a generic WordPress screen. Because Loginfy is part of your WP Adminify ecosystem, you avoid installing a separate login customizer plugin that adds even more settings and notices.
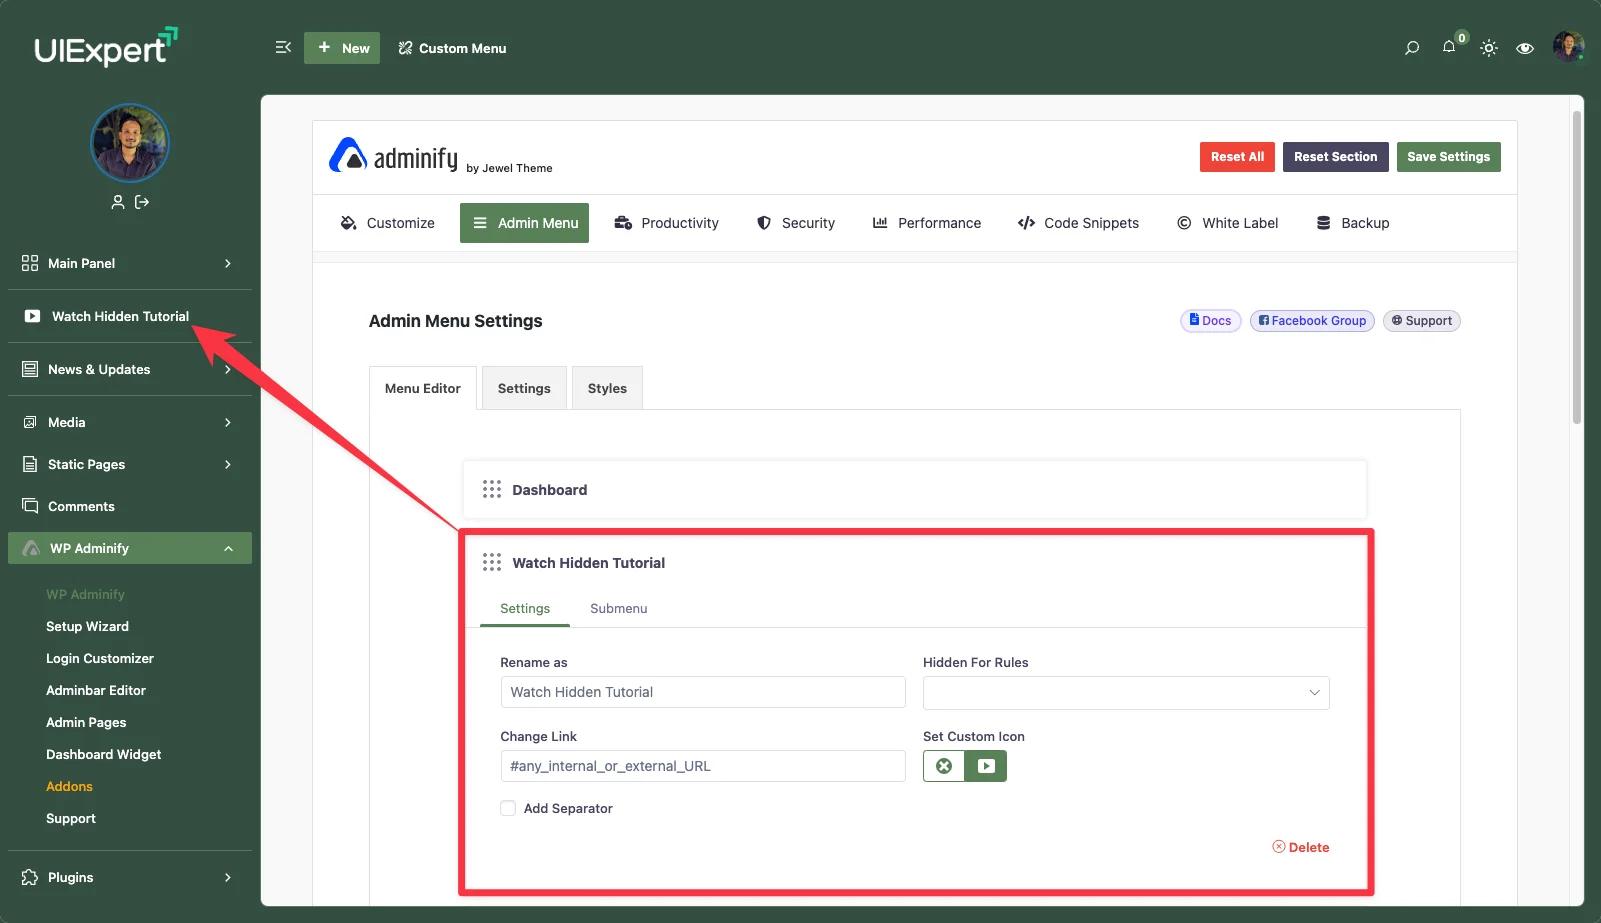
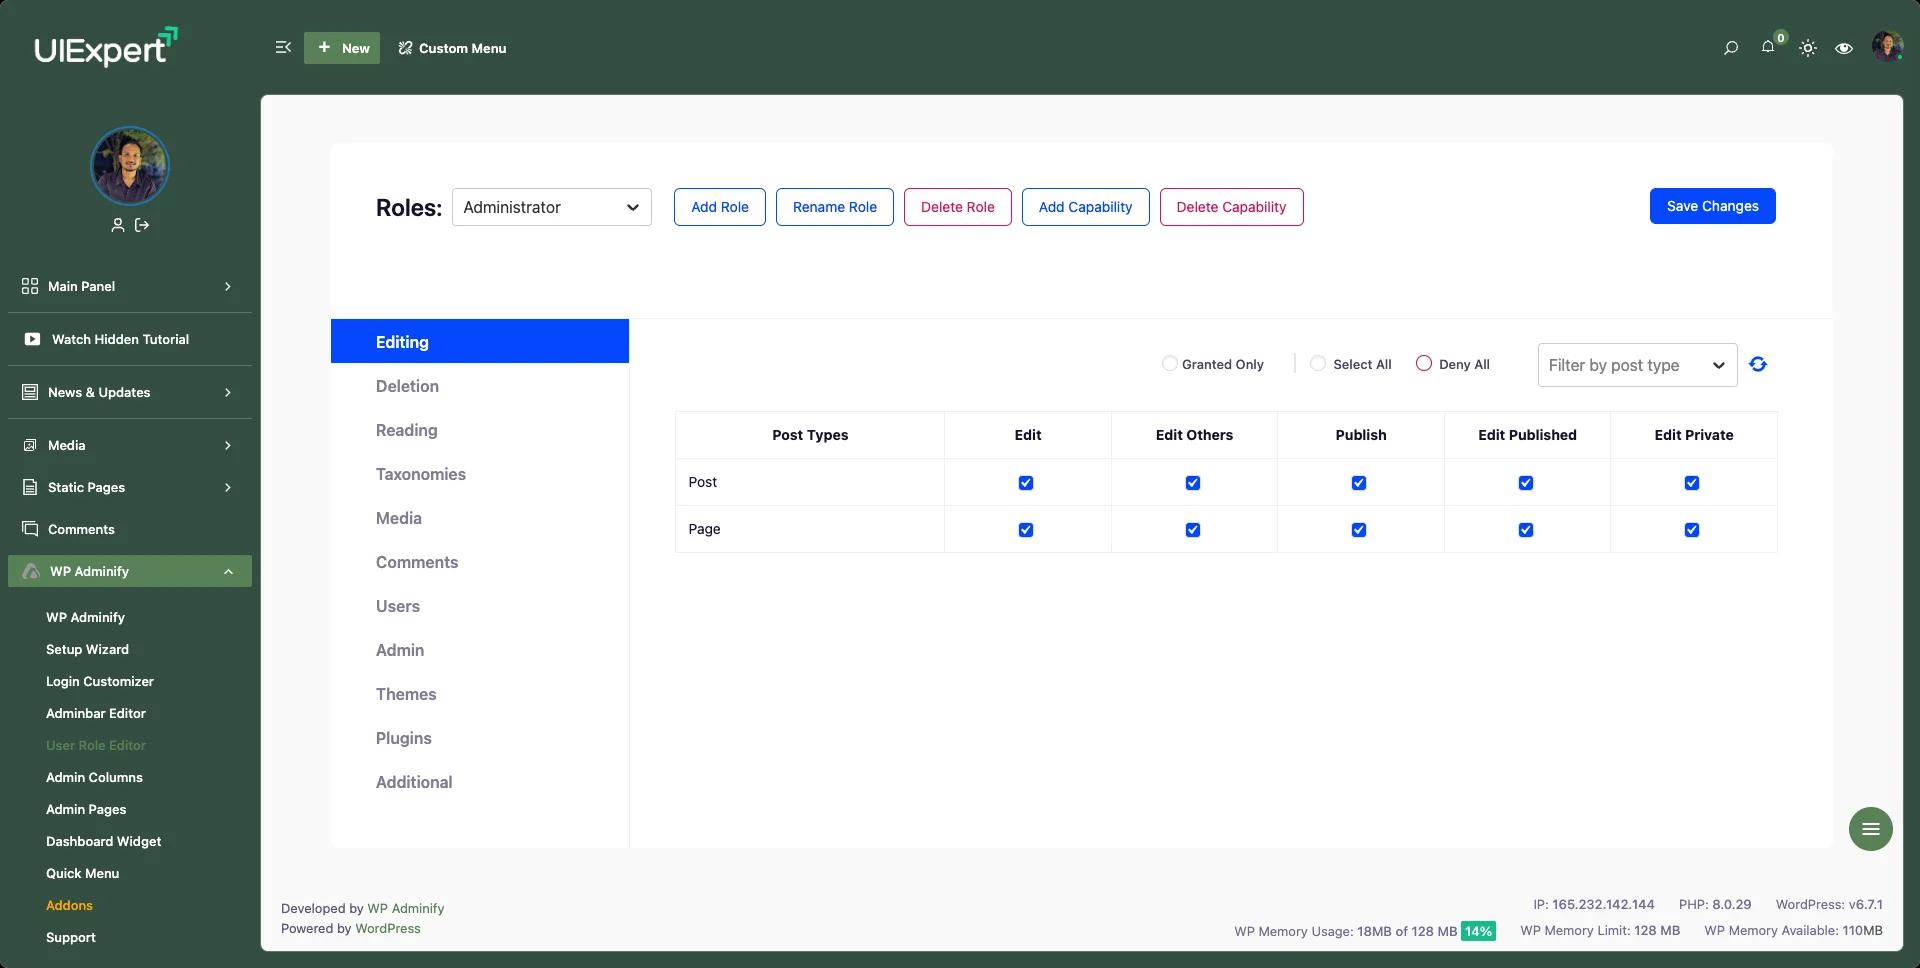
2) Clean, role-based admin menu (WP Adminify)
The left admin menu is usually the biggest source of confusion and accidental clicks. Every plugin adds its own top-level item, sometimes with a bright icon and inconsistent wording.
WP Adminify’s Admin Menu Editor lets you turn that chaos into a focused navigation:
- Use the visual drag‑and‑drop interface to reorder menus so content items (Pages, Posts, Products, Bookings, etc.) sit at the top where clients actually see them.
- Rename labels into client language: “Posts” → “Blog,” “WooCommerce” → “Shop,” “Testimonials CPT” → “Reviews.”
- Hide technical menus like Tools, Settings, Plugins, Appearance, and most plugin entries from non‑admin roles to prevent accidental changes.
- Assign custom icons and separators so related items are grouped in a way that feels intentional, not random.
Most importantly, you can show different menu structures per role:
- Admins (your team + trusted client owners) see full configuration.
- Editors see only content and marketing tools.
- Store managers see the shop and orders.
- Subscribers may see nothing but their profile.
This is perfect when you want a truly client-friendly admin where non‑technical users simply cannot reach dangerous screens.
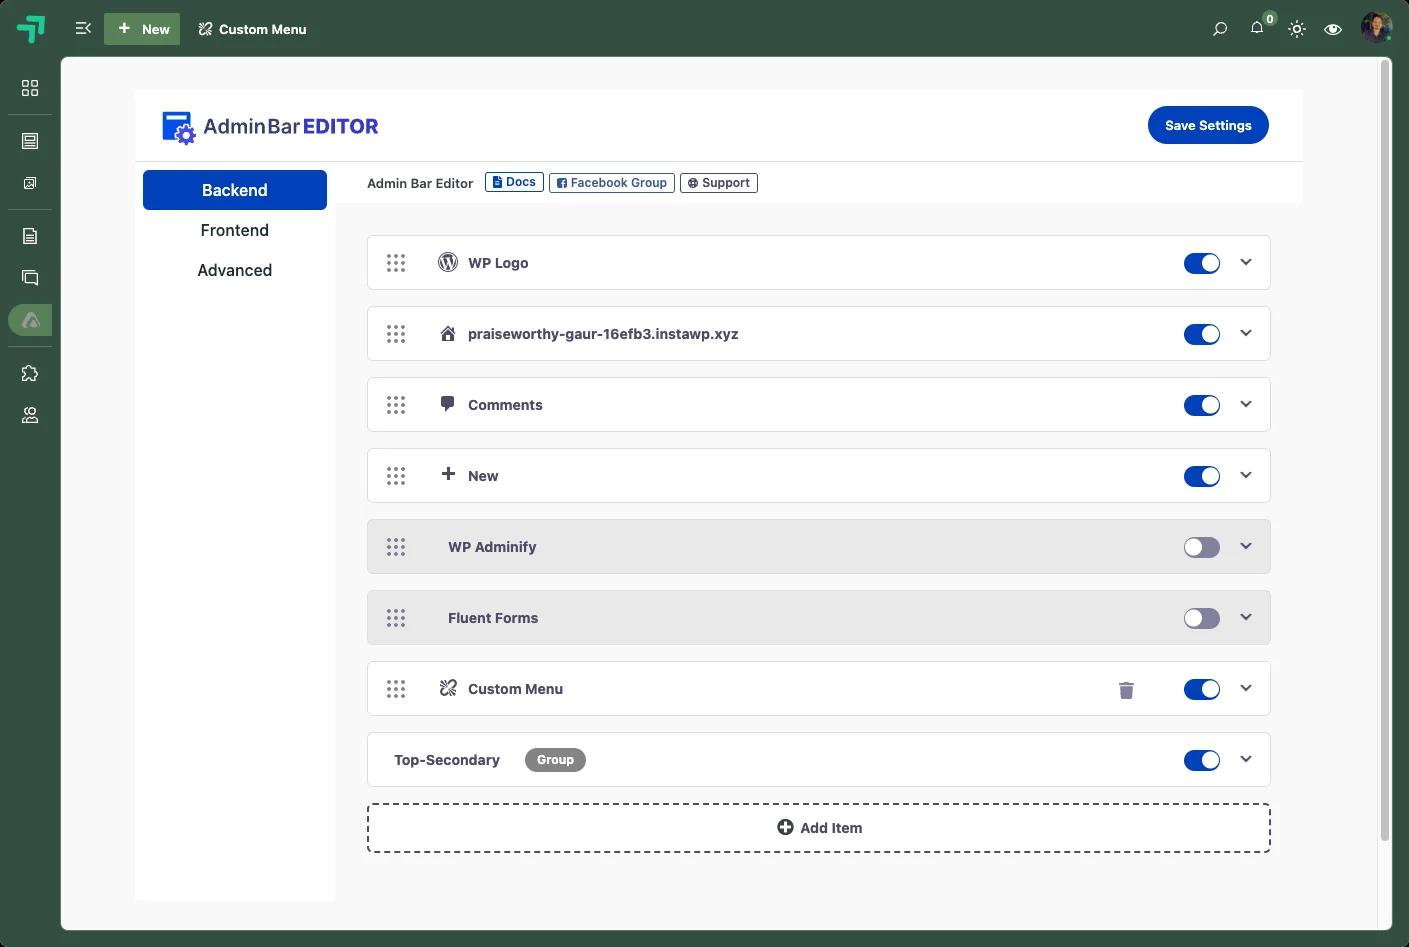
3) Client-focused admin bar shortcuts (Admin Bar Editor)
If your client spends more time on the frontend than the backend, the admin bar (WordPress toolbar) becomes their primary “control panel.” By default, it mixes WordPress branding, generic links, and plugin icons that often mean nothing to them.
The Admin Bar Editor plugin gives you precise control over this bar:
- Hide items you don’t want clients to see, such as the WordPress logo, “Customize,” updates, or plugin shortcuts that lead into complex settings.
- Reorder items with drag‑and‑drop so the most important actions are always one click away.
- Add custom menu items and submenus that match the client’s real tasks: “Add New Blog Post,” “Open Booking Calendar,” “View Orders,” “Contact Support,” or links to your own documentation.
- Rename menu titles and change icons using Dashicons or custom icons to match the client’s terminology and brand.
- Control visibility based on roles or specific usernames so admins see everything, while editors and authors only see tools they need.
For white‑label builds, you can also apply styles so the toolbar background, hover colors, and typography feel like an extension of the overall dashboard UX. When a client can log in, click “Add Blog Post,” and get straight to work, you eliminate a big chunk of “Where do I go to…?” tickets.
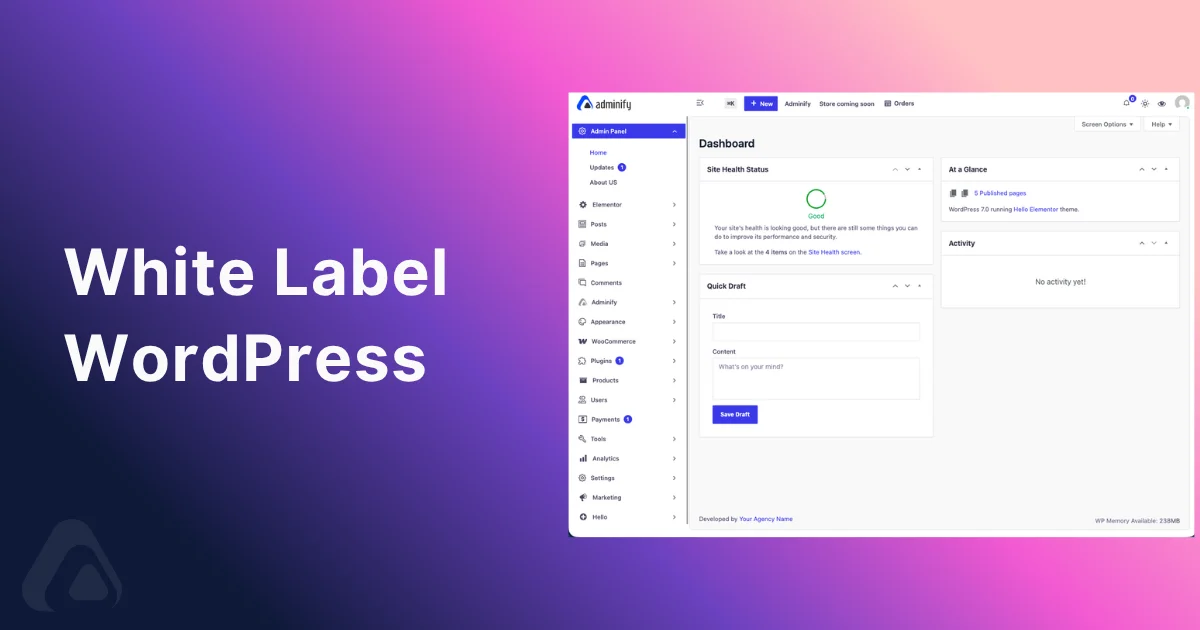
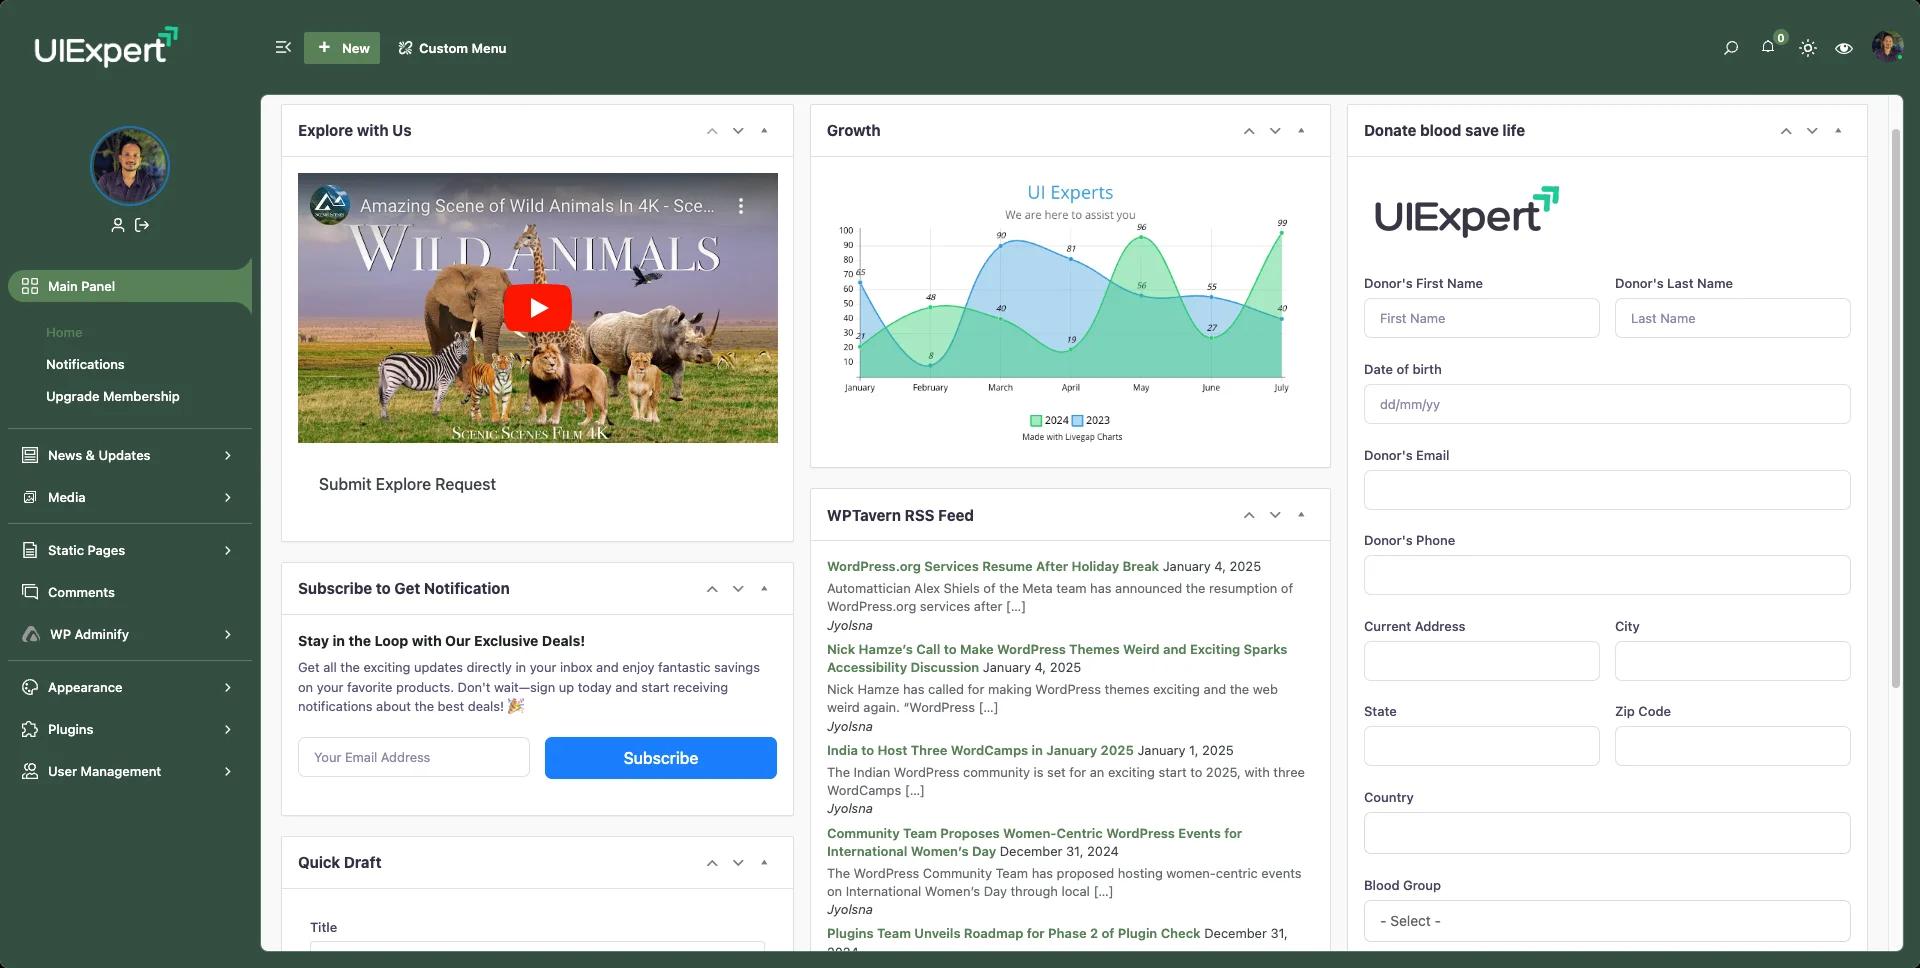
4) Minimal, high-signal dashboard widgets (WP Adminify)
The native Dashboard screen is usually a mix of “Welcome,” “Events & News,” and whatever random widgets plugins add. None of that helps your client publish content or check what actually matters to them.
WP Adminify lets you clean this up and replace it with something useful:
- Use the Dashboard Widgets module to disable WordPress core widgets your client doesn’t need (Welcome panel, Events & News, Quick Draft, etc.).
- Hide plugin widgets from non‑admin roles so clients don’t see upsells or advanced analytics they don’t understand.
- Add a single, focused Custom Welcome Widget that includes:
You can even use WP Adminify’s Custom Admin Pages feature to build a dedicated “Help” or “Start Here” page and then link it from the welcome widget. That way, every time a client logs in, they see exactly where to click next - and you get fewer “What do I do now?” messages.
5) Content and media organization with folders (WP Adminify)
Even with a simplified menu, clients get lost in long lists of pages, posts, and media items. When everything is just “Page 1, Page 2, Homepage – New,” confusion and duplication are inevitable.
WP Adminify’s folders and list enhancements solve this by giving structure without changing URLs:
- Create virtual folders for pages and posts such as “Homepage,” “Landing Pages,” “Blog – Live,” “Blog – Draft,” “Archived Campaigns.”
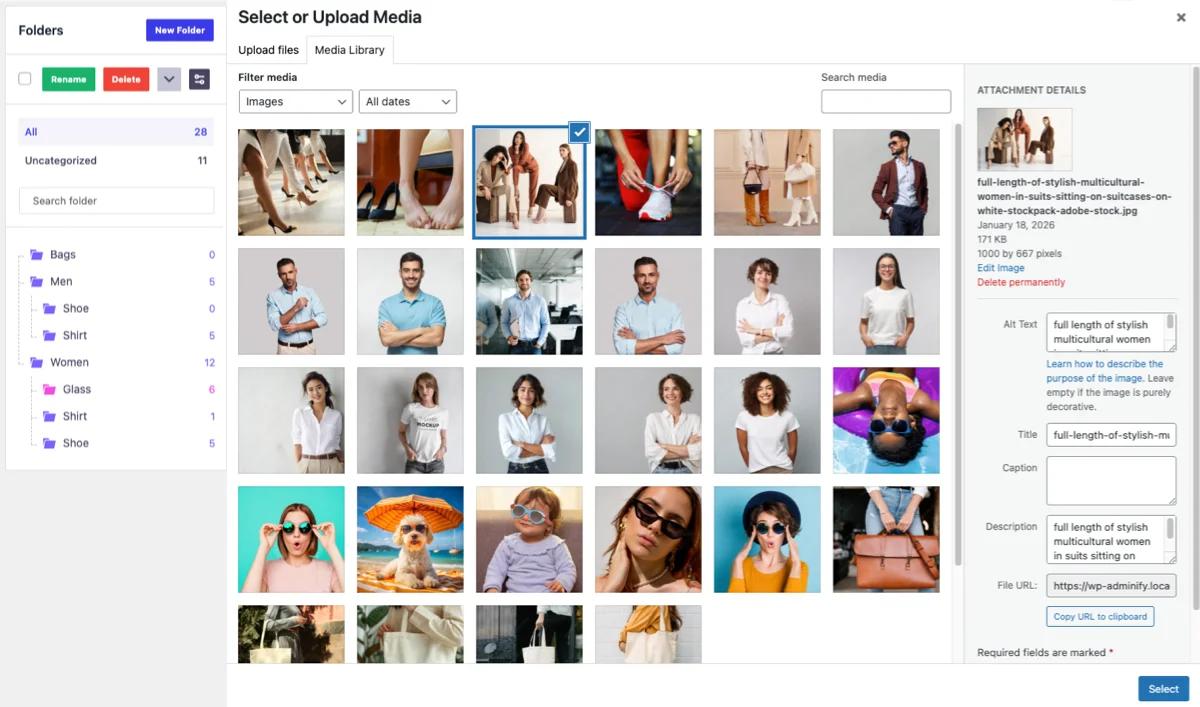
- Organize the Media Library into “Brand Assets,” “Blog Images,” “Product Photos,” and “Documents” so clients can filter instead of scrolling.
- Combine folders with the Post Type Order module so you can drag and drop content into a logical front‑end order.
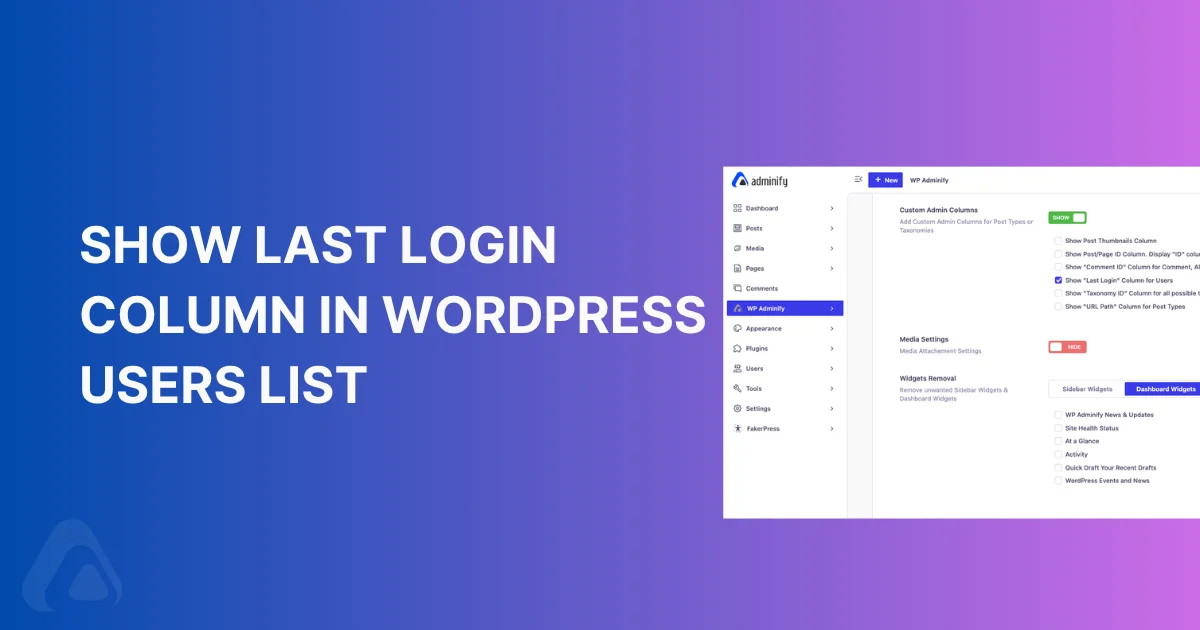
- Use WP Adminify’s Admin Columns features to show thumbnails, categories, or custom fields right in the list, so clients can visually confirm they’re editing the right item.
For many agencies, this alone removes entire categories of tickets like “I can’t find my homepage” or “Which image is used on this page?”
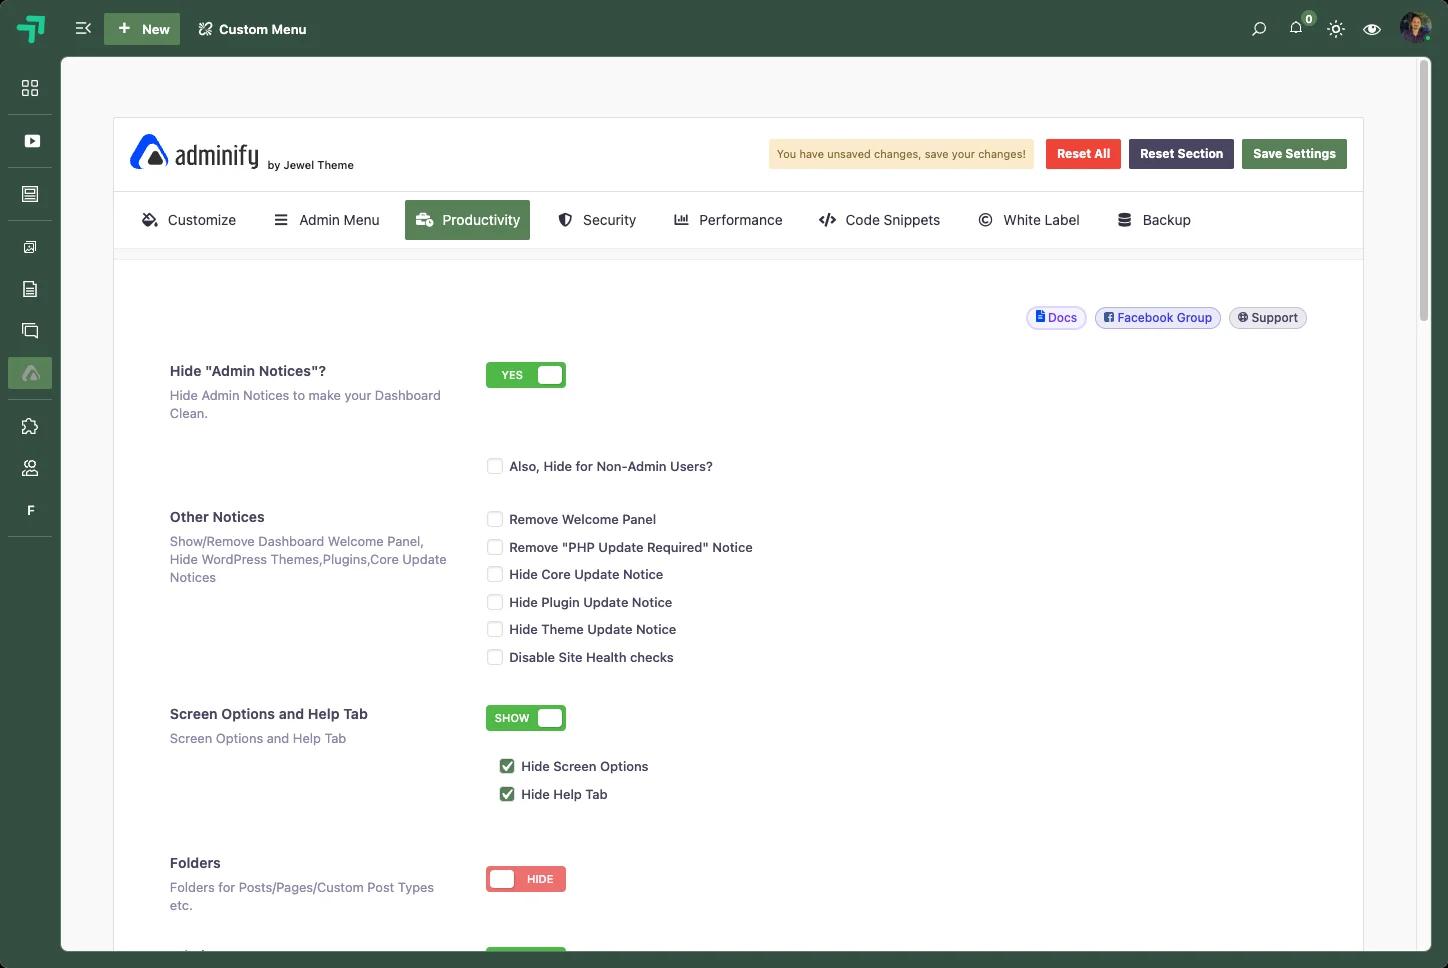
6) Noise-free notices and alerts (WP Adminify)
Admin notices are essential for developers but noisy and scary for clients. Orange and red banners about updates, licenses, and configuration warnings often trigger urgent emails - especially when they appear after months of a quiet dashboard.
WP Adminify lets you manage this noise while still keeping you informed:
- Hide or dismiss persistent plugin notices for non‑admin roles so clients see only messages meant for them.
- Keep update and license reminders visible for your own admin users, who know how to act on them safely.
- Remove clutter like “Screen Options” and “Help” tabs from roles that never need them, further reducing confusion.
When you pair this with a clear “If something looks broken, click here” link inside your custom welcome widget or help page, clients learn to trust that the dashboard is under control. That means fewer screenshots of harmless notices in your inbox.
7) Role-based access and safety rails (RoleMaster + Adminify)
Many support tickets happen because clients can technically do something, not because they should. Changing permalink structures, deactivating essential plugins, or switching themes might be only one click away.
By combining WP Adminify with your RoleMaster Suite configuration, you can add safety rails:
- Create or refine roles such as “Owner,” “Editor,” “Store Manager,” and “Contributor” with exactly the capabilities they need, nothing more.
- Use WP Adminify’s role‑based menu visibility to hide Plugins, Themes, Tools, and Settings from all non‑admin roles.
- Disable “Add New” or “Delete” options for certain post types for specific roles to avoid accidental removal of landing pages or system content.
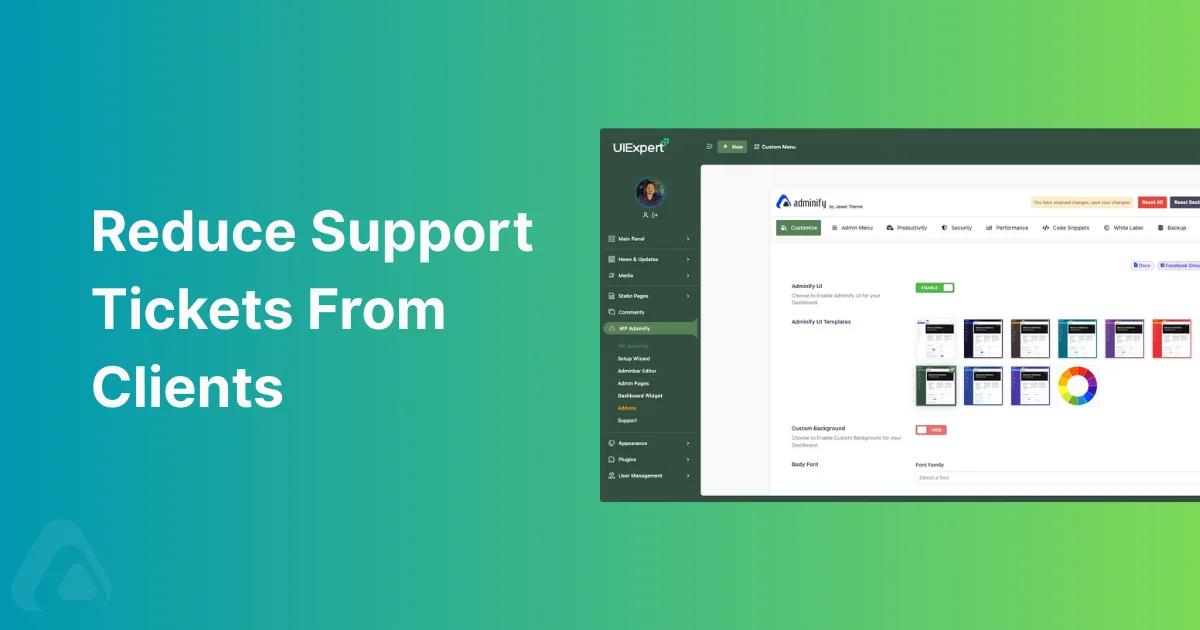
- Restrict access to WP Adminify’s own settings and white‑label panel so only your agency can change global dashboard configuration.
You can also use WP Adminify’s Custom Admin Pages for role‑restricted internal “SOP hubs” that only editors or owners see. This gives you a place inside the dashboard to document what clients should and shouldn’t touch.
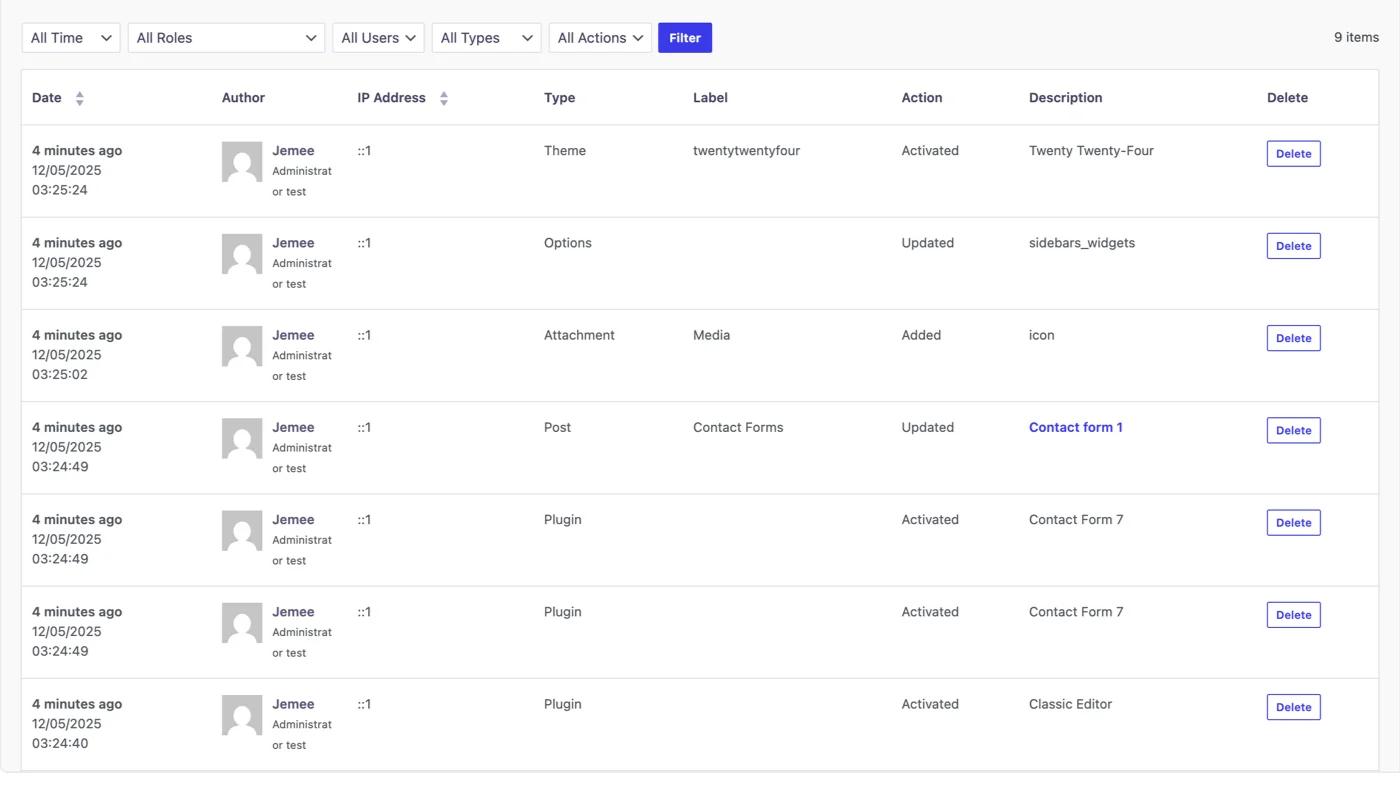
8) Activity logs and built‑in “self‑debugging” (Activity Logs)
Even with excellent UX, things occasionally break or change unexpectedly. When that happens, guessing who did what wastes time for everyone.
WP Adminify’s Activity Logs module gives you a clear audit trail:
- Log logins, content changes, plugin activations/deactivations, and other key actions with timestamps and usernames.
- Quickly answer “What changed right before this issue?” by filtering activities around the reported time.
- Use the history to coach clients: “Instead of editing this template directly, please use the ‘Landing Pages’ section next time.”
- Spot patterns that suggest you should tighten roles or adjust your dashboard design (for example, if clients keep editing a sensitive settings page).
When clients know you can see exactly what happened, they’re more comfortable experimenting inside the safe areas you’ve set up. And when something does go wrong, you can resolve it faster and with less back‑and‑forth.
Implementation playbook for agencies
Once you’ve designed a better WordPress client dashboard, you need a repeatable way to roll it out across all your client sites.
Here’s a simple playbook you can document and reuse:
Step 1: Build a “base” client dashboard on a sandbox site
- Install WP Adminify, Loginfy, Admin Bar Editor, RoleMaster Suite, and your preferred performance/security plugins.
- Choose an Admin UI template or color scheme in WP Adminify that matches your agency or default client branding.
- Configure a clean, role‑based admin menu, minimal dashboard widgets, and at least one custom help/welcome page.
- Set up the admin bar profile in Admin Bar Editor with your ideal shortcuts for editors and store managers.
- Design a standard login screen with Loginfy that you can tweak per client by swapping logos and colors.
Step 2: Export and document
- Use WP Adminify’s import/export options wherever available (Admin Menu, Folders, UI presets, etc.) to create a reusable configuration.
- Save Admin Bar Editor configurations as presets or export settings if you’re using the Pro version.
- Document your internal “Client Dashboard Setup” checklist in Notion, Google Docs, or your project management tool so your team can follow it consistently.
Step 3: Roll out to each new client site
For every new project:
- Import your base WP Adminify settings and folder structures.
- Apply your default admin bar layout and then tweak shortcuts based on the client’s main workflows.
- Set up roles and capabilities using RoleMaster and connect them to menu/toolbar visibility rules.
- Customize the login screen with the client’s logo, colors, and a client‑specific support note.
- Add a client‑specific welcome widget with links to their unique funnels, forms, or reports.
Step 4: Train once, support less
Use Activity Logs and support ticket patterns to periodically refine your base configuration so every new client benefits from what you’ve learned.
Record a single 10–15 minute walkthrough video on your base dashboard experience: how to log in, where to click to add content, how to upload images, and how to contact you.
Embed this video on the custom help page or link it from the welcome widget, so every new team member at the client can self‑onboard.
Related Reading
Checklist and next steps
To wrap up, give readers a quick action checklist they can follow in order:
- Enable Activity Logs to make future troubleshooting fast and transparent.
- Map your client’s actual WordPress workflows (content, bookings, products, etc.).
- Install WP Adminify on a staging site and explore the WordPress client dashboard example.
- Use Admin Menu Editor to create a simplified, role‑based menu for non‑technical users.
- Clean up dashboard widgets and add a custom welcome widget with links and training resources.
- Organize posts and media into folders and set post type order for easy navigation.
- Customize the admin bar with Admin Bar Editor so key actions are one click away.
- Brand and secure the login page using Loginfy.
- Lock down roles and capabilities with RoleMaster Suite and WP Adminify visibility rules.
If you want a cleaner, faster, and fully personalized WordPress client dashboard your clients actually enjoy using, start by installing WP Adminify and then layer in Loginfy and Admin Bar Editor on your next project. Over the next few launches, you’ll see support tickets drop while client satisfaction quietly goes up.