
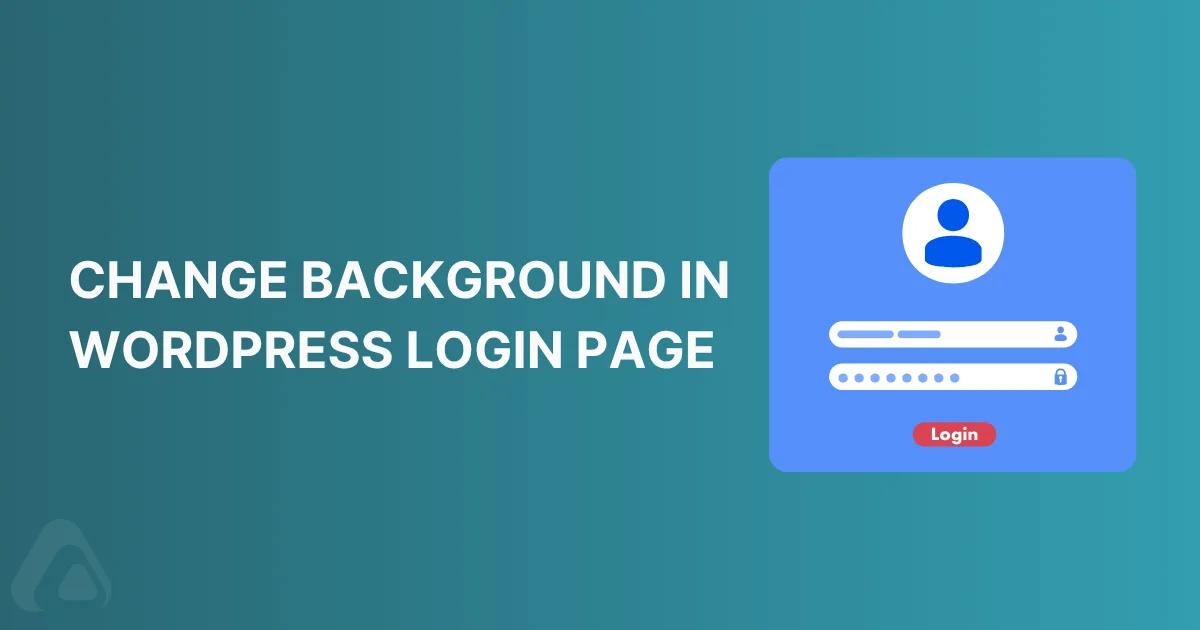

Short answer: install the Loginfy plugin, open Adminify → Login Customizer (or Loginfy → Customize), click Background, and pick a color, image, gradient, video, or slideshow. Everything renders in a live preview, and you hit Publish when it looks right. If you'd rather not add a plugin, the code methods further down do the same job in about fifteen lines of PHP.
The default WordPress login screen has looked more or less the same since 2008. Grey background, blue button, a WordPress logo linking away from your site. That's fine for a personal blog. It's a problem the moment a paying client or a store manager sees it, because the login screen is usually the first thing they touch after you hand the site over.
This guide covers every way to change that background, in the order most people should try them.
Changing the background is one piece of a full login redesign; for the logo, form, and URL too, see our guide on how to customize the WordPress login page.
What you'll need
Background customization lives in Loginfy, a login page customizer from Pixar Labs (version 1.0.5, tested up to WordPress 7.0, requires WordPress 5.0 and PHP 5.6 or newer). Two ways to run it:
- Loginfy on its own. Install it, and the panel appears under Loginfy → Customize. Nothing else required.
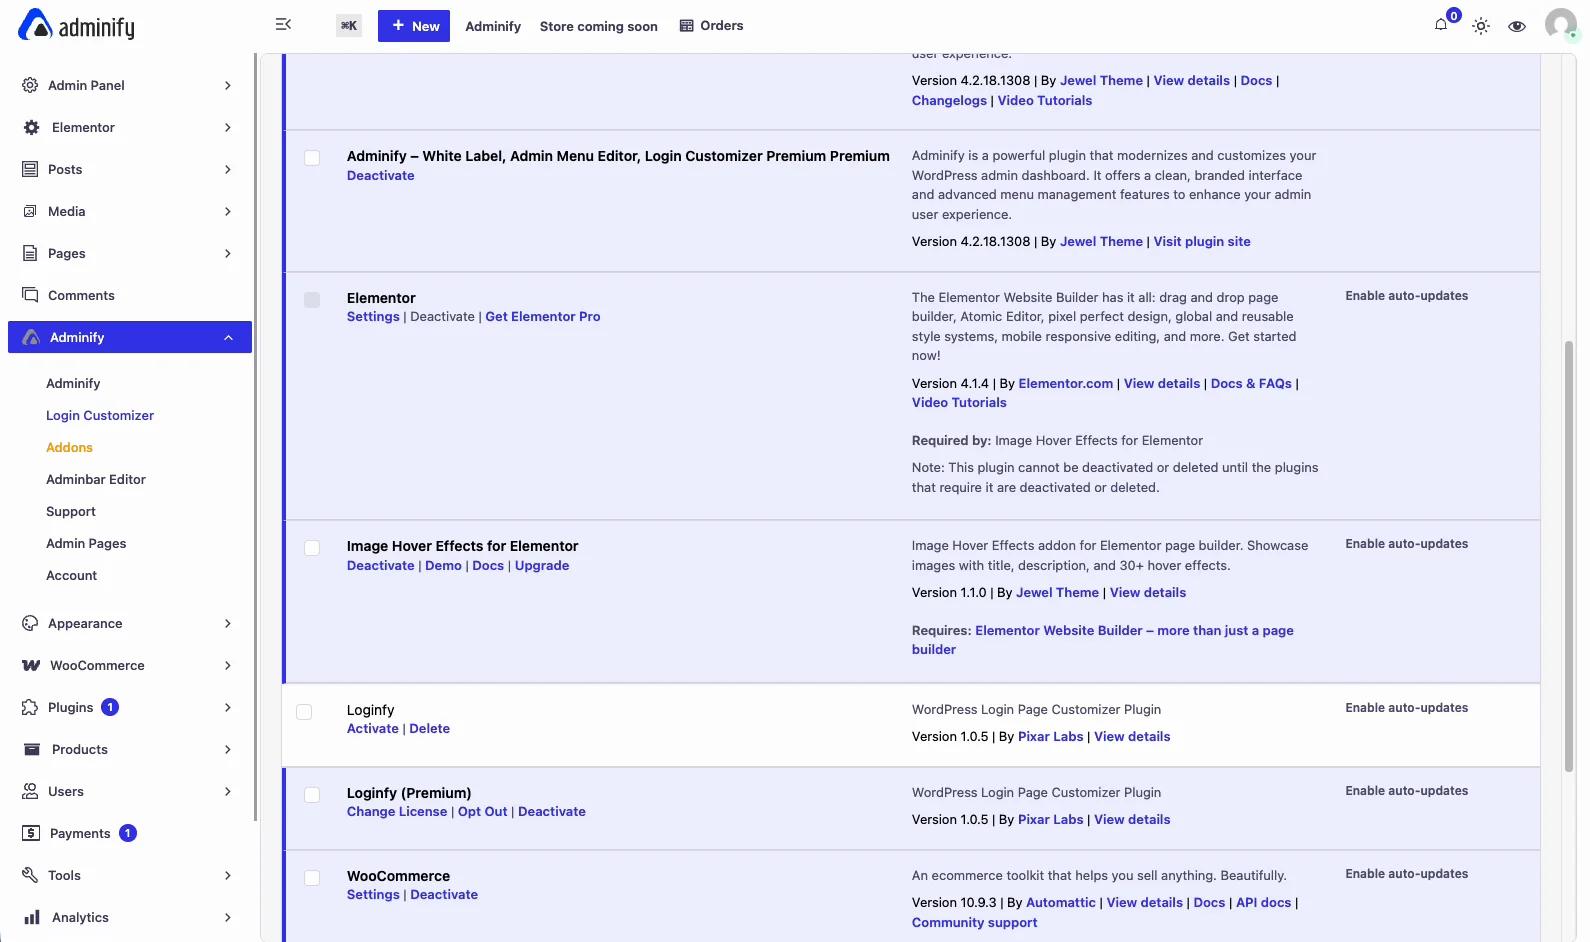
- Loginfy alongside WP Adminify. Adminify registers Loginfy as an addon and surfaces it at Adminify → Login Customizer, so login styling sits next to the rest of your dashboard customization settings.
One thing worth being clear about, because the older version of this article got it wrong: WP Adminify alone no longer ships the login background controls. The login customizer moved into Loginfy. If you only have Adminify installed, install Loginfy too. The menu item will still be there, but the sections behind it come from Loginfy.
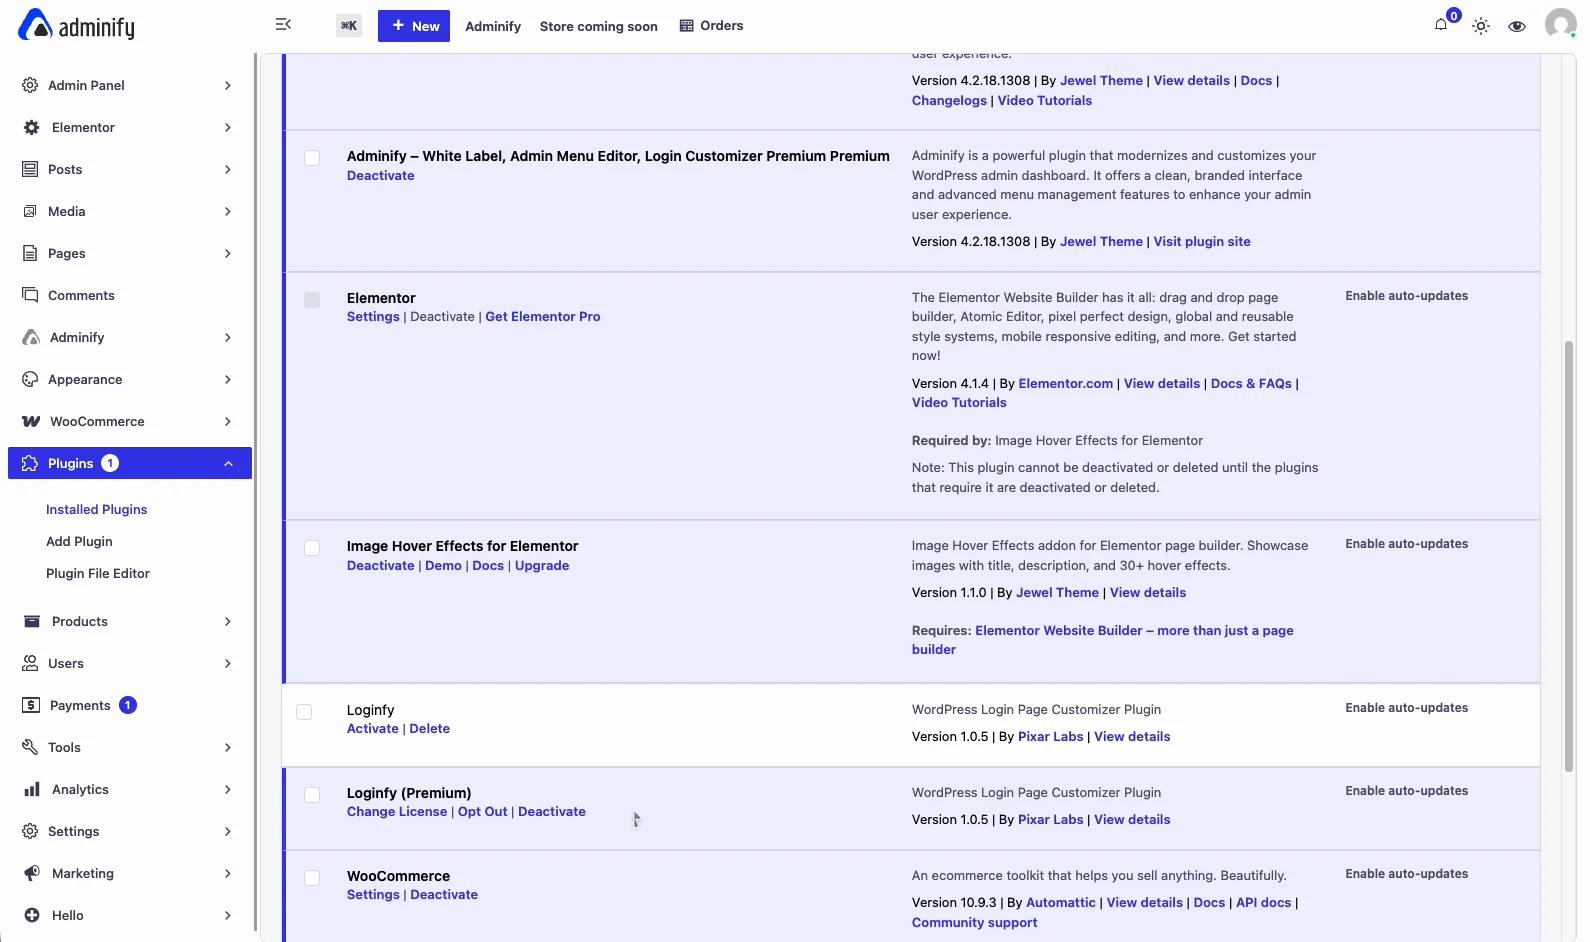
Free vs Pro, before you start
It saves time to know which controls you're about to find:
| Background type | Loginfy Free | Loginfy Pro |
|---|---|---|
| Solid color | Yes | Yes |
| Image (with position, repeat, attachment, size) | Yes | Yes |
| Gradient | Yes | Yes |
| Overlay color or gradient, with opacity | Yes | Yes |
| Self-hosted video background | No | Yes |
| YouTube video background | No | Yes |
| Image slideshow background | No | Yes |
Color, image, gradient and overlay cover most real client work. Video and slideshow are Pro features, and the code methods at the end of this article reproduce both of them for free if you're comfortable with PHP.
Method 1: change the login background with Loginfy (no code)
Step 1: install and activate Loginfy
From your dashboard, go to Plugins → Add Plugin, search for Loginfy, then install and activate it. If you're already running WP Adminify, you can also reach it through Adminify → Addons.
Step 2: open the Login Customizer
Two routes, same destination:
- With Adminify: Adminify → Login Customizer
- Without Adminify: Appearance → Customize → Loginfy
Either one drops you into the native WordPress Customizer with your login page loaded in the preview pane on the right. Every change you make repaints that preview immediately, so there's no save-and-refresh loop.
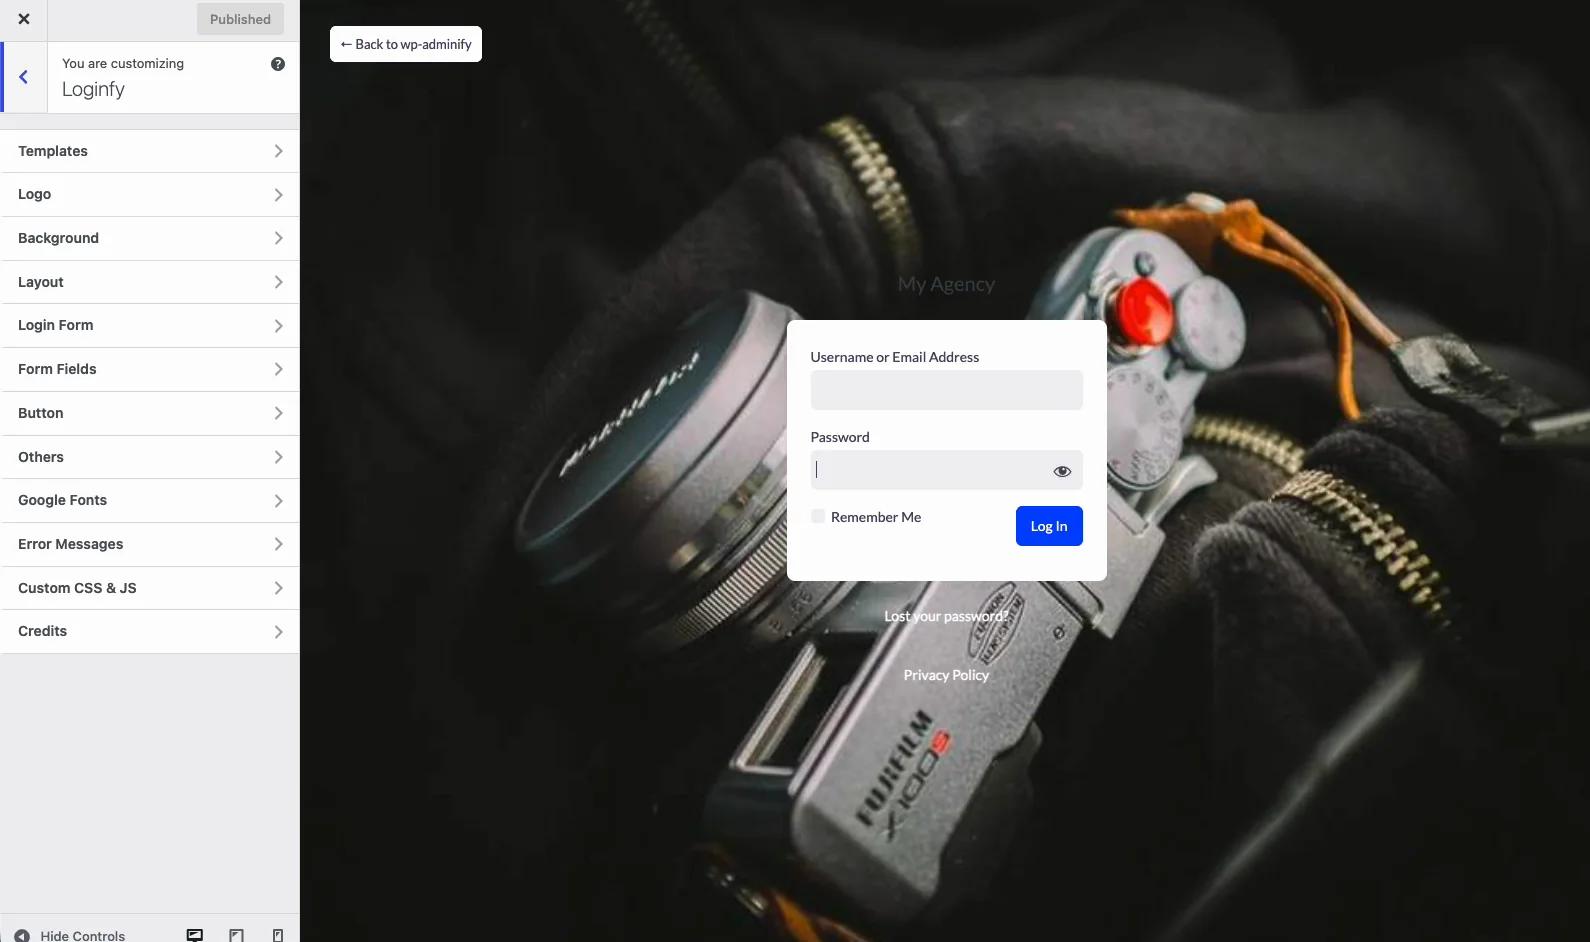
Step 3: find the Background section
The Loginfy panel breaks the login page into twelve sections: Templates, Logo, Background, Layout, Login Form, Form Fields, Button, Others, Google Fonts, Error Messages, Custom CSS & JS, and Credits. Click Background.
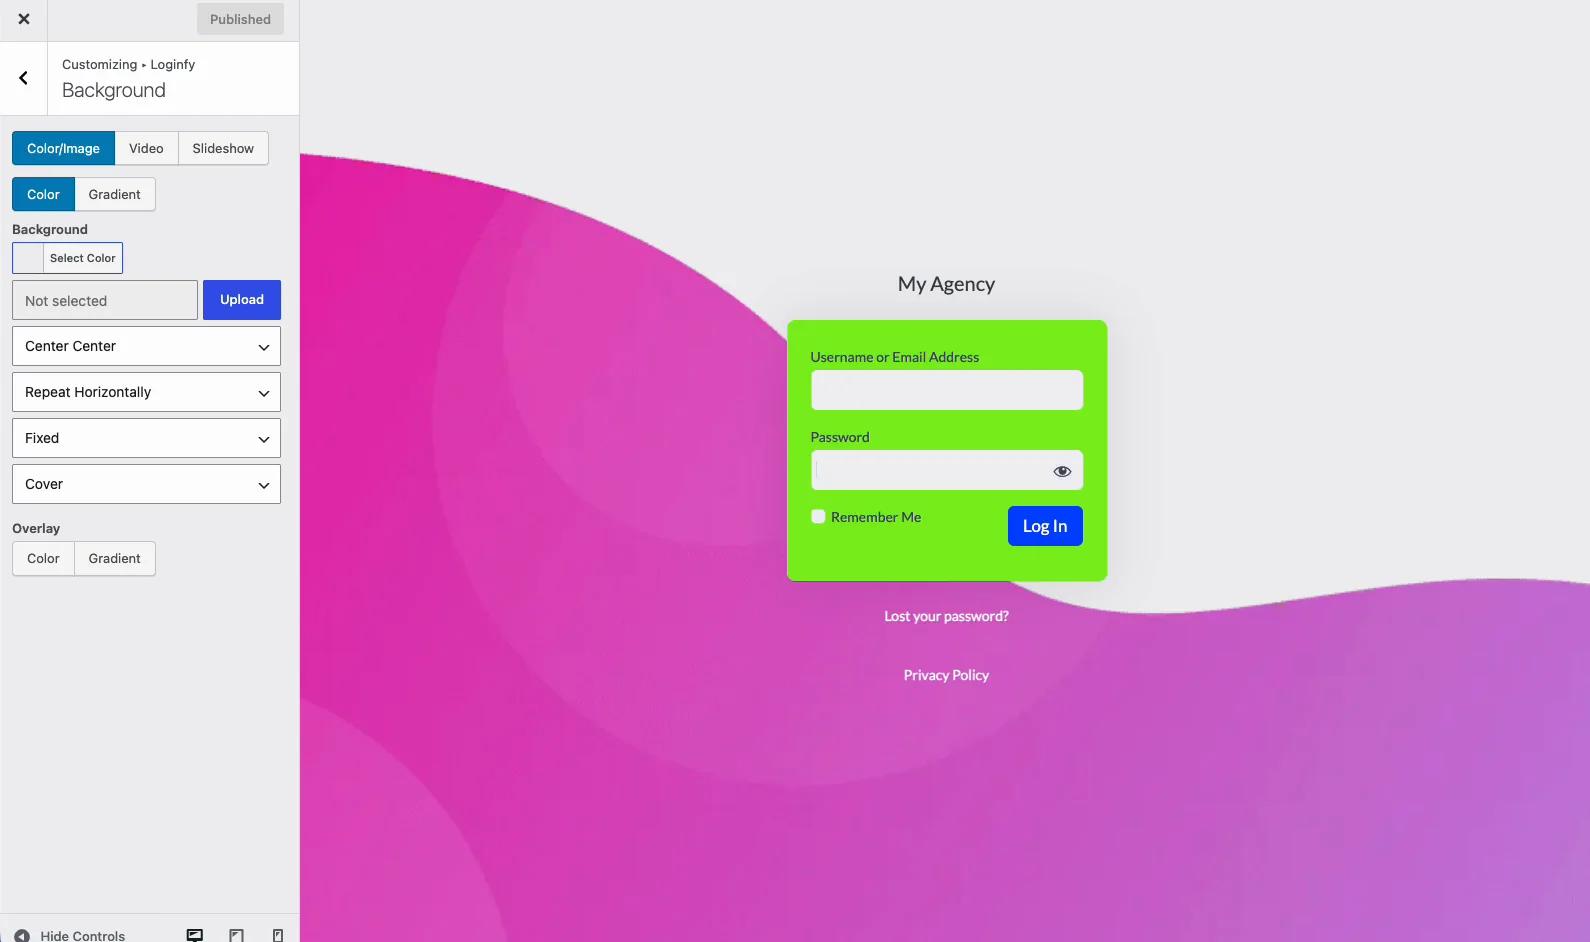
Inside Background you get three tabs across the top (Color/Image, Video, Slideshow) and an Overlay block underneath that applies to whichever tab you chose.
Step 4: set a solid color or a background image
On the Color/Image tab, the Color sub-tab gives you a color picker. That's the whole job for a solid background.
For an image, use the Upload button next to the background field, then work through the four dropdowns below it:
- Position. Nine anchor points, from Left Top through Center Center to Right Bottom. Center Center is the safe default.
- Repeat. Repeat, No Repeat, Repeat Horizontally, Repeat Vertically. Use No Repeat for photographs, Repeat for seamless textures.
- Attachment. Fixed or Scroll. The login page rarely scrolls, so this only matters on short mobile viewports.
- Size. Cover, Contain, or Auto. Cover fills the viewport and crops the overflow. Contain fits the whole image in and leaves empty space around it.
Step 5: or build a gradient
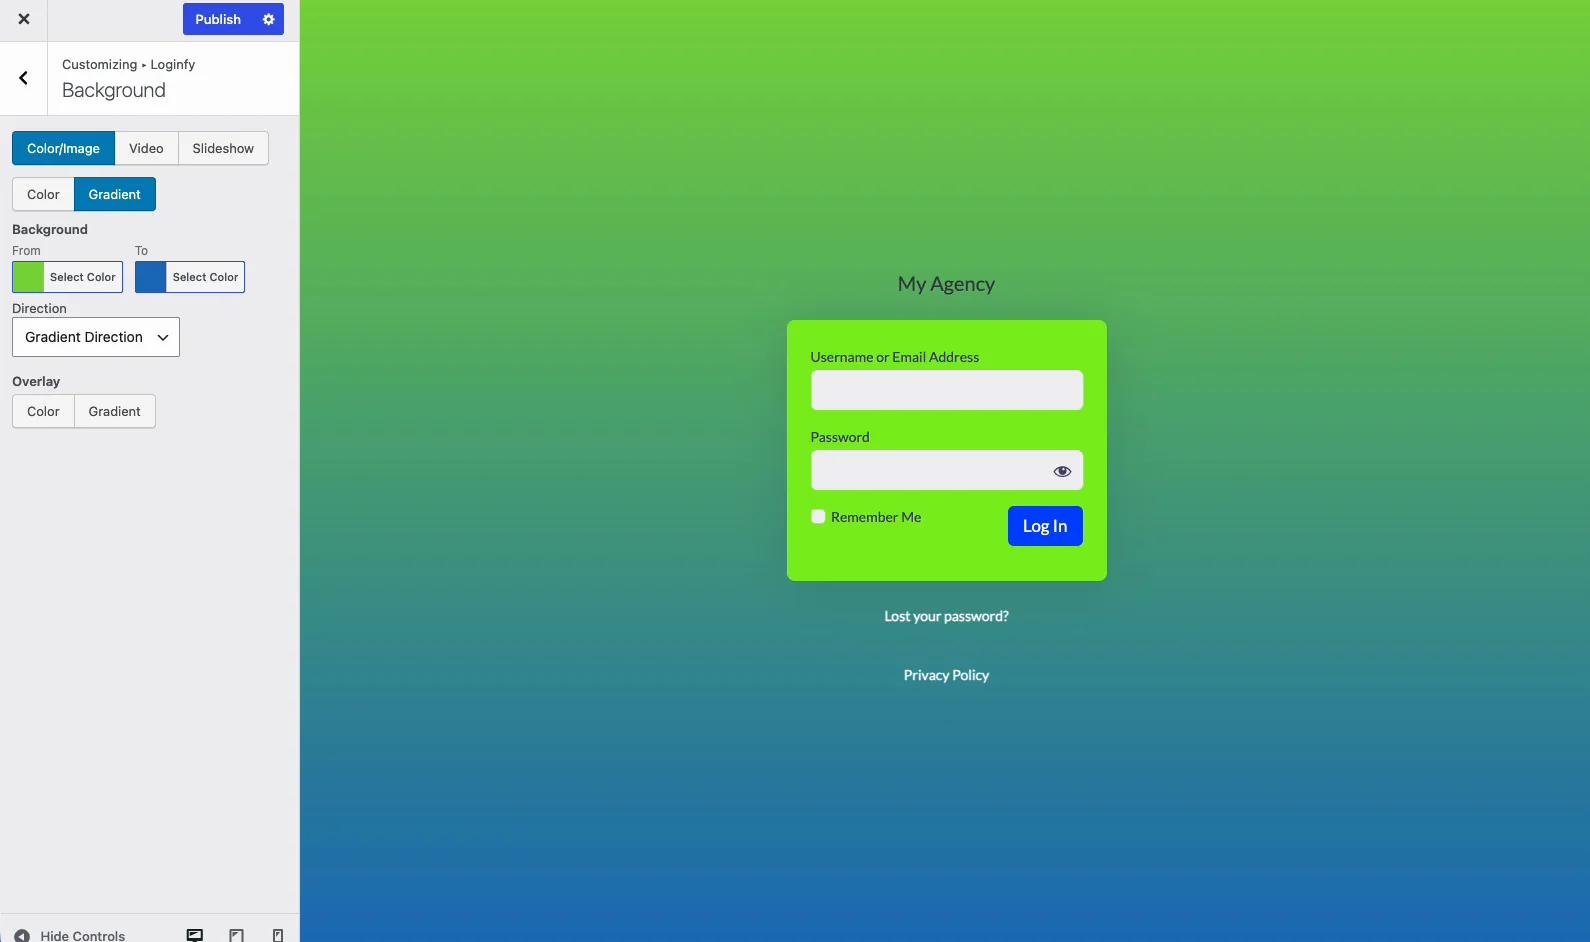
Switch the sub-tab from Color to Gradient and you get two color pickers, labeled From and To, plus a Direction dropdown. Pick your two stops, choose the angle, and the preview updates as you drag.
Gradients are what I reach for on client work. They weigh nothing, they never pixelate on a 4K display, and they can't fail to load. If you're rebranding an admin area for a client, a gradient pulled from their brand palette does more for perceived quality than a stock photograph ever will.
Step 6: add an overlay so the form stays readable
This is the step people skip, and it's the one that separates a login page that looks designed from one that looks like a screenshot with a form dropped on it.
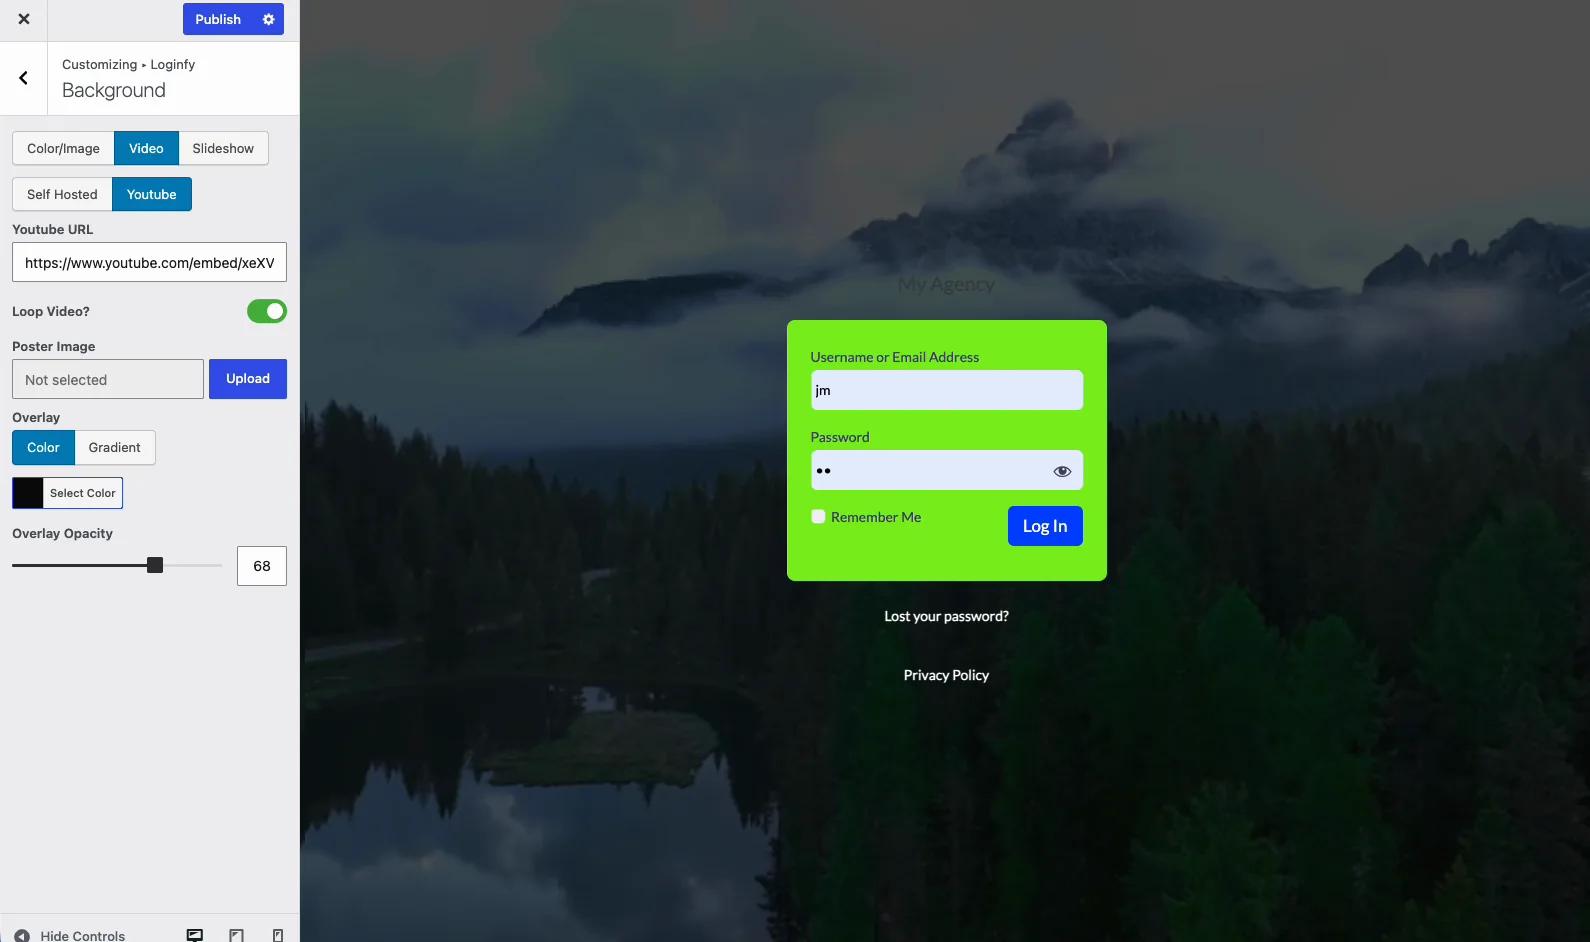
The Overlay block sits below the background tabs. Choose Color or Gradient, pick a value, then drag Overlay Opacity. A dark overlay somewhere between 25 and 70 percent will pull almost any busy photograph down to a level where white form labels stay legible.
Step 7: video backgrounds (Pro)
The Video tab offers two sources.
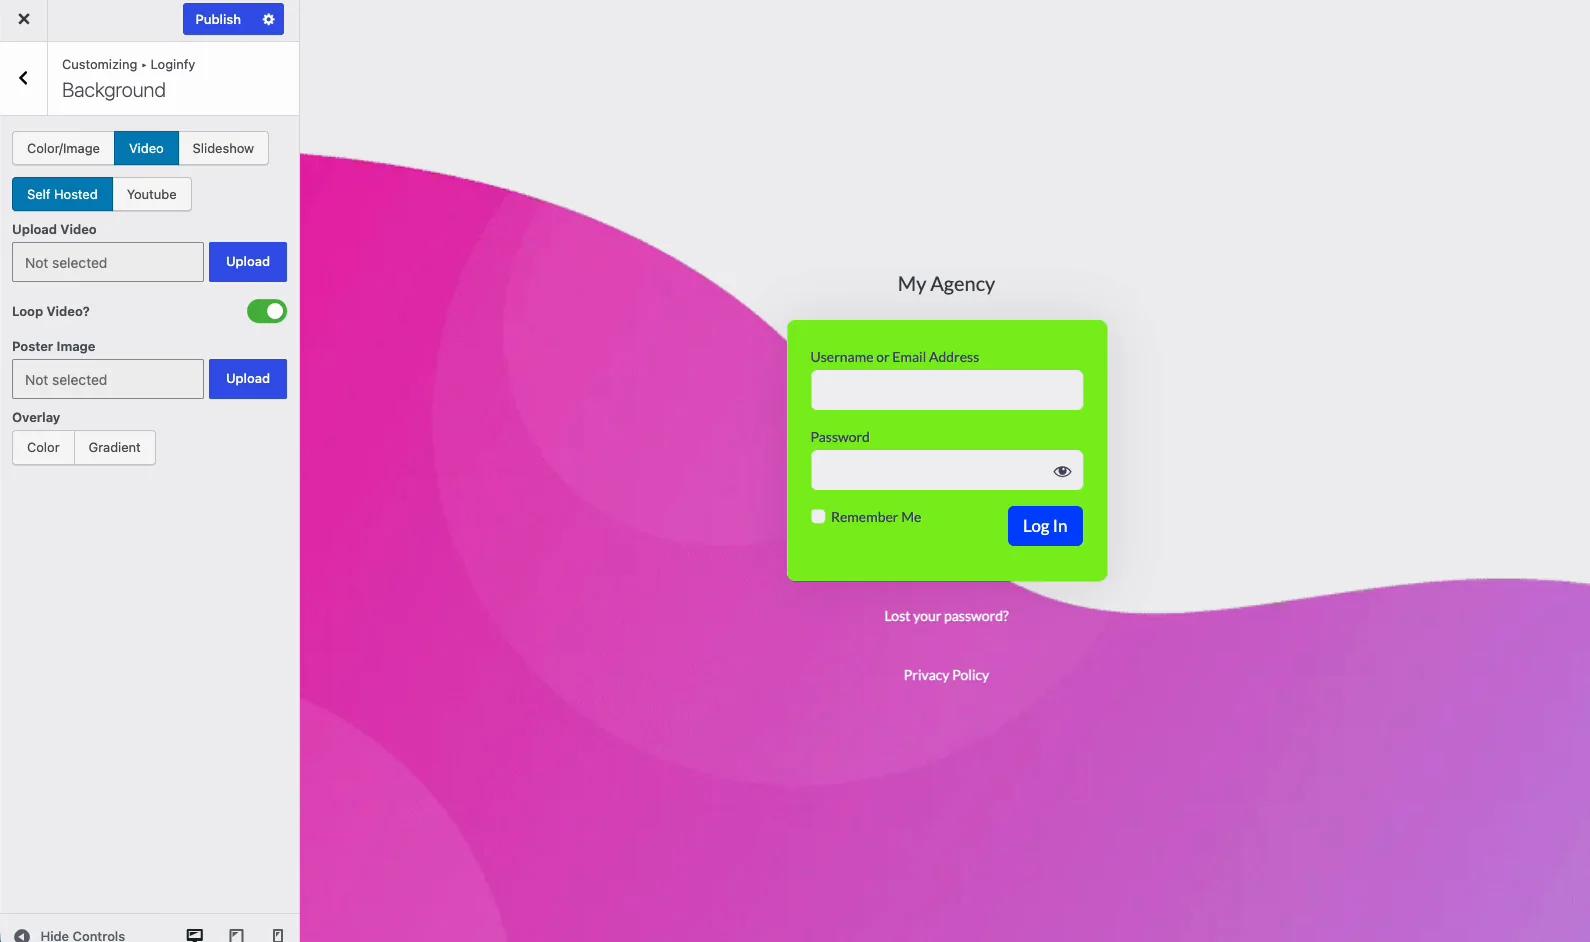
Self Hosted takes an MP4 you upload to the media library, plus an optional Poster Image that displays while the video buffers and on devices that refuse to autoplay. Leave Loop Video on unless you want the clip to freeze on its last frame.
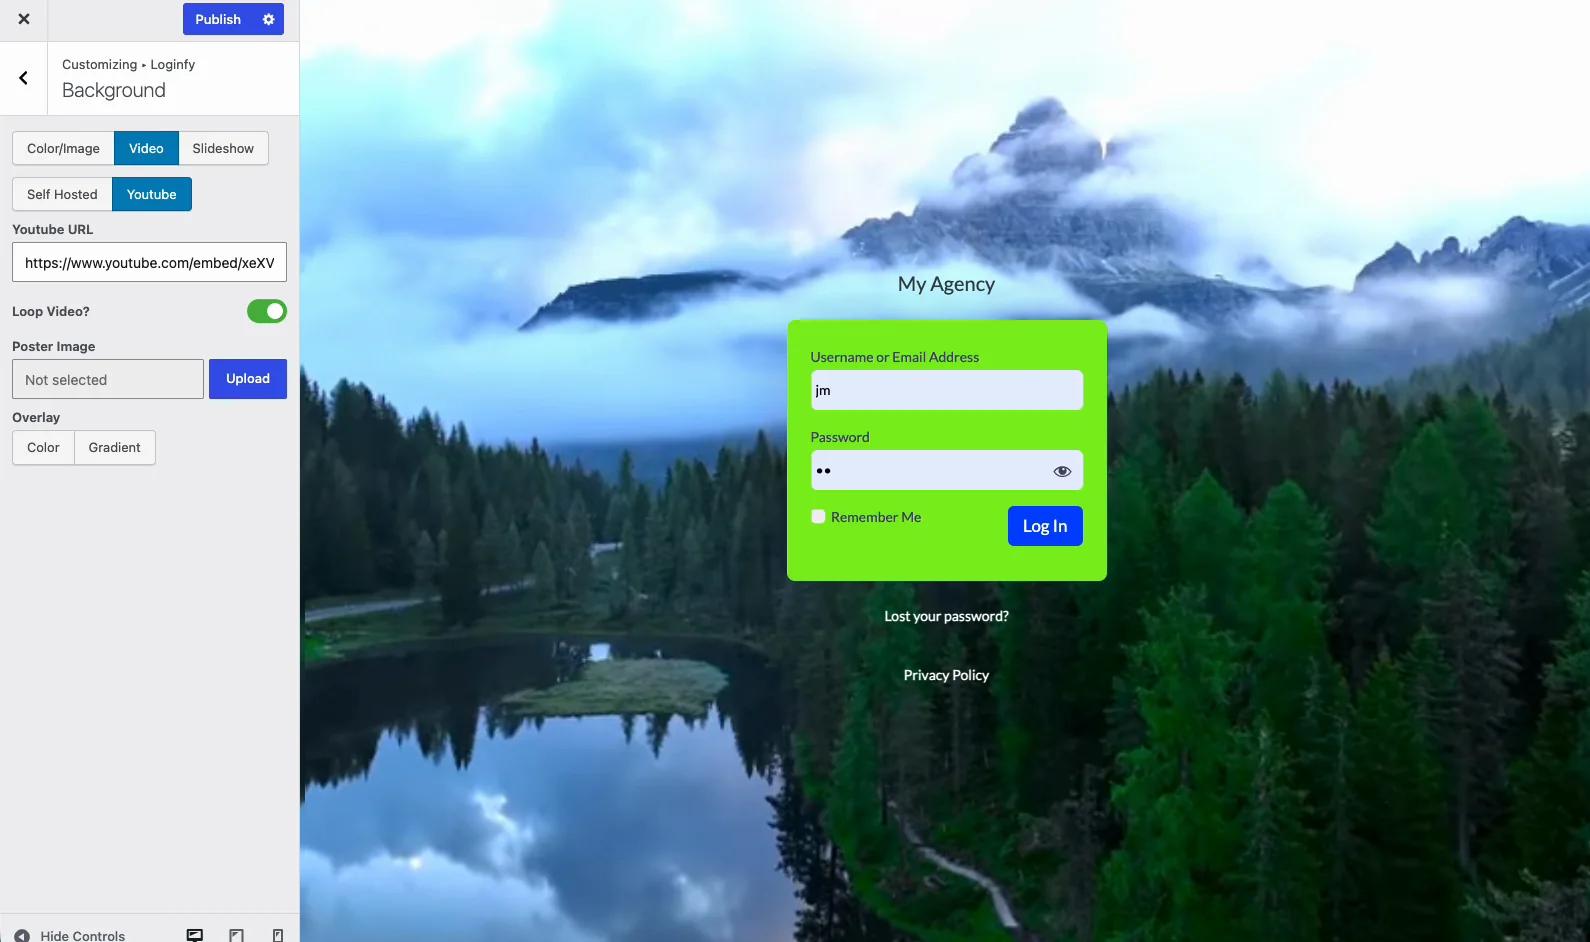
Youtube takes an embed URL, the https://www.youtube.com/embed/VIDEO_ID form, not the watch?v= form. That's the single most common mistake here. The clip plays muted and looped behind the form.
A word of caution before you ship a video login page. A 10-second 1080p loop is comfortably 2–5 MB, and it downloads before your client can type their password. On a slow connection that's a worse experience than any grey background. Set a poster image, keep the clip short, and ask yourself whether the people logging in, usually the same three people several times a day, actually benefit.
Step 8: slideshow backgrounds (Pro)
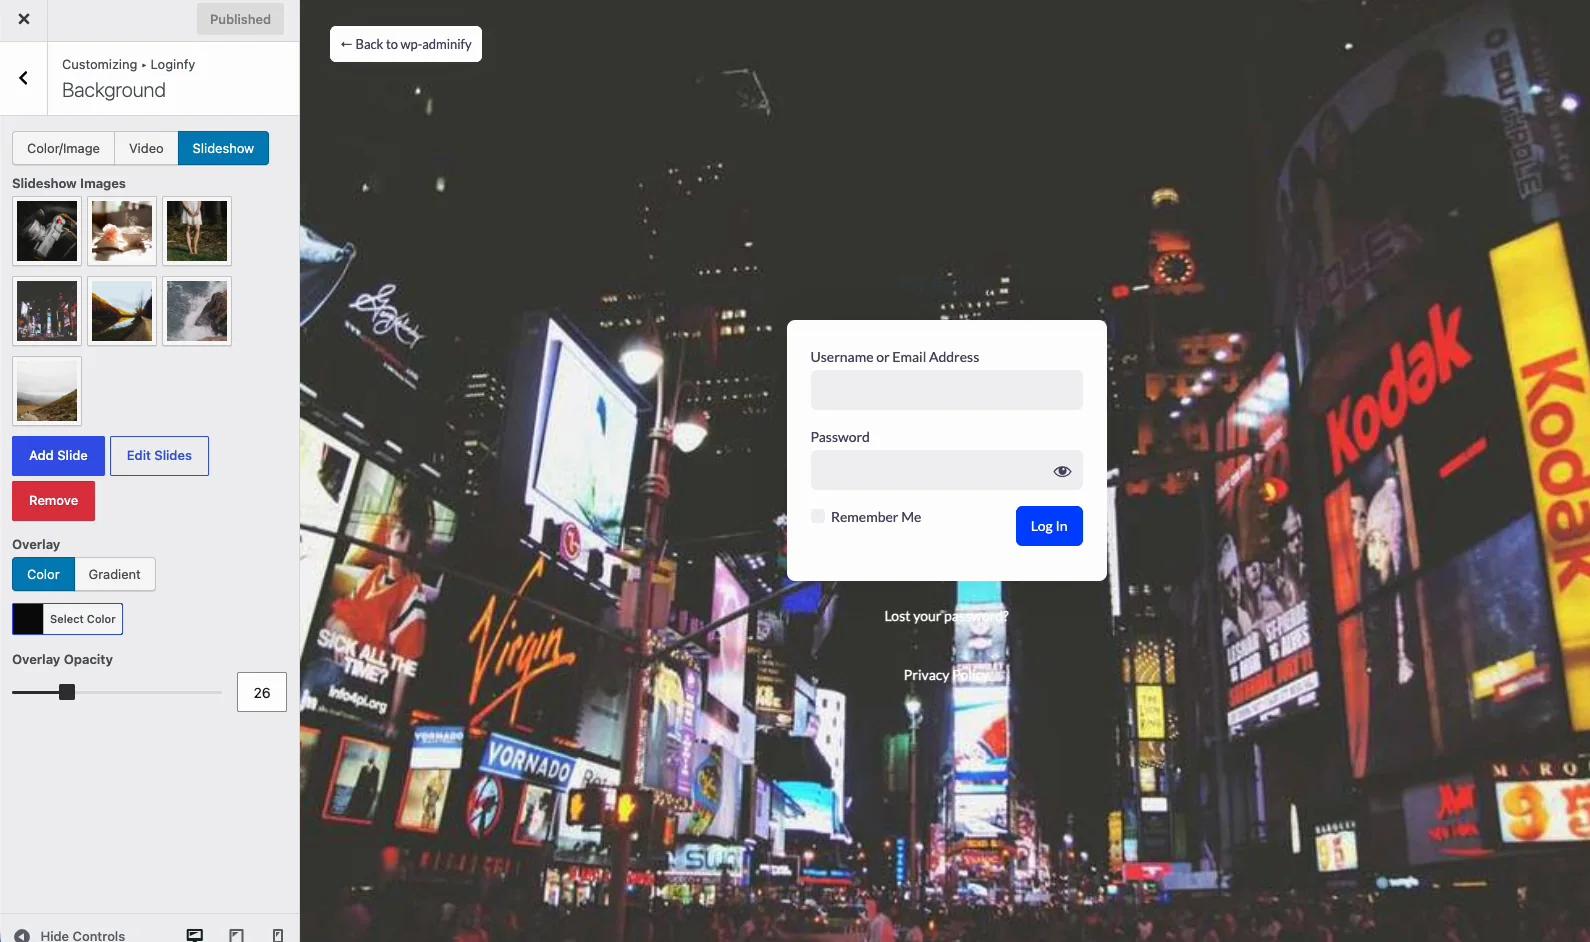
The Slideshow tab replaces the single image with a gallery. Click Add Slide, select your images in the media library, and they appear as thumbnails in the panel. Edit Slides reopens the gallery so you can reorder or swap them. Remove clears the set. The overlay and opacity controls work exactly as they do on the other tabs.
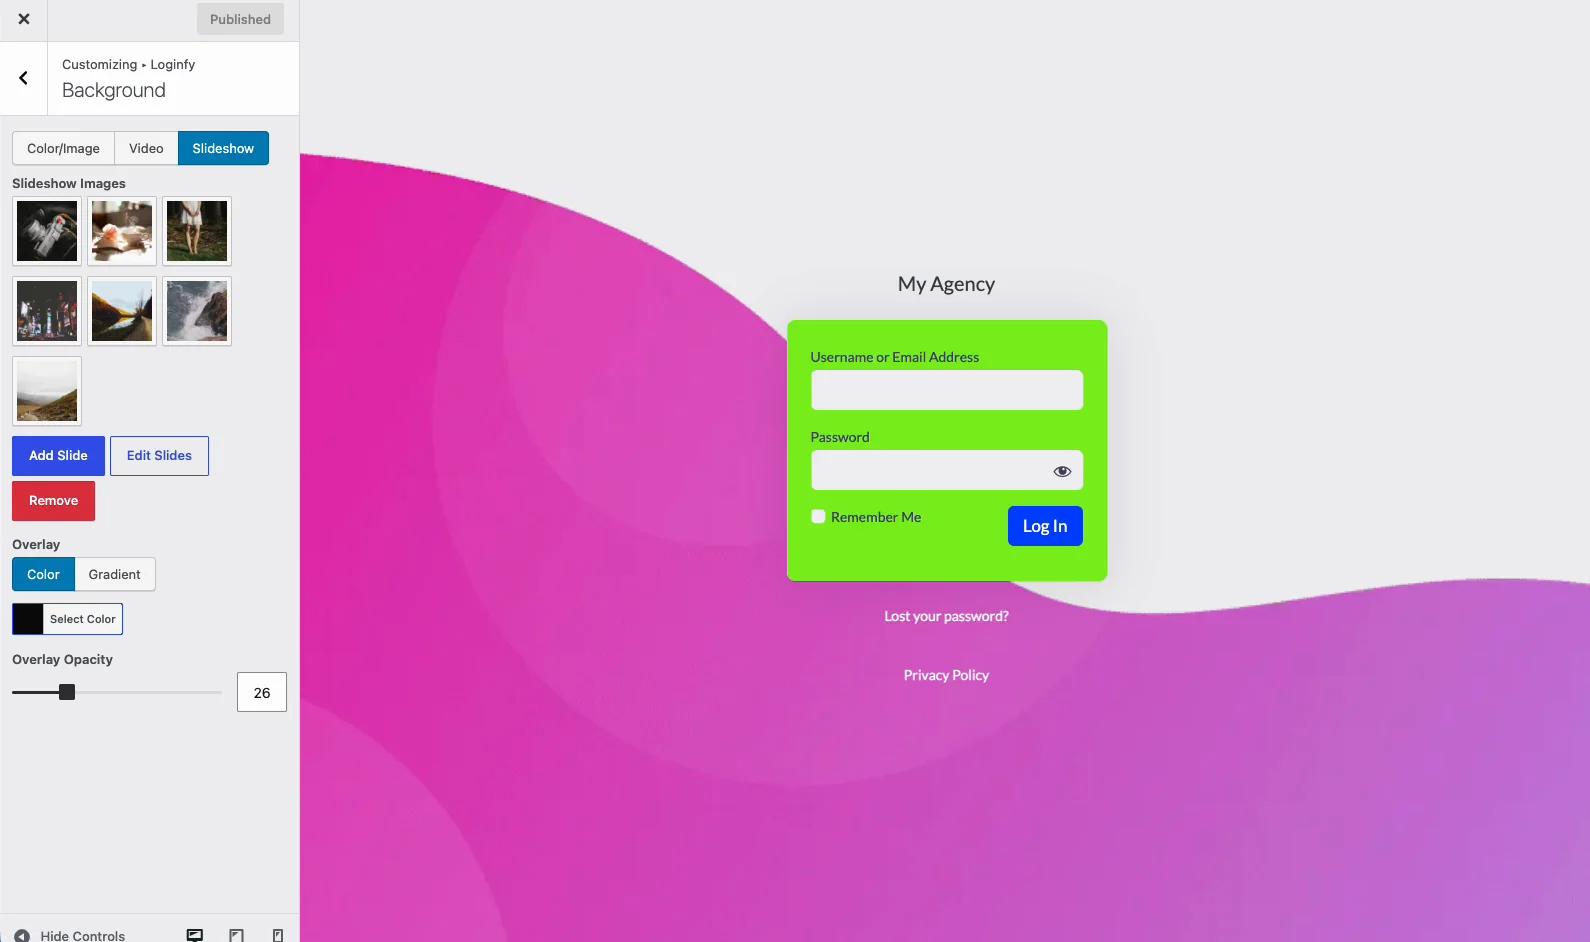
The rotation runs on the real login page. Here it is mid-cycle in the customizer preview:
Step 9: publish
Hit Publish at the top of the panel. Then open your login URL in a private window and check it as a logged-out visitor, because the customizer preview and the real wp-login.php occasionally disagree about caching.
Method 2: change the login background with code
Everything above can be done in PHP and CSS. WordPress fires a dedicated hook, login_enqueue_scripts, on the login screen and nowhere else, which is exactly where this belongs.
Where to put this code: not in your parent theme's functions.php, because the next theme update erases it. Use a child theme, a small site-specific plugin, or a snippets manager. WP Adminify's built-in Code Snippets module handles it, and so does anything else you already use to add code to your WordPress header.
Background image
1
2add_action( 'login_enqueue_scripts', 'jt_login_background_image' );
3
4function jt_login_background_image() {
5    $image_url = content_url( '/uploads/2026/07/login-bg.jpg' );
6    ?>
7    <style>
8        body.login {
9            background-image: url('<?php echo esc_url( $image_url ); ?>');
10            background-size: cover;
11            background-position: center center;
12            background-repeat: no-repeat;
13            background-attachment: fixed;
14        }
15    </style>
16    <?php
17}
18
Swap the path for your own upload. Copy it from Media → Library after you upload the file. If you keep your uploads tidy with media library folders, it's easier to find again in six months.
Gradient background
1
2add_action( 'login_enqueue_scripts', 'jt_login_background_gradient' );
3
4function jt_login_background_gradient() {
5    ?>
6    <style>
7        body.login {
8            background: linear-gradient( 135deg, #7ed321 0%, #1f6f8b 100% );
9        }
10    </style>
11    <?php
12}
13
Dark overlay over an image
A pseudo-element on body.login is the cleanest way to do this without touching the markup. The form needs a positive z-index so it stacks above the overlay.
1
2add_action( 'login_enqueue_scripts', 'jt_login_background_overlay' );
3
4function jt_login_background_overlay() {
5    $image_url = content_url( '/uploads/2026/07/login-bg.jpg' );
6    ?>
7    <style>
8        body.login {
9            background: url('<?php echo esc_url( $image_url ); ?>') center center / cover no-repeat fixed;
10        }
11        body.login::before {
12            content: "";
13            position: fixed;
14            inset: 0;
15            background-color: rgba( 0, 0, 0, 0.55 );
16            z-index: 0;
17        }
18        body.login #login {
19            position: relative;
20            z-index: 1;
21        }
22    </style>
23    <?php
24}
25
Adjust the fourth value in rgba(). That's the opacity, from 0 (invisible) to 1 (solid).
Self-hosted video background
Two hooks. One prints the <video> element into the login footer, the other styles it.
1
2add_action( 'login_footer', 'jt_login_video_markup' );
3
4function jt_login_video_markup() {
5    $video_url  = content_url( '/uploads/2026/07/login-loop.mp4' );
6    $poster_url = content_url( '/uploads/2026/07/login-poster.jpg' );
7    ?>
8    <video class="jt-login-video" autoplay muted loop playsinline
9           poster="<?php echo esc_url( $poster_url ); ?>">
10        <source src="<?php echo esc_url( $video_url ); ?>" type="video/mp4">
11    </video>
12    <?php
13}
14
15add_action( 'login_enqueue_scripts', 'jt_login_video_styles' );
16
17function jt_login_video_styles() {
18    ?>
19    <style>
20        body.login { background: #12151b; }
21        .jt-login-video {
22            position: fixed;
23            inset: 0;
24            width: 100%;
25            height: 100%;
26            object-fit: cover;
27            z-index: -1;
28        }
29        body.login #login { position: relative; z-index: 1; }
30
31        /* Respect the reduced-motion preference: show the poster, not the loop. */
32        @media ( prefers-reduced-motion: reduce ) {
33            .jt-login-video { display: none; }
34            body.login {
35                background: url('<?php echo esc_url( content_url( '/uploads/2026/07/login-poster.jpg' ) ); ?>') center / cover no-repeat;
36            }
37        }
38    </style>
39    <?php
40}
41
The muted and playsinline attributes are not optional. Every current browser blocks autoplay on videos with sound, and iOS Safari will open the clip fullscreen without playsinline.
Slideshow background
Pure CSS gets you a rotating background with hard cuts between images:
1
2add_action( 'login_enqueue_scripts', 'jt_login_slideshow' );
3
4function jt_login_slideshow() {
5    $slides = array(
6        content_url( '/uploads/2026/07/slide-1.jpg' ),
7        content_url( '/uploads/2026/07/slide-2.jpg' ),
8        content_url( '/uploads/2026/07/slide-3.jpg' ),
9    );
10    ?>
11    <style>
12        body.login::before {
13            content: "";
14            position: fixed;
15            inset: 0;
16            z-index: -1;
17            background-size: cover;
18            background-position: center center;
19            animation: jt-login-slides 18s infinite;
20        }
21        body.login #login { position: relative; z-index: 1; }
22
23        @keyframes jt-login-slides {
24            0%, 30%   { background-image: url('<?php echo esc_url( $slides[0] ); ?>'); }
25            33%, 63%  { background-image: url('<?php echo esc_url( $slides[1] ); ?>'); }
26            66%, 96%  { background-image: url('<?php echo esc_url( $slides[2] ); ?>'); }
27            100%      { background-image: url('<?php echo esc_url( $slides[0] ); ?>'); }
28        }
29    </style>
30    <?php
31}
32
One limitation: background-image is not an animatable property, so this cuts between slides rather than crossfading. A true crossfade needs one stacked, absolutely positioned layer per slide, each animating its own opacity. That's roughly forty lines of CSS, which is a fair argument for letting Loginfy Pro handle it.
Which method should you use?
| Situation | Use this |
|---|---|
| Client site, someone else maintains it | Loginfy customizer. The settings survive theme changes and the next person can find them |
| You want a live preview while you design | Loginfy customizer |
| One color or gradient, and you already have a snippets plugin | Code |
| Video or slideshow, and you don't want a Pro license | Code |
| Dozens of sites, deployed from one repo | Code, in a site-specific plugin |
The two aren't exclusive. Loginfy has a Custom CSS & JS section in the same panel, which is the natural home for one-off tweaks on top of the visual settings.
Image specifications that actually matter
- Dimensions. 1920 × 1080 covers most desktop viewports. Going beyond 2560 px wide buys you almost nothing except payload.
- File size. Stay under 300 KB. The login page has no other job than to load fast and take a password.
- Format. WebP, with a JPEG fallback only if you still support browsers that predate 2020.
- Composition. Keep the middle of the frame quiet. The form sits there. Detail belongs in the corners.
- Contrast. If you can't read the form labels at a glance, add an overlay rather than hunting for a different photo.
A heavy login background is a small, self-inflicted performance problem. It won't show up in your Core Web Vitals field data, because wp-login.php isn't a page Google measures, but the people signing in every morning will feel it.
Troubleshooting
The background does not appear on the real login page
Usually caching. Clear your page cache and any CDN cache, then test in a private window. Some hosts cache wp-login.php even though they shouldn't.
Another plugin is overriding it
Security plugins that rebuild the login screen, and some membership plugins, enqueue their own styles later in the chain and win. Deactivate them one at a time to find the culprit. If you need both, raise the priority of your own hook: add_action( 'login_enqueue_scripts', 'jt_login_background_image', 99 );
You changed your login URL and can't find the page
If you've moved wp-login.php, and you probably should have, the background still applies to the new slug. See how to change the WordPress login page URL, and how wp-admin redirects to the homepage if you're locking down the old one.
The login page won't load at all
That's a different problem from a styling problem. Work through the common WordPress login page issues first, then come back to the background.
The image looks stretched on mobile
Set Size to Cover and Position to Center Center. Cover crops rather than distorts. If the crop cuts off something important, the photograph is wrong for the job, not the setting.
A branded login page is not a secure login page
Worth stating plainly, because the two get conflated. Changing the background changes how the login screen looks. It does nothing to who can reach it or what they can try once they're there.
If your goal is protecting the login, the things that actually work are two-factor authentication, a strong admin password, dropping the default admin username, rate limiting, and monitoring who logs in and what they do. Do those first. Then make it pretty.
Where the login background fits in a full rebrand
For agency work, the login screen is one surface out of several. The others are worth doing in the same sitting, while you still have the client's brand guide open:
- Swap the WordPress mark for the client's logo. Changing the login logo takes two minutes in the same Loginfy panel.
- Carry the palette through to the dashboard with custom admin CSS.
- Remove the plugin noise your client never needs to see: hide plugins from clients and simplify the dashboard.
- Build them a proper landing screen, either a client dashboard or a custom user dashboard, then redirect users to it after login by role.
- Offer a dark mode, which people notice more than any background image.
The complete picture is covered in the WordPress login page white label guide and, for the admin area as a whole, in white label WordPress. If you're choosing tooling, the comparison of the best WordPress dashboard plugins is the place to start, and WordPress admin customization covers what else is possible once the login screen is done.
WordPress Login Background FAQs
Can I change the WordPress login background without a plugin?
Yes. Hook a stylesheet onto login_enqueue_scripts and set background on body.login. The code examples above do exactly that for images, gradients, overlays, video and slideshows. Put the code in a child theme or a site-specific plugin, never in a parent theme.
Does WP Adminify still change the login page background on its own?
No. The login customizer now lives in the Loginfy plugin. Adminify links to it at Adminify → Login Customizer, but Loginfy has to be installed and active for the Background section to exist. Loginfy also works standalone under Appearance → Customize.
Are video and slideshow backgrounds free?
Not in Loginfy — both are Pro features. Colour, image, gradient, background positioning, and the overlay with opacity control are all in the free version. The code methods in this article reproduce video and slideshow backgrounds without a licence.
What size should a WordPress login background image be?
1920 × 1080 pixels, under 300 KB, saved as WebP. Set Size to Cover and Position to Center Center so it crops cleanly instead of stretching on narrow screens.
Why is my login background not showing up?
In order of likelihood: page or CDN cache, a security plugin that replaces the login screen and enqueues its styles after yours, or a typo in the image path. Test in a private window first, then raise your hook priority to 99, then check the URL resolves on its own.
Will a custom login background slow my site down?
It only affects the login page, not your public pages, and wp-login.php is not measured in Core Web Vitals. It still affects the humans who sign in every day. Keep images under 300 KB and always give a video background a poster image.
Does the background survive a theme change?
If you set it through Loginfy, yes — the settings belong to the plugin. If you wrote the code into a theme's functions.php, no. That is the strongest practical argument for the plugin route on any site you don't personally maintain.
Wrapping up
For most people the answer is the customizer. Install Loginfy, open Background, pick a gradient, add an overlay at about 40 percent, publish. Five minutes, and the login screen stops looking like a default.
The code route is there when you need it: deploying across a fleet, wanting video without a Pro license, or simply preferring your configuration in version control. Both produce the same login page. Only one of them survives being handed to someone else.