
Images, videos, GIFs are a core part for any website. It enhances the curb appeal and also works as a major SEO factor.
Whoever manages a website surely adds multiple media in the site. But sometimes, you need to update them. Maybe the content has updated, a new update dropped or sometimes people also need to change/update the logo.
Obviously you can change the images (Or videos/gifs) manually throughout your website. But it’s hard work and costs a lot of time. Sometimes you might miss replacing images because it's tough to acknowledge where and how many times you’ve used the same media.
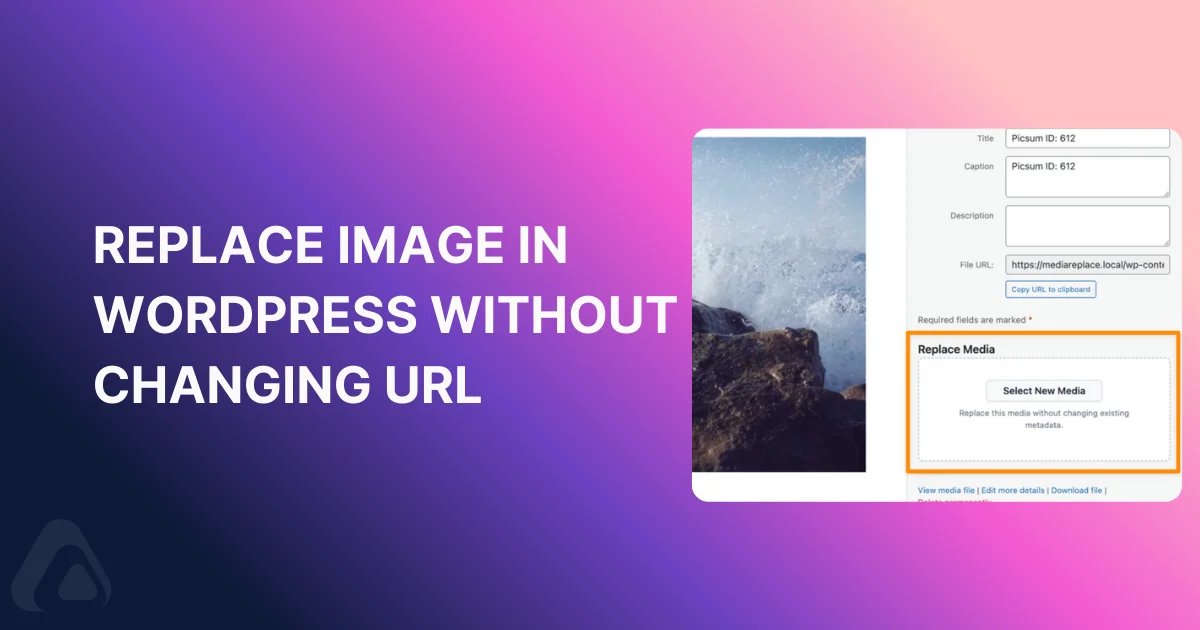
We’ve faced the same issue, and came up with an amazing idea. How to replace image in WordPress without changing URL. And thus the solution we are INTRODUCING WP Adminify’s Media Replacement.
You can replace any media without changing the URL/ID/Metadata. Also, the first time ever, Media Rollback.
So, today you’re going to expect the following in this article:
- How to replace image in WordPress without changing URL
- How to rollback to previous image after replacing it
- How to manually replace media files
Why Should You Keep the Same Image URL?
Replacing an image without changing its URL has a few major benefits. Which are as follows:
- No broken links – Once you replace the image it will be updated automatically in every place (Post, page, product listing, etc,..)
- Saves time – No need to manually update each image on the website. No more manual labor means more time to focus on the good stuff.
- Better user experience – Visitors don’t see missing images while you’re making updates.
- SEO safety – Google already indexed the image URL, so keeping it helps preserve your rankings.
And that is why you should keep the same image URL.
Method 1: How to Update/Replace Image in WordPress Without Changing URL (WP Adminify)
The image appears in multiple posts or pages? Want to keep the original URL for SEO and link safety? WP Adminify’s Media Replacement feature is the easiest option for you.
It works right inside your WordPress Media Library. Quickly update/replace images in WordPress without changing URL, ID, or metadata.
Step 1: Open the Media Library
Well, the Media Library is the home base of all the media for your WordPress website. So, you need to go there if you want to replace the image or any other media.
Go to Media → Library in your WordPress dashboard.
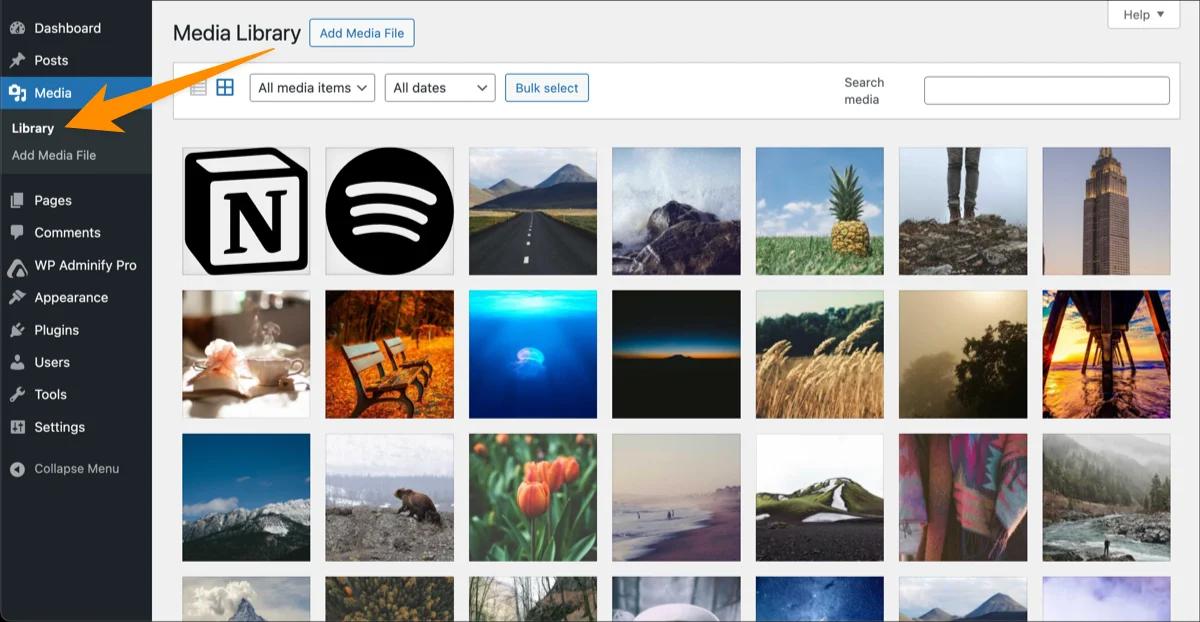
You’ll see all the uploaded media files from here. You can edit, or delete them. But today I’ll focus on replacing them.
Step 2: Select the Image to Replace
Now, you need to find and select the image you want to replace.
Once you pick the image, click it and it will open a new window for the settings.
Scroll down a little bit and you’ll see the "Replace Media" option. This is a new option added by WP Adminify.
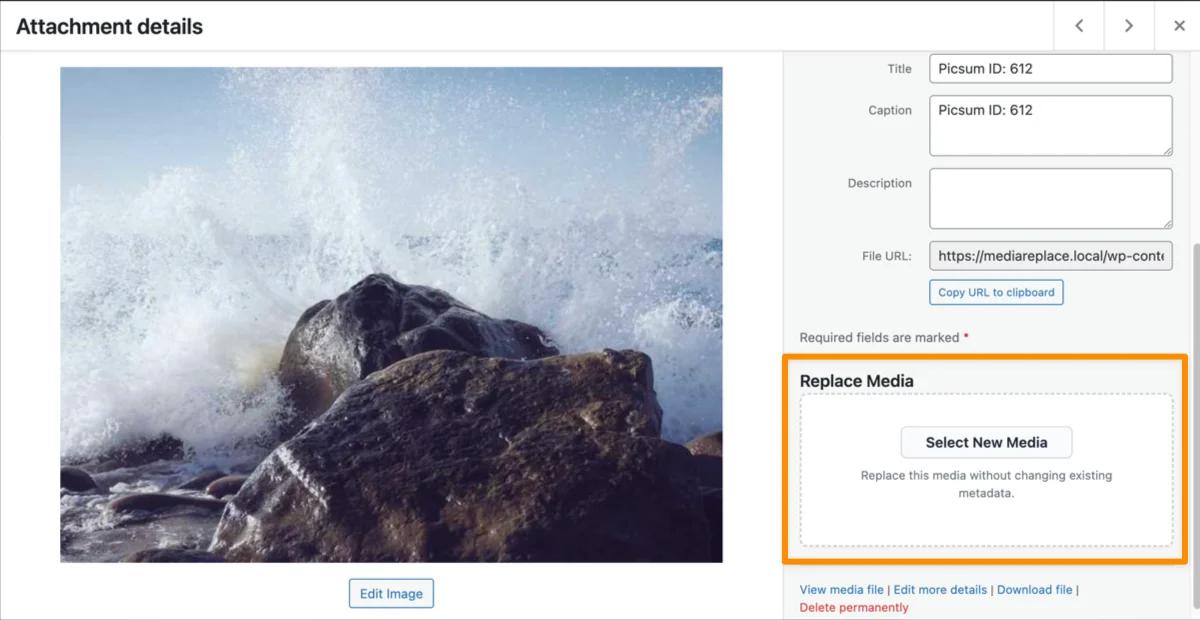
Now, click "Select New Media"
Step 3: Replace with New Image
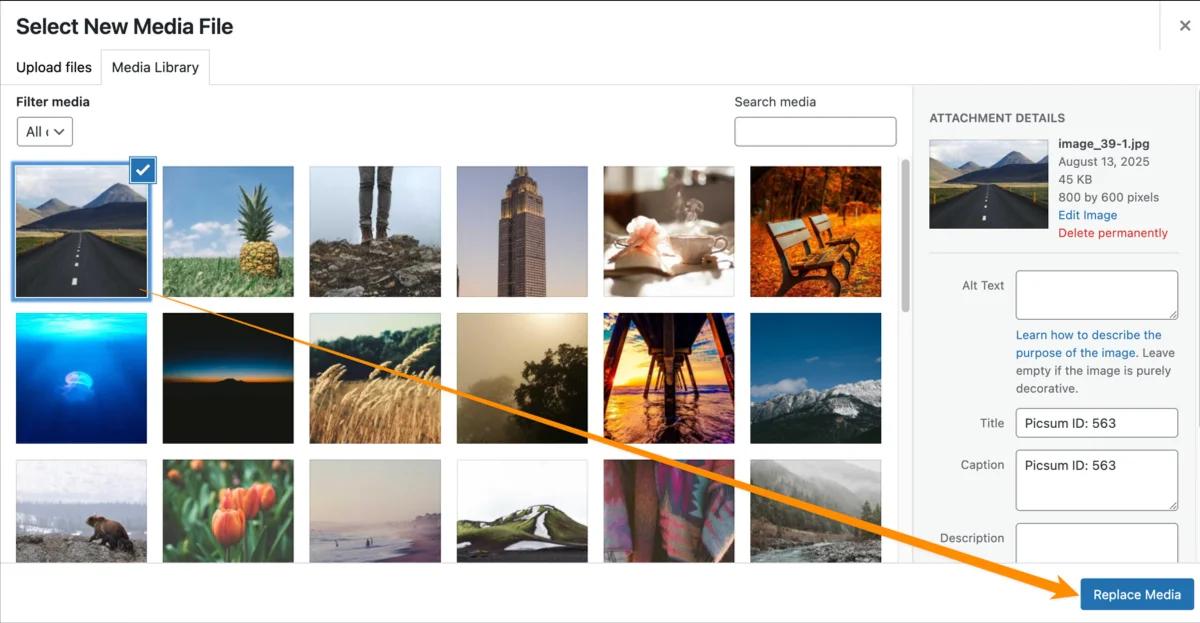
Once clicked, it will open the WordPress default media window.
You can either select your previously uploaded image, or add a new one from the "Upload Files" tab.
You can drag and drop your new image file into the upload area or click Select File to browse from your computer.
Note: You can change the image for any type of media (Image, GIF, video). But for best results, keep the new image the same format. This ensures it is replaced cleanly without any compatibility issues.
Step 4: Save and Done
Once done selecting your new image or newly uploaded one, click the "Replace Image" button on the bottom right.
And, voila! Your image is replaced successfully. You can check back and the image you wanted to replace is perfectly replaced with a new one.
For example, watch the following short video for better clarification -
Once I’ve replaced it, all the images were replaced with the new one.
How to Rollback to Previous Image after Replacing
WP Adminify brought this totally new feature you might haven’t seen anywhere till now. If you want to swap your image back to the original image you can do it in just a single click.
Just select the image, and scroll down a bit, you’ll see the option "Rollback Media". Click it and the replaced image will be reverted to the original one.
How to Replace Image in WordPress Manually
Well, you can manually change every image or media file if you want. But that's hard work. But still I'd love to show it to you.
In short here’s how to replace image in WordPress manually:
- Open the post or page in the WordPress editor.
- Click the image you want to replace.
- In the small toolbar that appears, click Replace → Open Media Library.
- Select your new image from the library or Upload a new one.
- Click Select and update the page.
You can use this method for one-off changes. But be aware that it doesn’t replace the image everywhere. If you have images that appear multiple times in your website, you have to replace each of them one by one.
Let’s see the process in more detail.
Step 1: Open the Page or Post Containing the Image
First you need to go to the page/post you want to replace the image for.
To go there, from the left-hand menu:
- Click Pages if the image is on a page
- Click Posts if the image is in a blog
Find the page or post you want to edit and click its title to open it in the block editor.
Step 2: Locate the Image
Now, you need to scroll down until you find the image you want to replace.
Once you find it, click the image once. You’ll notice a small toolbar appear just above it. In that toolbar, click the Replace button.
Step 3: Select Your Replacement Image
When you click Replace, WordPress will give you two options:
- Open Media Library – Lets you pick an image that’s already uploaded
- Upload – Lets you add a completely new image
If you already have the new image in your Media Library, choose Open Media Library. If not, choose Upload and select the file from your device.
Step 4: Select and Add the New Image
Now, if you’ve selected the Media Library, you can browse or search for the replacement image.
Simply select a new image and click the Select button in the bottom-right corner.
But if you uploaded a file, WordPress will insert it automatically once it finishes uploading.
Step 5: Save Your Changes
Once you’re done replacing the image, click Update in the top-right corner to save your changes.
And that’s it. The image is replaced in that one location. The old image will remain in your Media Library and still be used wherever else it appears on your site.
Conclusion
No more hassle to replace images in WordPress. With this new Image Replacement feature of WP Adminify, you can replace any image, GIF or video without changing URL, ID, or metadata. And with the added bonus of Media Rollback, you can quickly revert to the original image whenever you want..
Sure, you can still replace media manually. But only if you’re only dealing with a single image. But for bigger sites where you’ve used the same image multiple times, WP Adminify makes the process faster, safer, and way less stressful.
Happy Journey Fellas!

Leave a Comment
Your email address will not be published