
WP Adminify
How to create a proper White Label Dashboard in WordPres?
There are a lot of elements in the WordPress admin bar. Like Howdy message, WordPress logo, Site name, comments, updates and new text.
With WP Adminify’s White Label feature, you can remove them all. Let’s see how to do that.
Step 1: Go to White Label Settings
To get to the white label settings, go to the following path:
WP Adminify > White Label
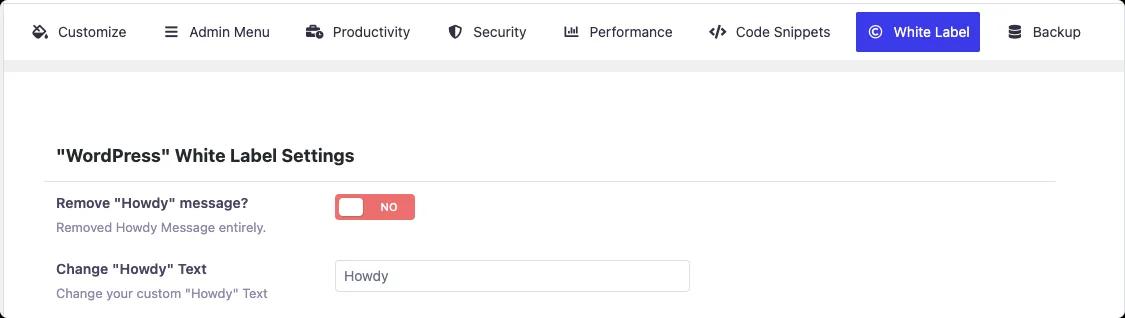
How to Remove “Howdy” Message
Note: If you already enabled WP Adminify’s default UI, the “Howdy” message is already hidden.
Toggle the “Remove "Howdy" message?” button. It will change the color to green and the text will change to “yes”.
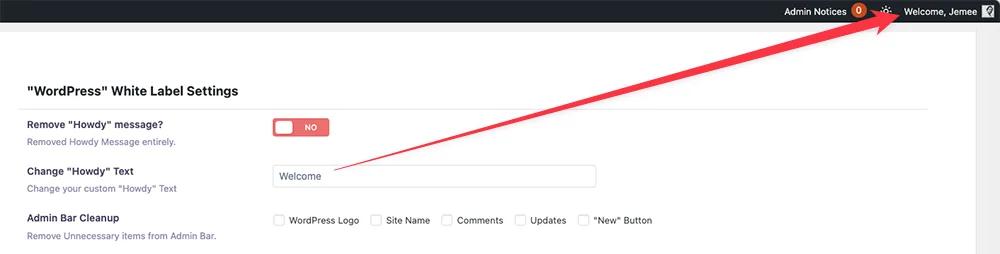
How to Change “Howdy” Message
You can also change the “Howdy” text to your preference.
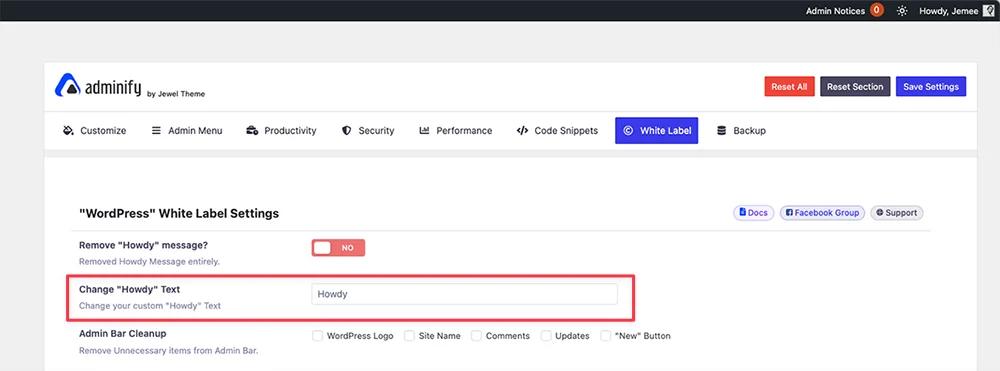
Simply add your preferred text in the “Change "Howdy" Text” text box. This will display your custom message instead of the default “Howdy” message.
How to Remove WordPress Admin Bar Elements
To remove WordPress admin bar elements, first you need to enable the “Remove "Howdy" message?” button.
It will unlock another option named: “Admin Bar Cleanup”.
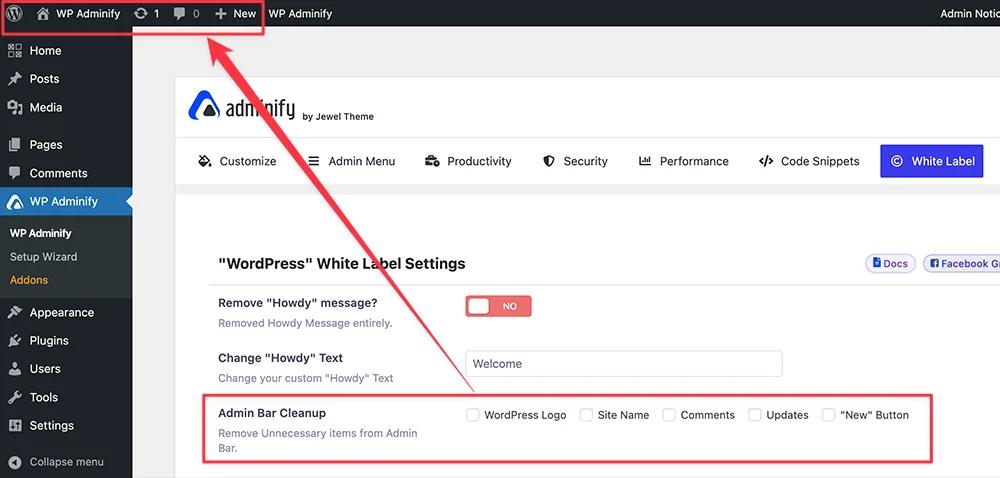
It consists of a few checkboxes you want to remove. Which are the following:
- WordPress Logo
- Site Name
- Comments
- Show WordPress Version
- "New" Button
Tick the checkboxes for the elements you want to remove.
How to Remove Admin Footer Elements in WordPress
WordPress shows a lot of elements in the footer section in the backend. But you can remove the ones you want.
In the WP Adminify White Label, you’ll see the “Admin Footer” option. It consists of the following options for you to remove:
- Show IP Address
- Show PHP Version
- Show WordPress Version
- Show Memory Usage
- Show Memory Limit
- Show Memory Available
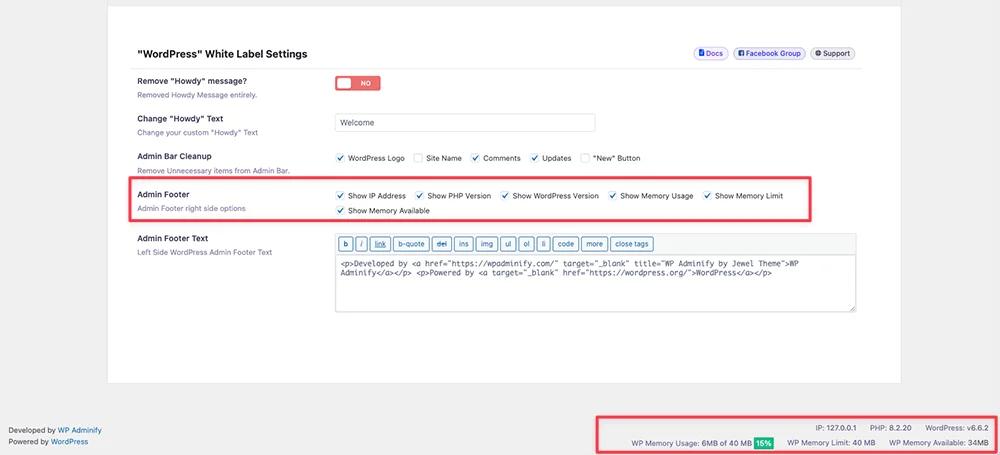
Mark the checkboxes you want to remove.
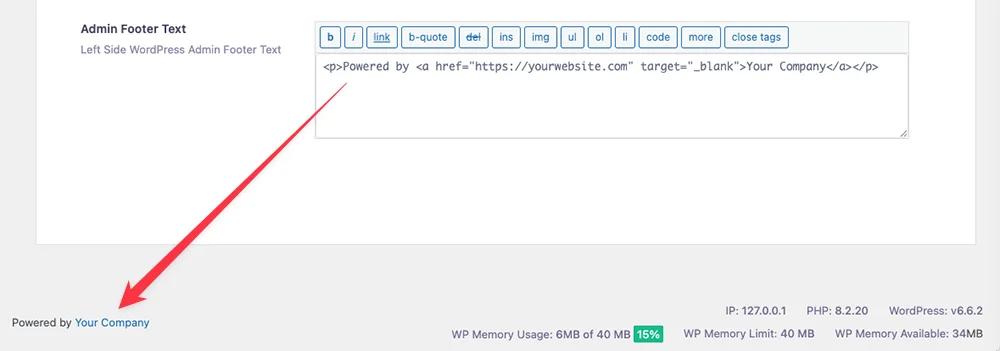
How to Customize Admin Footer Text in WordPress
You can also customize the admin footer text with WP Adminify.
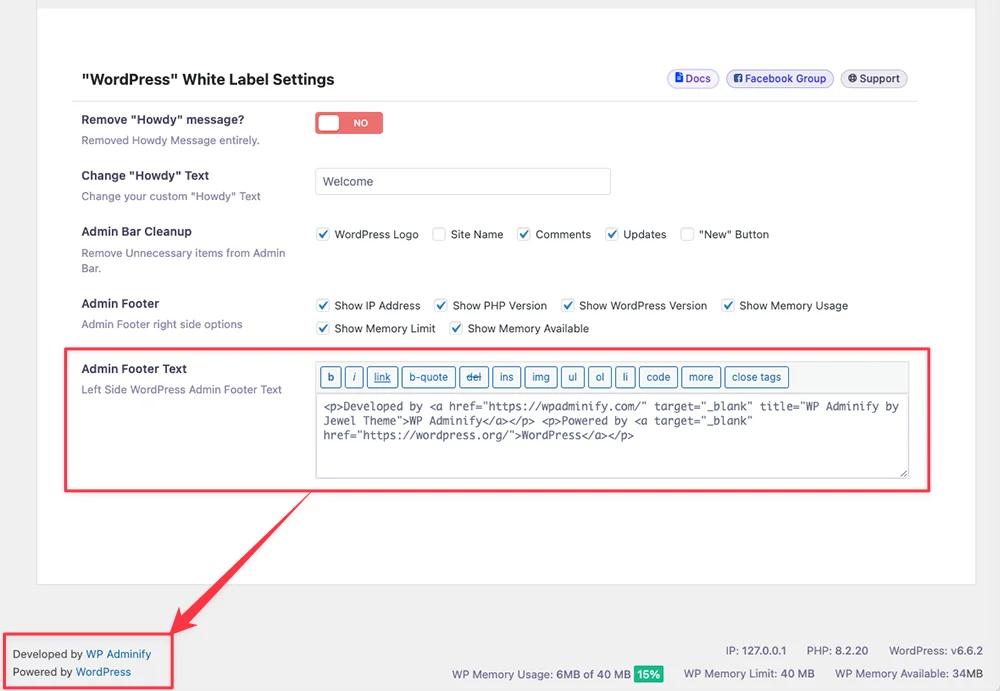
In the “Admin Footer Text” settings, you’ll see the text box to add your custom message in the footer section.
Save the Settings
After you’re done with your selection and customization, click the “Save Settings” button to apply the changes.
What You Can White Label
The White Label module covers the parts of wp-admin your clients actually see: the admin bar (WordPress logo, Howdy message, site name, comments and update indicators), the footer text, the dashboard branding, and the login screen. Combined with the plugin rebranding option, the finished dashboard carries your agency's name end to end — clients never see "WordPress" or "WP Adminify" unless you want them to.
Frequently Asked Questions
Can I remove the "Howdy" message and WordPress logo from the admin bar?
Yes — both are individual toggles in the White Label settings, along with the site name, comments icon, updates indicator, and the "New" menu.
Can I rebrand the WP Adminify plugin itself for clients?
Yes. The plugin white label option replaces WP Adminify's name, logo and URL with your agency's branding throughout the dashboard.
Does white labeling affect updates or plugin functionality?
No. White labeling only changes what's displayed — updates, licensing and all modules keep working exactly the same underneath.
Related Documentation
Didn’t find what you were looking for? Get in touch!
Updated on August 24, 2024
Was this helpful to you?