
WP Adminify
How to Rebrand WP Adminify Plugin for Your Agency with White Labeling?
If you’re an agency and managing client sites, you already know the importance of branding. WP Adminify lets you fully rebrand the plugin with your agency’s name, logo, URL and more.
Let’s see how to do that.
Go to WP Adminify White Label Settings
To get the to the WP Adminify White Label go to the following path:
WP Adminify > White Label
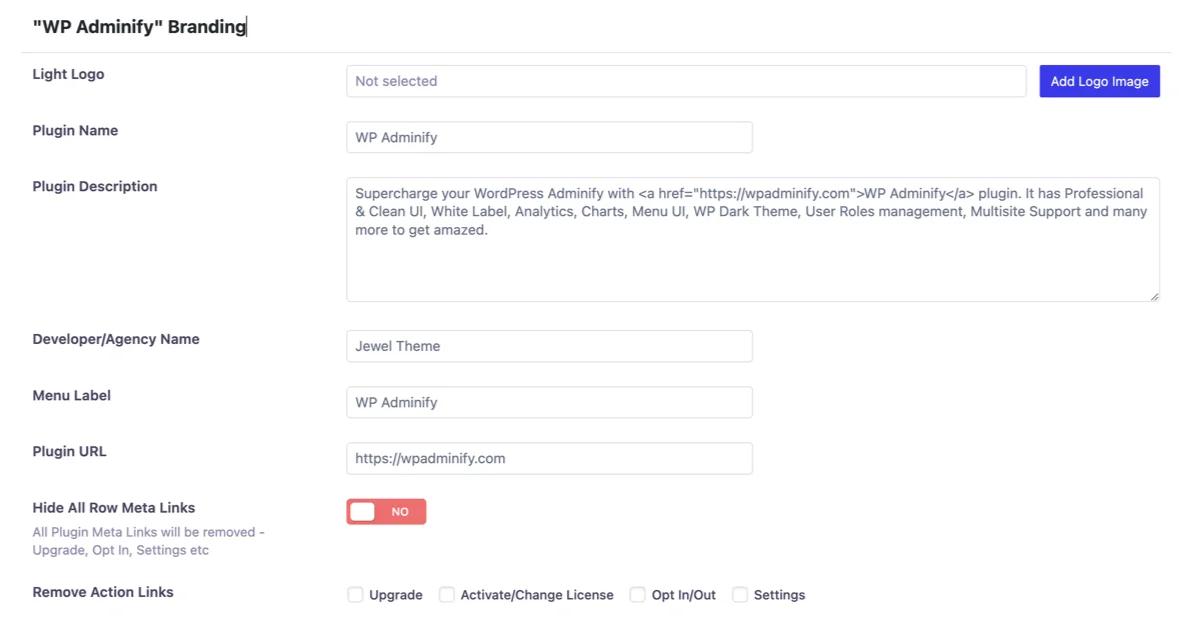
Here, you need to go to the “"WP Adminify" Branding” section.
Note: Remember this feature is only available from the Agency or higher plan.
How to Change Logo for Light/Dark Mode
In the “"WP Adminify" Branding” section, you can upload a logo for your light/dark mode.
It will automatically resize so you don’t need to worry about the logo size. Also, you can use any image file type and it will work.
How to Change Plugin Name and Description
WP Adminify also allows you to change the plugin name and description.
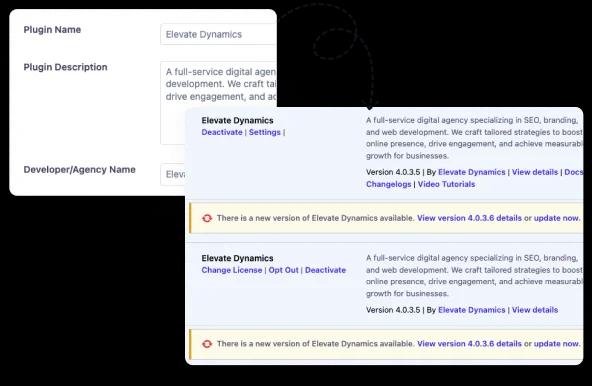
In the “Plugin Name” text box you can name the plugin as you like.
And in the “Plugin Description” you can change its description.
How to Add Agency Name
In the “Developer/Agency Name” text box, you can add your agency name to fully brand your agency.
In the Plugin Name field, add your agency’s name or a custom plugin name.
In the Plugin Description field, write a custom description like "Powered by [Your Agency Name]" or anything else that fits your brand.
How to Change Menu Label and Menu Icon
Menu Labels are positioned in the WordPress sidebar menu.
You can change WP Adminify’s menu label from the “Menu Label” text box.
Also, you can upload your own menu icon from the “Menu Icon” uploader.
How to Add Your Agency’s Website URL
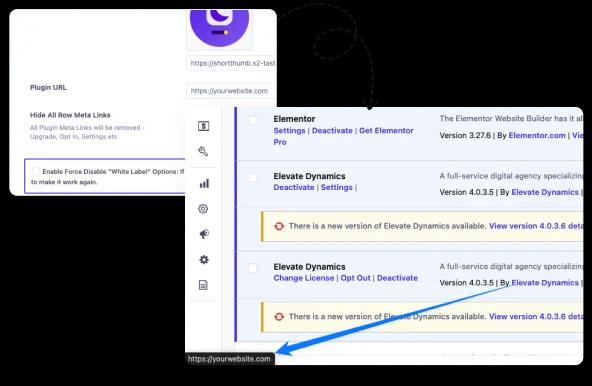
In the Plugin URL field, you can add your agency’s website URL.
This is the link users will be redirected to when they click on the plugin name or logo.
Step 6: Hide Plugin Row Meta Links
Find the Hide All Row Meta Links option.
Toggle it to Yes to remove links like Upgrade, Opt-In, and Settings from the plugin list.
How to Hide/Remove Row Meta Links
You can completely remove all row meta links.
To do that, enable the button in the “Hide All Row Meta Links” option.
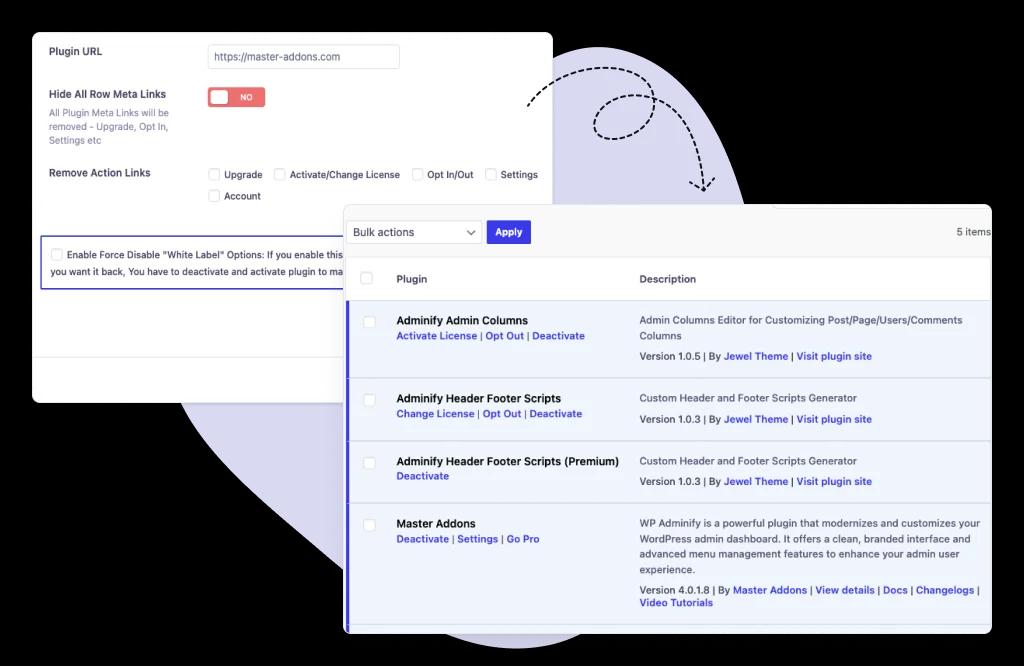
However, you can also choose which items you want to hide.
To do that, you’ll get the following options with checkbox:
- Upgrade
- Activate/Change License
- Settings
- Account
Check the boxes next to any action links you want to hide.
How to Hide White Label Options from WP Adminify Settings
If you don’t want your clients to see or change any white label settings you’ve made, you can do that.
In the bottom of the settings, you’ll see an option called “Enable Force Disable "White Label" Options”.
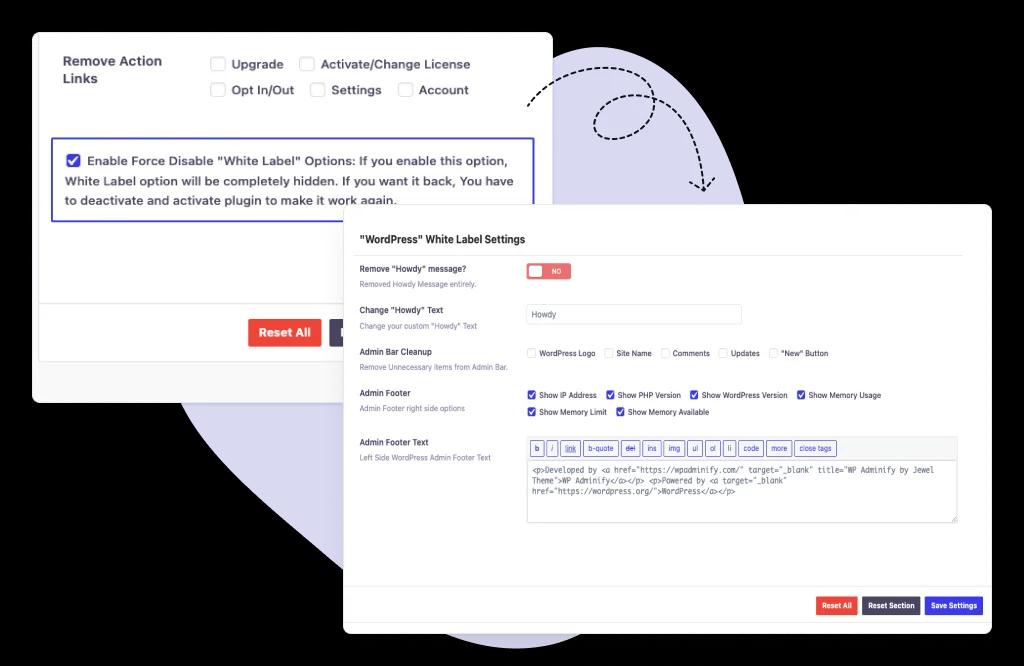
If you mark the checkbox, your clients won’t be able to see the White label options.
Note: You can get these settings back by deactivating and reactivating the plugin again.
Save Your Settings
After you’re done with your selection and customization, click the “Save Settings” button to apply the changes.
Didn’t find what you were looking for? Get in touch!
Updated on July 16, 2026
Was this helpful to you?