
Admin columns
How to Install and Activate Admin Column Editor?
Admin Columns editor allows you to add or remove all unwanted default or custom admin columns from your WordPress Dashboard.
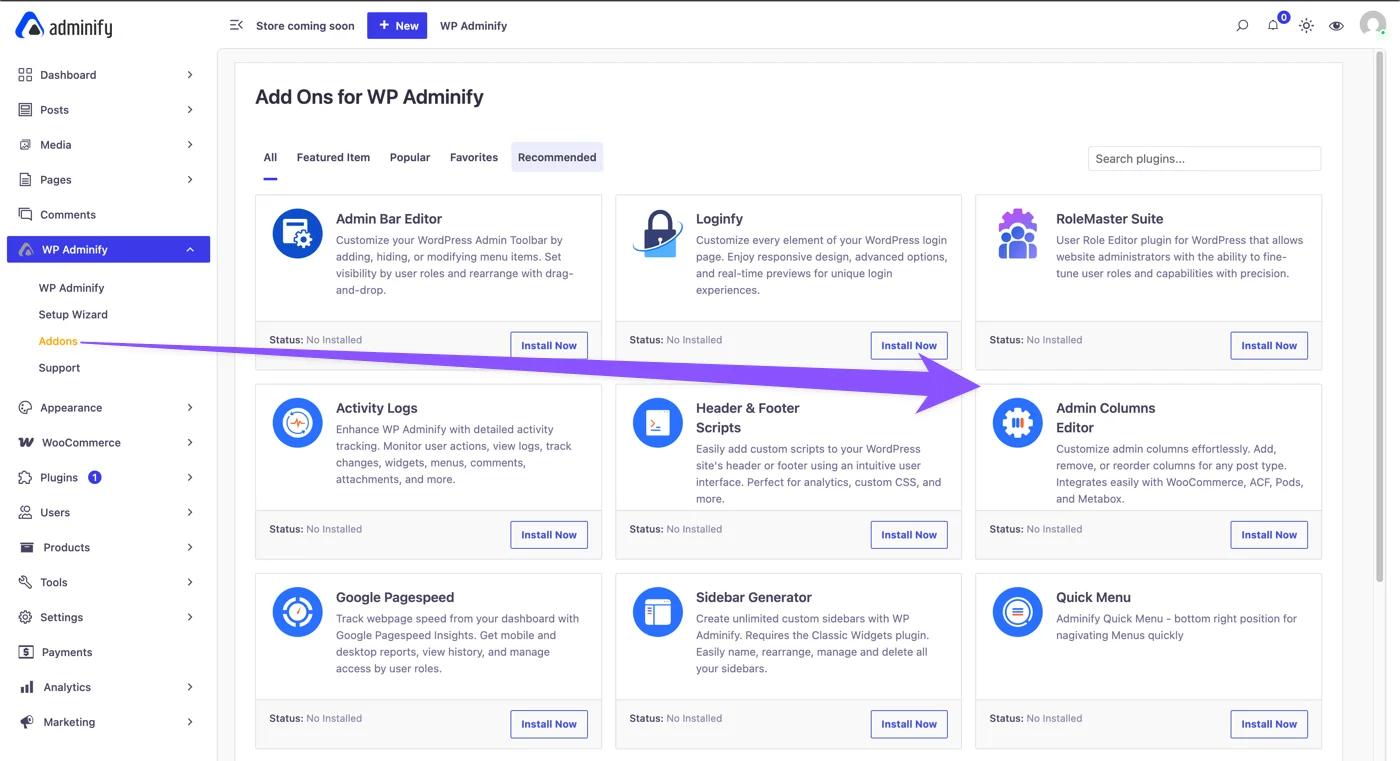
Install from WP Adminify
First, go to WP Adminify > Addons from the WordPress dashboard. Then look for the Admin Column Editor. Click install and then activate it.
Install the Pro Version
Admin Column Editor also comes with a PRO version. You can purchase the Admin Column Editor PRO version from the following link:
After completing your purchase, you’ll receive your login credentials via email.
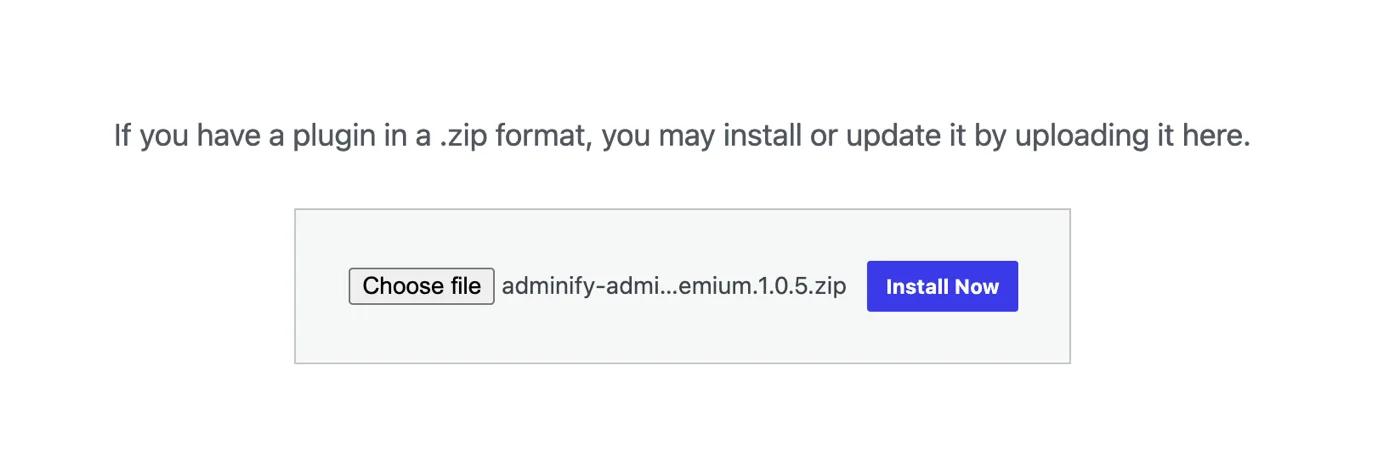
Now to download the pro version of Admin Column Editor, sign in to your account. Then go to the “Download” tab. You’ll see the pro version of Admin Column Editor is listed here. Click the download button to save it on your pc directory.
Now, you need to upload your plugin to your site. Go to Plugins > Add New > Upload Plugin. Then, select the zip you just downloaded (Pro Version of Admin Column Editor). After the uploading completes, click “Install Now” then “Activate”.
Now, you need to add your license to the PRO version to continue.
To get your license, sign in to your account. Then go to the “Licenses” page. You’ll see the Admin Column Editor Pro license here.
Copy the license from here, then paste it in the Pop up you’ll see in the Loginfy. Paste your license to activate the PRO version.
Once you successfully activate the PRO version, you'll see a confirmation message and unlock Pro features instantly!
How to Access the Admin Column Editor
After activating, go to WP Adminify > Admin Columns to get to the Admin Column Editor interface.
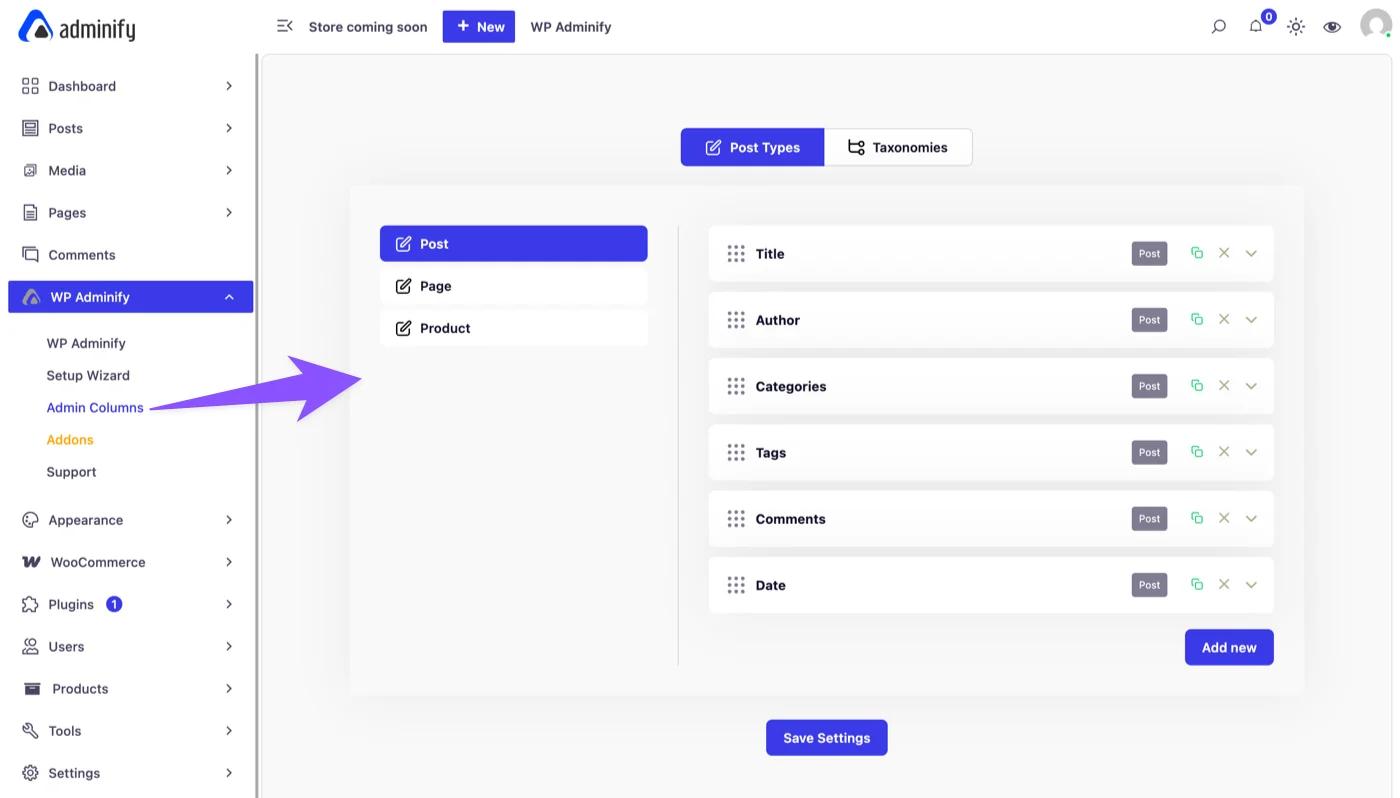
Now you can see the option panel for Admin Columns editor.
Didn’t find what you were looking for? Get in touch!
Updated on May 13, 2025
Was this helpful to you?