
Managing the media library will get tougher day by day. You never know how many images or media are stored in your library. Here WordPress Media Manager plugin comes to solve your organization's problem.
You can’t create a folder in your default WordPress media library. What if you could organize different types of media files into different folders like you do on your smartphone or laptop?
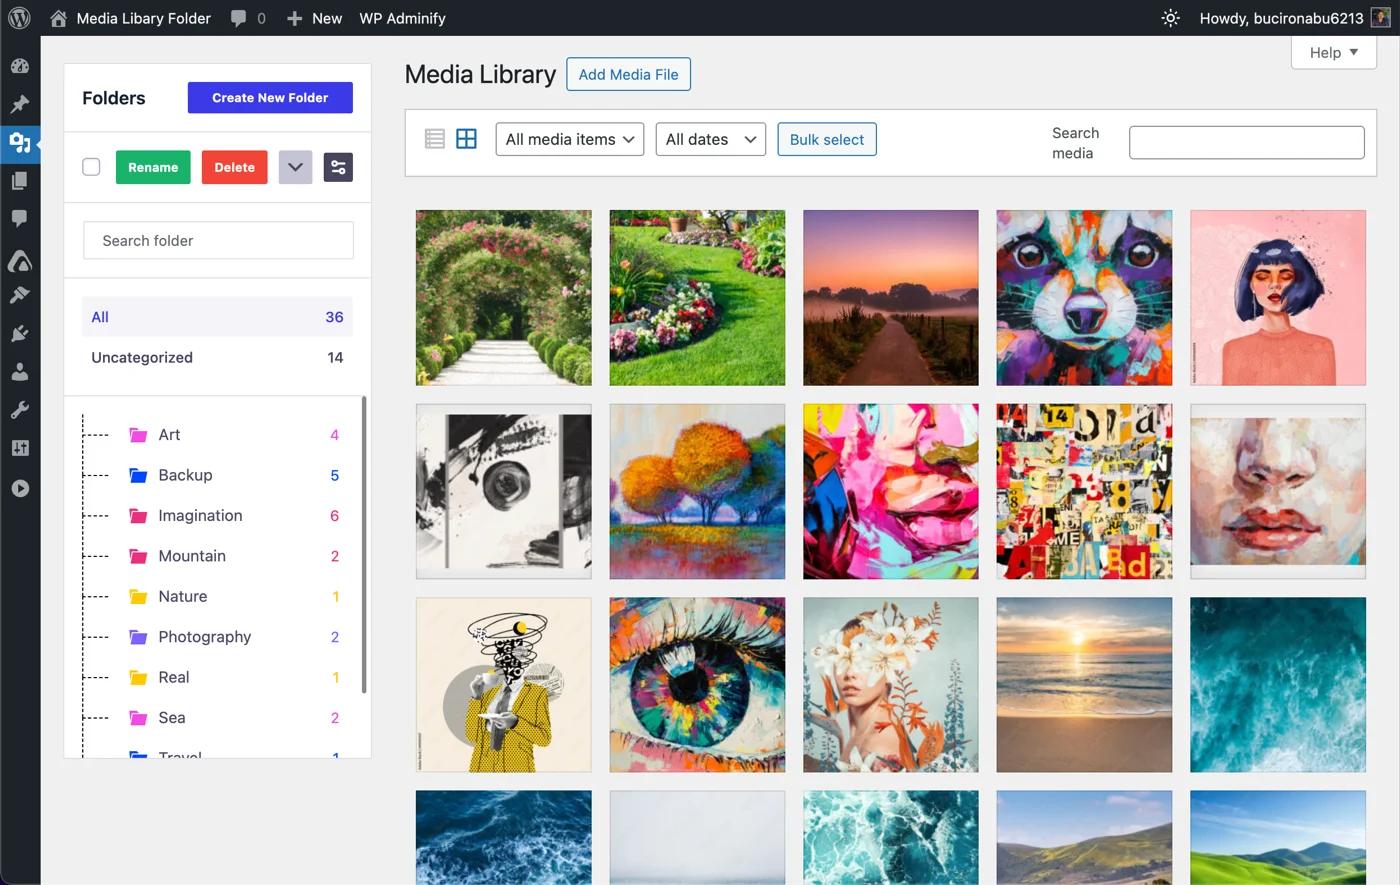
It sounds interesting, right? Yes, it's possible, and at the end of this blog post, you will learn how easy it is to create folders for WordPress media library like the following screenshot.
Who should configure WordPress Media Manager?
Before jumping into the technical part, I would like to tell you a story that I have heard from multiple clients. I promise it won't take so long, and I will not start it with "once upon a time..😉". While reading my story, just imagine if you can feel the same pain as my clients, or not.
So, should I begin -
Blogger Client - Professionally, she is a nutritionist. She runs a blog site where she uploads different types of recipes. I designed her website, and after almost 4 months, she emailed to know if there is any way she can create multiple galleries inside the WordPress media library? Within these 4 months, she published 100+ blog posts, and each blog post contains 7 to 8 images.
Photographer Client - He is a professional wedding photographer, and his media library is flooded with 3000+ media files. He asked if there is any solution to neatly categorize different event photos in the media library.
E-Commerce Store owner client - He sells electronic goods like mobiles, laptops, printers. He used to maintain a private page where he manually added all uploaded image attachment links for different products. This was necessary for him because, on live chat, people asked to provide more photos for selected products.
SEO Agency owner client - She provides local SEO services in her area. She uploads all assets for each client to her media library and shares the URL with her clients. She used to name each file something like jon-doe-website-local-seo-checklist.pdf. Now, when she needs to find out her specific client's file, she used to search jon-doe in her media library. Then go through each file name and select the preferred one. He is one of the happy agency users of the WP Adminify plugin now.
I am telling you this story from 2023 - 2024. These are the pain points my clients faced before configuring the WordPress Media Manager plugin on their website. I used to search on Google and install the free plugin for some of them.
Each of the plugins has limitations, but now I am going to share the easiest solution with you. I am pretty sure you have never experienced this before.
Get started with WordPress Media Manager
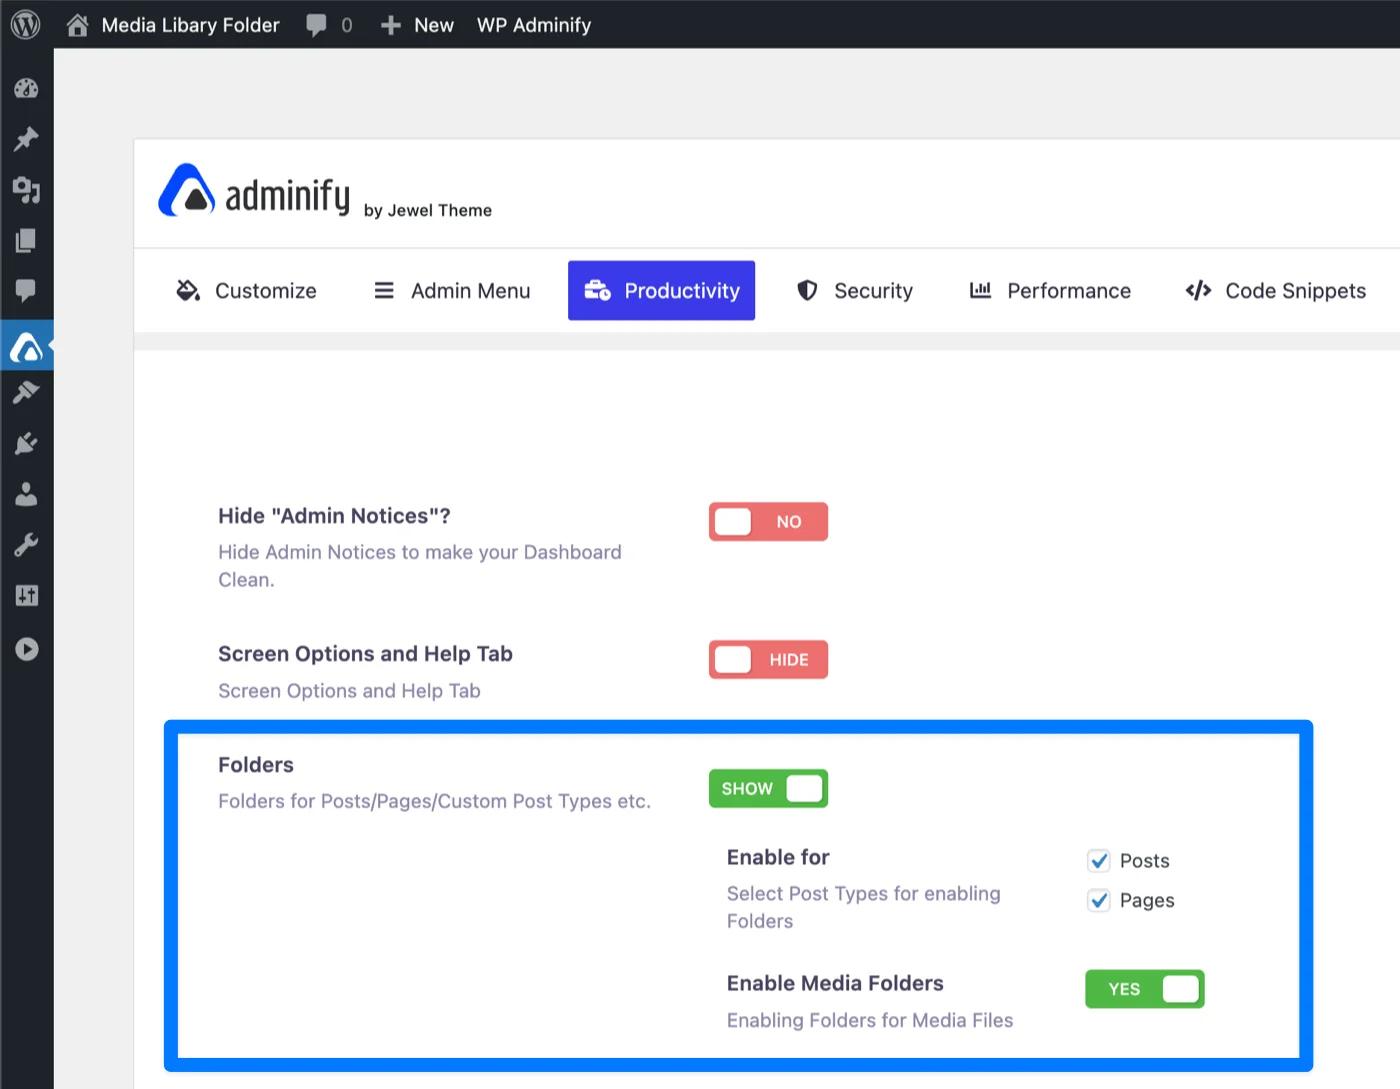
You must install the WP Adminify plugin and enable the folder. To enable the folder, navigate to WP Adminify > Productivity > Enable Folder. You can try this feature on the free version.
Free Download | Check WP Adminify PRO
Spoiler alert - This media library folder supports both grid and list layouts. Also, you can organize posts, pages, and custom post types items in multiple folders too. It will be a sticky folder; no matter how much you scroll, it will be fixed and will provide you with a better user experience. Search for anything instantly, maybe within milliseconds. Filter your folder items in A-Z or Z-A.
You will get all post types and a switcher to enable media folders. Just select where you like to implement the folder feature and save the settings. You can press Ctrl+S to save the settings.
Configure Folder for WordPress Media Manager
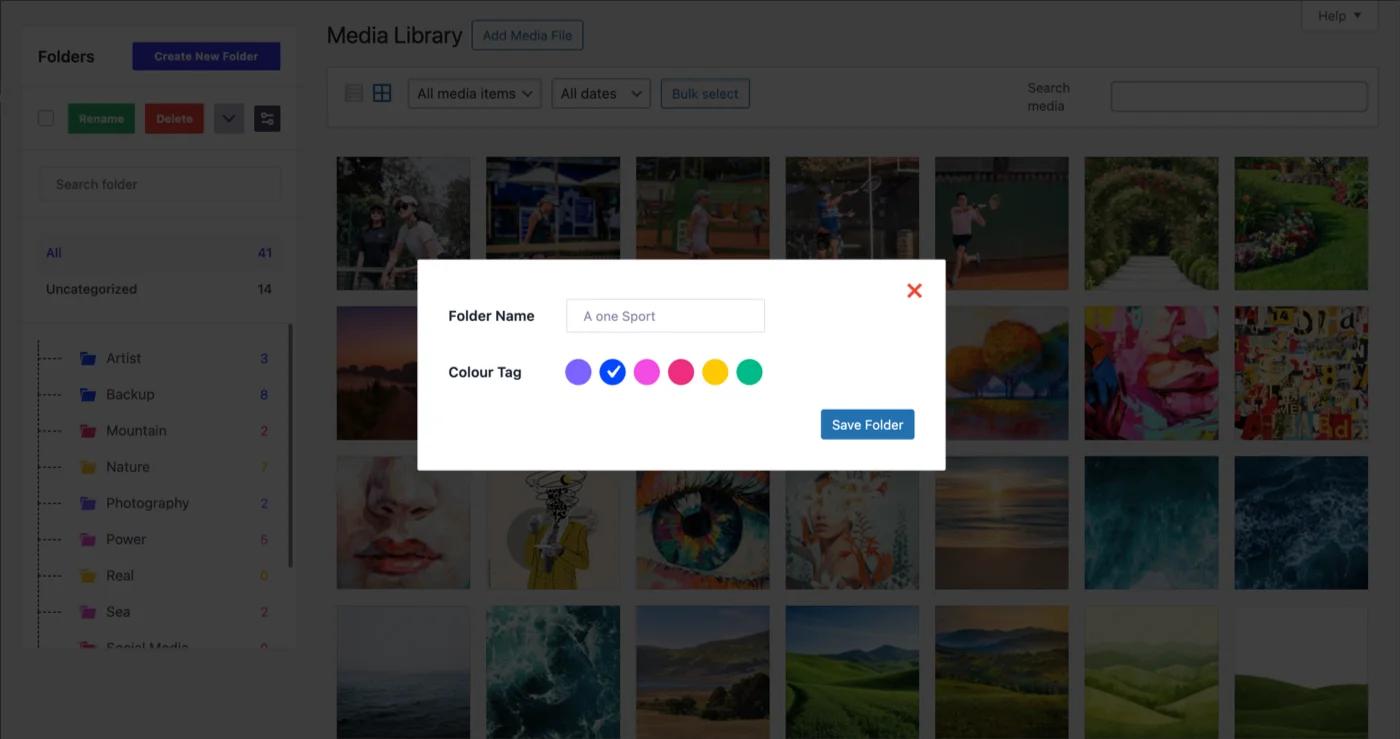
If you have enabled the media folders from the WP Adminify option panel. Now, just navigate to the media library of your WordPress Dashboard. You will get something like the following screenshot.
At the top, you can see the "Create New Folder" button. Just click on this button and a new pop-up will appear requesting you for the folder name, color. After inputting the name and choosing a color, just click on the save folder button.
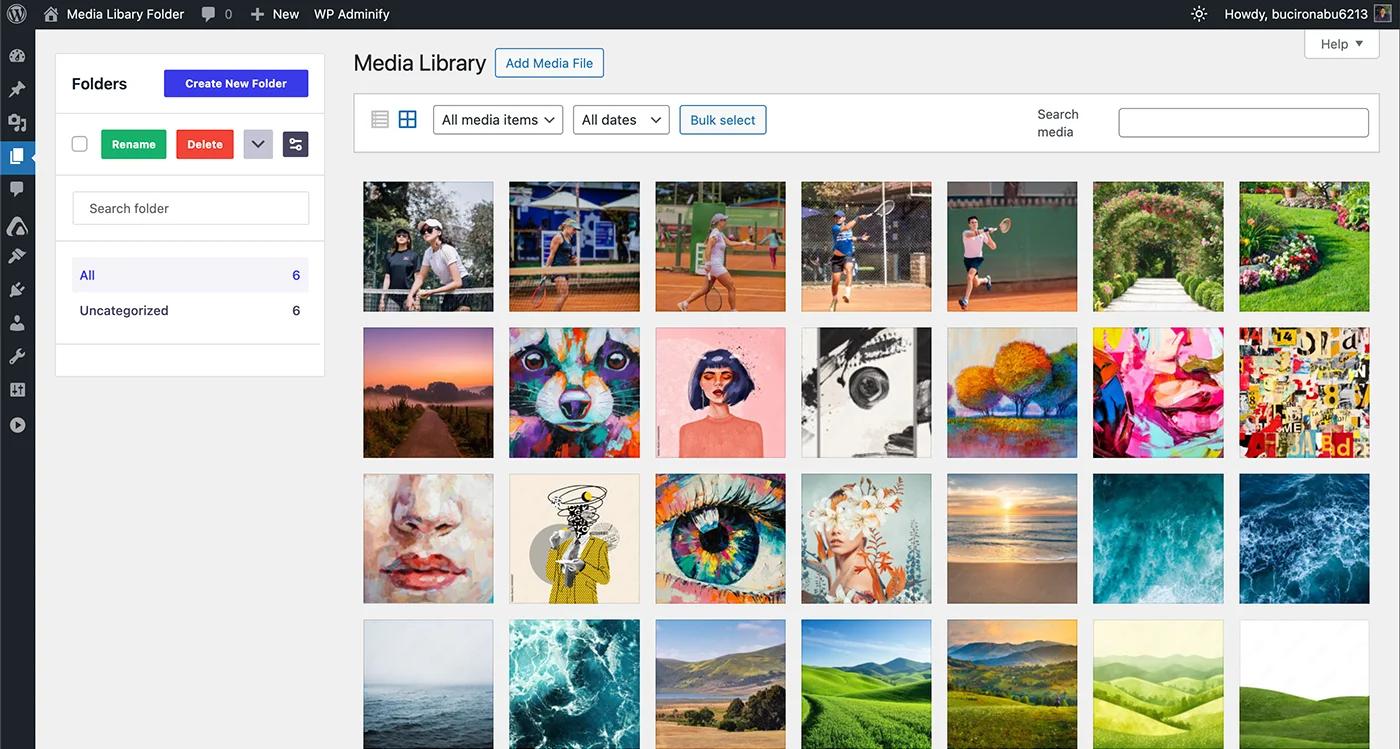
Instantly, it will appear on the folder list. It may be your first folder, so you will notice the single folder that you have created, just like the following screenshot.
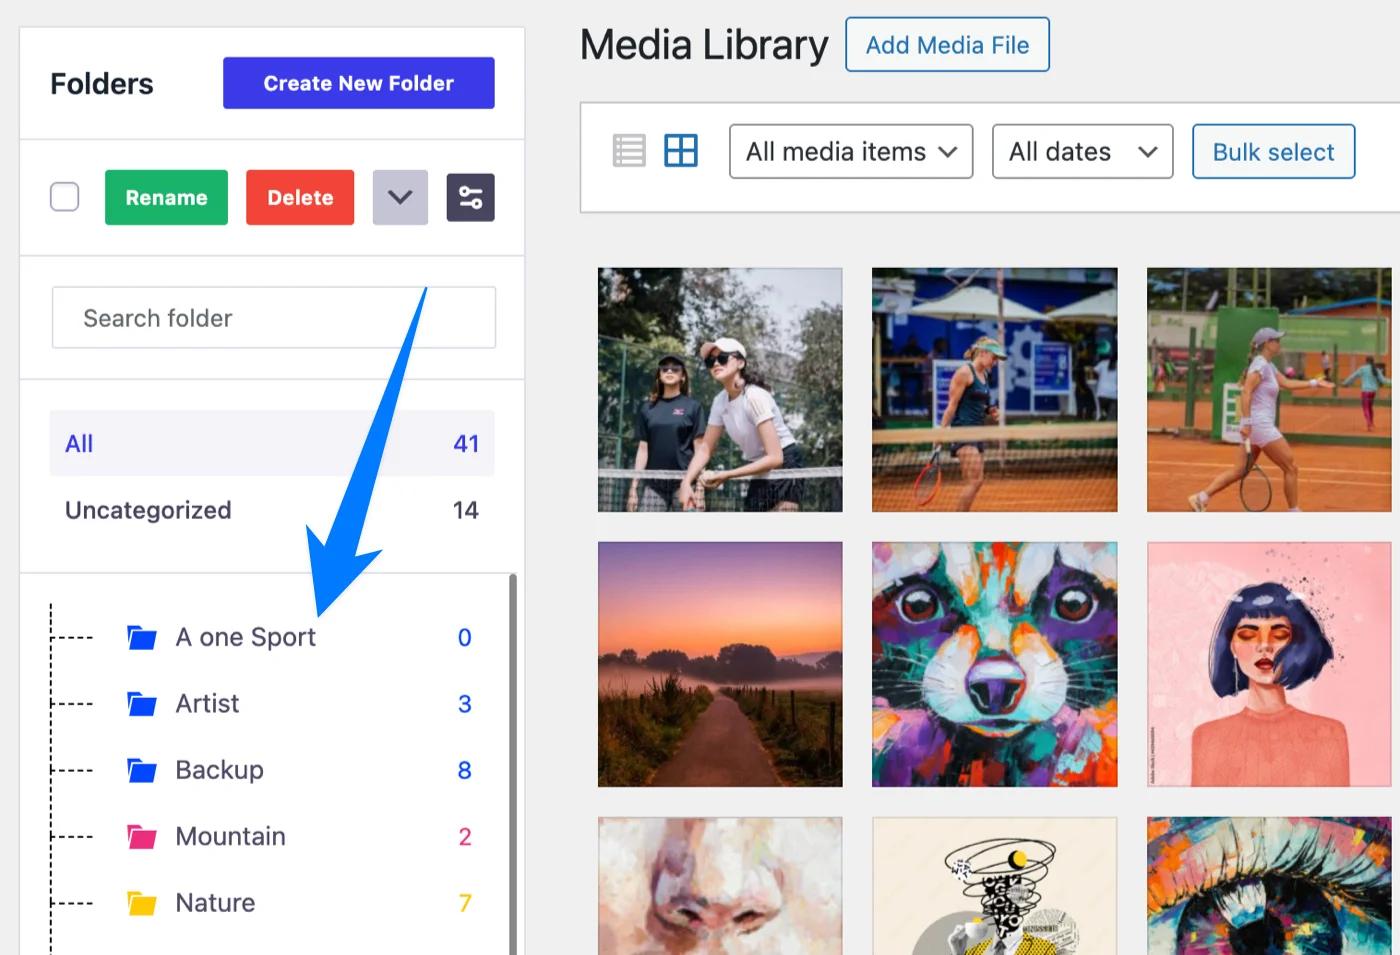
[Note: I have created multiple folders before to show you how actually it looks in real life.]
You can create a subfolder under any main folder. As human beings, we all make mistakes. This folder makes it easy to fix them. If you mistyped a folder name, you can quickly rename it.
If I tell you that you have to drag and drop each item one by one into your folder? How will it feel to you?
I know it will be painful for you. That’s why this Media Folder plugin supports the bulk select feature. Just use the default bulk select option in the default WordPress media library and drag all media files into your desired folder. Watch the following video, and you will get a clear idea.
There are a lot of users who prefer list items instead of grid item previews. For those users, I would like to happily mention that it supports both grid and list views. This can enhance your workflow and branding consistency, If you consider your branding, then you can also try this loginfy plugin for your login page customization.
Configure Folder for Posts, Pages, & Post Types
All options are similar, just like the media. Make sure to select specific post types in the option panel where you would like to enable the Folder feature by the WP Adminify plugin.
First, tap on the following video if you are on mobile or click on the play button if you are on desktop. I have organized my 100 demo blog posts into multiple folders. Just imagine how this folder can help you to organize 1000+ blog posts. Not only blog posts, but also it supports any custom post type, even WooCommerce products too.
Here, I have created 2 subfolders called corporate and small under the main folder called business. You can create unlimited folders and subfolders.
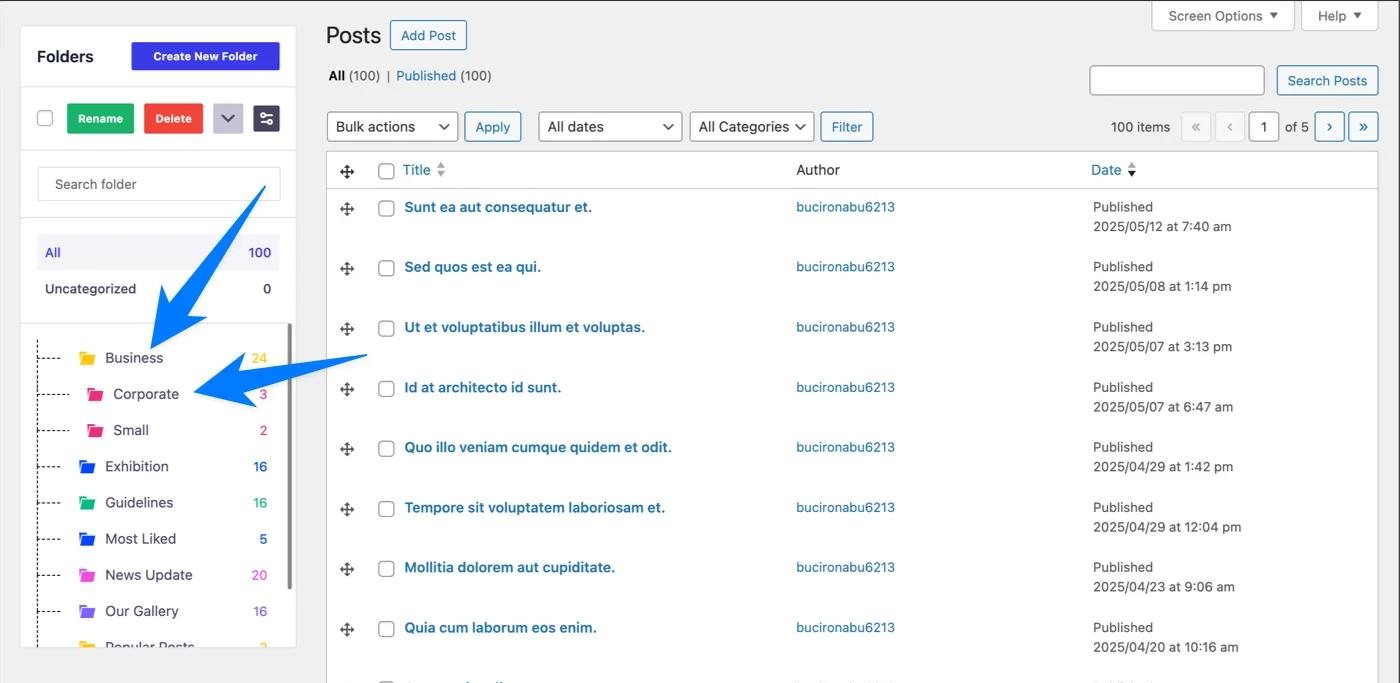
Have you noticed the screenshot properly? Don’t you think it’s cleaner? I removed some admin columns called Categories, Tags, and other SEO meta information from the admin columns area.
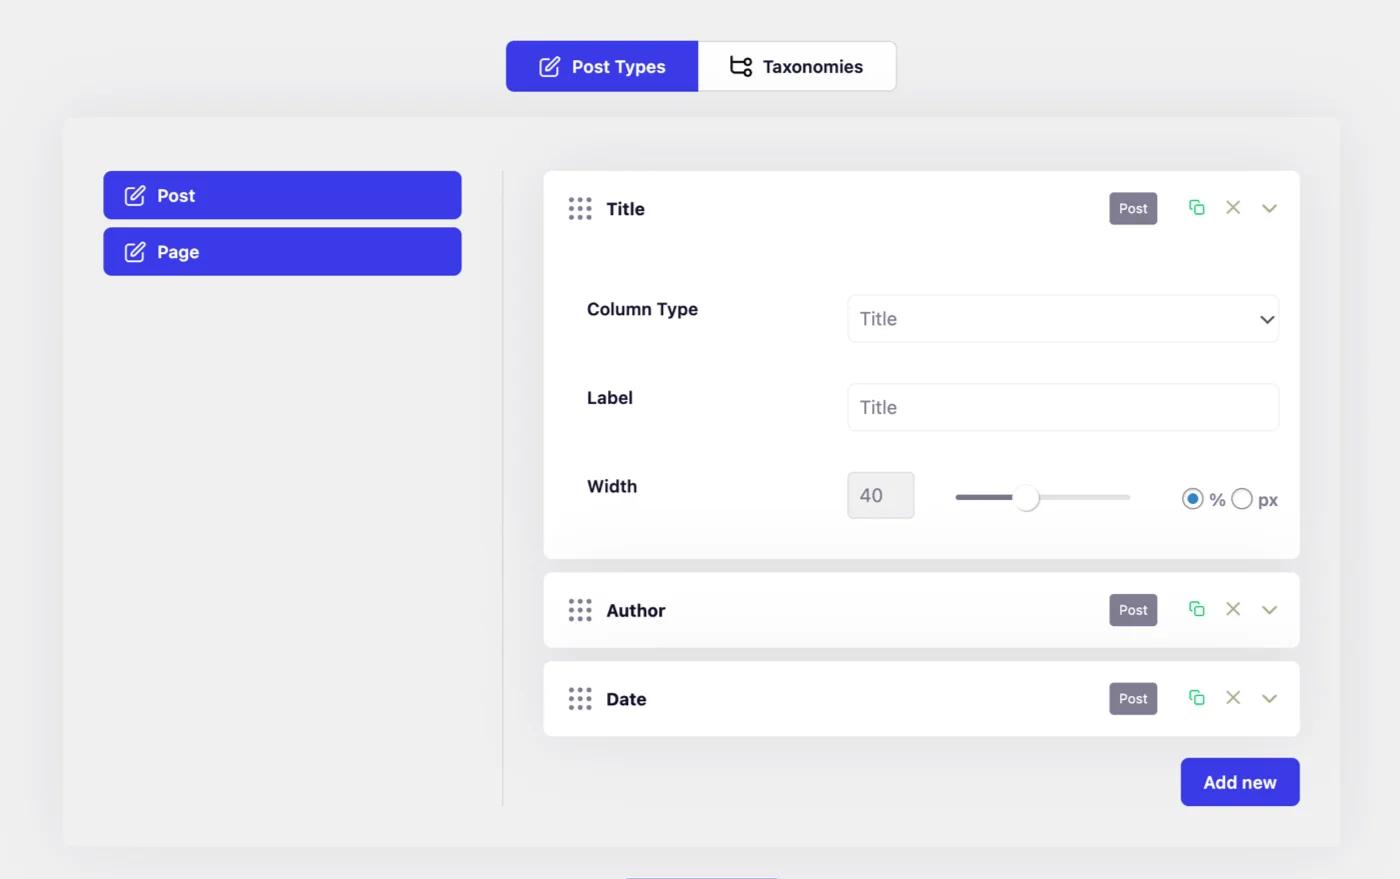
You can also clean up your columns for posts, pages, and other post types with the help of the Admin Columns addon. Just install this free admin columns addon and remove or add your columns. Modify the width for default admin columns and create a clear and professional panel.
That’s all about your WordPress media library management. You are getting 2 in one if you use the WP Adminify plugin, which is a very lightweight and faster plugin than any other custom dashboard plugin. WP Adminify is an all-in-one environment that needs you to supercharge your WordPress Dashboard.
Let’s Wrap UP!
Let me finish this blog post with my editorial note here. I would like to request that you try the live demo of the WP Adminify plugin, where you can try all features yourself and decide whether it’s suitable for your project or not.
If you face a problem while following my steps or face any problem, feel free to comment on this blog post or contact us. I will assist you and try to solve any issues that you are facing.

Leave a Comment
Your email address will not be published