
WordPress User Role Editor Using RoleMaster Suite
If you have installed the RoleMaster suite addon properly, then just navigate to WP Adminify > User Role Editor, and you will notice a clean option panel like the following screenshot.
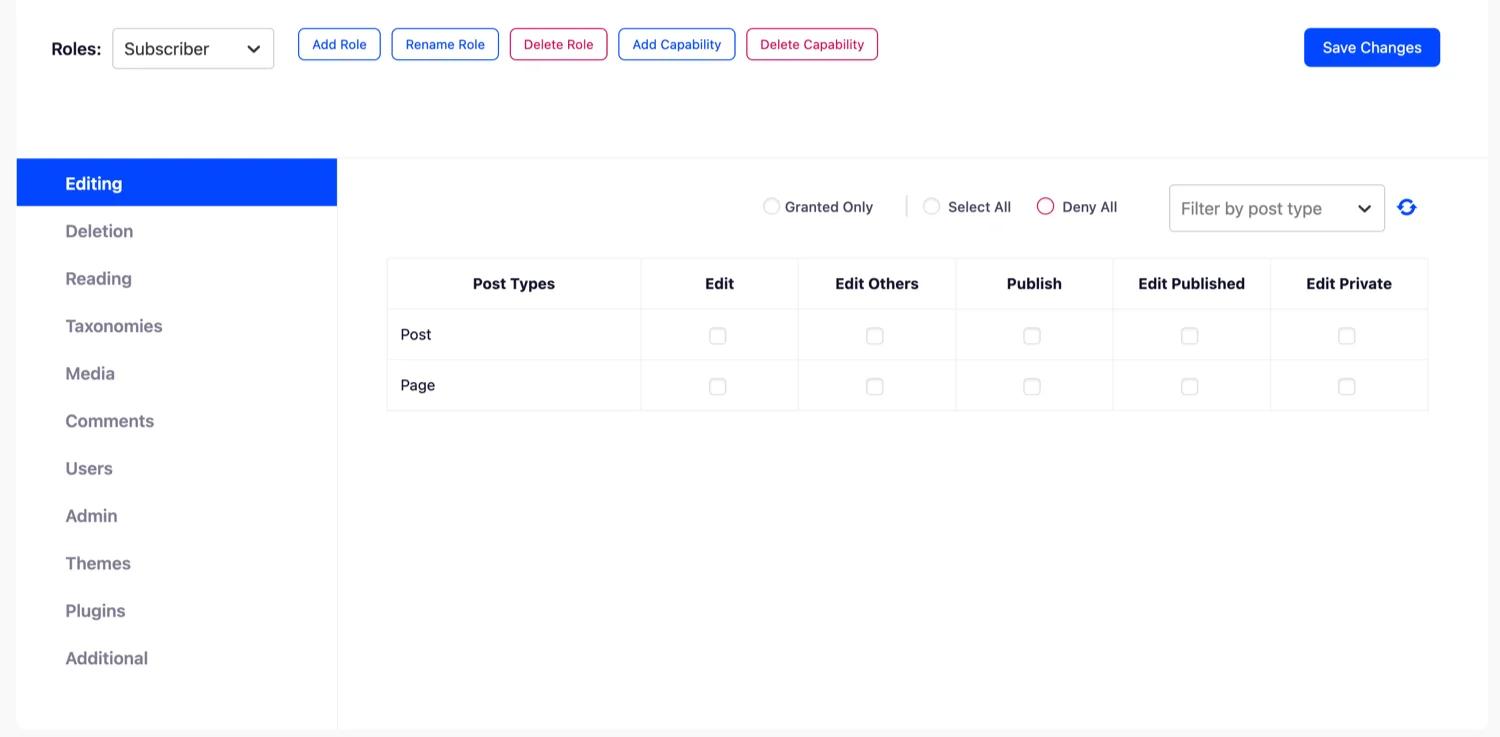
Control existing User Role permission
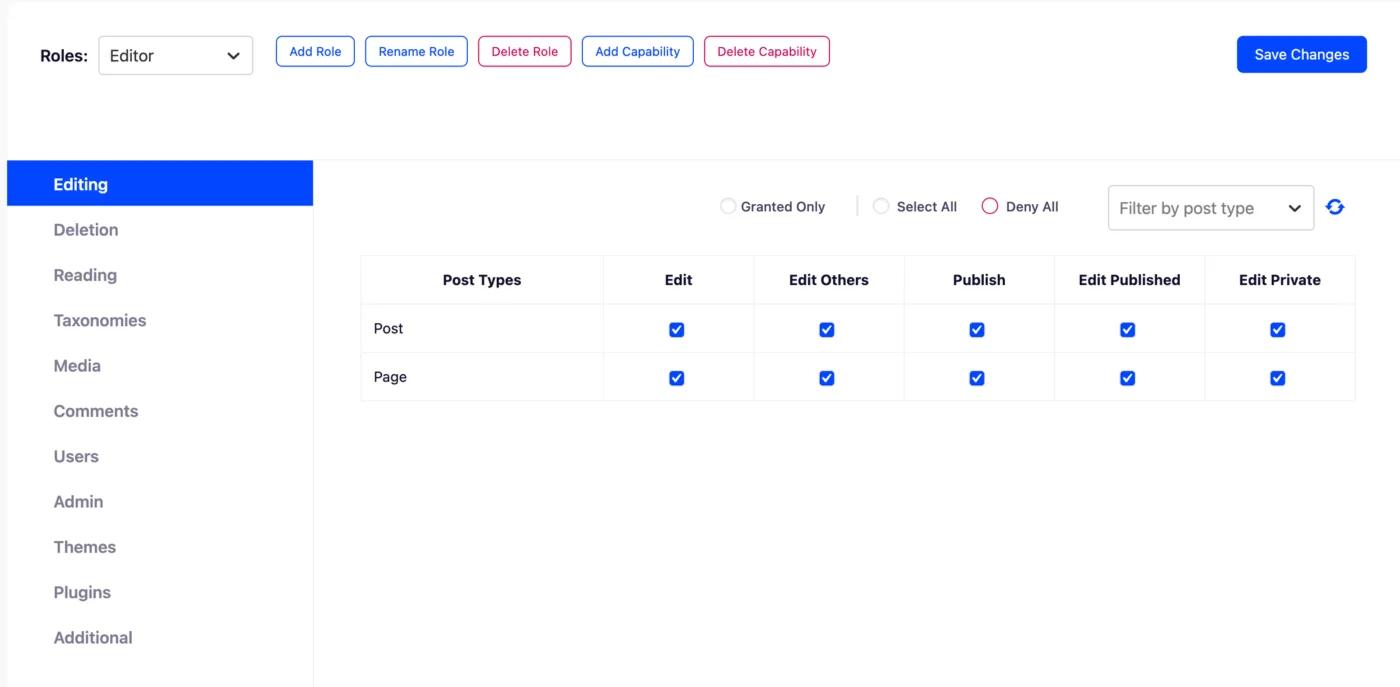
By default the selected user role is “Subscriber”. Just switch to any user role you want to modify. For Example; let’s select editor user role.
Now you can modify the permission for your editor user role and update the permission.
Add new Custom User Role
Just click on the “Add Role” button and a new popup will apper to provide new user role information.
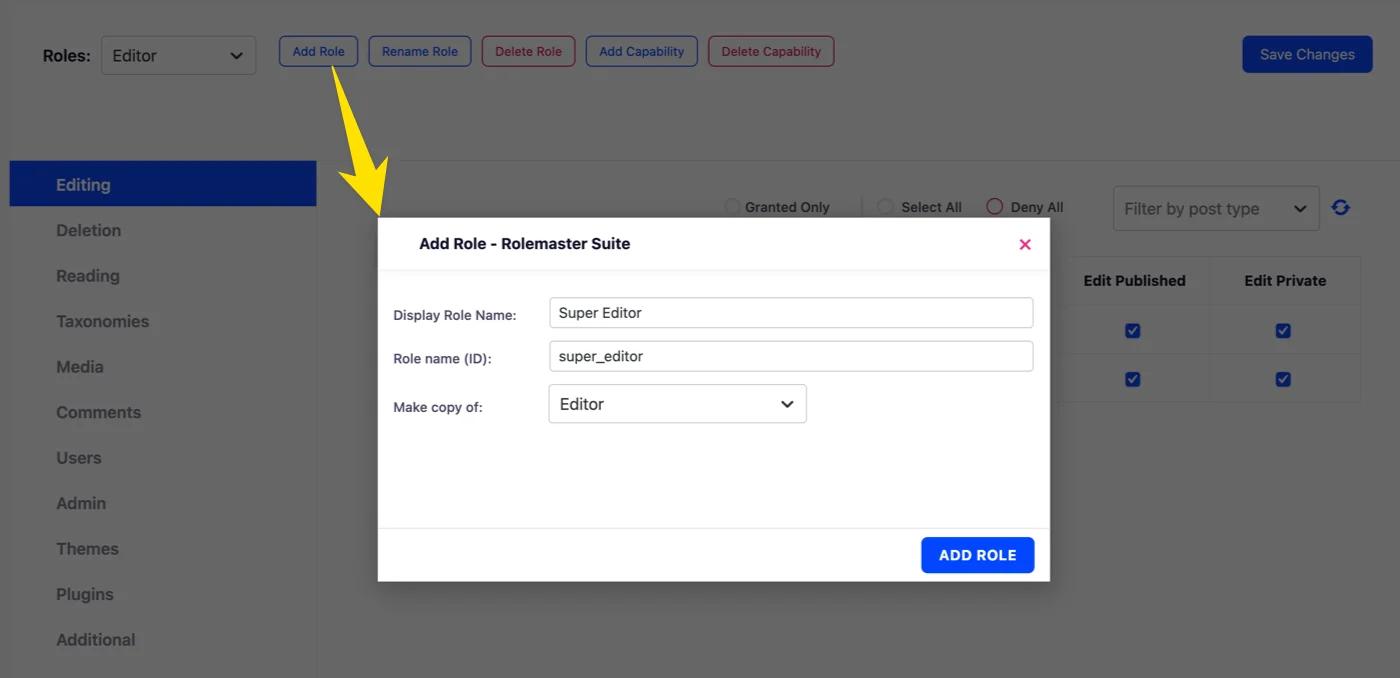
Here, you can define your User Role Name. It will automatically generate a ID based on your role name. [You can’t create user role with the same name.] Also, you can copy the capability from another user role. Just select your preferred user role from the “Make Copy of” option.
Rename User Role
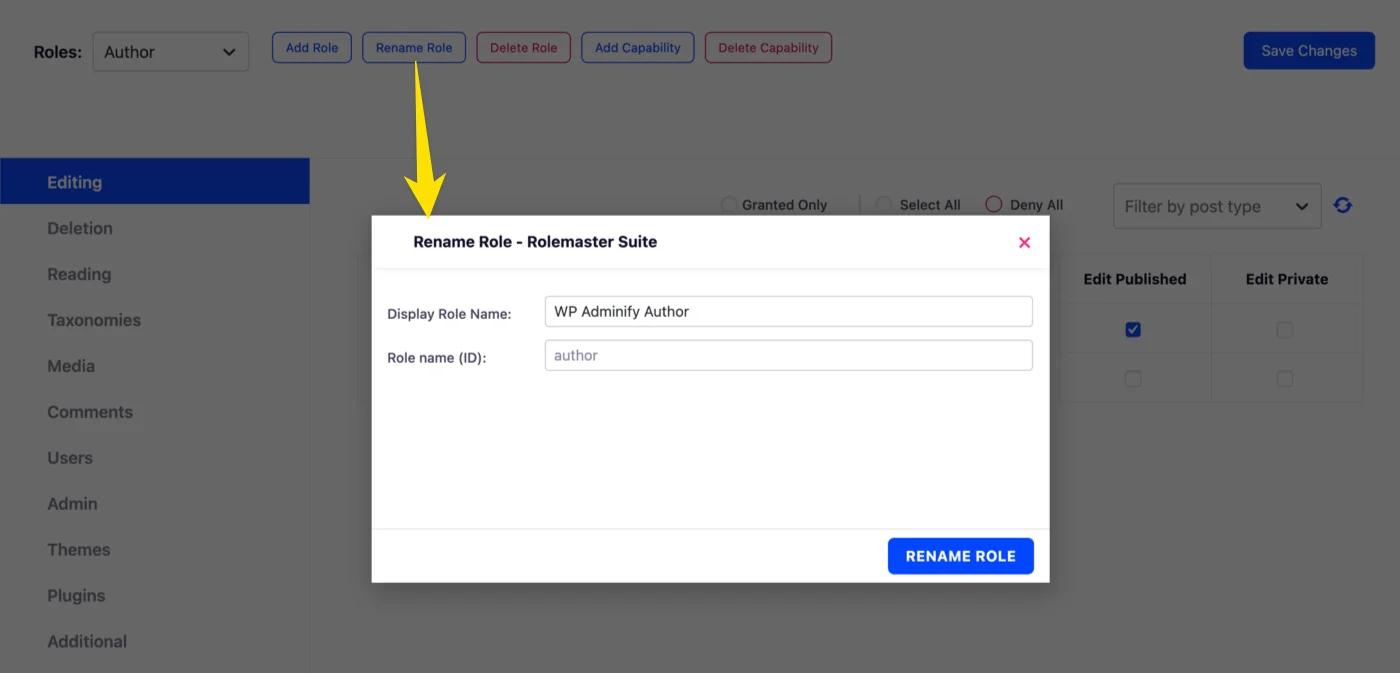
You can rename any default or custom user role. Make sure to select the user role that you like to rename and select on the “Rename Role” button.
Delete User Role
You can delete any custom user role that you have created using RoleMaster suite. Just click on the “Delete Role” button and select the user role that you like to delete.

How to delete RoleMaster Suite?
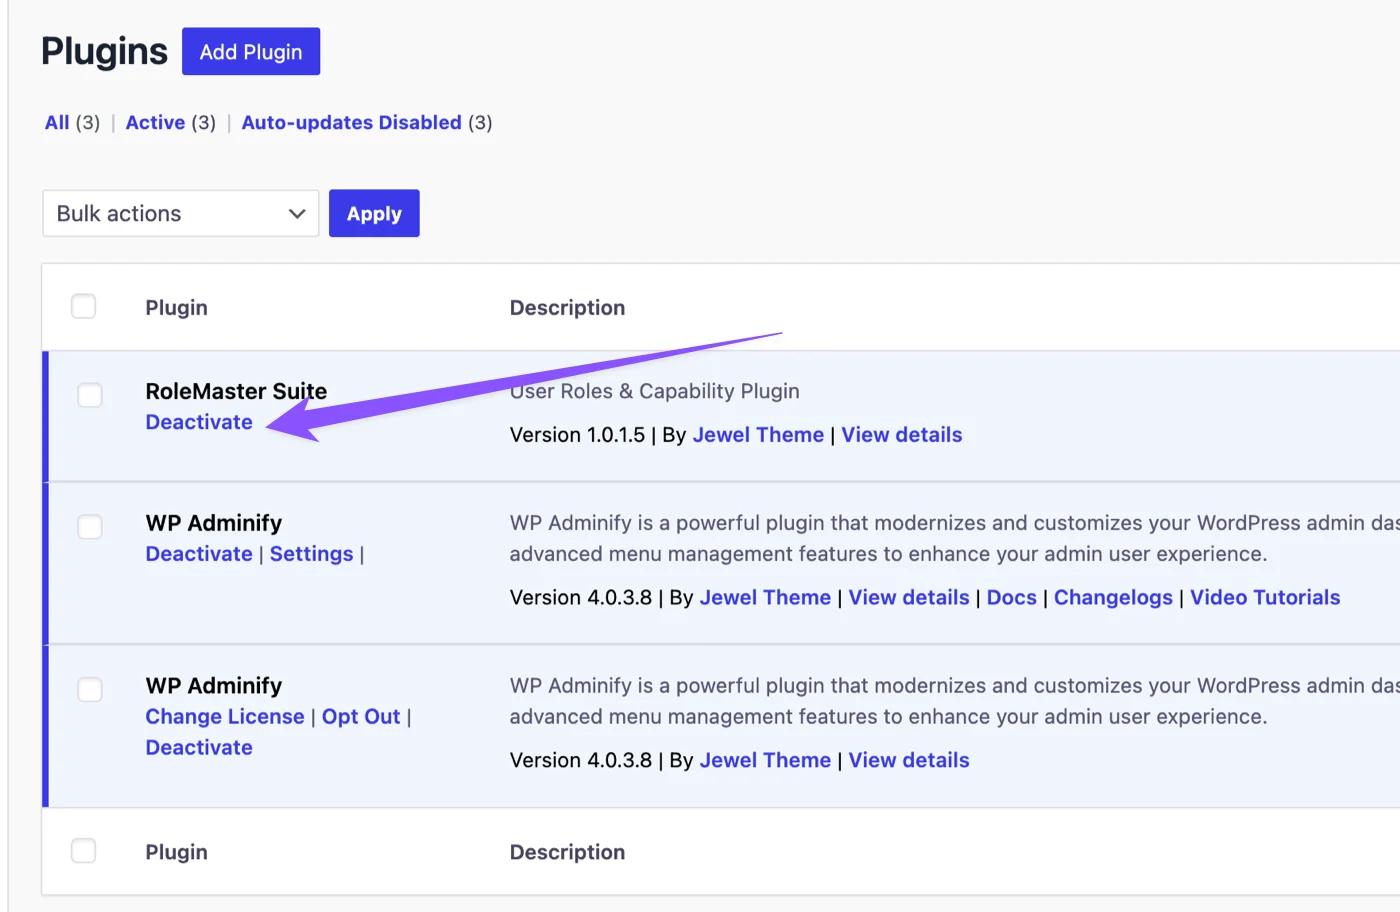
Just navigate to your installed plugins list and look for the RoleMaster Suite plugin. Deactivating the plugin will remove all functionality of RoleMaster Suite plugin.
Didn’t find what you were looking for? Get in touch!
Updated on October 2, 2024
Was this helpful to you?