
How to Customize WordPress Login Page with Loginfy?
You can customize WordPress login page with loginfy. There are different elements and settings, but don’t worry. We will show them all, so you won’t have any problems using loginfy.
How to Customize WordPress Login Page Template
First, go to WP Adminify > Login Customizer > Templates from your WordPress dashboard. You’ll see all the pre-made templates from Loginfy. Simply click one template to select.
Clicking a template will display a live view of the login page. So, you won’t face any trouble seeing the template in live view. Once you’re satisfied, you can apply the template by clicking the “Publish” button.
How to Customize WordPress Login Page Logo
First, go to WP Adminify > Login Customizer > Logo from your WordPress dashboard. You’ll see all the available options to customize the logo.
First you can enable/disable your logo. In the “Display Logo?” option you can use the toggle button to enable or disable login page logo.
Then you can choose which type of logo you want to add in the “Logo Type” section.
- Text (you can change the text in the “Text Logo” section, and add links in “Logo Link” section.)
- Image (you can upload the logo in the “Logo Image” section, and add links in the “Logo Link” section.)
- Image & Text (you get both options from the text and image section)
- None (Remove any text or image as a logo)
Also, you can adjust Height / Width for text, image and both. Also, for the Text, you can change font size, style and more in the “Title Typography” section.
In the “Login Page Title” section you can change the title of the login page. You can also adjust the top/bottom/left/right padding in the “Padding” section.
Don’t forget to hit the publish button after you’re done with your customization.
How to Customize WordPress Login Page Background
First, go to WP Adminify > Login Customizer > Background from your WordPress dashboard. You’ll see the options to customize the background of your WordPress login page.
You can adjust the background by:
- Color
- Image
- Video
- Slideshow
You can upload an image to set it as background. Also, you get regular color palettes, gradient color options and Overlay color options for your login background page.
Don’t forget to hit the publish button after you’re done with your customization.
How to Customize WordPress Login Page Layout
First, go to WP Adminify > Login Customizer > Layout from your WordPress dashboard. You’ll see the options to customize the layout of your WordPress login page.
Here’s what you can customize:
- Layout Type (Choose between a single or double-column layout)
- Column Alignment (Arrange multi columns in left-right, right-left, top-bottom, or bottom-top format)
- Horizontal/Vertical Alignment (Adjust the form content left / right/ center aligned)
- Column Background (Set color / image as background for each column. Control the position, size, repeat, and blend mode for the image.)
- Skew Effect (Apply a skewed background layout.)
Don’t forget to hit the publish button after you’re done with your customization.
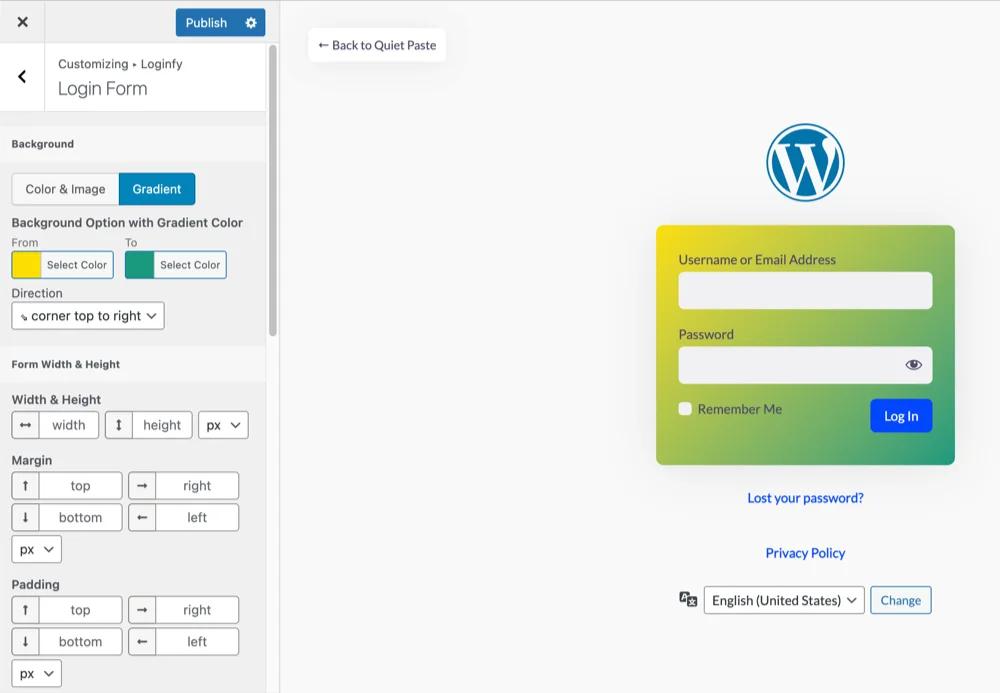
How to Customize WordPress Login Form Design
First, go to WP Adminify > Login Customizer > Login Form from your WordPress dashboard. You’ll see the options to customize the login form design.
Here’s what you can customize:
- Form Background (Set a color, gradient color, or image)
- Width & Height (Adjust the height and width of the login form)
- Margin & Padding (Adjust the margin and padding of the login form)
- Border & Border Radius (Select differents border styles, colors, and adjust the border radius for login form)
- Box Shadow (Add shadow effect with on inset and outline selection)
Don’t forget to hit the publish button after you’re done with your customization.
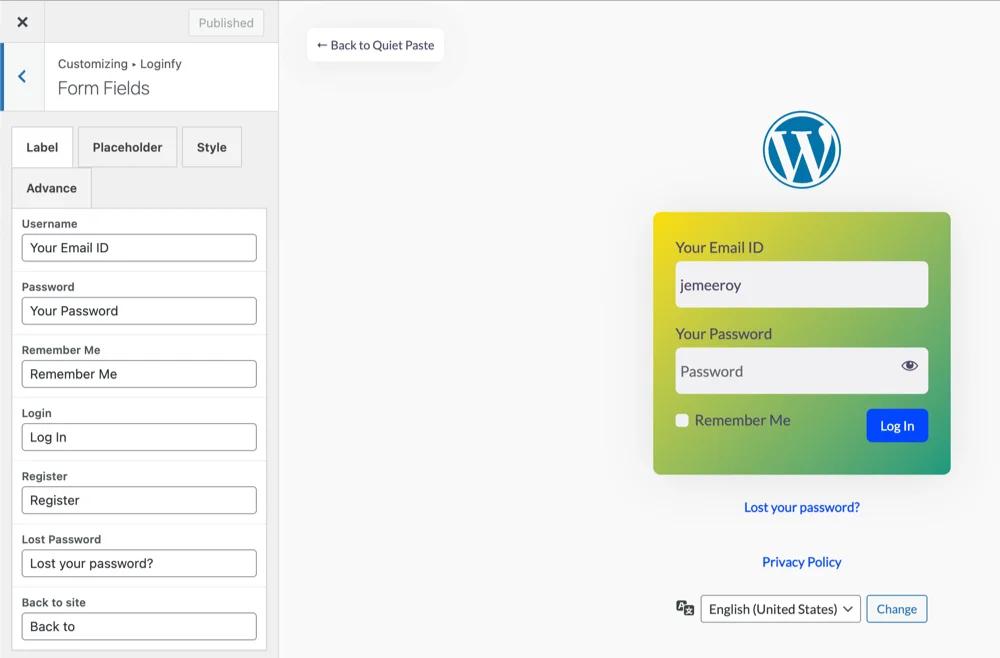
How to Customize WordPress Login Form Field
First, go to WP Adminify > Login Customizer > Form Fields from your WordPress dashboard. You’ll see the options to customize the login form field.
Here’s what you can customize:
Change the text labels of:
- Username
- Password
- Remember Me
- Login
- Register
- Lost Password
- Back to site
Change the placeholder texts for:
- Username
- Password
Field Style: Adjust font size, input height, background, label colors, and adjust text colors.
Advanced Customization: Advanced padding, margin, shadows, and color settings.
Don’t forget to hit the publish button after you’re done with your customization.
How to Customize WordPress Login Form Button
First, go to WP Adminify > Login Customizer > Button from your WordPress dashboard. You’ll see the options to customize the login form button.
Here’s what you can customize:
- Button Width & Height (Adjust the height and width of the button)
- Button (Customize the button color, background color, text shadow for normal and hovered)
- Advanced (Adjust margin, padding, border, border radius of the button)
Don’t forget to hit the publish button after you’re done with your customization.
How to Customize WordPress Login Form Fonts with Google Font
First, go to WP Adminify > Login Customizer > Google Font from your WordPress dashboard.
Here’s what you can customize from the typography settings:
- Font Family
- Font Style
- Text Align
- Text Transform
- Text Decoration
- Font Size
- Line Height
- Letter Spacing
- Word Spacing
- Font Color
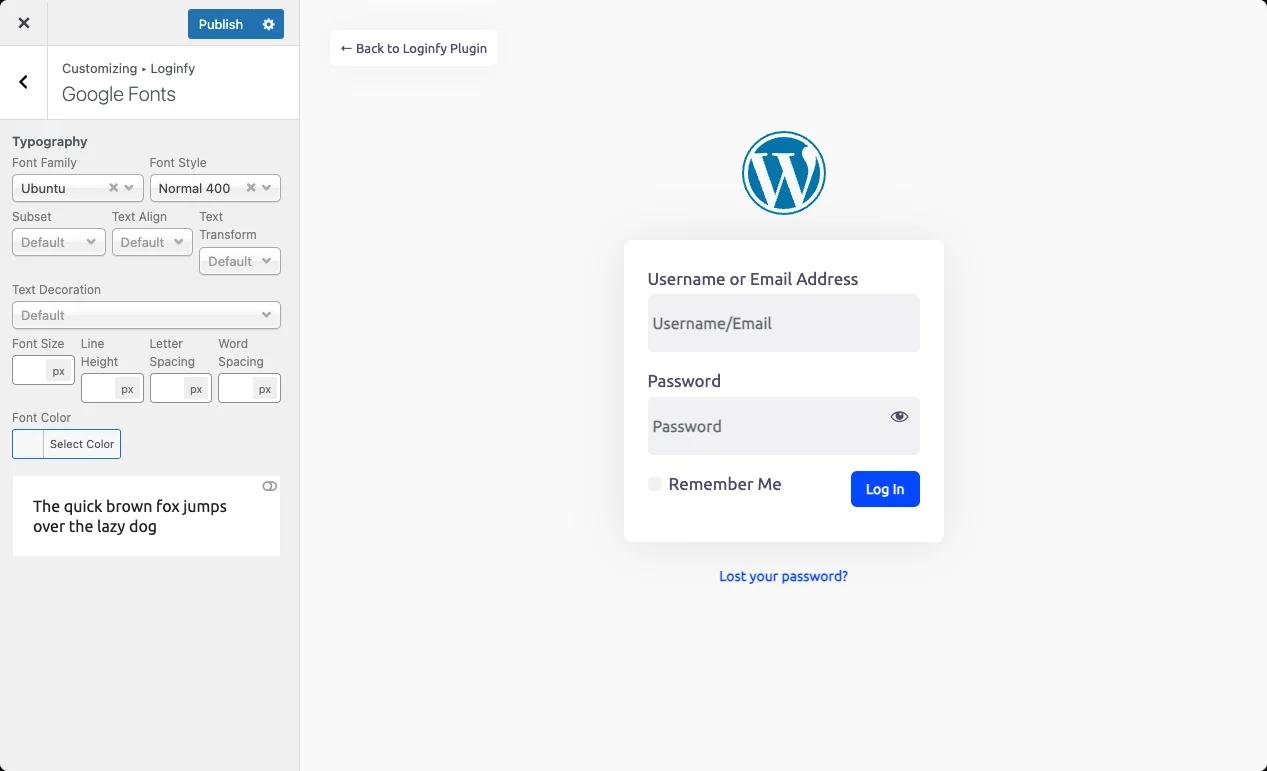
These settings are too basic and do exactly what it says so we’re not going to discuss them in detail. Don’t forget to hit the publish button after you’re done with your customization.
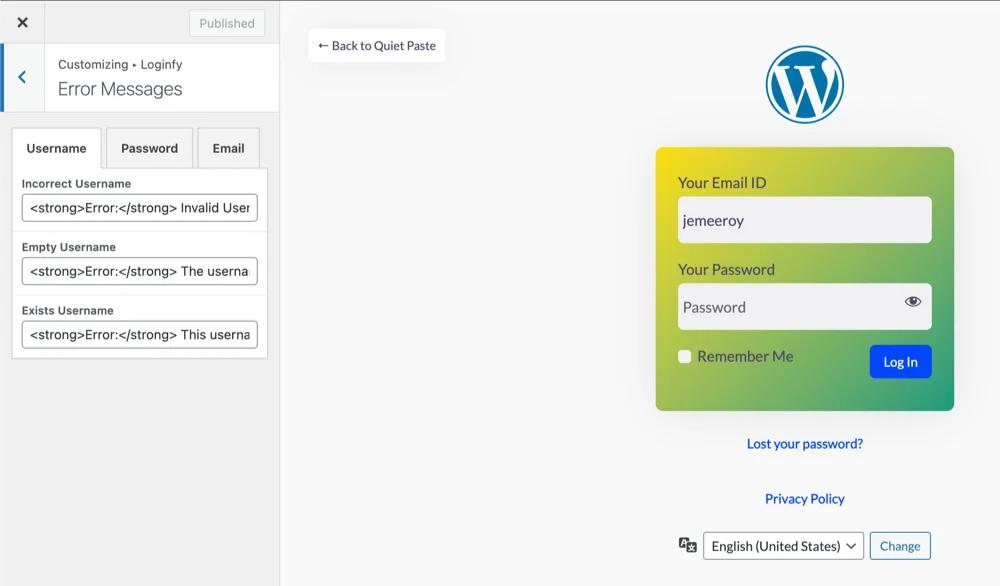
How to Customize WordPress Login Page Error Messages
First, go to WP Adminify > Login Customizer > Error Messages from your WordPress dashboard.
Here’s what texts you can customize for the error messages:
Username:
- Incorrect Username
- Empty Username
- Exists Username
Password:
- Incorrect Password
- Empty Password
- Forget Password
Email:
- Invalid Email
- Empty Email
- Exists Email
These settings are too basic and do exactly what it says so we’re not going to discuss them in detail. Don’t forget to hit the publish button after you’re done with your customization.
How to Add Custom CSS/JS in WordPress Login Form
First, go to WP Adminify > Login Customizer > Custom CSS & JS from your WordPress dashboard.
Now, it is very basic to understand that, in the CSS Field you can add your custom CSS and in the JS field you can add your custom Javascript.
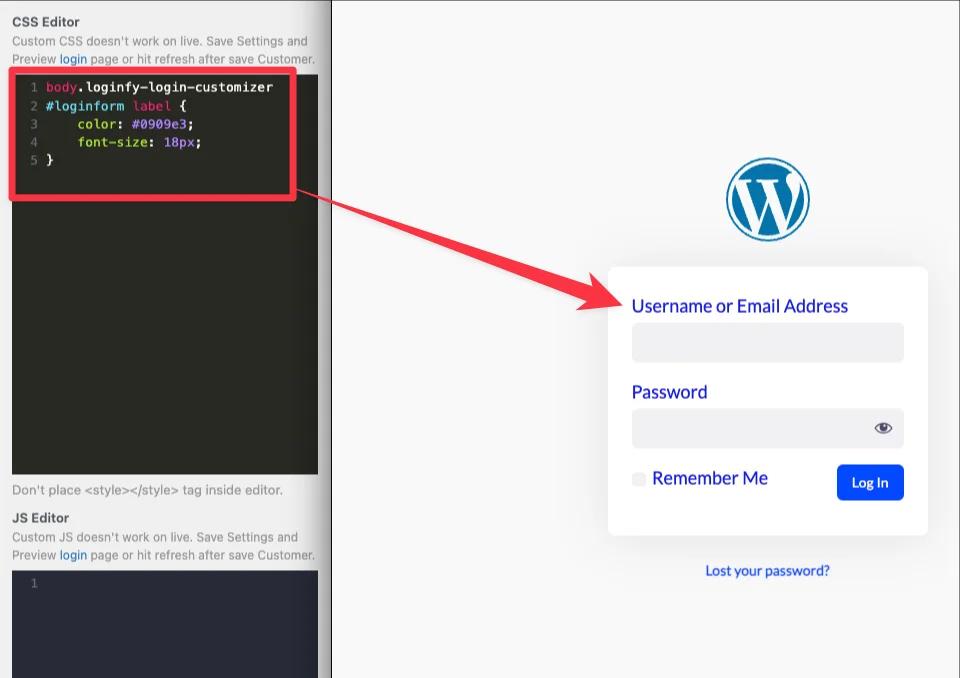
These settings are too basic and do exactly what it says so we’re not going to discuss them in detail. Don’t forget to hit the publish button after you’re done with your customization.
How to Enable/Disable Credits in WordPress Login Form
First, go to WP Adminify > Login Customizer > Credits from your WordPress dashboard.
You can enable/disable the credit section with the “Enable Credits?” toggle button. Also, you can change the text color and position of the credits when enabled.
Don’t forget to hit the publish button after you’re done with your customization.
How to Customize WordPress Login Form Additional Settings
First, go to WP Adminify > Login Customizer > Others from your WordPress dashboard.
Here’s what you can customize:
- Hide Remember Me?
- Disable Login shake?
- Disable Lost Password?
- Disable "Back to Website" ?
- Disable "Privacy Policy" ?
- Disable "Language Switcher" ?
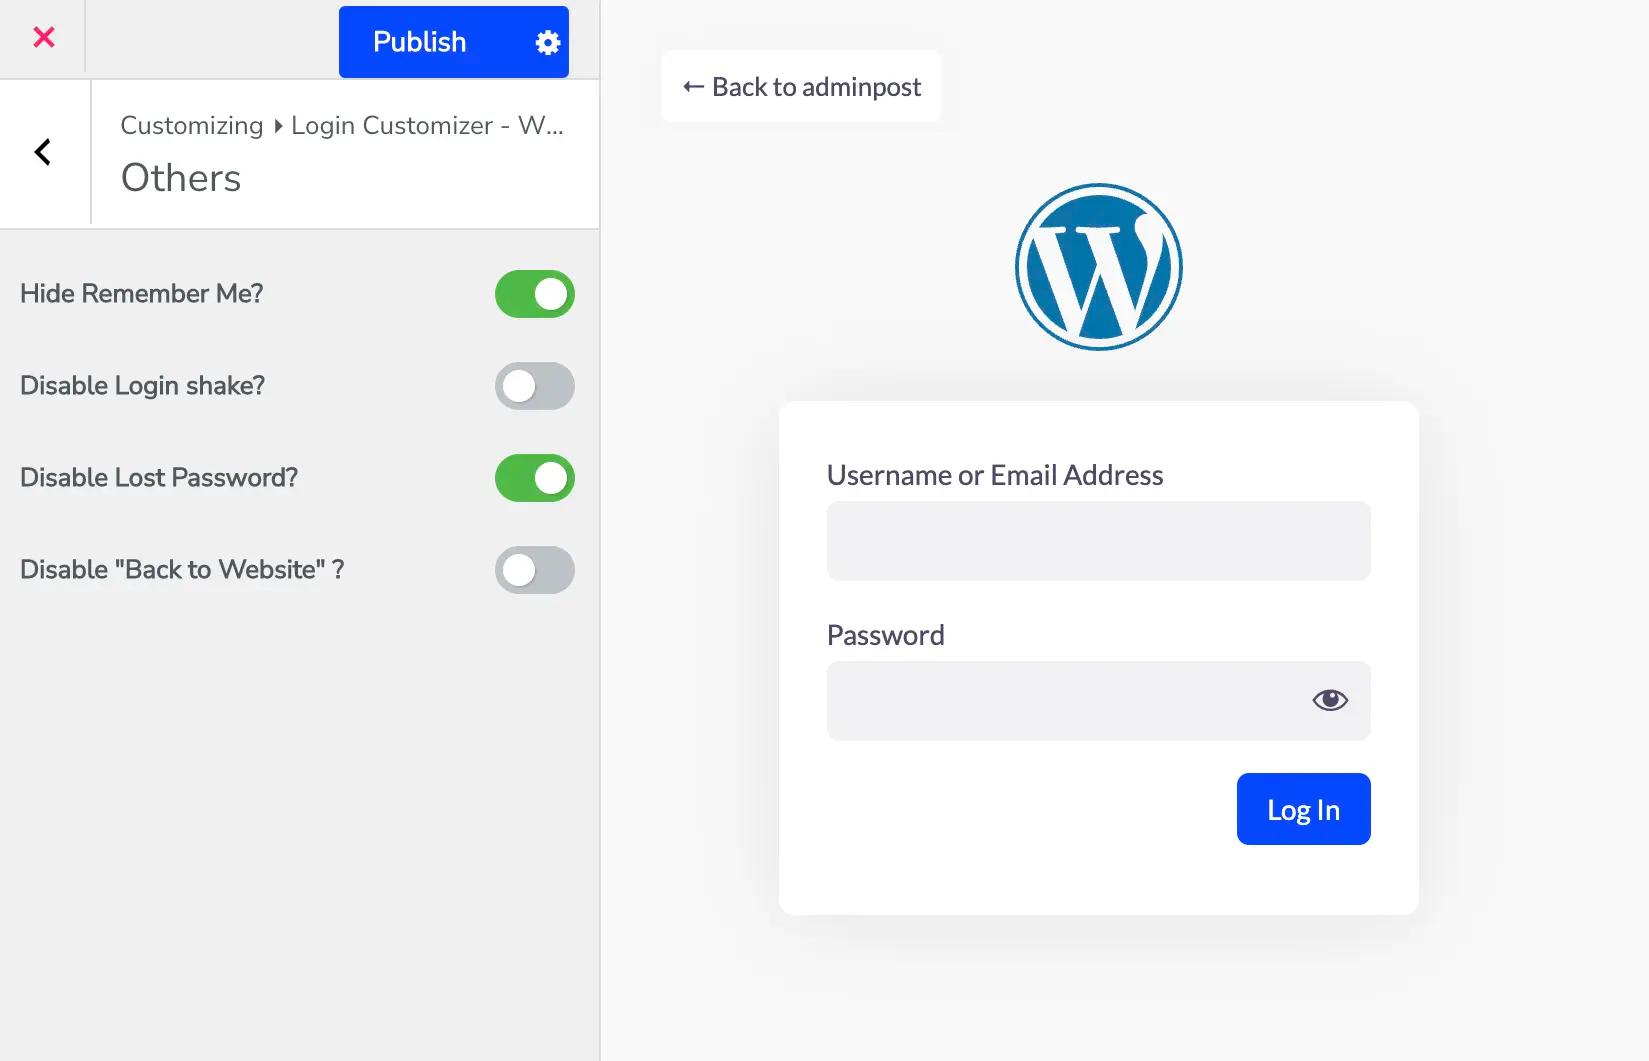
Simply use the toggle beside the options to enable/disable it.
Don’t forget to hit the publish button after you’re done with your customization.
Didn’t find what you were looking for? Get in touch!
Updated on October 2, 2024
Was this helpful to you?