
How to track Dashboard Activity Logs in WordPress?
You can track IP Address, Author Name, Date, Actions and much more information from the activity logs option.
Activity Logs Data default: 30 days
If you are installing the Activity logs for the first time, then you will notice blank data, just like the following screenshot. First of all, increase or decrease the default data store duration in days.

After setting up the day's value, you are done.
[Pro Tip: Hide the “Activity logs” option for other administrators by using our Admin Menu Editor feature ]
Start exploring data
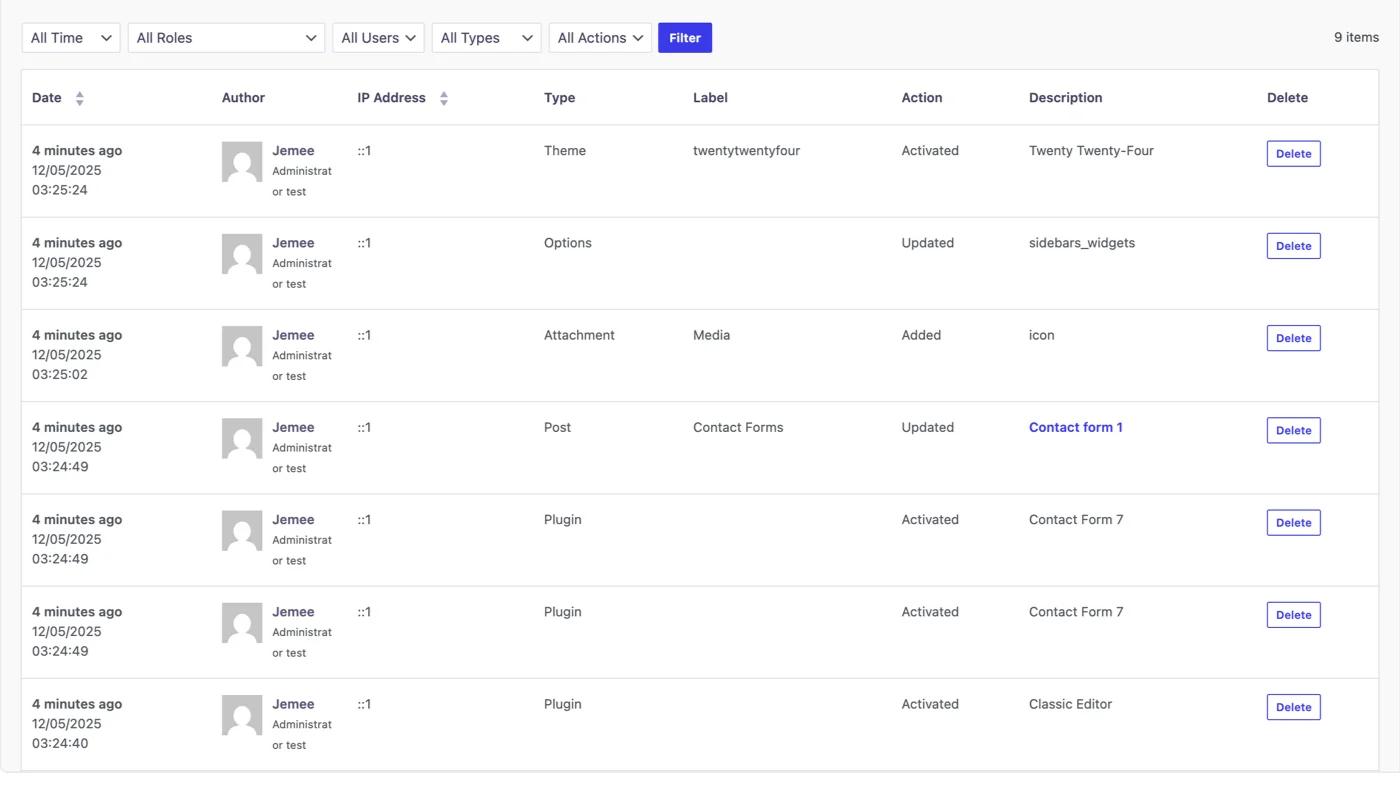
To test the activity logs, you can install any plugins or themes or upload media or modify any posts too. Here is a screenshot after a few minutes of Activity logs activation.
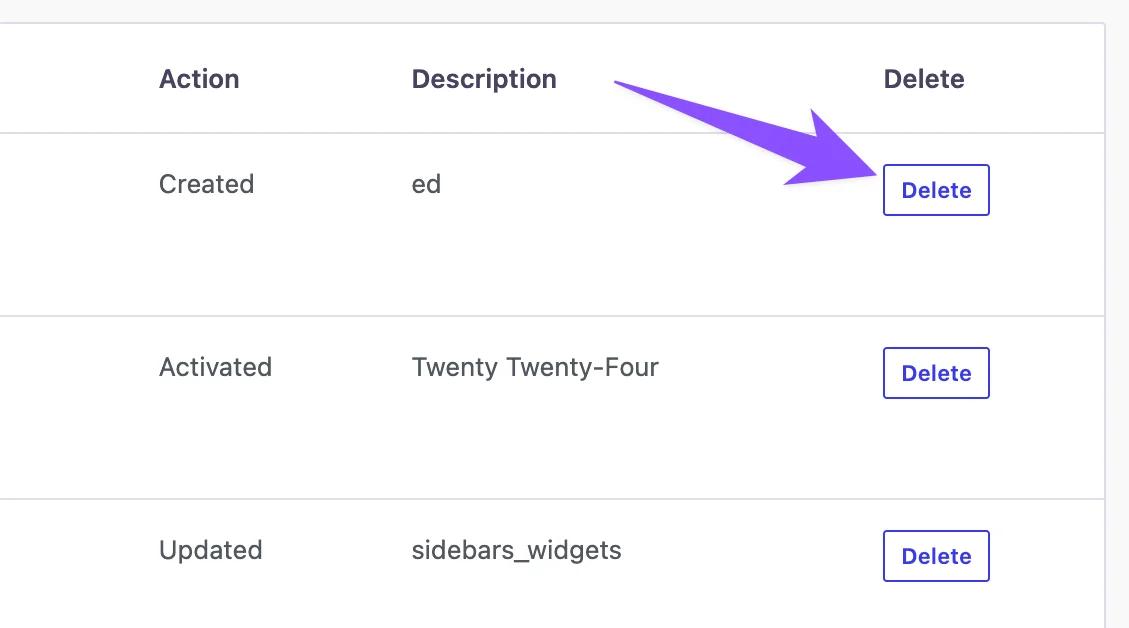
Delete Specific Activity Logs
Take a look at the right side of your activity logs and you will notice a delete button for each logs. Just click on the delete button and it will remove that specific activity from your site. Note: You will never able to get back the activity, it will be permanently removed from your dashboard.
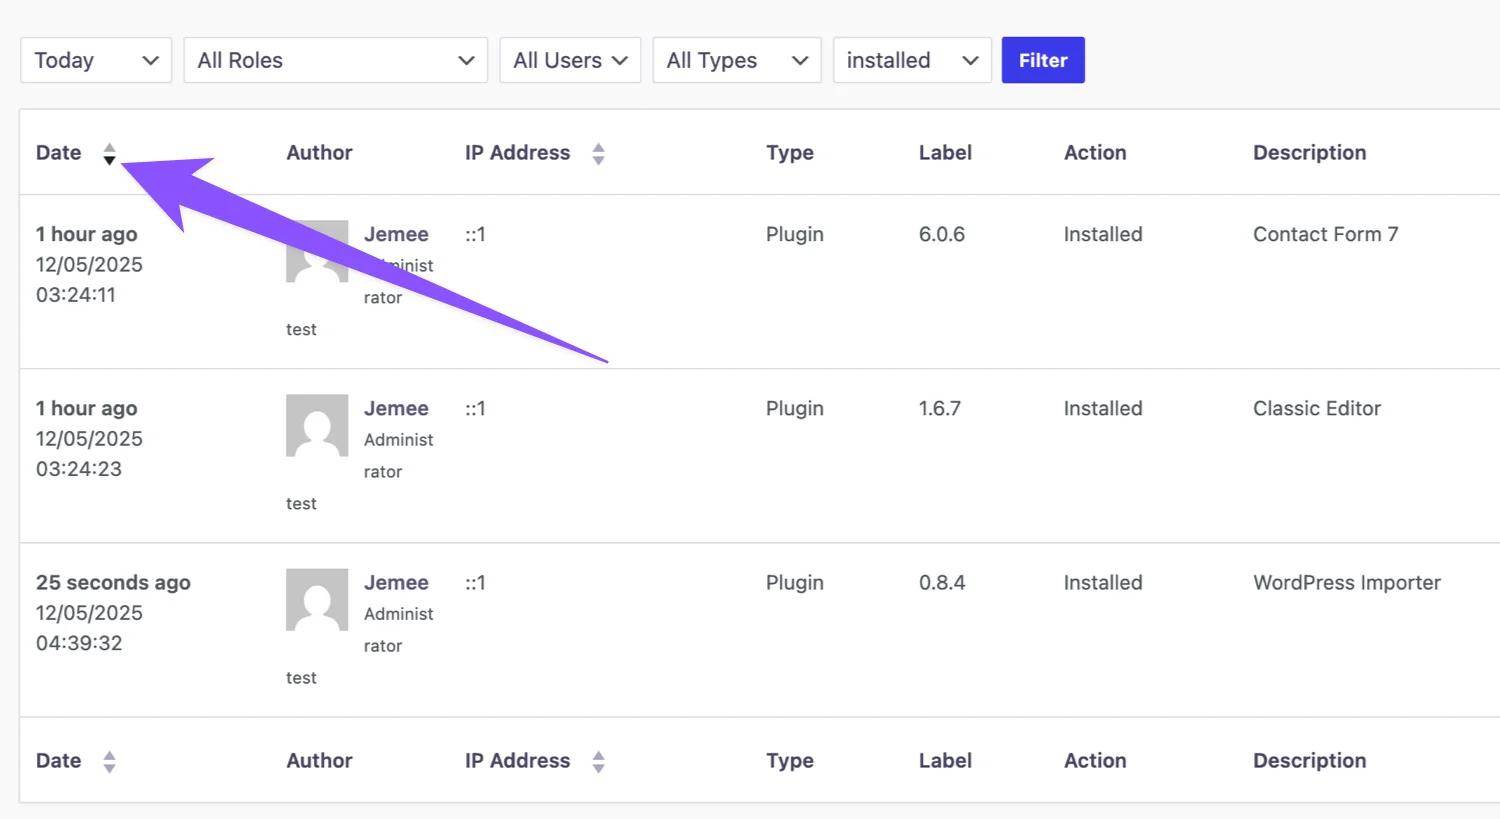
Filter Activity Logs
At the top position, there are different types of filter options available for Time, Role, User, Type, and Actions. After selecting your filter types properly just click on the filter button. You will get specific activity logs based on your filter now.

Sort Activity logs via Date or IP Address
You can easily sort ascending or descending by clicking on the up-down icon besides date and ip address.
Didn’t find what you were looking for? Get in touch!
Updated on October 2, 2024
Was this helpful to you?