
WP Adminify
WordPress Admin Menu Editor by WP Adminify
WP Adminify offers an intuitive admin menu editor for the WordPress Dashboard. This plugin allows you to reorder, rename, change URL, change icon, hide specific menu items based on user role or name and many more features.
Let’s break down each step one by one -
Admin Menu Editor
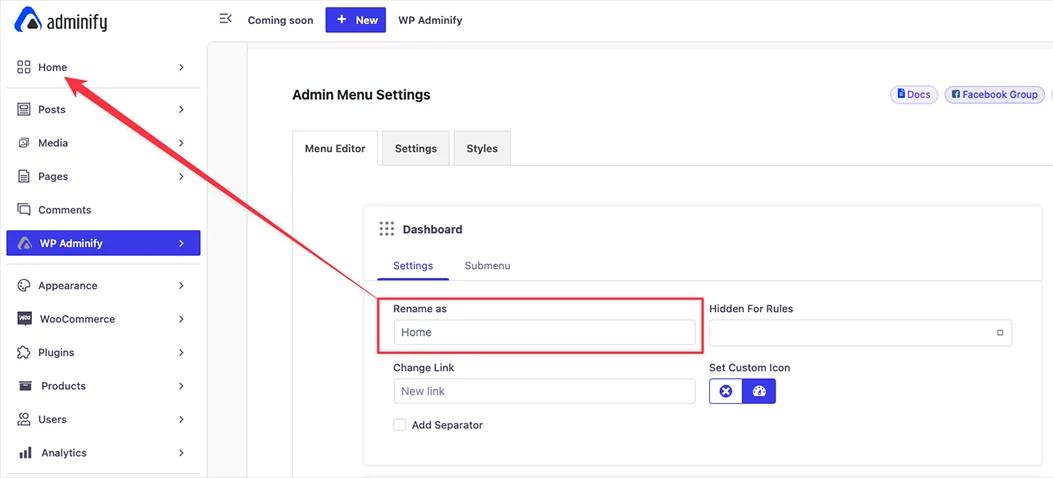
Log in to your WordPress Dashboard. Navigate to WP Adminify > Admin Menu option. You will notice an option panel like the following screenshot.
Reorder Admin Menu items
You can see the 9-dot icon beside each menu item. Click on this icon, drag your mouse anywhere, and drop the selected item.
Finally save the settings and reload to preview the changes.
Rename Admin Menu items
Click on any menu items that you lwould ike to rename. It will expand with some options and the first option is “Rename as” Type whatever you like to call the selected menu items and save the settings.
Change URL for Admin Menu
Under the rename option, there is an option called “Change Link”. You can input any internal or external URL in your menu items.
Also, there is an option called “New Window?”. It refers to whether you like to open the link in a new tab or not.
Hide Admin Menu Items for a specific User Role or User
You can hide individual menu items for specific user roles except Administrator, but with the help of username selection, you can hide menu items for specific Administrators too.
This is a multiple selection option. You can choose multiple usernames and user roles to hide any menu items. For Example, I have hidden the Page Menu for Editor in the following video.
Just like this way, you can hide any menu items for a specific user name too.
Select the Custom menu icon
WP Adminify offers Default Dashicons, Simple line icons and Custom icons option. Using the custom icon you can upload any icon in image format or SVG format and save it for your menu icons.
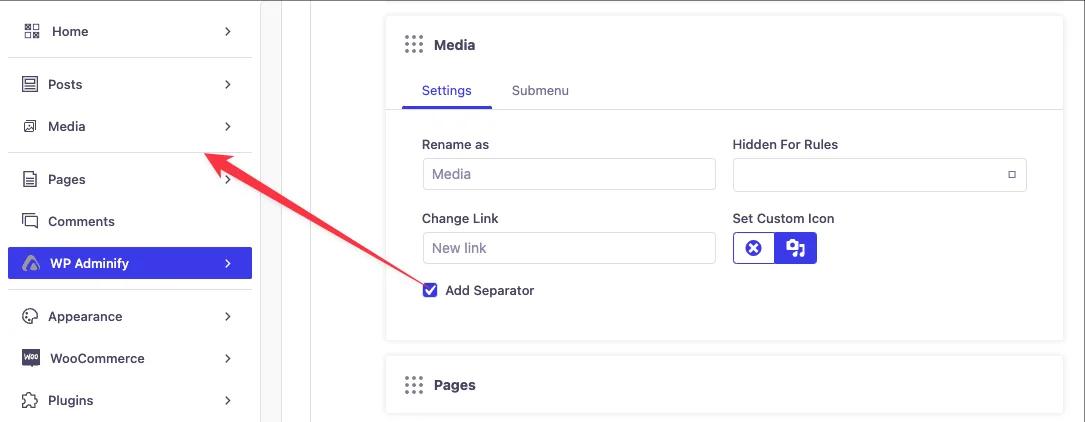
Add Separator in Admin Menu
Seperator is a visual divider between menu items. You can add seperator by for each menu items for better organization. Just check the box for “Add Seperator” option and save the settings.
Submenu Item customization
We have discussed all basic options for primary menu items, now take a close look and you will get “Submenu” option available besided the primary menu settings. All submenu will be available under individual menu items.
You can do everything like main menu customization for submenu items except the icon and seperator customization.
Add Custom Admin menu items
This works perfectly for both main menu and sub menu items.
To add a custom menu item as a main menu item, just scroll down until bottom of the Menu Editor option page. You will notice an option called “Add Item”.
When you click on add item, you will get the option to define menu item name, URL, Icon, Hidden for rules, Icon, Separator, and submenu options.
Just input all the necessary values properly and save the changes.
You can add submenu items as many as you need.
Didn’t find what you were looking for? Get in touch!
Updated on September 23, 2024
Was this helpful to you?