
WP Adminify
How To Redirect Users After Login and Logout in WordPress?
With WP Adminify, you can redirect your users after they login or logout. Here’s how to do it.
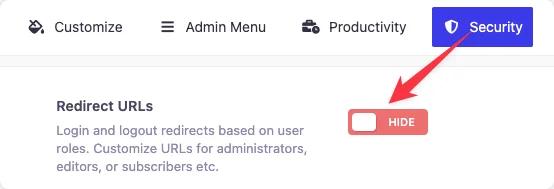
Step 1: Access Redirect URLs Settings
First, go to the following path: WP Adminify > Security. Now, find the setting labeled as “Redirect URLs” and enable it.
Step 2: How to Redirect Users After Login in WordPress
In the “Roles Redirect” tab, you will find the option called “Redirect Rules Type”. Here, select the “Login Redirect” tab.
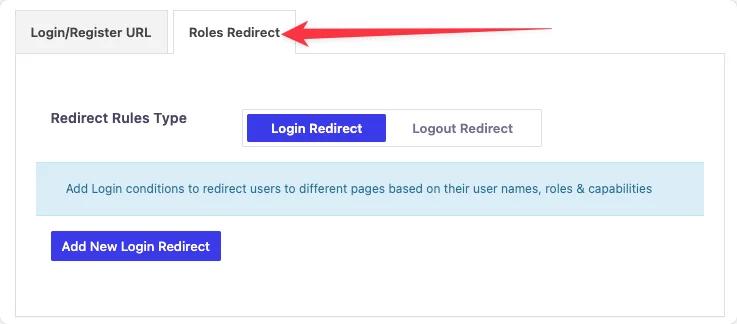
Now, click the “Add New Login Redirect” button. A new box field will appear with multiple settings.
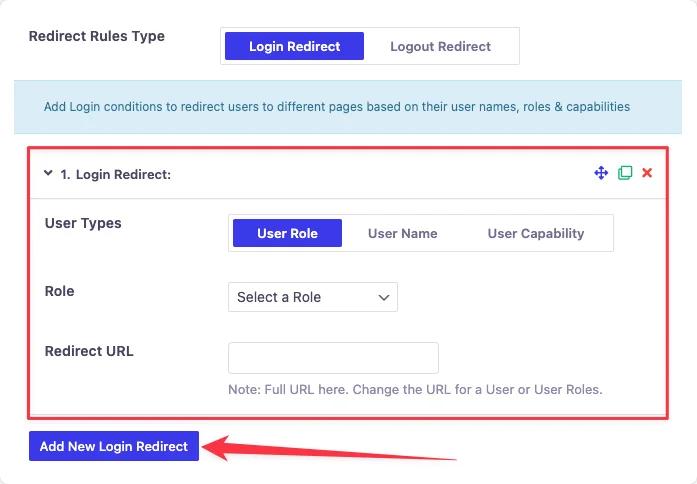
You can select your users from the “User Types”.
- User Role
- User Name
- User Capability
For each option you get a field to select Role / User / Capability.
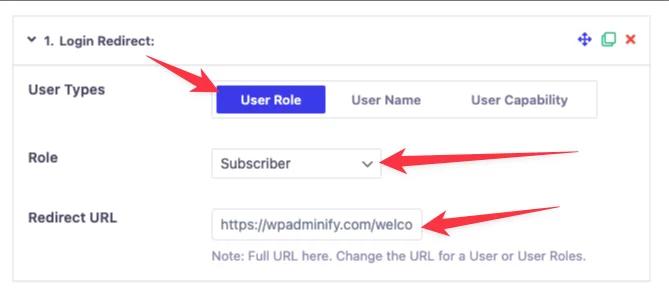
Then, add your redirection URL in the “Redirect URL” text box.
Note: You can add multiple redirection settings by clicking the “Add New Login Redirect” button.
After you’re done with the settings, click “Save Settings” to apply changes.
Step 3: How to Redirect Users After Logout in WordPress
The logout redirection is exactly the same as the login redirection. But, to help you we are going to tell you each step.
In the “Roles Redirect” tab, you will find the option called “Redirect Rules Type”. Here, select the “Logout Redirect” tab.
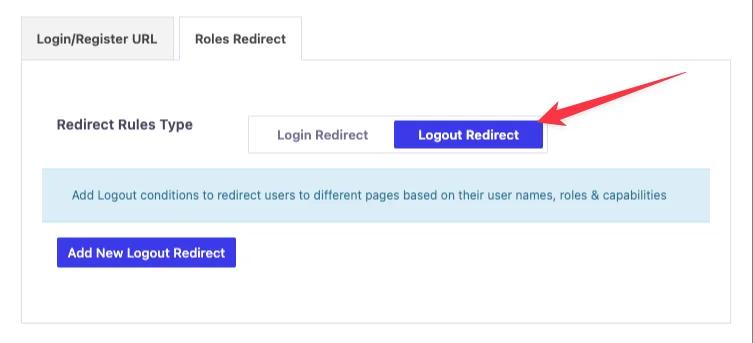
Now, click the “Add New Logout Redirect” button. A new box field will appear with multiple settings.
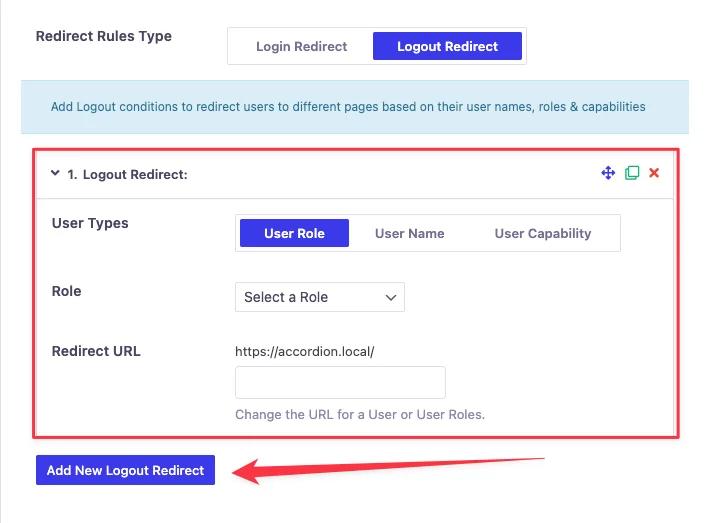
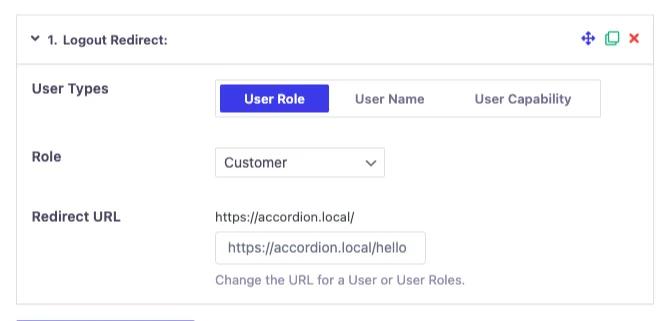
You can select your users from the “User Types”.
- User Role
- User Name
- User Capability
For each option you get a field to select Role / User / Capability.
Then, add your redirection URL in the “Redirect URL” text box.
Note: You can add multiple redirection settings by clicking the “Add New Logout Redirect” button.
After you’re done with the settings, click “Save Settings” to apply changes.
Didn’t find what you were looking for? Get in touch!
Updated on September 27, 2024
Was this helpful to you?