
WP Adminify
How to Change WordPress Login URLs of WordPress?
WP Adminify always takes security as a major concern. For this, you get the options to change WordPress Login URL and Admin Login URL. Here’s how to do it.
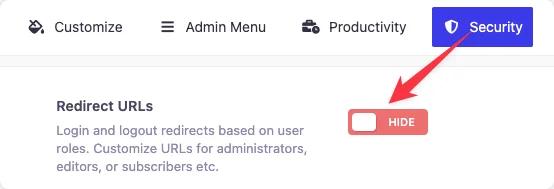
Step 1: How to Enable Redirect URLs
First, go to the following path: WP Adminify > Security. Now, find the setting labeled as “Redirect URLs” and enable it.
Step 2: How to Change Login URL of WordPress
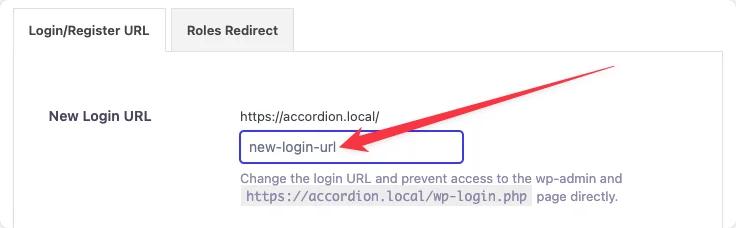
In the “Login/Register URL” tab, you will find the option to change Login URL.
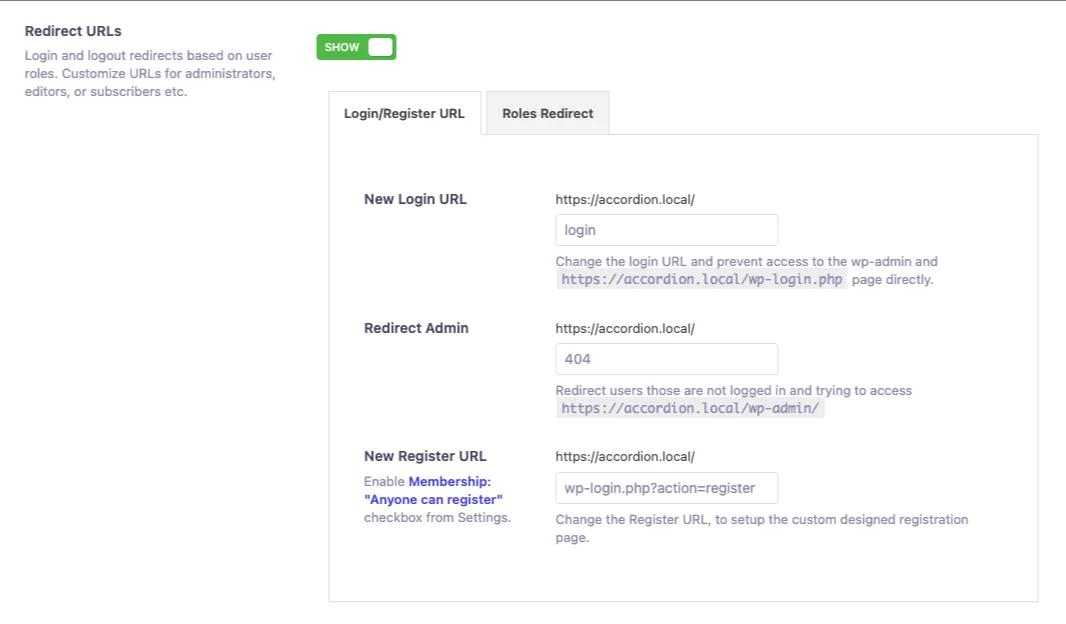
In the “New Login URL” textbox, type your desired URL. Then click “Save Settings” to apply changes.

Step 3: How to redirect wp-admin to custom URL
You can redirect all visitors who is trying to login your site via wp-admin to a specific landing page or homepage.
In the “Redirect Admin” textbox, type your desired URL. Then click “Save Settings” to apply changes.
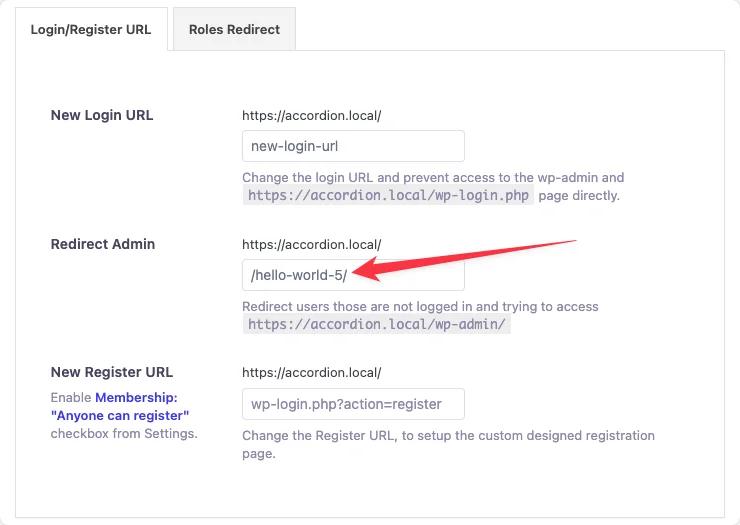
Save the settings and try to login your Dashboard via wp-admin and it will redirect you to the mentioned URL in "Redirect Admin".
Step 4: How to Change User Registration URL of WordPress
In the “Login/Register URL” tab, you will find the option to change the Registration URL.
In the “New Register URL” textbox, type your desired URL. Then click “Save Settings” to apply changes.
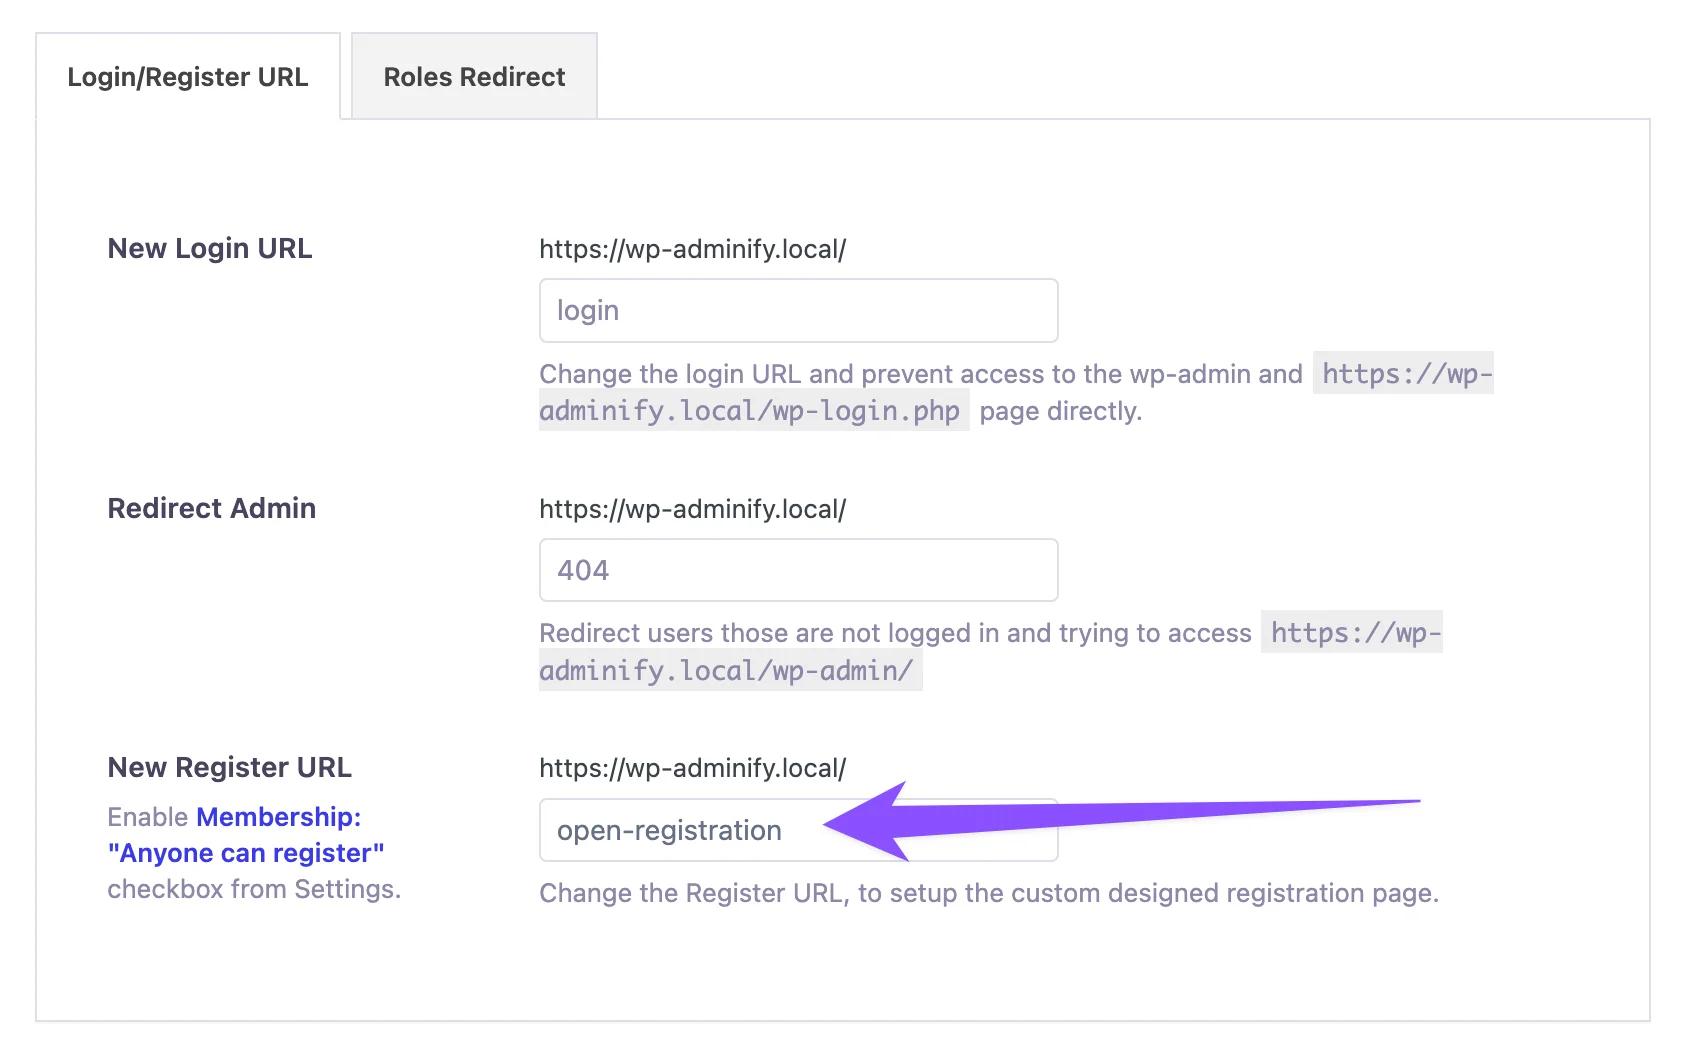
Note: You need to enable the "Anyone can register" option from WordPress settings. Here’s the path: Settings > General > Membership.
Important Notice:
Do not forget the new URL after changes, otherwise you won’t be able to log in.
For security reasons, it is often recommended to change the default WordPress login URL. WP Adminify offers the Redirect URLs feature, allowing you to customize your WordPress login, registration, and admin URLs to make your website more secure. Here’s how you can change the login URL using this feature.
1. Access the Redirect URLs Settings
To begin changing the WordPress login URL:
- From your WordPress dashboard, navigate to WP Adminify > Security > Redirect URLs.
2. Enable the Redirect URLs Feature
Make sure the feature is enabled by toggling the Show button at the top of the page. This will allow you to access and modify the login and register URL settings.
3. How to customize the WordPress Register URL
Under the Login/Register URL tab:
- Locate the New Login URL field.
- Enter your desired login URL slug, for example, instead of using the default
wp-login.php, you could change it to something likelogin.
For instance, if you set the slug to login, the new login URL will look like this:
https://yourdomain.com/login
4. Save Changes
After you’ve customized the login URL and any other settings, scroll down and click Save Changes to apply the new URL.
5. Test the New Login URL
To verify the change, log out of your WordPress dashboard and try to log in using the new URL you configured (e.g., yourdomain.com/login). The old wp-login.php URL should no longer be accessible.
Didn’t find what you were looking for? Get in touch!
Updated on September 26, 2024
Was this helpful to you?