
WP Adminify
Enable Media Replace in WordPress
Media replace feature will available in WP Adminify from 4.1.13 version, scheduled to role out in 29th April 2026.
The Media Replace feature in WP Adminify swaps a file in your Media Library for a new version while keeping the attachment ID, filename, publish date, and URL the same. Anything that already references the file (posts, page builders, external links) keeps working without re-attaching it.
Wrong logo uploaded, PDF brochure needs an update, typo in a screenshot you've already embedded in 30 posts? Replace the file in place. Every replacement is auto-backed up, so you can roll back step by step.
Requirements & Rules
⚠ File type must match. The new file needs the same MIME type as the original. A .jpg only swaps with another .jpg, never a .png or .webp. Same rule for PDFs, MP4s, and every other format.
| Original file | Allowed replacement | Not allowed |
|---|---|---|
| image_5.jpg | .jpg / .jpeg | .png, .webp, .svg |
| logo.png | .png | .jpg, .svg |
| brochure.pdf | .docx, .jpg | |
| video.mp4 | .mp4 | .mov, .webm |
Why same type? The URL, MIME type, and metadata (dimensions, duration) all carry over from the original. Allowing different types would break the URL extension and any code that expects a specific format.
Enable Media Replace
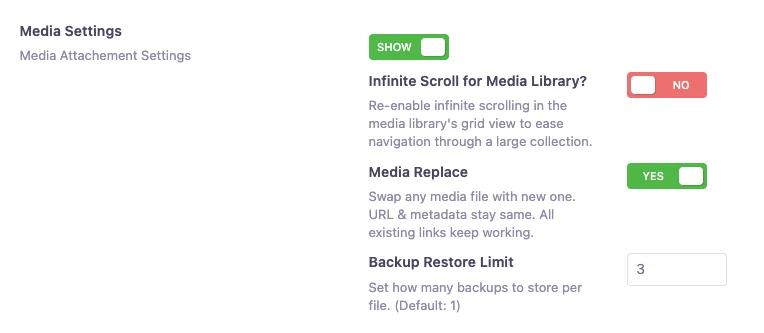
Before jumping to the action. Make sure to enable the media replace feature from WP Adminify → Productivity → Media Settings option.
By default you can undo replacement one time. But if you prefer to store more media files backup then make sure set the number on "Backup Restore Limit" number field.
Grid View - Replace a File
Grid View is the default modal layout when you click on any media item from Media → Library.
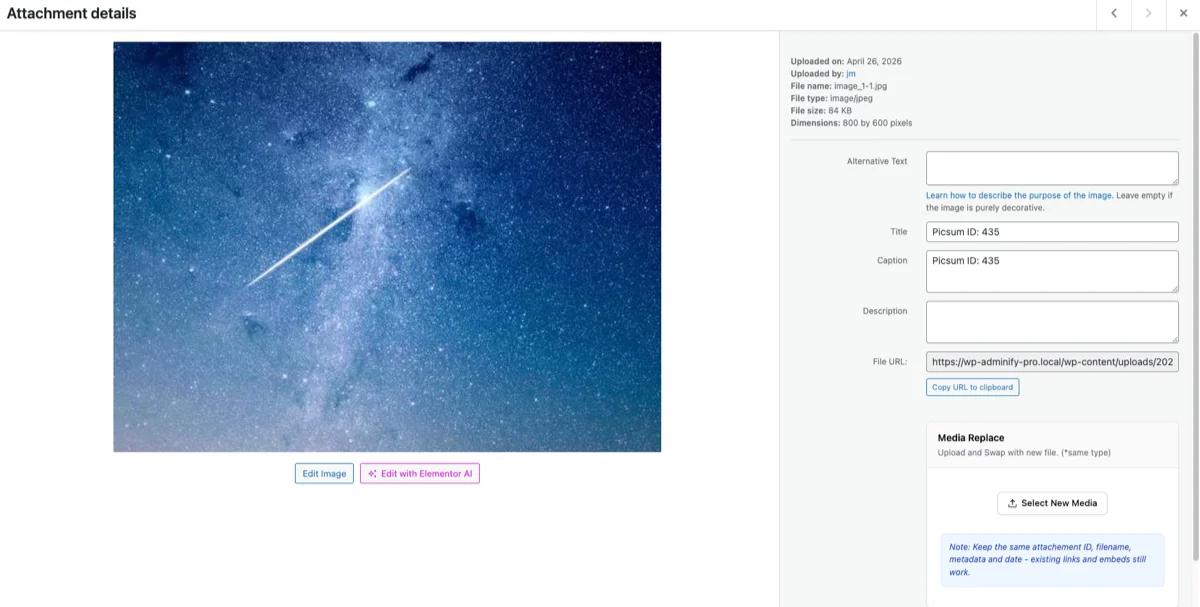
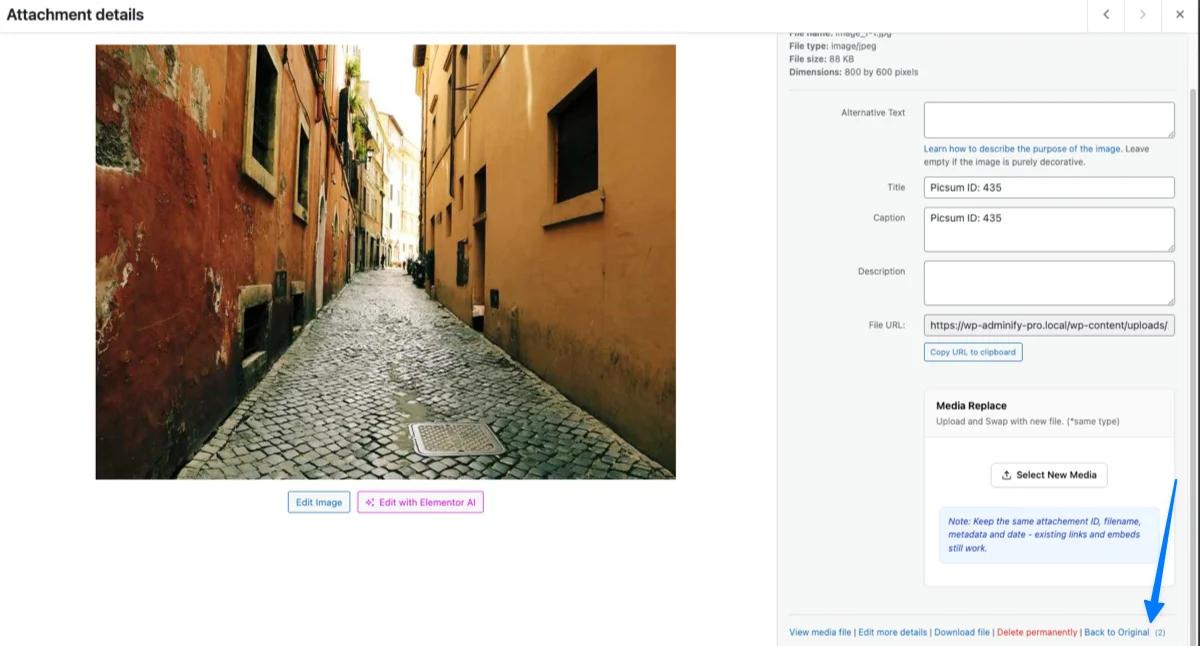
Open the media modal
Go to Media → Library in your WordPress dashboard. Click any media item to open its Attachment Details popup. You'll see a new Media Replace metabox in the right sidebar.
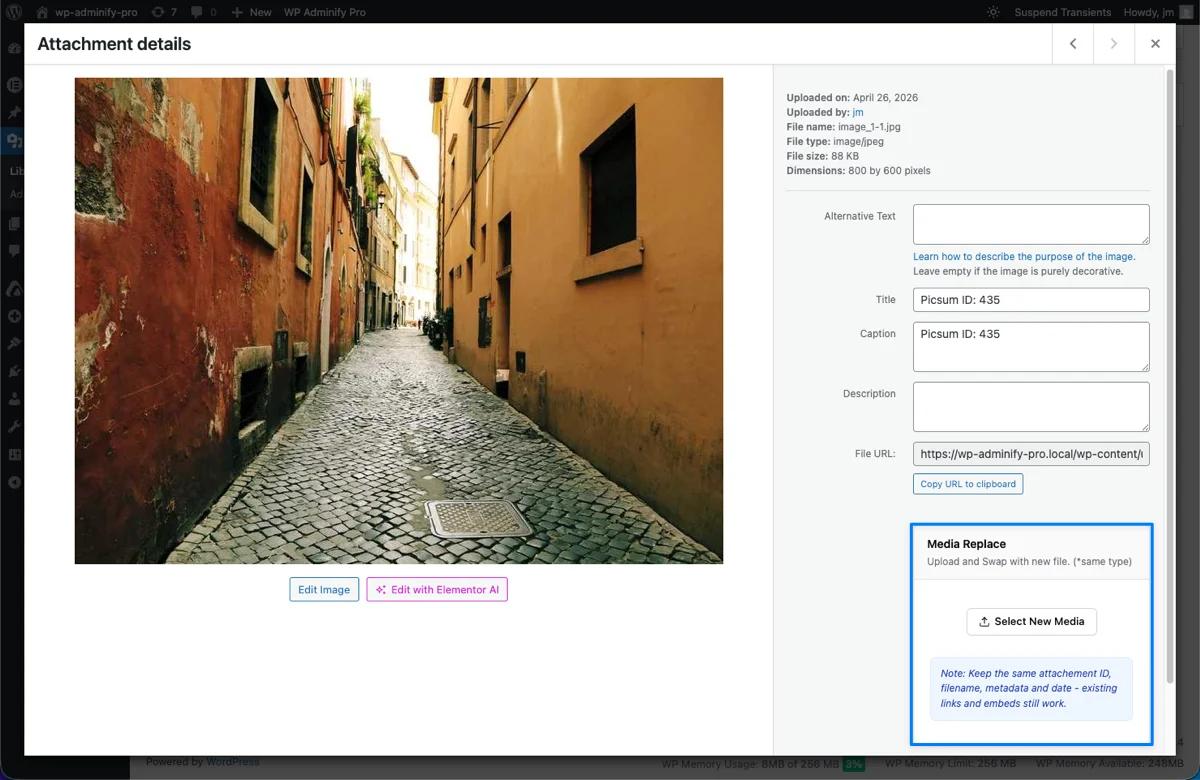
Click "Select New Media"
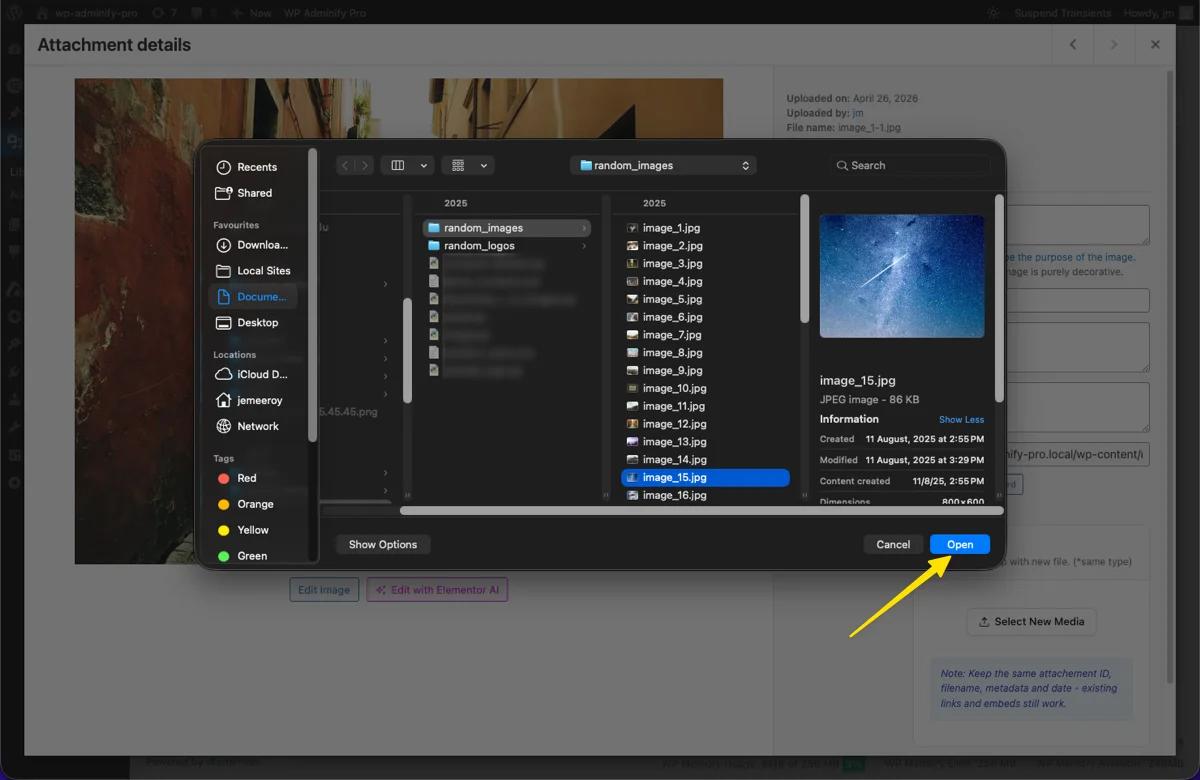
Press the Select New Media button inside the Media Replace metabox. Your operating system's file picker will open. Choose the new file from your device.
Reminder: The new file's extension must match the original (e.g., .jpg → .jpg). Different types will be rejected.
Confirm the replacement
After selecting a file, a confirmation prompt appears with a preview of the new file (filename + size). Review it, then click Replace to proceed or Cancel to abort.
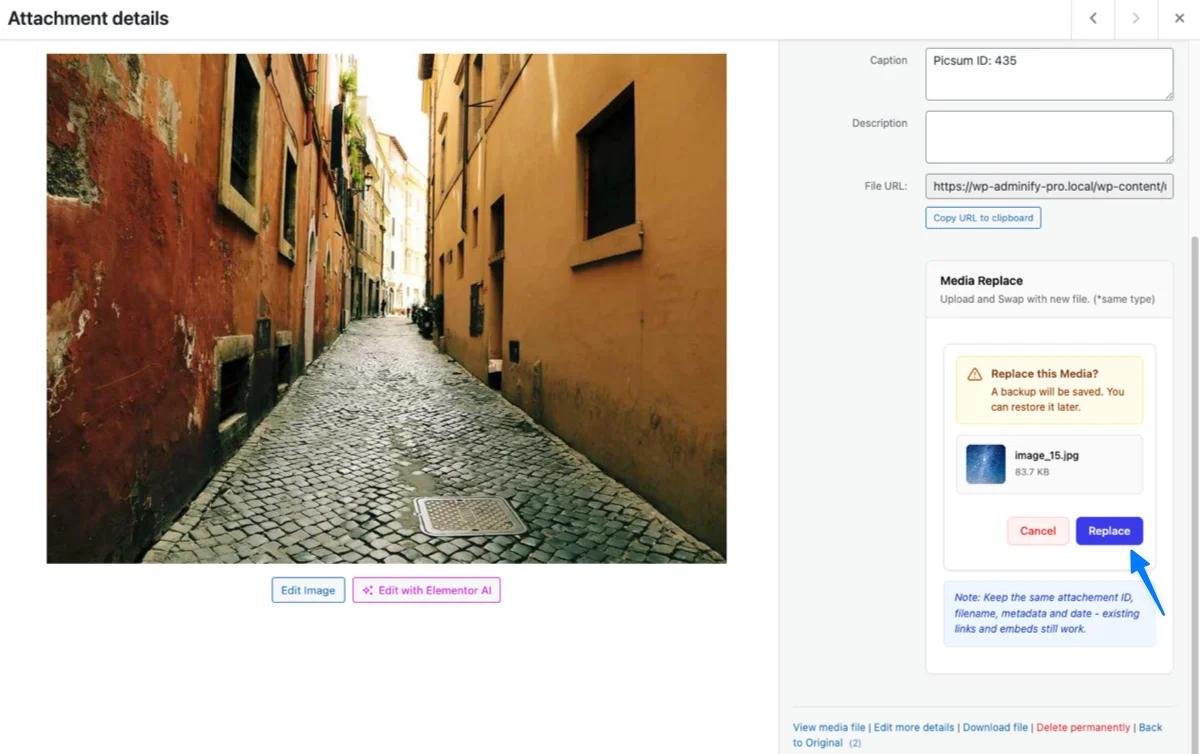
The confirmation modal shows the incoming file with size, plus Cancel/Replace actions.
Done - image swapped instantly
You'll see an "Image replacement successful" notice only for a seconds or less before it reloads.
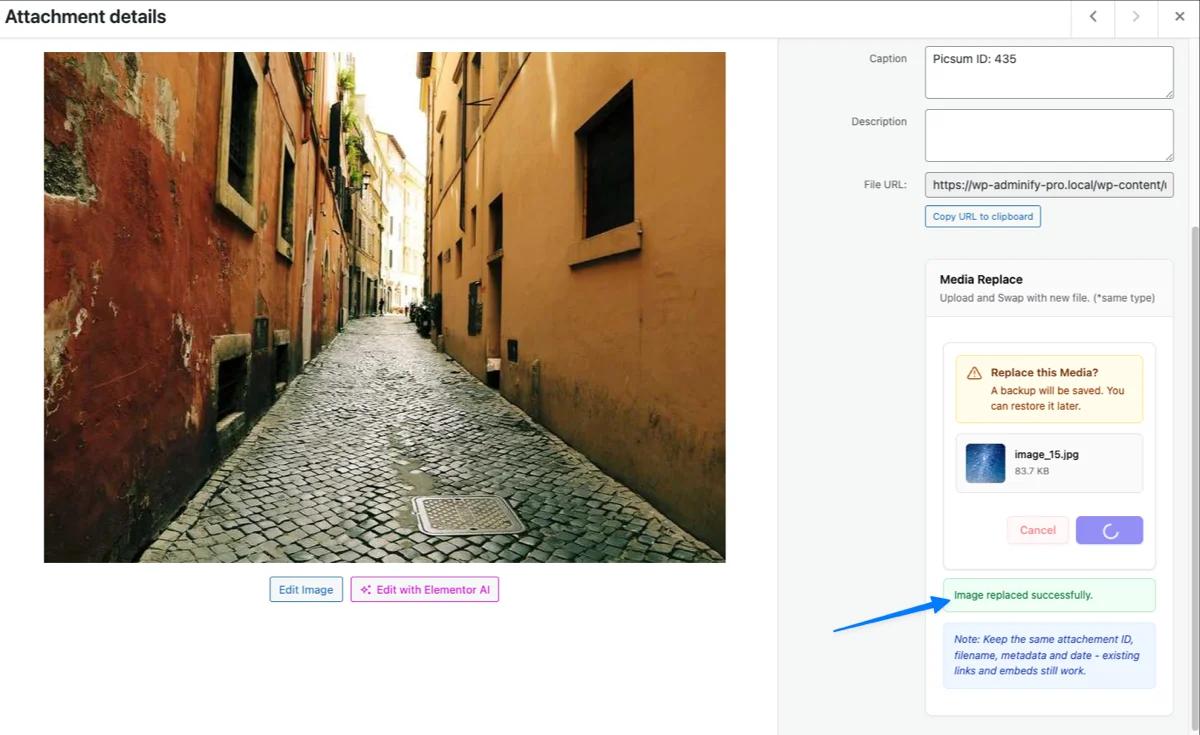
The Attachment Details modal reloads with the new file in place. Posts, embeds, and external links keep working because the URL didn't change.
What stays the same: File ID, filename, publish date, URL, and all attachments to posts/pages. What changes: The actual file content (and its metadata like dimensions or size).
Grid View - Restore Previous File
Wrong file uploaded, or changed your mind on the swap? Every replacement is auto-backed up. Roll back whenever you need.
Find "Back to Original" link
Open the same media item in the Attachment Details modal. At the bottom of the right sidebar, alongside Delete permanently, you'll see a new link: Back to Original. A number in parentheses (e.g., 3) shows how many times this file has been replaced.
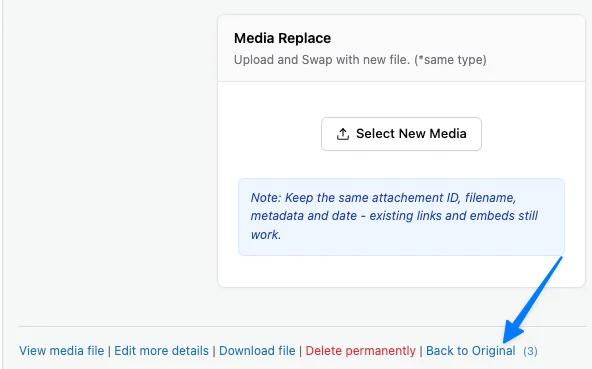
"Back to Original (3)" - the (3) means this media has been replaced 3 times.
Click "Back to Original"
Clicking opens the Undo replacement? confirmation modal. It explains that every replacement is saved as a backup - so you can keep going back.
The Undo confirmation prompt with Cancel and "Yes, Restore!" buttons.
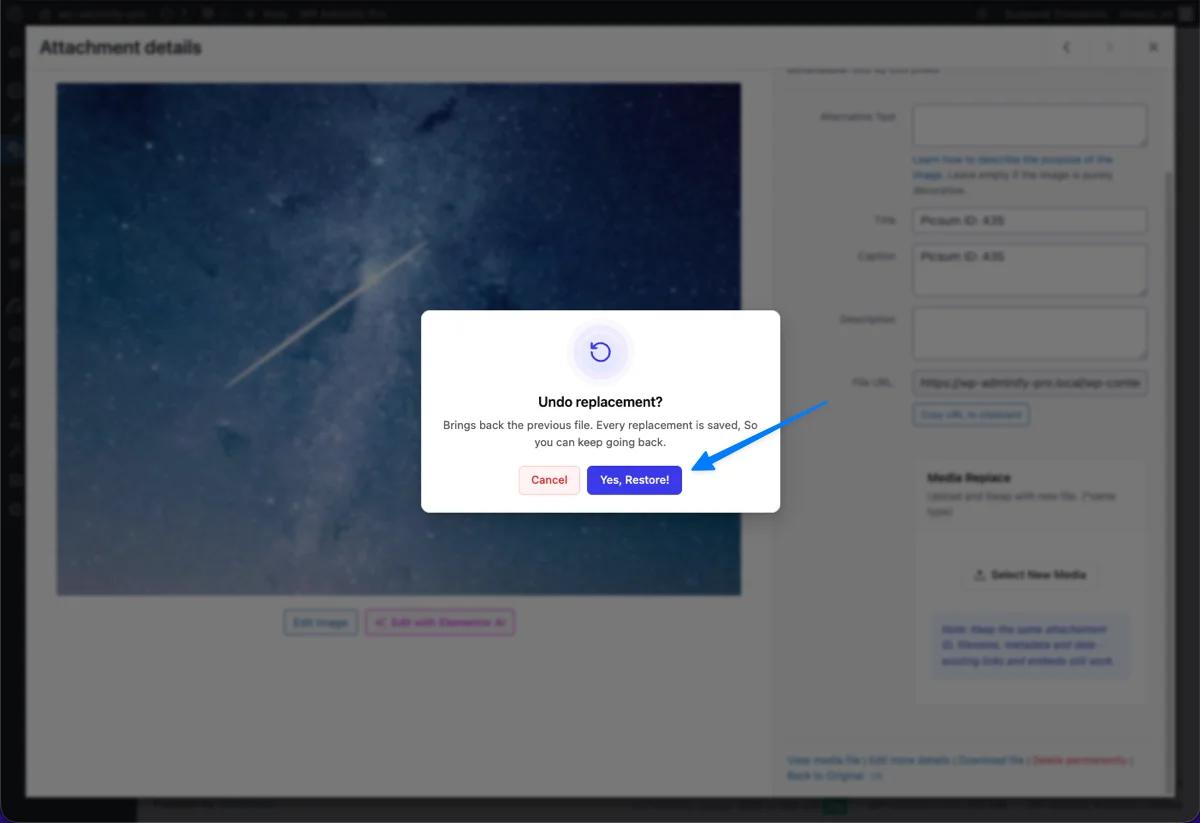
Confirm restore
Click Yes, Restore! The most recent backup takes over as the current file. The counter next to Back to Original drops by one, and the modal reloads with the restored version.
Multi-step undo: If you've replaced a file 5 times, you can click Back to Original up to 5 times - each click rolls back one step in history. The counter shows how many backups remain.
List View - Replace a File
List View is the alternate layout for the Media Library, accessible by toggling the view at Media → Library.
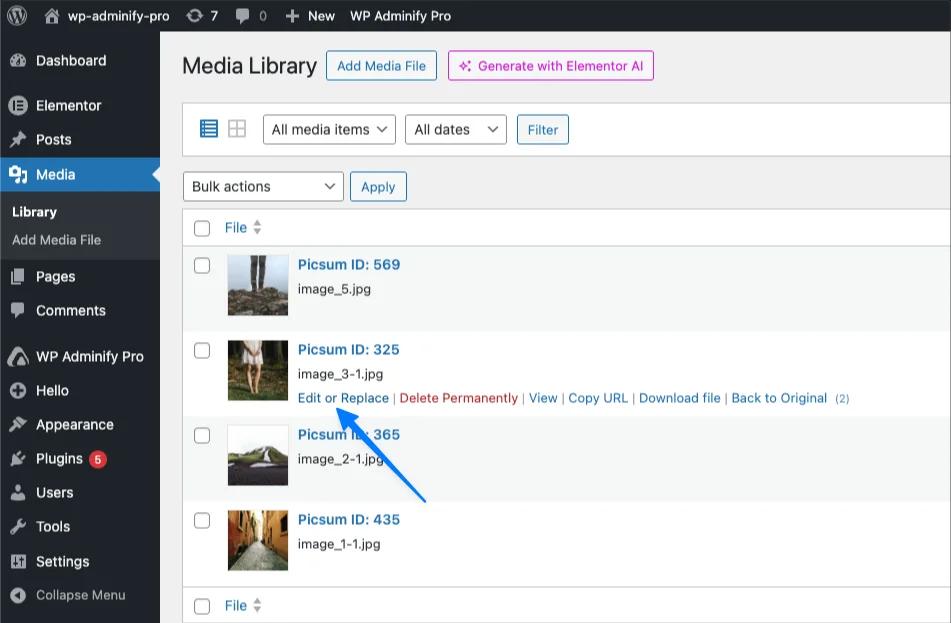
Click "Edit or Replace"
Hover over any media row in the list. The action links appear: Edit or Replace | Delete Permanently | View | Copy URL | Download file | Back to Original. Click Edit or Replace.
Locate "Media Replace" metabox
The Edit Media admin page opens. In the right sidebar, scroll down to find the Media Replace metabox below the Save panel.
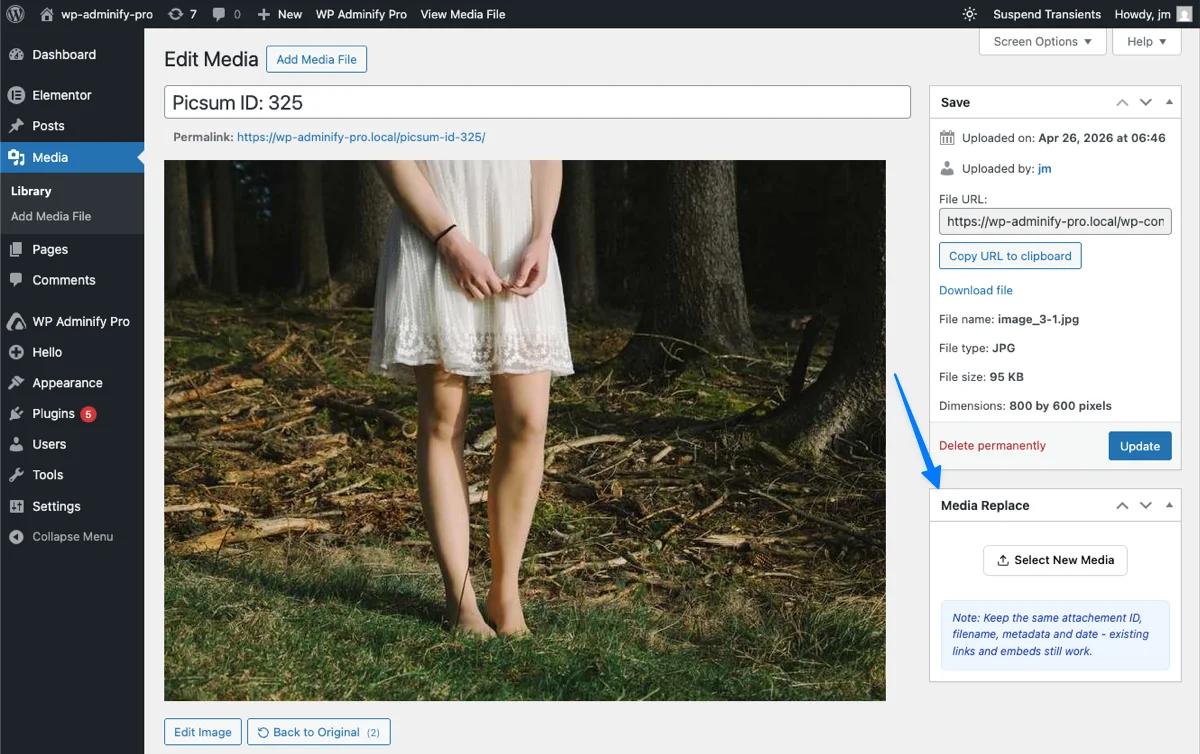
Select new file & confirm
Click Select New File, choose the new file from your device, and confirm in the prompt that appears.
The Replace File metabox works the same way as in Grid View.
From here the flow matches Grid View: confirmation prompt, reload, success notice.
List View - Restore Previous File
Hover the media row
From the main Media → Library list page, hover over the media item you want to restore. The action links appear under the filename, including Back to Original with a count badge if multiple replacements exist.
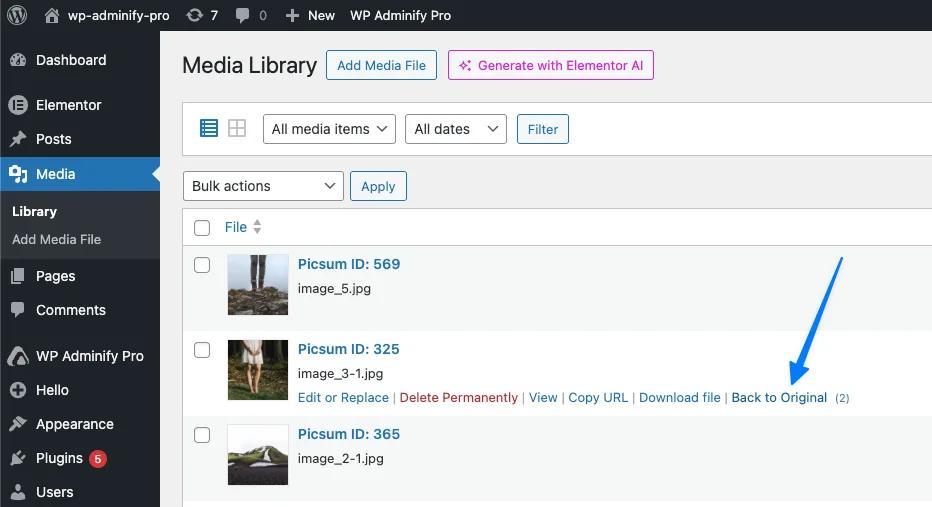
"Back to Original (3)" — three replacements available to roll back.
Click & confirm
Click Back to Original. The same Undo replacement? confirmation modal appears. Click Yes, Restore! to roll back one step. Repeat as needed.
How Version History Works
Each time you replace a file, WP Adminify creates a backup of the current version before swapping it. Backups are stacked, not overwritten.
Example: 5 replacements deep
| Action | Current file | Backup count |
|---|---|---|
| Initial upload | v1 (original) | 0 |
| Replace #1 | v2 | 1 (v1 saved) |
| Replace #2 | v3 | 2 (v1, v2 saved) |
| Replace #3 | v4 | 3 |
| Replace #4 | v5 | 4 |
| Replace #5 | v6 | 5 |
| Click Back to Original | v5 (rolled back 1 step) | 4 |
| Click again | v4 | 3 |
| Click 3 more times | v1 (back to original) | 0 |
Linear history: "Back to Original" always rolls back one step at a time. The counter beside the link tells you exactly how many steps backward are available.
Tips & Best Practices
When to use Media Replace
- Logo updates - replace your site logo without re-attaching it on every page
- Document revisions - update PDFs, brochures, contracts while keeping the same download URL
- Image corrections - fix typos, color issues, or quality problems in published images
- Compressed versions - replace large images with optimized versions (still same format)
- Watermarking / branding - add or update watermarks across your media
When NOT to use it
- You need to change file format (jpg → webp) - upload as new media instead
- You want to keep both old and new versions visible - replacement hides the old (though backup remains)
- You're cleaning up unused files = use Delete permanently
Performance note
If you run a CDN or page cache (Cloudflare, WP Rocket, LiteSpeed Cache), the new file may take a few minutes to propagate to visitor caches. Purge your cache after an important replacement.
Can I replace a JPG with a PNG?
No. The new file must have the same MIME type as the original. Replace JPG with JPG, PNG with PNG. To change format, upload the new file as a separate media item.
What happens to image thumbnails after replacement?
WordPress automatically regenerates all thumbnail sizes (thumbnail, medium, large, etc.) based on the new file. Existing posts using thumbnail sizes will display the new versions on the next page load.
Will all my embedded links still work?
Yes. The file URL stays exactly the same - only the file content behind that URL changes. Posts, pages, emails, and external sites linking to the URL continue to work.
How many backup versions are kept?
All of them. Every replacement is stored. The number beside Back to Original tells you how many backups exist. There's no automatic cleanup - backups are kept until you fully roll back.
Where are backups stored?
Backup files are saved in your WordPress uploads directory in a hidden folder managed by WP Adminify. They take up disk space, so be mindful if you replace large files (videos, big PDFs) frequently.
Can I undo a "Back to Original" action?
"Back to Original" is itself a backup-creating action - once you roll back, you can't undo this. You must reupload the image to replace again.
Does this work with Gutenberg, Elementor / page builders?
Yes. At present we offer support to Gutenberg editor only. From Gutenberg editor media popup modal you can replace the media file. Replace media on other page builder is not supported for now. It's upcoming feature on our to do list. Since the file URL never changes, all page builders and themes continue to display the file correctly without any republish step.
Can I bulk-replace multiple files?
Currently no - Media Replace works on one file at a time. For bulk operations, replace each file individually.
What permissions are required?
Any user with the upload_files capability can replace media (typically Authors, Editors, and Administrators). The same role that can upload media can replace it.
Does this break SEO or image indexing?
No. Search engines see the same URL with refreshed content. Image SEO signals (alt text, captions, surrounding context) all stay intact since they're metadata, not the file itself.
Didn’t find what you were looking for? Get in touch!
Updated on April 27, 2026
Was this helpful to you?