
WP Adminify
How to Create Custom Admin Page in WordPress?
Here’s how to create a custom admin page in WordPress using WP Adminify.
Step 1: How to Enable the Custom Admin Page Feature
First, go to the following path: WP Adminify > Productivity
Now, find the setting labeled as “Admin Pages” and enable it.
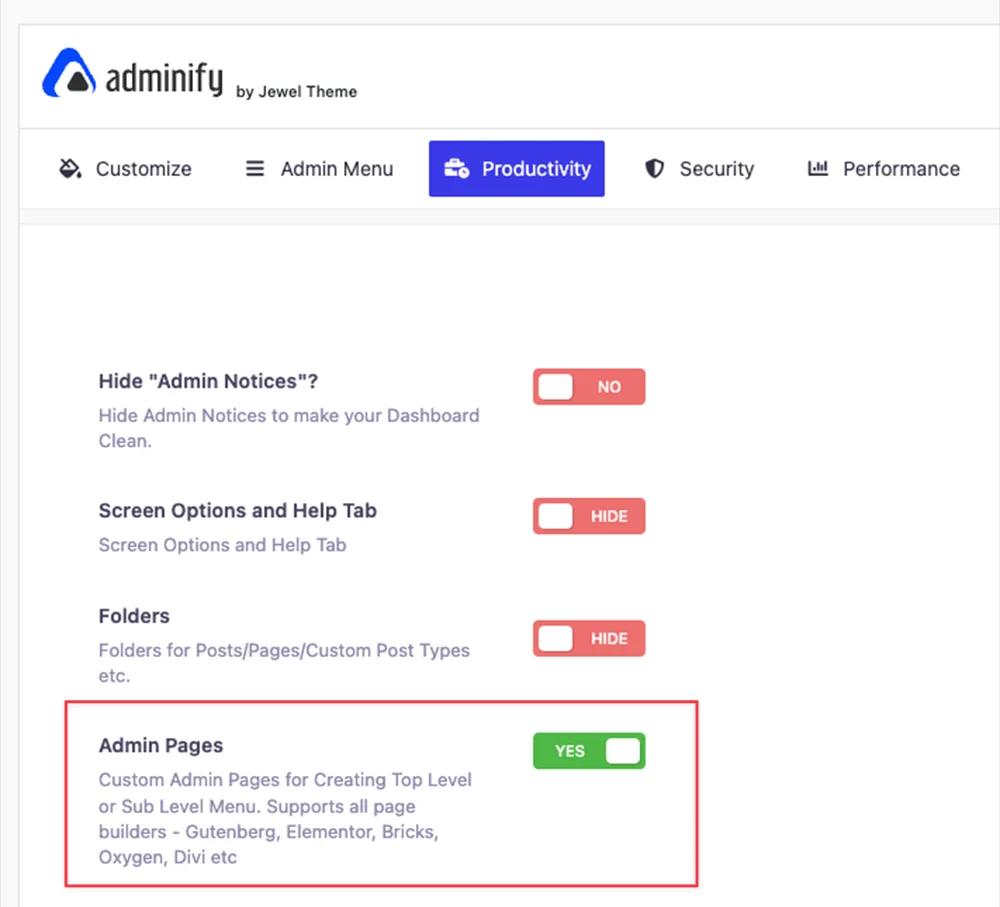
A new menu item labeled “Admin Pages” will appear under the WP Adminify menu.
Step 2: Save the Settings
Don’t forget to click the Save Changes button to apply your settings.
Step 3: How to Access the Admin Pages Section
To access the admin page section, go to:
WP Adminify > Admin Pages
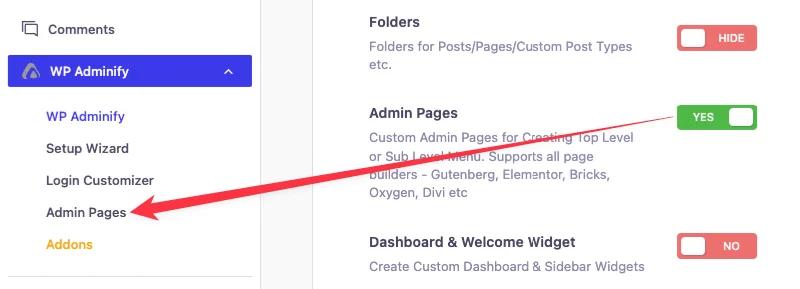
Here you can create, modify, and delete your custom admin pages.
Step 4: How to Create a Custom Admin Page
Click the “Add New Post” button, to create a custom admin page.
You can create custom admin page using:
- The default Gutenberg editor
- Any page builders
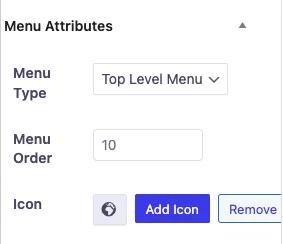
Step 5: How to Configure Menu Attributes
Go to editor settings from the right, and go to “Admin Page” settings.
You’ll see the Menu Attributes section. Here you can customize:
- Menu Type: A dropdown to select between top level menu or a submenu.
- Menu Order: You can change the menu position in the left sidebar.
- Icon: Add a menu icon beside the label.
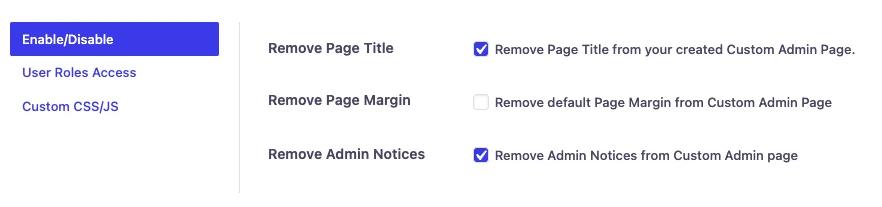
Step 6: How to Adjust Display Options
You can also adjust display options. You’ll find the settings at the bottom of the editor.
In the “Enable/Disable” option, you’ll see the following options with checkboxes to control the page display:
- Remove Page Title: Remove page title from your created custom admin page.
- Remove Page Margin: Remove default page margin from custom admin page.
- Remove Admin Notices: Hides admin notices from custom admin page
Step 7: Assign the Page to User Roles
In the User Roles section, select which roles can access this admin page. You’ll see a dropdown in “Allow users to access this page” settings to select your desired roles.

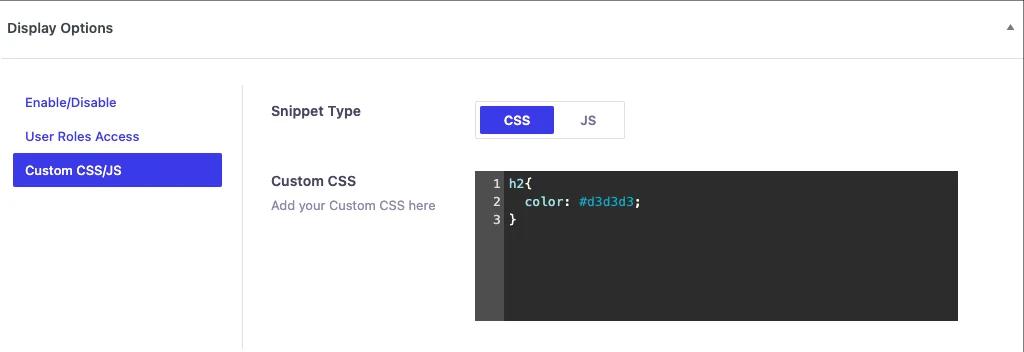
Step 8: How to Add Custom CSS and JavaScript
Select the “Custom CSS/JS” option.
You’ll see a toggle button for CSS and JS. And under each, you’ll see a custom field to add your codes.
Step 9: Publish the Page
After you’re done with your admin page creation and other settings, click the publish button to make it live.
What Custom Admin Pages Are Good For
A custom admin page is a page that exists only inside wp-admin — perfect for client welcome screens, internal how-to notes, support contact details, or onboarding checklists. Agencies typically pair it with the White Label module so clients log in to a dashboard that explains itself: what the site is, how to edit content, and who to call when something breaks.
Frequently Asked Questions
Do custom admin pages appear on my website's frontend?
No. Admin pages only exist inside the WordPress dashboard — visitors never see them. They're meant for the people who log in: clients, editors, and team members.
Can I control who sees a custom admin page?
Admin pages live in the admin menu, so you can manage their visibility per role with the Admin Menu Editor — hide or show the page's menu item for specific user roles.
Is the Admin Pages feature free?
The feature is part of WP Adminify's Productivity module — see the Custom Admin Page feature overview for the free vs Pro breakdown.
Related Documentation
Didn’t find what you were looking for? Get in touch!
Updated on July 16, 2026
Was this helpful to you?