
WP Adminify
How to Display Custom Admin Columns in WordPress?
WP Adminify lets you display custom admin columns. Follow these steps to continue.
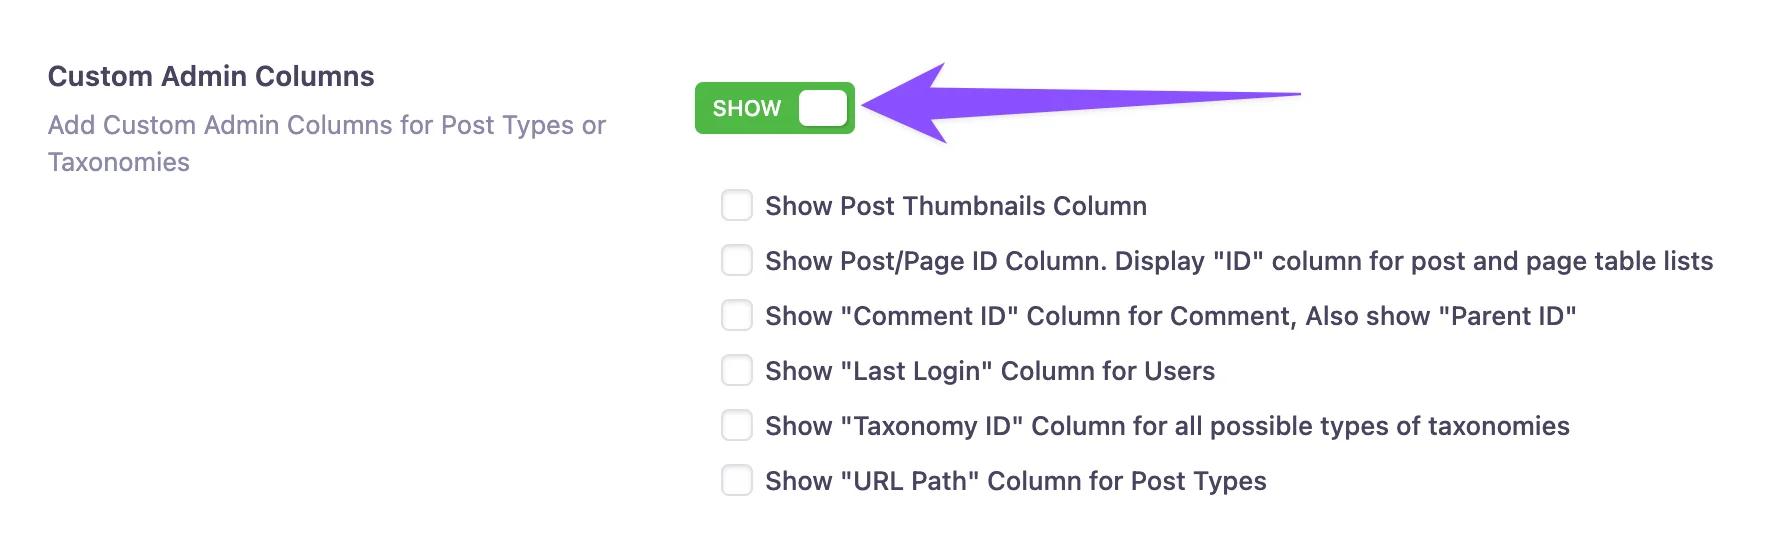
Initial Step: How to Enable Custom Admin Column
First, you need to enable the “Custom Admin Columns”. Go to the following path: WP Adminify > Productivity. Then Use the toggle button to enable “Custom Admin Columns”.
How to Display Post Thumbnail Column in WordPress
A list of options will be displayed. Among them, you’ll find the “Show Post Thumbnails Column” checkbox. Mark the checkbox to enable it.
A new option will appear labeled “Column Thumbnail Image”. Use the “Add Thumbnail Image” button to go to the WordPress media manager and upload the thumbnail image. This will be your default thumbnail image.

Click the “Save Settings” button to apply your settings.
Now, if you go to the Posts page, you’ll see a new thumbnail column showing the featured image for each post. If the post doesn't have a featured image, it will display the default thumbnail image instead.

How to Display Post/Page ID in WordPress
After you complete the initial step, a list of options will be displayed. Among them, you’ll find the “Show Post/Page ID Column. Display "ID" column for post and page table lists” checkbox. Mark the checkbox to enable it.
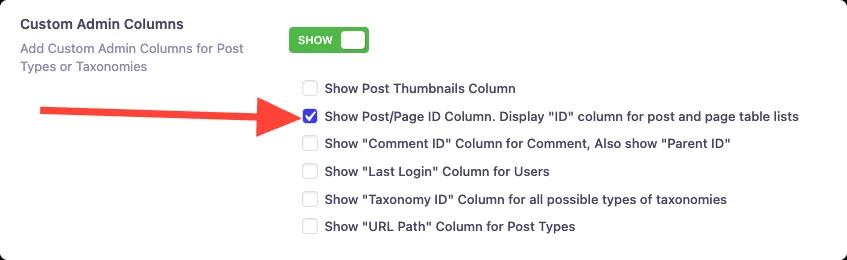
Click the “Save Settings” button to apply your settings.
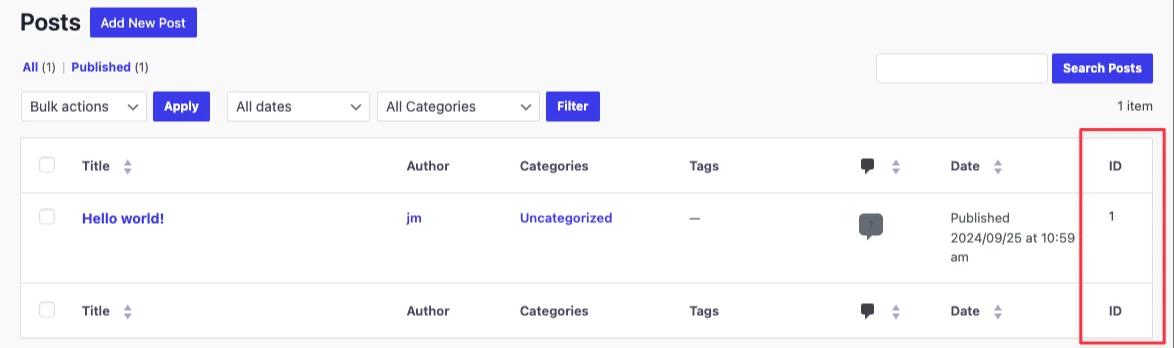
Now, if you go to the Posts/Pages, you’ll see a new field labeled “ID”.
How to Display Comment ID Column in WordPress
After you complete the initial step, a list of options will be displayed. Among them, you’ll find the “Show "Comment ID" Column for Comment, Also show "Parent ID"” checkbox. Mark the checkbox to enable it.
Click the “Save Settings” button to apply your settings.
Now, if you go to the Comments > All Comments, you’ll see a new field labeled “ID” and “parent ID”.
How to Display Last Login Column in WordPress
After you complete the initial step, a list of options will be displayed. Among them, you’ll find the “Show "Last Login" Column for Users” checkbox. Mark the checkbox to enable it.
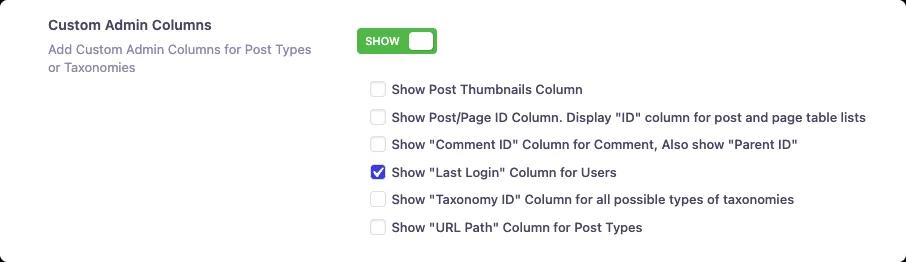
Click the “Save Settings” button to apply your settings.
Now, if you go to the Users > All Users, you’ll see a new field labeled “Last Login”.

How to Display Taxonomy ID Column in WordPress
After you complete the initial step, a list of options will be displayed. Among them, you’ll find the “Show "Taxonomy ID" Column for all possible types of taxonomies” checkbox. Mark the checkbox to enable it.
Click the “Save Settings” button to apply your settings.
Now, if you go to the relevant taxonomy page, you’ll see a new field labeled “Taxonomy ID”.
How to Display URL Path Column in WordPress
After you complete the initial step, a list of options will be displayed. Among them, you’ll find the “Show "URL Path" Column for Post Types” checkbox. Mark the checkbox to enable it.
A new option will appear labeled “"URL Path" Column for Post Types”. And you can select from the following options:
- Posts
- Pages
Note: All your custom post types will be displayed as options here dynamically.
Click the “Save Settings” button to apply your settings.
Now, if you go to the relevant page, you’ll see a new field labeled “URL Path”.
Didn’t find what you were looking for? Get in touch!
Updated on September 26, 2024
Was this helpful to you?