
WP Adminify
How to Add Custom Welcome Widget?
Follow these steps to create a custom welcome widget using WP Adminify.
Step 1: How to Enable Welcome Widget Settings
First, go to the following path: WP Adminify > Productivity
Then Enable the “Dashboard & Welcome Widget” settings. Click “Save Settings”.
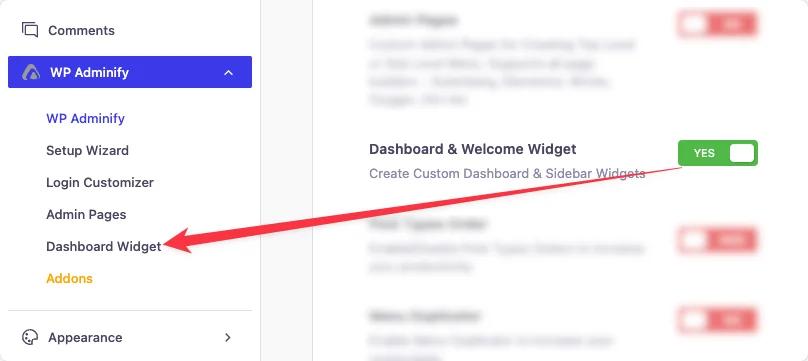
Step 2: How to Access Welcome Widgets Panel
Once you refresh the page, you’ll see the “Welcome Widget” under the WP Adminify panel.
Click on it to access the welcome widgets section.
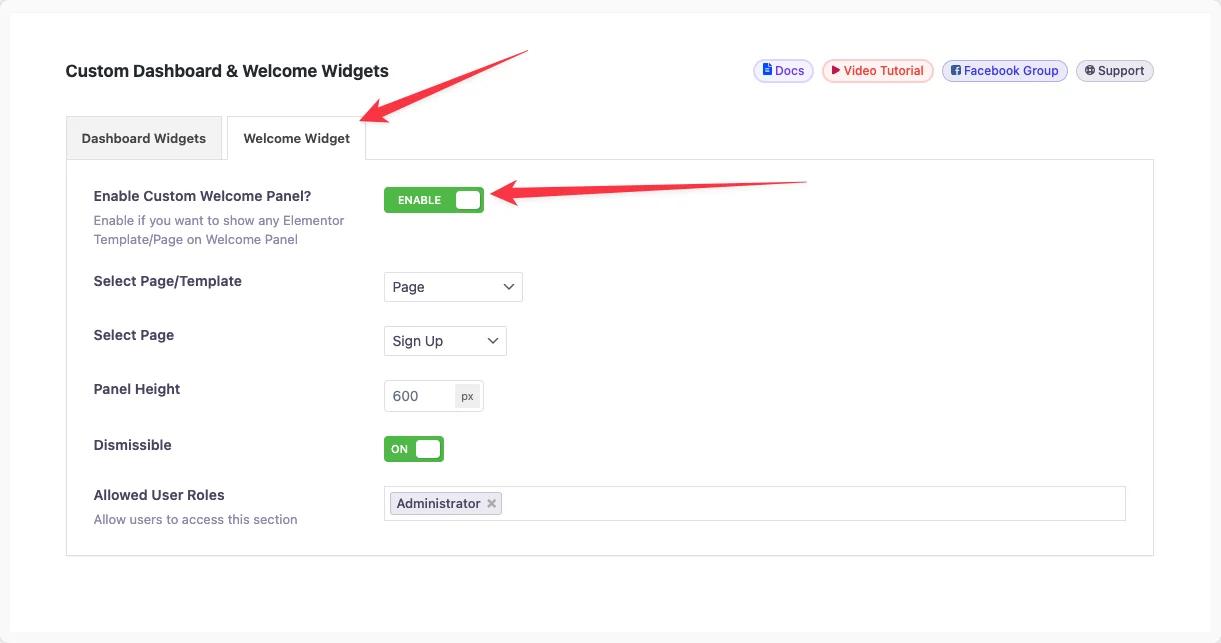
Now, to add a welcome widget, enable the “Enable Custom Welcome Panel?” button. This will reveal a few settings you can use to add your welcome widget.
Step 3: How to Choose to Page/Template
Under the “Select Page/Template dropdown”, choose either:
- Page
- Elementor Page Template
- Elementor Saved Section
- Elementor Saved Widget
Now, if you choose Page, use the “Select Page” dropdown to pick from your available pages.
If you choose Template, you can pick from the saved Elementor templates.
Step 4: How to Set the Panel Height
Use the Panel Height field to define the vertical size of your welcome widget.
You can also set the panel height if you’re using a page. Use the “Panel Height” field to define the vertical size (px) of your welcome widget.
Note: If you’ve picked elementor templates you won’t find this option.
Step 5: How to Enable Dismissibility
If you want to add the dismiss option, turn on the “Dismissible” button using the toggle.
Step 6: How to Assign User Roles for Access
You can also make the settings role based. To do that, select your desired roles from the “Allowed User Roles”.
Step 7: Save the Settings
Don’t forget to click the Save Changes button to apply your settings.
Didn’t find what you were looking for? Get in touch!
Updated on September 25, 2024
Was this helpful to you?