
WP Adminify
How to Control Heartbeat API Request Frequency?
WordPress Heartbeat API lets you autosave content, manage user sessions, and send real-time updates. But it will increase CPU usage.
WP Adminify lei
ts you control the Heartbeat API. Now you can easily reduce server load and improve site performance.
Here’s a few steps you can follow to Customize it.
Step 1: Go to WP Adminify Performance Setting
Go to the following path:
WP Adminify > Performance
Step 2: Enable Heartbeat API Settings
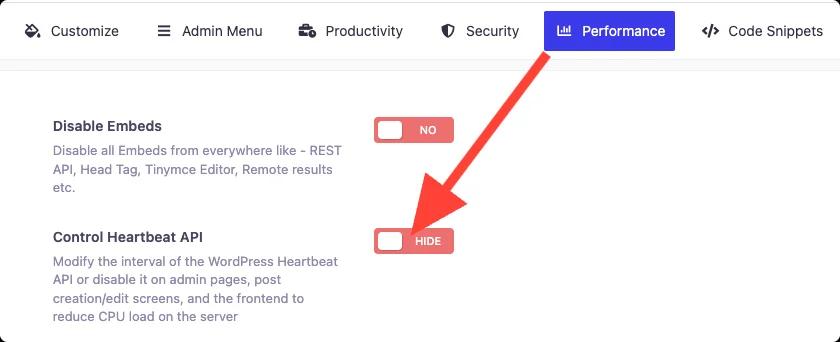
Look for the setting named “Control Heartbeat API”.
Click the toggle button. It will turn green and the text will change to “Show.”
Step 3: Customize Heartbeat API Settings
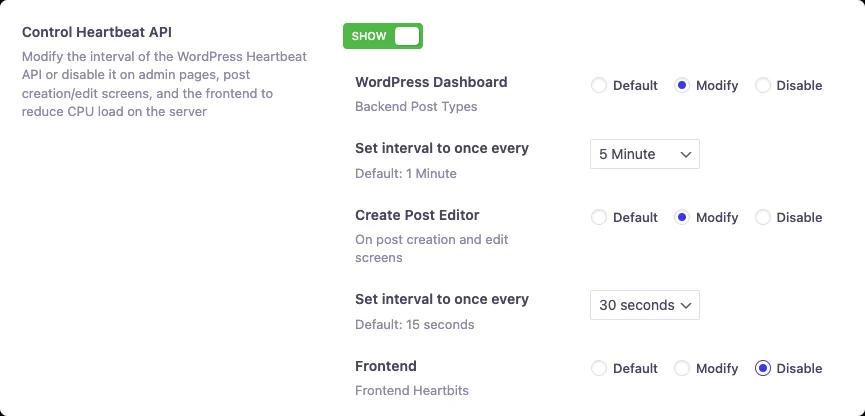
You will see 3 separate Heartbeat API options.
- WordPress Dashboard (Backend post types)
- Create Post Editor (On Post Creation and edit)
- Frontend (Frontend heartbeats)
For each area, you can select following options:
Default: Keeps WordPress's default heartbeat interval
Modify: Lets you adjust the interval with “Set interval to once every” dropdown
Disable: Completely turns off the Heartbeat API for that area
Select the option that best fits your site needs.
Note: You can change or modify these settings whenever you want.
Step 3: Save the Settings
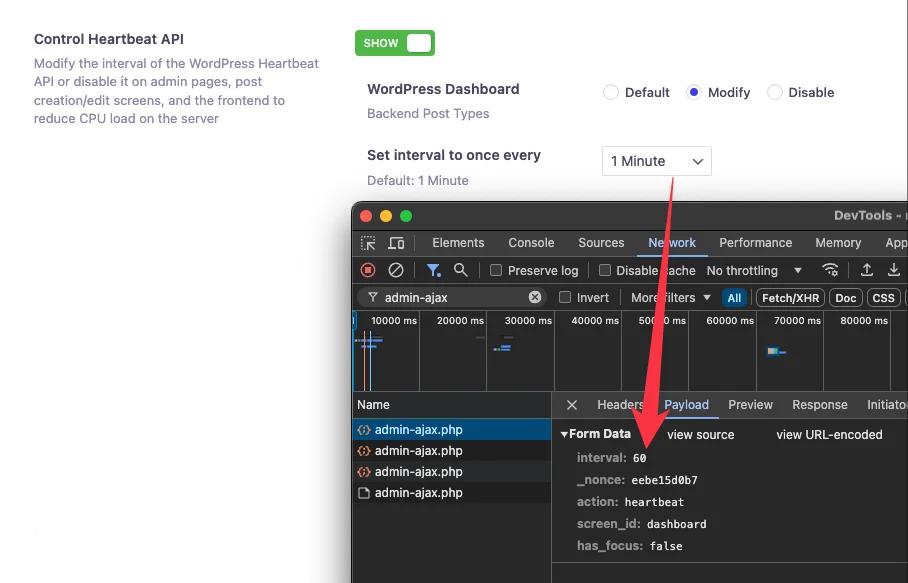
After you make your changes, click the “Save Settings” button to apply new settings.
This helps you confirm that the Heartbeat API is working as expected.
Step 4: How to Reset Heartbeat API settings to default
If you want to reset your settings, simply turn off the “Control Heartbeat API” button.
Also, you can select “Default” on the settings you want to use default settings for. And then hit the “Save Settings” to apply your changes.
Didn’t find what you were looking for? Get in touch!
Updated on January 2, 2025
Was this helpful to you?