Install, Upgrade, and Activate
Installing WP Adminify
WP Adminify can be easily installed from the WordPress Plugin Repository or by uploading the plugin manually.
Free Version
a. Install via WordPress Repository:
- Log in to your WordPress dashboard.
- Navigate to Plugins > Add New.
- In the search bar, type WP Adminify.
- Locate the plugin and click on Install Now.
- After the installation, click Activate to start using WP Adminify.
b. Install via Manual Upload:
- Download the WP Adminify plugin file from WordPress.org.
- Log in to your WordPress dashboard.
- Go to Plugins > Add New, then click on Upload Plugin.
- Select the downloaded .zip file and click Install Now.
- Once installed, click Activate to enable the plugin.
Pro version
Upgrading to WP Adminify Pro unlocks advanced features that enhance your WordPress dashboard experience. Follow these steps to purchase and activate the Pro version:
1. Visit the WP Adminify Pricing Page
- Go to the official WP Adminify website and navigate to the Pricing section.
- Here, you’ll find the different plans available for purchase.
2. Select a Plan
- Choose the plan that best fits your needs. Each plan provides different levels of features and support.
- Click Purchase Now to begin the checkout process.
3. Complete the Purchase
- Enter your billing information and complete the payment process. You will receive an email with your purchase details, the plugin zip file and the Pro license key once the transaction is completed.
4. Activate WP Adminify Pro
- After the purchase, install and activate the free version of WP Adminify if you haven’t already. The free version needs to be installed first in order for the Pro version to work.
- Navigate to WP Adminify > License in your WordPress dashboard.
- Enter the license key you received in your email and click Activate License to unlock all Pro features.
5. Enjoy Pro Features
Once activated, you can start using the advanced features available only in WP Adminify Pro, including more customization options, enhanced tools, and priority support.
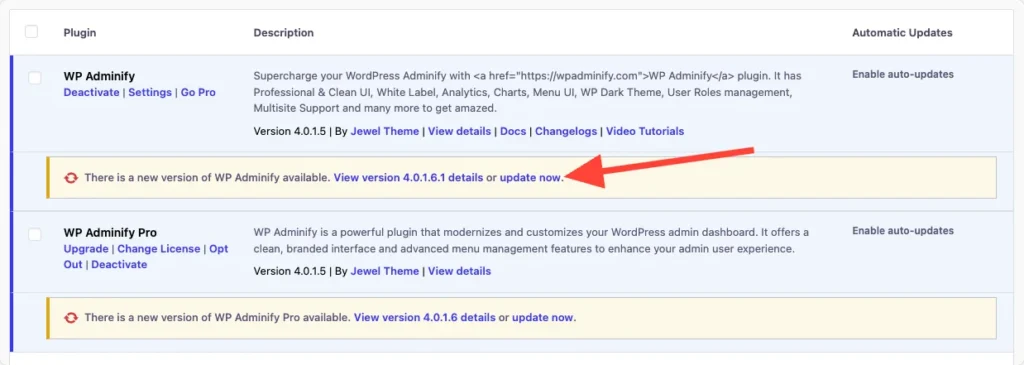
Updating WP Adminify
Keeping WP Adminify up to date ensures you have the latest features, improvements, and security patches.
Automatic Update:
- Navigate to Dashboard > Updates.
- If an update for WP Adminify is available, it will be listed under Plugins.
- Click Update Now to upgrade to the latest version.
Manual Update:
- Activate the updated version.
- Navigate to your WP Adminify account dashboard on the WP Adminify website.
- Deactivate and delete the current version from Plugins > Installed Plugins.
- Install the new version by following the manual upload steps mentioned above.
Troubleshooting Activation Issues
If you encounter any issues during installation, upgrading, or activation:
- Contact WP Adminify support for further assistance.
- Ensure your WordPress installation meets the minimum requirements.
- Deactivate and reactivate the plugin.
Didn’t find what you were looking for? Get in touch!
Updated on October 21, 2024
Was this helpful to you?