# WP Adminify — Full Content (llms-full.txt) > Full text of WP Adminify's published posts and documentation, inlined for LLM ingestion. The curated link index is at /llms.txt. Generated 2026-09-14 from the live CMS. 199 pages. --- # 6 Best WordPress Admin Themes Plugins (2026, Tested) URL: https://wpadminify.com/best-wordpress-admin-theme-plugin Last updated: 2026-09-13 Every WordPress install gives you the same backend. Dark grey sidebar, blue accents, and a dashboard packed with widgets you never asked for. You stop noticing it after a while, but a client logging in for the first time notices straight away, and they wonder why the site they just paid for looks like everybody else's. That's a big part of why agencies [customize the WordPress admin dashboard](https://wpadminify.com/wordpress-dashboard-customization) before they hand a site over. A WordPress admin theme is how you do it. It restyles wp-admin so the dashboard, menus, and login screen carry your brand, get a proper [admin dark mode](https://wpadminify.com/features/dark-mode), or are just nicer to spend a workday in. We compared six WordPress admin theme plugins from wordpress.org below, using the install counts, ratings, and update dates listed there in September 2026. ## Quick answer: the best WordPress admin theme plugin For most sites we'd pick WP Adminify. It puts UI templates, dark mode, a menu editor, white label branding, and a login customizer into a single plugin. If rebranding client sites is the only thing you care about, look at White Label CMS. If you want to build your own admin panel out of blocks, try UiPress Lite. And if you only want different colours, Admin Color Schemes is enough. ## What is a WordPress admin theme? A WordPress admin theme is a plugin that changes how the backend looks, and sometimes how it behaves, for logged-in users. It can restyle the sidebar, the toolbar, dashboard widgets, buttons, and fonts, and a lot of them restyle the login page too. Front-end visitors never see any of it. The name is a bit off, to be fair. WordPress doesn't have an "admin theme" slot like the Appearance > Themes screen you use for the front end. Every WordPress admin theme ships as a plugin. It either loads its own stylesheet on admin pages, registers a colour scheme through the core API, or swaps out parts of the admin interface altogether. In practice you'll run into three kinds: - Colour schemes. The lightest kind. They add palettes to the picker under Users > Profile > Admin Color Scheme, and that's all they touch. - Admin skins. One stylesheet that reworks spacing, type, and components but leaves the core WordPress layout where it is. - Admin UI suites. Bigger plugins with templates, dark mode, menu control, branding, and login styling, for when you want to customize the WordPress admin dashboard from top to bottom. Curious how far a backend redesign can go before you commit to a plugin? The [Adminify UI templates documentation](https://wpadminify.com/docs/adminify/customize/adminify-ui-templates) has examples of restyled admin screens you can look through. ## Why use a WordPress admin theme? The default admin works fine, so it's a reasonable question. When we build and hand over client sites, the reasons we see come down to these. 1. Client handover. Your logo and colours in the backend make the site feel finished and built for them. Add [white label WordPress](https://wpadminify.com/white-label-wordpress) branding on top and the client sees your agency's name when they log in, not WordPress. 2. Fewer support tickets. Most admin themes also let you hide menus and dashboard widgets. A shop manager who only sees Orders, Products, and Pages has no reason to wander into Settings and change something they shouldn't. 3. Comfort for long sessions. Writers and editors live in the block editor and the post lists for hours. Dark mode or a softer palette cuts the glare, which you'll appreciate most late at night. 4. Telling sites apart. Running staging, development, and live copies of one site? Give each a different admin colour and you're much less likely to edit the wrong one. To be fair to the default admin: if you're the only person who logs in and the stock look doesn't bother you, you can skip all of this. The colour schemes WordPress already ships might be plenty. ## The 6 best WordPress admin themes compared Every number here comes from the plugin's wordpress.org listing as of 13 September 2026. "Tested up to" is the newest WordPress version the developer has confirmed, and it's one of the quickest ways to tell whether a plugin is still being looked after. | Plugin | Type | Active installs | Rating | Last updated | Tested up to | Best for | | --- | --- | --- | --- | --- | --- | --- | | WP Adminify | Admin UI suite | 6,000+ | 4.3 (109 reviews) | Aug 2026 | 7.1 | All-in-one admin theming | | White Label CMS | Branding tool | 200,000+ | 4.7 (114 reviews) | Jul 2026 | 7.0.4 | Client rebranding | | UiPress Lite | Admin builder | 6,000+ | 4.1 (21 reviews) | Sep 2026 | Not listed | Custom block-built admin | | WP Admin UI Customize | Settings-based customizer | 30,000+ | 4.6 (59 reviews) | Nov 2024 | 4.9.31 | Free granular control | | Slate Admin Theme | Admin skin | 6,000+ | 4.7 (44 reviews) | Jan 2022 | 5.9 | Minimal writing-focused look | | Admin Color Schemes | Colour scheme pack | 4,000+ | 4.8 (26 reviews) | Jan 2022 | 5.9 | Lightweight colour change | ## 1. WP Adminify: best all-in-one WordPress admin theme ![WP Adminify plugin banner from the WordPress.org plugin repository](https://d1k2c27psfzbiv.cloudfront.net/wp-content/uploads/2026/08/26124254/wp-adminify-wordpress-plugin-banner.webp) [WP Adminify](https://wpadminify.com/features/dashboard-customization) does a lot more than change colours. It's aimed at agencies and site owners who want to redesign the whole admin without piling up a stack of plugins to do it. You get ready-made UI templates (Light, Dark, Modern, and Glass), your own colours and fonts, and a dark mode you can schedule so it switches on by itself in the evening. Next to the theming you'll find the tools you'd probably go looking for anyway. There's a drag-and-drop admin menu editor with role-based visibility, white label branding for your logo, favicon, and footer text, and the Loginfy login page customizer. It all lives in one plugin, so you set up the backend from one place rather than jumping between five settings screens. [Screenshot: WP Adminify UI template picker showing Light, Dark, Modern, and Glass templates] Pros - Styles the dashboard, menus, and login page from a single plugin - Dark mode with scheduling comes built in - Role-based controls, so editors can get a different backend from admins - Tested up to WordPress 7.1, last updated August 2026 Cons - There are far more settings than a simple skin has, so setup takes longer - Some of the advanced modules need WP Adminify Pro Pricing: The free version is on wordpress.org, and paid plans are listed on the [WP Adminify pricing page](https://wpadminify.com/pricing). ## 2. White Label CMS: best for client rebranding ![White Label CMS WordPress plugin banner](https://d1k2c27psfzbiv.cloudfront.net/wp-content/uploads/2026/09/01135731/white-label-cms-wordpress-plugin-banner.webp) No plugin on this list comes close to White Label CMS on installs. It has more than 200,000. The developers say it's for people who want to give clients "a more personalised and less confusing content management system", and that's a fair summary. Think of it as a branding tool that happens to restyle a little, not a full WordPress admin theme. You can put a logo and background image on the login page, add your branding to the admin bar, menu, and footer, wipe the default dashboard and drop in your own panel, and decide which menus a client gets to see. There's a setup wizard that gets the basics done in a few minutes, which helps a lot when you're repeating the same setup on client site after client site. [Screenshot: White Label CMS setup wizard with branding and dashboard options] Pros - Very large user base and a 4.7 rating - Quick setup through the wizard - Still maintained, tested up to WordPress 7.0.4 Cons - Not much visual restyling: no full UI templates, no built-in dark mode - For deeper menu or dashboard design you might still need another plugin Stuck between a branding-only tool and a full suite? Our [WP Adminify vs White Label CMS](https://wpadminify.com/wp-adminify-vs-white-label-cms) comparison goes through the differences one feature at a time. ## 3. UiPress Lite: best for building a custom admin panel ![UIpress wordpress plugin banner](https://d1k2c27psfzbiv.cloudfront.net/wp-content/uploads/2022/08/18103332/UIpress-wordpress-plugin-banner.webp) UiPress Lite works differently from the rest. It doesn't restyle the admin you already have. It hands you a block-based visual builder, called the uiBuilder, and you build admin pages, dashboards, and entire admin themes yourself. The free version comes with 50+ blocks, responsive templates, global styles, custom login pages, and a user role editor. If you want a custom WordPress admin panel that looks nothing like stock WordPress, say a client portal with one dashboard of analytics and shortcuts, this gives you the most room. What it costs you is time. Building an admin in a builder feels a lot more like building a website than installing a skin, and less technical users can get lost in it. [Screenshot: UiPress Lite uiBuilder editing a custom admin dashboard layout] Pros - More design freedom than anything else on this list - Updated recently (September 2026) - Friendly to developers, with an extendable API Cons - Harder to learn than a skin or a suite - The wordpress.org listing doesn't give a "Tested up to" version - Lower rating (4.1), and fewer reviews behind it We get into where each tool fits in [WP Adminify vs UiPress](https://wpadminify.com/wp-adminify-vs-uipress). ## 4. WP Admin UI Customize: best free settings-based customizer ![WP Admin UI Customize free WordPress backend customizer banner](https://d1k2c27psfzbiv.cloudfront.net/wp-content/uploads/2026/09/13170007/wp-admin-ui-customize-wordpress-plugin-banner.webp) WP Admin UI Customize has been around a long time. It's free, it has 30,000+ active installs, and it's rated 4.6. Don't expect a fresh new look from it. What it does is let you change the dashboard, the screen options tab, site meta output, the admin bar, the admin menu, meta boxes, and the login screen, all from ordinary settings pages. That's handy when you want a tidier WordPress backend and don't want to pay for it. You can rename or hide menu items, strip nodes out of the toolbar, and hide meta boxes on the edit screen, and none of it needs code. Pros - Free, with no paid tier - Fine-grained control over lots of admin areas - Big, long-standing user base Cons - Last updated November 2024, and the listing says it was last tested with WordPress 4.9.31 - It's about control, not visual design Common issue: A plugin nobody has tested against recent WordPress releases can clash with newer admin screens. Try WP Admin UI Customize on staging first, and write down what you change so you can undo it if something goes wrong. ## 5. Slate Admin Theme: best minimal free admin skin ![Slate Admin Theme minimal WordPress admin skin banner](https://d1k2c27psfzbiv.cloudfront.net/wp-content/uploads/2026/09/13170011/slate-admin-theme-wordpress-plugin-banner.webp) Slate is the one you install and forget about. Its developers describe the goal as a clean, simplified design with a primary focus on the content writing experience. You won't find a settings page. Turn it on and the admin gets flatter and quieter right away. That's exactly what bloggers and editors who mostly write tend to want. It's rated 4.7 across 44 reviews and has 6,000+ active installs. [Screenshot: WordPress dashboard before and after activating Slate Admin Theme] Pros - Nothing to configure - Clean look that stays out of your way - Free Cons - No updates since January 2022, and only tested up to WordPress 5.9 - No branding, menu, or dashboard controls Slate isn't maintained anymore, so we'd keep it to personal sites. It's not something to put on a client site you expect to support for years. ## 6. Admin Color Schemes: best lightweight colour change ![Admin Color Schemes plugin banner showing WordPress admin color palettes](https://d1k2c27psfzbiv.cloudfront.net/wp-content/uploads/2026/09/13170014/admin-color-schemes-wordpress-plugin-banner.webp) When all you want is new colours, Admin Color Schemes is the lightest way to get there. It adds 12 colour schemes, designed by Kate Whitley, Dave Whitley, Mel Choyce, and Kelly Dwan, to the picker WordPress already has. Every user picks their own under Users > Profile > Admin Color Scheme. It hooks into the native colour scheme system instead of overriding styles, so it adds almost no overhead and seldom clashes with other plugins. Its 4.8 rating is the highest on this list. If you want to understand how the built-in picker works, read our guide to [changing the admin color scheme in WordPress](https://wpadminify.com/how-to-change-the-admin-color-scheme-in-wordpress). Pros - Very light - Built on the core WordPress admin color scheme API - Each user chooses their own scheme Cons - Only colours change: layout, branding, and menus stay the same - Last updated January 2022 ## How to create a WordPress admin theme without a plugin If you're comfortable with code, a basic WordPress admin theme only takes a few lines. It's worth doing when you need one custom palette or a couple of style tweaks and would rather not add another plugin. ### Register a custom admin colour scheme WordPress has a [wp_admin_css_color()](https://developer.wordpress.org/reference/functions/wp_admin_css_color/) function for registering new schemes. Drop this into a small custom plugin or your child theme's `functions.php`, then create the stylesheet it points at: ``` // Register a branded admin colour scheme function mysite_register_admin_color_scheme() { wp_admin_css_color( 'mysite-brand', __( 'Brand', 'mysite' ), get_stylesheet_directory_uri() . '/admin-colors/brand.css', array( '#1d2327', '#2c3338', '#6c4cf1', '#ffffff' ), array( 'base' => '#a7aaad', 'focus' => '#ffffff', 'current' => '#ffffff', ) ); } add_action( 'admin_init', 'mysite_register_admin_color_scheme' ); ``` The four hex values are only the preview swatches in the profile picker. The icon array sets the Dashicons colour in the admin menu. The real styling goes in `brand.css`. ### Force one scheme for every user On a client site you'll usually want everyone on the same branded scheme. This filter ignores whatever each user picked: ``` // Apply the brand scheme to all users add_filter( 'get_user_option_admin_color', function () { return 'mysite-brand'; } ); ``` [Screenshot: Users > Profile screen showing the custom "Brand" colour scheme] ### Add extra admin CSS Some things a colour scheme can't do, like rounded buttons or a custom font. For those, load a stylesheet on admin pages only, using the [admin_enqueue_scripts](https://developer.wordpress.org/reference/hooks/admin_enqueue_scripts/) hook: ``` function mysite_admin_styles() { wp_enqueue_style( 'mysite-admin', get_stylesheet_directory_uri() . '/admin-colors/admin.css', array(), '1.0.0' ); } add_action( 'admin_enqueue_scripts', 'mysite_admin_styles' ); ``` Common issue: A WordPress update that renames classes or changes markup can break your custom admin CSS. Stick to stable selectors like `#adminmenu` and `#wpadminbar`, and check your styles again after each major release. Once you also want dark mode, templates, or menu control, a maintained plugin will usually cost you less time than writing all that CSS by hand. ## How to choose the right WordPress admin theme Pick based on what you need done, not on whose screenshots look best. Here's a shortcut: | Your goal | Best pick | Why | | --- | --- | --- | | Full backend redesign plus branding | WP Adminify | Templates, dark mode, menus, white label, and login in one plugin | | Rebrand client sites quickly | White Label CMS | Wizard setup built around logos, login, and dashboard panels | | Build a custom admin from scratch | UiPress Lite | Block-based builder with the most layout freedom | | Hide and rename admin items for free | WP Admin UI Customize | Settings pages for menus, toolbar, and meta boxes | | A calmer look for writing | Slate Admin Theme | Minimal design, nothing to set up | | New colours only | Admin Color Schemes | 12 extra palettes and almost no overhead | Before installing, look at these on the wordpress.org listing: - Last updated date. If it hasn't been touched in over a year, test it on staging first. - Tested up to. Check it against the WordPress version you're running. - Free vs Pro split. Confirm the features you want aren't sitting behind an upgrade. And only run one WordPress admin theme at a time. Two plugins restyling the same elements end up fighting over CSS priority, and the dashboard looks broken as a result. If you need more control over one particular area, add a focused tool like an [admin menu editor](https://wpadminify.com/features/admin-menu-editor) rather than a second theme. ## How to install a WordPress admin theme You install a WordPress admin theme the same way you install any plugin: - From your dashboard, go to Plugins > Add New Plugin. - Search for the plugin's name, such as "Adminify" or "White Label CMS". - Click Install Now, and then Activate. - Open the plugin's settings from the admin menu and choose a template, colours, or branding. - With a colour scheme plugin, head to Users > Profile and select the new scheme. [Screenshot: Plugins > Add New Plugin screen with an admin theme plugin search result] There are more options to browse under the [admin-theme tag on wordpress.org](https://wordpress.org/plugins/tags/admin-theme/). Troubleshooting: If the admin looks broken after you activate, start by clearing any caching or minification plugin, because some of them combine admin stylesheets. Still broken? Deactivate the admin theme over FTP by renaming its folder in `wp-content/plugins`. ## WordPress admin theme FAQs ### Do WordPress admin themes slow down my site? Not for your visitors. A WordPress admin theme only loads on backend pages for logged-in users, so the front end runs at the same speed. Colour schemes add next to nothing to the admin. Full UI suites load more assets, but on decent modern hosting you're unlikely to notice. ### Can I use a WordPress admin theme with any front-end theme? Yes. The admin theme and the front-end theme don't interact at all. Run Astra, GeneratePress, a block theme, or anything else on the front end, and use whichever admin theme plugin you like in the backend. ### Is there a free WordPress admin theme? Yes. Every plugin on this list has a free version on wordpress.org. Slate Admin Theme, Admin Color Schemes, and WP Admin UI Customize are free outright. WP Adminify, White Label CMS, and UiPress Lite have free versions plus paid upgrades if you want them. ### How do I add dark mode to the WordPress admin? WordPress core doesn't have an admin dark mode, so you'll need a plugin or some custom CSS. WP Adminify has dark mode with scheduling built in. For other routes, see our guide on [how to enable WordPress dark mode](https://wpadminify.com/how-to-enable-wordpress-dark-mode). ### Can I show a different admin theme to each user role? Yes, with the right plugin. Core WordPress lets each user choose a colour scheme, but admins get no way to control it by role. WP Adminify adds role-based controls, so clients can get a simpler backend while administrators keep full access. ### Will an admin theme break after a WordPress update? It can, if nobody's maintaining the plugin. Look at "Last updated" and "Tested up to" before you install, and run major WordPress updates on staging first. Plugins that are still actively maintained, like WP Adminify, White Label CMS, and UiPress Lite, are the safer bet over the long run. ## Which one should you pick? It comes down to how much of the admin you want to change: - Only the colours: Admin Color Schemes, or your own `wp_admin_css_color()` scheme. - A quieter place to write: Slate, after a test on staging. - Branding for clients: White Label CMS or WP Adminify. - A full redesign of the backend: WP Adminify if you want everything in one plugin, UiPress Lite if you'd rather build it yourself. If you want templates, dark mode, menu control, and white label branding without juggling a handful of plugins, [try WP Adminify's dashboard customization](https://wpadminify.com/features/dashboard-customization) for free. For a wider look at what's out there, read our roundup of the [best WordPress dashboard plugins](https://wpadminify.com/best-wordpress-dashboard-plugin). --- # 7 Best WordPress Media Folder Plugins in 2026 (Tested & Compared) URL: https://wpadminify.com/best-wordpress-media-folder-plugins Last updated: 2026-09-12 WordPress has no media folders. Every plugin here adds them, and on a feature list they read as interchangeable: folder tree, drag-and-drop, nesting, bulk move. The difference that decides which one you'll regret is invisible until you open the database. So we opened it. Each plugin went onto a clean WordPress 7.0.3 site, activated on its own, and we recorded what it did to the schema. The results split the field down a line no sales page mentions. The short answer: FileBird is the most polished if folders are all you need, Folders by Premio is the best-rated free option, and [WP Adminify's media folders](https://wpadminify.com/features/wordpress-media-folder) make the most sense if you want one plugin foldering media, posts, pages and WooCommerce products instead of four. Storage model is what separates them, and it is the one choice you cannot reverse cheaply. Scope: folder organization only. For the wider category of file replacement and metadata tools, see [replacing an image without changing its URL](https://wpadminify.com/how-to-update-replace-image-in-wordpress-without-changing-url). ![Comparison of seven WordPress media folder plugins showing storage model, install counts and ratings](https://d1k2c27psfzbiv.cloudfront.net/wp-content/uploads/2026/08/10071345/wordpress-media-folder-plugins-comparison-scaled.webp) ## What is a WordPress media folder plugin? A WordPress media folder plugin adds a folder tree to the Media Library so you can group uploads instead of scrolling one endless grid. WordPress itself has no folders, only date-based upload directories. The plugin keeps the folder structure in the database and filters the library view against it, in the list screen and in the media modal. ### Virtual folders, not folders on your server Every plugin on this list builds virtual folders. Not one of them moves a file on disk. Your images stay where WordPress put them, under `wp-content/uploads/` in year and month directories, and their URLs never change. Drag an image into a folder in the admin and nothing moves over FTP or SFTP. That is a deliberate design choice, not a shortcut. Relocating the actual files would break every post, page, theme setting and cached stylesheet pointing at the old URL. The tradeoff is that your folders exist only for as long as something in the database still remembers them, which is why the storage format below decides how much of the work you keep if you ever switch plugins. If you are planning several levels of hierarchy, read the notes on [nested media folders in WordPress](https://wpadminify.com/wordpress-nested-media-folders) before you design the tree. ## The test that matters All seven use virtual folders. None of them moves files into real directories, so your images keep their existing URLs no matter how you reshuffle things. That part is universal, and it's why reorganizing a live library is safe. Where they part company is how the folder structure gets stored: | Plugin | Storage | Verified as | | --- | --- | --- | | WP Adminify | Taxonomy | `media_folder` (hierarchical) | | Folders (Premio) | Taxonomy | `media_folder`, `folder`, `post_folder` | | Media Library Organizer | Taxonomy | `mlo-category` (hierarchical) | | Wicked Folders | Taxonomy | hierarchical folder taxonomies per post type | | FileBird | Custom tables | `wp_fbv`, `wp_fbv_attachment_folder` | | Real Media Library | Custom tables | `wp_realmedialibrary` ×4 tables | | CatFolders | Custom tables | `wp_catfolders`, `wp_catfolders_posts` | Why it matters: taxonomy folders are ordinary WordPress terms. Any tool can read them, `wp term list` exports them, and another taxonomy-based plugin can pick them up. Custom-table folders are readable by the plugin that created them and nothing else. We tested what that means rather than assuming. Built an 11-folder, 2-level structure in FileBird, deactivated the plugin, and looked: all 38 files intact, folder tree gone from the admin, and a different folder plugin activated afterwards showed an empty sidebar. The rows were still sitting in `wp_fbv` the whole time. Nothing could read them. Background on how portable folders are stored in [WordPress media folders explained](https://wpadminify.com/wordpress-media-library-folders). Custom tables aren't a flaw, and we're not going to frame them as one. They perform better at scale and they support manual ordering that the term system handles badly. Just go in knowing which trade you're making, because it's the one you can't undo cheaply. ## 1. WP Adminify ![WP Adminify plugin free version](https://d1k2c27psfzbiv.cloudfront.net/wp-content/uploads/2022/08/02094912/WP-Adminify-plugin-banner.webp) Verified: 6,000+ installs · 86/100 from 109 ratings · v4.3.1 · updated 20 August 2026 Storage: `media_folder`, hierarchical, no custom tables [Media folders](https://wpadminify.com/features/wordpress-media-folder) inside a wider admin toolkit rather than a plugin that does one job. Folders show up in the Media Library and in the media modal, so inserting an image into a post means clicking a folder instead of scrolling the global grid. That second part gets underrated constantly, and we'd argue it's the whole point: you browse the library occasionally, you insert images every single time you write anything. https://www.youtube.com/watch?v=8e1WHsjcWLA Watch: configuring media folders and post type folders in WP Adminify Strengths: taxonomy storage keeps the structure portable; the hierarchical flag is confirmed, so subfolders work at the data layer; role-based controls; it replaces a stack of single-purpose admin plugins. Limitations: more plugin than you need if folders are genuinely the only thing on your list. And there's no manual folder ordering, which is a real gap next to FileBird rather than a footnote. Best for: teams who want folders alongside admin menu control, white labelling and dashboard customization. See [the folder documentation](https://wpadminify.com/docs/adminify/productivity/create-folder-for-post-types). ## 2. FileBird ![FileBird WordPress plugin banner](https://d1k2c27psfzbiv.cloudfront.net/wp-content/uploads/2026/08/10064131/filebird-banner.webp) Verified: 200,000 installs · 94/100 from 1,121 ratings · v6.5.8 · updated 22 August 2026 · Ninja Team Storage: `wp_fbv` (`id, name, parent, type, ord, created_by`) + `wp_fbv_attachment_folder` The category leader by adoption, and the schema explains why the interface feels the way it does. That dedicated `ord` column means dragging folders into whatever order you want is a first-class feature rather than a workaround, and the `parent` column confirms nesting has no ceiling in the data layer. Strengths: the most polished interface here; the best performance profile on very large libraries; explicit folder ordering; the biggest install base, which is the cheapest insurance against a plugin being abandoned. Limitations: the deepest practical lock-in of anything we tested, so leaving needs a purpose-built importer. Free tier caps folder count. Pricing: free plus paid tiers [$39 to $599 across site counts and lifetime options] Best for: anyone who puts interface quality and scale ahead of portability. More detail: our [FileBird review](https://wpadminify.com/filebird-review), the [FileBird vs WP Adminify comparison](https://wpadminify.com/filebird-vs-wp-adminify), and [FileBird alternatives](https://wpadminify.com/filebird-alternatives) if the lock-in is what gives you pause. ## 3. Real Media Library ![Real Media Library WordPress plugin banner](https://d1k2c27psfzbiv.cloudfront.net/wp-content/uploads/2026/08/10061132/real-media-library-banner.webp) Verified: 100,000 installs · 96/100 from 291 ratings · v4.23.4 · updated 1 September 2026 · devowl.io Storage: four tables, `wp_realmedialibrary`, `_posts`, `_meta`, `_tmp` The most feature-dense option here. Four tables in the free version tells you how much engineering sits underneath: ordering, metadata and staging state each get storage of their own rather than sharing a column. Strengths: the deepest feature set; strong rating; an established vendor; gallery and ordering integration that goes well past basic folders. Limitations: the heaviest database footprint here, so the deepest lock-in. More complexity than a small site will ever use. And the WordPress.org slug is `real-media-library-lite`, which is why searching the plugin installer for its actual name often returns nothing. Best for: large libraries where the advanced organization earns the commitment to one vendor. More detail: our [Real Media Library review](https://wpadminify.com/real-media-library-review), [Real Media Library vs WP Adminify](https://wpadminify.com/real-media-library-vs-wp-adminify), and [Real Media Library alternatives](https://wpadminify.com/real-media-library-alternatives). ## 4. Folders by Premio ![Folders by Premio WordPress plugin banner](https://d1k2c27psfzbiv.cloudfront.net/wp-content/uploads/2026/08/10061127/folders-by-premio-banner.webp) Verified: 90,000 installs · 100/100 from 1,517 ratings · v3.2.0 · updated 9 September 2026 · Premio Storage: `media_folder` (attachments), `folder` (pages), `post_folder` (posts), all hierarchical A perfect score across more than fifteen hundred ratings is the strongest signal in this category, and it arrives with taxonomy storage attached. Popular and portable is a rare pairing here. One quirk to know before you install: Folders and WP Adminify both register a taxonomy called `media_folder`, which we confirmed by activating each one alone. Don't run both. The flip side is that moving between them is far simpler than any custom-table migration, because the data already lives under the same name. Strengths: the best-rated plugin here; taxonomy storage; covers posts and pages as well as media; actively maintained. Limitations: the media interface is less specialized than FileBird's, and there's the taxonomy name collision. Best for: sites organizing content and media together, and anyone who wants an exit route. More detail: our [Folders by Premio review](https://wpadminify.com/folders-plugin-review), [Folders vs WP Adminify](https://wpadminify.com/folders-vs-wp-adminify), and [Folders plugin alternatives](https://wpadminify.com/folders-plugin-alternatives). ## 5. Media Library Organizer ![Media Library Organizer WordPress plugin banner](https://d1k2c27psfzbiv.cloudfront.net/wp-content/uploads/2026/08/10061136/media-library-organizer-banner.webp) Verified: 20,000 installs · 94/100 from 148 ratings · v2.1.3 · updated 7 September 2026 · Themeisle Storage: `mlo-category`, hierarchical, no custom tables The cleanest implementation we tested. One hierarchical taxonomy, nothing else, no tables. If you're the kind of person who checks `SHOW TABLES;` after installing anything, this is the one to look at first. Strengths: minimal footprint; fully portable; established vendor; recently updated. Limitations: smaller user base, no manual folder ordering, fewer advanced features. Best for: sites that want folders with the least possible commitment. More detail: our [Media Library Organizer review](https://wpadminify.com/media-library-organizer-review), [Media Library Organizer vs WP Adminify](https://wpadminify.com/media-library-organizer-vs-wp-adminify), and [Media Library Organizer alternatives](https://wpadminify.com/media-library-organizer-alternatives). ## 6. Wicked Folders ![Wicked Folders WordPress plugin banner](https://d1k2c27psfzbiv.cloudfront.net/wp-content/uploads/2026/08/10061141/wicked-folders-banner.webp) Verified: 20,000 installs · 98/100 from 56 ratings · v4.1.3 · updated 1 September 2026 · wickedplugins Storage: hierarchical taxonomies per post type Built to organize everything rather than media alone. We confirmed hierarchical folder taxonomies registered for pages alongside the media handling, so the claim holds up at the data layer. Strengths: works across posts, pages and custom post types; taxonomy storage; an excellent rating. Limitations: 56 ratings is a thin sample to judge reliability on, and media is one job among several rather than the focus. Best for: custom-post-type-heavy sites that want one folder system covering the lot. More detail: our [Wicked Folders review](https://wpadminify.com/wicked-folders-review). ## 7. CatFolders ![CatFolders WordPress plugin banner](https://d1k2c27psfzbiv.cloudfront.net/wp-content/uploads/2026/08/10061151/catfolders-banner.webp) Verified: 6,000 installs · 86/100 from 22 ratings · v2.5.6 · updated 23 August 2026 Storage: `wp_catfolders`, `wp_catfolders_posts` The newest and smallest option here. Custom-table storage like FileBird, on a much shorter track record. Strengths: lightweight, actively developed, clean interface. Limitations: 21 ratings is too small to judge reliability, and custom tables mean lock-in without the install base that makes FileBird's longevity a fair bet. Best for: small sites happy to try something young. We wouldn't put a 20,000-file library on it yet. ## Which of these folder plugins are free? All seven. Every plugin reviewed here ships a free version on wordpress.org, so nothing on this page is a paid-only recommendation, and you can install any of them and build a real folder tree without paying. The free tiers cover the job most sites actually have: create folders, nest them, drag files in. Paid tiers mostly lift limits and add role permissions, bulk tools and support. Where the free versions differ is maintenance, and that is worth more than a feature list. Install counts and update dates below were read from the wordpress.org plugin API on 12 September 2026. | Plugin | Free version | Active installs | Rating | Last updated | | --- | --- | --- | --- | --- | | FileBird | Yes | 200,000+ | 94/100 (1,121) | 22 Aug 2026 | | Real Media Library Lite | Yes | 100,000+ | 96/100 (291) | 1 Sep 2026 | | Folders by Premio | Yes | 90,000+ | 100/100 (1,517) | 9 Sep 2026 | | Media Library Organizer | Yes | 20,000+ | 94/100 (148) | 7 Sep 2026 | | Wicked Folders | Yes | 20,000+ | 98/100 (56) | 1 Sep 2026 | | WP Adminify | Yes | 6,000+ | 86/100 (109) | 20 Aug 2026 | | CatFolders | Yes | 6,000+ | 86/100 (22) | 23 Aug 2026 | Read that table as a maintenance signal rather than a quality score. Every one of these was updated inside the last month, which is the answer you want when the plugin owns your entire library structure. A high rating on twenty-two reviews tells you far less than a slightly lower one on more than a thousand. If you are starting with a library that is already large and unsorted, sorting it is its own job, covered in [bulk organizing the WordPress media library](https://wpadminify.com/bulk-organize-wordpress-media). ## What to check before you install | Check | Why | | --- | --- | | Taxonomy or custom tables? | Decides your exit cost. Run `wp db query "SHOW TABLES;"` after activating. | | Folders inside the media modal? | Without it you still scroll a global grid every time you insert an image, which is half the benefit gone. | | Nesting depth in the UI | All seven support nesting in the data layer. UI caps vary and are rarely documented. | | Bulk move with multi-select | Organizing an existing library is impractical without it. | | Free tier folder limit | Several cap folder count on the free version. | | Performance on your library | Test on a copy of your real data, not a demo site with 40 images. | The storage question takes one command and settles the thing you can't easily reverse: ``` # After activating your chosen plugin wp db query "SHOW TABLES;" wp db query "SELECT taxonomy, COUNT(*) FROM wp_term_taxonomy GROUP BY taxonomy;" ``` ## Which should you pick? | If you… | Pick | | --- | --- | | Want the most established, most polished option | FileBird | | Want the best-rated plugin with portable storage | Folders by Premio | | Need advanced features on a very large library | Real Media Library | | Want folders plus wider admin control | WP Adminify | | Want the smallest possible footprint | Media Library Organizer | | Need folders across custom post types | Wicked Folders | | Need manual folder ordering | FileBird or Real Media Library | ## WordPress Media Folder Plugin FAQs ### What is the best WordPress media folder plugin? FileBird leads on adoption with 200,000 installs and the most polished interface, at the cost of keeping folders in proprietary tables. Folders by Premio holds a perfect 100/100 from 1,517 ratings and uses portable taxonomy storage. Which one is right comes down to whether you'd rather have interface polish or an exit route. ### Do media folder plugins move files on my server? No. All seven tested use virtual folders, so files stay in wp-content/uploads/ and image URLs never change. That's deliberate, because moving files would break every post that embeds them. Only the folder structure lives in the database. ### Can I create subfolders with these plugins? Yes, all seven support nesting at the data layer, either through a hierarchical taxonomy or a parent column in their own table. Interface limits vary and are rarely documented, so if you need three levels, build three levels in the UI before you commit to a structure that assumes it. ### Which media folder plugin is easiest to switch away from? Any taxonomy-based one: WP Adminify, Folders, Media Library Organizer or Wicked Folders. Their folders are standard WordPress terms that any tool can read. FileBird, Real Media Library and CatFolders use private tables, so leaving needs a purpose-built importer. ### Is the free version of these plugins enough? For most sites, yes. Free tiers generally give you folders, nesting and drag-and-drop. Paid tiers mostly lift folder count limits and add role-based permissions. Start free and upgrade when you hit a limit you can actually feel. ### Can I run two media folder plugins at the same time? No. Several register overlapping taxonomies, and we confirmed WP Adminify and Folders by Premio both register one named media_folder. Running them together gives you two half-populated folder trees and no way to tell which is right. Activate one. ### What happens to my folders if I deactivate the plugin? Deactivating hides the folder tree, it does not delete it. The structure sits in the database, so reactivating brings the same folders back with the same files in them. Uninstalling is the risky step, because a plugin may drop its own tables or terms on removal. Check the uninstall behaviour before you delete anything. ### Can I upload a folder of images and keep the structure? Not through the normal uploader. WordPress reads a dropped folder as a flat list of files, so the nesting is lost on arrival and everything lands unsorted. Plugins that support this do it through a separate import or server-sync feature instead. For a migration, move the files first and build the folders afterwards. ## Final verdict - FileBird is the default pick for interface quality and scale, if the lock-in doesn't bother you. - Folders by Premio has the best combination of rating, portability and breadth. - WP Adminify is the right shape when media is one of several admin problems, not the only one. - Media Library Organizer is the minimal, standards-based choice. - Run the storage check before you commit a large library. One command, and it answers the decision you can't easily reverse. Also tested, just outside the seven: [WP Media Folder](https://wpadminify.com/wp-media-folder-review), including [how it compares with WP Adminify](https://wpadminify.com/wp-media-folder-vs-wp-adminify) and [what else to consider instead of it](https://wpadminify.com/wp-media-folder-alternatives), plus [Enhanced Media Library](https://wpadminify.com/enhanced-media-library-review) and [Media Library Folders](https://wpadminify.com/media-library-folders-review). Once the plugin is installed: [media library best practices](https://wpadminify.com/wordpress-media-library-best-practices), [bulk-organizing a library you already have](https://wpadminify.com/bulk-organize-wordpress-media), [building nested folders](https://wpadminify.com/wordpress-nested-media-folders), and [finding an image fast once there are thousands](https://wpadminify.com/find-images-wordpress-media-library). New to media folders? Start with [how WordPress media folders work](https://wpadminify.com/wordpress-media-library-folders), then [how to create folders in the Media Library](https://wpadminify.com/how-to-add-folders-to-wordpress-media-library). Planning a deep structure? See [how to organize your media library with folders](https://wpadminify.com/how-to-organize-wordpress-media-library-with-folders). Want folders for more than just media? [WP Adminify Media Folder](https://wpadminify.com/features/wordpress-media-folder) organizes posts, pages, and WooCommerce products too, and it is part of a wider [WordPress dashboard customization](https://wpadminify.com/wordpress-dashboard-customization) toolkit, compare tiers on the [WP Adminify pricing](https://wpadminify.com/pricing) page. If your library has grown unwieldy, see how to [manage a large WordPress media library](https://wpadminify.com/manage-large-wordpress-media-library) and [clean it up safely](https://wpadminify.com/clean-wordpress-media-library). --- # How to White-Label WordPress Login Page for Your Clients? URL: https://wpadminify.com/white-label-wordpress-login-page-for-your-clients Last updated: 2026-09-12 As a website owner, you want to reflect your branding in your website login page. Instead of the default login screen, using custom logos, colors, backgrounds, and fonts can increase your brand identity. Not only for branding, but also a Custom WordPress Login Page is necessary for better security. It’s a good choice to integrate reCAPTCHA in your login page, which can protect you from brute force attacks. Customizing the default WordPress login page is easy if you follow the proper guidelines. To make it easier, I will break down this blog post into a few steps. First, I am going to clarify each step, then I will share the necessary tools and code that will assist you in creating a custom branded Login Page. For a complete method-by-method walkthrough, including the plugin, code, and white-label options, read our full guide on [how to customize the WordPress login page](https://wpadminify.com/customize-wordpress-login-page). Before beginning, I would like to share this [WordPress custom client Dashboard](https://wpadminify.com/how-to-create-wordpress-custom-user-dashboard-without-coding) resource. Open this link in a new tab and learn how you can create a custom WordPress Dashboard. For now, let’s focus on creating a personalized login page. ## Creating a Custom WordPress Login Page I have tried to break down this blog post into four different parts. You can skip any part if you think it’s not relevant to you. But most people like me prefer to implement all of my mentioned 4 points in a WordPress login page. If you have any extra customization ideas on your mind, please comment below, and I will highly appreciate your time and will definitely update this blog post with your suggestions. ### Branding with Visual Design As a freelancer and agency owner, my priority is branding. Changing logo, Colors, Background, and Typography customization is enough for a visual branding. ### User Experience and error notice Adding a warm welcome message within a short title can add a personal touch to your login page. Customizing the default error messages and showing all necessary links inside the login page will help you connect with your users. ### Security enhancements Changing the default WordPress login URL (/wp-admin/) and redirecting all visitors to a custom link who are trying to login via /wp-admin/ will help you add a layer to your security. But that’s not the end, you should integrate reCAPTCHA in your login form to prevent bot login. ### Advanced Functional Customizations If you are running a business that needs users login to your WordPress site, then social media login integration is a must. It can help you generate more conversions. Social login reduces the vulnerabilities from weak password practices. To add more extra touch in customization, you can redirect different types of users to a specific URL after successful login. ## Rebrand Your WordPress Login Page For creating a Custom WordPress Login Page, I will use the [Loginfy plugin](https://wpadminify.com/loginfy). Loginfy offers so many features in the free version that no other plugin offers at this time. You can try the Loginfy Pro to get more advanced customization. [Free Download](https://wordpress.org/plugins/loginfy) | [Get loginfy PRO ](https://wpadminify.com/loginfy/pricing) Check the [installation and activation guidelines](https://wpadminify.com/docs/loginfy/getting-started) from Loginfy and let’s begin our customization journey now. When I navigate to the login customizer page, my first option is to disable the credit. It will remove the Powered by Loginfy credit from the login page. Navigate to `Loginfy> Customizer > Credit > Disable credit`. ![Remove Loginfy credit from the login page](https://d1k2c27psfzbiv.cloudfront.net/wp-content/uploads/2022/09/18103342/Remove-Loginfy-credit-from-the-login-page.webp) ### Replace the default WordPress logo Navigate to `Loginfy> Customizer> Logo`. If you like the add a warm welcome message with your logo, then select Image and text. Upload your logo, then write anything inside the text field. ![Change WordPress login page logo with loginfy](https://d1k2c27psfzbiv.cloudfront.net/wp-content/uploads/2022/09/18103341/Change-WordPress-login-page-logo-with-loginfy.webp) Bonus: You can also change the login page title. Generally, it’s not visible inside your login page content, but it provides a personal touch to your audience. ![Change WordPress login page title](https://d1k2c27psfzbiv.cloudfront.net/wp-content/uploads/2022/09/18103340/Change-WordPress-login-page-title.webp) ### Change the Background color or add an image Navigate to `Loginfy> Customizer > Background`. You can add color/image, Video, and Slideshow in your login page background. If you choose the color that is by default selected, then you will get two options called color and gradient. Inside the default color option, you will notice an image uploader option. Just upload your image, and this will be your background image. ![Change WordPress login page background color and image](https://d1k2c27psfzbiv.cloudfront.net/wp-content/uploads/2022/09/18103339/Change-WordPress-login-page-background-color-and-image.webp) Bonus: You can select an overlay color or a gradient and control the opacity for your overlay. Proper customization of the overlay can provide you with extra beauty in the login page. ### Change WordPress login page font Every website has a font that represents the brand to its audience. If font matters too much for your front end, then why not the login page? Navigate to`Loginfy> Customizer > Google fonts` and select a suitable font that expresses your brand. ![Change WordPress login page font](https://d1k2c27psfzbiv.cloudfront.net/wp-content/uploads/2022/09/18103338/Change-WordPress-login-page-font.webp) ## Enhance UX and Modify Error messages I have already mentioned how you can add a warm welcome note in the logo changing option. Now I will share the customization of Error messages in your default WordPress login page. Navigate to `Loginfy > Customizer > Error Messages` option. Here you will notice 3 different tabs for different types of notices called Username, Password, and Email. Click on each tab and customize its error messages. ![Login page error messages customization](https://d1k2c27psfzbiv.cloudfront.net/wp-content/uploads/2022/09/18103337/Login-page-error-messages-customization.webp) ## Change Login URL & Add reCAPTCHA for Security This gonna be a little critical and needs basic coding knowledge. I am going to use the WP Adminify plugin to change the login URL, this will be the easiest way to change the login page URL. For the reCAPTCHA, I will share a code and steps that you should follow to configure the reCAPTCHA in your login page. [Free Download](https://wordpress.org/plugins/adminify) | [Get WP Adminify PRO ](https://wpadminify.com/pricing) Make sure to install the WP Adminify plugin PRO properly, and feel free to comment if you face any issues. There was a simple code snippet that worked to change the login URL before, but in the latest version of 6.8+, that code doesn’t work. ### Change the default WordPress login URL In short, navigate to `WP Adminify > Security > Enable Redirect URLs > type the new login page URL`. If you have WP Adminify installed, then inside the security option, you will get a new login URL option. Just type your preferred text here for the new login URL and save the settings. ![How to Change WordPress login page URL](https://d1k2c27psfzbiv.cloudfront.net/wp-content/uploads/2022/03/18103401/How-to-Change-WordPress-login-page-URL.webp) To learn more about the feature, you can read this how to [change WordPress login page URL](https://wpadminify.com/change-wordpress-login-page-url). ### Enhance Security with reCAPTCHA As I mentioned, this is going to be technical. But tie up your seat belt and follow my steps properly, this is gonna be super easy. Adding reCAPTCHA to your WordPress login page provides a personal touch and reduces the risk of brute-force attacks or other vulnerabilities. To configure Google reCAPTCHA, visit the [Google reCAPTCHA Admin](https://www.google.com/recaptcha/admin/create) page and register a new website. Make sure to provide a proper website URL without https://. ![Add website in Google reCAPTCHA Admin](https://d1k2c27psfzbiv.cloudfront.net/wp-content/uploads/2022/09/18103347/Add-website-in-Google-reCAPTCHA-Admin.webp) When you click on the submit button after providing all necessary information, it will redirect you to a page containing your site key and your secret key. ![Copy site key and secret key for captcha](https://d1k2c27psfzbiv.cloudfront.net/wp-content/uploads/2022/09/18103348/Copy-site-key-and-secret-key-for-captcha.webp) Now, copy the following code and paste it into your functions.php file. All you have to do is replace `your_site_key` and `your_secret_key`with the actual keys that you have received from Google. ``` // Enqueue the Google reCAPTCHA API script on the login page. function enqueue_recaptcha_script() { wp_enqueue_script( 'google-recaptcha', 'https://www.google.com/recaptcha/api.js' ); } add_action( 'login_enqueue_scripts', 'enqueue_recaptcha_script' ); // Display the reCAPTCHA widget on the login form. function display_recaptcha_on_login() { // Replace 'your_site_key' with your actual Site Key from Google reCAPTCHA. echo '
'; } add_action( 'login_form', 'display_recaptcha_on_login' ); // Verify the reCAPTCHA response during user authentication. function verify_recaptcha_response( $user, $username, $password ) { // Check if the reCAPTCHA response is submitted. if ( isset( $_POST['g-recaptcha-response'] ) && ! empty( $_POST['g-recaptcha-response'] ) ) { $recaptcha_response = sanitize_text_field( $_POST['g-recaptcha-response'] ); $secret_key = 'your_secret_key'; // Replace with your actual Secret Key from Google reCAPTCHA. // Send the request to Google for verification. $response = wp_remote_post( 'https://www.google.com/recaptcha/api/siteverify', array( 'body' => array( 'secret' => $secret_key, 'response' => $recaptcha_response, 'remoteip' => $_SERVER['REMOTE_ADDR'] ) ) ); $result = json_decode( wp_remote_retrieve_body( $response ), true ); // If verification failed, return a WP_Error which stops the login. if ( ! isset( $result['success'] ) || true !== $result['success'] ) { return new WP_Error( 'recaptcha_invalid', __( 'ERROR: reCAPTCHA verification failed. Please try again.' ) ); } } else { // If there's no reCAPTCHA response, return an error. return new WP_Error( 'recaptcha_empty', __( 'ERROR: Please verify that you are not a robot.' ) ); } return $user; } add_filter( 'authenticate', 'verify_recaptcha_response', 21, 3 ); ``` Now save your functions.php file. Before saving, make sure there is no issue in the code; otherwise, it may result in a critical error on your website. If everything is fine, you will get this type of reCAPTCHA in your WordPress login page. ![Add Captcha to default WordPress login page](https://d1k2c27psfzbiv.cloudfront.net/wp-content/uploads/2022/09/18103343/Add-Captcha-to-default-WordPress-login-page.webp) NOTE: 2 factor authentication can increase your website security. You may checkout [how to enable two factor authentication](https://wpadminify.com/two-factor-authentication-for-wordpress-admin) post. ## Advanced Customizations on the login page This is optional, but useful if you consider user experience. Enabling social login on your WordPress login page can be hassle-free for your users. Personally, I also don’t prefer to note down my password and prefer a social login system. After a successful login, a user expects you to redirect to a special page that is only designed for him/her. I will cover these two options in this section. ### Enable social login on the WordPress login page To enable social login, I will use the Nextend Social Login and Register plugin. Install this plugin like you have installed Loginfy and WP Adminify in your WordPress Dashboard. You will get Facebook, Google, X (formerly Twitter) for free. ![Facebook Google and Twitter social login](https://d1k2c27psfzbiv.cloudfront.net/wp-content/uploads/2022/09/18103336/Facebook-Google-and-Twitter-social-login.webp) Just click on the Getting Started button beside your preferred social media icon and do all the configuration properly. These settings are very basic and I don’t want to explain each step in this blog post. But if you face any problem, feel free to comment and I will try to assist you. ### Redirect users while log in and log out This is another interesting part for user experience. You can track users when they log in and based on user roles or user name, you can redirect them to a specific URL. Not only for login but also when someone log out, instead of showing them the default login page, you can set a URL where you want to redirect your users when they log out. Navigate to `WP Adminify > Security > Enable Redirect URLs > Roles Redirect > Add new login redirect` button. ![Redirect users to a custom admin page while login](https://d1k2c27psfzbiv.cloudfront.net/wp-content/uploads/2022/03/18103420/Redirect-users-to-a-custom-admin-page-while-login.webp) Just input any URL (Support both backend and frontend) and set the user role or user name condition properly. Play the following video and you will get a clear idea on how this works. Login to clients account and check the redirection to custom admin page Just like login redirection, you can apply log out redirection too. Click on the Logout Redirect tab and add new log out redirect. ![Redirect user on log out to a page](https://d1k2c27psfzbiv.cloudfront.net/wp-content/uploads/2022/03/18103416/Redirect-user-on-log-out-to-a-page.webp) Here is a video preview for you - Redirect users to a custom landing page when someone log out from Admin Panel ## Let’s Wrap UP! That’s all about creating a custom WordPress login page. If you consider the design of your login page, Loginfy offers 16 pre-built templates with multiple layout options. You can position the login form anywhere in the login page and many more. Start using Loginfy and the WP Adminify plugin, and I am pretty sure you will love it. If you face any problem while using the plugin, feel free to get in touch or comment below and I will try my best to respond to your comment. --- # How to Add reCAPTCHA to the WordPress Login Page With Code? URL: https://wpadminify.com/wordpress-login-recaptcha-code Last updated: 2026-09-12 Every CAPTCHA plugin does the same four things: load Google's script on the login page, render a widget inside the form, post the resulting token, and check that token against Google before letting the login through. None of it is complicated. The version below runs to about a hundred lines, and a good half of that is guards and error handling. This is the no-plugin version, written out in full. If you already keep a snippets file for the login screen, this drops straight into it, and [customizing the WordPress login page without a plugin](https://wpadminify.com/customize-wordpress-login-page-without-plugin) covers where that file should live. One thing to be clear about before you start: CAPTCHA filters bots, it does not stop someone who already has your password. [Two-factor authentication](https://wpadminify.com/two-factor-authentication-for-wordpress-admin) is the measure that does, and it belongs above this one on any list. ## How the pieces fit together Two keys, two halves of the job. The site key is public. It goes into the page markup, the browser uses it to ask Google for a token, and anyone viewing source can read it. That is by design and it is not a leak. The secret key never leaves your server. When the login form is submitted, your PHP posts the token and the secret key to Google's `siteverify` endpoint and gets back a yes or no. The browser is not involved in that call and cannot forge it. Skip the second half and you have decoration. A widget that renders but is never verified server side blocks nobody, because an attacker posting directly to `wp-login.php` simply omits the field. It is the failure worth checking for first, because the page looks correct either way. ## Pick a version before you generate keys The keys are version-specific. Choosing v3 and then deciding you wanted v2 means going back to the console and registering again. | Version | What the user sees | What your code has to do | | --- | --- | --- | | v2 checkbox | An "I'm not a robot" tickbox, sometimes an image puzzle | Render a div, read one POST field, verify it | | v2 invisible | Nothing, unless Google is suspicious | Bind the widget to the submit button with a callback | | v3 | Nothing ever, apart from a corner badge | Execute on page load, store the token in a hidden field, then check a score you choose | For a login page, v3 is usually the right call and v2 checkbox is the easiest to get working. The code below covers v2 checkbox first because it is the shortest complete example, then the v3 variant in full. ## Step 1: generate the keys in the Google console Open the reCAPTCHA admin console and register the site. ![Add website in Google reCAPTCHA Admin](https://d1k2c27psfzbiv.cloudfront.net/wp-content/uploads/2022/09/18103347/Add-website-in-Google-reCAPTCHA-Admin.webp) Four fields, and two of them cause most of the setup failures: - Label. Something you will recognise in a year. "example.com login" beats "test 2". - Type. Whichever version you settled on above. This is the field you cannot change later. - Domains. The bare domain, no protocol and no path: `example.com`. Add `www.example.com` as a separate entry if the site answers on both, because Google matches the exact hostname. Add `localhost` only while you are testing locally, then remove it. - Owners. Add a second person from the team. Keys tied to one personal Google account become a problem the day that person leaves. Submit, and Google shows both keys. ![Copy site key and secret key for captcha](https://d1k2c27psfzbiv.cloudfront.net/wp-content/uploads/2022/09/18103348/Copy-site-key-and-secret-key-for-captcha.webp) ## Step 2: put the keys in wp-config.php Not in your theme, not in a settings row, and not hardcoded halfway down a function you will forget about. Constants in `wp-config.php` keep the secret out of the database, out of exports, and out of any repository that ignores that file. ``` define( 'MYSITE_RECAPTCHA_SITE_KEY', '6Lxxxxxxxxxxxxxxxxxxxxxxxxxxxxxxxxxxxxx' ); define( 'MYSITE_RECAPTCHA_SECRET_KEY', '6Lxxxxxxxxxxxxxxxxxxxxxxxxxxxxxxxxxxxxx' ); ``` Put them above the line that reads `/* That's all, stop editing! */`. If the site is in version control and `wp-config.php` is committed, use environment variables instead and read them with `getenv()`. ## Step 3: render the widget on the login form Two hooks. `login_enqueue_scripts` fires on `wp-login.php` and nowhere else, so Google's script never loads on your front end or in the admin. `login_form` prints inside the form, below the password field. Everything from here goes in a must-use plugin at `wp-content/mu-plugins/login-recaptcha.php`. An mu-plugin survives theme switches and cannot be deactivated from the plugins screen by accident, which matters for a file that controls whether anyone can log in. ```php ', esc_attr( MYSITE_RECAPTCHA_SITE_KEY ) ); } ); ``` Load the login page now and the checkbox should be sitting between the password field and the Log In button. It does nothing yet. Anyone can still log in with it untouched, because nothing is checking. ## Step 4: verify the token on the server This is the half that matters. The `authenticate` filter is where WordPress decides whether a login succeeds, and it is the right place to reject a request that failed the CAPTCHA. Priority matters here. WordPress runs `wp_authenticate_username_password` on `authenticate` at priority 20. Hooking at 21 means your check runs after the password has been evaluated, so you are not spending a Google API call on every empty page load. ``` add_filter( 'authenticate', 'mysite_recaptcha_check', 21, 3 ); function mysite_recaptcha_check( $user, $username, $password ) { // Only interfere with a real form submission on wp-login.php. if ( 'POST' !== ( $_SERVER['REQUEST_METHOD'] ?? '' ) || empty( $_POST['wp-submit'] ) ) { return $user; } // Let WP-CLI, XML-RPC and programmatic logins through untouched. if ( ( defined( 'WP_CLI' ) && WP_CLI ) || ( defined( 'XMLRPC_REQUEST' ) && XMLRPC_REQUEST ) ) { return $user; } $token = isset( $_POST['g-recaptcha-response'] ) ? sanitize_text_field( wp_unslash( $_POST['g-recaptcha-response'] ) ) : ''; if ( '' === $token ) { return new WP_Error( 'recaptcha_missing', 'Error: Please complete the CAPTCHA and try again.' ); } $result = mysite_recaptcha_siteverify( $token ); if ( is_wp_error( $result ) ) { // Google unreachable. Decide your own policy, see the note below. return $user; } if ( empty( $result['success'] ) ) { return new WP_Error( 'recaptcha_failed', 'Error: CAPTCHA verification failed. Please try again.' ); } return $user; } /** * Server to server call to Google. The secret key never reaches the browser. */ function mysite_recaptcha_siteverify( $token ) { $response = wp_remote_post( 'https://www.google.com/recaptcha/api/siteverify', array( 'timeout' => 10, 'body' => array( 'secret' => MYSITE_RECAPTCHA_SECRET_KEY, 'response' => $token, 'remoteip' => isset( $_SERVER['REMOTE_ADDR'] ) ? sanitize_text_field( wp_unslash( $_SERVER['REMOTE_ADDR'] ) ) : '', ), ) ); if ( is_wp_error( $response ) ) { return $response; } $body = json_decode( wp_remote_retrieve_body( $response ), true ); return is_array( $body ) ? $body : new WP_Error( 'recaptcha_bad_response', 'Unreadable response' ); } ``` Read the `is_wp_error` branch again and decide what you want. As written, if Google is unreachable the login is allowed through. That is fail-open: a Google outage does not lock out your whole team. The alternative is to return a `WP_Error` there, which is fail-closed and more secure, and which also means an outage at Google is an outage at your login page. There is no universally correct answer. Pick one deliberately rather than inheriting it from a snippet. ## Step 5: cover the other forms `login_form` only fires on the login form itself. The lost password and registration forms have their own hooks, and leaving them open moves the bots rather than stopping them. The password reset form is the one worth protecting, because it accepts an email address and tells you things. ``` // Render the widget on the lost password and registration forms too. add_action( 'lostpassword_form', 'mysite_recaptcha_widget' ); add_action( 'register_form', 'mysite_recaptcha_widget' ); function mysite_recaptcha_widget() { printf( '
', esc_attr( MYSITE_RECAPTCHA_SITE_KEY ) ); } // Verify on password reset requests. add_filter( 'allow_password_reset', function ( $allow ) { if ( 'POST' !== ( $_SERVER['REQUEST_METHOD'] ?? '' ) ) { return $allow; } $token = isset( $_POST['g-recaptcha-response'] ) ? sanitize_text_field( wp_unslash( $_POST['g-recaptcha-response'] ) ) : ''; if ( '' === $token ) { return new WP_Error( 'recaptcha_missing', 'Please complete the CAPTCHA.' ); } $result = mysite_recaptcha_siteverify( $token ); if ( ! is_wp_error( $result ) && empty( $result['success'] ) ) { return new WP_Error( 'recaptcha_failed', 'CAPTCHA verification failed.' ); } return $allow; } ); // Verify on registration. add_filter( 'registration_errors', function ( $errors ) { $token = isset( $_POST['g-recaptcha-response'] ) ? sanitize_text_field( wp_unslash( $_POST['g-recaptcha-response'] ) ) : ''; $result = '' === $token ? null : mysite_recaptcha_siteverify( $token ); if ( '' === $token || ( ! is_wp_error( $result ) && empty( $result['success'] ) ) ) { $errors->add( 'recaptcha_failed', 'Error: CAPTCHA verification failed.' ); } return $errors; } ); ``` If your site also has a front-end login form built with `wp_login_form()`, it posts to `wp-login.php` and the `authenticate` filter covers it. The widget will not appear on it though, because `login_form` does not fire there. [How to create a custom WordPress login form](https://wpadminify.com/wordpress-custom-login-form) shows where to print it on that build. ## The v3 version v3 never shows a challenge. It scores the request from 0.0 to 1.0 and hands you the number, which means the code changes in three places: the script URL takes the site key, the token comes from a JavaScript call rather than a rendered widget, and you compare a score. ```php General | | Best thing about it | It does one job, does it well, and asks nothing else of you | | Worst thing about it | What people believe it does | | Skip it if | You think it replaces rate limiting or two-factor | ## The numbers From the WordPress.org Plugin API, re-pulled 1 September 2026. | Metric | Value | | --- | --- | | Active installs | 2,000,000 | | Rating | 96/100 from 2,111 ratings | | Five-star / one-star | 1,986 / 62 | | Requires | WordPress 4.1, PHP 7.0 | | Price | Free, no paid tier | Two million installs is the largest number anywhere in this cluster, ten times LoginPress and forty times Colorlib's login customizer. Sixty-two one-star ratings out of 2,111 is a 2.9 per cent complaint rate at a scale where almost every possible host, theme and plugin combination has been tried by somebody. Its tested-up-to version matched the current WordPress release when we checked, and it had shipped a release within the previous month. On a plugin that sits on the authentication path, that's the field that should reassure you most, and it's the one to re-read on its WordPress.org listing before you install it. ## The entire plugin ![The WPS Hide Login section at the bottom of WordPress Settings General, containing a Login url field, a Redirection url field and a Save Changes button](https://d1k2c27psfzbiv.cloudfront.net/wp-content/uploads/2026/09/01135751/wps-hide-login-entire-settings-block.webp) Two fields. Login url. The address your login screen moves to. Type `login` and your login lives at `yoursite.com/login`. Redirection url. Where everyone who requests the old address gets sent. The default is `404`, which serves your site's not-found page and tells a scanner nothing. That's it. Save Changes, and the job is done. ![WordPress Settings General screen with the WPS Hide Login section visible at the bottom and a WPS Hide Login entry in the Settings submenu](https://d1k2c27psfzbiv.cloudfront.net/wp-content/uploads/2026/09/01135758/wps-hide-login-settings-general.webp) A small correction to something we've written before: the plugin adds no top-level admin menu, which is the restraint people praise it for, but it does add a Settings > WPS Hide Login submenu entry that links to the section. Both facts are visible in the screenshot above. The settings block also carries vendor links: a support forum, a note that the plugin comes from WPServeur, and pointers to four sibling products. It's the only promotional surface in the plugin and it sits below the fields rather than in front of them. Some people find it noisy. Given that this is a free plugin with no paid tier, it seems a fair trade. ## What it actually protects against This is the part that decides whether the plugin is worth installing, and it's the part most write-ups skip. The overwhelming majority of login attempts on a WordPress site are automated and generic. A script walks a list of domains, requests `/wp-login.php` on each one, and starts trying credentials. It doesn't read your site, it doesn't look for a custom URL, and it moves on when it gets a 404. Against that traffic, a changed login URL is close to perfectly effective, and the benefit isn't only security. Those requests cost CPU, fill error logs, trip rate limiters and, on cheap shared hosting, measurably slow the site. A lot of what people describe as "the site feels faster after installing this" is exactly that. What it does not stop: - A targeted attacker. Anyone who wants into your site specifically will find the URL. There are several ways it leaks, listed below. - A weak or reused password. Once someone reaches the form, the URL has done its whole job. - A leaked or guessable username. Author archives and the REST API both enumerate users by default: [the WordPress REST API leaks usernames](https://wpadminify.com/wordpress-rest-api-leaks-usernames), and [changing a WordPress username](https://wpadminify.com/how-to-change-wordpress-username) covers the fix. - Anything that is not the login form. XML-RPC, a vulnerable plugin, an insecure host, a stolen session cookie. None of them care where your login page is. So the honest framing is that this plugin removes noise rather than removing risk. That's genuinely worth having. [The best WordPress login security plugins](https://wpadminify.com/best-wordpress-login-security-plugins) covers what does the actual work. ### One thing it does better than a code snippet Worth naming, because it's a real technical distinction. Most "change your login URL" snippets you'll find online hook `init` and redirect GET requests to `wp-login.php`. That's cosmetic: a direct POST to `wp-login.php` still authenticates, so bots are entirely unaffected. WPS Hide Login's own field text describes it as preventing access to `wp-login.php` and the `wp-admin` directory for people who aren't logged in, which is a stronger claim than a redirect. If you're choosing between this plugin and a snippet you copied from a forum, that difference is the reason to choose the plugin. ## The URL leaks more easily than you think Four common paths, and none of them requires an attacker to be clever. Referrer headers. Click an external link from a page whose URL contains your login slug and the destination server may see it in its logs. Plugins and themes that hard-code the login address. Anything generating a "Log in" link with `wp-login.php` written into it will either break or expose the real address. This is also the most common cause of "WPS Hide Login broke my site" reports. Password reset emails. Reset links contain the login URL by design. Every reset email is a copy of your secret sitting in an inbox. People. A team member pastes it into a shared document, a support ticket, or a message to a contractor. This is the leak that actually happens. None of these is a reason not to use the plugin. They're reasons to treat the URL as a filter and not as a password, and to put a real password policy and two-factor behind it: [two-factor authentication for WordPress admin](https://wpadminify.com/two-factor-authentication-for-wordpress-admin). ## If you lock yourself out This is the plugin's only real risk, and it's entirely a human one: you forget the URL, or a client does, and now nobody can reach the login screen at all. Two ways back in. Neither needs the login page. Over SFTP. Rename the plugin's folder in `wp-content/plugins/`. WordPress can't find the plugin, deactivates it, and `wp-login.php` works again immediately. Rename it back afterwards and set a URL you'll remember. ``` wp-content/plugins/wps-hide-login/ ↓ rename to wp-content/plugins/wps-hide-login-disabled/ ``` With WP-CLI, if your host provides SSH: ``` wp plugin deactivate wps-hide-login ``` Three things to do before you ever need either of those: - Write the URL down where you keep passwords, not in a browser bookmark on one machine. - Tell every person who logs in. A client who can't find their login page at nine on a Monday won't remember which plugin caused it. - Do not change the login URL in the same session as anything else. If two changes break the site you won't know which one did it. If you're already locked out and the situation is worse than a forgotten URL, [fixing WordPress login page issues](https://wpadminify.com/how-to-fix-wordpress-login-page-issues) covers redirect loops, [wp-admin redirecting to the homepage](https://wpadminify.com/wp-admin-redirects-to-homepage) covers that specific symptom, and [resetting a WordPress admin password](https://wpadminify.com/how-to-change-or-reset-wordpress-admin-password) covers the database and WP-CLI routes. ## Known friction Three situations where this plugin needs attention rather than installation and forgetting. Caching. A full-page cache or a CDN that has cached a redirect or a 404 for the old address can produce confusing behaviour after a change. Clear every cache layer immediately after saving, and test in a private window. Plugins that hard-code `wp-login.php`. Membership plugins, some form builders and some themes generate login links directly. Those links will land on your redirection target. Audit your "Log in" links after enabling this. Multisite. Behaviour differs between a network-wide activation and a per-site one, and it's worth reading the plugin's own notes rather than assuming. This isn't a place to guess. ## What WPS Hide Login does well Scope discipline. Two fields. No dashboard, no notifications, no weekly summary email, no upsell modal. In a category where every competitor is a suite, this is a genuine design achievement and it's why two million people run it. It is free, permanently. No pro tier, no locked features, no licence key. There's nothing to renew and nothing to forget to renew. Maintenance. Current on both the last-updated and tested-up-to fields when we checked. For a plugin on the authentication path that matters more than any feature. Evidence. 2,111 ratings at 96/100. Whatever edge case you're worried about has almost certainly been hit by somebody already. It stops the POST too, unlike the redirect snippets that circulate on forums. ## Where it falls short What people believe it does. The biggest problem with this plugin is that a lot of sites install it and consider login security finished. It's one thin layer. No lockout safety net. No email reminder of the URL, no grace period, no emergency access token. Losing the URL means an SFTP session. It cannot help with anything else. No rate limiting, no two-factor, no logging, no notification when someone tries the old URL. Whether that's a fault or the entire point depends on your view. The sibling-product links. Four promotional links inside the settings block. Minor, and worth mentioning because "no upsell" is part of this plugin's reputation and isn't quite true. ## Who should install it Almost any WordPress site. It's free, it's two fields, it measurably reduces junk traffic, and at two million installs it's about as well-tested as WordPress plugins get. As one layer among several, it's easy to recommend. Sites on cheap shared hosting, where the CPU cost of constant bot traffic is a real performance problem rather than a theoretical one. Anyone who has just read a log full of failed login attempts and wants the volume to stop today. ## Who should look elsewhere Anyone who wants this instead of real login security. Rate limiting and two-factor do the work. [The tested comparison](https://wpadminify.com/best-wordpress-login-security-plugins) covers both. Anyone who wants the login screen to look like their brand. Different job entirely. WPS Hide Login changes the address and doesn't touch the design: [the best WordPress login page plugins](https://wpadminify.com/best-wordpress-login-page-plugin), or [how to customize the WordPress login page](https://wpadminify.com/customize-wordpress-login-page). Anyone who wants login redirects by role. Also a different job: [redirecting users after login by role](https://wpadminify.com/wordpress-redirect-users-after-login-by-role), which in our stack lives in [WP Adminify](https://wpadminify.com/wp-adminify-free-vs-pro). Anyone managing many client sites who wants one plugin for the URL, the redirects and the branding. That's a consolidation argument, and it's a fair one, though it means running a bigger plugin than this one. ## Frequently asked questions ### Is WPS Hide Login safe to use? Yes, with one precaution: record the login URL somewhere you can reach without logging in. The plugin has 2,000,000 active installs and 96/100 from 2,111 ratings, and its tested-up-to version was current when we checked. Its only real risk is a human one, which is losing the address you set. ### Does WPS Hide Login actually improve security? It removes noise rather than risk. Automated bots requesting /wp-login.php stop reaching your login form, which cuts junk traffic and log volume substantially. It does nothing about weak passwords, leaked usernames, XML-RPC or a vulnerable plugin, so treat it as one thin layer above rate limiting and two-factor rather than a replacement for either. ### What happens if I forget my login URL? Rename the plugin's folder in wp-content/plugins/ over SFTP and WordPress will deactivate it, restoring wp-login.php. With SSH access, wp plugin deactivate wps-hide-login does the same thing. Neither route needs the login page, so you're never permanently locked out. ### Is WPS Hide Login free? Yes, entirely, with no paid tier and no locked features. It's published by WPServeur, a WordPress specialist host, and its settings block carries links to four sibling plugins, which is the only promotional element in it. ### Does it break other plugins? It can, in one specific way: anything that generates a login link with wp-login.php hard-coded into it will point at your redirection target instead. Membership plugins, some form builders and some themes do this. Check every "Log in" link on the site after enabling it, and clear all caches. ### Is a hidden login URL enough on its own? No. It filters generic automated traffic and nothing else. A targeted attacker will find the URL through a referrer header, a hard-coded link, a password reset email or a person sharing it. Put strong unique passwords, rate limiting and two-factor behind it. ## Where this belongs in a security stack In order of how much they actually protect you: - Strong, unique passwords, and no username called `admin`. Everything else is decoration without this. - Rate limiting on failed attempts. The measure that stops credential stuffing. - Two-factor on every account that can install a plugin. [The practical version](https://wpadminify.com/two-factor-authentication-for-wordpress-admin). - Generic failure messages, so the form doesn't confirm which usernames exist: [customizing WordPress login error messages](https://wpadminify.com/wordpress-login-error-messages). - A changed login URL. This plugin. Useful, cheap, and the thinnest layer of the five. If you've done one through four, add this. If you've done only this, you've tidied your logs. ## The verdict WPS Hide Login is an easy plugin to recommend and an easy one to misunderstand. It does exactly one thing, it's free, it's maintained, and at two million installs it's among the most thoroughly exercised plugins on WordPress.org. It will cut the automated login traffic hitting your site to almost nothing, and on cheap hosting that's a performance win as much as a security one. It's also better than the redirect snippets people copy from forums, because it closes the POST as well as the GET. Install it. Write the URL down. Then go and do the things that actually protect the login, because this one is the thin layer on top, not the foundation. For the methods including the code route, [changing your WordPress login URL](https://wpadminify.com/change-wordpress-login-page-url). For the layers underneath, [the best WordPress login security plugins](https://wpadminify.com/best-wordpress-login-security-plugins). And for the design half of the login page, which this plugin deliberately never touches, [the WordPress login page white-label guide](https://wpadminify.com/wordpress-login-page-white-label-guide). --- # LoginPress Review 2026: Features, Pricing, and Honest Testing URL: https://wpadminify.com/loginpress-review Last updated: 2026-09-12 LoginPress is the default answer to "which login customizer should I use", and it has earned that on volume: 200,000 active installs and 1,075 ratings averaging 96 out of 100. When a plugin is that far ahead, the useful review isn't "is it good". It's "where exactly does the free version stop, and is the licence priced for your situation". We installed LoginPress on a clean WordPress 7.0.4 site on 25 August 2026 and went through every panel. Some of what we found contradicts what we expected, including one thing that works against our own plugin. It's all below. If you're still deciding between tools rather than evaluating this one, [the best WordPress login page plugins](https://wpadminify.com/best-wordpress-login-page-plugin) is the wider comparison, and [how to customize the WordPress login page](https://wpadminify.com/customize-wordpress-login-page) covers the methods before you pick any plugin at all. ![LoginPress WordPress plugin banner from the WordPress.org plugin repository](https://d1k2c27psfzbiv.cloudfront.net/wp-content/uploads/2026/08/03063939/loginpress-banner.webp) ## The short version | Best for | A single site, or an agency that wants unlimited sites on one licence | | --- | --- | | Free version | Genuinely capable. Two themes, and almost every styling control unlocked | | What you pay for | Themes, and a set of add-ons that are mostly security and routing features rather than design | | Weakest point | Entry pricing. $99 a year covers two sites | | Strongest point | Unlimited-site licensing at $199 a year, and a track record nothing else in this category matches | | Skip it if | You run five to twenty client sites and only need the design half | ## The numbers All from the WordPress.org Plugin API, 25 August 2026. | Metric | LoginPress | | --- | --- | | Active installs | 200,000 | | Rating | 96/100 from 1,075 ratings | | Five-star ratings | 1,006 | | One-star ratings | 23 | | Requires | WordPress 4.0 | Twenty-three one-star ratings out of 1,075 is a two per cent complaint rate, which for a plugin at this scale is unusually clean. For contrast, Theme My Login carries 120 one-star ratings out of 460. Whatever else is true, LoginPress doesn't have a reputation problem. The update cadence is the number worth watching over time rather than today. Six weeks between the last release and our test is normal maintenance, not neglect. ## What you get, panel by panel LoginPress lives in the WordPress Customizer, which is the right home for this kind of tool: you change a colour and the login screen next to you updates, no save-and-reload cycle. ![LoginPress free customizer sidebar listing Themes, Logo, Background, Customize Login Form, Customize Forget Form, reCAPTCHA, Button Beauty, Error Messages, Welcome Messages, Form Footer, Google Fonts and Custom CSS/JS](https://d1k2c27psfzbiv.cloudfront.net/wp-content/uploads/2026/09/01135609/loginpress-free-customizer-sections.webp) Twelve sections: Themes, Logo, Background, Customize Login Form, Customize Forget Form, reCAPTCHA, Button Beauty, Error Messages, Welcome Messages, Form Footer, Google Fonts and Custom CSS/JS. ### Themes ![LoginPress themes panel showing a grid of login page themes with most of them greyed out](https://d1k2c27psfzbiv.cloudfront.net/wp-content/uploads/2026/09/01135635/loginpress-free-themes-panel.webp) Default and Minimalist are yours. Everything else in the grid is greyed, and hovering one produces an "Unlock Premium Feature" prompt. ![LoginPress theme grid with premium tiles greyed out and an Unlock Premium Feature prompt](https://d1k2c27psfzbiv.cloudfront.net/wp-content/uploads/2026/09/01135640/loginpress-free-themes-unlock-premium.webp) This is the single clearest free-versus-paid line in the plugin, and it's worth understanding what it does and doesn't cost you. A theme here's a preset: a background, a form position, some colours. You can rebuild most of what the locked tiles show using the free controls in the panels below it, given twenty minutes. What you're paying for is the twenty minutes, not a capability. Whether that's worth $99 depends entirely on how many sites you're doing it on. ### Logo ![LoginPress logo section with logo image, width, height, space bottom, mobile logo width and mobile logo height controls](https://d1k2c27psfzbiv.cloudfront.net/wp-content/uploads/2026/09/01135625/loginpress-free-logo-section.webp) Disable Logo, Logo Image, Logo Width, Logo Height, Space Bottom, Mobile Logo Width, Mobile Logo Height, Logo URL. All free. Separate desktop and mobile logo sizing is a genuinely thoughtful inclusion and one that plenty of paid competitors don't offer. A logo sized for a 1440px screen is usually wrong at 375px, and the alternative is a media query in a custom CSS box. Worth calling out. Our own walkthrough of the underlying problem is in [changing the WordPress login logo](https://wpadminify.com/change-wordpress-login-logo). ### Background ![LoginPress background panel showing background colour, a background gallery, background image, mobile background image, repeat, position and size](https://d1k2c27psfzbiv.cloudfront.net/wp-content/uploads/2026/09/01135554/loginpress-free-background-panel.webp) Then, scrolling down that same free panel, the part we didn't expect. ![LoginPress free background panel showing Random Background Images and Background Video toggles with no premium badge](https://d1k2c27psfzbiv.cloudfront.net/wp-content/uploads/2026/09/01135559/loginpress-free-background-video-random-toggles.webp) Two sections sit at the bottom of the free Background panel: Random Background Images, and Background Video. Both are plain toggles. Neither carries the "Unlock Premium Feature" treatment that the theme grid uses so freely, and neither carries the red badge used elsewhere in the panel, which in any case reads "New" rather than "PRO". We're going to be precise about what that does and doesn't prove, because this is the kind of claim reviews get wrong in both directions. The controls exist and are not gated. We did not switch them on and load the login page, so we cannot tell you they produce output. Vendor comparison tables overstate free tiers routinely, and a toggle that sets an option nothing reads wouldn't be the first in WordPress history. What we can say is that LoginPress's own comparison table claims video background support on the free tier, and the free build's UI is consistent with that claim rather than contradicting it. Why does this matter enough to spend three paragraphs on? Because video and slideshow backgrounds are commonly sold as premium features across this category, including by us. If LoginPress genuinely ships them free, that's a real point in its favour and anyone comparing plugins deserves to know. The background options in general, and whether a video background is a good idea on a login screen at all, are covered in [changing the WordPress login page background](https://wpadminify.com/change-wordpress-login-page-background). ### Customize Login Form ![LoginPress login form panel with transparency, background, width, mobile width, minimum height, radius and shadow controls](https://d1k2c27psfzbiv.cloudfront.net/wp-content/uploads/2026/09/01135620/loginpress-free-login-form-panel.webp) Enable Form Transparency, Form Background Image, Form Background Colour, Form Width, Mobile Form Width, Form Minimum Height, Form Radius, Form Shadow, Form Shadow Opacity. Again, separate mobile sizing, with a note under the field explaining that it applies below 767px and that zero inherits the desktop value. That's a small thing done properly. ### Customize Forget Form ![LoginPress preview showing the styled lost password form with its own background colour applied](https://d1k2c27psfzbiv.cloudfront.net/wp-content/uploads/2026/09/01135614/loginpress-free-forgot-form-preview.webp) A separate background image and background colour for the password recovery screen. It sounds trivial. It's the screen a locked-out user sees at the exact moment they're most frustrated, and on most sites it's a grey box that looks nothing like the login page they just came from. ### Button Beauty ![LoginPress button styling panel with colour, border colour, hover colours, box shadow, text colour, size and padding controls](https://d1k2c27psfzbiv.cloudfront.net/wp-content/uploads/2026/09/01135604/loginpress-free-button-beauty-panel.webp) Hover states included, which is more than the panel name suggests and more than several paid competitors provide. ### The rest - Error Messages. Rewrite the text WordPress shows on a failed login. Worth doing for reasons beyond tone: the defaults tell an attacker whether a username exists. That argument in full is in [customizing WordPress login error messages](https://wpadminify.com/wordpress-login-error-messages). - Welcome Messages. The text above the form. - Form Footer. The "Back to site" area. - Google Fonts. A full section in the free sidebar. Same caveat as the background video: the section is there and ungated, and we didn't verify the rendered output. - Custom CSS/JS. An escape hatch for everything the panels don't cover. ## The reCAPTCHA question Here's a contradiction we could not resolve from the video, and we're flagging it rather than guessing. A reCAPTCHA section sits in the free customizer sidebar, between Customize Forget Form and Button Beauty. Meanwhile, on LoginPress's own Settings screen, Captchas is listed as a paid add-on. ![LoginPress settings screen listing Captchas, Auto Login, Login Redirects, Limit Login Attempts, Hide Login, Social Login and Integrations as premium add-ons](https://d1k2c27psfzbiv.cloudfront.net/wp-content/uploads/2026/09/01135630/loginpress-free-settings-addons-list.webp) Both are true at once, which usually means the free section handles standard Google reCAPTCHA while the paid add-on adds other providers, or adds it to more forms than the login. We aren't going to state which without configuring a real site key and testing it. If reCAPTCHA on the login page is the reason you're considering LoginPress, budget for the add-on and treat a free version as a bonus if it works. ## Where the free line actually falls Put the customizer and the Settings screen side by side and the licensing model becomes clear, and it isn't the one most people assume. | Free, in the customizer | Paid add-on | | --- | --- | | Logo, including mobile sizing | Themes beyond Default and Minimalist | | Background colour, image, mobile image | Captchas | | Background video toggle (untested output) | Auto Login | | Random background images (untested output) | Login Redirects | | Form width, height, radius, shadow, transparency | Limit Login Attempts | | Button colours, hover states, shadow, padding | Hide Login (custom login URL) | | Lost-password screen styling | Social Login | | Error and welcome messages | Login Widget | | Google Fonts section (untested output) | Integrations | | Custom CSS and JS | | Read the right-hand column again. Apart from the themes, almost nothing you pay LoginPress for is a design feature. Captchas, limit login attempts, hide login, social login, auto login, redirects: these are security and authentication features. LoginPress's free tier is a login page designer, and its paid tier is a login page security and routing suite that happens to include some presets. That has a practical consequence. If what you want is a branded login screen, LoginPress free may genuinely be all you need, and you shouldn't let a pricing page talk you out of that. If what you want is to lock down the login, you're comparing LoginPress's licence against dedicated security plugins, several of which are free. [The best WordPress login security plugins](https://wpadminify.com/best-wordpress-login-security-plugins) covers that field, and [changing your WordPress login URL](https://wpadminify.com/change-wordpress-login-page-url) covers the Hide Login feature specifically, including with free tools. ## The pricing question Prices verified on loginpress.pro on 25 August 2026. LoginPress shows a struck-through list price beside each tier; the figures below are what you actually pay. | Tier | Price | Sites | Per site | | --- | --- | --- | --- | | Startup | $99/yr | 2 | $49.50 | | Agency | $199/yr | Unlimited | None | | Lifetime | $499 once | Unlimited | None | The shape of that table is unusual and it's the most useful thing in this review. The gap between two sites and unlimited sites is $100. There's no middle. That produces two very different verdicts depending on who you're: If you run one site, $99 a year for a login customizer is a lot, and the free version is good enough that most single-site owners should stay on it. If you run thirty client sites, $199 a year for unlimited is close to unbeatable, and the $499 lifetime is better still. Nothing else in this category prices unlimited that low. If you run five to twenty sites, you're the customer this pricing serves worst. You're paying the unlimited price for a fraction of unlimited, and this is the band where alternatives matter. For comparison, [Loginfy](https://wpadminify.com/loginfy) starts at $49 a year for five sites and $149 a year for a hundred, which works out at $9.80 and $1.49 per site respectively against LoginPress's $49.50 at the entry tier. LoginPress wins outright at genuinely unlimited scale; below that, the per-site maths runs the other way. Both numbers are list prices, verified 25 August 2026. One thing not to do: compare a competitor's price against LoginPress's struck-through $199 and $399. Those are marketing anchors, the discount has been standing for a long time, and a reader who clicks through sees the real price in one second. ## What LoginPress does well The free tier is not a trailer. Plenty of freemium plugins ship a free version that exists to frustrate you into upgrading. This isn't one. You can brand a login page properly without paying, and the pro upsell is confined almost entirely to one panel. Mobile is treated as a first-class case. Separate mobile logo sizing, separate mobile form width, separate mobile background image. Most competitors give you one set of numbers and a media query in a CSS box. The lost-password screen exists. It has its own panel. That reflects someone having watched a real user get locked out. Unlimited-site licensing is real and cheap. At $199 a year, or $499 once, an agency stops thinking about it entirely. Track record. 200,000 installs, six years of releases, 96/100 from over a thousand ratings. That isn't nothing when you're picking something to run on client sites. ## Where it falls short Entry pricing is punishing. $99 for two sites is the highest per-site entry price in this category by a distance. The free-versus-paid line is confusing. A reCAPTCHA section in a free customizer and a Captchas add-on on the pricing page is the kind of thing that generates support tickets, and it made this review harder to write than it should have been. Themes are the upsell, and themes are the least defensible thing to sell. Every locked tile is reproducible with the free controls given enough patience. You're buying convenience, which is fine, but it's worth knowing that's what you're buying. The add-on bundle is a different product. Half of what a licence buys, limiting login attempts, hiding the login URL, social login, is available free elsewhere from plugins that specialise in it. Paying a design plugin for security features is a defensible convenience and a poor value calculation. ## Who should buy it Buy the Agency or Lifetime tier if you're an agency or freelancer with more than about ten sites, you want one login tool everywhere, and you would rather not think about site counts again. At $199 a year this is straightforwardly good value. Stay on free if you run one or two sites and want a branded login screen. You won't hit a wall that matters. ## Who should look elsewhere The five-to-twenty-site agency. You're paying unlimited money for non-unlimited scale. Compare per-site pricing before you renew. Anyone buying this for security. Buy a security plugin. [The tested comparison](https://wpadminify.com/best-wordpress-login-security-plugins) covers the field, and [two-factor authentication for WordPress admin](https://wpadminify.com/two-factor-authentication-for-wordpress-admin) covers the measure that matters most. Anyone who wants no plugin at all. A branded login screen is roughly forty lines of CSS and one hook. [Customizing the WordPress login page without a plugin](https://wpadminify.com/customize-wordpress-login-page-without-plugin) has the whole thing, and [creating a custom WordPress login form](https://wpadminify.com/wordpress-custom-login-form) covers the markup underneath. ## Frequently asked questions ### Is LoginPress free? Yes, and the free version is substantial. It covers logo, background, form and button styling, error and welcome messages, the lost-password screen, Google Fonts and custom CSS. What's paid is the theme presets beyond Default and Minimalist, plus add-ons for captchas, limiting login attempts, hiding the login URL, social login, auto login and redirects. ### How much does LoginPress cost? $99 a year for two sites, $199 a year for unlimited sites, or $499 once for a lifetime unlimited licence, verified on loginpress.pro on 25 August 2026. The site count is the only difference between tiers, and there's no middle tier between two sites and unlimited. ### Does LoginPress free include video backgrounds? The free Background panel exposes a Background Video toggle and a Random Background Images toggle, neither locked or badged as premium, and the vendor's own comparison table claims video support on the free tier. We saw the controls but didn't verify the rendered output, so treat it as available rather than confirmed working, and test it before you rely on it. ### Can LoginPress change the WordPress login URL? Only with a paid licence. Hide Login is a premium add-on, and the free version can't change the login URL. Free plugins do this on its own, and the methods are covered in our guide to changing the WordPress login URL. ### Is LoginPress better than a code-based approach? It depends on how often you do this. A branded login screen in code is one hook and some CSS, which is faster than installing anything if you write CSS comfortably. A customizer with a live preview is faster if you don't, and much faster when a client is sitting next to you changing their mind about the shade of blue. ### Does LoginPress slow down a site? Its styling only loads on wp-login.php, which visitors don't request, so the front-end impact is effectively nil. The paid add-ons that hook into authentication and the admin are a different question and worth measuring individually if you run several of them. ## The verdict LoginPress is a good plugin with a pricing model that suits two audiences very well and one audience badly. The free version is more generous than its reputation suggests and, for a single site, is likely all you need. The Agency and Lifetime tiers are strong value for anyone genuinely running unlimited sites. The gap in the middle, the five-to-twenty-site agency, is where the maths stops working and where it's worth looking at what else is available. And the surprise from the test bench stands: the free build exposes background video, random background images and Google Fonts with no lock on any of them. If those work as the controls suggest, LoginPress free is doing more than most of the category's paid tiers. For the wider field, [the best WordPress login page plugins](https://wpadminify.com/best-wordpress-login-page-plugin). For the agency-handover angle specifically, [white-labelling the WordPress login page for clients](https://wpadminify.com/white-label-wordpress-login-page-for-your-clients), and for the full reference, [the WordPress login page white-label guide](https://wpadminify.com/wordpress-login-page-white-label-guide). --- # 8 Best WordPress Login Page Plugins (2026, Tested) URL: https://wpadminify.com/best-wordpress-login-page-plugin Last updated: 2026-09-10 The default WordPress login screen works, but it shows the [WordPress logo](https://wpadminify.com/change-wordpress-login-logo) to your clients, carries none of your branding, and does nothing to slow down brute-force bots. A login page plugin fixes that, whether you just want your own logo up there or a fully [white-labeled login page](https://wpadminify.com/wordpress-login-page-white-label-guide). This guide compares the eight best WordPress login plugins, from login page customizers to security, redirect, and temporary-access tools, each checked against its live wordpress.org listing in August 2026, so you can match a plugin to the job you actually have. Prefer a step-by-step walkthrough to a plugin comparison? Follow our full guide on how to [customize the WordPress login page](https://wpadminify.com/customize-wordpress-login-page). ## What is a WordPress login plugin? A WordPress login plugin changes how the login screen looks, works, or is protected. Most do one of four jobs: styling the login page, hardening it against brute-force attacks, moving login and registration onto front-end forms, or deciding where each user lands after signing in. Few plugins cover all four, so the right pick depends on the job you have. ## What is the best WordPress login page plugin? For most sites, LoginPress is the best dedicated login page customizer. Its template library and live preview are the strongest of the dedicated tools, and its user base dwarfs the rest. If you want to brand the login screen and the whole dashboard from one tool, WP Adminify (through its Loginfy module) is the stronger choice, especially for agencies building a [white-label login page for clients](https://wpadminify.com/white-label-wordpress-login-page-for-your-clients). For pure security, WPS Hide Login [changes your login URL](https://wpadminify.com/change-wordpress-login-page-url) to stop automated attacks. If your real problem is access rather than appearance, the answer is a different tool again: Temporary Login Without Password for time-limited developer logins, or LoginWP for sending each role to the right page after sign-in. Which one you pick comes down to what the login page needs to do for you. ## The 8 best WordPress login page plugins compared | Plugin | Active installs | Rating | Best for | Free / Pro | | --- | --- | --- | --- | --- | | WP Adminify (Loginfy) | 6,000+ | 4.3★ | Login + full dashboard branding | Free + Pro | | LoginPress | 200,000+ | 4.8★ | Dedicated login customization | Free + Pro | | Custom Login Page Customizer | 90,000+ | 4.8★ | Free Customizer-based styling | Free + Pro | | Branda | 20,000+ | 4.5★ | Full white-label branding | Free + Pro | | WPS Hide Login | 2,000,000+ | 4.8★ | Changing the login URL (security) | Free | | Theme My Login | 60,000+ | 3.7★ | Front-end login & registration | Free + add-ons | | Temporary Login Without Password | 100,000+ | 5.0★ | Time-limited developer access | Free + Pro | | LoginWP | 90,000+ | 4.8★ | Post-login redirect rules | Free + Pro | ## 1. WP Adminify (Loginfy): best for login + dashboard branding together ![Loginfy custom WordPress login page customizer plugin banner](https://d1k2c27psfzbiv.cloudfront.net/wp-content/uploads/2026/07/15113309/loginfy-banner.webp) https://www.youtube.com/watch?v=YVns3KGbAkY Watch: customize the WordPress login page with no code using Loginfy WP Adminify is an admin customization toolkit, and its [Loginfy login page builder](https://wpadminify.com/loginfy) lets you redesign the WordPress login screen with 16 ready-made templates. You can swap the logo, set a background image or colour, and adjust fonts, all with a live preview so you see each change before it goes live. It rates 4.3★ from 109 reviews with 6,000+ active installs on wordpress.org, and the [free vs Pro comparison](https://wpadminify.com/wp-adminify-free-vs-pro) breaks down what each tier includes. The difference is scope. The same plugin also handles admin menu editing, dashboard themes, admin columns, and [white-label branding](https://wpadminify.com/white-label-wordpress) for the rest of wp-admin, so the login page and the dashboard behind it can match without a second plugin. Best for: agencies and freelancers who brand the entire client experience, not just the login form. ## 2. LoginPress: best dedicated login page customizer ![LoginPress WordPress plugin banner from the WordPress.org plugin repository](https://d1k2c27psfzbiv.cloudfront.net/wp-content/uploads/2026/08/03063939/loginpress-banner.webp) LoginPress is the most popular plugin built purely for login pages, with 200,000+ active installs and a 4.8★ rating from over 1,000 reviews. The free version covers logo, background, and button styling through the WordPress Customizer with a live preview. Pro adds ready-made templates, social login, [login-page redirects by user role](https://wpadminify.com/wordpress-redirect-users-after-login-by-role), and Google reCAPTCHA. Best for: anyone who wants deep, focused login customization and a large support community behind it. ## 3. Custom Login Page Customizer: best free option ![Custom Login Page Customizer WordPress plugin banner from the WordPress.org plugin repository](https://d1k2c27psfzbiv.cloudfront.net/wp-content/uploads/2026/08/03063942/login-customizer-banner.webp) Custom Login Page Customizer (by Colorlib) runs entirely inside the native WordPress Customizer, so you edit the [login background](https://wpadminify.com/change-wordpress-login-page-background), colours, logo, and form styling with instant preview and no code. It has 90,000+ active installs and a 4.8★ rating. The free tier is genuinely generous; the Pro upgrade adds templates and extra fields, but plenty of sites never need it. Best for: hobby and small-business sites that want a clean, branded login without paying for it. ## 4. Branda: best for full white-label branding ![Branda white labeling WordPress plugin banner from the WordPress.org plugin directory](https://d1k2c27psfzbiv.cloudfront.net/wp-content/uploads/2026/07/25063224/branda-white-labeling-banner.webp) Branda (by WPMU DEV) is a broad white-label toolkit, and login-screen branding is one module among many: [admin bar](https://wpadminify.com/remove-wordpress-logo-from-admin-bar), dashboard widgets, maintenance mode, and email branding are all included. It has 20,000+ active installs and a 4.5★ rating. If you already run Branda for white-labelling, its login customizer saves you installing a second plugin for the job. Best for: teams that want one white-label plugin covering login and the wider admin. ## 5. WPS Hide Login: best for login security WPS Hide Login solves a different problem. Instead of styling the login page, it moves its URL away from the well-known `/wp-login.php` and `/wp-admin`, which blocks the automated bots that hammer those paths. Many of those bots first [harvest your usernames through the REST API](https://wpadminify.com/wordpress-rest-api-leaks-usernames), then start guessing passwords against the login form. With 2,000,000+ active installs and a 4.8★ rating, it is the most-used plugin on this list, and it's lightweight and free. Best for: pairing with a branded login page as a security layer, ideally alongside [two-factor authentication](https://wpadminify.com/two-factor-authentication-for-wordpress-admin). Design your login with one plugin, then hide its address with this one. ## 6. Theme My Login: best for front-end login and registration ![Theme My Login WordPress plugin banner from the WordPress.org plugin repository](https://d1k2c27psfzbiv.cloudfront.net/wp-content/uploads/2026/08/03063945/theme-my-login-banner.webp) Theme My Login moves login, registration, and password-reset off wp-login.php and onto your own themed front-end pages, so users never see the standard WordPress screen at all. It has 60,000+ active installs, but its 3.7★ rating is the lowest here, so test it on staging first. A misconfigured login flow is one of the more common causes of [WordPress login page issues](https://wpadminify.com/how-to-fix-wordpress-login-page-issues), and this plugin touches every part of that flow. Extra features come through paid add-ons. Best for: membership and community sites that need login and registration inside the site's own design. ## 7. Temporary Login Without Password: best for safe developer and support access Sooner or later a developer, a theme author, or a support agent needs to get into your admin, and the usual answer is emailing a password you then forget to change. Temporary Login Without Password replaces that with a one-click link that expires on a schedule you set, carries the role you choose, and can be revoked the moment the work is finished. It has 100,000+ active installs and a 5.0★ rating from more than 1,500 reviews, and it was last updated in August 2026, so it keeps pace with current WordPress releases. It changes nothing about how your login screen looks, which is exactly why it sits comfortably alongside a customizer. Best for: handing out time-limited admin access without creating a permanent account or sharing credentials. ## 8. LoginWP: best for post-login redirect rules A beautifully branded login page still drops everyone onto the same dashboard by default. LoginWP, formerly Peter's Login Redirect, sends people somewhere useful instead: editors to the posts list, customers to their account page, subscribers to a members area. You can [redirect users after login by role](https://wpadminify.com/wordpress-redirect-users-after-login-by-role), by capability, or by individual username, and it handles logout and post-registration destinations too. With 90,000+ active installs and a 4.8★ rating it is the standard answer for this job, and it is the piece almost every login customizer leaves out. Best for: sites where different user roles should land on different pages after signing in. ## Login customization vs security vs social login: which do you need? "Login page plugin" covers three jobs that people often mix up, and the best tool depends on which one you actually need. Login customization is about looks: replacing the WordPress logo, styling the login form, and matching the page to your brand. LoginPress, Custom Login Page Customizer, and WP Adminify Loginfy all live here. Login security is about protection: changing the login URL, adding Google reCAPTCHA, and limiting failed login attempts so bots can't brute-force their way in. It also means [customizing the login error messages](https://wpadminify.com/wordpress-login-error-messages) so a failed attempt never tells an attacker whether a username exists. WPS Hide Login handles the URL, and plugins like Limit Login Attempts Reloaded or Loginizer cap repeated attempts. Social login and registration is about access: letting users sign in with Google or Facebook, or register through a custom form. Nextend Social Login covers social sign-in, while user-registration plugins add front-end registration forms. Most real sites want a blend. A typical setup is one plugin to design the login page, WPS Hide Login to move its URL, and a limit-login tool to slow attackers. If you also run a membership or community site, add social login and a registration form so new users onboard without ever seeing the default WordPress screen. ## Honourable mentions A few more WordPress login plugins are worth knowing depending on your priority. Nextend Social Login adds one-click Google, Facebook, and X sign-in, which cuts friction on registration-heavy sites. Limit Login Attempts Reloaded blocks repeated failed login attempts and is a common security pairing. SeedProd can build a fully custom login page as part of a wider landing-page builder. Colorlib Login Customizer is a well-rated free alternative for basic login styling. None of these replace a dedicated customizer, but each fills a specific gap around the login form. ## Login forms and user registration: a different kind of login plugin Plenty of people searching for a WordPress login plugin are not trying to restyle `wp-login.php` at all. They want [a custom WordPress login form](https://wpadminify.com/wordpress-custom-login-form) inside their own theme, a registration form for new members, or a Google button so nobody has to invent another password. Those are different plugin categories, and a login page customizer will not do any of them. | What you actually want | Plugin category | Examples (wordpress.org, September 2026) | | --- | --- | --- | | Restyle the default login screen | Login page customizer | LoginPress, Custom Login Page Customizer, WP Adminify Loginfy | | A login form on your own pages | Front-end login plugin | Theme My Login (60,000+ installs), Ultimate Member (200,000+) | | Let visitors sign up themselves | User registration plugin | User Registration and Membership (50,000+), User Profile Builder (40,000+) | | Sign in with Google or Facebook | Social login plugin | Nextend Social Login and Register (200,000+) | | Stop brute-force attempts | Login security plugin | WPS Hide Login (2,000,000+), Limit Login Attempts Reloaded | The quickest way to tell which row you are in: if the problem is what visitors see at `/wp-login.php`, you want a customizer from the list above. If visitors should never reach `/wp-login.php` in the first place, you want a front-end login or registration plugin. Membership sites usually end up running one of each, since registration tools rarely bother to style the admin login screen that editors still use. ## How to choose the right login page plugin Start from your goal. If you only need a branded login screen, a dedicated customizer like LoginPress or Custom Login Page Customizer is the fastest route. If you brand full client sites, pick a tool that also styles the dashboard, such as [WP Adminify](https://wpadminify.com/wordpress-dashboard-customization) or Branda, so login and admin match. If your real concern is bots and brute-force attempts, add WPS Hide Login to change the login URL. And if users should log in from a front-end page, choose Theme My Login. Plenty of sites combine two on purpose: one for design, one for security. Before you install anything, run through a short checklist so the plugin matches how your site works: - Customization depth: Can you customize the login form, logo, background, and colours from a live preview, or only a few fields? - Templates: Are there ready-made login page templates, or do you build every screen from scratch? - Security add-ons: Does it offer reCAPTCHA, or limit login attempts, or work cleanly alongside a plugin that does? - User roles: Can you show a different login experience or redirect by user role after sign-in? - Social login and registration: Do you need social login buttons or a front-end registration form for new users? - Free version limits: Does the free version cover your needs, and what does the Pro upgrade actually add? Match those answers to the six plugins above. A small brochure site only needs a free login customizer. An agency wants role-based branding across login and dashboard. A membership site needs social login and registration, and a high-traffic site needs security on top of the design. Many owners run two plugins deliberately: one to customize the login page, one to lock it down. WP Adminify Pro bundles the Loginfy login builder with [white-label](https://wpadminify.com/features/white-label), [menu editing](https://wpadminify.com/best-wordpress-admin-menu-plugin), admin columns, and dashboard themes in one license, which usually works out cheaper than stacking single-purpose plugins. See the [WP Adminify pricing](https://wpadminify.com/pricing) page to compare, browse the [Loginfy login page builder](https://wpadminify.com/loginfy), or read our guide to the [best white-label WordPress plugins](https://wpadminify.com/best-white-label-wordpress-plugin) if client branding is your priority. For the wider admin, our [best WordPress dashboard plugins](https://wpadminify.com/best-wordpress-dashboard-plugin) roundup goes deeper. ## WordPress Login Page Plugin FAQs ### What is the best free WordPress login page plugin? Custom Login Page Customizer by Colorlib is one of the best free options, with 90,000+ active installs and a 4.8-star rating. It styles the login logo, background, colours, and form inside the native WordPress Customizer with live preview. LoginPress and WP Adminify also offer capable free tiers before you upgrade to Pro. ### How do I customize the WordPress login page without code? Install a login page plugin such as LoginPress or WP Adminify Loginfy, open its customizer, then change the logo, background, colours, and fonts with a live preview. Each change saves without touching functions.php or CSS, so the default WordPress branding is replaced in a few clicks and shown to every user at login. ### How do I change the WordPress login URL? Changing the login URL is a security task, not a design one. A plugin like WPS Hide Login moves your login page away from the default wp-login.php and wp-admin paths to a custom address, which blocks bots that target those known URLs. Pair it with a branded login page plugin for both looks and protection. ### Are WordPress login page plugins safe to use? Yes, when you choose well-maintained plugins from wordpress.org with strong ratings and recent updates, like the ones in this guide. Keep them updated, use one login customizer at a time to avoid conflicts, and add a security plugin that changes the login URL or adds reCAPTCHA to cut down brute-force attempts. ### Can I brand the WordPress login page differently for each client? Yes. Tools built for agencies, such as WP Adminify and Branda, let you set a client logo, background, and colours on the login screen and carry that branding into a full WordPress client dashboard. Each client site gets its own look without stacking extra plugins, which is what freelancers and agencies delivering finished sites usually want. ### How do I give a developer temporary access to WordPress without sharing a password? Use Temporary Login Without Password. It generates a one-click login link with the role and the expiry date you choose, so the developer signs in without a password and access shuts off automatically. You can revoke any link early from the plugin settings screen if the job finishes sooner. ### Can I send users to a different page after they log in? Yes. LoginWP sets post-login, post-logout, and post-registration destinations by role, capability, or username, so editors, customers, and subscribers each land where they should. Most login page customizers only style the form and leave redirects alone, so this is usually a second plugin. ### Do I need a login plugin for my WordPress site? Not always. If you are the only user and the default screen does not bother you, WordPress handles login perfectly well on its own. A plugin earns its place when clients or customers see that screen, when bots are hammering wp-login.php, or when different roles should land on different pages after signing in. Those three jobs are what the plugins on this list exist for. ### Which plugin is best for user registration and login forms? For registration and front-end forms rather than login page styling, look at User Registration and Membership by WPEverest (50,000+ active installs, 4.8 stars) or Ultimate Member (200,000+ installs, 4.4 stars). Theme My Login also moves login and registration onto your own pages. A login page customizer will not build a registration form, so this is normally a second plugin. ### How do social login plugins handle existing WordPress accounts? They match on the email address. When someone signs in with Google or Facebook and that email already belongs to a WordPress user, the social profile is linked to that account instead of creating a duplicate. If no account matches, most plugins register a new user with whatever default role you set. Nextend Social Login and Register, with 200,000+ active installs, works this way. ### Doesn't WordPress already have a built-in registration system? It does, but it is minimal. Ticking Anyone can register under Settings, then General, gives you the standard wp-login.php form with a username and an email field: no extra profile fields, no spam screening, and no control over which page it lives on. Registration plugins exist to add those fields, put the form on a front-end page, and keep bot signups out. --- # How to Activate Two Factor Authentication (2FA) for WordPress Admin URL: https://wpadminify.com/two-factor-authentication-for-wordpress-admin Last updated: 2026-09-08 Here’s a fun little fact. In 2021: out of the reported 3.57 million skydives made, only 721 had to use their reserve parachute. In other words, the odds of a skydiver needing to use their reserve parachute are approximately 1 in 5,000. Now, what if I was to tell you “Hey, just jump without your reserve?” Would you do it? I think the answer will be a resounding “No!” quite soundly. Why is that? Disaster only needs to strike once and all is lost. Now I say all this because your WordPress website's security rests on a similar balance. "Around 13000 WordPress sites are hacked daily!" So its evident that the risks are at all time high. Cyber threats continuously evolving. And hackers are constantly finding new ways to breach securities. For WordPress website owners, it is very much important to prevent unauthorized access and data breaches. The easiest solution to this is two factor authentication (2FA). Today, I'll share a guide on how to activate two factor authentication (2FA) for WordPress. ## What is Two Factor Authentication for WordPress Admin? Two-factor authentication (2FA) is a additional security measure. It requires a second form of identification to log in. The first is with your credentials. The second is an unique code sent to your phone or generated by an authenticator app. ![Two Factor Authentication for WordPress](https://d1k2c27psfzbiv.cloudfront.net/wp-content/uploads/2024/07/12112844/Two-Factor-Authentication-for-WordPress.webp) When you log in to your [WordPress admin](https://wpadminify.com/features/productivity), you enter your password first. Then, you're asked for the second form of ID. And this is the two factor authentication or 2FA in short. This extra step make sure that even if someone steals your password, they can't access your site. This makes sure that your WordPress admin better secured. ## How to Activate Two-Factor Authentication in WordPress Here's how to activate two factor authentication in WordPress. ### Choose a 2FA Plugin First, you need to select a 2FA plugin. Some popular options are: - [Wordfence](https://wordpress.org/plugins/wordfence/) - [WP 2FA](https://wordpress.org/plugins/wp-2fa/) You can get from the WordPress plugin repository. For example, we'll use the Google Authenticator app. ### Install and Activate the Plugin First you need to log in to your WordPress dashboard. Then, Navigate to Plugins > Add New. Now, Search for "Wordfence". Click "Install Now". After installation, click "Activate". ![Wordfence plugin install for 2fa](https://d1k2c27psfzbiv.cloudfront.net/wp-content/uploads/2024/07/12112847/Wordfence-plugin-install-for-2fa.webp) ### Configure the Plugin To configure the plugin: Go to Wordfence > Login security. Scan the displayed QR code with your authenticator app with your smartphone. Open the authenticator app on your smartphone. Tap the "+" icon to add a new account. Select "Scan a QR code" and use your phone’s camera to scan. You can see the QR code in WordPress settings. ### Set Up the Authenticator App Here's how to set up the authenticator app: The app will generate a six-digit code. Add the code here and click on activate ### Download Backup Codes As soon as you activate the 2FA, it will provide you a option to download the backup codes. Store these codes in a safe place. These codes can be used if you lose access to your authenticator app. ![Download 2FA backup or recovery codes](https://d1k2c27psfzbiv.cloudfront.net/wp-content/uploads/2024/07/12112901/Download-2FA-backup-or-recovery-codes.webp) ### 2FA Activation based on WordPress User Role Navigate to settings. Select Required / Optional / Disabled 2FA for roles. Save the settings. ![two factor authentication based on user role](https://d1k2c27psfzbiv.cloudfront.net/wp-content/uploads/2024/07/12112859/two-factor-authentication-based-on-user-role.webp) ### Testing the Setup Log out of your WordPress admin. And, log back in using your username and password. Now, you'll need to enter the six-digit code from your authenticator app. Enter the code and click "Log In". ### Enhance Security with Custom Login URL (Optional) WordPress provides a secure login system. But you can add an extra layer of protection by [changing the default login URL](https://wpadminify.com/change-wordpress-login-page-url) (`/wp-login.php`). This makes it harder for scrapers/crawlers to discover your login page. Here's how to do that using [WP Adminify's URL Redirection](https://wpadminify.com/features/security): #### What WP Adminify Offers: New Login URL: Set a custom login URL (e.g., /secure-login) to replace the default `/wp-admin` or `/wp-login.php`. Note: This changes the default login page URL. Redirect Admin: Redirect users access from the default admin URL (`/wp-admin or /wp-admin/`) to a custom page (Could be a 404 error page). New Register URL (Optional): You can create a unique registration page to [customize the user registration process](https://wpadminify.com/how-to-create-wordpress-custom-user-dashboard-without-coding). WP Adminify doesn't directly control user registration. But you can use other third party plugins for that. Then, set a custom URL for your registration page using WP Adminify. ![Change WordPress login url to enhance security besides 2fa](https://d1k2c27psfzbiv.cloudfront.net/wp-content/uploads/2024/07/12112908/Change-WordPress-login-url-to-enhance-security-besides-2fa.webp) Login Redirect: Control where logged-in users with specific roles or usernames get redirected after logging in. Logout Redirect: Control where users are sent after logging out, depending on their roles or usernames. ![User role based login and log out redirection](https://d1k2c27psfzbiv.cloudfront.net/wp-content/uploads/2024/07/12112911/User-role-based-login-and-log-out-redirection.webp) ## Recommendation Since you’re already down the rabbit hole of security, there’s an extra level beyond 2FA you can go to ensure ultimate protection. This one’s a bit subtle so bear with us. How can a robber rob a safe if the safe doesn’t look like a safe? Think of cheesy money heist movies. The safes are always hidden in plain sight: behind a painting, or behind a bookshelf. What do we learn from this? You can’t steal from or break into something you can’t see. In terms of WordPress login pages, they are pretty easy to spot. They stick out like a sore thumb. What if we could change that? Well with Loginfy, you can. [Loginfy is a WordPress plugin](https://wordpress.org/plugins/loginfy) that lets you completely customize the look of your login page so that it doesn’t look like a typical WordPress login page. Hackers and malicious third parties will usually ignore custom-looking login pages because they are harder to break into. Loginfy lets you: - Change logos, backgrounds, forms, and buttons for a perfect design. - Live preview ensures a flawless login page before publishing. - Extensive color & typography options for perfect brand alignment. - Advanced features like custom CSS & Javascript for unique login pages. - Improve security & user experience with options to hide features. ![WordPress login page templates by WP Adminify](https://d1k2c27psfzbiv.cloudfront.net/wp-content/uploads/2023/01/12111615/WordPress-login-page-templates-by-WP-Adminify.webp) Two-factor authentication hardens the login, and a custom login screen closes the loop. Pair 2FA with a branded, harder-to-spot sign-in page using our [WordPress login page customization guide](https://wpadminify.com/customize-wordpress-login-page). ### How do I disable 2FA for WordPress? Log in to your WordPress admin dashboard. Go to WordFence >Login Security (or your chosen plugin). You will get a button called "Deactivate" inside "Two-Factor Authentication". Just click on this button and confirm deactivation. ![Deactivate 2FA settings in WordPress login](https://d1k2c27psfzbiv.cloudfront.net/wp-content/uploads/2024/07/12112905/Deactivate-2FA-settings-in-WordPress-login.webp) ### How do I reset my 2FA on WordPress? Log in using a backup code if you have one. Go to Settings > Google Authenticator (or your chosen plugin). Scan a new QR code with your new authenticator app. If you don’t have a backup code, contact your site administrator for assistance. Otherwise, use other recovery options provided by your plugin. ### How to disable the two factor authentication from single user? Log in to your WordPress admin dashboard. Go to Users > All Users. Click on the username of the account for which you want to disable 2FA. Scroll down to the 2FA settings section. Uncheck the box to disable 2FA for that user. Save the settings. ![Wordfence Login security for user](https://d1k2c27psfzbiv.cloudfront.net/wp-content/uploads/2024/07/12112906/Wordfence-Login-security-for-user.webp) ## Does WordPress have two-factor authentication built in? No. A default WordPress install authenticates on a username and password alone, and there is no setting anywhere in the dashboard to add a second step. Core does ship application passwords, which are separate tokens for REST API and app access, but those are about giving software limited access rather than protecting your own login. Anything resembling MFA on `wp-login.php` comes from a plugin. That is worth saying plainly because a lot of teams assume it is handled. If your host offers a login shield at the edge, or your agency put a security plugin on the site two years ago, check which one is enforcing a second factor and for which roles. Half-configured 2FA (enabled on the plugin, not required for any role) is common and reads as protection when it is not. ## What does 2FA status mean in the WordPress users list? Most 2FA plugins add a column to Users > All Users showing whether each account has finished enrolling. Wordfence labels it Login Security or 2FA Status, and the values are usually Active, Inactive, or Required but not yet set up. It is the fastest way to answer the question that matters after rollout: not "is the plugin on" but "who has scanned the QR code". If that column is missing, check Screen Options at the top of the users list first, since it may just be unticked. When you want the column permanently in place, alongside things like last login or role, an [admin columns editor](https://wpadminify.com/admin-columns-editor) lets you pin and reorder the columns on that screen. Reviewing enrollment monthly is a small habit that catches the account someone created in a hurry and never secured. ## WordPress Admin 2FA FAQs ### Which 2FA method is safest for a WordPress admin login? An authenticator app using time-based codes (TOTP) is the practical choice for most sites. It works offline, it is free, and the code never travels over a network someone else controls. Email codes are the weakest of the common options, because an attacker who already has the password often has the inbox too. SMS sits in between and is vulnerable to SIM swapping. If you support hardware keys, use them for the administrator accounts and TOTP for everyone else. ### What happens if I lose my phone and my backup codes? You lock yourself out, and no plugin can talk you back in, which is the point. The recovery route is server side. Rename the security plugin folder over SFTP or in your host file manager to deactivate it, log in with your password, then rename it back and re-enrol. If you have terminal access, wp plugin deactivate does the same thing more cleanly. Print the backup codes before you need them and keep them somewhere that is not the phone. ### Can I require 2FA only for administrators and editors? Yes, and this is how most sites should start. Every serious 2FA plugin sets the policy per role, so you can make it mandatory for Administrator and Editor, optional for Author, and leave Subscriber alone. Roll it out to your own team first, confirm the login flow and the recovery path work, then widen it. Making it required for everyone on day one generates support tickets from people who have no access to anything worth protecting. ### Does 2FA work with WooCommerce or membership customer logins? It can, but think about whether it should. Customer accounts log in through the same WordPress system, so a role-based policy will cover them. Forcing a second step on a Customer role usually costs more in abandoned checkouts and password resets than it saves, since those accounts hold an order history rather than site control. Protect the roles that can change the site, and use rate limiting on the login form for the rest. ### Will 2FA stop brute force attacks on wp-login.php? It stops them from succeeding, not from happening. Bots keep hammering the form, so the requests, the server load, and the log noise all continue. Pair 2FA with rate limiting or a lockout after a handful of failed attempts, and consider moving the login URL off the default path so most automated traffic never finds the form. 2FA is the last line, not the whole defence. ## Final Thoughts Now you know to to activate two-factor authentication for WordPress admin. Using 2FA significantly reduces the risk of unauthorized access, even if your password is compromised. As cyber attacks continues, 2FA helps you safeguard your website. Don't leave your WordPress site vulnerable. Go through this article to learn to activate 2FA today! Take control of your website's security. --- # How to Create a WordPress Login Page for Users (Front-End Guide) URL: https://wpadminify.com/wordpress-login-page-for-users Last updated: 2026-09-08 There is a difference between a login page you have branded and a login page your users never leave your site to reach. A branded `wp-login.php` still looks like software. It has no header, no navigation, no footer, and after a successful login it drops the user into the WordPress admin, which is the last place a member of a course or a community should end up. This is about the other approach: a login form on a normal page of your site, in your theme, that sends people somewhere sensible afterwards. It is a different build from restyling the admin screen, which is [how to customize the WordPress login page](https://wpadminify.com/customize-wordpress-login-page), and it leans on the front-end form function covered in [how to create a custom WordPress login form](https://wpadminify.com/wordpress-custom-login-form). If you only need the admin login to look like your brand, the first of those is a tenth of the work and you can stop reading here. ![Default WordPress login page](https://d1k2c27psfzbiv.cloudfront.net/wp-content/uploads/2025/07/16040322/Default-WordPress-login-page.webp) ## Do you actually need this? Worth filtering first, because a front-end login page is more moving parts than a branded `wp-login.php` and plenty of sites do not need it. | Situation | What to build | | --- | --- | | Staff, clients and contributors log in | Brand `wp-login.php`. Done. | | Members log in to read gated content | Front-end login page | | Students log in to a course | Front-end login page | | Customers log into a WooCommerce account | WooCommerce already gives you one at `/my-account/` | | You want people to register themselves too | Front-end login and registration | | You just want it to look nicer | Brand `wp-login.php` | If the answer is the branded admin login, stop here and read [how to create a custom WordPress login page](https://wpadminify.com/customize-wordpress-login-page) instead. And if what you actually want is a place for members to land once they are in, rather than a nicer door, that is a [WordPress client dashboard](https://wpadminify.com/wordpress-client-dashboard) question, not a login page one. ## The four pieces Every front-end login setup, whatever tool you use, is these four things: - A page with a login form on it - A redirect so `wp-login.php` sends people to that page - A destination after successful login that is not the WordPress dashboard - Admin bar and `wp-admin` access hidden from the roles that should not see them Skip the fourth and your members get a black WordPress toolbar across the top of every page, which undoes the illusion instantly. ## Method 1: Theme My Login 60,000 installs · 74/100 from 460 ratings · v7.1.15 · updated 13 August 2026 · tested to WordPress 7.0.4 The long-standing free option. It replaces the WordPress login, registration, lost password and reset password screens with pages rendered inside your theme. We installed it on a clean WordPress 7.0.4 site to see exactly what it produces. ![Theme My Login rendering a login form inside the active WordPress theme with site header and sidebar visible](https://d1k2c27psfzbiv.cloudfront.net/wp-content/uploads/2026/08/30131229/theme-my-login-frontend-login-form.webp) That screenshot is the point. Theme My Login handles the flow: it puts the form on a real page inside your template and wires the actions correctly. It does not style anything. On a well-designed theme that is exactly what you want. On a default theme you get what you see there, which is a plain form with a sidebar next to it. Theme My Login gives you placement and routing. Styling is still your job. Any tutorial that shows a beautiful member login page and credits it to Theme My Login is showing you a theme. ### The settings that matter ![Theme My Login settings showing Registration Type, Passwords and Auto-Login options](https://d1k2c27psfzbiv.cloudfront.net/wp-content/uploads/2026/08/30121430/theme-my-login-general-settings.webp) - Login Type. Default, Username only, or Email only. On a member site, Email only removes a decision your users should never have to make. - Registration Type. Default or Email only. Same reasoning. - Passwords. Let users set their own password at registration rather than receiving a generated one by email. Fewer abandoned signups. - Auto-Login. Log the user in immediately after registering. Removes a step that loses people. - AJAX. Submits without a page reload. Nice, and worth testing against your theme's JavaScript before you rely on it. ### The action slugs ![Theme My Login action slugs for register, lost password and reset password with their generated URLs](https://d1k2c27psfzbiv.cloudfront.net/wp-content/uploads/2026/08/30121434/theme-my-login-action-slugs.webp) Six actions, each with an editable slug: dashboard, login, logout, register, lostpassword, resetpass. Each generates a URL in the form `yoursite.com/?action=login`. Change these to language your members recognise. `?action=resetpass` is a developer's word for it. `?action=new-password` is not. ## Method 2: a page and a shortcode you control If you want fewer dependencies, WordPress core has shipped a front-end login form function for years. Wrap it in a shortcode and you have the same thing with no plugin. ``` add_shortcode( 'member_login', 'mysite_member_login' ); function mysite_member_login( $atts ) { if ( is_user_logged_in() ) { return '

You are signed in. Go to your account.

'; } $atts = shortcode_atts( array( 'redirect' => home_url( '/members/' ), ), $atts ); return wp_login_form( array( 'echo' => false, 'redirect' => esc_url_raw( $atts['redirect'] ), 'label_username' => 'Email', 'label_log_in' => 'Sign in', 'remember' => true, ) ); } ``` Create a page called Sign In, drop `[member_login]` on it, and you have a working front-end login inside your theme. The `is_user_logged_in()` check matters: without it, someone already signed in sees a login form and reasonably concludes they are not. More on the styling and the full argument list is in [how to create a custom WordPress login form](https://wpadminify.com/wordpress-custom-login-form). ## Step 2: redirect wp-login.php to your page Your new page exists. The old one still does too, and every "Log in" link WordPress generates still points at it. ``` add_action( 'init', 'mysite_redirect_login_page' ); function mysite_redirect_login_page() { if ( ! isset( $_SERVER['REQUEST_URI'] ) ) { return; } $is_login_page = strpos( $_SERVER['REQUEST_URI'], 'wp-login.php' ) !== false; $is_post = ( 'POST' === $_SERVER['REQUEST_METHOD'] ); $action = isset( $_GET['action'] ) ? sanitize_key( $_GET['action'] ) : ''; // Never intercept the POST, logout, or password reset flows. if ( ! $is_login_page || $is_post || in_array( $action, array( 'logout', 'rp', 'resetpass', 'lostpassword' ), true ) ) { return; } wp_safe_redirect( home_url( '/sign-in/' ) ); exit; } ``` The exclusions are the whole trick. Redirect the POST and nobody can log in. Redirect logout and people get stuck in a session they cannot end. Redirect the reset links and every password reset email breaks. Plenty of the "redirect wp-login.php" snippets you will find leave at least one of these out. Test all four flows before you consider this done: login, logout, lost password, and clicking a reset link from an email. ## Step 3: send them somewhere sensible after login By default WordPress sends everyone to `/wp-admin`. For a subscriber that is a screen with almost nothing on it and a menu they have no permission to use. ![WordPress redirect after login](https://d1k2c27psfzbiv.cloudfront.net/wp-content/uploads/2025/03/12055104/WordPress-redirect-after-login.webp) Different roles usually want different destinations: subscribers to a members area, editors to the posts list, administrators to the dashboard. In code: ``` add_filter( 'login_redirect', 'mysite_role_redirect', 10, 3 ); function mysite_role_redirect( $redirect_to, $requested, $user ) { if ( ! ( $user instanceof WP_User ) || ! isset( $user->roles ) ) { return $redirect_to; } if ( in_array( 'administrator', (array) $user->roles, true ) ) { return admin_url(); } if ( in_array( 'editor', (array) $user->roles, true ) ) { return admin_url( 'edit.php' ); } return home_url( '/members/' ); } ``` Or without code. WP Adminify Pro handles this as rules in the Roles Redirect tab. ![Roles Redirect tab in WP Adminify showing the Login Redirect rule type selected and the Add New Login Redirect button](https://d1k2c27psfzbiv.cloudfront.net/wp-content/uploads/2026/06/09103400/wp-adminify-roles-redirect-add-new-login-redirect.png) The full walkthrough, including logout redirects and redirecting by username or capability rather than role, is in [how to redirect users after login by role in WordPress](https://wpadminify.com/wordpress-redirect-users-after-login-by-role). If the destination you are sending them to does not exist yet, [creating a WordPress custom user dashboard without coding](https://wpadminify.com/how-to-create-wordpress-custom-user-dashboard-without-coding) covers building one. ## Step 4: keep members out of wp-admin Two loose ends undo everything above if you leave them. The admin bar. WordPress shows its black toolbar to every logged-in user on the front end. Turn it off for the roles that should not see it, either with the snippet below or with the no-code route in [hiding the admin bar based on user roles](https://wpadminify.com/hide-admin-bar-based-on-user-roles): ``` add_action( 'after_setup_theme', function () { if ( ! current_user_can( 'edit_posts' ) ) { show_admin_bar( false ); } } ); ``` Direct `/wp-admin` access. A member who types the URL, or follows an old bookmark, lands in the dashboard: ``` add_action( 'admin_init', function () { if ( wp_doing_ajax() ) { return; // admin-ajax.php must stay reachable. } if ( ! current_user_can( 'edit_posts' ) ) { wp_safe_redirect( home_url( '/members/' ) ); exit; } } ); ``` The `wp_doing_ajax()` guard is not optional. Plenty of front-end features post to `admin-ajax.php`, and redirecting that breaks them in ways that are hard to trace back to this snippet. ![WP Admin to login on WordPress Dashboard](https://d1k2c27psfzbiv.cloudfront.net/wp-content/uploads/2024/07/21115548/WP-Admin-to-login-on-WordPress-Dashboard.webp) ## What to check before you call it done Create a real subscriber account and use it in a private window, rather than an administrator with a role switcher. - Log in from the front-end page. Do you land in the members area? - Log out. Where do you end up, and can you log back in? - Request a password reset. Does the email arrive, and does its link work? - Type `/wp-admin`. Are you redirected? - Is the black admin bar gone? - Do all of it again on a phone. Password reset is the one that breaks most often, because the reset link goes to `wp-login.php` with an `action` parameter and an over-eager redirect swallows it. If you break it on yourself while testing, [resetting a WordPress admin password](https://wpadminify.com/how-to-change-or-reset-wordpress-admin-password) has the database and WP-CLI routes back in, and [WordPress login page not working](https://wpadminify.com/how-to-fix-wordpress-login-page-issues) covers redirect loops. ## Security notes The core login page still works. A redirect on `init` is a convenience for humans, not a wall. Direct POSTs to `wp-login.php` still authenticate. If you want that closed, you need a URL-changing tool. See [how to change your WordPress login URL](https://wpadminify.com/change-wordpress-login-page-url). A front-end form needs rate limiting too. It posts to the same handler, so it is exactly as brute-forceable. Keep failure messages generic. A member-facing form that says "no account with that email" is an enumeration leak on a page that is easier to find than `wp-login.php`. HTTPS. Non-negotiable on any page that accepts a password. Staff accounts still need a second factor. Moving members to a front-end form does nothing for the administrator account that can install plugins. [Two-factor authentication for WordPress admin](https://wpadminify.com/two-factor-authentication-for-wordpress-admin) is the measure that matters there. ## Frequently asked questions ### What is the difference between a custom login page and a front-end login page? A custom login page restyles wp-login.php: same URL, same standalone screen, new appearance. A front-end login page is a normal page of your site with a login form on it, inside your theme, with your header and footer. The first is for staff and clients; the second is for members. ### Can I have both? Yes, and on a membership site it is usually the right answer. Staff use the branded wp-login.php; members use the front-end page. Both authenticate against the same accounts. ### Do I need a plugin for a front-end login page? No. wp_login_form() is core, and the shortcode wrapper above is eight lines. A plugin such as Theme My Login is worth it when you also want registration, password reset and profile editing rendered in the theme. ### How do I stop subscribers seeing the WordPress dashboard? Two changes. Redirect them on login with the login_redirect filter, and redirect direct /wp-admin requests on admin_init, excluding admin-ajax.php. Then hide the admin bar for those roles. ### Will this work with WooCommerce or a membership plugin? Usually, and check for duplication before you build. WooCommerce already provides a front-end account area with login, registration and password reset at /my-account/, and most membership plugins ship their own. Building a second one alongside creates two login pages and a support question about which is correct. ## Next steps If members also need to sign themselves up, that is the other half: [how to build a WordPress login and registration page](https://wpadminify.com/wordpress-login-and-registration-page). If you also want the admin login branded for the staff who still use it, [how to customize the WordPress login page](https://wpadminify.com/customize-wordpress-login-page) covers the methods and [the step-by-step build](https://wpadminify.com/customize-wordpress-login-page-without-plugin) takes about ten minutes. For the wider reference, including client handover, see [the WordPress login page white-label guide](https://wpadminify.com/wordpress-login-page-white-label-guide). --- # How to Create a Custom Login Page With Elementor URL: https://wpadminify.com/elementor-custom-login-page Last updated: 2026-09-08 Elementor can build you a beautiful login page. It can't build you the login page you're probably picturing. That distinction is worth thirty seconds before you open the editor, because it decides whether the next hour is productive. Elementor is a front-end builder. It designs pages inside your theme. The WordPress login screen at `wp-login.php` isn't inside your theme and never has been, so Elementor can't reach it, no matter which widget you drag onto the canvas. What Elementor can do is build a login page of your own on the front end, in your design, with your header and footer, which is the approach covered in general terms in creating a WordPress login page for users. Restyling the admin screen instead is [a different job with different tools](https://wpadminify.com/customize-wordpress-login-page). Both are legitimate. Most sites that ask this question end up wanting both. Here's how to do the Elementor half properly, and what to bolt on afterwards. ## What Elementor can and cannot reach | What you want | Elementor | What to use instead | | --- | --- | --- | | A login page in your theme, with your header and nav | Yes | None | | A login form inside a popup | Yes, with the Popup builder | None | | A members-only landing page after login | Yes | None | | Restyle `wp-login.php` | No | A login customizer, or login CSS | | Change the login URL | No | A URL-changing plugin | | Style the password reset screen | No | A login customizer | | Brand the login for a client handover | Partly | Both, together | The three "no" rows are all the same reason: those screens are served by `wp-login.php`, which loads before your theme and renders its own markup. Nothing in Elementor's stack runs there. ## Method 1: the Elementor Pro Login widget The Login widget ships with Elementor Pro, not with the free plugin. If you're on free, skip to method 2, which costs nothing and produces a form that works just as well, with less styling comfort. ![Elementor Website Builder](https://d1k2c27psfzbiv.cloudfront.net/wp-content/uploads/2025/07/10100132/lementor-Website-Builder-scaled.webp) ### Build the page - Create a new page. Call it Sign In and give it the slug `/sign-in`. - Choose a page template. Elementor Canvas gives you a blank slate with no theme header or footer, which suits a dedicated splash-style login. Elementor Full Width keeps your header and navigation, which suits a member area where people need to get back to the site. Pick deliberately; this is the single decision that changes how the page feels. - Edit with Elementor, search the widget panel for Login, drag it in. - Set the field labels to your own language. "Email" beats "Username or Email Address" on a site where nobody has a username. - Decide whether to show the "Lost your password?" and "Register" links. Show the first one. Read the section below before you show the second. - Set Redirect After Login to wherever members belong. Leaving it empty sends people to `/wp-admin`, which is the wrong destination for every non-staff account. - Set Redirect After Logout too. The default drops people back on `wp-login.php`, which undoes the whole exercise in one click. One quirk that catches everyone: the widget renders as a placeholder in the editor when you're logged in, because you can't be shown a login form while authenticated. Preview the page in a private window to see what visitors see. Elementor also offers a preview toggle for the logged-out state, which is quicker for styling but not a substitute for the real thing. ### Styling it The Style tab covers form, fields, labels and button independently. Three things are worth more than the rest: Field height and font size. Elementor's defaults are compact. On mobile, inputs below about 44 pixels tall are awkward to hit and inputs with a font size below 16 pixels make iOS zoom the page on focus, which is jarring on a login form. Set both explicitly. Button width. A full-width submit button on mobile removes any ambiguity about what to tap. Set it per-breakpoint rather than globally. Focus states. The Style tab gives you a focus colour for fields. Use it. A form where nothing visibly changes when you tab into a field is a form people fill in wrongly. The same reasoning about hit areas, focus states and mobile behaviour applies to any login form, and the longer version is in [creating a custom WordPress login form](https://wpadminify.com/wordpress-custom-login-form). ## Method 2: no Elementor Pro required WordPress has shipped a front-end login form function for years. Wrap it in a shortcode, drop the shortcode into Elementor's Shortcode widget, and you've the same page without the Pro licence. ``` add_shortcode( 'site_login', 'mysite_login_form' ); function mysite_login_form( $atts ) { if ( is_user_logged_in() ) { return '
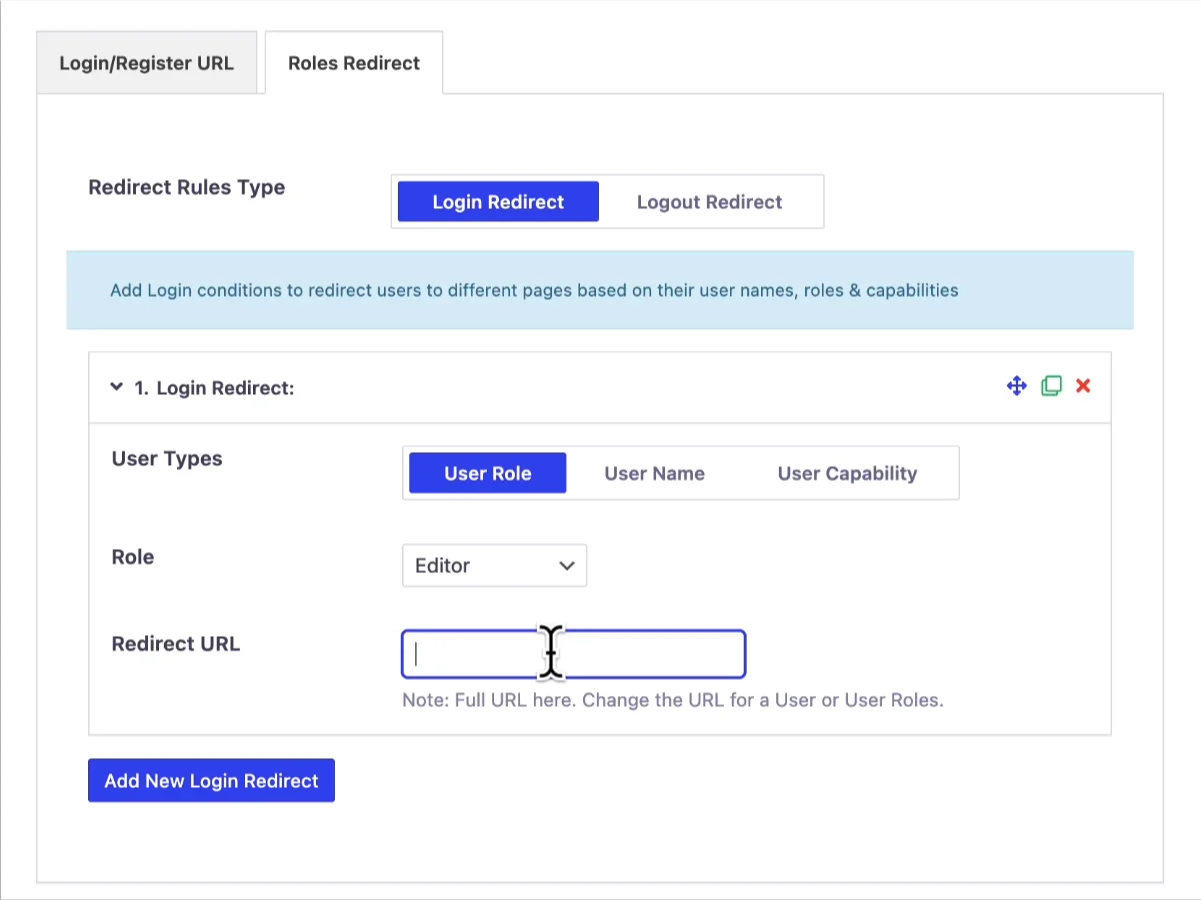
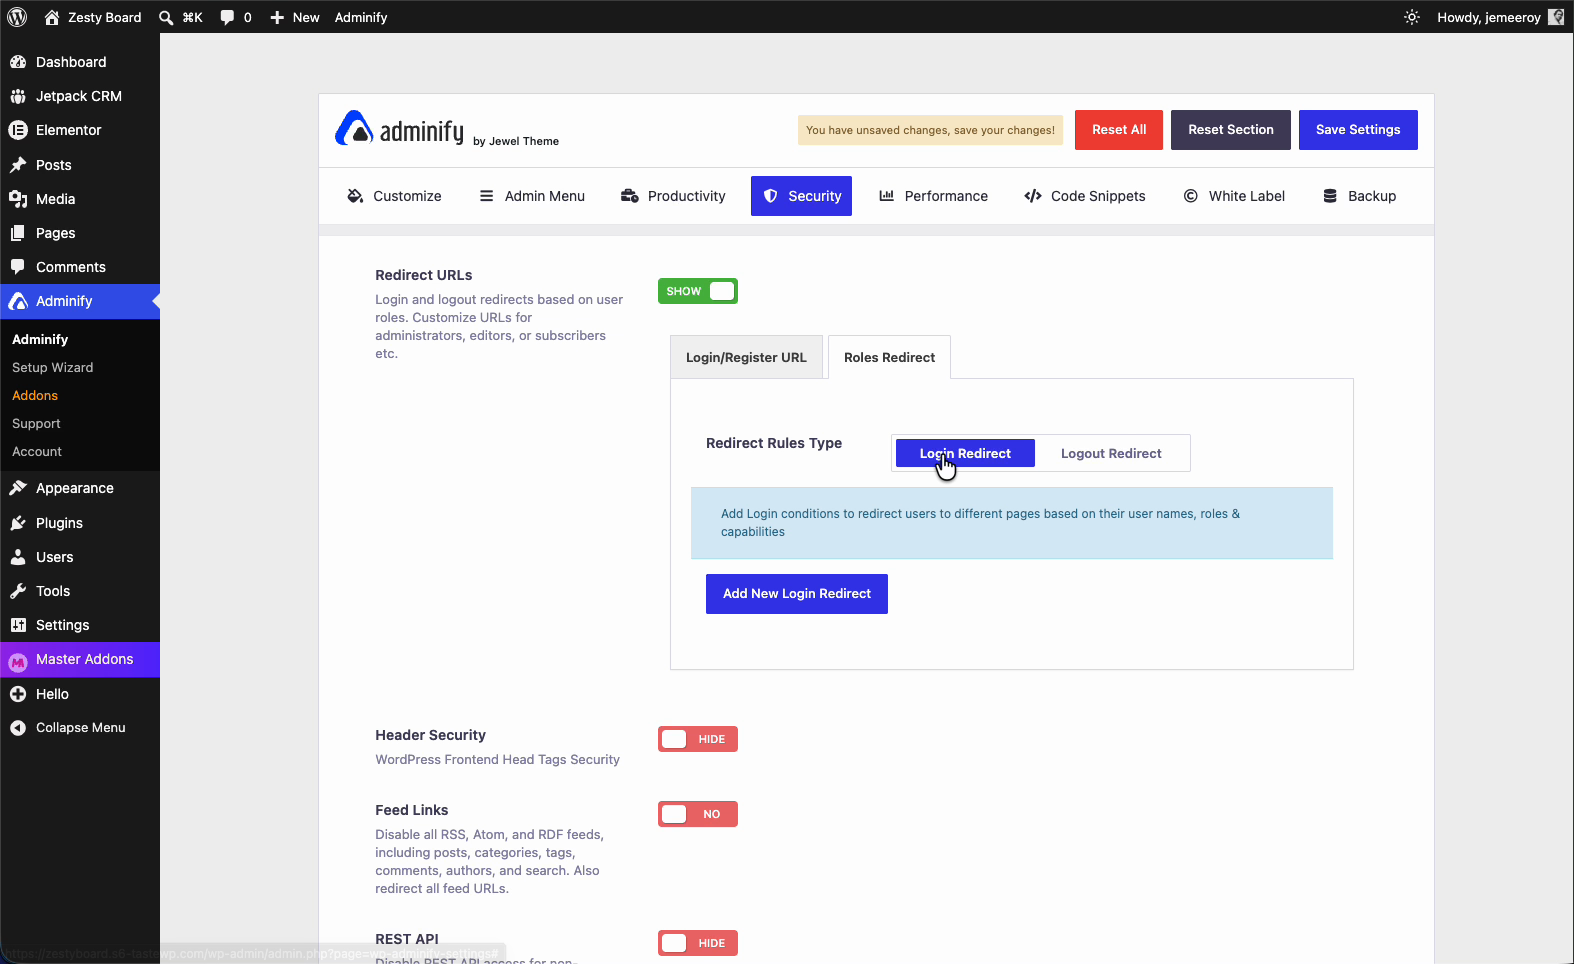
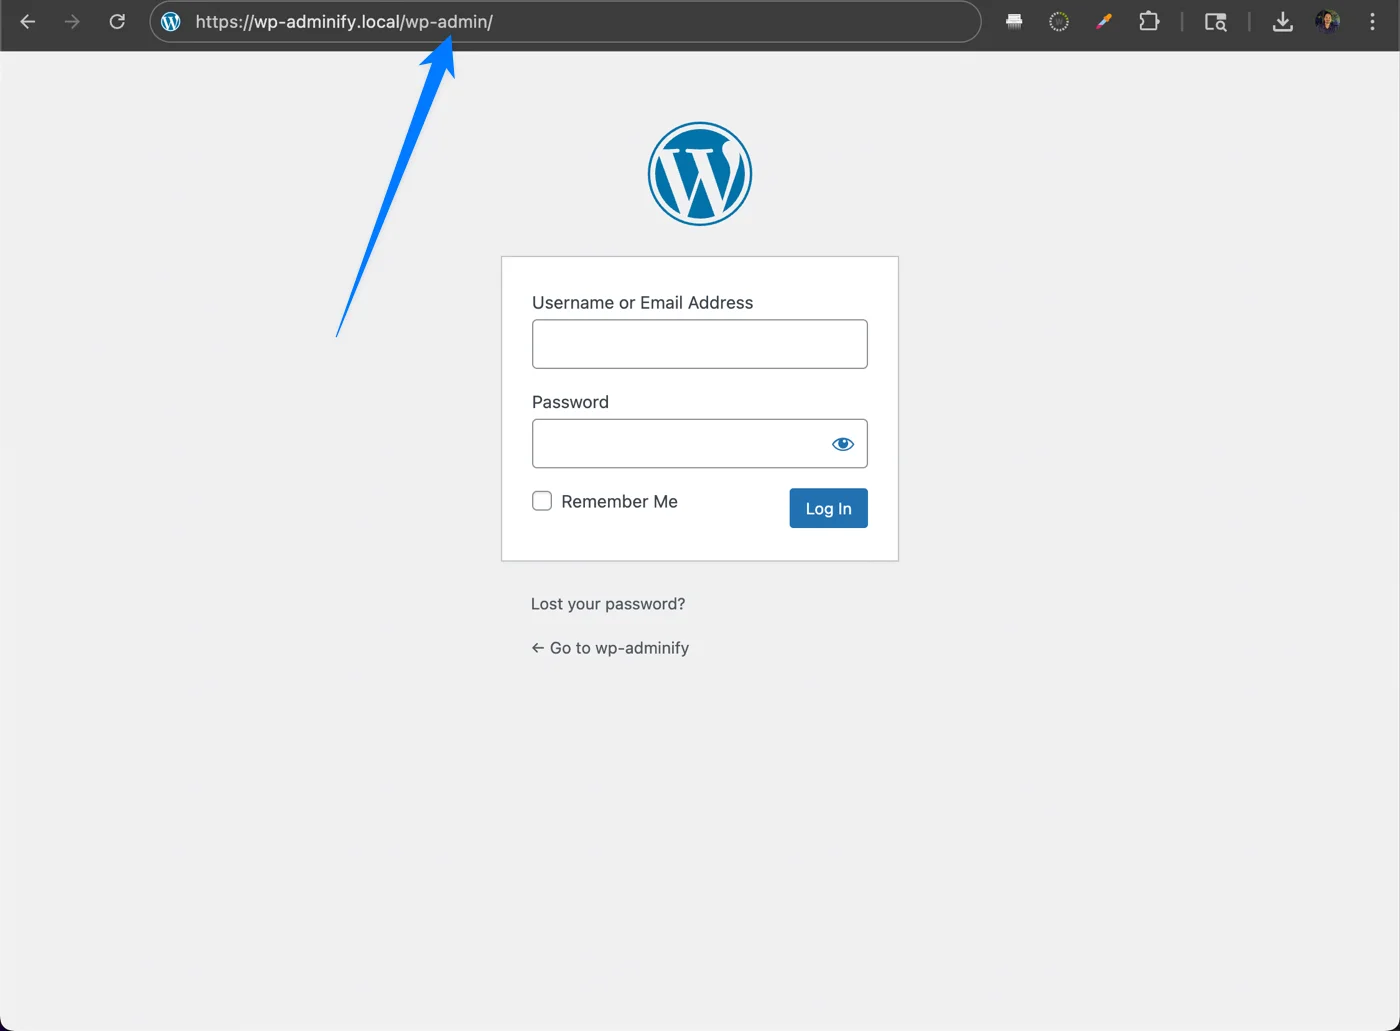
You are signed in. Go to your account.

'; } $atts = shortcode_atts( array( 'redirect' => home_url( '/members/' ), ), $atts ); return wp_login_form( array( 'echo' => false, 'redirect' => esc_url_raw( $atts['redirect'] ), 'label_username' => 'Email', 'label_log_in' => 'Sign in', 'remember' => true, ) ); } ``` Add a Shortcode widget to your Elementor page, put `[site_login]` in it, and the form renders inside your layout. Style it with a few rules in Elementor's custom CSS box, or in your child theme: ``` .login-username input, .login-password input { width: 100%; padding: .85rem 1rem; font-size: 16px; /* stops iOS zooming on focus */ border: 1px solid #d7d7d7; border-radius: 8px; } .login-submit input { width: 100%; min-height: 48px; border-radius: 8px; } ``` The `is_user_logged_in()` guard is the part worth keeping. Without it, a member who is already signed in lands on a page showing a login form and reasonably concludes they aren't. This route has a real advantage beyond price: it's markup you control, so nothing changes underneath you when a plugin updates. The trade is that you're writing CSS rather than clicking a Style tab. ## The four flows the widget does not own This is where most Elementor login tutorials stop, and it's where most Elementor login pages break. Your page has a form on it. Four other requests still route through `wp-login.php`, and each one has to keep working. - The authenticating POST. The form posts to `wp-login.php`. That's normal and correct. It just means any redirect you add later must let POSTs through. - Logout. `wp-login.php?action=logout`, with a nonce. If you redirect it, people can't sign out. - Lost password. The "Lost your password?" link goes to `wp-login.php?action=lostpassword`, which is a stock WordPress screen. Your beautifully styled sign-in page hands off to an unstyled grey box the moment somebody forgets their password. - The reset link in the email. Also `wp-login.php`, with `action=rp` and a key. Redirect this and password recovery is dead for every user on the site. Two of those are cosmetic and two are functional. Deal with the functional ones first. ### If you redirect wp-login.php, exclude everything Sending `wp-login.php` traffic to your Elementor page is reasonable, as long as the exclusions are right: ``` add_action( 'init', 'mysite_redirect_login_page' ); function mysite_redirect_login_page() { if ( ! isset( $_SERVER['REQUEST_URI'], $_SERVER['REQUEST_METHOD'] ) ) { return; } if ( false === strpos( $_SERVER['REQUEST_URI'], 'wp-login.php' ) ) { return; } if ( 'POST' === $_SERVER['REQUEST_METHOD'] ) { return; } $action = isset( $_GET['action'] ) ? sanitize_key( $_GET['action'] ) : ''; if ( in_array( $action, array( 'logout', 'rp', 'resetpass', 'lostpassword', 'register' ), true ) ) { return; } wp_safe_redirect( home_url( '/sign-in/' ) ); exit; } ``` Test all four flows afterwards, in a private window, with a real non-administrator account. Password reset is the one that fails silently: nobody reports it until a customer can't get in, and by then it has been broken for a fortnight. ### The two cosmetic ones need a different tool The lost-password and reset screens are `wp-login.php` output. Elementor can't style them. A login customizer can, because that's exactly what login customizers do, and it's the cheapest way to stop the handoff from looking broken. More on that in the next section. ## Where people land after login Elementor's Login widget takes one redirect URL for everybody. That's fine for a site with one kind of member and wrong for a site with several. ![WordPress redirect after login](https://d1k2c27psfzbiv.cloudfront.net/wp-content/uploads/2025/03/12055104/WordPress-redirect-after-login.webp) For role-based destinations, use the core filter: ``` add_filter( 'login_redirect', 'mysite_role_redirect', 10, 3 ); function mysite_role_redirect( $redirect_to, $requested, $user ) { if ( ! ( $user instanceof WP_User ) || empty( $user->roles ) ) { return $redirect_to; } if ( in_array( 'administrator', (array) $user->roles, true ) ) { return admin_url(); } if ( in_array( 'editor', (array) $user->roles, true ) ) { return admin_url( 'edit.php' ); } return home_url( '/members/' ); } ``` The settings-screen version of the same thing, plus the logout side, is in [redirecting users after login by role](https://wpadminify.com/wordpress-redirect-users-after-login-by-role). And if the destination itself is what you're building, [a WordPress client dashboard](https://wpadminify.com/wordpress-client-dashboard) covers what belongs on it. While you're here, hide the admin toolbar from the roles that shouldn't see it. A member who logs in through a carefully designed Elementor page and then gets a black WordPress bar across the top of every page has been shown exactly how the trick works. [Hiding the admin bar by user role](https://wpadminify.com/hide-admin-bar-based-on-user-roles) takes a minute. ## Elementor cannot touch wp-login.php Your Elementor page exists. So does the old one, and everyone who has ever bookmarked `/wp-admin` still lands there. ![Default WordPress login page](https://d1k2c27psfzbiv.cloudfront.net/wp-content/uploads/2025/07/16040322/Default-WordPress-login-page.webp) On a client site this matters more than the front-end page does, because the client is the one who logs in every week. Two routes. Code. Enqueue a stylesheet on the `login_enqueue_scripts` hook and restyle the screen. Step by step in [customizing the WordPress login page without a plugin](https://wpadminify.com/customize-wordpress-login-page-without-plugin). A login customizer. A live-preview panel for the same job, which also covers the lost-password and reset screens Elementor leaves grey. [Loginfy](https://wpadminify.com/loginfy) is ours: templates, logo, backgrounds with gradients and overlays, form and field styling, custom error messages and a credit toggle, previewed live in the Customizer. The free build handles logo, background, layout and form styling; templates, video and slideshow backgrounds and Google Fonts are paid, from $49 a year for five sites. The wider field is compared in [the best WordPress login page plugins](https://wpadminify.com/best-wordpress-login-page-plugin). ![White label WordPress login page being designed in the Loginfy customizer with template gallery and branded background](https://d1k2c27psfzbiv.cloudfront.net/wp-content/uploads/2026/07/08052730/03-custom-login-page-loginfy.webp) If your store runs WooCommerce, there's a third login screen as well, and customizing the WooCommerce login page covers how the account form and the checkout form fit alongside these two. ## Should you let people register from this page? The Login widget can show a Register link, and Elementor Pro's form widget can be wired into user registration. Before you switch it on, check three things. Is registration actually enabled? Settings > General > Membership has to allow it. A Register link on a site where registration is off produces an error page, which is a bad first impression. Have you got spam protection? Open registration without a check attracts bots within days. A CAPTCHA on the registration form isn't optional in 2026. What role do new accounts get? Settings > General > New User Default Role. It should be Subscriber or a custom role you've defined. Anything with editing capability is a security incident waiting for a slow week. The full build, including what to do after signup, is in [building a WordPress login and registration page](https://wpadminify.com/wordpress-login-and-registration-page). ## Security notes - A front-end form is exactly as brute-forceable as `wp-login.php`. It posts to the same handler. Rate limiting protects both or neither. - Your redirect is not a wall. Direct POSTs to `wp-login.php` still authenticate. To actually close that door you need [a changed login URL](https://wpadminify.com/change-wordpress-login-page-url). - Keep failure messages generic. A pretty form that says "there's no account with that email" is a user-enumeration leak on a page that's easier to find than the admin login. - Two-factor for staff accounts. Moving members to an Elementor page does nothing for the administrator account that can install plugins. [Two-factor authentication for WordPress admin](https://wpadminify.com/two-factor-authentication-for-wordpress-admin). ## Before you call it done Make a real subscriber account and test in a private window. Not an administrator, not a role switcher. - Log in from the Elementor page. Do you land where you intended? - Log out. Where do you end up, and can you get back in? - Click "Lost your password?" and see what the visitor sees. - Complete a reset from the email link. - Type `/wp-admin`. Are you redirected? - Is the admin toolbar gone? - Repeat all of it on a phone. If a redirect loop appears while you're testing, [fixing WordPress login page issues](https://wpadminify.com/how-to-fix-wordpress-login-page-issues) covers the usual causes, and [the login URL post](https://wpadminify.com/change-wordpress-login-page-url) covers getting back in when you've locked yourself out. ## Frequently asked questions ### Can Elementor customize the WordPress login page? No, not the one at wp-login.php. Elementor builds front-end pages inside your theme, and the WordPress login screen loads outside the theme entirely. Elementor can build a separate login page of your own design on the front end, and you can redirect wp-login.php to it, but styling the admin login screen itself needs a login customizer plugin or login CSS. ### Do I need Elementor Pro for a login page? Only for the Login widget. On the free plugin you can wrap the core wp_login_form() function in a shortcode and place it with Elementor's Shortcode widget, which produces a working login form on any Elementor page. You style it with CSS instead of a Style tab. ### Why does the Elementor Login widget show a placeholder in the editor? Because you're logged in while editing, and WordPress can't render a login form for an authenticated user. Preview the page in a private browser window to see it as visitors do. Elementor also provides a preview toggle for the logged-out state, which is faster for styling but not a substitute for testing the real page. ### Where does the "Lost your password?" link go? To wp-login.php?action=lostpassword, which is a stock WordPress screen that Elementor can't style. That's why sites with an Elementor login page usually add a login customizer as well: it covers the lost-password and reset screens so the flow doesn't jump from a branded page to a grey box. ### How do I send different roles to different pages after login? The Login widget takes a single redirect URL for everyone. For per-role destinations, use the core login_redirect filter, or a plugin with role-based redirect settings. Set a logout destination as well, or WordPress returns people to wp-login.php. ### Is redirecting wp-login.php to my Elementor page a security measure? No. It's a convenience for people following links. Direct POST requests to wp-login.php still authenticate, so bots are unaffected. If the goal is to stop automated login attempts, you need rate limiting and, optionally, a changed login URL. ## Next steps If the admin login is the half that still looks unfinished, [the WordPress login page white-label guide](https://wpadminify.com/wordpress-login-page-white-label-guide) is the reference behind it. If you're building a member area rather than just a door into one goes deeper on routing and access, and [the client dashboard guide](https://wpadminify.com/wordpress-client-dashboard) covers where to send people once they're in. --- # Adminify vs. White Label CMS [Feature Comparison] URL: https://wpadminify.com/wp-adminify-vs-white-label-cms Last updated: 2026-09-08 ## WP Adminify vs White Label CMS (2026): Is There Even a Contest? White Label CMS was once a go-to plugin for agencies wanting to [rebrand the WordPress admin for clients](https://wpadminify.com/features/white-label). In its heyday, it filled a real gap in the ecosystem. But in 2026, the plugin landscape has moved on dramatically, and White Label CMS has not kept pace. WP Adminify represents the next generation of [WordPress admin management](https://wpadminify.com/wordpress-dashboard-customization). It does everything White Label CMS does, does it better, and then goes dramatically further with [60+ additional features](https://wpadminify.com/features). This comparison will examine the full picture, but the conclusion will be clear: if you are evaluating these two plugins for a new project or considering switching, WP Adminify is the right choice. ## What Is a White Label CMS? A white label CMS is a content management system whose admin interface has been rebranded so it carries your agency name and logo instead of the software vendor name. Clients log in, edit pages, and see your branding throughout. On WordPress you get this from a white label plugin, so the site keeps every WordPress feature. Two different things share that name. There is the category, meaning any CMS you can rebrand, and there is White Label CMS, one specific WordPress plugin. This page compares that plugin with [WP Adminify white label](https://wpadminify.com/features/white-label). If you came looking for the category, the short answer is that WordPress plus a white label admin plugin is the route most agencies take, because it rebrands a platform their clients and their developers already know. Three approaches show up under the same label, and they suit very different teams: | Approach | Example | What gets rebranded | Best fit | | --- | --- | --- | --- | | WordPress plus a white label plugin | WP Adminify, White Label CMS | Login page, admin logo and colors, footer text, admin menu, plugin names | Agencies handing finished sites to clients | | Headless CMS with a rebrandable admin | Payload, CrafterCMS | The editor interface the platform ships | Teams building a custom front end | | Reseller site builder | Hosted builder platforms | The whole editor, sold under the agency brand | Agencies reselling a subscription | The rest of this page covers the first row, because that is where the White Label CMS plugin and WP Adminify actually compete. https://www.youtube.com/watch?v=zDK_MwIcTpc See how WP Adminify white labels the entire WordPress admin for clients. ## What Is the White Label CMS Plugin? White Label CMS is a WordPress plugin designed to help agencies and developers rebrand the WordPress admin for client sites. Its core capabilities include: - Custom login logo: Replace the WordPress logo on the login page - Admin color scheme: Change the basic admin color palette - Custom footer text: Replace the default "Thank you for creating with WordPress" text - Hide admin bar items: Remove some default admin bar elements - Custom dashboard widgets: Add basic welcome panels and widgets - Hide update notifications: Hide WordPress core update notices from clients That is essentially it. These features were genuinely useful in 2014-2018 when alternatives were scarce. In 2026, they represent the bare minimum that any serious admin plugin must provide, and White Label CMS offers little beyond them. The plugin's development activity has slowed significantly. Compatibility with modern WordPress versions is maintained through basic updates, but no significant new features have been added in years. For agencies building professional client sites in 2026, White Label CMS is a liability, not an asset. ## What is WP Adminify? WP Adminify is a comprehensive, actively developed WordPress admin management suite. Since launching, it has grown to cover 60+ features across dashboard customization, admin menu management, white labeling, login page design, dark mode, performance optimization, code snippet management, media folder organization, activity logging, and more. Where White Label CMS takes a narrow "branding only" approach, WP Adminify takes a "replace your entire admin plugin stack" approach. It handles [WordPress admin customization](https://wpadminify.com/wordpress-admin-customization) at every level, from cosmetic to functional to performance. For a detailed overview of what modern [WordPress dashboard customization](https://wpadminify.com/wordpress-dashboard-customization) looks like with WP Adminify, our pillar guide covers the full capability set. ## Head-to-Head Feature Comparison ![WP Adminify vs White Label CMS](https://d1k2c27psfzbiv.cloudfront.net/wp-content/uploads/2023/08/12112125/WP-Adminify-vs-White-Label-CMS.webp) | Feature | WP Adminify | White Label CMS | | --- | --- | --- | | Custom Login Logo | Yes, plus 16 full templates | Yes, logo only | | Login Page Templates | 16 professional templates | None | | Admin Color Customization | Full custom color system | Basic palette | | Admin Footer Customization | Full customization | Basic text replacement | | Admin Bar Customization | Full control + items management | Hide some items | | Dashboard Widget Customization | Full builder | Basic welcome panel | | Plugin White Label | Yes, hide or rename the plugin | No | | Admin Menu Editor | Full drag-and-drop + role-based | No | | Dark Mode | Scheduled + per-user preferences | No | | Activity Logs | Full user action logging | No | | Heartbeat API Control | Full granular control | No | | Code Snippets Manager | PHP, CSS, JavaScript | No | | Media Folder Organization | Drag-and-drop folders | No | | Role-based Access Control | Granular per-role | Basic hide notices | | Hide Update Notifications | Yes, role-based | Yes | | Performance Optimization Tools | Multiple (heartbeat, etc.) | None | | Client Dashboard Builder | Full client area | No | | Active Development (2026) | Yes, regular updates | Minimal | | Free Version Quality | Excellent, beats WLCMS entirely | Free but very limited | ## The Core Problem with White Label CMS in 2026 ### It Only Does Basic Branding White Label CMS was designed around a single concept: replace WordPress branding with your own. That is still its entire value proposition in 2026. The features it offers are the minimum viable set for client site delivery, not the comprehensive toolkit that modern agencies need. Professional [white label WordPress development](https://wpadminify.com/white-label-wordpress-development) in 2026 requires much more: plugin white label (hiding all tool names from clients), professional login templates, per-role menu management, activity logging for accountability, and performance optimization. White Label CMS covers none of these. ### Development Has Stagnated WordPress is a rapidly evolving platform. Gutenberg, Full Site Editing, PHP 8.x, and significant security and performance changes require constant plugin adaptation. White Label CMS receives basic compatibility updates but has not meaningfully invested in new features or modernization. Stagnant plugins create risk: compatibility issues with future WordPress versions, potential security vulnerabilities from unmaintained code, and an inability to leverage new WordPress APIs. WP Adminify, by contrast, has an active development team with regular feature releases and security audits. ### The Free Tier Is No Longer Competitive White Label CMS is free, and that has historically been its main selling point. But WP Adminify's free version available on WordPress.org includes dashboard customization, basic white labeling, admin menu editing, dark mode, activity logs, and more, all features that collectively surpass everything White Label CMS offers, free or paid. The "it's free" argument for White Label CMS no longer holds when a better free alternative exists. ## Where WP Adminify Dramatically Outperforms White Label CMS ### 1. Login Page Customization (16 Templates vs. Logo Swap) White Label CMS lets you change the login logo. That is it. WP Adminify's [Loginfy](https://wpadminify.com/loginfy) module provides 16 professionally designed login page templates, full-page designs with custom backgrounds, colors, typography, and layouts. Creating a branded client login experience that looks like a premium SaaS product takes minutes. Our guide on [WordPress login page white label](https://wpadminify.com/wordpress-login-page-white-label-guide) shows exactly how to set up a professional branded login experience. The difference in client impression between a logo swap and a full custom template is enormous. ### 2. Plugin White Label: The Feature White Label CMS Cannot Do WP Adminify's [Plugin White Label](https://wpadminify.com/features/plugin-white-label) lets you hide WP Adminify's name from the plugins list entirely, or rename it to your own product name. Clients see "Acme Admin Suite" (or whatever you choose) instead of "WP Adminify." This is the feature that completes the professional white label experience. White Label CMS cannot white label itself or any other plugin. WP Adminify's [full white label system](https://wpadminify.com/features/white-label) handles both the WordPress admin branding and the plugin's own presence, a complete solution. ### 3. Admin Menu Editor: Full Control vs. Nothing WP Adminify's [Admin Menu Editor](https://wpadminify.com/features/admin-menu-editor) lets you reorder, rename, hide, add custom icons to, and control every item in the WordPress admin menu, per user role. Clients see only what you want them to see. This is fundamental to delivering a clean, professional client experience. White Label CMS has no admin menu editor at all. Our detailed guide on [how to use the WordPress admin menu editor](https://wpadminify.com/how-to-use-the-wordpress-admin-menu-editor) shows how powerful this feature is for client site management. ### 4. Dark Mode, Modern User Experience WP Adminify's [Dark Mode](https://wpadminify.com/features/dark-mode) is a feature your clients and team members will love immediately. It supports scheduled switching (automatically switch to dark mode at a set time), per-user preferences, and multiple dark color palettes. In 2026, dark mode is an expected feature, not a luxury. White Label CMS has no dark mode support. Check our guide on [how to enable WordPress dark mode](https://wpadminify.com/how-to-enable-wordpress-dark-mode) to see the full configuration options. ### 5. Activity Logs, Accountability for Client Sites WP Adminify's activity logs record every significant action on your WordPress site: who logged in, what posts were edited, which plugins were activated or deactivated, and more. For client sites where you need to audit changes or troubleshoot issues, activity logs are invaluable. White Label CMS has zero activity logging capability. This means no accountability trail and no easy way to investigate unexpected changes on client sites. ### 6. Heartbeat API Control: Performance White Label CMS Ignores The WordPress Heartbeat API can significantly impact server performance, especially on shared hosting. WP Adminify's [Heartbeat Control](https://wpadminify.com/features/heartbeat-control) lets you manage Heartbeat frequency separately for the dashboard, post editor, and frontend, reducing unnecessary AJAX requests and improving admin responsiveness. See our comprehensive guide on [how to control the WordPress Heartbeat API](https://wpadminify.com/how-to-control-wordpress-heartbeat-api). For sites focused on [WordPress performance optimization](https://wpadminify.com/wordpress-performance-optimization), this feature alone justifies choosing WP Adminify. White Label CMS has no performance tools. ### 7. Code Snippets: Developer Tools Built-In WP Adminify's [Code Snippets](https://wpadminify.com/features/code-snippets) module provides a safe, organized way to add custom PHP, CSS, and JavaScript to WordPress without editing theme files. Each snippet is independently toggleable, reducing the risk of site-breaking changes. White Label CMS has no equivalent developer tools. Developers using White Label CMS still need a separate code snippets plugin, yet another plugin to manage, update, and worry about for compatibility. ### 8. Media Library Folders: Organization at Scale WP Adminify's [Media Folder](https://wpadminify.com/features/wordpress-media-folder) feature adds drag-and-drop folder organization to the WordPress media library. As sites accumulate images, PDFs, and other assets, the flat media library becomes unmanageable. WP Adminify solves this without any additional plugin. See our guide on [how to organize WordPress media library with folders](https://wpadminify.com/how-to-organize-wordpress-media-library-with-folders). White Label CMS has no media management capabilities. ## Plugin Consolidation: What WP Adminify Replaces Beyond simply replacing White Label CMS, WP Adminify consolidates the entire stack of plugins many agencies maintain separately: - White Label CMS, replaced entirely by WP Adminify's white label system - Admin Menu Editor, replaced by WP Adminify's [menu editor](https://wpadminify.com/features/admin-menu-editor) - WP Dark Mode, replaced by WP Adminify's [dark mode](https://wpadminify.com/features/dark-mode) - Custom Login Page plugins, replaced by [Loginfy](https://wpadminify.com/loginfy) - Activity Log plugins, replaced by WP Adminify's activity logs - Code Snippets plugins, replaced by WP Adminify's [snippets manager](https://wpadminify.com/features/code-snippets) - Media Folder plugins, replaced by WP Adminify's [media folders](https://wpadminify.com/features/wordpress-media-folder) - Heartbeat control plugins, replaced by WP Adminify's [heartbeat control](https://wpadminify.com/features/heartbeat-control) Replacing 8+ plugins with one well-integrated suite reduces plugin conflicts, improves performance, simplifies maintenance, and reduces update overhead. For agencies building [WordPress client dashboards](https://wpadminify.com/wordpress-client-dashboard), this consolidation is a major operational benefit. ## Pricing Comparison (2026) ### WP Adminify Pricing - Free: WordPress.org, already surpasses White Label CMS in features - Personal: $79/year, 1 site with full premium features - Business: $129/year, 5 sites - Agency: $299/year, unlimited sites - Lifetime Bundle: $799 one-time, all products, unlimited sites ### White Label CMS Pricing - Free: Available on WordPress.org, this is the only version White Label CMS is free. That sounds appealing until you realize that WP Adminify's free version is also free, available on WordPress.org, and already more capable than everything White Label CMS offers. The "cost" argument for White Label CMS evaporates entirely when the better option is also free at its base tier. For agencies wanting premium features, WP Adminify's $79/year Personal or $299/year Agency plan deliver extraordinary ROI, especially since they replace multiple paid plugins that White Label CMS users still need to purchase separately (admin menu editor, login customizer, activity logger, code snippets, media folders). [See WP Adminify Pricing, Start Free](https://wpadminify.com/pricing) ## Migration: Moving from White Label CMS to WP Adminify Migrating from White Label CMS to WP Adminify is straightforward because WP Adminify covers all the same ground and more. The migration process: - Step 1: Install and activate WP Adminify (free version handles the basics) - Step 2: Configure white label settings, logo, colors, footer, admin bar - Step 3: Set up the login page using Loginfy templates - Step 4: Configure admin menu visibility per user role - Step 5: Enable dark mode, activity logs, and other desired features - Step 6: Deactivate and delete White Label CMS The entire migration can be completed in under 30 minutes for most sites, and the result is a dramatically more capable admin setup with zero additional cost if you stay on the free tier. ## White Label CMS FAQs ### Is WP Adminify better than White Label CMS? Yes, decisively. WP Adminify offers 60+ features including plugin white label, 16 login templates, admin menu editor, dark mode, activity logs, heartbeat control, code snippets, and media folders. White Label CMS only does basic branding. WP Adminify's free version already surpasses everything White Label CMS offers. ### Can I replace White Label CMS with WP Adminify? Absolutely. WP Adminify covers everything White Label CMS does (logo, colors, footer, admin bar branding) and goes dramatically further with plugin white label, login templates, menu editor, dark mode, and more. Migration takes under 30 minutes. ### Is White Label CMS still being developed? White Label CMS receives basic compatibility updates for new WordPress versions, but has not added significant new features in years. In contrast, WP Adminify has an active development team with regular feature releases and security updates. ### Is WP Adminify free like White Label CMS? Yes. WP Adminify has a free version on WordPress.org that is more feature-rich than White Label CMS. Premium plans start at $79/year for 1 site or $299/year for unlimited sites, and they replace multiple other paid plugins you would otherwise need. ### Does WP Adminify do plugin white label that White Label CMS can't? Yes. WP Adminify's Plugin White Label feature lets you hide or rename WP Adminify in the plugins list so clients never see it. White Label CMS cannot white label itself or any other plugin, leaving the tool names visible to clients. ### What features does White Label CMS have that WP Adminify doesn't? There are no significant features White Label CMS has that WP Adminify does not also cover and exceed. Both offer logo replacement, admin colors, footer text, and admin bar customization. WP Adminify does all of this plus 50+ additional features. ### Which white label WordPress plugin is best for agencies in 2026? WP Adminify is the best white label WordPress plugin for agencies in 2026. It offers agency-grade white labeling, plugin white label, unlimited site licensing at $299/year, 16 login templates, admin menu editor with role-based control, activity logs, and complete plugin consolidation, far superior to White Label CMS or any single-purpose white label plugin. ### How long does it take to migrate from White Label CMS to WP Adminify? Migration from White Label CMS to WP Adminify typically takes 20-30 minutes. Install WP Adminify, configure the white label settings (logo, colors, footer), set up a login template, configure menu visibility per role, then deactivate White Label CMS. The result is a dramatically more capable admin setup. ### What is the best White Label CMS plugin alternative? WP Adminify is the best White Label CMS plugin alternative for most WordPress sites. It does everything White Label CMS (sometimes written Whitelabel CMS) does and adds plugin white label, an admin menu editor, dark mode, and 16 login templates, so you can fully customize the WordPress admin from one plugin. Among the best white label WordPress plugins, other options include Ultimate Dashboard for simple client dashboards and Branda for basic branding, but neither matches WP Adminify's depth for agencies. Start with the free version and rebrand a client admin in under 30 minutes. ### What exactly is a white label? A white label product is built by one company and delivered under another company's brand. The buyer sees your name, not the maker's. In WordPress terms, white labeling means replacing WordPress and plugin branding inside the admin area so the site looks like your agency built the whole thing. ### What is the difference between white label and SaaS? They answer different questions. SaaS describes how software reaches you, hosted by the vendor and paid for by subscription. White label describes whose brand sits on it. A SaaS product can be white labeled, and so can self-hosted software like WordPress, so the two terms overlap rather than compete. ## Looking for a White Label CMS Alternative? (Updated September 2026) The best White Label CMS alternative in 2026 is WP Adminify. It does everything White Label CMS does (custom login branding, admin colors, footer text, and dashboard widgets), then adds plugin white label, 16 login templates, a role-based admin menu editor, dark mode, activity logs, and performance controls. Its free version alone already surpasses White Label CMS. Agencies usually start hunting for a White Label CMS alternative for one of three reasons: they need to white label the plugin itself so clients never see the tool name, they want a genuinely branded login page instead of a logo swap, or they need per-role menu control to hide admin areas from clients. White Label CMS handles none of these. WP Adminify handles all three. ### Which White Label CMS Alternative Should You Choose? - For agencies rebranding client sites: WP Adminify, the full [white label system](https://wpadminify.com/features/white-label) plus plugin white label. Start with our [white label WordPress guide](https://wpadminify.com/white-label-wordpress). - For a free-only setup: WP Adminify's free version on WordPress.org, already more capable than White Label CMS at zero cost. - For login-page branding specifically: WP Adminify's Loginfy, 16 templates versus a single logo replacement. - If you only need to change the admin footer: even that narrow job is covered by WP Adminify's branding controls in the full [white label feature](https://wpadminify.com/features/white-label). Want the complete agency workflow, from rebranding the admin to hiding plugins and building a client dashboard? Our [white label WordPress pillar guide](https://wpadminify.com/white-label-wordpress) walks through the full setup step by step. ## Final Verdict White Label CMS served a purpose in an earlier era of WordPress. In 2026, it is a legacy plugin that cannot compete with the breadth, depth, or active development of WP Adminify. WP Adminify's free version alone surpasses everything White Label CMS offers. Add in the premium features (plugin white label, 16 login templates, admin menu editor, dark mode scheduling, heartbeat control, code snippets, media folders, and activity logs), and the comparison is not even close. If you are using White Label CMS today, the migration path to WP Adminify is simple, the upgrade is free to start, and the functional improvement is massive. There is no good reason to stay on a stagnant legacy plugin when a far superior alternative exists. [Switch to WP Adminify Today, Free Forever Plan Available](https://wpadminify.com/pricing) --- # WP Media Folder Alternatives: 7 Best WordPress Media Plugins URL: https://wpadminify.com/wp-media-folder-alternatives Last updated: 2026-09-08 WP Media Folder is JoomUnited's premium media manager, bundling folder organization with cloud storage integration, galleries and image processing. One thing about it sends people looking for alternatives more than any missing feature: it's premium-only, with no free version on WordPress.org. Which means you can't drop it on a staging copy of your real library and see how it behaves before you pay. That's exactly how anyone should evaluate a folder plugin at scale, and it's the one thing this plugin won't let you do. Every alternative below went onto a clean WordPress 7.0.3 site and got inspected, so the install counts, ratings and storage models here are measured rather than copied off a landing page. One alternative below is ours: WP Adminify bundles [media folders with admin-wide tools](https://wpadminify.com/features/wordpress-media-folder). The full field is in our [best WordPress media folder plugins](https://wpadminify.com/best-wordpress-media-folder-plugins) roundup, this plugin has its own [WP Media Folder review](https://wpadminify.com/wp-media-folder-review), and the direct comparison is [WP Media Folder vs WP Adminify](https://wpadminify.com/wp-media-folder-vs-wp-adminify). ## Why people look for alternatives | Reason | What to look for | | --- | --- | | Want a free version to trial | FileBird, Folders, Real Media Library, Media Library Organizer | | Only need folders, not the whole bundle | Any dedicated folder plugin | | Want folder data stored portably | Folders, Media Library Organizer, WP Adminify, Wicked Folders | | Need cloud offloading specifically | A dedicated offload plugin plus a folder plugin | | Consolidating admin plugins generally | WP Adminify | Worth reframing before you shop. WP Media Folder bundles several jobs together, and if you only need one of them, a specialist will do that job better and cost less. If you genuinely need folders and cloud offloading and galleries, the bundle has a real argument. But pairing a strong free folder plugin with a dedicated offload plugin is usually cheaper and gives you better tools for both halves. ## Quick comparison | Plugin | Installs | Rating | Free tier | Storage | | --- | --- | --- | --- | --- | | FileBird | 200,000 | 94/100 · 1,121 | Yes | Custom tables | | Real Media Library | 100,000 | 96/100 · 289 | Yes | Custom tables ×4 | | Folders (Premio) | 90,000 | 100/100 · 1,514 | Yes | Taxonomy | | Media Library Assistant | 70,000 | 96/100 · 201 | Fully free | Taxonomy | | Media Library Organizer | 20,000 | 94/100 · 147 | Yes | Taxonomy | | Wicked Folders | 20,000 | 98/100 · 56 | Yes | Taxonomy | | WP Adminify | 7,000+ | 86/100 · 108 | Yes | Taxonomy | ## 1. FileBird: the best free folder plugin ![FileBird WordPress plugin banner](https://d1k2c27psfzbiv.cloudfront.net/wp-content/uploads/2026/08/10064131/filebird-banner.webp) Verified: 200,000 installs · 94/100 from 1,121 ratings · v6.5.7 · updated 27 July 2026 Storage: `wp_fbv`, `wp_fbv_attachment_folder` The straight answer if folders were the part you actually wanted. Free version on WordPress.org, the most polished interface in the category, and an `ord` column that gives you manual folder ordering most competitors can't offer. Trade-off: media folders only. No cloud integration, no galleries. And its own tables mean the structure is readable by FileBird and nothing else. Background in [WordPress media folders explained](https://wpadminify.com/wordpress-media-library-folders). ## 2. Folders by Premio: best rated, fully portable ![Folders by Premio WordPress plugin banner](https://d1k2c27psfzbiv.cloudfront.net/wp-content/uploads/2026/08/10061127/folders-by-premio-banner.webp) Verified: 90,000 installs · 100/100 from 1,514 ratings · v3.1.9 · updated 21 July 2026 Storage: `media_folder`, `folder`, `post_folder`, hierarchical taxonomies, no tables The best-rated plugin in the category, with a free tier, and it organizes posts and pages as well as media. Because folders are standard WordPress terms, you can walk away whenever you like and your structure comes with you. That's a pointed contrast with a premium plugin whose storage model you can't inspect until after you've paid. Trade-off: folders only. No cloud, no galleries, no image processing. ## 3. Real Media Library: closest on feature depth ![Real Media Library WordPress plugin banner](https://d1k2c27psfzbiv.cloudfront.net/wp-content/uploads/2026/08/10061132/real-media-library-banner.webp) Verified: 100,000 installs · 96/100 from 289 ratings · v4.22.82 · updated 2 July 2026 Storage: four custom tables The most feature-dense thing here with a free tier, and the closest in ambition to a paid product. Per-folder metadata, staged bulk operations and gallery integration, with a Lite version that actually works rather than nagging. Trade-off: the heaviest lock-in we measured. Its WordPress.org slug is `real-media-library-lite`, which is why searching the plugin installer for "real media library" often turns up nothing useful. ## 4. WP Adminify: broader admin consolidation ![WP Adminify plugin free version](https://d1k2c27psfzbiv.cloudfront.net/wp-content/uploads/2022/08/02094912/WP-Adminify-plugin-banner.webp) Verified: 7,000+ installs · 86/100 from 108 ratings · v4.2.24 · updated 9 August 2026 Storage: `media_folder` hierarchical taxonomy, no custom tables (verified) A different kind of bundle. WP Media Folder groups media-adjacent jobs together: folders, cloud, galleries, compression. WP Adminify groups admin-wide jobs: folders, menu editing, white labelling, login customization, admin columns. If your reason for wanting a bundle in the first place was "I have too many plugins," this answers the same itch from the other direction, and there's a free version to test it with. Trade-off: no cloud integration, no galleries, no manual folder ordering. Full comparison in [the WP Adminify media folder feature](https://wpadminify.com/features/wordpress-media-folder), and [how it is priced](https://wpadminify.com/pricing) is listed openly. ## 5. Media Library Organizer: simplest free option ![Media Library Organizer WordPress plugin banner](https://d1k2c27psfzbiv.cloudfront.net/wp-content/uploads/2026/08/10061136/media-library-organizer-banner.webp) Verified: 20,000 installs · 94/100 from 147 ratings · v2.1.2 · updated 23 July 2026 · Themeisle Storage: `mlo-category`, one hierarchical taxonomy, no tables The minimal end of the scale. One taxonomy, no tables, folders working. If WP Media Folder felt like a great deal more plugin than your problem called for, this is the corrective. Trade-off: basic by design. No ordering, no advanced features, media only. ## 6. Wicked Folders: folders across post types ![Wicked Folders WordPress plugin banner](https://d1k2c27psfzbiv.cloudfront.net/wp-content/uploads/2026/08/10061141/wicked-folders-banner.webp) Verified: 20,000 installs · 98/100 from 56 ratings · v4.1.3 · updated 23 June 2026 Storage: hierarchical taxonomies per post type Folders for media, posts, pages and custom post types. Taxonomy-based, and free. Trade-off: 56 ratings is a thin sample. ## 7. Media Library Assistant: metadata, free ![Media Library Assistant WordPress plugin banner](https://d1k2c27psfzbiv.cloudfront.net/wp-content/uploads/2026/08/10061146/media-library-assistant-banner.webp) Verified: 70,000 installs · 96/100 from 201 ratings · v3.39 · updated 11 July 2026 · entirely free, no paid tier Worth including because part of WP Media Folder's pull is media management rather than folders as such. This handles IPTC and EXIF data, bulk alt text, custom taxonomies and shortcode galleries, and charges nothing for any of it. Be clear: no drag-and-drop folder tree. Wrong tool for folders, excellent for metadata. ## If you actually need cloud offloading This is the one WP Media Folder capability nothing above replicates, so it gets a straight answer rather than a shrug. If offloading is a real requirement, meaning backups no longer finish overnight, migrations time out, or storage costs keep climbing, the usual approach is a dedicated offload plugin sitting next to a dedicated folder plugin. Two specialists instead of one generalist. Two things to check if you go that way: - Test folder plugin compatibility on staging. Most folder plugins don't care about offloading, because folders are database relationships rather than file paths. Verify it anyway. - Offloading is hard to reverse. Bringing 100,000 files back is a project, not an afternoon. Choose it deliberately. A CDN in front of your existing uploads is the lighter option, and it solves the delivery half of the problem without the migration risk. ## WP Media Folder Alternatives FAQs ### What is the best free alternative to WP Media Folder? For folders specifically, FileBird with 200,000 installs and the most polished interface, or Folders by Premio with a 100/100 from 1,514 ratings, portable storage and coverage of posts and pages. Both have working free versions on WordPress.org, so you can trial them on a copy of your real library before deciding anything. ### Does WP Media Folder have a free version? No. JoomUnited sells it directly and it isn't distributed through the WordPress.org repository, which we confirmed on 9 August 2026 when the plugin API returned nothing for it. So there's no staging trial before purchase, which makes the vendor's refund policy worth reading first. ### Which alternative supports cloud storage? None of the dedicated folder plugins. Cloud offloading is normally a separate plugin built for that one job, paired with whichever folder plugin you pick. Test the combination on staging, though most folder plugins are unaffected because folders are database relationships rather than file paths. ### Are free media folder plugins good enough? For folder organization, yes. The free tiers of FileBird, Folders, Real Media Library and Media Library Organizer all give you folders, nesting and drag-and-drop. Paid tiers mostly lift folder count limits and add support rather than unlocking anything core. ### Will my folders transfer from WP Media Folder? Depends on whether it stores folders as WordPress taxonomy terms or in its own tables, which we couldn't verify without a licence. Find out yourself by running wp db query "SHOW TABLES;" on your install. If its own tables show up, export the structure before you deactivate anything. ## Final verdict - Just want folders? FileBird or Folders by Premio, both free and both better at that one job. - Want portability? Folders, Media Library Organizer, Wicked Folders or WP Adminify, all taxonomy-based and verified. - Want a different kind of bundle? WP Adminify consolidates admin-wide rather than media-wide. - Genuinely need cloud offloading? Pair a dedicated offload plugin with a dedicated folder plugin. - The difference that matters: every alternative here has a free version you can trial on your real library. WP Media Folder doesn't. Want the storage background first? See [how WordPress media folders work](https://wpadminify.com/wordpress-media-library-folders), or [WP Adminify's media folder feature](https://wpadminify.com/features/wordpress-media-folder) for the admin-bundle route. --- # How to Change WordPress Login Page URL for Better Security? URL: https://wpadminify.com/change-wordpress-login-page-url Last updated: 2026-09-04 The WordPress login page allows authorized users to uninterruptedly access the website by entering the correct credentials. But unauthorized users may also try to reach the site to take full control of it. They sometimes prevail and make others completely despondent. If you have a website designed with WordPress, you may fall into trouble and even give up on your web-oriented business if the website’s security system becomes fragile and vulnerable. So what do you do to protect your profitable site? Of course, you need to change the [WordPress login page URL](https://wpadminify.com/loginfy) first. Moving the login URL is a security step. To rebrand the screen itself, follow our guide to [customizing the WordPress login page](https://wpadminify.com/customize-wordpress-login-page). Besides, you have to gain mastery over ethereal actions to prevent malicious attacks. How? It’s not a daunting task at all if you can apply one of the highly functional plugins, WP Adminify. In this article, we will walk you through the process of harnessing the resounding plugin. Let’s dive deeper. ## Is it Worth Changing the WordPress Login Page URL? No matter how robustly you develop your website, it doesn't matter how strong your password is; you will encounter frequent unwanted access attempts from toxic users. They may, at times, break into your site to inflict it. Ultimately, they may steal your sensitive data and interrupt the performance. Literally, there will be little hope of expecting any revenue from the site once it’s out of your control. To say it straight, the entire security system of your website may fall into jeopardy unless you adopt preventive steps. In this case, you need to protect your data and information from unlawful login seekers at any cost. That means you have to utilize tools and software compatible with WordPress to reinforce security. There are a plethora of plugins available online that can rescue your site from a great loss by changing the login page URL to other pages. ## How to Change WordPress Login Page URL? You obviously expect seamless interaction, a higher conversion rate, and maximum revenue from your website. And it’s possible if you can reach your business goal by working relentlessly based on specific strategies. But you must be mindful of the security system of your site, as it might be susceptible to getting hacked by hackers. You can create a custom WordPress login page URL to deceive cunning, malicious users. https://www.youtube.com/watch?v=JOZm-pErAgg As the WP Adminify plugin is at your fingertips, there is no need for concern. You can install the plugin to get your desired task successfully done. Only installing won’t do; you also need to navigate the process properly to succeed. Note: [Never install nulled plugins](https://wpadminify.com/pro-nulled-plugin), it might risk your entire site. ## Boost Your Site's Security WP Adminify lets you to create customized dashboard which properly reflect your brand's identity and your needs. [Choose Your Plan](https://wpadminify.com/pricing) [Live Demo](https://demo.pixarlabs.com/?pl-product=adminify) ![Change Login url and set redirection](https://d1k2c27psfzbiv.cloudfront.net/wp-content/uploads/2023/06/07061322/Change-Login-url-and-set-redirection.webp) Do you want to excel at changing the WordPress login page using Adminify? If so, then you’re asked to adhere to the following steps: ### Backup your website: The WP Adminify is safe and tested. But you may back up your WordPress website prior to working with the plugin to overcome any unexpected occurrences. [By backing up](http://docs/adminify/export-import/backup), you can make sure there will be no obstacles to reviving the site if it crashes by chance. How do you back up your site? Try to install a reliable plugin to keep the data and assets of your site intact. ![Backup your WordPress Website](https://d1k2c27psfzbiv.cloudfront.net/wp-content/uploads/2023/06/12111820/Backup-your-WordPress-Website.webp) ### Install WP Adminify To change your login URL you'll need the a [Pro version of WP Adminify](https://wpadminify.com/pricing). After purchase, you'll receive a zip file of the plugin from your [login page](https://wpadminify.com/account). Then you can go to the "Upload Plugin" option from the dashboard and click on the "Add New" option. Then click on "Upload Plugin", now choose the WP Adminify plugin that you've downloaded from your account. ![Install and Active WP Adminify Plugin](https://d1k2c27psfzbiv.cloudfront.net/wp-content/uploads/2023/06/12111822/Install-and-Active-WP-Adminify-Plugin.webp) ### Configure the plugin After installing the plugin, you need to activate the license [which you can get from here](https://wpadminify.com/account). Once you configure the premium version of it, you will discover the "WP Adminify Pro" option in the left bar of the dashboard. Just click on the option, and a page with a vast number of modules will be presented to you. ### Enable the Redirect URLs module Now your task is to find the Redirect URLs module, which you badly need to manipulate. The module might be disabled by default. So you have to enable it to allow it to commence the operation. Once you are able to enable the module, your next task is to click on the "Save" button and reload the page. ![Change WordPress login Page URL](https://d1k2c27psfzbiv.cloudfront.net/wp-content/uploads/2024/10/12144827/Redirect-URLs.webp) ### Click on the Redirect URLs The module will be aligned with the other modules in the left menu bar of the dashboard after enabling it. This time, you have to click on it. A login URL page involving the "New Login URL" and Redirect Admin" fields will be shown to you. You have to fill up the fields with appropriate data. ![Redirect URLs options](https://d1k2c27psfzbiv.cloudfront.net/wp-content/uploads/2023/10/07061345/Redirect-URLs-options.webp) ### Fill in the fields under the Login URL page Now it’s the most important step. You have to enter the login page URL into the "New Login URL" field. Then enter a page URL into "Redirect admin", where you’re willing to redirect users with a view to enhancing security. It will be the best option if you enter the "page 404" URL to prevent access for those who are trying to make an intrusion on your site. But you can also change the WordPress login page URL to other pages at your convenience. ![Change WordPress admin login url](https://d1k2c27psfzbiv.cloudfront.net/wp-content/uploads/2022/10/07105423/Change-WordPress-admin-login-url.webp) ### Test your new login URL You’re ready to take full advantage of the intuitive [WP Adminify](https://wpadminify.com/about-us) plugin once you enter the page URLs and click on the "Save" button. As of now, just test your new login URL to make sure the plugin is working with your website. ![New WordPress Dashboard Login URL](https://d1k2c27psfzbiv.cloudfront.net/wp-content/uploads/2023/06/12111816/New-WordPress-Dashboard-Login-URL.webp) If you find the login page is redirecting you to "404", you take a deep sigh as your time and effort have paid off. ![redirect to custom 404 page for WordPress default Login URL](https://d1k2c27psfzbiv.cloudfront.net/wp-content/uploads/2023/06/12111818/redirect-to-custom-404-page-for-WordPress-default-Login-URL.gif) ### Change WordPress login URL without plugin (using code) If your WordPress abilities are a bit advanced by which I mean that you are comfortable touching code then this method will be cakewalk for you. Lets break it down into a few steps. #### Step 1: Back up your website Mistakes can happen when changing the codes. So its best backup your data before making any edits to core files. We’ve already discussed earlier how you can do this so if you’re just joining us on this section I’d advise you to just scroll up a little and see how to back up your website. #### Step 2: Access your website files There are many ways to access your website files. [You can use FileZilla](https://filezillapro.com/docs/v3/getting-started/how-to-install-filezilla/) and connect to your host server using FTP or you can use the file manager tool from your cPanel settings. #### Step 3: Locate the functions.php file Find the functions.php file in the your public_html file. Just follow this path in the file directory: public_html >>> wp-content >>> themes >>> “Whatever theme you’re using” >>> functions.php ![Modify function php file of your active Theme](https://d1k2c27psfzbiv.cloudfront.net/wp-content/uploads/2024/06/12112745/Modify-function-php-file-of-your-active-Theme.webp) #### Step 4: Edit the functions.php file Click on the functions.php file or right click on it and select edit start editing. Now, scroll to the bottom and add the following code: ``` function custom_login_url_redirect() { // Check if the current request is for the login page if (strpos($_SERVER['REQUEST_URI'], '/wp-login.php') !== false) { // Redirect to the custom login URL wp_redirect('https://example.com/custom-login'); exit; } } add_action('init', 'custom_login_url_redirect'); ``` Remember to replace https://example.com/custom-login with your actual custom login URL. #### Step 5: Test the New Login URL Now we test! Instead of typing the default /wp-login.php or /wp-admin, simply enter the unique URL you specified (e.g., https://example.com/custom-login) directly into your browser's address bar and hit enter. If everything's done correctly, you'll be redirected to the default WordPress login screen. But you'll see the changed URL! Now you know how to change WordPress admin URL for better security on your site. Without and with code! ## Final words It’s presumed that the reduction of protection can wreak havoc on the potential of a website through continuous intrusive attacks. If you’re running a website built with WordPress, you need to ensure optimal security at all times by changing the login page. How to change the WordPress login page URL to enhance security? It won’t appear to be a strenuous task if you can follow ideal methodologies and realize the nuances of the utilities available online. However, based on rigorous research and practical experience, we shared with you a phenomenal plugin that can certainly make a significant difference by changing the login page. You can reach out to the unmatched plugin to prevail over others in terms of protecting and customizing your website. Got any suggestions or feedback? [Take our survey](https://wpadminify.com/survey) so we can improve WP Adminify and give you the best experience ever. --- # How to Create WordPress Custom User Dashboard without Coding? URL: https://wpadminify.com/how-to-create-wordpress-custom-user-dashboard-without-coding Last updated: 2026-09-04 A custom user dashboard turns the cluttered default WordPress backend into a clean, focused workspace built around what each user actually needs, and you do not need to write code to build one. This guide walks through creating a WordPress custom user dashboard, a branded admin page, role-based redirects, hidden menu items, and custom dashboard widgets, all with WP Adminify. This is the hands-on, no-code build. If you want the strategy side, why a client dashboard cuts support tickets and which customizations matter for agencies, see our [WordPress client dashboard](https://wpadminify.com/wordpress-client-dashboard) guide. For the complete overview, see the [WordPress dashboard customization](https://wpadminify.com/wordpress-dashboard-customization) guide, and for the tool decision itself, our roundup of the [best WordPress dashboard plugins](https://wpadminify.com/best-wordpress-dashboard-plugin). For Example, it’s better to create a [custom admin page](https://wpadminify.com/features/custom-admin-page) for clients and redirect them to the custom admin page automatically as soon as they log in to the Dashboard. What content you will put in the custom admin page is a different question. I will answer this question in the following content. Especially keeping the dashboard clean is necessary for non-tech clients, otherwise, they may get lost and click on unnecessary options. Have you ever heard from your clients that the Dashboard is messy and it's very confusing? If yes, can you let me know how you have handled the situation in the comments? I like to hear your story. ## How to Create a WordPress Custom User Dashboard This is a broad topic, and I am going to break down the summary within this section before moving to action. You will get a clear idea of my plan for creating a WordPress Custom User Dashboard for clients or for any specific user role. So, here's what you need to understand first before creating a custom dashboard in WordPress. ### Create an Admin Page It’s the main point above all of the following tasks. I will guide how to create a proper admin page for a specific user role or user name by using your preferred page builder or default WordPress editor. ### Redirect Clients to the Custom Admin Page on Login As soon as we log in to the WordPress Dashboard, it redirects us to the default Dashboard page. But for clients, it’s necessary to redirect them to their suitable custom admin page. ### Redirect Clients to a Frontend URL on Logout (Optional) This is optional, but if you consider more about user experience, then you can redirect any type of user to a special frontend URL. Maybe you can create a Thank You page and write a proper farewell message or provide value-added content based on your niche. ### Hide Unwanted WordPress Admin Menu Items Clients always prefer to get the main administrator access. Now it’s our job to provide them a clean interface on their administrator account by hiding unwanted admin menu items like Tools, Settings. ### Create some Custom Dashboard Widgets If you prefer to stick with the default Dashboard without creating a custom admin page, then it’s necessary to add some custom Dashboard widgets that will provide real value to your clients. Also, hiding the default Dashboard widget is a must. ### Hide Plugins from Installed Plugins You can block the preview for some special plugins that you don’t want to preview to your clients. Keep the necessary plugins and hide all plugins that you have used to customize the WordPress Dashboard and improve site performance. ### Customized Login Page (Optional) Instead of the default WordPress login page, it’s better to rename the login page URL and customize the WordPress login page. ## Before Getting Started Before we jump into our action, I would like to mention that you must install the WP Adminify Free or Pro version in your WordPress Dashboard. With the help of the WP Adminify plugin, I will guide you on creating a WordPress Custom User Dashboard. [Free Download](https://wordpress.org/plugins/adminify) | [Explore WP Adminify Plans](https://wpadminify.com/pricing) If you have finished the setup, we can move forward to this blog post. Surprise awaits - I have an amazing freebie as a bonus for you at the last of this blog post. ## How to Create a Custom Admin Page? Navigate to`WP Adminify > Productivity > Enable Admin Pages Switcher`. Now reload your Dashboard, and you will notice an option called Admin Page under the WP Adminify admin menu item. ![Enable Custom Admin Page in WP Adminify Plugin](https://d1k2c27psfzbiv.cloudfront.net/wp-content/uploads/2022/03/18103426/Enable-Custom-Admin-Page-in-WP-Adminify-Plugin.webp) Now, click on this [Admin Page option](https://wpadminify.com/docs/adminify/productivity/custom-admin-pages), and you will notice a preview like the following screenshot. It looks similar, right? Yes, this is a post type developed by the WP Adminify team, and it supports any page builder. ![Custom WordPresss Admin Page option](https://d1k2c27psfzbiv.cloudfront.net/wp-content/uploads/2022/03/18103425/Custom-WordPresss-Admin-Page-option.webp) Now, click on the Add Admin Page button. You will get the editor with some extra custom fields called Display Option and Menu Attributes. ![Custom field for Custom Admin Page](https://d1k2c27psfzbiv.cloudfront.net/wp-content/uploads/2022/03/18103424/Custom-field-for-Custom-Admin-Page.webp) Let’s add some content in with the default WordPress Editor. Do all necessary customization for the Custom admin page, like add title, change icon, define menu order, and select the user role that can preview the admin page. After doing all modifications, the page will look like something like the following screenshot. ![Add content and customize settings for Custom Admin Page](https://d1k2c27psfzbiv.cloudfront.net/wp-content/uploads/2022/03/18103423/Add-content-and-customize-settings-for-Custom-Admin-PAge.webp) NOTE: I have added all content just for demo purposes. You can organize the layout and add dynamic or static content based on your needs. Now, publish this custom admin page and navigate to your Dashboard. As I mentioned "1" as my menu order, you can notice the "Pixar Admin" (Title of my Admin Page) menu took its position before the default Dashboard. Clicking on this "Pixar Admin" will preview all the content that I have added inside the editor, and its preview looks like the following screenshot. ![Added Custom Admin Page with default WordPress Editor](https://d1k2c27psfzbiv.cloudfront.net/wp-content/uploads/2022/03/18103422/Added-Custom-Admin-Page-with-default-WordPress-Editor.webp) ## Redirect a Specific User to Custom Admin Page I have created an admin account called "client". Now I will add a condition for this specific user: My condition is that when the user logs in to the WordPress Dashboard, it will redirect the user to my custom admin page instead of the default WordPress Dashboard. I will do this with the [Redirect URLs option](https://wpadminify.com/features/url-redirection). ![Created an admin account called Client](https://d1k2c27psfzbiv.cloudfront.net/wp-content/uploads/2022/03/18103421/Created-an-admin-account-called-Client.webp) First, navigate to `WP Adminify > Security > Enable Redirect URLs`. After enabling this feature, you can see the Roles Redirect tab, click on this option, and click on the "Add New Login Redirect" button. Here, I am going to do the following things - - User Type = Username - User = Select Client username - Redirect URL = Copy and paste the full URL of my custom Admin Page ![Redirect users to a custom admin page while login](https://d1k2c27psfzbiv.cloudfront.net/wp-content/uploads/2022/03/18103420/Redirect-users-to-a-custom-admin-page-while-login.webp) Then save the settings. Now it’s testing time. I have logged out and am trying to log in via my client username and password. Watch the following short video, and you will get the result. Login to clients account and check the redirection to the custom admin page ## Redirect Users to a URL while Logging Out (Optional) You can stick with the default WordPress logout page. But if you want to add an extra touch on user log out, then you can create a thank you page and redirect your users to the thank you page when they log out. The process is similar to the previous condition. Just select the logout redirection option instead of the login redirection. ![Logout redirection condition for WordPress user](https://d1k2c27psfzbiv.cloudfront.net/wp-content/uploads/2022/03/18103418/Logout-redirection-condition-for-WordPress-user.webp) Now follow the same condition and change the Redirect URL to your thank you page URL. Just like the following screenshot. ![Redirect user on log out to a page](https://d1k2c27psfzbiv.cloudfront.net/wp-content/uploads/2022/03/18103416/Redirect-user-on-log-out-to-a-page.webp) Watch the following video, and you can easily understand how it works. Redirect users to a custom landing page when someone log out from Admin Panel ## How to Hide Unwanted WordPress Admin Menu Items? To hide WordPress Admin menu items, I will use the [Admin Menu Editor](https://wpadminify.com/features/admin-menu-editor) by the WP Adminify plugin, which is 100% Free to use. Just navigate to`WP Adminify > Admin Menu Editor`. For example, I would like to hide the default Dashboard menu item for the client user. Now, click on the Dashboard menu item in our Menu Editor and choose the client username inside the Hidden for Rules option. It will [hide the Dashboard menu item from the client Dashboard](https://wpadminify.com/how-to-use-the-wordpress-admin-menu-editor). In the following screenshot, you can see a side-by-side view. ![Hide admin menu items for client Dashboard](https://d1k2c27psfzbiv.cloudfront.net/wp-content/uploads/2022/03/18103406/Hide-admin-menu-items-for-client-Dashboard.webp) By applying the same method, you can hide all unwanted menu items for your client's dashboard. Not only this, but you can also reorder the admin menu items position. Rename existing admin menu, Change icon, add custom admin menu items and many more. ## How to Create Custom Dashboard Widgets? To create a Dashboard Widget, you need to enable the option called [Dashboard & Welcome Widget](https://wpadminify.com/features/custom-dashboard-widget) from the productivity option of the WP Adminify plugin. After enabling the option, just reload your dashboard, and you will get the Dashboard Widget option under WP Adminify. ![Enable Custom Dashboard widget in WordPress](https://d1k2c27psfzbiv.cloudfront.net/wp-content/uploads/2022/03/18103405/Enable-Custom-Dashboard-widget-in-WordPress.webp) Click on this [Dashboard widget option](https://wpadminify.com/docs/adminify/productivity/create-custom-dashboard-widget), and it will redirect you to the main options panel for adding a Custom Dashboard widget. Just click on the "Add New Widget" button, and all necessary options will appear. Let me break down each option - - Widget Title: I have added “WP Adminify Intro” as the title - Widget Position: Choose Normal or Side - Content Type: Choose any one from our 6 options (I chose Video) - Allowed User Roles: Select who can see this specific Dashboard Widget ![Added YouTube video as WordPress Dashboard Widget](https://d1k2c27psfzbiv.cloudfront.net/wp-content/uploads/2022/03/18103404/Added-YouTube-video-as-WordPress-Dashboard-Widget.webp) This widget will be added inside the default WordPress Dashboard. In the following screenshot, you can notice that the Dashboard widget added and it behaves like all other default Dashboard widgets. You can drag and drop this widget to anywhere inside the Dashboard. ![Output for Video widget in WordPress Dashboard](https://d1k2c27psfzbiv.cloudfront.net/wp-content/uploads/2022/03/18103403/Output-for-Video-widget-in-WordPress-Dashboard.webp) ## Hide plugins from installed plugins You don’t want to display what type of plugins you have used to create a custom client Dashboard for your clients, right? You can do this with the help of `functions.php` file. Just paste the following code and modify the username with your client's username, and input the plugins folder and the main filename. Then save the functions.php file ``` function hide_plugins_for_specific_user_adminify( $plugins ) { if ( ! is_admin() ) { return $plugins; } $current_user = wp_get_current_user(); if ( 'set-username' === $current_user->user_login ) { $plugins_to_hide = array( 'woocommerce/woocommerce.php', // Add additional plugins as needed. ); foreach ( $plugins_to_hide as $plugin_file ) { if ( isset( $plugins[ $plugin_file ] ) ) { unset( $plugins[ $plugin_file ] ); } } } return $plugins; } add_filter( 'all_plugins', 'hide_plugins_for_specific_user_adminify' ); ``` ## How to Customize WordPress Login Page? (Optional) This is necessary for branding. If you own an agency, you know brand identity is something that is the first touchpoint to your clients. You can [rebrand the default login page](https://wpadminify.com/white-label-wordpress-login-page-for-your-clients), which enhances the brand identity plus improves user experience. To customize the default login page, you need to install the [Loginfy Addon](https://wpadminify.com/loginfy) by WP Adminify. After installation, navigate to `WP Adminify > Login customizer`. You will get access to 16 pre-built login page templates. ![Select template for WordPress login page](https://d1k2c27psfzbiv.cloudfront.net/wp-content/uploads/2022/03/18103359/Select-template-for-WordPress-login-page.webp) Select any template and start customizing the template. Change the login page Logo, Title, color, and adjust the margin padding for more visibility. You can create something unique that doesn’t seem like the default login page. ![Change logo for the WordPress login page](https://d1k2c27psfzbiv.cloudfront.net/wp-content/uploads/2022/03/18103358/Change-logo-for-the-WordPress-login-page.webp) [Changing the login page URL](https://wpadminify.com/docs/adminify/security/change-the-wordpress-login-url) is also mandatory. It’s not only for branding but also for security. You can prevent a brute force attack by changing the default WordPress login URL. To change the default WordPress login page URL, navigate to `WP Adminify > Security > Redirect URLs`. There, you can notice an option called "New Login URL", just input anything inside this area and save the settings. Whatever you type here will be the new login URL for your WordPress Dashboard. ![How to Change WordPress login page URL](https://d1k2c27psfzbiv.cloudfront.net/wp-content/uploads/2022/03/18103401/How-to-Change-WordPress-login-page-URL.webp) Here is a screenshot of the new WordPress login page design with a custom URL called "new-login". ![Changed WordPress login page URL](https://d1k2c27psfzbiv.cloudfront.net/wp-content/uploads/2022/03/18103402/Changed-WordPress-login-page-URL.webp) ## Bonus Tool Thanks for reading so far. As promised, I would like to share a bonus tool with you that can enhance your Admin navigation faster than ever. If you are a MacBook user, then you are familiar with the Spotlight search. What if I told you that you can add a spotlight search in your WordPress Dashboard? Seems interesting, right? WP Spotlight plugin for faster navigation in WordPress Dashboard and Frontend [Free Download](https://wordpress.org/plugins/spotlight/) | [Explore WP Spotlight Plans](https://wpspotlight.pro/pricing) Just install the WP Spotlight plugin, and you will get to know all shortcut keys inside the key bindings option. Also, feel free to modify the shortcut key based on your needs and navigate to your Dashboard from anywhere. It supports both backend and frontend search, too. ## Let’s Wrap UP! In this blog post, I have tried to cover all the necessary steps you should follow to enhance client navigation, allowing role-based content that keeps your clients up to date. If you followed the mentioned steps, you can create a professional WordPress Custom User Dashboard without any coding knowledge. To brand and restyle the admin itself, explore WP Adminify's [WordPress dashboard customization](https://wpadminify.com/features/dashboard-customization). If you still faced any problem while following my steps, feel free to comment below. I will try my best to assist you with any available resource or support. --- # WordPress Client Dashboards: 8 Customizations That Reduce Support Tickets URL: https://wpadminify.com/wordpress-client-dashboard Last updated: 2026-09-04 Your clients don’t hate WordPress - they hate confusing admin screens that feel like they were built for developers, not for them. When you turn the default backend into a focused, client-friendly admin, you can quietly cut support tickets while making your service look premium. This is the strategy side: why a WordPress client dashboard cuts support tickets and which customizations matter for agencies. If you want the exact no-code build, follow our step-by-step guide on [how to create a custom user dashboard without coding](https://wpadminify.com/how-to-create-wordpress-custom-user-dashboard-without-coding). For the full picture of admin customization, see the [WordPress dashboard customization](https://wpadminify.com/wordpress-dashboard-customization) And if you are still choosing the tool, we compared the [best WordPress dashboard plugins](https://wpadminify.com/best-wordpress-dashboard-plugin) for client work, install counts included. ![WordPress client dashboard created with WP Adminify](https://d1k2c27psfzbiv.cloudfront.net/wp-content/uploads/2022/10/07095428/Minimal-WordPress-client-Dashboard.webp) ## Why your WordPress client dashboard is generating support tickets Most WordPress client dashboards are accidental: you install a theme, add a few plugins, and let everything show up in the admin as it wants. That’s how you end up with menus, widgets, notices, and toolbars designed around plugins - not around how your client actually works day to day. Common ticket triggers you probably recognize: - Where do I edit my homepage again? - Why does my dashboard look broken today? - Is it safe to click this update button? Underneath, the problem is almost always the same: there’s no intentional client-friendly admin that hides complexity and highlights only the 5–7 tasks this specific client actually does. When you design a WordPress client dashboard on purpose - with tools like [WP Adminify](https://wpadminify.com/), [Admin Bar Editor](https://jeweltheme.com/admin-bar-editor), and [Loginfy](https://wpadminify.com/loginfy) - you stop answering the same questions and start preventing them. ## Principle: one dashboard per client workflow Before you touch any settings, define what “success” looks like for this client inside WordPress. A salon owner, an online course creator, and an eCommerce brand should not see the same backend. ​ For most small business sites, daily and weekly workflows boil down to: - Adding or editing pages or blog posts - Uploading images and documents - Managing bookings, products, or services - Checking a few key stats and forms Everything else - plugins, tools, system settings, advanced appearance options - belongs to you as the agency or developer. Your job is to design a client admin interface that reflects those real workflows and hides or demotes everything that feels like infrastructure. WP Adminify plugin basic options for Admin menu That’s exactly where a dashboard customizer like [WP Adminify](https://wpadminify.com/wordpress-dashboard-customization), a toolbar controller like [Admin Bar Editor](https://jeweltheme.com/admin-bar-editor), and a login customizer like [Loginfy](https://wpadminify.com/loginfy) work together: they let you build one coherent experience instead of a pile of plugin settings screens. ![Checklist mapping client workflows to WordPress dashboard tasks](https://d1k2c27psfzbiv.cloudfront.net/wp-content/uploads/2022/10/07121836/client-workflow-mapping-checklist.webp) ## 8 client dashboard customizations that reduce tickets In this section, you’ll see eight practical changes you can implement on any client site. Each one is designed to remove a specific type of support ticket, not just make the dashboard “look cool.” ### 1) Simplified, branded login experience (Loginfy) For many clients, “WordPress” means the login screen and the first dashboard page they see after login. If the login is generic, cluttered, or looks different from their site, you’ve already added friction. ​ With the [Loginfy](https://wpadminify.com/loginfy) addon for WP Adminify, you can transform wp-login.php into a polished, on‑brand experience: ​ - Replace the WordPress logo with the client’s logo and favicon. - Apply their brand colors, gradients, and background image so it feels like part of the site, not a separate system. - Adjust typography and layout using the Live Customizer so you can preview changes in real time. ​ - Add a short, friendly note below the form like “Need help? Email support@youragency.com” to deflect basic access questions before they become tickets. You can also combine this with security best practices like changing the login URL, adding reCAPTCHA, and limiting attempts, so clients see a professional, safe entry point instead of a generic WordPress screen. Because Loginfy is part of your WP Adminify ecosystem, you avoid installing a separate login customizer plugin that adds even more settings and notices. ![Custom WordPress login page designed with Loginfy addon](https://d1k2c27psfzbiv.cloudfront.net/wp-content/uploads/2022/10/07095352/Customize-the-WordPress-Login-Page.webp) ### 2) Clean, role-based admin menu (WP Adminify) The left admin menu is usually the biggest source of confusion and accidental clicks. Every plugin adds its own top-level item, sometimes with a bright icon and inconsistent wording. ​ WP Adminify’s [Admin Menu Editor](https://wpadminify.com/features/admin-menu-editor) lets you turn that chaos into a focused navigation: - Use the visual drag‑and‑drop interface to reorder menus so content items (Pages, Posts, Products, Bookings, etc.) sit at the top where clients actually see them. ​ - Rename labels into client language: “Posts” → “Blog,” “WooCommerce” → “Shop,” “Testimonials CPT” → “Reviews.” ​ - Hide technical menus like Tools, Settings, Plugins, Appearance, and most plugin entries from non‑admin roles to prevent accidental changes. ​ - Assign custom icons and separators so related items are grouped in a way that feels intentional, not random. ​ Multiple menu modes and type by WP Adminify Plugin Most importantly, you can show different menu structures per role: - Admins (your team + trusted client owners) see full configuration. - Editors see only content and marketing tools. - Store managers see the shop and orders. - Subscribers may see nothing but their profile. ​ This is perfect when you want a truly client-friendly admin where non‑technical users simply cannot reach dangerous screens. ![WP Adminify Admin Menu Editor with drag and drop menu customization](https://d1k2c27psfzbiv.cloudfront.net/wp-content/uploads/2022/10/07095320/Create-custom-admin-menu-items.webp) ### 3) Client-focused admin bar shortcuts (Admin Bar Editor) If your client spends more time on the frontend than the backend, the admin bar (WordPress toolbar) becomes their primary “control panel.” By default, it mixes WordPress branding, generic links, and plugin icons that often mean nothing to them. ​ The [Admin Bar Editor](https://jeweltheme.com/admin-bar-editor) plugin gives you precise control over this bar: - Hide items you don’t want clients to see, such as the WordPress logo, “Customize,” updates, or plugin shortcuts that lead into complex settings. ​ - Reorder items with drag‑and‑drop so the most important actions are always one click away. ​ - Add custom menu items and submenus that match the client’s real tasks: “Add New Blog Post,” “Open Booking Calendar,” “View Orders,” “Contact Support,” or links to your own documentation. ​ - Rename menu titles and change icons using Dashicons or custom icons to match the client’s terminology and brand. ​ - Control visibility based on roles or specific usernames so admins see everything, while editors and authors only see tools they need. For white‑label builds, you can also apply styles so the toolbar background, hover colors, and typography feel like an extension of the overall dashboard UX. When a client can log in, click “Add Blog Post,” and get straight to work, you eliminate a big chunk of “Where do I go to…?” tickets. ![Customized WordPress admin toolbar created with Admin Bar Editor](https://d1k2c27psfzbiv.cloudfront.net/wp-content/uploads/2022/10/07095440/Personalize-WordPress-Admin-bar.webp) ### 4) Minimal, high-signal dashboard widgets (WP Adminify) The native Dashboard screen is usually a mix of “Welcome,” “Events & News,” and whatever random widgets plugins add. None of that helps your client publish content or check what actually matters to them. ​ WP Adminify lets you clean this up and replace it with something useful: - Use the [Dashboard Widgets module](https://wpadminify.com/features/custom-dashboard-widget) to disable WordPress core widgets your client doesn’t need (Welcome panel, Events & News, Quick Draft, etc.). ​ - Hide plugin widgets from non‑admin roles so clients don’t see upsells or advanced analytics they don’t understand. ​ - Add a single, focused Custom Welcome Widget that includes: - “Add New Page” / “Add New Blog Post” direct links - “View Forms” or “View Orders” - A short “Start here” checklist - A link to your agency’s documentation or training video ​ You can even use WP Adminify’s [Custom Admin Pages](https://wpadminify.com/features/custom-admin-page) feature to build a dedicated “Help” or “Start Here” page and then link it from the welcome widget. That way, every time a client logs in, they see exactly where to click next - and you get fewer “What do I do now?” messages. ![Custom welcome widget in WordPress dashboard with quick links for clients](https://d1k2c27psfzbiv.cloudfront.net/wp-content/uploads/2022/10/07095345/Custom-welcome-widget-in-Client-Dashboard.webp) ### 5) Content and media organization with folders (WP Adminify) Even with a simplified menu, clients get lost in long lists of pages, posts, and media items. When everything is just “Page 1, Page 2, Homepage – New,” confusion and duplication are inevitable. ​ WP Adminify’s folders and list enhancements solve this by giving structure without changing URLs:​ ​ - Create virtual folders for pages and posts such as “Homepage,” “Landing Pages,” “Blog – Live,” “Blog – Draft,” “Archived Campaigns.” ​ - Organize the Media Library into “Brand Assets,” “Blog Images,” “Product Photos,” and “Documents” so clients can filter instead of scrolling. ​ - Combine folders with the [Post Type Order](https://wpadminify.com/features/post-type-order) module so you can drag and drop content into a logical front‑end order.​ - Use WP Adminify’s Admin Columns features to show thumbnails, categories, or custom fields right in the list, so clients can visually confirm they’re editing the right item. ​ For many agencies, this alone removes entire categories of tickets like “I can’t find my homepage” or “Which image is used on this page?” ![WP Adminify media folders available inside WordPress media uploader popup](https://d1k2c27psfzbiv.cloudfront.net/wp-content/uploads/2026/01/18111013/wp-adminify-media-folder-inside-media-uploader.webp) ### 6) Noise-free notices and alerts (WP Adminify) Admin notices are essential for developers but noisy and scary for clients. Orange and red banners about updates, licenses, and configuration warnings often trigger urgent emails - especially when they appear after months of a quiet dashboard. ​ WP Adminify lets you manage this noise while still keeping you informed: - Hide or dismiss persistent plugin notices for non‑admin roles so clients see only messages meant for them. ​ - Keep update and license reminders visible for your own admin users, who know how to act on them safely. ​ - Remove clutter like “Screen Options” and “Help” tabs from roles that never need them, further reducing confusion. ​ When you pair this with a clear “If something looks broken, click here” link inside your custom welcome widget or help page, clients learn to trust that the dashboard is under control. That means fewer screenshots of harmless notices in your inbox. ![Cleaner WordPress admin screen with unneeded notices removed](https://d1k2c27psfzbiv.cloudfront.net/wp-content/uploads/2022/10/07102236/Hide-admin-notice-and-nags-from-Dashboard.webp) ### 7) Role-based access and safety rails (RoleMaster + Adminify) Many support tickets happen because clients can technically do something, not because they should. Changing permalink structures, deactivating essential plugins, or switching themes might be only one click away. ​ By combining [WP Adminify](https://wpadminify.com/) with your [RoleMaster Suite](https://wpadminify.com/rolemaster-suite) configuration, you can add safety rails: ​ - Create or refine roles such as “Owner,” “Editor,” “Store Manager,” and “Contributor” with exactly the capabilities they need, nothing more. ​ - Use WP Adminify’s role‑based menu visibility to hide Plugins, Themes, Tools, and Settings from all non‑admin roles. ​ - Disable “Add New” or “Delete” options for certain post types for specific roles to avoid accidental removal of landing pages or system content. ​ - Restrict access to WP Adminify’s own settings and white‑label panel so only your agency can change global dashboard configuration. ​ You can also use WP Adminify’s [Custom Admin Pages](https://wpadminify.com/wordpress-dashboard-customization) for role‑restricted internal “SOP hubs” that only editors or owners see. This gives you a place inside the dashboard to document what clients should and shouldn’t touch. ![Control User role using Rolemaster suite in WP Adminify](https://d1k2c27psfzbiv.cloudfront.net/wp-content/uploads/2022/10/07105121/Control-User-role-using-Rolemaster-suite-in-WP-Adminify.webp) ### 8) Activity logs and built‑in “self‑debugging” (Activity Logs) Even with excellent UX, things occasionally break or change unexpectedly. When that happens, guessing who did what wastes time for everyone.​ WP Adminify’s [Activity Logs](https://wpadminify.com/activity-logs) module gives you a clear audit trail: ​​ - Log logins, content changes, plugin activations/deactivations, and other key actions with timestamps and usernames. ​ - Quickly answer “What changed right before this issue?” by filtering activities around the reported time. ​ - Use the history to coach clients: “Instead of editing this template directly, please use the ‘Landing Pages’ section next time.” ​ - Spot patterns that suggest you should tighten roles or adjust your dashboard design (for example, if clients keep editing a sensitive settings page).​ When clients know you can see exactly what happened, they’re more comfortable experimenting inside the safe areas you’ve set up. And when something does go wrong, you can resolve it faster and with less back‑and‑forth. ![WP Adminify activity logs showing recent user actions in WordPress](https://d1k2c27psfzbiv.cloudfront.net/wp-content/uploads/2024/10/18103544/Track-WordPress-Dashboard-activity-logs.webp) ## Implementation playbook for agencies Once you’ve designed a better WordPress client dashboard, you need a repeatable way to roll it out across all your client sites. ​ Here’s a simple playbook you can document and reuse: ### Step 1: Build a “base” client dashboard on a sandbox site - Install [WP Adminify](https://wpadminify.com/), [Loginfy](https://wpadminify.com/loginfy), [Admin Bar Editor](https://jeweltheme.com/admin-bar-editor), RoleMaster Suite, and your preferred performance/security plugins. - Choose an Admin UI template or color scheme in WP Adminify that matches your agency or default client branding. ​ - Configure a clean, role‑based admin menu, minimal dashboard widgets, and at least one custom help/welcome page. ​ - Set up the admin bar profile in Admin Bar Editor with your ideal shortcuts for editors and store managers. ​ - Design a standard login screen with Loginfy that you can tweak per client by swapping logos and colors. ​ ### Step 2: Export and document - Use WP Adminify’s import/export options wherever available (Admin Menu, Folders, UI presets, etc.) to create a reusable configuration. ​ - Save Admin Bar Editor configurations as presets or export settings if you’re using the Pro version. ​ - Document your internal “Client Dashboard Setup” checklist in Notion, Google Docs, or your project management tool so your team can follow it consistently. ​ ### Step 3: Roll out to each new client site For every new project: - Import your base WP Adminify settings and folder structures. ​ - Apply your default admin bar layout and then tweak shortcuts based on the client’s main workflows. ​ - Set up roles and capabilities using RoleMaster and connect them to menu/toolbar visibility rules. ​ - Customize the login screen with the client’s logo, colors, and a client‑specific support note. ​ - Add a client‑specific welcome widget with links to their unique funnels, forms, or reports. ​ ### Step 4: Train once, support less Use Activity Logs and support ticket patterns to periodically refine your base configuration so every new client benefits from what you’ve learned. Record a single 10–15 minute walkthrough video on your base dashboard experience: how to log in, where to click to add content, how to upload images, and how to contact you. ​ Embed this video on the custom help page or link it from the welcome widget, so every new team member at the client can self‑onboard. ### Related Reading [white label WordPress guide](https://wpadminify.com/white-label-wordpress) ## ​Checklist and next steps To wrap up, give readers a quick action checklist they can follow in order: - Enable [Activity Logs](https://wpadminify.com/activity-logs) to make future troubleshooting fast and transparent. - Map your client’s actual WordPress workflows (content, bookings, products, etc.). - Install [WP Adminify](https://wpadminify.com/) on a staging site and explore the [WordPress client dashboard](https://wpadminify.com/wordpress-client-dashboard) example. - Use Admin Menu Editor to create a simplified, role‑based menu for non‑technical users. - Clean up dashboard widgets and add a custom welcome widget with links and training resources. ​ - Organize posts and media into folders and set post type order for easy navigation.​ ​ - Customize the admin bar with [Admin Bar Editor](https://jeweltheme.com/admin-bar-editor) so key actions are one click away. - Brand and secure the login page using [Loginfy](https://wpadminify.com/loginfy). ​ - Lock down roles and capabilities with RoleMaster Suite and WP Adminify visibility rules. If you want a cleaner, faster, and fully personalized WordPress client dashboard your clients actually enjoy using, start by installing WP Adminify and then layer in Loginfy and Admin Bar Editor on your next project. Over the next few launches, you’ll see support tickets drop while client satisfaction quietly goes up. --- # 10 Best WordPress Dashboard Plugins for 2026 (Tested & Compared) URL: https://wpadminify.com/best-wordpress-dashboard-plugin Last updated: 2026-09-04 Your WordPress Dashboard is not just something to manage your blog posts or pages. It’s the main control center of your entire site. Maybe you never thought about improving your Dashboard, but believe me, with the help of my mentioned plugin, you can boost your productivity. A WordPress Dashboard plugin transforms your Admin into a branded, user-friendly panel that will help you stay focused and well-organized. No matter if you run a blog, client’s site, or an agency – I highly recommend you go through my mentioned plugin list and choose the best one for your needs. In 2026, WordPress Dashboard customization is not a luxury but a necessity for better management. Whether you want to customise the admin for yourself or brand it for clients, the right plugin does the heavy lifting. Good news is, there are a variety of powerful WordPress Dashboard plugins available in the WordPress plugin repository. Quick answer: WP Adminify is the best overall WordPress dashboard plugin in 2026, one all-in-one toolkit that combines admin UI customization, a drag-and-drop menu editor, custom dashboard widgets, login branding, and full white labeling in a single plugin (60+ features). If you are building a WordPress client dashboard for handover, WP Adminify and Ultimate Client Dash are the two that cover branding, widgets and role limits together, while Ultimate Dashboard is the lighter widget-only pick and White Label CMS handles branding on a budget. For a single job like a branded login page, faster navigation, analytics, or caching, pair WP Adminify with a focused tool such as Loginfy, WP Spotlight, MonsterInsights, or WP Rocket. ## Why Customize Your WordPress Dashboard? I’d like to mention a few things that will encourage you to start your WordPress Dashboard customization journey. SPOILER: Your client will definitely love the personalized Dashboard instead of the default. - A custom Dashboard improves usability & visibility - White-label the WordPress Dashboard - Hide unwanted options for different user roles or clients - Custom widgets and menus can help your other members ## Key Features to Look for in Dashboard Plugins Before selecting any plugin, just think properly about what feature you need most. After brainstorming properly, decide the right plugin for you. But I’d like to mention some features that you should consider while choosing the best Dashboard plugin for your site or client’s site. Customization: It should have the option to add, remove, rearrange dashboard widgets and of course, login page customization. How much flexibility a plugin provides for [Admin Customization](https://wpadminify.com/wordpress-admin-customization) should be your priority. Admin Menu Optimization: The Admin menu plays a vital role in WordPress Dashboard. Your plugin must have this [admin menu editor](https://wpadminify.com/how-to-use-the-wordpress-admin-menu-editor) feature, or you’ll have to use another plugin to get this feature. Analytics Integration: It’s not a standard part of the WordPress Dashboard, but having this feature in a Dashboard customization plugin is a bonus for you. User Role Editor: This is one of the must-have features when you try to modify the default admin panel. Modify the [User Role permission](https://wpadminify.com/rolemaster-suite) for better accessibility. White Labeling: [White labeling for the WordPress](https://wpadminify.com/white-label-wordpress-development) Dashboard is necessary if you want to provide a branded look to your clients or users. ## What Is a WordPress Client Dashboard? A WordPress client dashboard is the admin area rebranded and stripped back for the person who owns the site rather than the person who built it. You hide the menus they do not need, replace the default widgets with your own, put your agency logo on the login screen, and lock the whole thing to their user role. That is not the same thing as a front end client portal. A portal sits on the public side of the site and shows project files, invoices or progress updates. Everything on this page is admin side, so it changes what the client sees after they sign in at `/wp-admin`. If you need the portal kind, you are shopping in a different plugin category. Most of the plugins below handle part of this job. Our guide to [the client dashboard customizations that reduce support tickets](https://wpadminify.com/wordpress-client-dashboard) walks through the settings themselves. This page is about which plugin to install first. ## The Best WordPress Dashboard Plugins for 2026 I have tried my best to keep things minimal. You will get Dashboard plugins, Analytics, Forms, and Performance in my following recommended list. The following plugins are 100% compatible with each other, as I have personally tested them on my local server. | Plugin | Best for | Standout feature | Free version | | --- | --- | --- | --- | | WP Adminify | All-in-one dashboard customization & white label | Admin UI + menu editor, white label, 60+ features | Yes (WordPress.org) | | Ultimate Dashboard | Simple, widget-only client dashboards | Replace default widgets; Elementor/Bricks dashboard (Pro) | Yes (WordPress.org) | | White Label CMS | Basic admin branding on a budget | Login, dashboard & footer branding presets | Yes (WordPress.org) | | Admin Bar Editor | Cleaning up the admin toolbar | Hide/customize admin bar per user role | Yes (WordPress.org) | | Loginfy | Branded login pages | 16 login templates with live preview | Yes (WordPress.org) | | RoleMaster Suite | User roles & permissions | Create/duplicate roles, edit capabilities | Yes (WordPress.org) | | WP Spotlight | Fast dashboard navigation | Alt+S command palette + quick actions | Yes (WordPress.org) | | MonsterInsights | Analytics inside the dashboard | Google Analytics stats in wp-admin | Yes (freemium) | | WP Forms | Forms & lead capture | Drag-and-drop builder, 2,000+ templates | Yes (Lite) | | WP Rocket | Performance & caching | One-click caching & speed optimization | No (premium) | ## [WP Adminify ](https://wordpress.org/plugins/adminify/) ![Best WordPress dashboard plugin by WP Adminify](https://d1k2c27psfzbiv.cloudfront.net/wp-content/uploads/2025/09/23045747/WP-Adminify-Plugin.webp) You will get excellent support and continuous updates with new features and fixes from the WP Adminify team. No matter whether you are a free or pro version user, each user will get the same value from the team. This plugin offers all the necessary features that a basic user needs from a WordPress Dashboard plugin. See the full [WordPress dashboard customization](https://wpadminify.com/features/dashboard-customization) feature set. Let me mention some popular features like Admin UI customization, Admin Menu Editor, Media Folder, Admin notice control, Custom Admin Page, [Custom Dashboard widget](https://wpadminify.com/features/custom-dashboard-widget), [Change login URL](https://wpadminify.com/change-wordpress-login-page-url), User role-based redirection, Control Heartbeat API, and much more. Also, it offers a white labeling feature to Pro plans. You can easily rebrand WP Adminify with your own agency logo, name, and much more. WP Adminify has a free version on WordPress.org, and Pro plans start at $79/year - see the full breakdown on the [WP Adminify pricing page](https://wpadminify.com/pricing). ## [Admin Bar Editor ](https://jeweltheme.com/admin-bar-editor) ![Admin bar Editor plugin](https://d1k2c27psfzbiv.cloudfront.net/wp-content/uploads/2025/09/23045715/Admin-bar-Editor-plugin.webp) Most of the WordPress Dashboard Plugins skip the default [Admin bar customization](https://wordpress.org/plugins/admin-bar/) part. But the Admin Bar plays a vital role in your WordPress Admin Panel. You have customized the entire Dashboard, but the Admin Bar remains the same with the default color and icons. Which doesn’t seem professional for an Admin panel. With the help of the Admin Bar Editor plugin, you can hide, customize, and add any Admin bar items. That’s not the end – you can also hide the admin bar for specific user roles or even hide specific items for specific user roles too. It offers background customization options for the Admin bar and also defines the admin bar position from top to bottom. ## [Loginfy](https://wordpress.org/plugins/loginfy/) ![Custom WordPress login page by loginfy](https://d1k2c27psfzbiv.cloudfront.net/wp-content/uploads/2025/09/23045722/Custom-WordPress-login-page-by-loginfy.webp) To get a professional look on your WordPress login page, you should install Loginfy. It provides 16 pre-built templates and live login page customization ability. Without saving your login page, you can preview whatever you are doing with the login page. [Change your login page logo](https://wpadminify.com/change-wordpress-login-logo), layout, background (color, gradient, photo, video, slideshow), login form, fields, button, and much more. Not only the UI, but it also offers some extra functionality like error message customization, custom CSS, and Google Font for the login page. ## [RoleMaster Suite ](https://wordpress.org/plugins/rolemaster-suite/) ![User role editor plugin by rolemaster](https://d1k2c27psfzbiv.cloudfront.net/wp-content/uploads/2025/09/23045741/User-role-editor-plugin-by-rolemaster.webp) Enjoy the modern UI and easy-to-use interface while customizing your default user role permissions. It supports any other custom user roles too. For example, if you are using WooCommerce, then you can modify the permissions for your shop manager and vendor. Not only customization of user permissions, but it also offers you the option to create custom user roles. You can create a custom user role from scratch or duplicate any existing user role to speed up your role creation journey. ## [WP Spotlight](https://wordpress.org/plugins/spotlight/) ![Spotlight plugin for better WordPress dashboard navigation](https://d1k2c27psfzbiv.cloudfront.net/wp-content/uploads/2025/09/23045734/Spotlight-plugin-for-better-WordPress-dashboard-navigation.webp) If you are a power WordPress user and spend most of your time inside your WordPress Dashboard, then this plugin will save you 10 times the navigation time. All you have to do is press `Alt+S` on Mac and Windows. You will get a spotlight search in your WordPress dashboard. Now you can type anything and navigate to relevant searches and press enter to directly navigate on the specific option. Not only for navigation but also this plugin offers some quick action like creating new page, post, upload media, theme and plugin activation or deletion and much more. ## [Ultimate Dashboard](https://wordpress.org/plugins/ultimate-dashboard/) - Best for simple, widget-only client dashboards Ultimate Dashboard is a clean, lightweight plugin built around one job: replacing the default WordPress dashboard widgets with your own icon, text, and HTML widgets so clients land on a tidy welcome screen. The Pro version can swap the dashboard for an Elementor, Bricks, or Divi layout. If a decluttered welcome screen is all you need, it is a solid pick. Where it stops is breadth. There is no admin menu editor, dark mode, media folders, command palette, or plugin-level white label, so agencies that need to rebrand and reorganize the whole admin usually outgrow it. If you want that widget control plus full admin customization in one place, see the feature-by-feature [WP Adminify vs Ultimate Dashboard](https://wpadminify.com/wp-adminify-vs-ultimate-dashboard) comparison. ## [White Label CMS](https://wordpress.org/plugins/white-label-cms/) - Best for basic admin branding on a budget White Label CMS is a long-standing free plugin for putting your logo on the login screen, dashboard, and admin footer, plus a few branded dashboard panels. For a freelancer who only needs light branding, it does the job well. It is branding first and customization second: there is no drag-and-drop menu editor, dark mode, or role-based menu control. WP Adminify covers the same branding and adds the rest of the admin toolkit - menu editor, dashboard widgets, media folders, and more. For the feature-by-feature breakdown, see our [WP Adminify vs White Label CMS](https://wpadminify.com/wp-adminify-vs-white-label-cms) comparison, and our [white label WordPress guide](https://wpadminify.com/white-label-wordpress) walks through both approaches. ## [MonsterInsights](https://www.monsterinsights.com/ref/740/) ![Monsterinsights plugin for analytics](https://d1k2c27psfzbiv.cloudfront.net/wp-content/uploads/2025/09/23045729/Monsterinsights-plugin-for-analytics.webp) If you are using Google Analytics to track your website audience, then having MonsterInsights will save tons of time for you. You never have to visit the Google Analytics Dashboard to preview your traffic data. You can check all traffic stats inside your WordPress Dashboard. Track e-commerce, conversion, traffic sources – everything in one place. Track affiliate links properly with outbound link clicks using this plugin. You can also preview the user journey of your visitors and customers and see how long they are staying on your pages. It offers integration with WooCommerce, YouTube, WP Forms, and many more plugins. ## [WP Forms ](https://wpforms.com/ref/366/) ![WP Forms plugin for WordPress contact form creation](https://d1k2c27psfzbiv.cloudfront.net/wp-content/uploads/2025/09/23045754/WP-Forms-plugin-for-WordPress.webp) Are you questioning yourself that – There is Contact Form 7, so why am I mentioning WP Forms? Let me clarify – WP Forms is not just a general form plugin. It offers more features like registration forms, survey forms, payment forms, newsletter forms, and much more. WP Forms offers a rich template library of 2000+ forms, where you can easily find different types of pre-built forms and import them directly to your website. Just customize the text and publish your form. Enjoy drag-and-drop form builder with smart conditional logic to create a dynamic form based on different types of users. Also, it offers a mobile-friendly design so you don’t have to worry about responsiveness. ## WP Rocket After finalizing your WordPress website, it’s necessary to optimize your website’s page speed. Do you know that page speed plays a great role in ranking on different search engines like Google? Before indexing your website in search engines, I highly recommend you optimize your website performance. You can use the Google PageSpeed test tool to check your website performance. WP Rocket is a beginner-friendly tool, and you will love the options panel. Just select your caching mode, and you will notice the changes instantly. If you already uploaded too many high-resolution media files to your website, then I recommend you compress the media files to get better page speed. Do you know? Already 50M websites are using WP Rocket to supercharge their website’s page speed. You can give this plugin a try. ## Installation & Basic Setup The installation of all of my mentioned plugins is very simple. All plugins are available in the WordPress plugin repository except WP Rocket. WP Rocket is a premium plugin. The [plugin installation](https://wpadminify.com/docs/adminify/getting-started/free-installation) is similar to others. Just go to Plugins > Add New and search by the plugin name, then click on Install and Activate. After activation of a plugin, you will notice the settings of your installed plugin in the admin menu. Some plugins offer a setup wizard; I recommend you follow the setup wizard and do the basic recommended settings by your desired plugin. ### Related Reading - [WordPress dashboard guide](https://wpadminify.com/complete-guide-to-wordpress-admin-panel-for-beginners) - [WP Adminify vs UIPress](https://wpadminify.com/wp-adminify-vs-uipress) - [dashboard customization guide](https://wpadminify.com/wordpress-dashboard-customization) ## What is a WordPress dashboard plugin? A WordPress dashboard plugin changes what you and your users see after login: the admin sidebar, the admin bar, the widgets on the Dashboard screen, the login form, and the colours and logo wrapped around all of it. Core WordPress gives you almost none of that. Screen Options can hide one widget for one user, and that is roughly where it stops. Every plugin on this list adds a settings screen so the same choices apply site wide and per user role. It is worth separating two things people search for with the same words. An analytics dashboard (MonsterInsights and similar) pulls traffic data into WordPress. A dashboard customization plugin changes the interface itself. They solve different problems, and most agencies end up running one of each rather than picking a winner. ## Do you need a plugin to customize the WordPress dashboard? No, but the code route gets tedious quickly. You can call `remove_menu_page()` in a snippet to drop a menu item, `wp_add_dashboard_widget()` to add your own widget, and hook `login_enqueue_scripts` to restyle the login form. That is three separate hooks before you have touched user roles, and each one lives in a theme or a snippet plugin that a future site owner will not know about. A dashboard plugin keeps the configuration in the database and gives the client a screen they can read without calling you. ## Which WordPress dashboard plugin is best for client sites? For handover work the deciding feature is usually white labelling rather than widgets. You want the WordPress logo gone, your own branding on the login screen, the menu trimmed to what the client should touch, and the whole thing locked to their role so nothing breaks when they explore. WP Adminify, White Label CMS and Ultimate Dashboard all cover some of that; the difference is how much you have to stack on top. Our [WordPress dashboard customization](https://wpadminify.com/features/dashboard-customization) page breaks the feature set down screen by screen, and [white label](https://wpadminify.com/features/white-label) covers the branding side. ### Client dashboard plugins compared Four plugins keep turning up on client handover work, plus one premium tool that is not on WordPress.org at all. Active install counts below were read from the WordPress.org plugin directory in September 2026. | Plugin | What it covers on a handover | Active installs | Free version | | --- | --- | --- | --- | | WP Adminify | Admin menu editor, custom widgets, login branding and full white label in one plugin | 6,000+ | Yes | | Ultimate Client Dash | Rebrands the dashboard and login, adds client instructions and custom widgets | 2,000+ | Yes | | Ultimate Dashboard | Replaces the default widgets with a simple welcome screen | 60,000+ | Yes | | White Label CMS | Branding presets for the login screen, dashboard and footer | 200,000+ | Yes | | Simple Client Dashboard | One click limited admin role with almost no configuration | Not on WordPress.org | Premium only | Install counts are a poor proxy for fit here. White Label CMS has the largest install base on the list and still does not touch the admin menu, while Ultimate Client Dash has the smallest and covers more of the handover checklist than either plugin above it. Choose on the column that matches the work in front of you, then check whether the free tier already does it before you pay for anything. ## WordPress Dashboard Plugin FAQs ### What is the best WordPress dashboard plugin? For most sites, WP Adminify is the best WordPress dashboard plugin in 2026. It combines admin UI customization, a drag-and-drop menu editor, custom widgets, login branding, and white labeling in one plugin, so you don’t need to stack five separate tools. You can start free and upgrade on the [pricing page](https://wpadminify.com/pricing). ### Is there a free WordPress dashboard plugin? Yes. WP Adminify, Admin Bar Editor, Loginfy, RoleMaster Suite, and WP Spotlight all have free versions on WordPress.org, and MonsterInsights and WP Forms offer free tiers. WP Rocket is the only premium-only tool on this list. You can customize most of your dashboard without spending anything. ### How do I customize the WordPress dashboard without code? Install a dashboard plugin like WP Adminify, then use its visual settings to rearrange widgets, edit the admin menu, hide clutter, and rebrand the login page - no PHP required. For a full walkthrough, read our [dashboard customization guide](https://wpadminify.com/wordpress-dashboard-customization). Most changes take effect instantly after you save. ### Which dashboard plugin is best for agencies and client sites? WP Adminify is the strongest pick for agencies because its white label feature rebrands the entire admin - logo, name, and footer - so client sites look like your own. Pair it with RoleMaster Suite to control what each client role can see. Both scale across unlimited client installs on Agency plans. ### Is WP Adminify better than Ultimate Dashboard? For most users, yes. WP Adminify is the more complete WordPress dashboard plugin - it does everything Ultimate Dashboard does (custom dashboard widgets and a clean client welcome screen) and adds an admin menu editor, dark mode, login branding, media folders, and full white labeling in one plugin. Ultimate Dashboard is lighter and best if you only need to replace dashboard widgets. Read the full [WP Adminify vs Ultimate Dashboard](https://wpadminify.com/wp-adminify-vs-ultimate-dashboard) comparison for a feature-by-feature breakdown. ### How to create a client dashboard? Install a dashboard plugin, then work through four screens. Trim the admin menu to the pages the client actually edits, swap the default widgets for a welcome panel of your own, brand the login page, and restrict everything else to their user role. Our [WordPress client dashboard guide](https://wpadminify.com/wordpress-client-dashboard) covers the settings that cut the most support tickets. ### Does WordPress have a dashboard? Yes. Every WordPress site has an admin dashboard at /wp-admin, and it opens on a Home screen made of widgets: At a Glance, Activity, Quick Draft, and WordPress Events and News. Those default widgets are the part most agencies replace first, because almost none of them mean anything to a client. ### How do I add widgets to my WordPress dashboard? In code you register one with wp_add_dashboard_widget() inside the wp_dashboard_setup hook. With a plugin you build it visually instead. WP Adminify and Ultimate Dashboard both let you add a widget, drop in text, an image or a link, and choose which roles can see it, with no snippet left in your theme to maintain later. ## Let’s Wrap UP! Customizing the WordPress Dashboard with the right WordPress Dashboard plugin can improve your admin experience. Starting with WP Adminify for a cleaner, branded Admin panel. Pair it with MonsterInsights for analytics insights inside your WordPress Dashboard. Use the recommended plugin to make your WordPress Admin not just functional but easy to use. I highlight the best WordPress Dashboard plugins you can rely on to enhance the WordPress admin experience. Each plugin targets a different aspect of dashboard modification. So think for yourself properly and choose the best plugin that will make your Dashboard smart. --- # How to Build a WordPress Login and Registration Page URL: https://wpadminify.com/wordpress-login-and-registration-page Last updated: 2026-09-03 WordPress can already do this. Registration is a checkbox in Settings, and the registration form lives at `wp-login.php?action=register`. The problem is that the built-in version asks for a username and an email, emails a generated password, and drops the new user into the WordPress dashboard. For a members area, a course, or a community, every one of those steps is wrong. What follows is the version that works, plus what happens the week after you turn signups on. The login half of this leans on the front-end form covered in [how to create a custom WordPress login form](https://wpadminify.com/wordpress-custom-login-form); registration has no core equivalent, so most of the code below is the part WordPress does not give you. If your users are staff rather than members and you only want the admin screen branded, [how to customize the WordPress login page](https://wpadminify.com/customize-wordpress-login-page) is a far shorter job and nothing on this page applies. ## Before anything else: should registration be open? Open registration on a WordPress site attracts automated signups within days, not as a risk but as a certainty. The endpoint is well known and it is scanned constantly. Three questions worth answering first: - What does a registered user get? If the answer is "nothing yet," you are building a spam magnet with no upside. Build the gated content first. - What role do they get? Subscriber, and only Subscriber. Step 1 covers why, because this is the setting with the worst consequences when it is wrong. - Do you need approval? On a professional community, manual approval or email verification is worth the friction. If registration is not genuinely needed, leave it off and create accounts by hand. An account that cannot be created by a stranger cannot be abused by one. ![Disable Register in WordPress Login page](https://d1k2c27psfzbiv.cloudfront.net/wp-content/uploads/2022/09/12115433/Disable-Register-in-WordPress-Login-page.webp) ## Step 1: enable registration and set the default role Settings > General. Tick "Anyone can register" next to Membership, then set New User Default Role. Set it to Subscriber. Not Contributor, not Author, and under no circumstances Editor or Administrator. If the default role is Author, anyone who registers can publish on your domain. If it is Administrator, anyone who registers owns the site. Both misconfigurations exist in the wild, usually because someone changed the role while debugging and never changed it back. Check it now on any site you run with open registration. It takes ten seconds. Then check the users list itself for accounts that already hold a role they should not, which is easier when you can see who has actually signed in: [adding a last login column to the WordPress users list](https://wpadminify.com/how-to-show-last-login-column-in-wordpress-users-list). ## Step 2: put the forms on your own pages Registration is now on at `wp-login.php?action=register`, which is the admin screen again. Two ways to move it into your theme. ### Theme My Login 60,000 installs · 74/100 from 460 ratings It handles login, registration, lost password and reset password as pages inside your theme, which makes it the shortest path to a complete flow. ![Theme My Login settings showing Registration Type, Passwords and Auto-Login options](https://d1k2c27psfzbiv.cloudfront.net/wp-content/uploads/2026/08/30121430/theme-my-login-general-settings.webp) Three settings decide how the signup feels: - Registration Type: Email only. Drop the username field. Nobody wants to invent a username, and it is one more thing to get stuck on before an account exists. - Passwords: allow users to set their own. The default WordPress flow emails a generated password, and that email has to survive the spam filter before anyone can log in. Letting people choose at signup removes an entire class of support ticket. - Auto-Login: on. Sign them in immediately after registering. Making someone who just created an account log in again is a step that loses people for no benefit. ![Theme My Login action slugs for register, lost password and reset password with their generated URLs](https://d1k2c27psfzbiv.cloudfront.net/wp-content/uploads/2026/08/30121434/theme-my-login-action-slugs.webp) Extensions are sold separately at $15 for one site, $30 for two to five, and $45 unlimited, billed yearly, per extension, verified 25 August 2026. The Moderation extension is the relevant one here if you need manual approval or email confirmation. ### Or build it yourself Login is eight lines with `wp_login_form()`, covered in [how to create a custom WordPress login form](https://wpadminify.com/wordpress-custom-login-form). Registration has no core equivalent, so you handle the POST: ``` add_shortcode( 'member_register', 'mysite_register_form' ); function mysite_register_form() { if ( is_user_logged_in() ) { return '

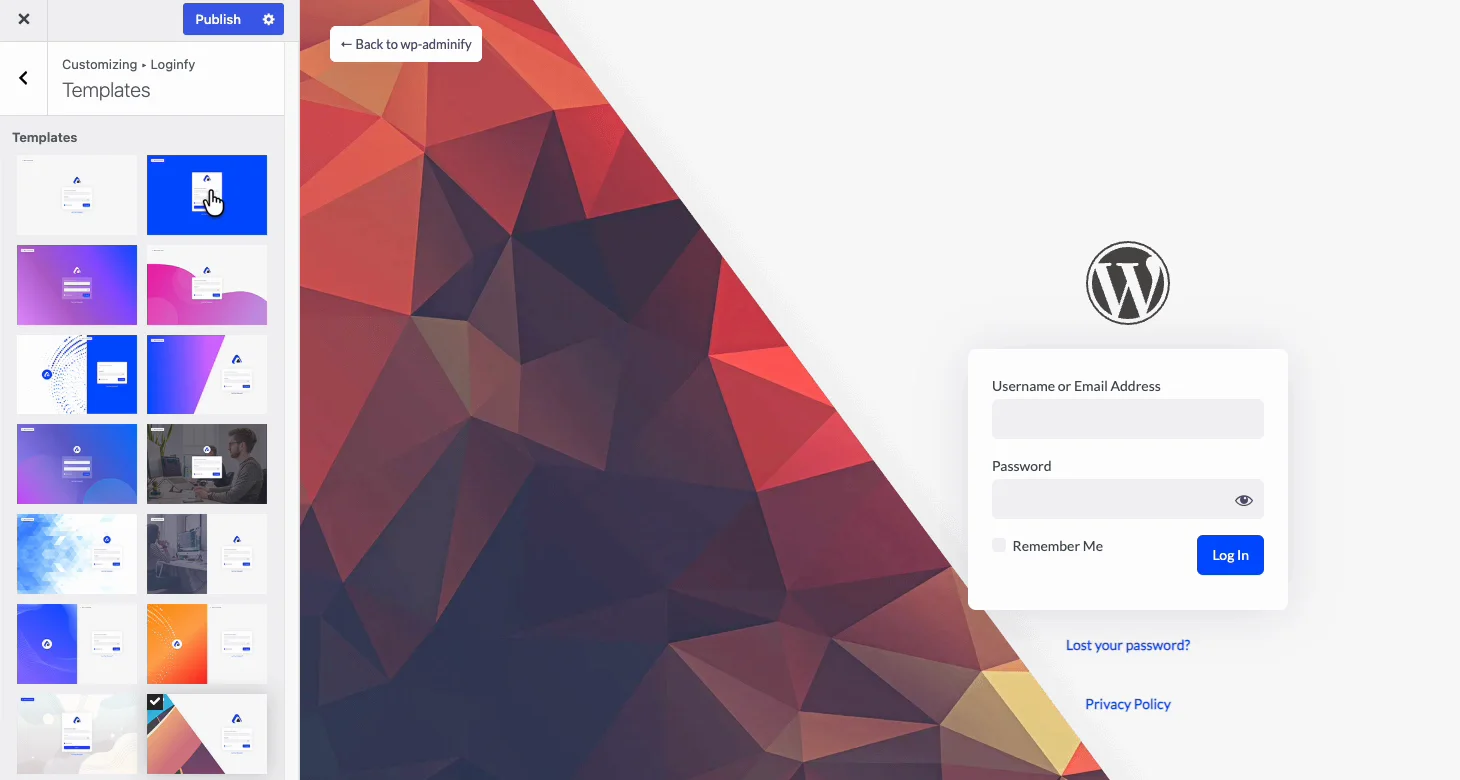
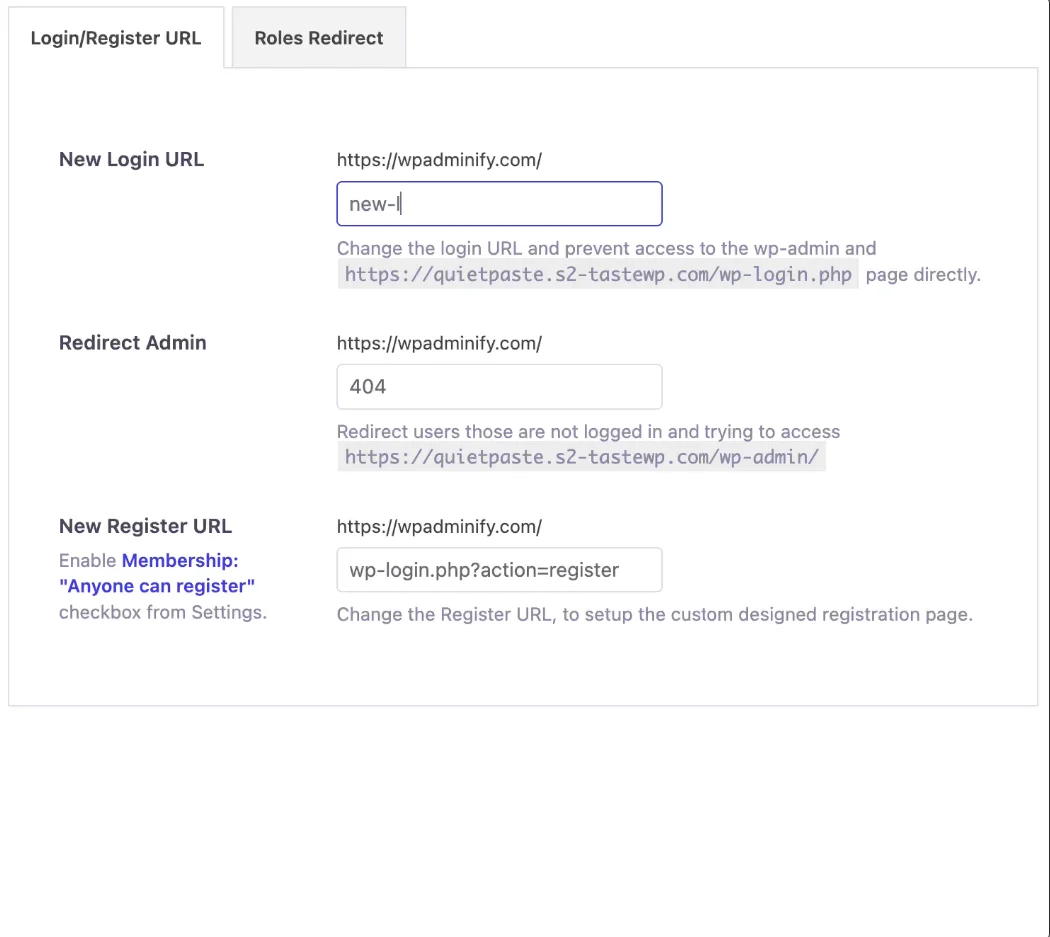
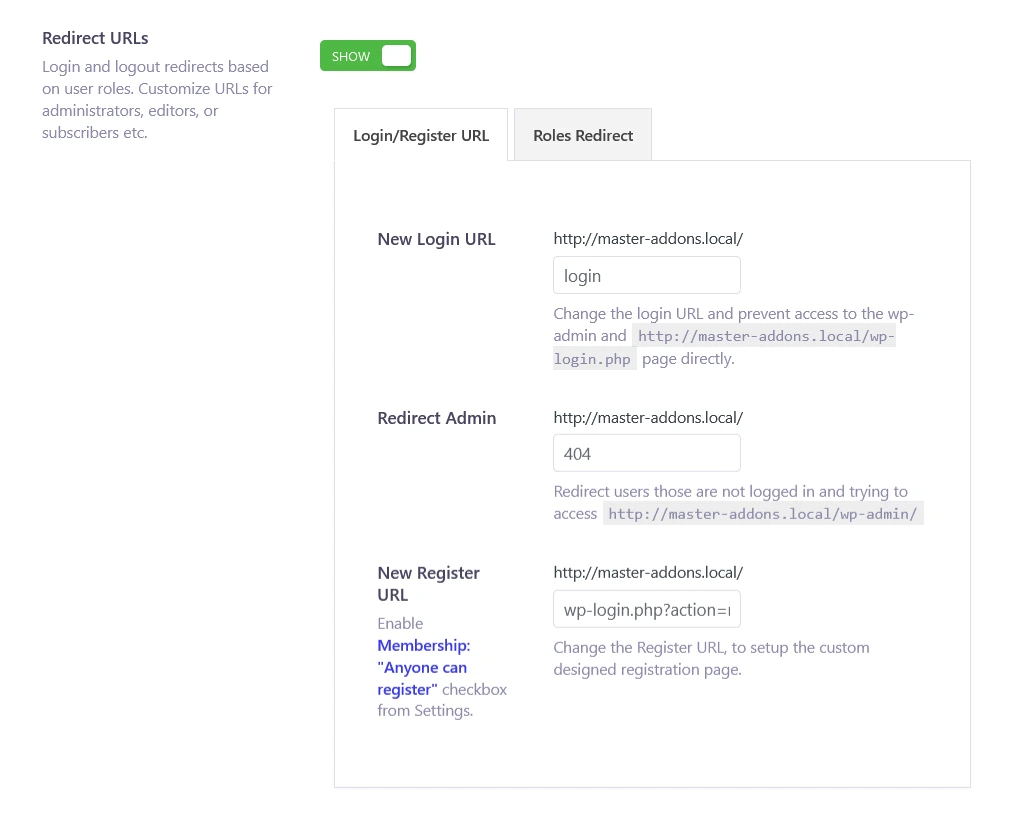
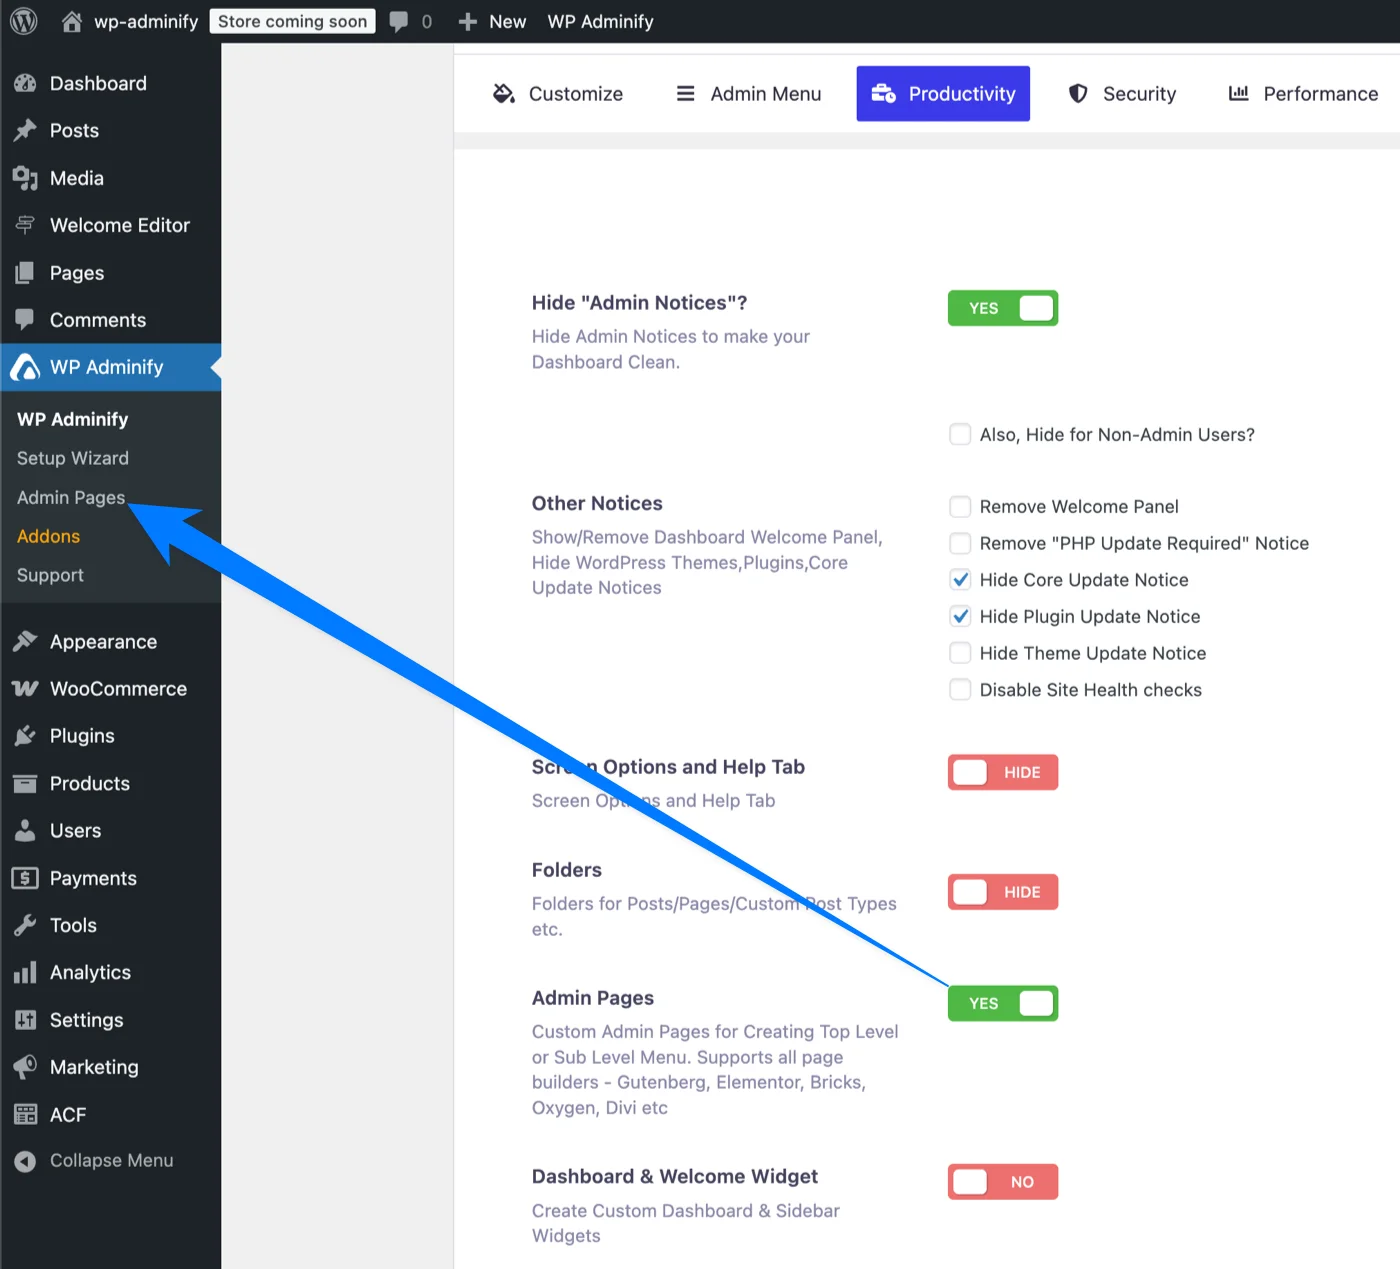
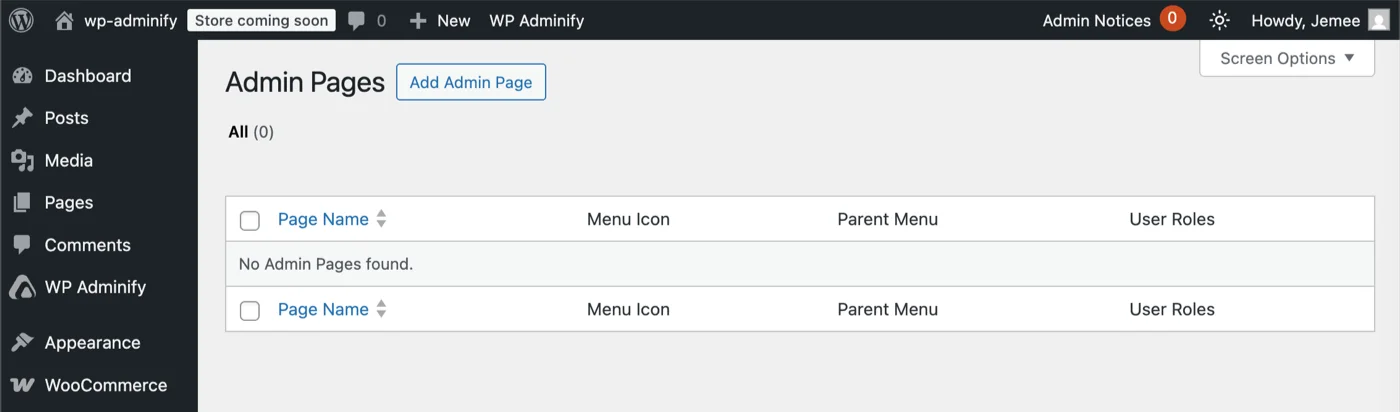
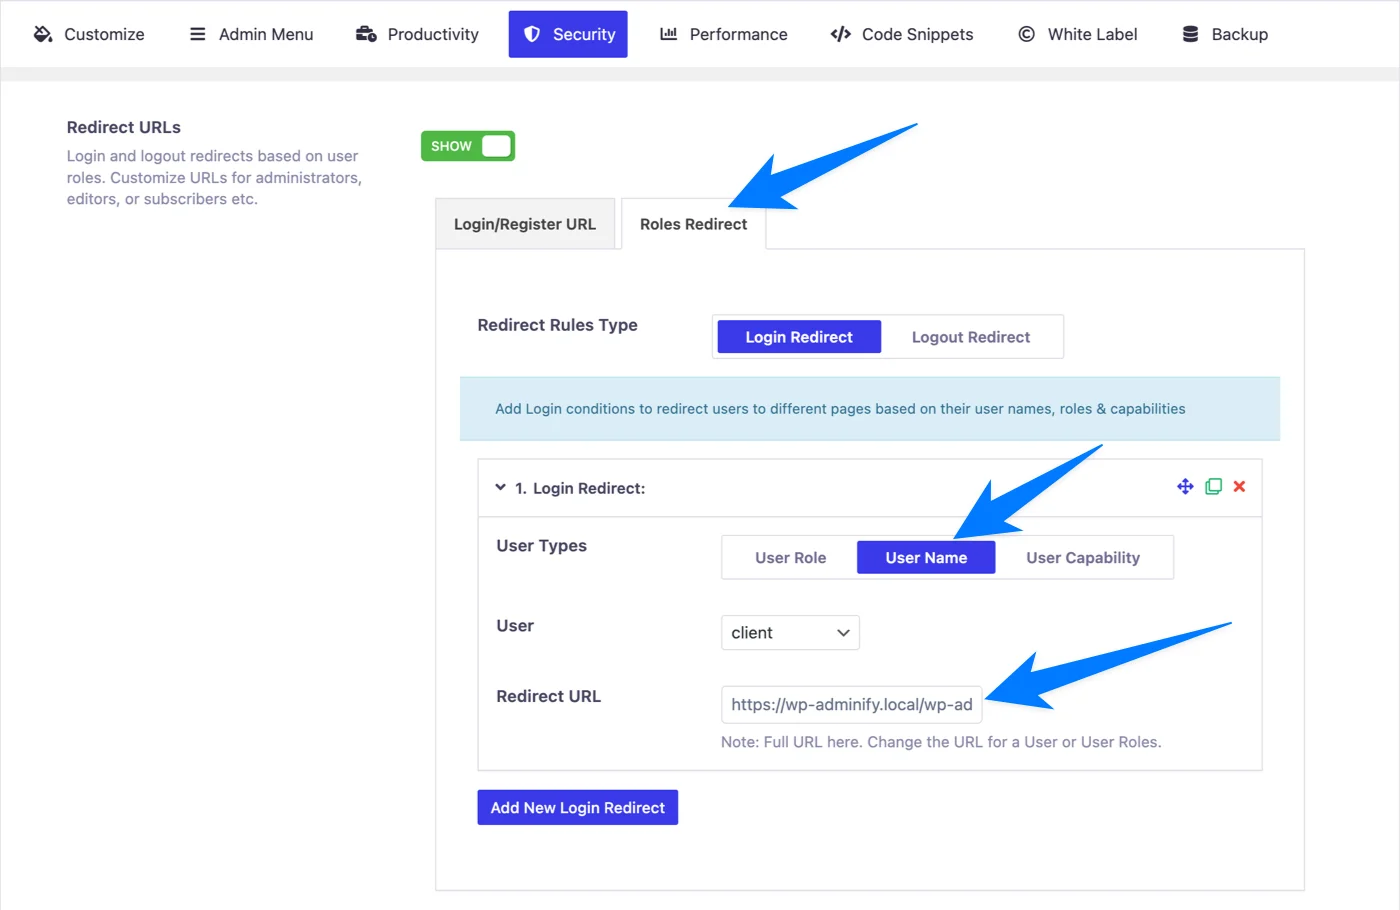
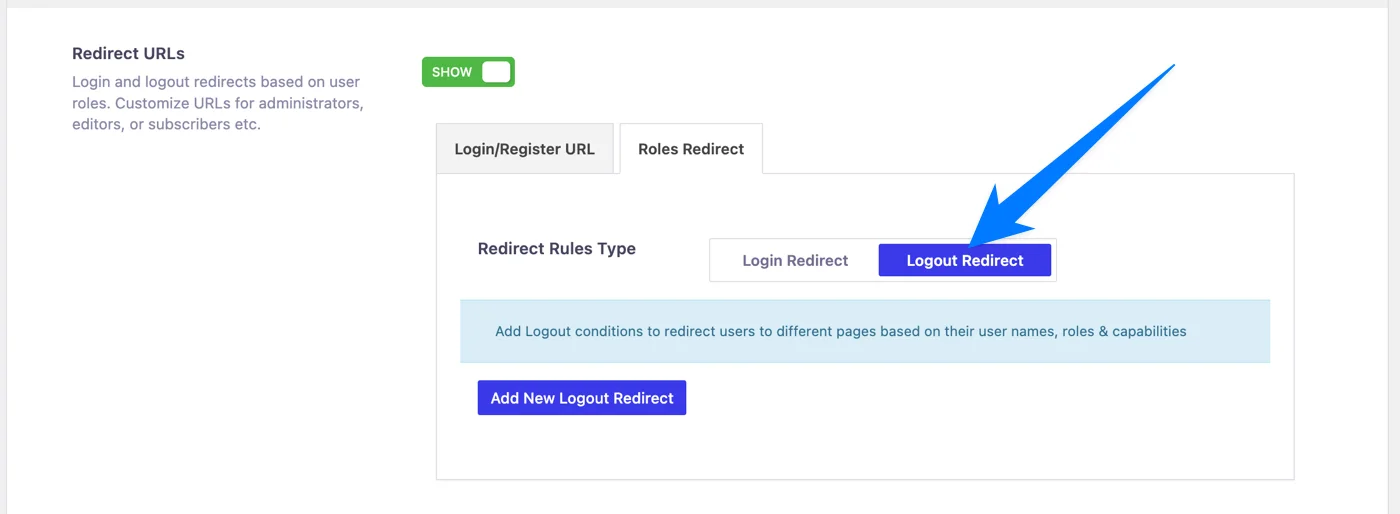
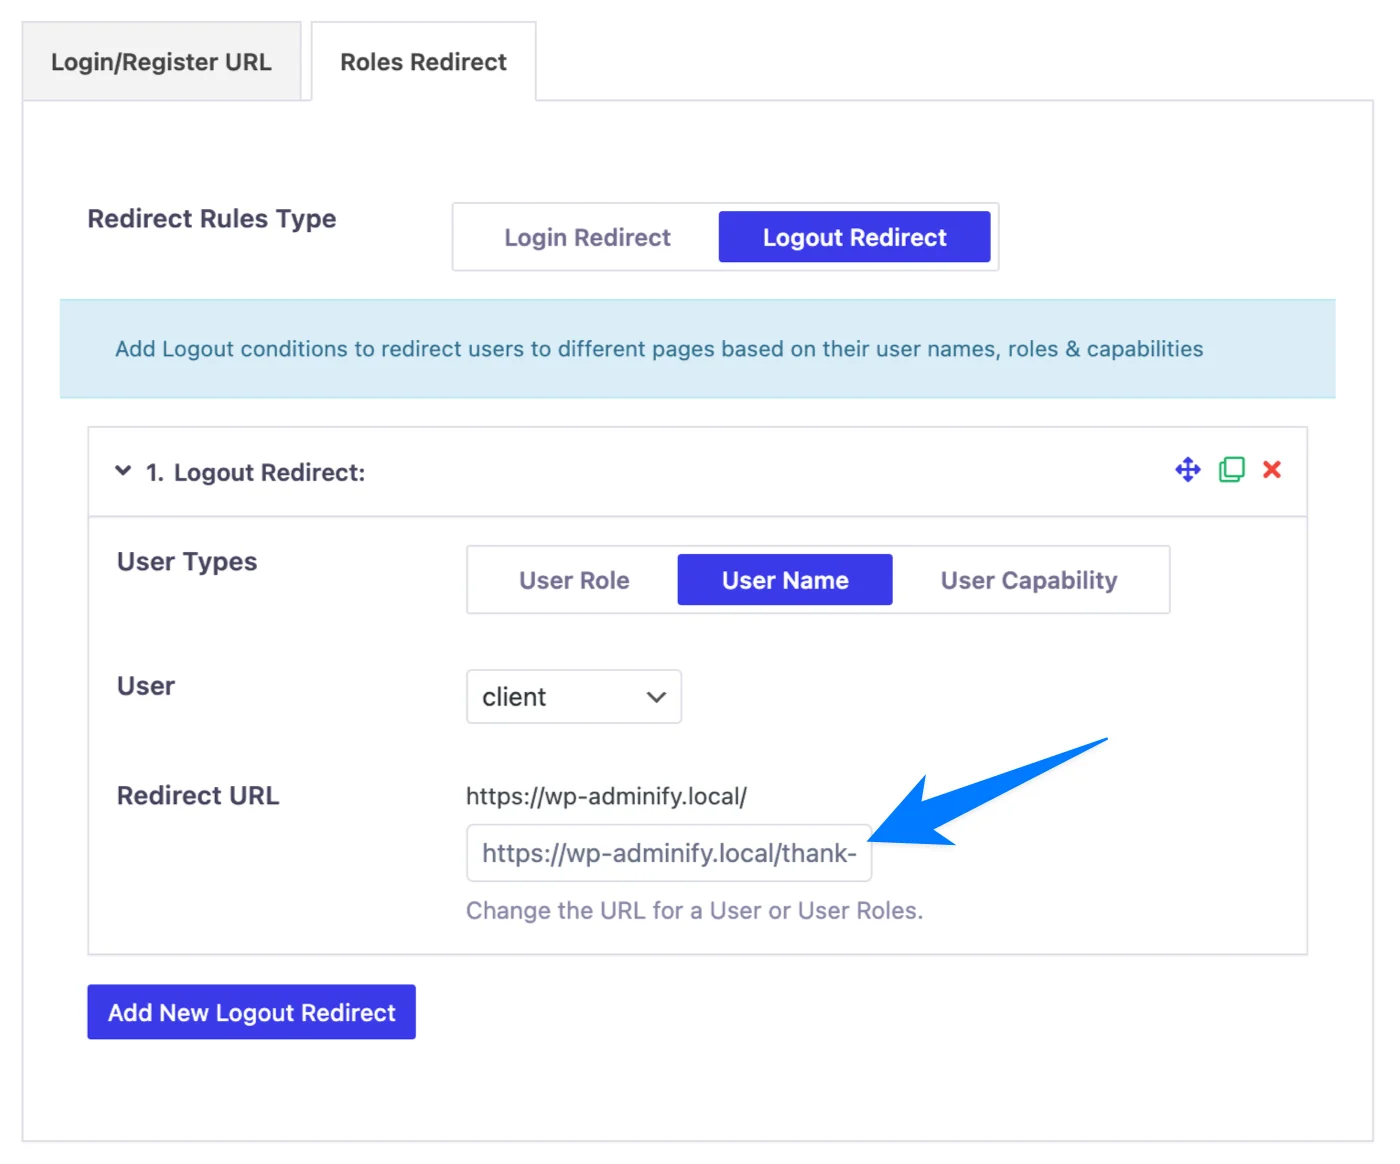
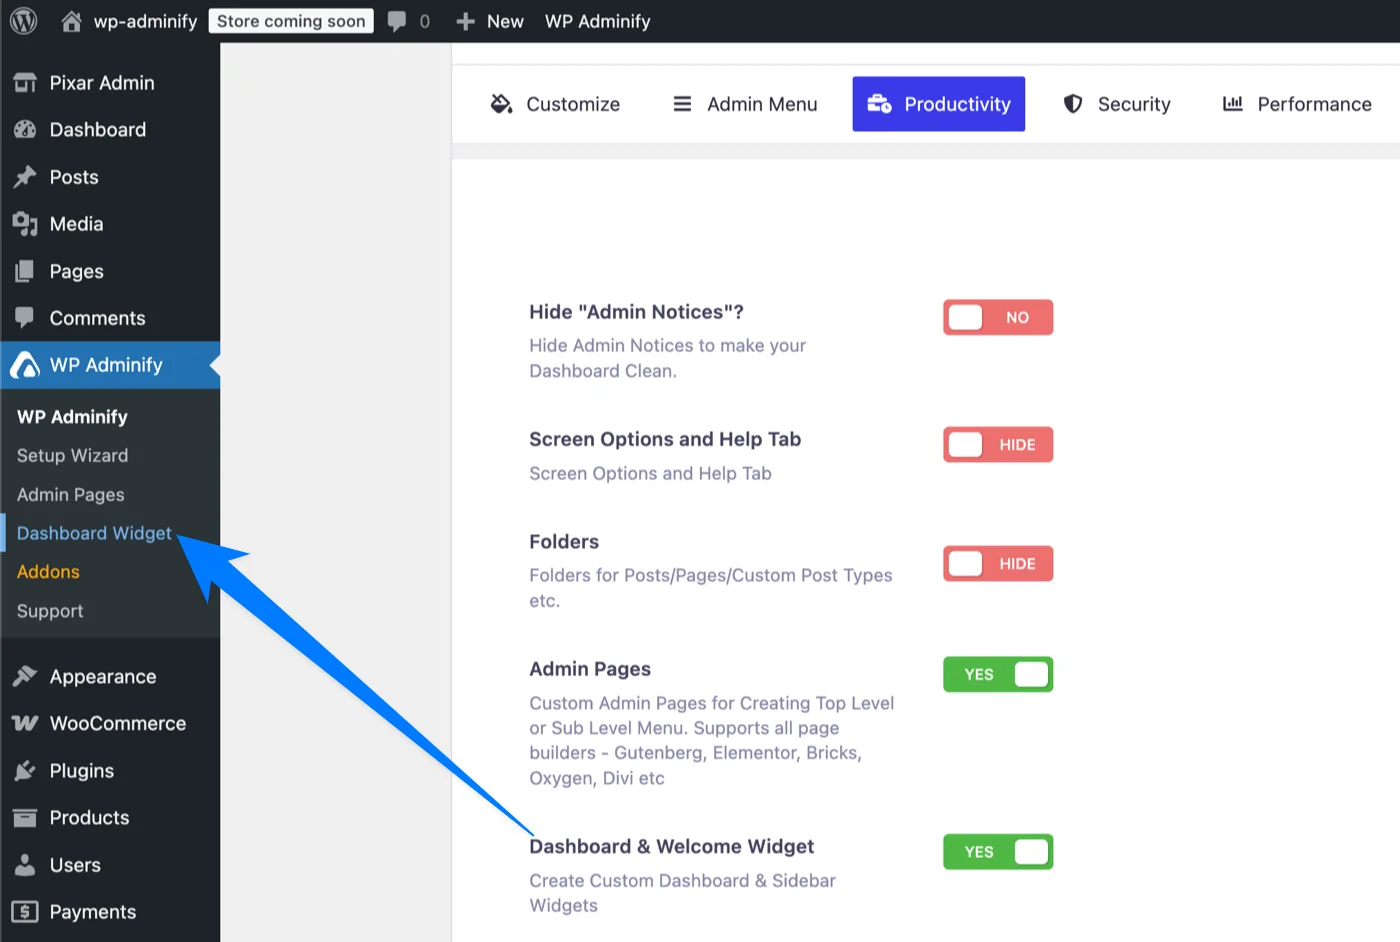
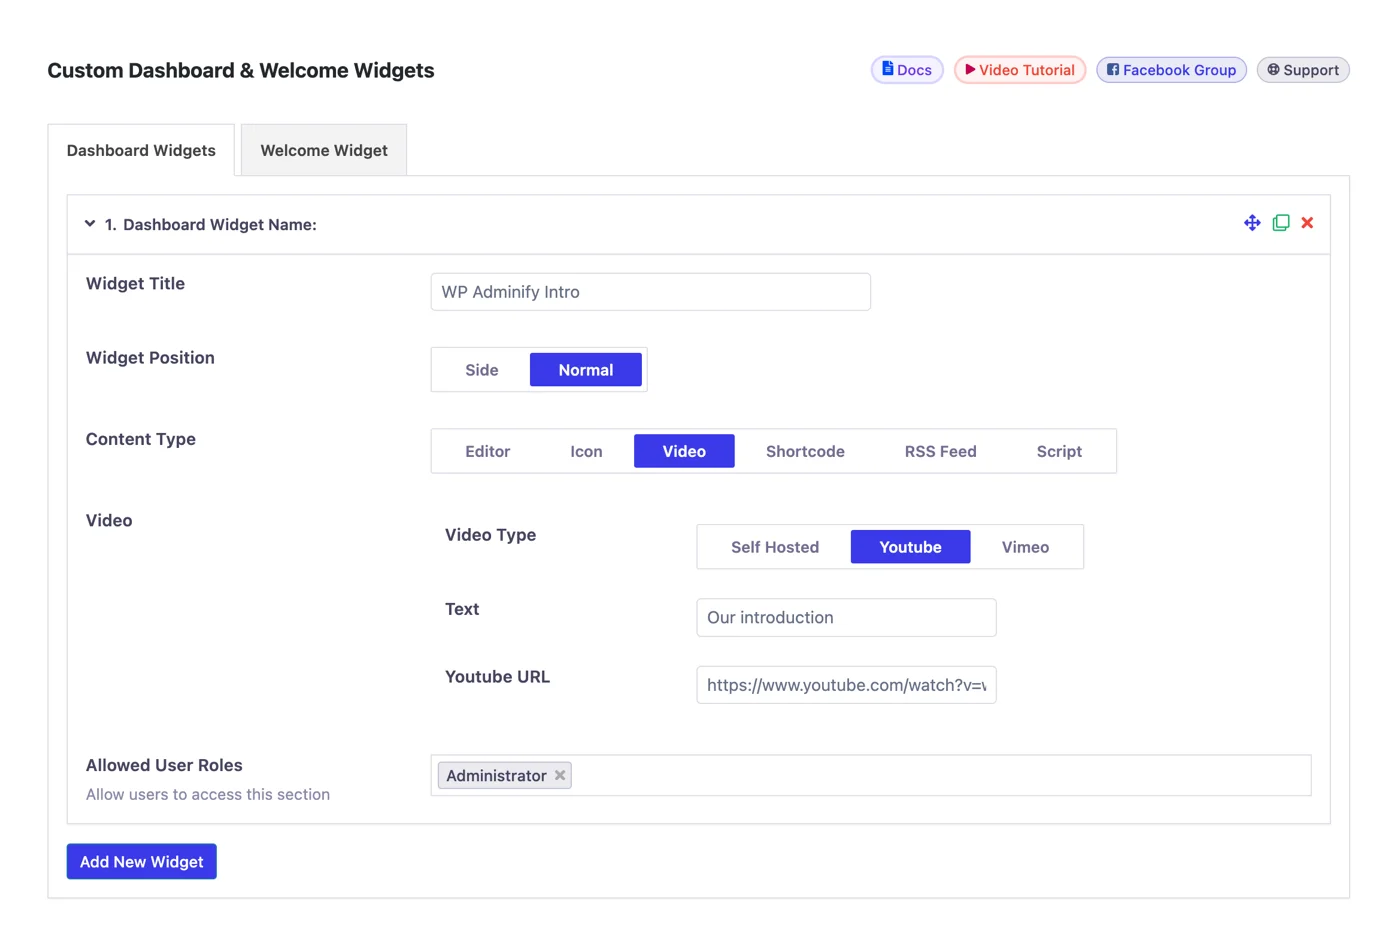
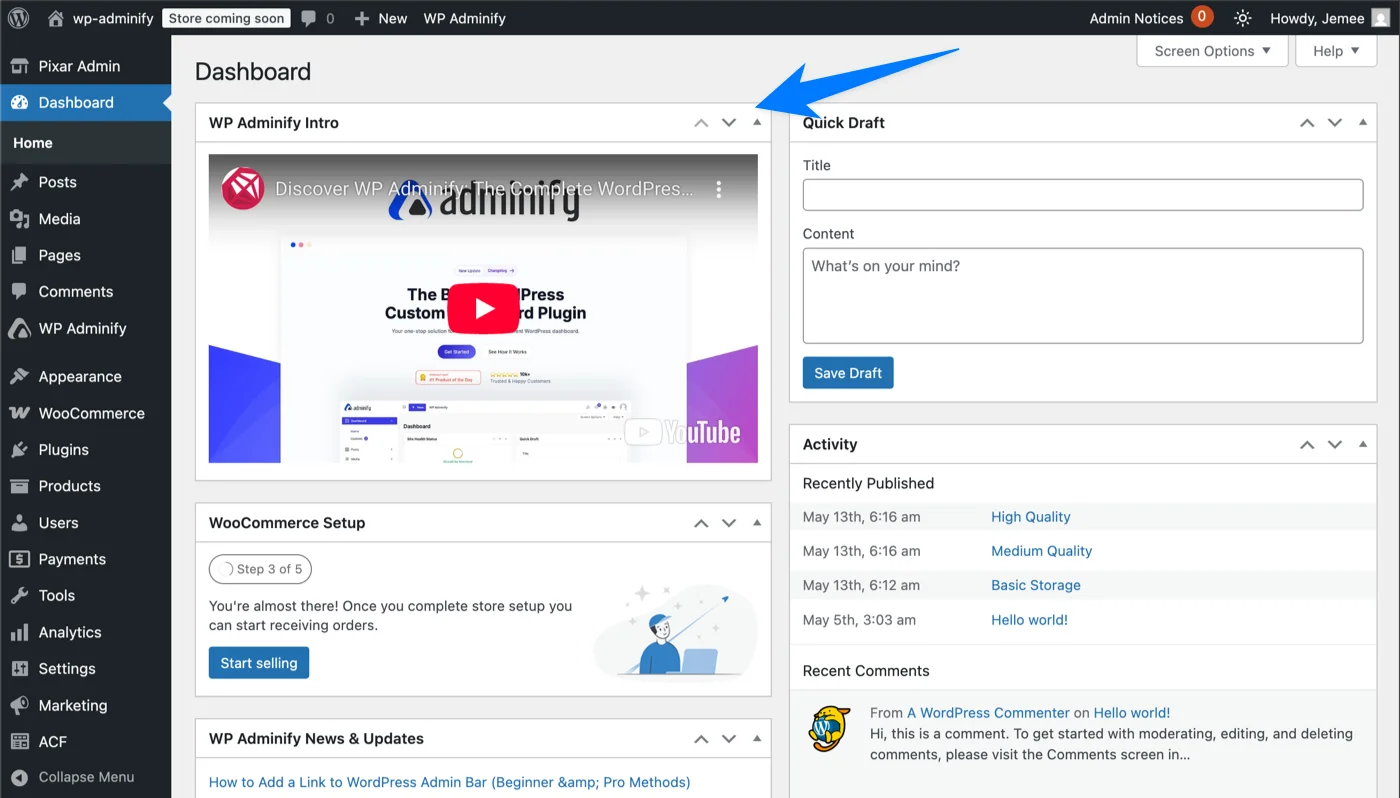
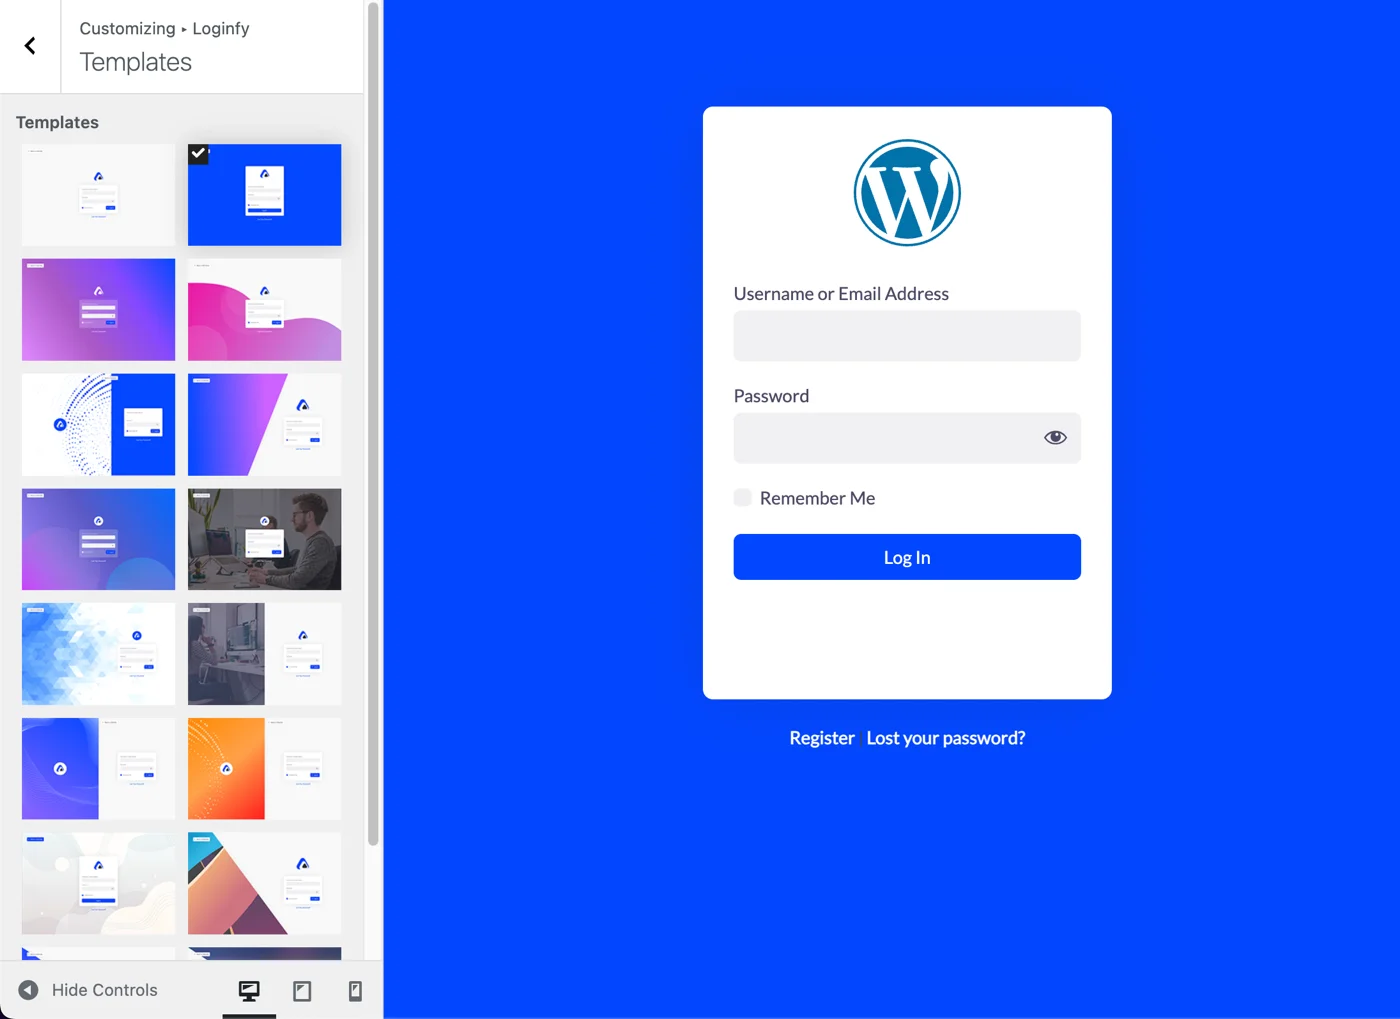
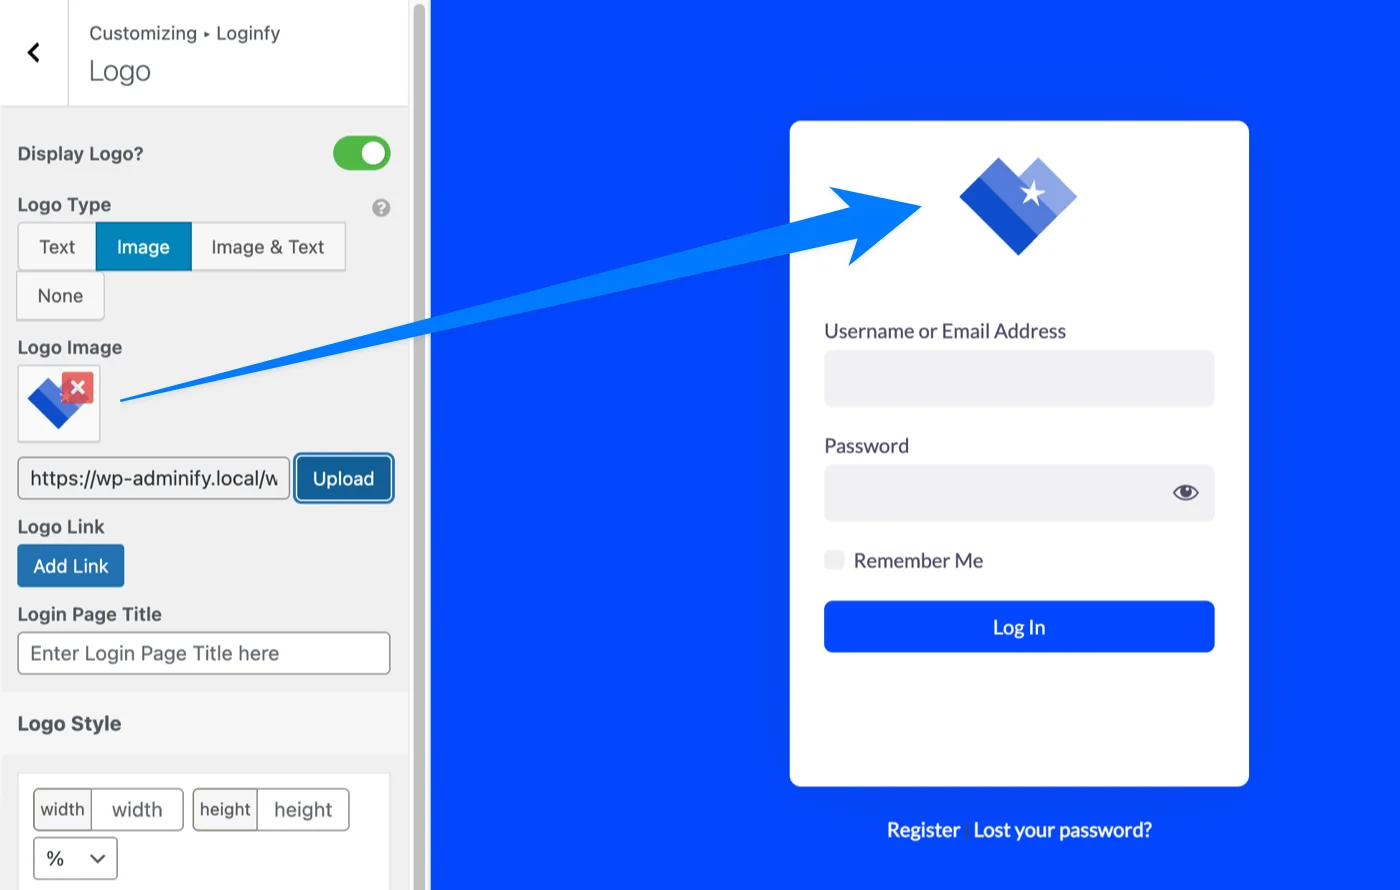
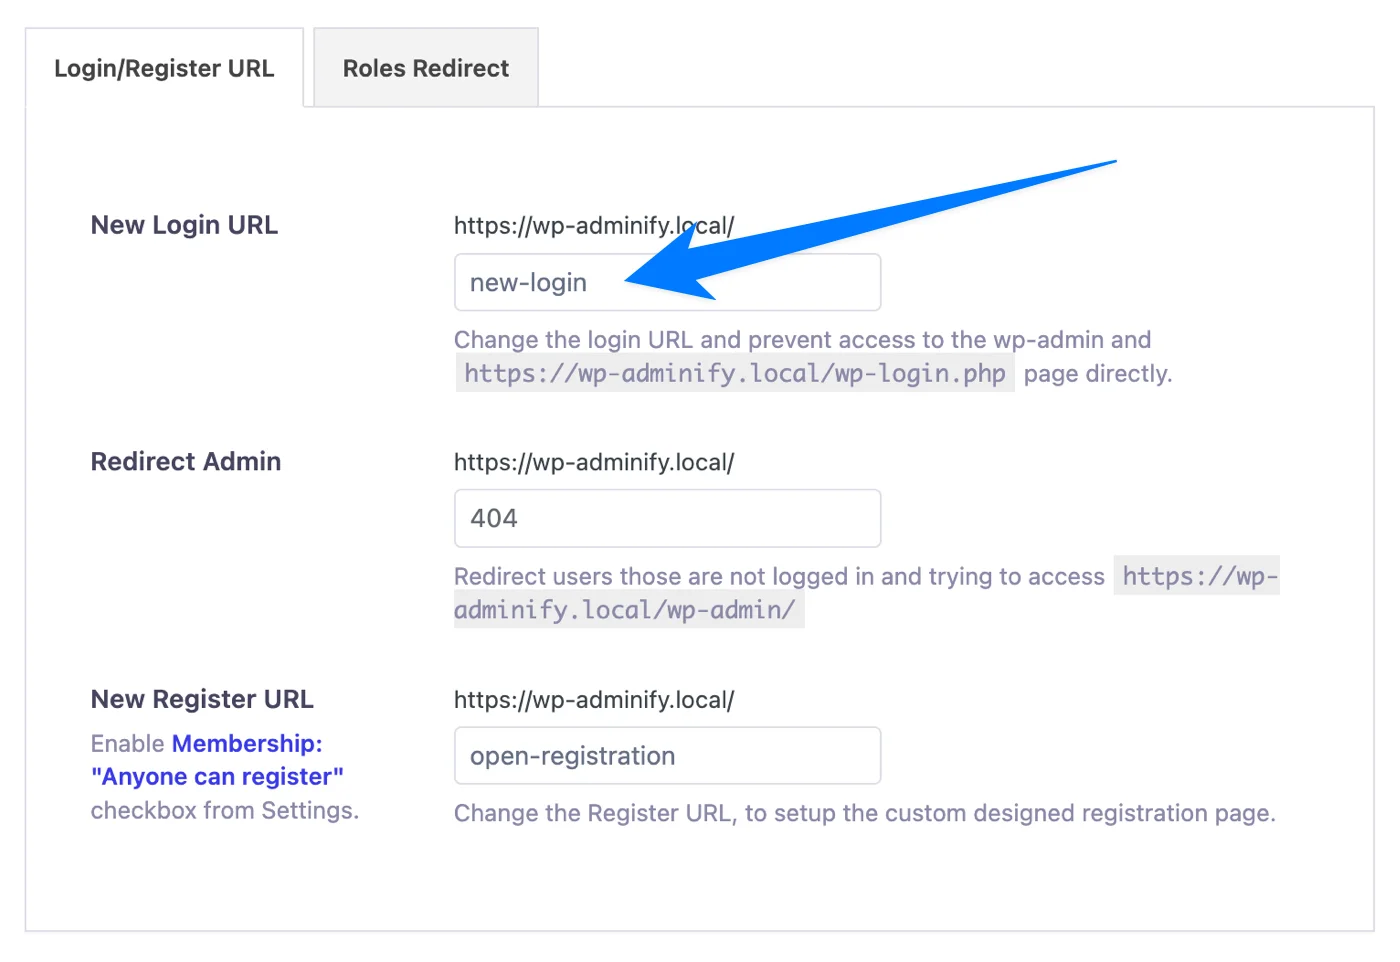
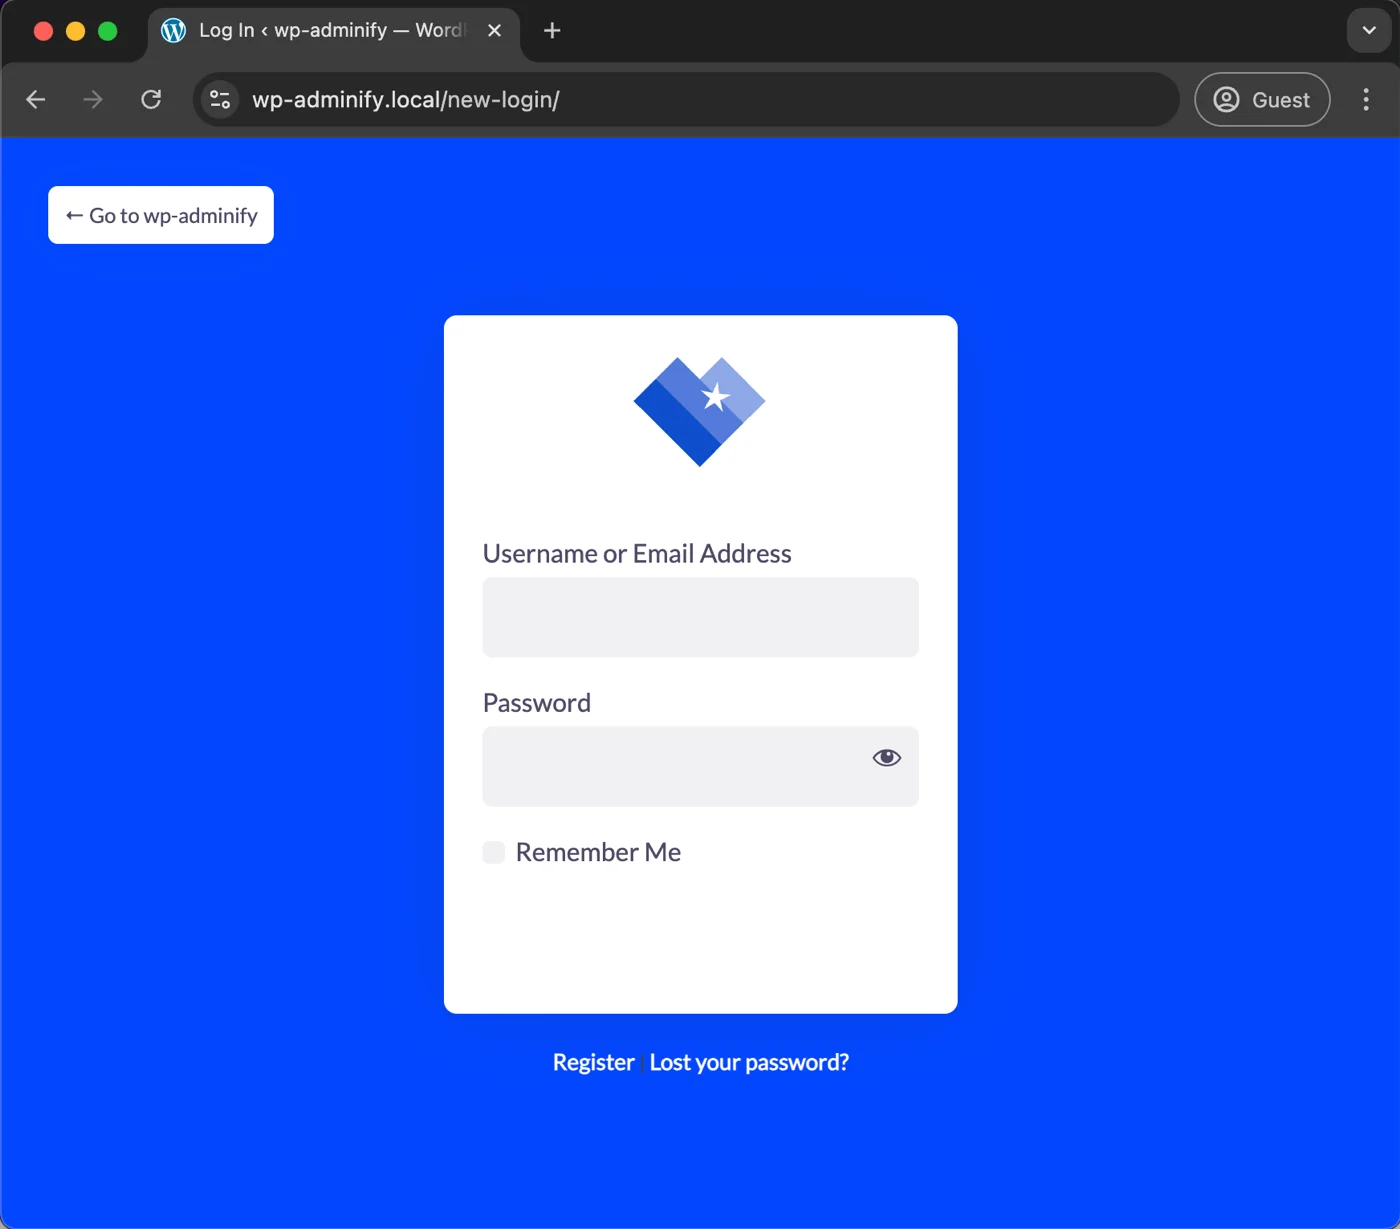
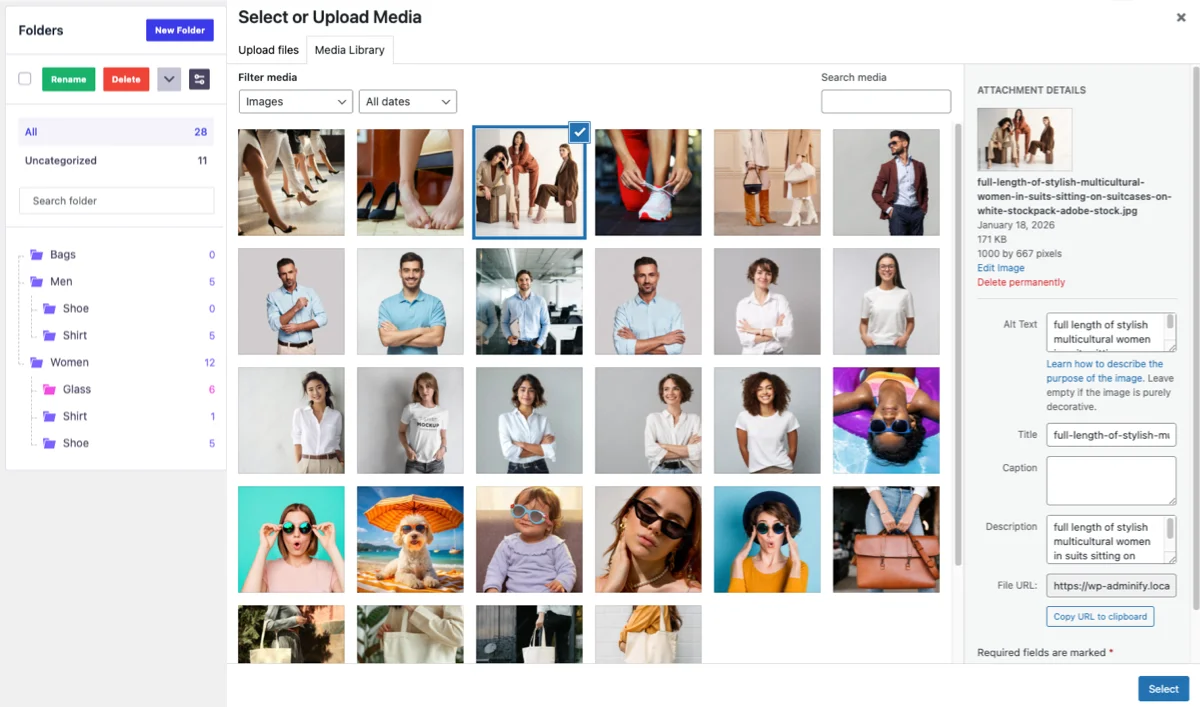
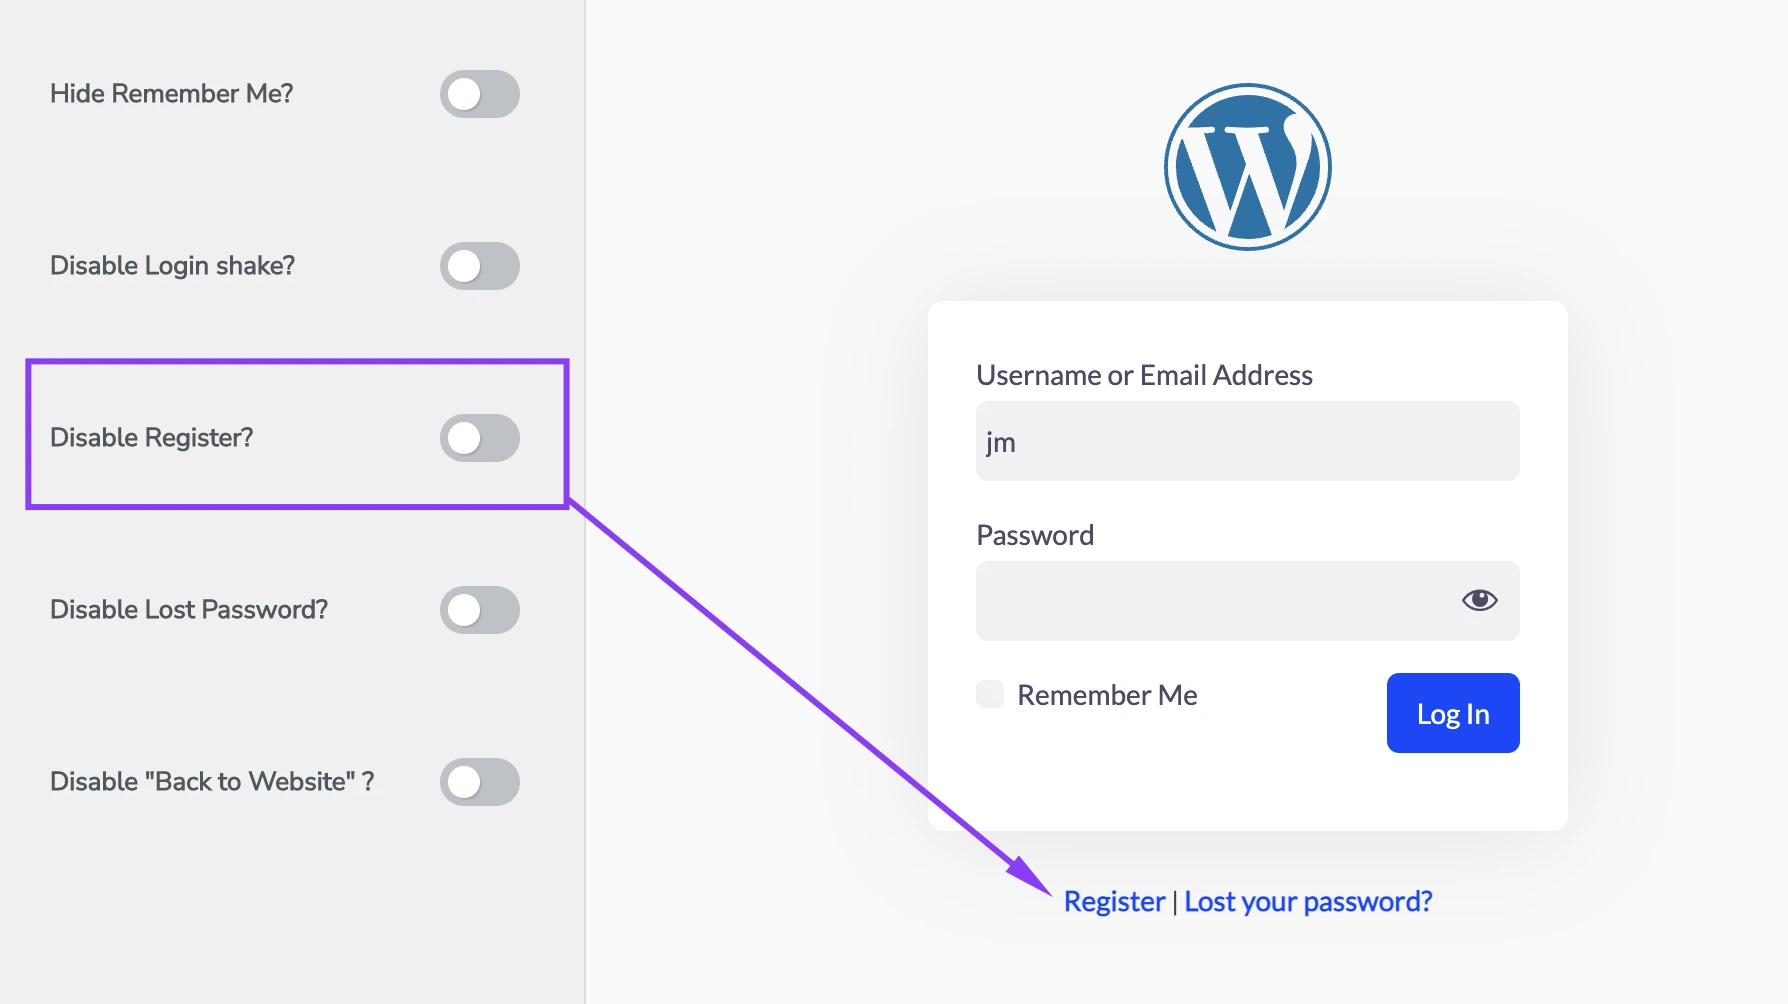
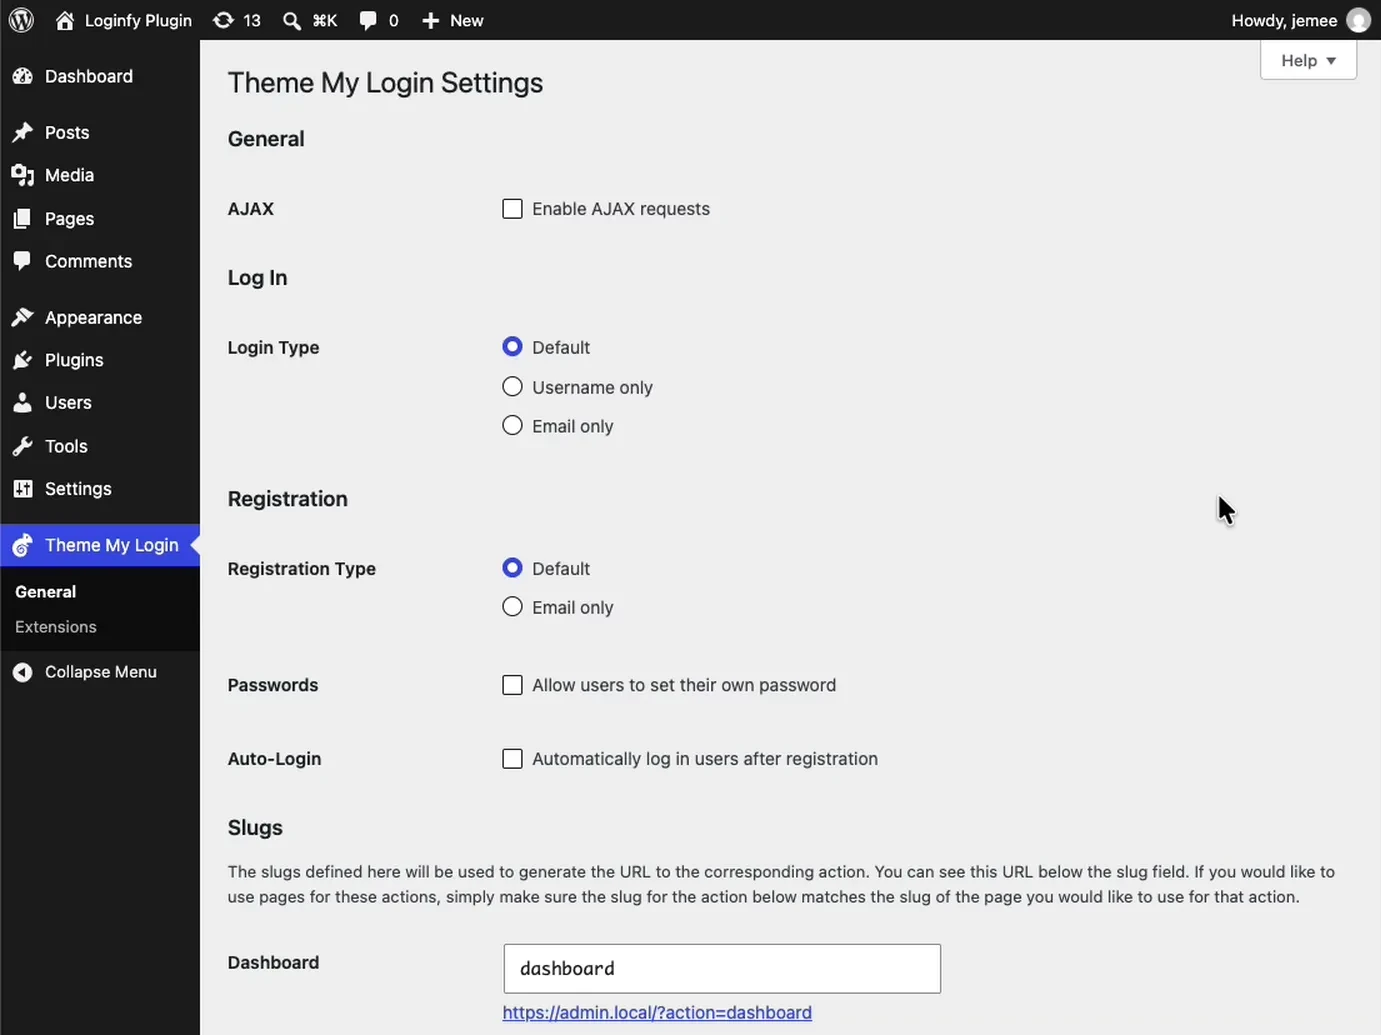
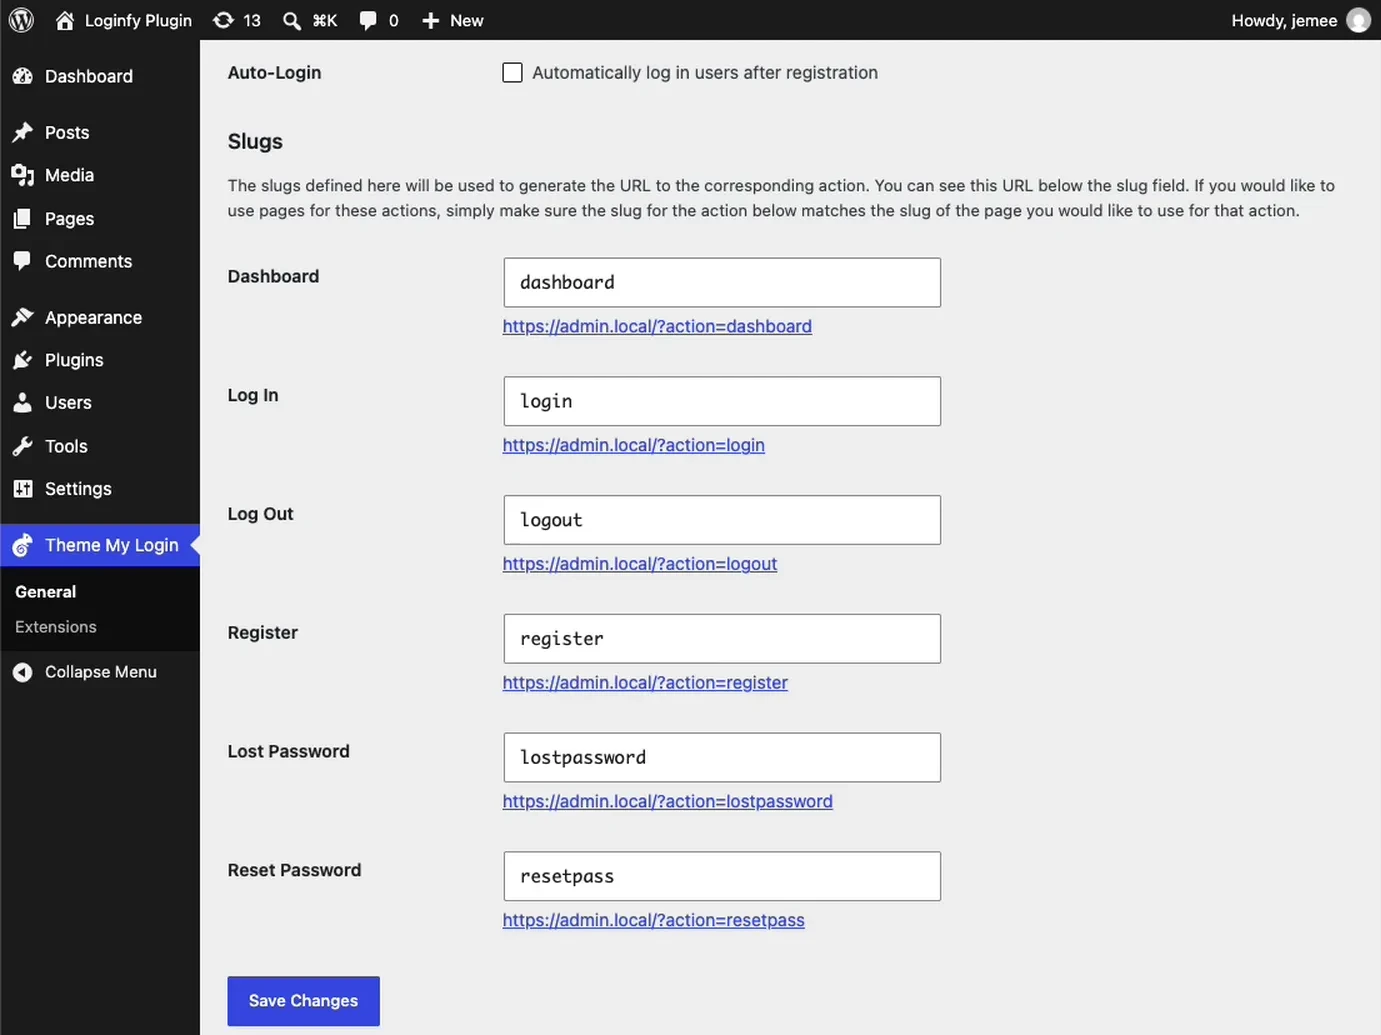
You already have an account.

'; } ob_start(); if ( ! empty( $_POST['mysite_register'] ) ) { echo mysite_handle_registration(); } ?>

Something went wrong. Please try again.

'; } // Honeypot filled means bot. if ( ! empty( $_POST['mysite_website'] ) ) { return '

Thanks, check your email.

'; } if ( ! get_option( 'users_can_register' ) ) { return '

Registration is closed.

'; } $email = sanitize_email( wp_unslash( $_POST['reg_email'] ) ); $pass = (string) $_POST['reg_pass']; if ( ! is_email( $email ) || strlen( $pass ) < 10 ) { return '

Please enter a valid email and a password of at least 10 characters.

'; } if ( email_exists( $email ) ) { // Do not confirm the address is registered. return '

Thanks, check your email.

'; } $user_id = wp_create_user( $email, $pass, $email ); if ( is_wp_error( $user_id ) ) { return '

We could not create that account. Please try again.

'; } wp_update_user( array( 'ID' => $user_id, 'role' => 'subscriber' ) ); wp_set_current_user( $user_id ); wp_set_auth_cookie( $user_id ); wp_safe_redirect( home_url( '/members/' ) ); exit; } ``` Note the `email_exists()` branch. Returning "that email is already registered" turns your signup form into an account-checking tool, which is the same enumeration problem the login form has. Return the same message either way. And closing it here is wasted if the site is still handing the same list out through another door, which it is by default: [how the WordPress REST API leaks your usernames](https://wpadminify.com/wordpress-rest-api-leaks-usernames). ## Step 3: point the registration URL at your page WordPress generates "Register" links pointing at `wp-login.php?action=register`. Repoint them: ``` add_filter( 'register_url', function () { return home_url( '/create-account/' ); } ); ``` Or set it without code. Several dashboard toolkits expose login and registration URL fields together. ![Change WordPress default registration URL](https://d1k2c27psfzbiv.cloudfront.net/wp-content/uploads/2024/09/18103557/Change-WordPress-default-registration-URL.webp) ## Step 4: handle the password reset flow Every registration system needs a working reset flow, and it is the piece most often left half finished. ![Enter your username or email address to reset password](https://d1k2c27psfzbiv.cloudfront.net/wp-content/uploads/2024/06/12112722/Enter-your-username-or-email-address-to-reset-password.webp) Two rules. First, the confirmation message must not reveal whether the address exists: "If that address is registered, we have sent a reset link" is the correct wording, always. Second, do not break the reset link. It arrives as a `wp-login.php` URL with an `action` parameter, and a blanket redirect on `wp-login.php` swallows it. ![WordPress default Password reset email](https://d1k2c27psfzbiv.cloudfront.net/wp-content/uploads/2024/06/12112724/WordPress-default-Password-reset-email.webp) Recovery routes, for when this goes wrong on a live site, are in [resetting a WordPress admin password without email](https://wpadminify.com/how-to-change-or-reset-wordpress-admin-password). If the reset emails are not arriving at all, the sending address is worth checking first: [changing the WordPress admin email address](https://wpadminify.com/how-to-change-wordpress-admin-email). ## Step 5: deal with the spam Open registration attracts automated signups. Layer these, cheapest first: - Honeypot field. Free, invisible to users, catches a surprising share of bots. Included in the code above. - Email verification. The account stays inactive until a link is clicked. Removes almost everything with a fake address. - CAPTCHA on the registration form. Use invisible v3 or Cloudflare Turnstile, not an image puzzle. - Domain restrictions. If registration is for one organisation, allow only their email domain. LoginPress free includes a "Registration from Specific Domains" setting, and it is a couple of lines in code. - Manual approval. The strongest and the most work. Right for professional communities, wrong for anything at volume. Rate limit the registration endpoint too. Everyone limits login attempts and forgets that a signup form is also a form a script can post to a thousand times. ## What the new user sees after they register Creating the account is the easy half. The person on the other end still has to understand what just happened and where they now are. Three things decide that, and all three are easy to leave at the WordPress default by accident. The destination. Without a redirect, WordPress sends a new Subscriber to `/wp-admin`: a near-empty dashboard with a menu they have no permission to use. Send them to the members area instead, and make the first thing they see explain what they now have access to. The rules for that are in [redirecting users after login by role in WordPress](https://wpadminify.com/wordpress-redirect-users-after-login-by-role), and if the members area does not exist yet, [creating a WordPress custom user dashboard without coding](https://wpadminify.com/how-to-create-wordpress-custom-user-dashboard-without-coding) covers building one. The welcome email. WordPress sends a plain-text notification with your site name in the subject line and nothing else. It is the first email your new member receives from you, and it reads like a system alert. Rewrite it with the `wp_new_user_notification_email` filter, or use whatever your membership plugin provides. The admin bar. A black WordPress toolbar across the top of every page tells a member, correctly, that they are inside somebody's admin system. [Hide it for roles below Editor](https://wpadminify.com/hide-admin-bar-based-on-user-roles), with a toggle or a snippet. ## A note on GDPR and consent Creating a user account stores personal data, so a registration form in the EU or UK carries obligations that a login form does not. Practical version, without pretending this is legal advice. Link your privacy policy from the form itself, not three clicks away. If you are adding people to a mailing list at the same time, that needs its own unticked checkbox rather than being bundled into the signup. Keep only the fields you actually use: every extra field is data you now have to store, secure and delete on request. And make sure account deletion is possible, since WordPress has shipped personal data export and erasure tools since 4.9.6 and they only work if somebody knows they are there. ## Step 6: audit it after a month Put a reminder in the calendar. Open Users, sort by registration date, and look. What you are looking for: accounts with gibberish emails, accounts that registered and never returned, and above all any account holding a role other than Subscriber. Delete the junk. If more than a small fraction is junk, add the next layer from the list above. An activity log makes this a five-minute job rather than a squint at a user table, because it records the registrations, the logins that followed and anything those accounts changed: [monitoring user activity in WordPress with activity logs](https://wpadminify.com/how-to-monitor-user-activity-in-wordpress). ## Frequently asked questions ### How do I enable user registration in WordPress? Settings > General, tick "Anyone can register" next to Membership, and set New User Default Role to Subscriber. The registration form then lives at wp-login.php?action=register until you move it to a page of your own. ### Can I have login and registration on the same page? Yes. Put both shortcodes on one page, or use tabs so only one form shows at a time. Keep the two submissions clearly separate: a single form that tries to guess whether someone is signing in or signing up produces confusing errors. ### What role should new users get? Subscriber, unless you have a specific reason otherwise. Contributor lets people create draft posts, Author lets them publish. On a site with open registration, anything above Subscriber is an invitation. ### How do I stop spam registrations? Layer defences: honeypot field, email verification, invisible CAPTCHA, and domain restrictions where the audience allows it. Manual approval stops everything at the cost of your time. Rate limit the registration endpoint as well as the login one. ### Do I need a plugin for a registration page? No, and the code above is a working implementation. A plugin such as Theme My Login is worth it once you also want lost password, reset password and profile editing rendered in your theme, because that is four templates rather than one. ## Next steps If you have not built the login half yet, that is creating a WordPress login page for users, including the redirects that keep members out of `/wp-admin`. Once signups are open, the site has more accounts than it did last week, and every one is a way in. The WordPress login security is the follow-up that matters, and the item at the top of it, [two-factor authentication for WordPress admin](https://wpadminify.com/two-factor-authentication-for-wordpress-admin), is worth doing before the signups rather than after. --- # 6 Best Free WordPress Booking Plugins with Payment Integration URL: https://wpadminify.com/free-wordpress-booking-plugins Last updated: 2026-09-03 A booking system with no payment integration is incomplete. If customers can reserve a slot but not pay at the same time, you’re inviting no-shows and manual follow-ups. That’s wasted time. Modern WordPress booking plugins solve this in minutes. They allow clients to choose a time, pay online via Stripe or PayPal, and receive automatic confirmation, all without leaving your WordPress website. The good news? You don’t need pricey SaaS tools or software solutions. There are a lot of free appointment booking plugins in the WordPress rich ecosystem. In this guide, I’ve handpicked 6 free WordPress booking plugins that connect smoothly with payment gateways. ## Why You Need a Booking Plugin with Payment Integration I’d like to discuss a few things that will encourage you to hit that "Install Now" button on WordPress booking plugins right now. Let’s be real. A booking form without payment integration is only doing half the job. If customers can reserve a slot but don’t pay upfront, what happens next? You will have to take confirmation from them. Need to send reminders. Still, you may have to deal with no-shows. This all wastes your time and potential for your staff members. A proper WordPress booking plugin with payment integration changes everything. It makes sure: - You get paid before the appointment. - You eliminate manual follow-ups. - Your business looks professional. - Everything stays inside your WordPress dashboard. - You lower no-shows automatically. When money is involved, people show up. They take it seriously ## What to Look for in WordPress Booking Plugins When choosing a booking plugin for your WordPress site, it’s about making the complete booking process smooth for both you and your customers. Thus, I'd like to share a few things to look for in a WordPress booking plugin, whether a free or paid one. - Easy Payment Integration: The whole point of a booking system is to get paid. Thus, look for plugins that support Stripe, PayPal or WooCommerce payments, right out of the box. Because these are the most popular payment options used worldwide. - Simple Booking Management: Booking should be a breeze, for both your customers and you. Good plugins let you view all appointments in a clean calendar, approve or reschedule bookings easily and a lot more. - Flexible Scheduling: Top booking calendar plugins allow you to add custom time slots, buffer times, multiple services and Holiday or unavailable hours. - Automated Notifications: Manual reminders are old-school. Your booking system should automatically send a confirmation notification to lower the no-shows. - Customizable Booking Form: A one-size-fits-all form rarely works. That's why I suggest you look for a plugin that lets you customize your booking form the way you want. - Mobile-Friendly Design: Over 82% of customers will book on phones or tablets. So make sure your booking form is fully responsive. - Scalability & Add-Ons: Best WordPress booking plugins let you grow by offering payment addons, staff management features, multiple location support and more. ## 6 Best Free WordPress Booking Plugins with Payment Integration I didn’t just pick these plugins randomly. Before putting this list together, I tested more than 20 different free WordPress booking plugins. Only then I realise finding a free plugin is much tougher than a paid one. Some looked great on the surface but felt confusing inside the dashboard. Some handled bookings well, but made payment integration complicated. And a few were simply too limited in their free versions. So I installed them, set up services, tested real booking flows, connected payment gateways and checked how smooth the experience actually felt. The six plugins below are the ones that truly worked. So if you wanna skip the trial-and-error phase, this shortlist will save you a lot of time. ### BookingPress Lite ![bookingpress](https://d1k2c27psfzbiv.cloudfront.net/wp-content/uploads/2026/02/23094945/bookingpress.webp) [BookingPress](https://www.bookingpressplugin.com/) is the leading WordPress booking plugin around here. While its premium version is popular for its rich ecosystem of 60+ premium addons, BookingPress Lite is the free version with PayPal payment integration. Whether you run a salon, coaching business, consultancy, or any service based business, BookingPress Lite lets you start accepting bookings and payments right from your WordPress dashboard. Standout Features: - Working schedule management. - Unlimited appointments and services. - Fully customizable and responsive booking form. - On-site and online payment support via PayPal integration. - Advanced calendar management and a friendly user interface. - Sends automatic custom email notifications. ## MotoPress Appointment Booking ![MotoPress Appointment Booking plugin](https://d1k2c27psfzbiv.cloudfront.net/wp-content/uploads/2026/03/03113138/MotoPress-Appointment-Booking.webp) [WordPress Appointment Booking](https://motopress.com/products/appointment-booking/) by MotoPress is a flexible WordPress scheduling plugin for service-based businesses that want to manage appointments, staff schedules, and payments from one dashboard. It works well for salons, coaches, tutors, consultants, healthcare practices, photographers, and other businesses that sell timeslot-based services. In the [free version](https://wordpress.org/plugins/motopress-appointment-lite/), you can create unlimited services and employees, set individual schedules and pricing, add breaks and buffer times, and let customers book available time slots through a responsive booking form. Standout Features: - Unlimited services, employees, and locations. - Flexible staff schedules, breaks, days off, and buffer times. - Individual and group appointment bookings. - Custom service duration and pricing. - On-site payment options (online in Pro). - Automated email notifications. - Google Calendar synchronization (available in Pro). ### Bookify ![bookify](https://d1k2c27psfzbiv.cloudfront.net/wp-content/uploads/2026/02/23094943/bookify.webp) If you want a booking system that feels simple from day one, [Bookify](https://wordpress.org/plugins/bookify/) is worth your attention. It allows you to manage appointments and accept online payments with zero complicated setup. Whether you’re running a small service business or just starting out, Bookify is the best simple appointment booking plugin for WordPress. Standout Features: Responsive design. - Unlimited appointment booking forms - Accept onsite or online payments via PayPal. - Works smoothly with all WordPress themes. - Translation ready. ### LatePoint ![latepoint](https://d1k2c27psfzbiv.cloudfront.net/wp-content/uploads/2026/02/23094949/latepoint.webp) [LatePoint](https://wordpress.org/plugins/latepoint/) is the best lightweight appointment booking plugin for WordPress. Its free version lets you create custom booking forms with customizable steps, services and fields with zero coding. This free WordPress booking plugin keeps things organized while still giving you the core booking features you need to manage appointments and payments. Standout Features: - Send automatic confirmations and reminders. - Visual booking form builder. - Modern customer and admin dashboard. - Syncs bookings across Google Calendar. - Accept online payments via Stripe. ### WP Amelia ![wp amelia](https://d1k2c27psfzbiv.cloudfront.net/wp-content/uploads/2026/02/23094952/wp-amelia.webp) [WP Amelia](https://wordpress.org/plugins/ameliabooking/) is another great free WordPress booking calendar plugin with payment integration. It gives you a surprisingly capable free version that plays well with payments and scheduling. If you’re planning to grow your business, adding more services or handling multiple staff, WP Amelia makes that transition feel smooth rather than confusing. Standout Features: - Accept online payments via Square payment integration. - Easy appointment and event management. - Send automated email notifications. - Easily embed booking forms with shortcodes. - Mobile-first design for both admin and customer booking forms. ### eaSYNC Booking ![easync booking](https://d1k2c27psfzbiv.cloudfront.net/wp-content/uploads/2026/02/23094947/easync-booking.webp) [eaSYNC Booking](https://wordpress.org/plugins/easync-booking/) is one of the best free WordPress booking plugins for hotels, restaurants and car rentals. It's a versatile tool that comes without a price tag (100% Free with no premium plans or Paywall). It handles not just bookings but also payment integration via PayPal easily. If your business isn’t limited to typical service appointments like salons or consultations, and instead involves reservations for rooms, tables, or vehicles, eaSYNC Booking gives you full flexibility. Key Features: - Multiple reservation modules. - Fully responsive booking form. - Calendar view for booking or reservations. - Currency & pricing customization. - Accept online bookings via PayPal. ### WP Hotel Booking ![wp hotel booking](https://d1k2c27psfzbiv.cloudfront.net/wp-content/uploads/2026/02/23094953/wp-hotel-booking.webp) If your bookings aren’t appointments but rooms, stays, or accommodations, [WP Hotel Booking](https://wordpress.org/plugins/wp-hotel-booking/) is one of the most complete free options you’ll find on WordPress. This plugin is built specifically for hotels, guesthouses, B&Bs, lodges, and similar businesses that need structured room management, pricing plans, coupons, and payment support, all inside your WordPress site. Standout Features: - Room and booking management from a simple user dashboard. - Accept payments via Offline payment, Authorize.net, PayPal and Stripe. - Support discounts via coupon codes and pricing plan support. - Add extra packages and services. - Reports + Multilingual ready. ## Wrap Up Choosing the right WordPress booking plugin can create a smooth system where bookings, payments and management all work smoothly together. If you have service base business, I suggest to start with BookingPress Lite. It is the most balanced and reliable free option. It gives you a clean interface, smooth PayPal integration, unlimited appointments and a booking flow that actually feels professional, even without upgrading. Of course, you can try Bookify, LatePoint & WP Amelia as well. Moreover, if you are running small to medium sized hospitality and rental businesses, then you can choose the eaSYNC Booking plugin. Aside from this, WP Hotel Booking is also a good option for accommodation businesses. Each plugin serves a slightly different purpose. That’s why it’s important to think about your business model first. Pick the plugin that fits your workflow, install it, connect your payment gateway and start accepting bookings right away. Because the right booking plugin grows your business smarter. --- # How to Change the WordPress Login Page Background (5 Methods) URL: https://wpadminify.com/change-wordpress-login-page-background Last updated: 2026-09-03 Short answer: install the [Loginfy](https://wordpress.org/plugins/loginfy/) plugin, open Adminify → Login Customizer (or Loginfy → Customize), click Background, and pick a color, image, gradient, video, or slideshow. Everything renders in a live preview, and you hit Publish when it looks right. If you'd rather not add a plugin, the code methods further down do the same job in about fifteen lines of PHP. The default WordPress login screen has looked more or less the same since 2008. Grey background, blue button, a WordPress logo linking away from your site. That's fine for a personal blog. It's a problem the moment a paying client or a store manager sees it, because the login screen is usually the first thing they touch after you hand the site over. This guide covers every way to change that background, in the order most people should try them. Changing the background is one piece of a full login redesign; for the logo, form, and URL too, see our guide on how to [customize the WordPress login page](https://wpadminify.com/customize-wordpress-login-page). ## What you'll need Background customization lives in Loginfy, a login page customizer from Pixar Labs (version 1.0.5, tested up to WordPress 7.0, requires WordPress 5.0 and PHP 5.6 or newer). Two ways to run it: - Loginfy on its own. Install it, and the panel appears under Loginfy → Customize. Nothing else required. - Loginfy alongside WP Adminify. Adminify registers Loginfy as an addon and surfaces it at Adminify → Login Customizer, so login styling sits next to the rest of your [dashboard customization](https://wpadminify.com/wordpress-dashboard-customization) settings. One thing worth being clear about, because the older version of this article got it wrong: WP Adminify alone no longer ships the login background controls. The login customizer moved into Loginfy. If you only have Adminify installed, install Loginfy too. The menu item will still be there, but the sections behind it come from Loginfy. ![WordPress plugins screen showing WP Adminify and Loginfy both installed and active](https://d1k2c27psfzbiv.cloudfront.net/wp-content/uploads/2026/07/09102233/adminify-loginfy-plugins-active.webp) ### Free vs Pro, before you start It saves time to know which controls you're about to find: | Background type | Loginfy Free | Loginfy Pro | | --- | --- | --- | | Solid color | Yes | Yes | | Image (with position, repeat, attachment, size) | Yes | Yes | | Gradient | Yes | Yes | | Overlay color or gradient, with opacity | Yes | Yes | | Self-hosted video background | No | Yes | | YouTube video background | No | Yes | | Image slideshow background | No | Yes | Color, image, gradient and overlay cover most real client work. Video and slideshow are Pro features, and the code methods at the end of this article reproduce both of them for free if you're comfortable with PHP. ## Method 1: change the login background with Loginfy (no code) ### Step 1: install and activate Loginfy From your dashboard, go to Plugins → Add Plugin, search for Loginfy, then install and activate it. If you're already running WP Adminify, you can also reach it through Adminify → Addons. ### Step 2: open the Login Customizer Two routes, same destination: - With Adminify: Adminify → Login Customizer - Without Adminify: Appearance → Customize → Loginfy Either one drops you into the native WordPress Customizer with your login page loaded in the preview pane on the right. Every change you make repaints that preview immediately, so there's no save-and-refresh loop. ![WordPress admin with the Adminify menu expanded, showing the Login Customizer link above the plugins screen](https://d1k2c27psfzbiv.cloudfront.net/wp-content/uploads/2026/07/09102239/adminify-login-customizer-menu.webp) ### Step 3: find the Background section The Loginfy panel breaks the login page into twelve sections: Templates, Logo, Background, Layout, Login Form, Form Fields, Button, Others, Google Fonts, Error Messages, Custom CSS & JS, and Credits. Click Background. ![Loginfy customizer panel listing Templates, Logo, Background, Layout, Login Form and other sections, with the login page preview alongside](https://d1k2c27psfzbiv.cloudfront.net/wp-content/uploads/2026/07/09102244/loginfy-customizer-panel-sections.webp) Inside Background you get three tabs across the top (Color/Image, Video, Slideshow) and an Overlay block underneath that applies to whichever tab you chose. ### Step 4: set a solid color or a background image On the Color/Image tab, the Color sub-tab gives you a color picker. That's the whole job for a solid background. For an image, use the Upload button next to the background field, then work through the four dropdowns below it: - Position. Nine anchor points, from Left Top through Center Center to Right Bottom. Center Center is the safe default. - Repeat. Repeat, No Repeat, Repeat Horizontally, Repeat Vertically. Use No Repeat for photographs, Repeat for seamless textures. - Attachment. Fixed or Scroll. The login page rarely scrolls, so this only matters on short mobile viewports. - Size. Cover, Contain, or Auto. Cover fills the viewport and crops the overflow. Contain fits the whole image in and leaves empty space around it. ![Loginfy Background section on the Color/Image tab, showing color picker, upload field, position, repeat, attachment and size dropdowns](https://d1k2c27psfzbiv.cloudfront.net/wp-content/uploads/2026/07/09102249/loginfy-background-color-image-settings.webp) ### Step 5: or build a gradient Switch the sub-tab from Color to Gradient and you get two color pickers, labeled From and To, plus a Direction dropdown. Pick your two stops, choose the angle, and the preview updates as you drag. Gradients are what I reach for on client work. They weigh nothing, they never pixelate on a 4K display, and they can't fail to load. If you're rebranding an admin area for a client, a gradient pulled from their brand palette does more for perceived quality than a stock photograph ever will. ![Loginfy gradient background with From and To color pickers, previewing a green to blue login page](https://d1k2c27psfzbiv.cloudfront.net/wp-content/uploads/2026/07/09102254/loginfy-gradient-background-login-page.webp) ### Step 6: add an overlay so the form stays readable This is the step people skip, and it's the one that separates a login page that looks designed from one that looks like a screenshot with a form dropped on it. The Overlay block sits below the background tabs. Choose Color or Gradient, pick a value, then drag Overlay Opacity. A dark overlay somewhere between 25 and 70 percent will pull almost any busy photograph down to a level where white form labels stay legible. ![Loginfy overlay color set to black with opacity at 68, darkening a video background behind the login form](https://d1k2c27psfzbiv.cloudfront.net/wp-content/uploads/2026/07/09102259/loginfy-overlay-color-opacity.webp) ### Step 7: video backgrounds (Pro) The Video tab offers two sources. Self Hosted takes an MP4 you upload to the media library, plus an optional Poster Image that displays while the video buffers and on devices that refuse to autoplay. Leave Loop Video on unless you want the clip to freeze on its last frame. ![Loginfy Video tab with Self Hosted selected, showing Upload Video, Loop Video toggle and Poster Image controls](https://d1k2c27psfzbiv.cloudfront.net/wp-content/uploads/2026/07/09102305/loginfy-self-hosted-video-background.webp) Youtube takes an embed URL, the `https://www.youtube.com/embed/VIDEO_ID` form, not the `watch?v=` form. That's the single most common mistake here. The clip plays muted and looped behind the form. ![Loginfy YouTube video background playing behind a WordPress login form in the customizer preview](https://d1k2c27psfzbiv.cloudfront.net/wp-content/uploads/2026/07/09102310/loginfy-youtube-video-login-background.webp) A word of caution before you ship a video login page. A 10-second 1080p loop is comfortably 2–5 MB, and it downloads before your client can type their password. On a slow connection that's a worse experience than any grey background. Set a poster image, keep the clip short, and ask yourself whether the people logging in, usually the same three people several times a day, actually benefit. ### Step 8: slideshow backgrounds (Pro) The Slideshow tab replaces the single image with a gallery. Click Add Slide, select your images in the media library, and they appear as thumbnails in the panel. Edit Slides reopens the gallery so you can reorder or swap them. Remove clears the set. The overlay and opacity controls work exactly as they do on the other tabs. ![Loginfy Slideshow tab with seven gallery thumbnails, Add Slide, Edit Slides and Remove buttons](https://d1k2c27psfzbiv.cloudfront.net/wp-content/uploads/2026/07/09102315/loginfy-slideshow-background-settings.webp) The rotation runs on the real login page. Here it is mid-cycle in the customizer preview: ![WordPress login form over a rotating slideshow background showing a night city scene](https://d1k2c27psfzbiv.cloudfront.net/wp-content/uploads/2026/07/09102320/loginfy-slideshow-login-page-preview.webp) ### Step 9: publish Hit Publish at the top of the panel. Then open your login URL in a private window and check it as a logged-out visitor, because the customizer preview and the real `wp-login.php` occasionally disagree about caching. ## Method 2: change the login background with code Everything above can be done in PHP and CSS. WordPress fires a dedicated hook, `login_enqueue_scripts`, on the login screen and nowhere else, which is exactly where this belongs. Where to put this code: not in your parent theme's `functions.php`, because the next theme update erases it. Use a child theme, a small site-specific plugin, or a snippets manager. WP Adminify's built-in Code Snippets module handles it, and so does anything else you already use to [add code to your WordPress header](https://wpadminify.com/add-code-to-wordpress-header). ### Background image ``` add_action( 'login_enqueue_scripts', 'jt_login_background_image' ); function jt_login_background_image() { $image_url = content_url( '/uploads/2026/07/login-bg.jpg' ); ?> body.login { background-image: url(''); background-size: cover; background-position: center center; background-repeat: no-repeat; background-attachment: fixed; } body.login { background: linear-gradient( 135deg, #7ed321 0%, #1f6f8b 100% ); } body.login { background: url('') center center / cover no-repeat fixed; } body.login::before { content: ""; position: fixed; inset: 0; background-color: rgba( 0, 0, 0, 0.55 ); z-index: 0; } body.login #login { position: relative; z-index: 1; } "> body.login { background: #12151b; } .jt-login-video { position: fixed; inset: 0; width: 100%; height: 100%; object-fit: cover; z-index: -1; } body.login #login { position: relative; z-index: 1; } /* Respect the reduced-motion preference: show the poster, not the loop. */ @media ( prefers-reduced-motion: reduce ) { .jt-login-video { display: none; } body.login { background: url('') center / cover no-repeat; } } body.login::before { content: ""; position: fixed; inset: 0; z-index: -1; background-size: cover; background-position: center center; animation: jt-login-slides 18s infinite; } body.login #login { position: relative; z-index: 1; } @keyframes jt-login-slides { 0%, 30% { background-image: url(''); } 33%, 63% { background-image: url(''); } 66%, 96% { background-image: url(''); } 100% { background-image: url(''); } } If that address is registered, we have sent a reset link.
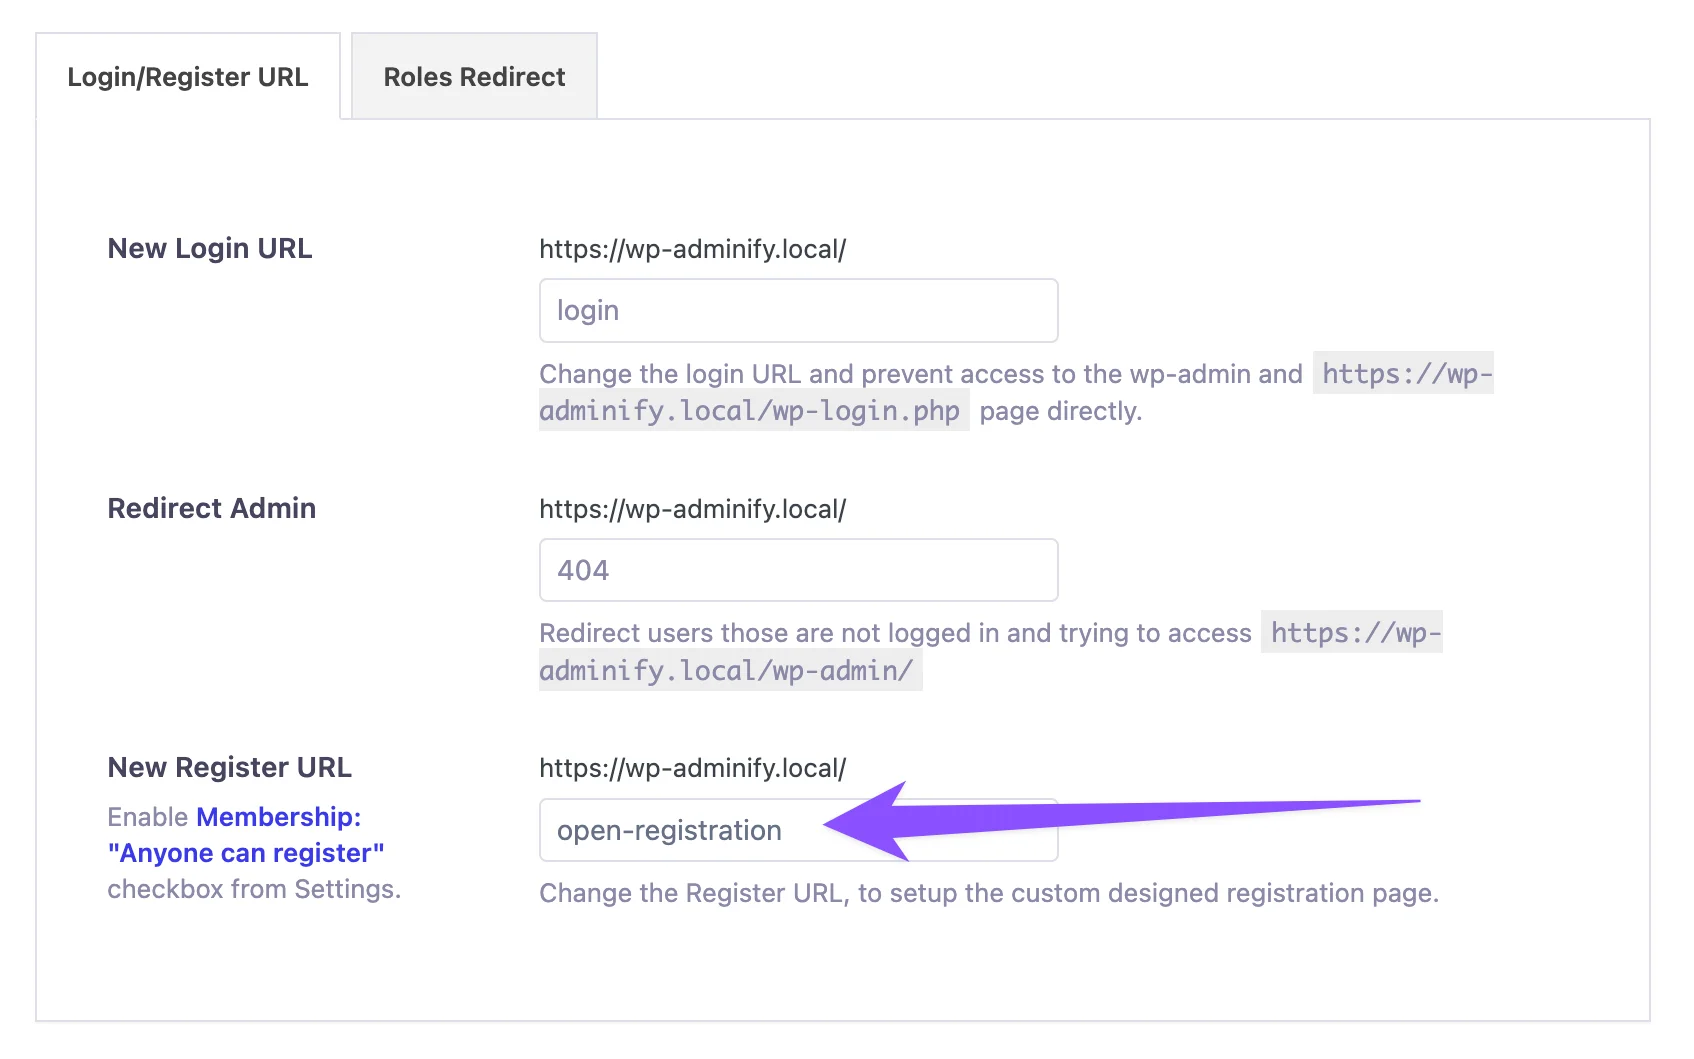
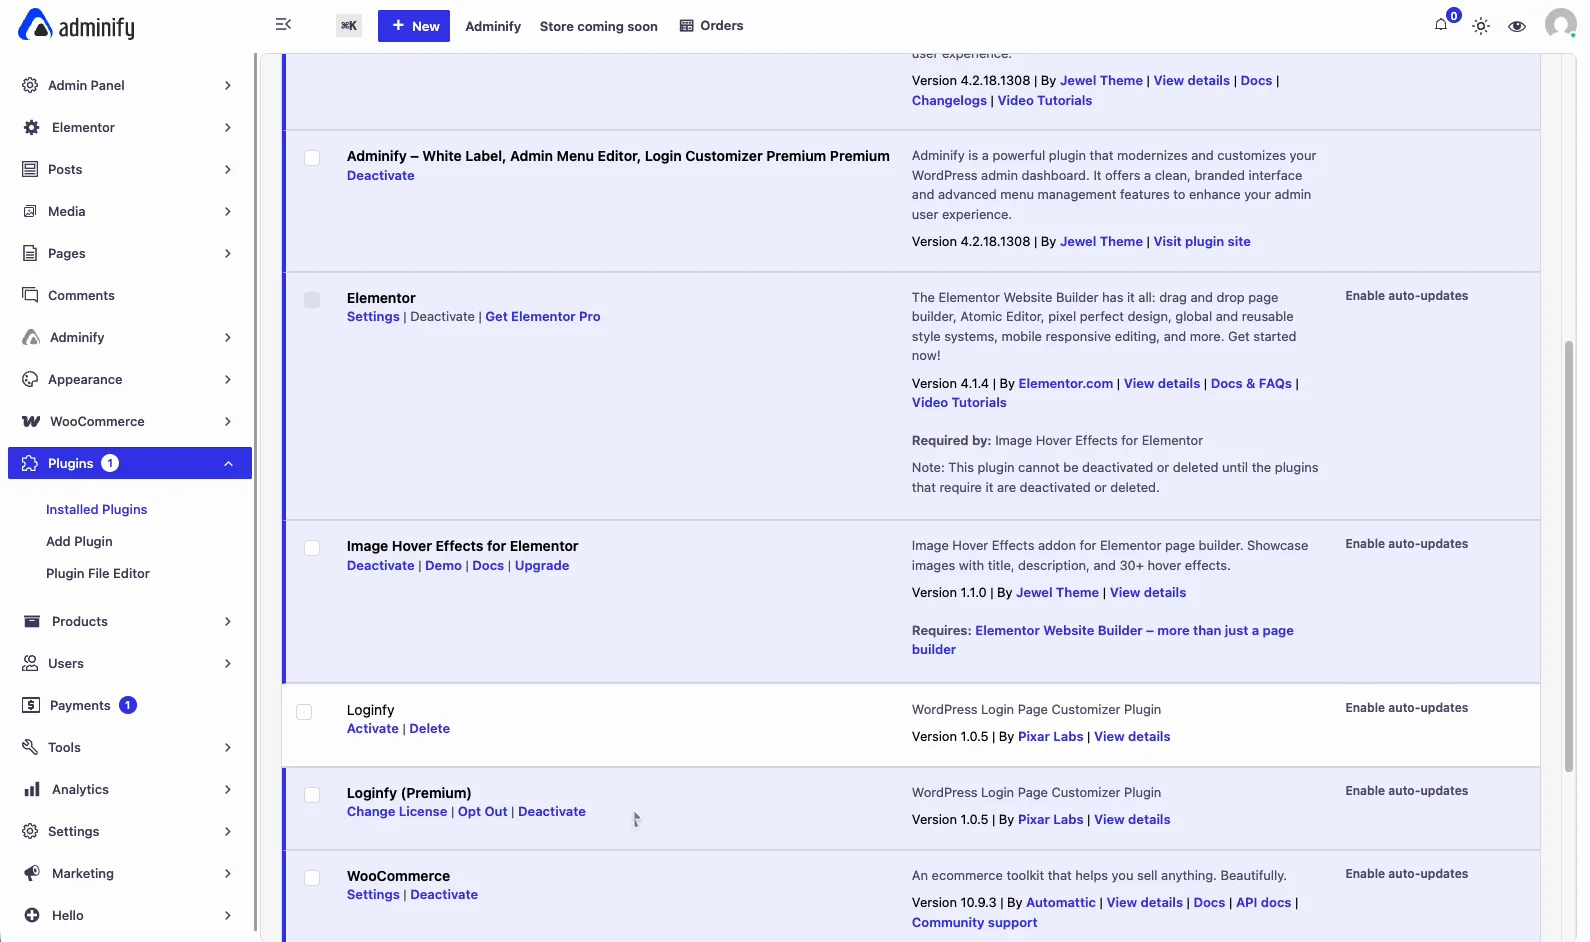
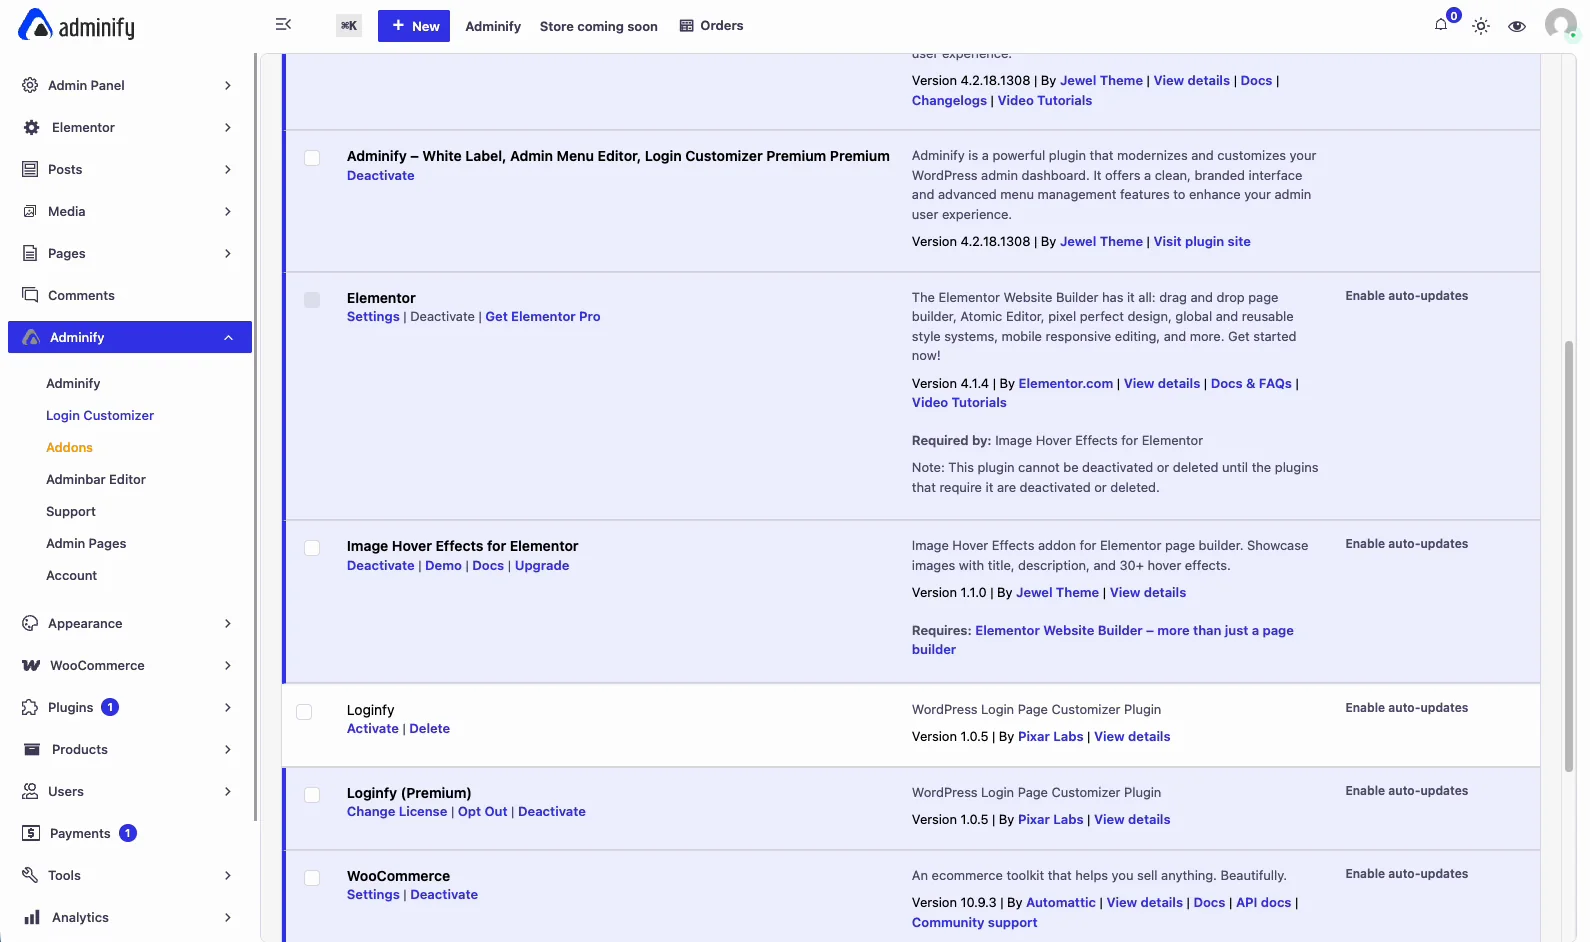
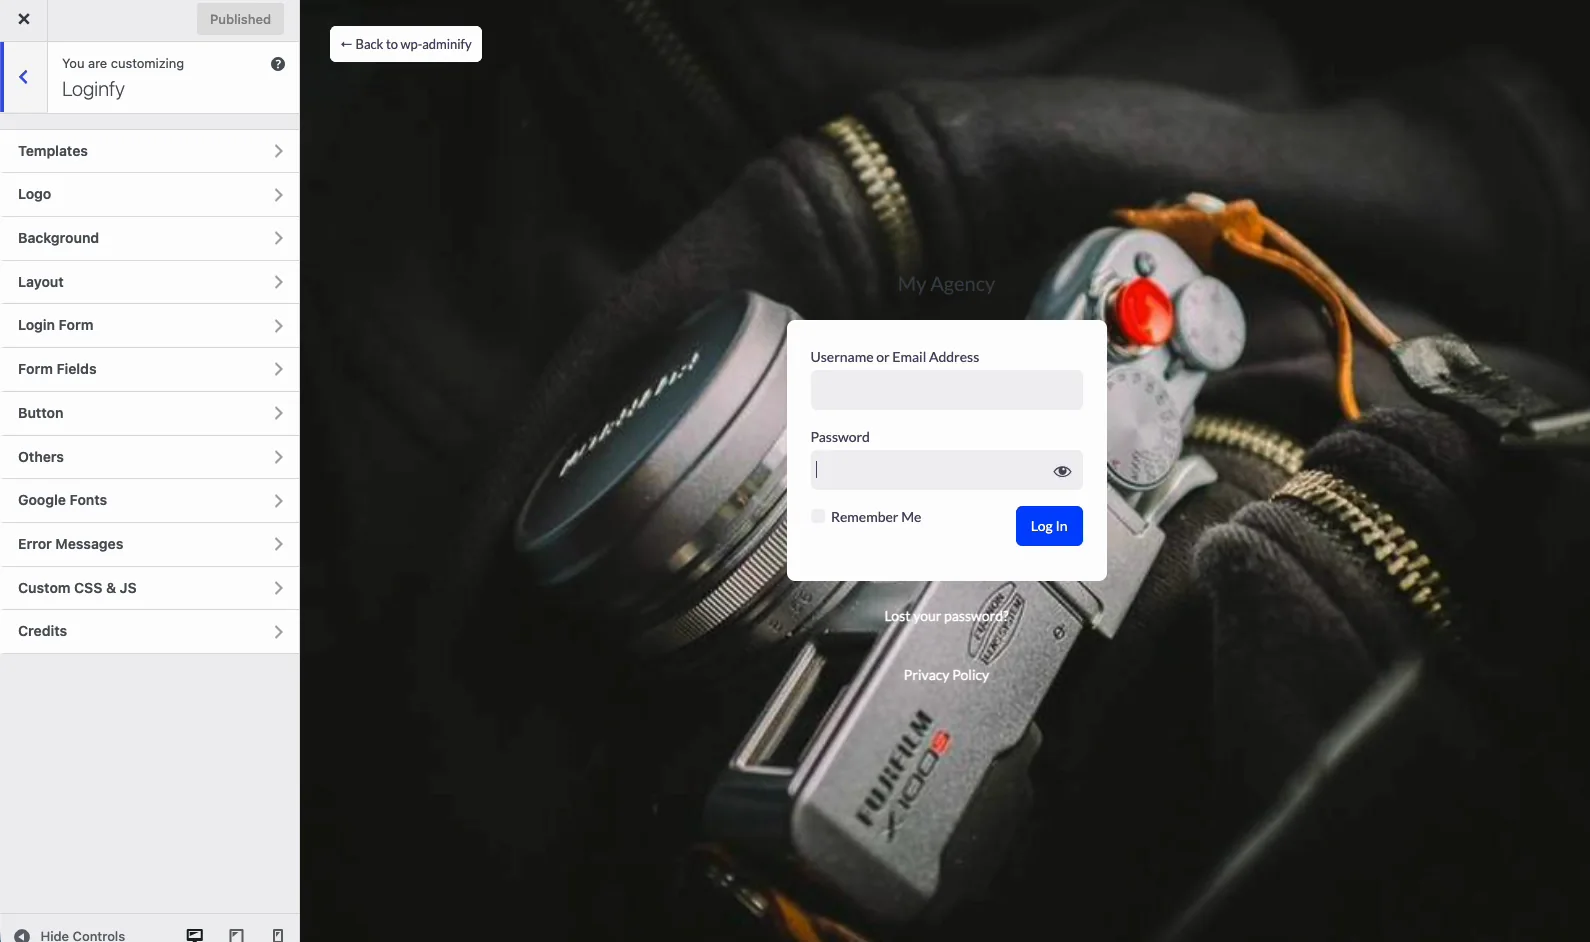
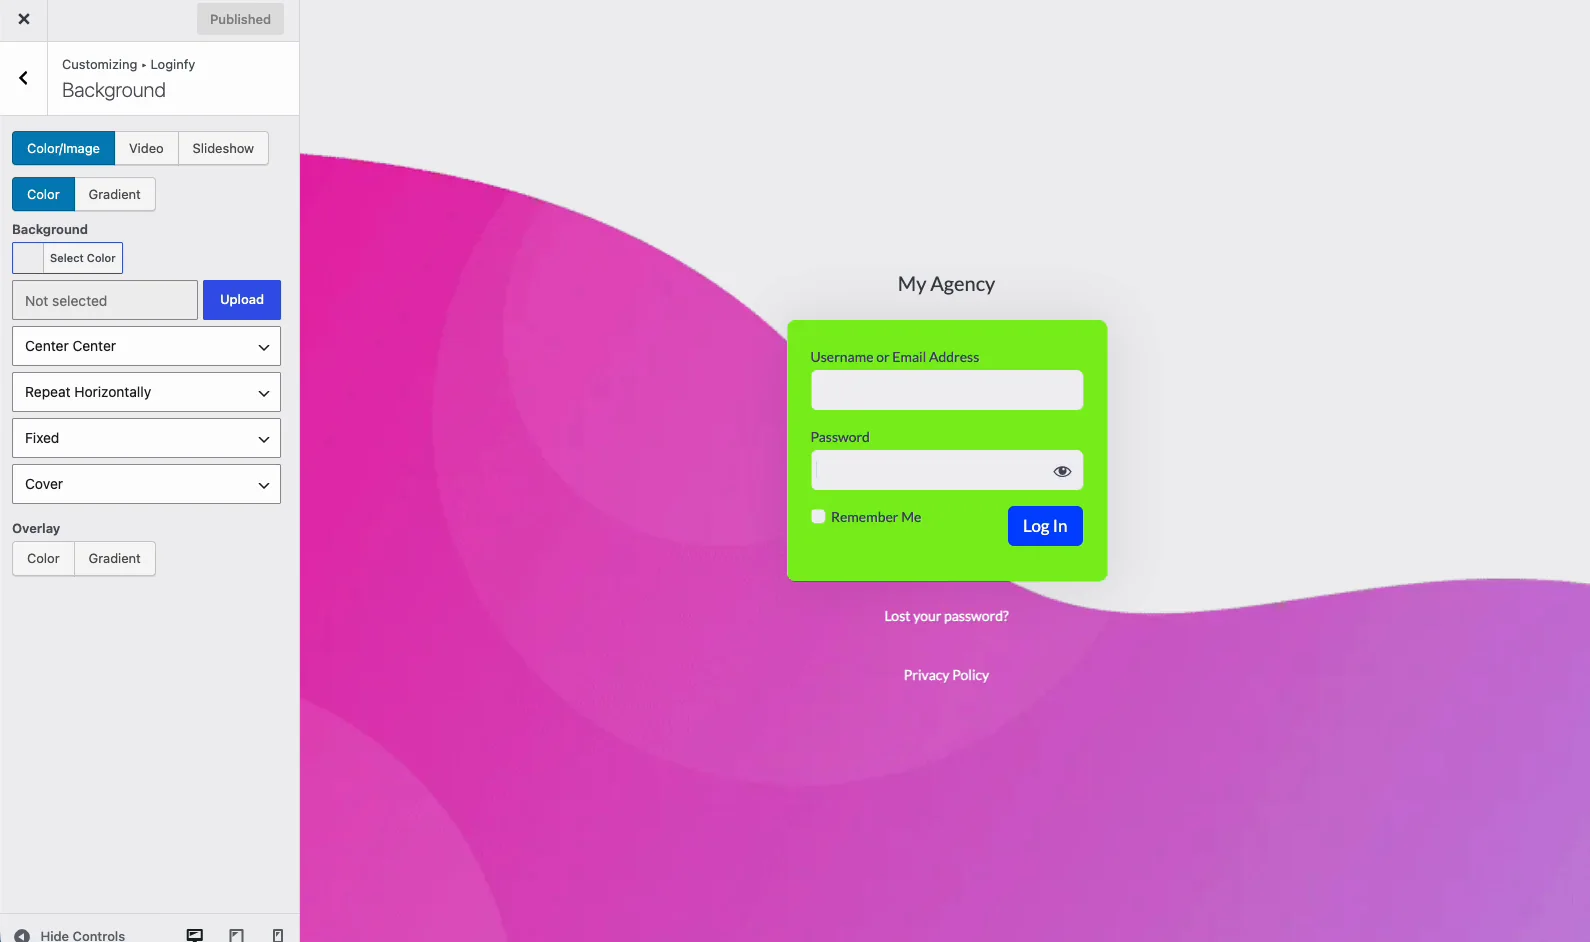
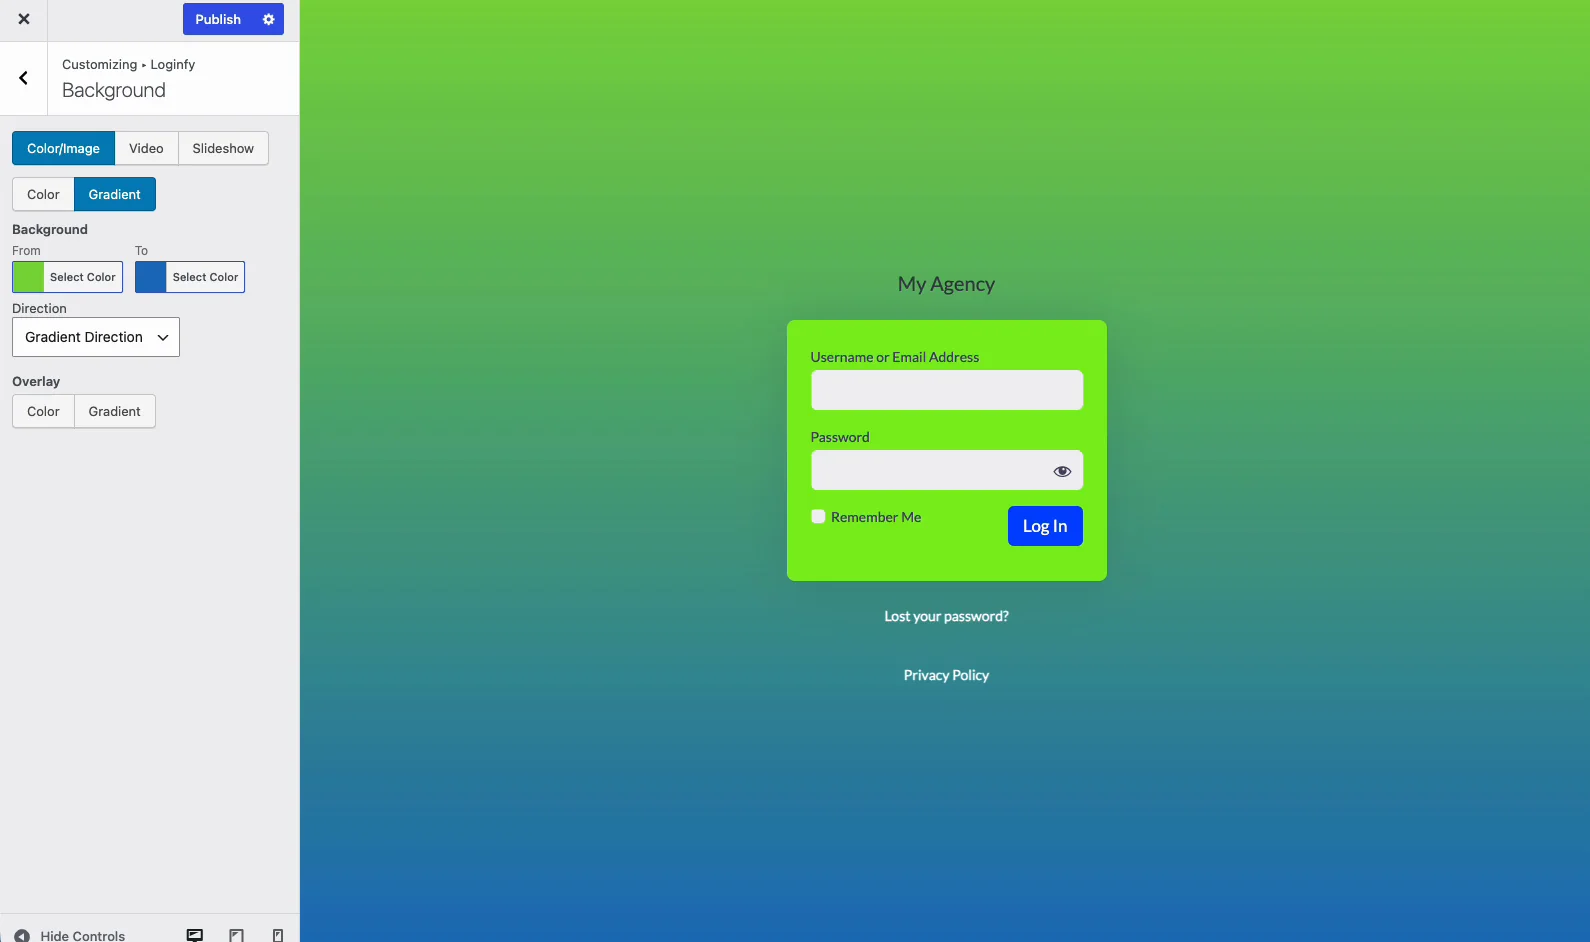
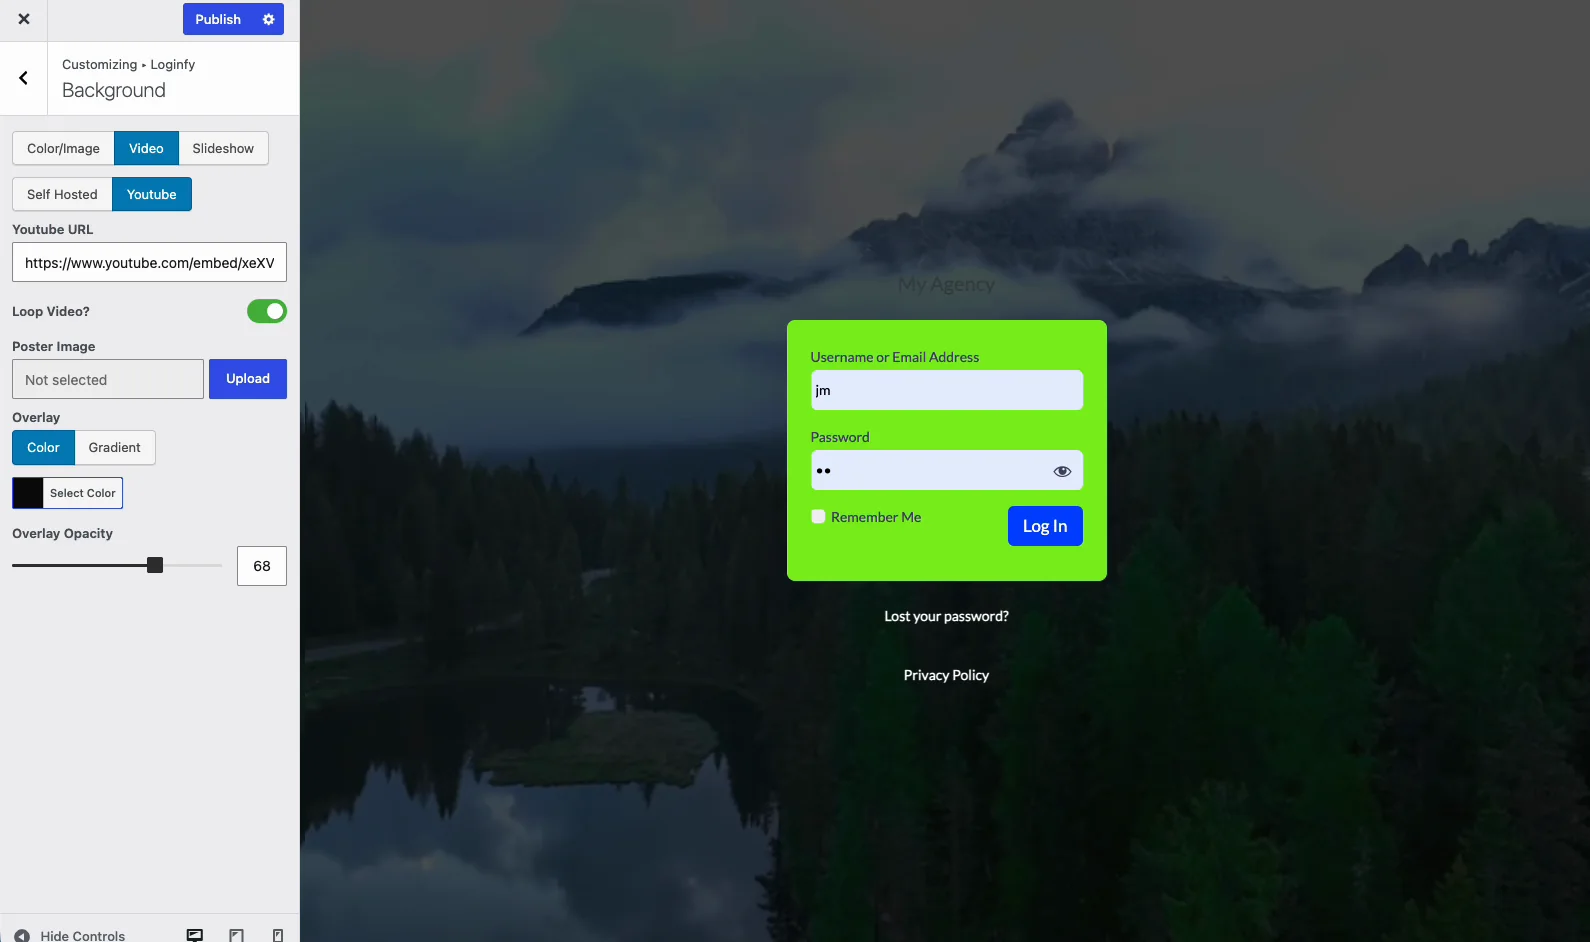
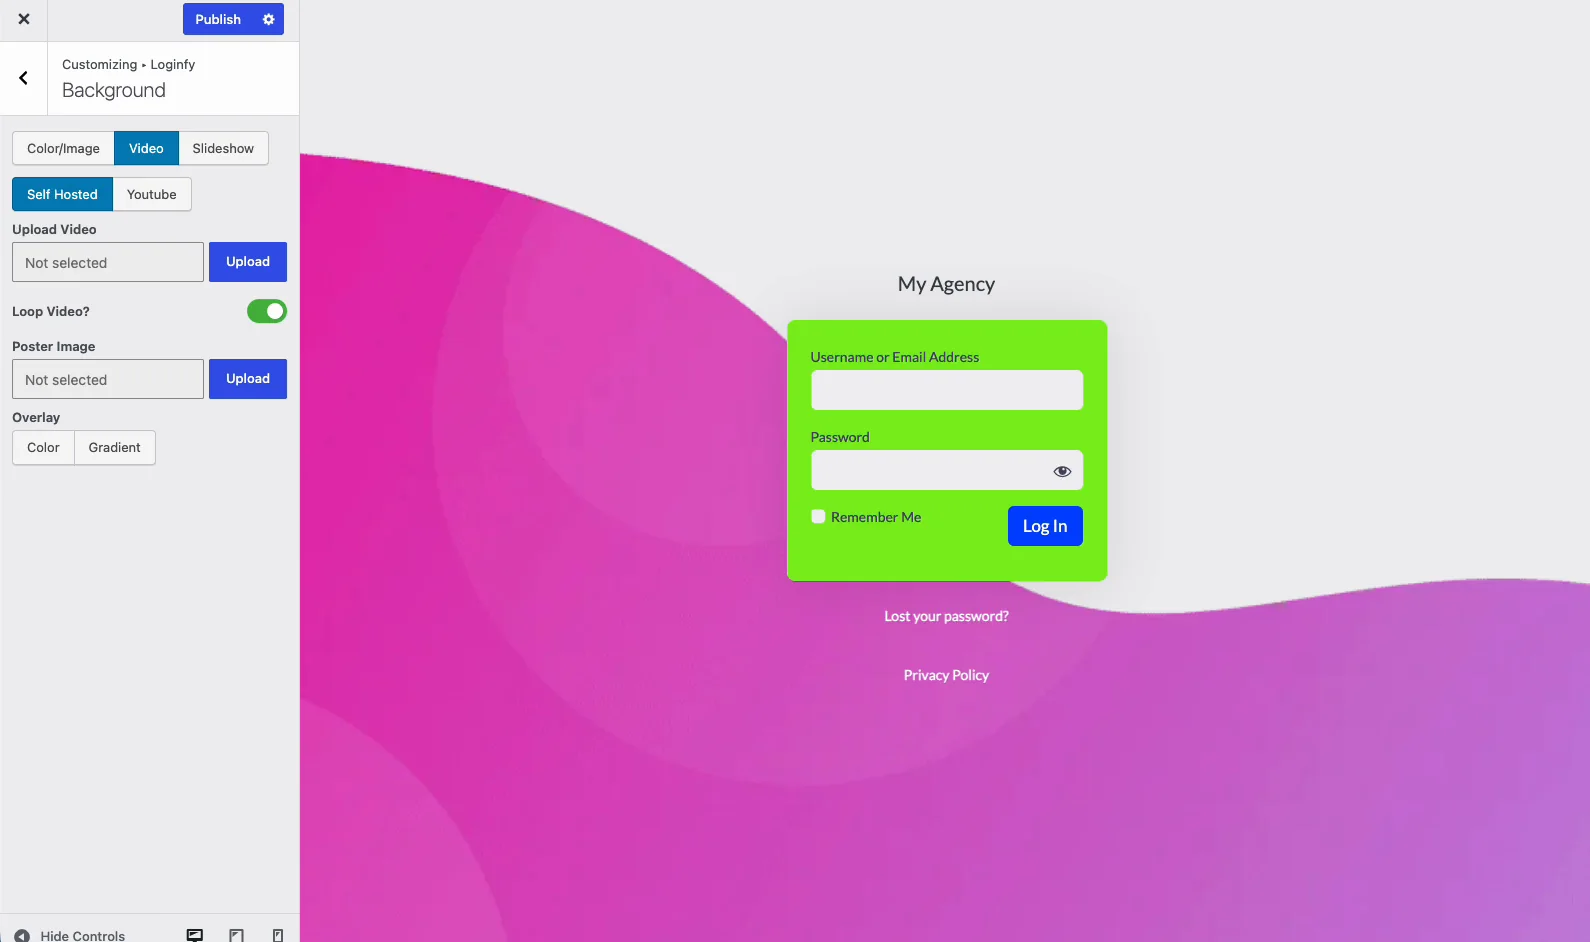
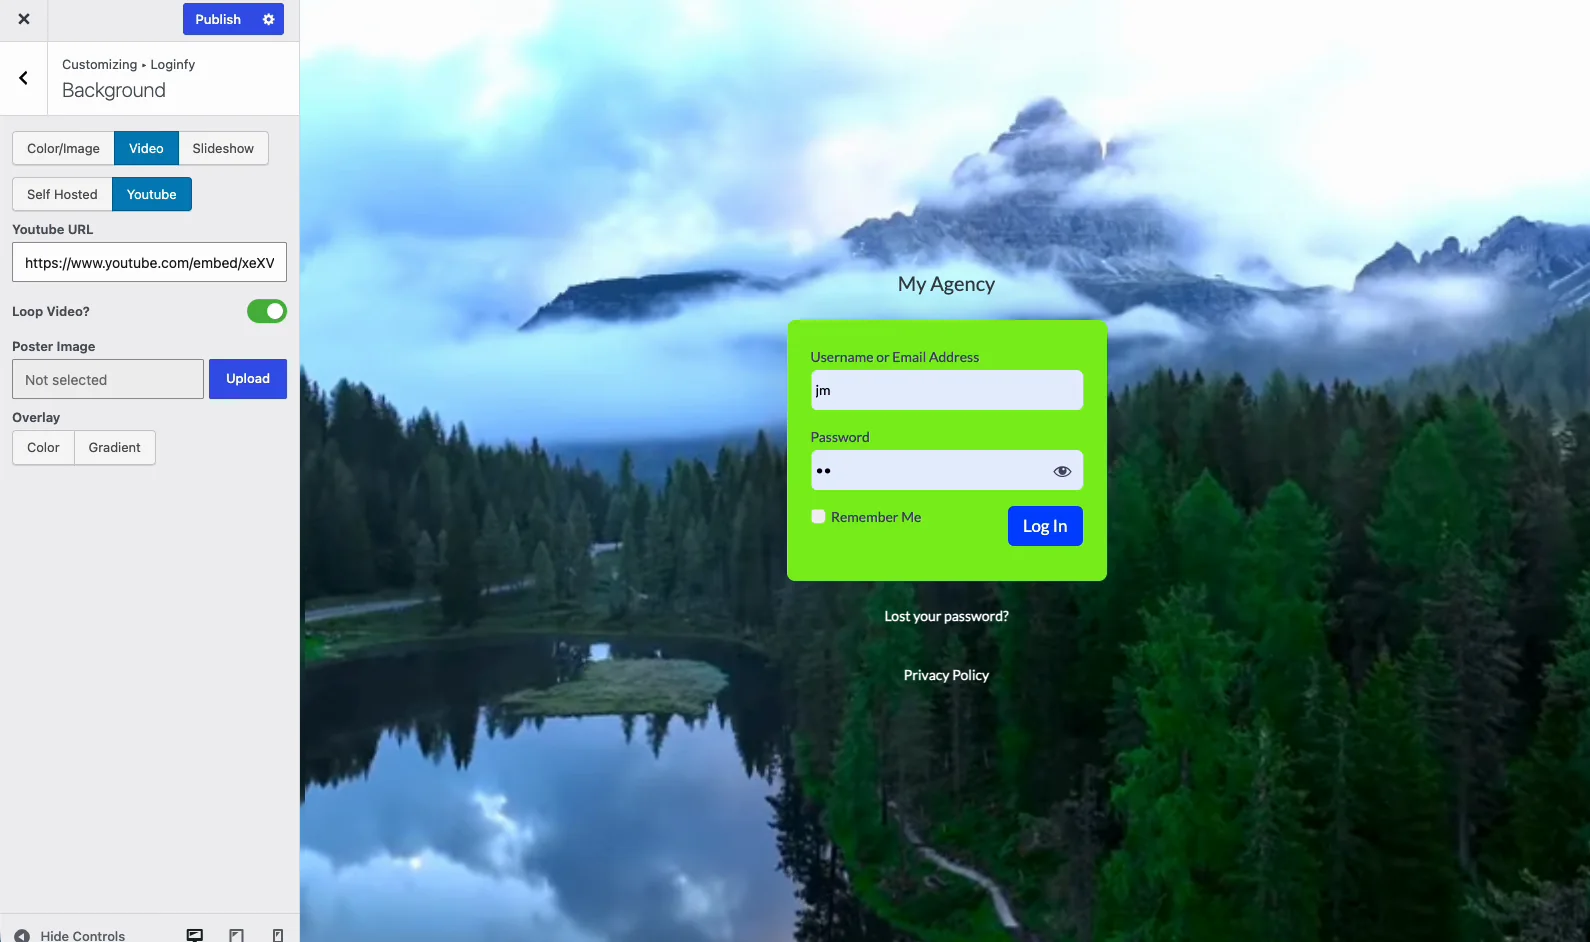
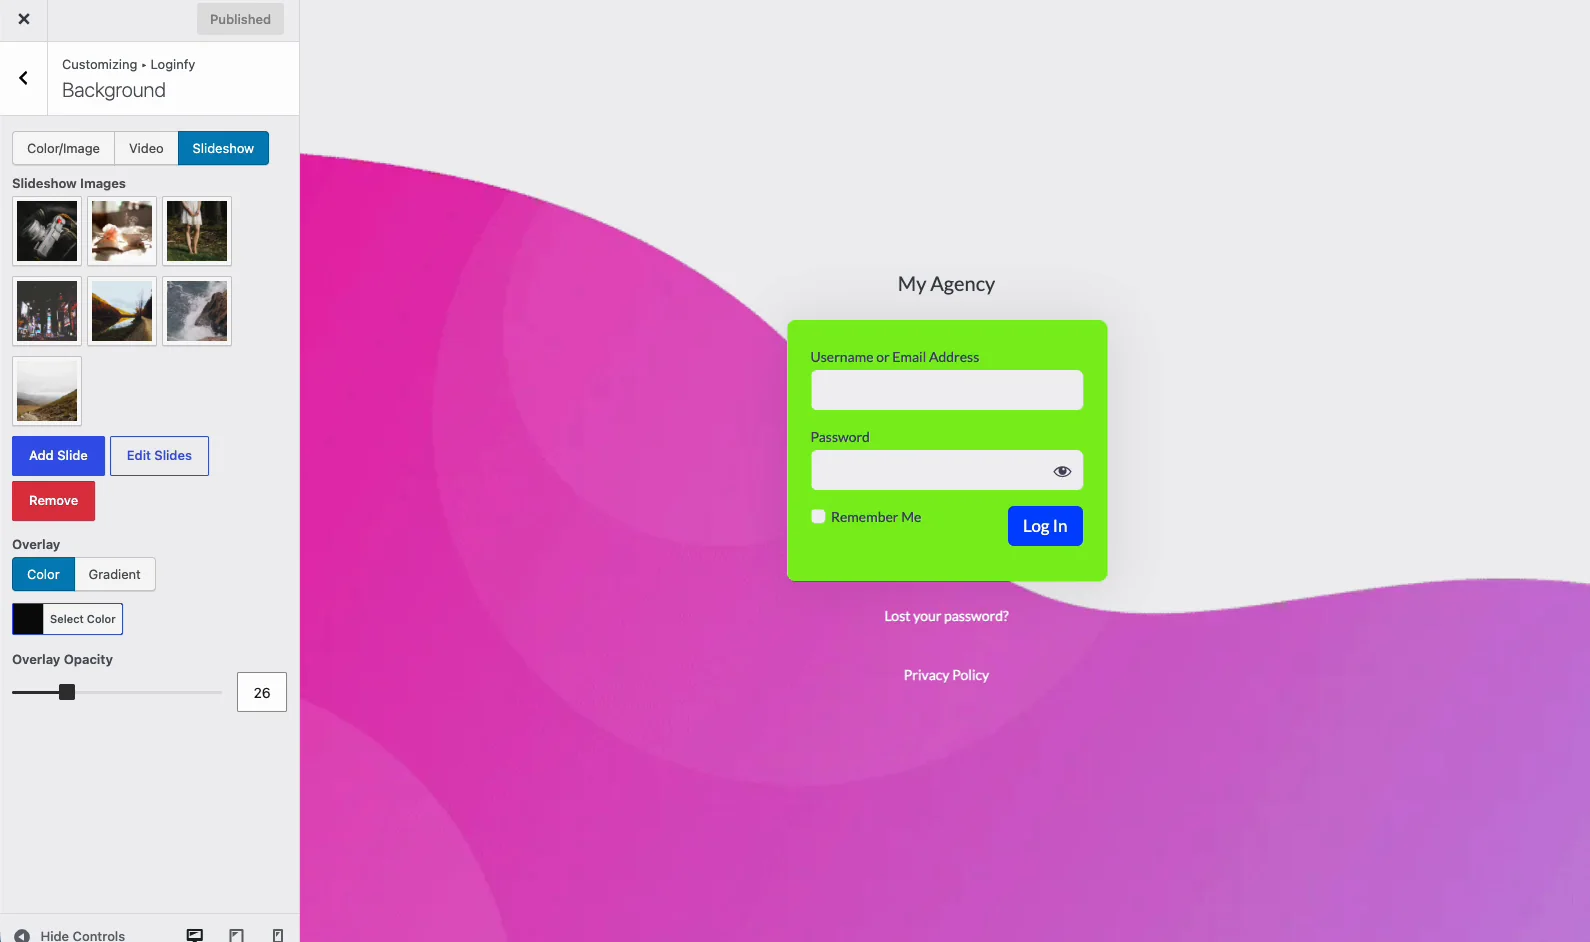
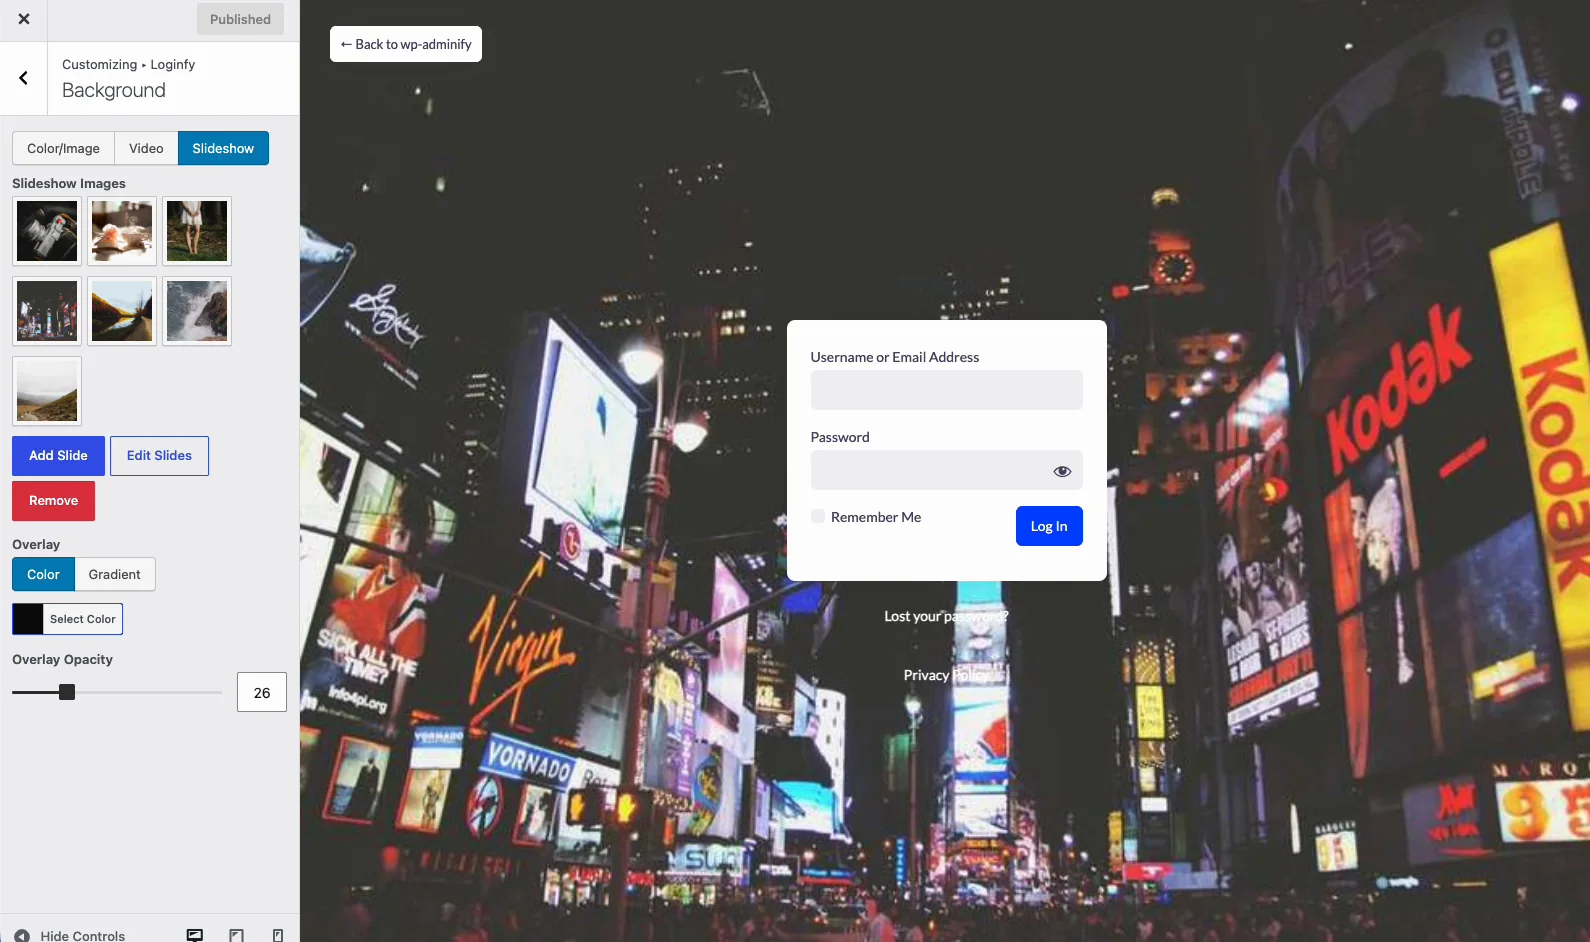
'; } return $message; } // Remove the shake on failure. add_action( 'login_head', function () { remove_action( 'login_footer', 'wp_shake_js', 12 ); } ); ``` Roughly thirty lines, no plugin dependency, and it survives theme changes because it is an mu-plugin rather than theme code. ## What this does not fix Being clear about the limits, because generic errors are often oversold: It does not stop brute force attacks. An attacker can still guess passwords. They just cannot pre-filter the username list from the login form. Rate limiting is what stops the guessing, and that is a separate tool. So is [two-factor authentication](https://wpadminify.com/two-factor-authentication-for-wordpress-admin), which is the one measure that still holds when a password has already leaked. It does not close the other enumeration routes. The REST API users endpoint, author archives at `/?author=1`, and comment author names all leak usernames independently of the login form. It does not hide the login page. Every bot on the internet knows where `wp-login.php` is. Moving it is a separate decision with its own trade-offs, weighed in [how to change your WordPress login page URL](https://wpadminify.com/change-wordpress-login-page-url). ## Frequently asked questions ### Why does WordPress show different errors for wrong username and wrong password? Because it is more helpful to a genuine user. The trade-off is that it is equally helpful to an attacker enumerating accounts. WordPress leaves the decision to site owners through the login_errors filter rather than picking one behaviour for everyone. ### Will generic error messages break anything? No. The filter changes only the text displayed. Authentication, password reset and every plugin that hooks the login flow continue to work exactly as before. If the login page misbehaves after you add the snippet, it is almost always something else: WordPress login page not working covers the usual causes. ### Can I change login errors without editing code? Yes. Login customizers including Loginfy and LoginPress expose the error strings as editable fields on their free tiers. Set every one of them to the same text, otherwise you have restyled the leak rather than closed it. ### Does hiding login errors help with brute force protection? Partly. It removes the reconnaissance step that makes brute forcing efficient, so an attacker has to guess username and password together instead of confirming usernames first. It does not limit attempts, so it is a supporting measure, not the fix. ### What is the best generic login error message? One that is identical for every failure and still tells the user what to do next. "The username or password you entered is not correct. Check both, or reset your password" satisfies both. ## Next steps Two follow-ups, in order of value. Close the other enumeration routes first: [how the WordPress REST API leaks your usernames](https://wpadminify.com/wordpress-rest-api-leaks-usernames). Then turn on the measure that survives a leaked credential: [two-factor authentication for WordPress admin](https://wpadminify.com/two-factor-authentication-for-wordpress-admin). If you are editing these messages inside a customizer rather than in code, the rest of that panel is covered in [how to customize the WordPress login page](https://wpadminify.com/customize-wordpress-login-page), and the full reference, from logo through to client handover, is [the WordPress login page white-label guide](https://wpadminify.com/wordpress-login-page-white-label-guide). --- # WordPress HTTP Error and HTTP Status Codes: The Complete Guide URL: https://wpadminify.com/wordpress-http-status-code-errors Last updated: 2026-09-03 It’s a beautiful sunny day, you’re up early sitting on your porch admiring the weather and you pull out your laptop excited by the endless possibilities of a productive day to follow. You open your browser, go over to the search bar, and type in your website URL. Just as you’re taking a sip of your coffee your eyes wander to the screen and you see this ![wordpress http status code errors](https://d1k2c27psfzbiv.cloudfront.net/wp-content/uploads/2024/08/12113242/wordpress-http-status-code-errors.webp) Vibes ruined, day ruined, mood ruined! But it can get way worse! What if you don’t know what the http status code error even means? We’ve all been there. Trying to get work done only to be stopped in our tracks by an http error code. It's truly a nightmare, especially for a non-technical person who lacks the know-how to decipher the code. That is exactly why we’ve decided to write this guide for you. We’ll take you through the dark seedy underbelly of the world of http error codes and walk you through what each means and what to do when you run into one. But first, we need to understand what an http error code is. ## What Is the WordPress HTTP Error? The WordPress HTTP error is not a status code. It appears in the media library when an image upload fails, and the message gives you no reason at all. The usual causes are a low PHP memory limit, an oversized file, the image editor library WordPress picked, or wrong permissions on the uploads folder. That distinction matters, because the fixes are different. A 500 or a 503 comes from the server and takes the whole page down, which is much closer to a [WordPress dashboard that will not load at all](https://wpadminify.com/guide-to-fixing-wordpress-dashboard-not-loading). The HTTP error stops one upload while the rest of your dashboard keeps working, so start with the PHP limits and the file itself before you go anywhere near the server. ### How to Fix the HTTP Error When Uploading Images Work down this table in order. The first three rows account for most cases, and each one is a two minute check. | Cause | What you see | Fix | | --- | --- | --- | | Expired login session | Fails after a long editing session, works after a refresh | Reload the page, sign in again, retry the upload | | PHP memory limit too low | Large images fail, small ones go through | Add `define( 'WP_MEMORY_LIMIT', '256M' );` to `wp-config.php` | | File is over the upload cap | Fails instantly, always on the same big file | Raise `upload_max_filesize` and `post_max_size`, then check Tools > Site Health > Info > Media Handling | | ImageMagick is failing | Every image fails, whatever the size | Force the GD library with the `wp_image_editors` filter | | Uploads folder not writable | Nothing uploads and no month folder is created | Set folders to 755 and files to 644 inside `wp-content/uploads` | | Special characters in the filename | One file fails, the rest are fine | Rename it using letters, numbers, hyphens and underscores only | | Plugin or theme conflict | Started right after an update | Deactivate plugins one at a time, then switch to a default theme to confirm | To force the GD library, drop this into your theme's `functions.php` or a site specific plugin. It tells WordPress to try GD before ImageMagick, which clears the error on hosts where the ImageMagick module is old or partly compiled. ``` add_filter( 'wp_image_editors', function( $editors ) { return array( 'WP_Image_Editor_GD', 'WP_Image_Editor_Imagick' ); } ); ``` If none of that helps, stop guessing and read the log. Add `define( 'WP_DEBUG', true );` and `define( 'WP_DEBUG_LOG', true );` to `wp-config.php`, retry the upload, then open `wp-content/debug.log`. The real error is almost always named there in a single line, and it usually points at memory or at the image editor. When memory is the culprit it rarely stops at uploads, so check whether you also have a [slow WordPress admin](https://wpadminify.com/why-is-my-wordpress-admin-so-slow) to go with it. A cluttered library makes all of this harder to spot, because every failed retry can leave an orphan file behind. It is worth [cleaning up your WordPress media library](https://wpadminify.com/clean-wordpress-media-library) once the uploads work again, and if you are running thousands of files, our guide to [managing a large media library](https://wpadminify.com/manage-large-wordpress-media-library) covers the load side of the problem. [WP Adminify media folders](https://wpadminify.com/features/wordpress-media-folder) keep new uploads sorted as they arrive, so a gap is obvious the day it appears. ## What is an HTTP Status Code Error? HTTP status codes are messages from web servers to your browser. They help explain what happened when you try to visit a webpage. These are important! Why? Because it simply shows what's wrong with your site. Here’s how it works: - Requesting a Page: Suppose, you typed a web address or clicked a link. Now the browser asks it's (the URLs) server for information for the given URL/Link. - Server Processes the Request: Once the server get the request and search information for the page. - Server Sends a Response: Then the server processes and approves the information and sends a response with status codes. There are five (5) types of status codes. Which are following: - 1xx Informational: The server request was received and current processing. - 2xx Success: The request was successful, and the server has sent the page or file you wanted. The request is successfully processed. And it sent you required information. - 3xx Redirection: The page you're looking for is moved, so you need to move on to a new page. - 4xx Client Error: There is a problem with your request. Either the page is missing or you don't have access to the page. - 5xx Server Error: This is a server-sided issue. The server failed to process the request you gave. Status codes gives you information on why a page isn’t loading. It indicates what might be wrong and how to fix it. If you don't, well do not worry! Because this article is for you. And I'll try my level best to inform you all the things you should know in a very simple way. However, you might think what these error codes are actually referring to. As, mostly the terms are quite specific. Although developers and web designers easily understands it, a basic user might not. So, before I share details about the status codes, I've listed the frequently used terms for you. ## Terminology List HTTP This is the system that lets your browser talk to websites. It moves data between your device and the server. Status Code A 3-digit number that shows what happened when you tried to load a page. It tells you if things went right or wrong. URI (Uniform Resource Identifier) This is a web address that points to something online. URLs (like the ones you type in the browser) are one type of URI. Server A powerful computer that stores websites. It sends pages, images, and data to you when you ask for them. Client That’s your device or browser. It asks the server for stuff like pages or files. Browser An app you use to visit websites. For example: Chrome, Brave, Firefox, Safari, and Edge. Redirect A web page automatically sends you to another page. This happens when a link has changed to a new directory. A misconfigured redirect can also trap you in a [WordPress login redirect loop](https://wpadminify.com/wp-admin-redirects-to-homepage), where the login screen keeps reloading instead of opening the dashboard. Cache It is the temporary storage for browsers. It helps to load websites faster the next time you visit. Permissions Rules that decide who can view, change, or use files on a site or server. Logs Records of what happened on a server. They help you find and fix problems. Plugin An extra tool you add to your WordPress site to add new features or functions. Theme The design and layout of your WordPress site. It controls how your site looks. Host / Hosting Provider A service that stores your website and makes it available online. They keep your site running and accessible to visitors. ## Common WordPress HTTP Status Code Errors ### Informational Responses (1xx) 1xx status codes are messages from the server that tell you the request has been received and is being processed. These are not final responses, but rather updates that the server is working on your request. 1xx codes are generally not common in everyday browsing. They are more like behind-the-scenes updates to let the browser know the server is handling things. ### Successful Responses (2xx) 2xx codes mean your request worked properly. The server received your request, and processed it. Meaning the server responded just as expected. ### Redirection Messages (3xx) 3xx codes mean your browser needs switch to finish the request. Usually, this happens when a page/URL moved to a new location. ### Client Error Responses (4xx) 4xx codes mean there was a problem with the request. Maybe you typed the wrong URL. Or, you tried to access a restricted page. ### Server Error Responses (5xx) 5xx codes mean the server ran into an error and couldn’t finish the request. This indicates a server-sided error. ## Some Common WordPress Error Codes If you manage a WordPress site, you’ve probably come across a few error codes. These HTTP status codes can be confusing. But they actually give you helpful insights about what’s going wrong. Here are some of the most common error codes WordPress users get. ### 403 Forbidden Error 403 error occurs when you're blocked from accessing the page. It happens because of incorrect file permissions. How to fix it: You need to tweak your .htaccess file. Temporarily disable all the security plugins to fix it. Or seek assistance from the hosting provider. ![403 Forbidden error](https://d1k2c27psfzbiv.cloudfront.net/wp-content/uploads/2024/08/12113248/403-Forbidden-error.webp) ### 404 Not Found Error The most common error is 404 not found. This means your permalink settings are broken or your `.htaccess` file is corrupted. How to fix it: Resetting permalinks regenerating the `.htaccess` file will fix 404 errors ![404 Not Found Error](https://d1k2c27psfzbiv.cloudfront.net/wp-content/uploads/2024/08/12113249/404-Page-not-found.webp) ### 400 Bad Request Error 400 bad request usually happens during AJAX requests. Plugin conflicts, theme issues, or bad server settings are the main cause of it. How to fix it: Try disabling plugins one by one. If the issue still persists, switch to a default theme. Sometimes increasing the PHP memory limit would do the trick. ![400 Bad request Error](https://d1k2c27psfzbiv.cloudfront.net/wp-content/uploads/2024/08/12113246/400-Bad-request-Error.webp) ### 415 Unsupported Media Type 415 error means uploading a wrong media file. When you upload a he file type that isn't allowed or your server doesn’t recognize, 415 appears. How to fix it: Check if the server's MIME types are properly configured. And upload only the supported formats. ![415 Unsupported Media Type](https://d1k2c27psfzbiv.cloudfront.net/wp-content/uploads/2024/08/12113250/415-Unsupported-Media-Type.webp) ### 500 Internal Server Error 500 status code means its an internal server error. Plugin conflicts, corrupted WordPress files, or low PHP memory are the main reason for this. How to fix it: Increase your PHP memory limit, disable all plugins, or reinstall core WordPress files. ![500 Internal Server error](https://d1k2c27psfzbiv.cloudfront.net/wp-content/uploads/2024/08/12113251/500-Internal-Server-error.webp) ### 503 Service Unavailable When the server is down for maintenance or overloaded, 503 error appears. A server hungry plugin might cause this issue. How to fix it: Generally it fixes automatically within few minutes. But if the issue still appears, contact your hosting provider. ![503 Service unavailable error](https://d1k2c27psfzbiv.cloudfront.net/wp-content/uploads/2024/08/12113252/503-Service-unavailable-error.webp) ## Final Thoughts Running a WordPress site? Then you must know about HTTP status codes. These codes tell you the details when a page doesn’t load. Sometime you might be at fault and in other cases it might be the server. You can detect issues faster if you know the status codes. You’ll know what went wrong and how to fix. Do read this guide top to bottom. It will help you understand and solve problems quickly. ## WordPress HTTP Error FAQs ### How do I fix an HTTP error in WordPress? Retry the upload first, because a dropped login session causes a surprising number of them. If it fails again, raise the PHP memory limit to 256M, confirm the file is under your upload cap, rename it without special characters, and check that wp-content/uploads is writable. Force the GD image library if every image fails. ### How to fix HTTP error 500 in WordPress? A 500 is a server error, not an upload error, so treat it separately. Rename .htaccess to .htaccess-old and reload the site. If it returns, resave your permalinks to rebuild the file. If it does not, deactivate all plugins, switch to a default theme, and raise the PHP memory limit, testing after each step. ### How do I increase the WordPress memory limit? Add define( 'WP_MEMORY_LIMIT', '256M' ); to wp-config.php, above the line that tells you to stop editing. Some hosts cap memory at the server level, so open Tools > Site Health > Info > Server afterwards and confirm the new value took effect. If it did not, ask your host to raise the PHP memory limit. ### How do I enable WP_DEBUG in WordPress? Open wp-config.php and set define( 'WP_DEBUG', true ); and define( 'WP_DEBUG_LOG', true );. Add define( 'WP_DEBUG_DISPLAY', false ); so visitors never see the errors. WordPress then writes everything to wp-content/debug.log. Switch all three back off once you have found the cause. ### What causes the WordPress white screen of death? A fatal PHP error with error display switched off. The usual triggers are a plugin or theme that is incompatible with your PHP version, a memory limit that runs out mid request, or a syntax error in a file you just edited. Enable WP_DEBUG_LOG and the log will name the file that threw it. ### What is causing a 500 error when logging into WordPress? A login that returns 500 usually points at a corrupted .htaccess file, a security or login plugin that is failing, or a memory limit that runs out while the dashboard loads. Rename .htaccess, then rename the plugins folder over FTP to disable everything at once, and try signing in again. --- # How to change a WordPress username in 2026? (5 methods) URL: https://wpadminify.com/how-to-change-wordpress-username Last updated: 2026-09-02 You created a WordPress account two years ago and called yourself "admin123". Now your client logs into the dashboard and sees that name on every comment, author byline, and password-reset email. You head to Users → Profile to fix it, and the Username field is grayed out with a tooltip that says "Usernames cannot be changed." That is core WordPress behavior. The `user_login` column in the `wp_users` table is locked from the admin UI on purpose. There are five ways around it that actually work without breaking the site, and this guide walks through each one. The new WP Adminify Username Change module, a code snippet for `functions.php`, the phpMyAdmin route that works on any host, WP-CLI for people who live in the terminal, and the native WordPress create-and-delete dance for the cases where everything else is unavailable. ## What are the WordPress username requirements? A WordPress username can be up to 60 characters and may contain letters, numbers, spaces, and the characters `_ . - @`. It has to be unique on the site and cannot be empty once WordPress has sanitized it. Core sets no minimum length, and once the account exists you cannot edit the name from the dashboard. | Rule | What WordPress actually enforces | | --- | --- | | Allowed characters | Letters, numbers, spaces, and `_ . - @`. Everything else is removed by `sanitize_user()` in strict mode | | Maximum length | 60 characters, because `wp_users.user_login` is a `VARCHAR(60)` column | | Minimum length | None in core. The name only has to survive sanitizing without becoming empty | | Uniqueness | One login per site, or per network on Multisite. `username_exists()` blocks duplicates | | Letter case | Stored exactly as typed, but matched case-insensitively at login because of the column collation | | Banned names | Whatever the `illegal_user_logins` filter returns, plus the Banned Names list under Network Settings on Multisite | | Editable later | No. The field is read-only in Users > Profile, which is why the five methods below exist | Two code paths apply those rules differently, and the difference is what people hit when a name will not save. The registration form runs `validate_username()`, which compares your input against the sanitized version and rejects the whole thing when they differ, so you get a visible error. A programmatic `wp_insert_user()` call runs `sanitize_user()` and carries on, so the account is created under a quietly shortened login. If a new user's name does not match what you typed, an unsupported character is the first thing to check. None of this governs the name visitors actually see. WordPress keeps the login in `user_login`, the author-archive slug in `user_nicename`, and the byline in `display_name`, and only the first one is locked. Changing a display name takes five seconds in Users > Profile. Worth knowing before you treat a login as secret: [the WordPress REST API publishes usernames](https://wpadminify.com/wordpress-rest-api-leaks-usernames) on a default install, so an unguessable login protects far less than a strong password and two-factor do. ## Why WordPress Locks the Username Field The `user_login` field is the primary identifier WordPress uses for login authentication. It also seeds entries in `wp_usermeta`, comment author records, post-author relationships, and any third party plugin that stores user references by login string instead of user ID. If WordPress let anyone change a username from the profile screen, sites running a poorly coded plugin would silently break. Comments orphaned. ACF user-relationship fields lost. REST API tokens invalidated. Core takes the safe path and locks the field instead. The [official Users Screen docs](https://wordpress.org/documentation/article/users-screen/) say "Username (cannot be changed)" right there. The methods below all work because they update the same database column directly. They just wrap the change in safeguards: capability checks, username sanitization, session invalidation. That way you don't end up with broken auth and a panicked client. [This feature is coming soon in WP Adminify. We took screenshot from our beta version. It will be available in WP Adminify within 1 or 2 upcoming release.] ## Method 1: WP Adminify Username Change (recommended for most sites) The fastest GUI route. WP Adminify v3.7+ ships a Username Change module under WP Adminify → Security → Users Security. Once it's on, every user edit screen gets a "Change" link beside the username field. Exactly where WordPress should have put it in 2010. ### Step 1 - Enable the Username Change toggle In your WordPress admin, go to WP Adminify → Security. Scroll to the Users Security row, switch it to Show, then toggle Username Change to Yes. The setting saves automatically. ![WP Adminify Security panel with Users Security row expanded and Username Change toggle set to Yes](https://d1k2c27psfzbiv.cloudfront.net/wp-content/uploads/2026/05/03072421/WP-Adminify-Security-panel-with-Users-Security.webp) ### Step 2 - Open the user you want to rename Go to Users → All Users. Click Edit under the user whose username you want to change. Scroll down to the Name section. ### Step 3 - Click "Change" beside the username You will now see a Change link beside the previously-locked Username field. Click it. ![User edit screen showing the Change link beside the username and the new input field with Save Change button]](https://d1k2c27psfzbiv.cloudfront.net/wp-content/uploads/2026/05/03072846/User-edit-screen-showing-the-Change-link.webp) ### Step 4 - Type the new username and save A new text input appears below the original username, plus a blue Save Change button. Type your desired username. WP Adminify validates it on save. It checks against existing usernames, runs WordPress's `sanitize_user()` rules (no spaces, restricted character set), and rejects anything that would conflict. ![Type the new username and save](https://d1k2c27psfzbiv.cloudfront.net/wp-content/uploads/2026/05/03073037/Type-the-new-username-and-save-changes.webp) Click Save Change. The username updates instantly. If you changed your own username, WordPress logs you out and you'll need to log back in with the new username and your existing password (more on this in the "What happens right after" section). Why this is the path I recommend first: WP Adminify handles the capability check (`edit_users` required), runs the change through `wp_update_user()` hooks so other plugins fire correctly, and updates session tokens so the affected user is properly logged out. You get the database accuracy of a manual SQL update without the orphan-data risk that comes from forgetting one of those steps. ## Method 2: Add code to functions.php (developer-friendly, no plugin) If you don't want to install a plugin just for one username change, drop this snippet into your active theme's `functions.php`. Or better, use a [code snippets manager](https://wpadminify.com/features/code-snippets) so it survives a theme switch and you can disable it with a toggle when you're done. The snippet adds an admin-only handler that updates the `user_login` column directly when an authorized request hits it. ```php update( $wpdb->users, array( 'user_login' => $new_username ), array( 'ID' => $user_id ), array( '%s' ), array( '%d' ) ); if ( false === $updated ) { wp_die( 'Database update failed.' ); } // Invalidate user session tokens so they're forced to log in again. $sessions = WP_Session_Tokens::get_instance( $user_id ); $sessions->destroy_all(); wp_die( sprintf( 'Username changed to %s. Log in again.', esc_html( $new_username ), esc_url( wp_login_url() ) ) ); } ``` How to use it: - Add the snippet to `functions.php` in your active theme, or use the [code snippets manager](https://wpadminify.com/features/code-snippets) in WP Adminify. - While logged in as an administrator, visit: `https://yoursite.com/wp-admin/?adminify_change_username=1&user_id=2&new_username=newname` - Replace `2` with the actual user ID and `newname` with the username you want. - Remove the snippet right after the change. A username-change handler accessible via URL is a security risk, even with the capability check. Don't leave it in. What this code does, line by line: - `current_user_can( 'edit_users' )` blocks anyone who isn't an admin. - `sanitize_user()` with the strict flag strips invalid characters that would break login. - `username_exists()` stops a duplicate-username collision that would corrupt the users table. - `$wpdb->update()` on `$wpdb->users` runs a direct UPDATE on the `user_login` column with prepared placeholders. - `WP_Session_Tokens::destroy_all()` invalidates the affected user's sessions so they have to re-authenticate. This is functionally what WP Adminify does behind the GUI button. Minus the validation UI, the audit log entry, and the protection against accidentally renaming the only admin out of dashboard access. ## Method 3: Edit wp_users directly in phpMyAdmin The database-level fallback. Works on any host with phpMyAdmin (cPanel, Plesk, most managed hosts). Use this when you can't log into WordPress at all. For example, if a previous admin locked you out of the dashboard or your only admin account is the one you're trying to rename and the GUI methods can't help. ### Step 1 - Open phpMyAdmin and select the WordPress database From your hosting control panel, open phpMyAdmin and click your WordPress database in the left sidebar. If you have multiple databases, the right one is referenced as `DB_NAME` in your `wp-config.php` file. ### Step 2 - Open the wp_users table Find the `wp_users` table. Your prefix may differ - check `$table_prefix` in `wp-config.php`. Click it to see the user list. ### Step 3 - Edit the row Click Edit beside the user you want to rename. Find the `user_login` field. Change it to your new username. Click Go at the bottom to save. ![phpMyAdmin showing the wp_users row with user_login field highlighted for edit]](https://d1k2c27psfzbiv.cloudfront.net/wp-content/uploads/2026/05/03074038/phpMyAdmin-showing-the-wp_users-row-with-user_login-field-highlighted-for-edit.webp) One thing not to touch: `user_nicename`. That is the URL-friendly version of the display name and WordPress regenerates it from the new username automatically when the user updates their profile next. Editing it manually here can desync the author archive slug. ### SQL alternative for the terminal-friendly If you have command-line MySQL access: ``` UPDATE wp_users SET user_login = 'newname' WHERE ID = 2; ``` One line. Done. Replace `wp_` with your actual table prefix, `newname` with the new username, and `2` with the user ID. ## Method 4: WP-CLI command (one-liner) If your host supports WP-CLI (most managed hosts do - Kinsta, WP Engine, Cloudways, SiteGround all bundle it), this is the quickest method. ``` wp db query "UPDATE $(wp db prefix)users SET user_login='newname' WHERE ID=2;" ``` Or, if you prefer the safer wrapper that also runs WordPress hooks: ``` wp user update 2 --user_login=newname ``` One thing to watch: `wp user update` doesn't always allow `user_login` changes on every WP-CLI version. If it errors, fall back to the raw SQL form above. Either way, follow up with: ``` wp user session destroy 2 --all ``` That invalidates the renamed user's existing sessions so they have to log in again with the new username. ## Method 5: Create a new user and delete the old one (native WP, zero code) This is the route the WordPress.org documentation suggests because it doesn't touch the database directly. It is safe but slow, and it changes the user ID, which causes problems on sites where content is referenced by user ID. ### Step 1 - Create the new user Go to Users → Add New. Enter the new username, the same email as the old account (you'll need to temporarily change the old account's email to a placeholder first, since WordPress requires unique emails). Set the role to match the old user. ### Step 2 - Log out of the old account You can't delete the user you're currently logged in as. Log out and log back in as another administrator. ### Step 3 - Delete the old user and reassign content Go to Users → All Users. Hover over the old username and click Delete. WordPress will ask what to do with the user's content. Choose Attribute all content to and pick your new username from the dropdown. Trade-offs to know about: - You lose the original user ID. Any plugin that stores data against user ID (like ACF user fields, Easy Digital Downloads order history, BuddyBoss profiles) needs to be migrated manually. - Comment authorship transfers, but custom meta tied to the old ID does not. - Email notification subscriptions usually need to be re-confirmed. I'd only use this on a small site with no third party plugins that lean on user ID. For everything else, the first four methods are safer. ## Comparison table: pick the right method | Method | Difficulty | Risk | Best for | Preserves user ID? | | --- | --- | --- | --- | --- | | 1. WP Adminify Username Change | Easy (GUI) | Low | Most sites - agencies, non-developers, multisite | Yes | | 2. functions.php code snippet | Medium | Medium (URL-triggered, must be removed after) | Developers, one-off changes, no plugin install | Yes | | 3. phpMyAdmin SQL edit | Medium | Medium (one typo can corrupt the row) | Locked out of admin, hosting-only access | Yes | | 4. WP-CLI command | Easy (if CLI available) | Low | Managed hosts, server-savvy admins | Yes | | 5. Create + delete (native WP) | Easy | High (loses user ID, breaks plugin meta) | Small sites, no third party user-meta dependencies | No | ## What happens right after you change a username Most guides skip this part. Three things happen the moment `user_login` updates: - If you changed your own username, you get logged out immediately. WordPress invalidates your session because the cookie is keyed against the old `user_login`. Log back in with the new username and your existing password. The password doesn't change. - If you changed someone else's username, they get logged out the next time their cookie is validated. They'll see the login screen and need to use the new username. - The author archive URL changes. If your author URL was `yoursite.com/author/oldname/`, it now becomes `yoursite.com/author/newname/`. The old URL returns 404. Set up a 301 redirect from the old slug to the new one if the page had backlinks or organic traffic. What does not change: - The user ID stays the same (methods 1 through 4). - The display name (the public byline) stays the same unless you also update it. - The email address stays the same. - The password stays the same. - All user roles, capabilities, and meta stay the same. - Authored posts, comments, and media uploads stay attached to the same user. ## Common issues and fixes ### "Username already exists" error WordPress requires unique usernames. Pick a different one or, if the duplicate is an old test account you don't need, delete that account first. ### The change saved but I'm still seeing the old username on posts The byline shown publicly is `display_name`, not `user_login`. Go to Users → Profile and update Display name publicly as to match your new preference. ### I'm locked out after changing my own username Use the new username with your existing password. If that fails, request a password reset. The reset link is sent to your email address, which didn't change. If you've also lost email access, follow the [password reset guide](https://wpadminify.com/how-to-change-or-reset-wordpress-admin-password) via phpMyAdmin. ### Author archive URL returns 404 The slug changed with the username. Either set up a 301 redirect (use your SEO plugin or the [URL redirection feature](https://wpadminify.com/features/url-redirection)), or manually update `user_nicename` in `wp_users` back to the old slug if SEO is the priority. ### WooCommerce orders show "Guest" instead of the renamed customer WooCommerce stores the customer reference by user ID, not username. So this shouldn't happen with methods 1 through 4. If you used method 5 (create + delete), the user ID changed and you'll need to manually reassign the orders to the new account from WooCommerce → Orders. ### Multisite: which database table do I edit? On Multisite, users are global. They live in the network-level `wp_users` table, not the per-subsite `wp_2_users` table. Edit the network table. The username change applies across every subsite the user has access to. ## Can wp_update_user() change user_login? No. `wp_update_user()` will happily update the email, display name, role, password and the rest, but it does not change `user_login`. Pass a new login in the array and the call still succeeds, which is what makes this so confusing: nothing errors, and the username is simply unchanged. WordPress treats the login as a fixed identifier once the account exists. So if you are scripting this, do not reach for `wp_update_user()`. Use one of the methods above instead: WP-CLI for a single command, a direct `wp_users` update when you are already in the database, or create a replacement user and reassign their content. Two fields nearby often get mistaken for the login and are updatable. `user_nicename` is the URL-safe slug used in author archive links, and `display_name` is the name shown publicly on posts. Changing either leaves the actual login untouched, which is usually all you need when the goal is to stop a real name appearing on the front end. ## WordPress Username FAQs ### Can I change the WordPress admin username without a plugin? Yes. Use phpMyAdmin to update the user_login column in the wp_users table, run a WP-CLI command, or drop the functions.php snippet from method 2 above. All three work without installing a plugin. WP Adminify is faster and safer for non-developers, but no plugin is technically required. ### Will changing my WordPress username log me out? Yes. If you change your own username, WordPress invalidates your session cookie immediately and redirects you to the login screen. Log back in with the new username and your existing password. Other users you rename get logged out the next time their session is validated. ### Does changing the username also change my WordPress password? No. Username and password are stored in separate columns (user_login and user_pass). Renaming the username has no effect on the password. The same password works after the change. ### Will my posts and comments stay attached to my account after I change the username? Yes, as long as you use methods 1 through 4 (which preserve the user ID). Posts, comments, and media uploads in WordPress are linked by user ID, not username, so the relationships survive the rename. Method 5 (create + delete) does not preserve the ID, which is why it's last on the list. ### Can I change a username on WordPress Multisite? Yes. Use any of methods 1 through 4 from the Network Admin. The change applies across every subsite the user has access to, since users on Multisite are stored in the network-level wp_users table. WP Adminify works the same way on Multisite as on a single site. ### What characters are allowed in a WordPress username? Letters, numbers, spaces, underscores, hyphens, periods, and the @ symbol. Spaces are technically allowed in user_login via sanitize_user() with the strict flag off, but most admins avoid them. WordPress automatically trims and lowercases the username on creation, but does not on direct database updates. That's why the WP Adminify and code methods both run sanitize_user() first. ### Why does WordPress not let me change usernames from the profile screen? WordPress core locks the username field because user_login is referenced by countless plugins, login cookies, and external integrations. Allowing arbitrary username changes from the profile UI would silently break sites where third party code stores user references by login string instead of user ID. The methods in this guide all wrap the change in safety checks (capability checks, session invalidation, duplicate detection) that the native profile screen would lack. ### Is there a free plugin to change WordPress usernames? Yes. The WP Adminify pro on [WordPress.org](https://wordpress.org/plugins/adminify/) includes the Username Change module from version 4.1.16+. Older alternatives include "Username Changer" and "Easy Username Updater". Both work but only handle the rename and don't bundle the rest of the admin customization stack. ### What is a WordPress username? A WordPress username is the value stored in the `user_login` column of the `wp_users` table. It is what you type on the login screen, it is set once when the account is created, and it is separate from your display name, your nickname, and your email address. WordPress deliberately makes it read-only in Users > Profile. ### What is a good WordPress username? A short, lowercase name that is not `admin`, not the site name, and not identical to your public display name. Logins surface through author archives and the REST API on a default install, so treat one as public rather than secret. The real protection is a strong password and two-factor, not an unguessable login. ### What are the requirements for a username? Up to 60 characters, built only from letters, numbers, spaces, and the characters `_ . - @`, and unique across the site. Core sets no minimum beyond being non-empty after sanitizing. Anything else is stripped by `sanitize_user()`, and the registration form rejects the name outright rather than silently trimming it. ## Conclusion Five methods, one job. Pick by use case: - Most sites: WP Adminify Username Change. GUI, safe, audit-logged. - One-off, no plugin: the functions.php snippet. Just remove it after the change. - Locked out of admin: phpMyAdmin SQL edit. - Server access available: WP-CLI one-liner. - Tiny site, no third party user data: create new user + delete old. Last resort. Whichever method you pick, remember the post-change behavior. Changing your own username logs you out, the password stays the same, and the author archive URL updates. If you want the safest path plus 60+ other admin tools in the same plugin, [turn on the Security module in WP Adminify](https://wpadminify.com/features/security). --- # Best Black Friday SaaS Deals 2026 - Top Tools for Growth URL: https://wpadminify.com/black-friday-saas-deals Last updated: 2026-08-31 Let’s be honest, SaaS subscriptions add up fast. When you are using 100+ tools and pay $10 for each tool, that means you are paying $1000 in a month. Which is huge. What if your one smart move can cut 50% of your software expenses? Thanks to black friday SaaS deals. I am going to share most of the necessary SaaS tools with you within a single post. Believe me, you won’t get bored. This is the only time of year when premium tools like Semrush, HubSpot, and Ahrefs provide huge discounts. I tried my best to categorize the deals, just use the table of contents and scroll to your preferred category within a click. The problem? Searching through hundreds of websites for real deals takes hours - and half of what you find is outdated, fake, or just plain useless. The good news is, I have done this heavy lifting for you. I normally add the following deals after having a discussion with the SaaS tools developer. I add and update the maximum discount of each SaaS tool mentioned below in real time. ## Submit Your Black Friday SaaS Deal Sharing is caring. If you found a good deal, then please [submit the deal](https://forms.gle/R9LsbobB8GV4LNvP6) information. Or if you are a product owner, I welcome you to submit your deals by using the Google form. [Submit Your Deals](https://forms.gle/R9LsbobB8GV4LNvP6) In this live-updated guide, you’ll find: ✅ Hand-verified 2026 Black Friday SaaS deals (no fake "10% off" gimmicks!) ⚡ Lifetime licenses & 50 - 90% discounts on top tools 📅 Early-bird sales (Generally live 2 weeks before Black Friday) 🚨 Urgency alerts: Deals expire November 29! Bookmark this page - we refresh hourly. ## Why Trust This List? In a sea of AI-generated content, how do you know these offers are legit? Short answer: I examine every SaaS discount like a forensic accountant. I will never mention a tool that is not worth it. Watch the Following Steps Early monitoring: I track 200+ different categories of SaaS vendors. I check their pricing, history, previous black friday offer, and talk with the founder or anyone from their team. Pricing: No fake discounts allowed. I use the web archive and check their normal pricing properly. If I get any hints of an increasing price and then provide a discount, then it’s cut. No AI listicles: Every deal is human-tested, and you can always contact me via comment or website contact form. Transparency: I will write a note in the description if a vendor offers worse deals than 2024 ( rare, but I’ll warn you). ## Using WordPress, Then You must try - If you are using WordPress website for your business or personal or clients user. Then using the following plugin is must for you. Listing save ## Cold Email SaaS Deals Save time and convert emails into successful leads with the help of cold email SaaS tools. Some tools, like Orkap, offer custom event-based webhooks, which provide extra integration possibilities with any CRM or other tools. Get the best cold email Black Friday SaaS deals now, and you’ll never have to regret it. Orkap Orkap is a smart outreach platform that turns leads into backlinks. It manages campaigns, automates personalized emails and follow-ups, and provides tools for teams, analytics, and integration to scale link-building efforts. Deal: FREE For BETA Ongoing Coupon: Not applicable [Get The Deal](https://orkap.com/login) MailBluster MailBluster is a super affordable all-in-one email marketing platform that comes with prominent features, including advanced email automation, segmentation, a drag-and-drop editor, premade responsive email templates, forms, and more capabilities. Deal: 50% off on the upgrade plan & up to 30% off on email sending volume 19th Nov - 3rd Dec Coupon: MBBFCM25 [Get The Deal](https://mailbluster.com/offer?utm_source=mailbluster&utm_medium=dealbutton&utm_campaign=bfcm25) ## Management SAAS Tools A Management SaaS tool is a cloud-based platform that consolidates project, team, and customer data into a single system. It provides real-time visibility and streamlines workflows, empowering managers to drive productivity and make informed, data-driven decisions. Menumium Menumium is the all-in-one, cloud-based restaurant management solution. It helps food businesses run better and serve customers more quickly. From cafes to fast food outlets to chains, Menumium gives you multiple restaurant solutions in one easy-to-use system. Deal: 50% Off 19th Nov - 2nd Dec Coupon: Auto-Applied [Get The Deal](https://menumium.com/restaurant-management-software-lifetime-deal/?utm_source=wp-spotlight&utm_medium=referral&utm_campaign=bfcm-round-up-2025) TBA TBA Deal: TBA TBA Coupon: TBA Get The Deal ## Social Media SaaS Tools The following tools will help you schedule posts across multiple social media platforms from a single dashboard. Get the maximum boost for your social handles with the help of the tools I’ve mentioned. Don’t be surprised to see Canva on my social media tools list - I use the Pro version of Canva to create my social media posts. Grab the best Social Media SaaS deals from my list. TBA TBA Deal: TBA TBA Coupon: TBA Get The Deal TBA TBA Deal: TBA TBA Coupon: TBA Get The Deal ## Pro Tips for Maximizing Savings Outsmart your SaaS vendors and stack discounts like a pro: Stack Coupons: Some SaaS tools drop their pricing in Black Friday, but a lot of offer general 10% to 20% welcome discount. Subscribe their mail list and maybe you will get a coupon from their automation. Try to apply this which will provide you extra 10% to 20%. Buy Multi-Year Plans: Tools like Cloudflare and GitLab offer 15-25% extra off on 2-3-year commitments during BFCM. Exploit Education/Non-Profit Discounts: Canva Pro and Notion grant 50% off for verified schools/NGOs - stackable with BF deals. If you have verified schools or NGOs, then try this. Hunt "SECRET DEAL" Tags: We negotiated unadvertised offers (e.g., Orkap offer 10% more for subscribers) – look for “Tag” icons in our list! Pro Move: Bookmark this roundup blog post. I’ll add live deal-stacking hacks starting November 13! ## Black Friday SaaS Deals FAQs save ### When do 2025 Black Friday SaaS deals start? Most launch November 13-20. Sprout Social, Canva, and HubSpot often drop early-bird deals November 1. ### Are Black Friday SaaS deals better than Cyber Monday? It’s tough to answer. But in general, the discount remains the same for 90% SaaS providers. ### Can I upgrade my existing plan with a Black Friday deal? Yes! Intercom, Zendesk, Orkap and ClickUp let you apply discounts mid-cycle. Contact support with the coupon code. ### Which tools offer lifetime deals? Orkap (40% lifetime access), GMass (30% lifetime access), AppSumo tools (e.g., Smartlead), and Loom (occasional LTDs). ### How do I avoid fake SaaS discounts? When you notice "Deals" under 30%, no historic price tracking, or limited-time claims in October. You should skip this offer. ## Conclusion Black Friday is not just about upgrading your TVs and electronic gadgets. It’s time to upgrade your SaaS tools. The best part? Grab a SaaS tool now, and next Black Friday you can either renew it - or skip it and switch to something even better. But remember: These discounts vanish on December 9. Most of the mentioned SaaS deals don’t run fake campaigns or discounts to attract customers. The commitment is Procrastination = paying full price in 2026. Got questions? Drop them below – I reply in 15 - 30 mins during BFCM week! --- # Best WordPress Black Friday Deals & Discount 2026 [UPDATE] URL: https://wpadminify.com/wordpress-black-friday-deals Last updated: 2026-08-31 Black Friday Sales aren’t just for buying your home appliances. It’s a golden opportunity for WordPress users to grab a new Theme, Plugin, or hosting for their upcoming or existing websites. To celebrate WordPress Black Friday deals, I have covered 100+ different types of WordPress Plugins and Themes inside this roundup post. No matter if you are a blogger who is searching for some new Themes, a Developer looking to get some pro Plugins, or a digital entrepreneur who wants to enhance your site’s performance, this is your moment. I am dedicating time to test each Plugin and speaking with different Plugin authors before listing them in this Black Friday deals roundup post. You can grab any items from my list without hesitation. Here’s a twist for you: If you find any WordPress-related products in the market that are worth mentioning and want me to add them to this roundup post, please click on the [Submit Your Deals](https://forms.gle/GHJf3QSWkX4P9ymL8) button and fill out the form. I will happily update my deals with your submitted products. [Submit Your Deals](https://forms.gle/GHJf3QSWkX4P9ymL8) Why should you trust this list? As mentioned earlier, I am updating my deals collection after testing each and every Plugin or Theme. As for hosting - I have personally used each of the mentioned hosting providers at least once in my lifetime. ## Why WordPress black friday deals matter for you? I call Black Friday a strategic opportunity for WordPress users who know how to invest in high-quality WordPress tools instead of getting scammed. According to some stats, a user can get 40% more products on average during Black Friday sales. Upgrade your Pro plugin list: Over time, you will notice a lot of better alternative plugins appear on the market. You should adapt yourself with time, so Black Friday deals are the best opportunity for you to grab all alternatives plus the new plugin on your list. Exclusive Bundles: It’s always better to stick with an ecosystem. Many authors provide a bundle of their different plugins, like the WP Adminify Bundle or themes, which are 100% compatible and will provide you with a better experience. When you purchase a bundle, it will provide you with maximum ROI in the future. Reset yourself: Upgrade your outdated plugins list. Switch to faster hosting, and maximize your investments. Pro Tip: Bookmark this page! I am tracking the best deals around the web and updating this roundup post. Feel free to visit once you are ready to purchase and choose your favorite deals from my WordPress Black Friday Deals roundup. Tired of Wasting Time on Cold Emails That Get Ignored? You're not alone. We're launching a new SaaS built to solve exactly that. Become a beta tester, get access to premium features at no cost. [Get Beta Access & Boost Replies](https://orkap.com/login) ## Top WordPress Black Friday Deals So, are you ready to jump into the ocean of deals? Below you will find 100+ WordPress Black Friday deals across different types of themes, plugins, hosting plans, and productivity tools. Whether you are launching a new website, improving performance and SEO, or upgrading to premium features, these limited-time deals can become your assets in the future. Don’t miss out - scroll slowly, compare different offers, and get the ones that match your needs. DON'T SKIP THE FIRST 3 PLUGINS. ![WP Adminify Black Friday Deals](https://d1k2c27psfzbiv.cloudfront.net/wp-content/uploads/2023/11/02110213/WP-Adminify-Black-Friday-Deals-1.webp) ### WP Adminify Introducing WP Adminify, the ultimate WordPress dashboard customization plugin that offers a wide range of powerful features within an intuitive and user-friendly platform. With extensive dashboard customization, admin menu editing, dark mode, white label branding, and productivity tools, WP Adminify provides complete control over your dashboard, allowing you to skyrocket your productivity. This versatile Plugin is highly recommended for website administrators, eCommerce websites, and agencies, making it a valuable asset for all types of WordPress users. Take advantage of the Black Friday offer and get WP Adminify now at a discounted price of up to 55% off to significantly boost productivity and take back control of your time. Don't miss out on this opportunity to personalize your admin experience, security, and work faster with WP Adminify this Black Friday. Deal: Up to 55% 18th Nov - 30th Nov Coupon: Not Needed [Get The Deal](https://wpadminify.com/deals) [See How It Works](https://wpadminify.com/features) ![WP Spotlight BFCM Deal](https://d1k2c27psfzbiv.cloudfront.net/wp-content/uploads/2024/11/16064644/WP-Spotlight-BFCM-Deal.webp) ### WP Spotlight Are you tired of navigating through endless menus in your WordPress dashboard? WP Spotlight is here to revolutionize your workflow! With its faster, accurate search capabilities, you can find what you need instantly and get back to your work without distractions. This Black Friday, take advantage of our 55% OFF offer and experience the ultimate efficiency upgrade. WP Spotlight empowers you to manage user access and details with just a few keystrokes. Search by role, directly email search, and profile edits are just a glimpse of what you can do. No more clicking through multiple screens, everything is at your fingertips. Ready to enhance your productivity? Don't miss out on this incredible deal! Plugin and theme management have never been easier. With WP Spotlight, you can find, install, manage, and even safely delete themes in seconds. Enjoy quick access to the theme repository and instant plugin management, ensuring your site stays up-to-date and clutter-free. Take control of your site like never before with WP Spotlight’s seamless navigation features. From content and media management to lightning-fast multisite switching, WP Spotlight covers it all. Create and manage posts, upload media, and switch between sites effortlessly. Customize your workflow with key binds and keyboard shortcuts. This Black Friday, invest in WP Spotlight and save 55%. Transform your WordPress experience and discover the power of efficient site management today! Deal: Flat 50% OFF 16th Nov - 6th Dec Coupon: BFCM50 [Get The Deal](https://wpspotlight.pro/) [See How It Works](https://wpspotlight.pro/features) ![Admin Bar Editor Black Friday Deals](https://d1k2c27psfzbiv.cloudfront.net/wp-content/uploads/2023/11/02110149/Admin-Bar-Editor-Black-Friday-Deals.webp) ### Admin Bar Editor Maximize your control over the WordPress admin bar with the Admin Bar Editor. Customize the backend and frontend experiences by hiding, renaming, or reordering menu items based on user types. Add personalized links and icons, customize the appearance, and build hierarchical menus with up to three levels. Utilize features like drag-and-drop reordering, conditional visibility based on user roles, and various positioning options to create a tailored, user-friendly workspace. Ideal for agencies and eCommerce websites, the Admin Bar Editor is currently available at a 50% discount for Black Friday. Seize this opportunity to unleash the full potential of your admin bar! Deal: Flat 5o% OFF 18th Nov - 30th Nov Coupon: BFCM50 [Get The Deal](https://jeweltheme.com/admin-bar-editor) [Try Live Demo](https://demo.pixarlabs.com/?pl-product=admin-bar) ![Loginfy Black Friday Deals](https://d1k2c27psfzbiv.cloudfront.net/wp-content/uploads/2023/11/02110154/Loginfy-Black-Friday-Deals.webp) ### Loginfy - WordPress login Page Customizer Style your WordPress login page with Loginfy! Customize your logo, color scheme, and typography to align with your brand's identity. Choose from a variety of background options, including colors, images, videos, or gradients, and enhance the form and button styling for a polished look. Utilize pre-built templates and live preview to effortlessly create the ideal login experience. With multilingual support and mobile responsiveness, Loginfy caters to a global audience. Whether you're a novice or experienced WordPress user, take advantage of Loginfy's Black Friday offer - a 50% discount on all customization options. Don't miss out on this opportunity to create unlimited login page designs. Deal: Flat 5o% OFF 18th Nov - 30th Nov Coupon: BFCM50 [Get The Deal](https://wpadminify.com/loginfy/pricing) [Explore Features](https://wpadminify.com/loginfy) ![Master Addons Black Friday Deals](https://d1k2c27psfzbiv.cloudfront.net/wp-content/uploads/2023/11/02110205/Master-Addons-Black-Friday-Deals.webp) ### Master Addons For Elementor Enhance your Elementor experience with over 60 powerful widgets and extensions. Elevate your website with dynamic elements such as animated headlines, progress bars, flip boxes, and image hover effects. Unleash your creativity with unique layouts using our Header & Footer builder, custom CSS, floating effects, and display conditions. With Master Addons, building your dream website has never been easier. Take advantage of our special Black Friday offer and get Master Addons at a flat 50% OFF. Elevate your Elementor website to new heights today! Deal: Flat 5o% OFF 18th Nov - 30th Nov Coupon: BFCM50 [Get The Deal](https://master-addons.com/pricing) [Live Demo](https://demo.pixarlabs.com/?pl-product=master-addons) ![Master Blocks Black Friday Deals](https://d1k2c27psfzbiv.cloudfront.net/wp-content/uploads/2023/11/02110209/Master-Blocks-Black-Friday-Deals.webp) ### Master Blocks For Elementor Discover the power of Master Blocks with 50+ versatile blocks and templates designed to simplify stunning website creation for all skill levels. Whether you need creative content blocks or powerful marketing features, our comprehensive collection has everything you need for beautiful, functional layouts. With intuitive tools, advanced customization options, and a rich template library, Master Blocks streamlines the website design process. Additionally, our performance-optimized blocks guarantee fast-loading and responsive sites. Don't miss out on our Black Friday offer - get Master Blocks at a 50% discount and start crafting beautiful content for your website today! Deal: Flat 5o% OFF 18th Nov - 30th Nov Coupon: BFCM50 [Get The Deal](https://jeweltheme.com/master-blocks/pricing) [Explore Features](https://jeweltheme.com/master-blocks) ## Must-Have WordPress Black Friday Deals Discover exclusive discounts, bundles, and limited-time offers in our latest content. Whether you're looking for special deals on products or services, this content has everything you need to save big. This comprehensive guide highlights the best deals on these essential tools, helping you optimize your website and protect it from potential threats. Don't miss out on these incredible opportunities to get more for less. Listing save Listing save ### SEO Plugins Poor search engine rankings can limit your website's visibility. Without effective SEO, your site struggles to attract organic traffic. SEO plugins optimize your content and site structure, boosting your search engine rankings. Listing save #### Performance Plugins Slow loading times can drive visitors away from your site. High bounce rates and low user satisfaction can hurt your business. Performance plugins enhance your site's speed and efficiency, ensuring a smooth user experience. Listing save #### Security Plugins WordPress sites are frequently targeted by hackers, risking data breaches and site downtime. Without proper security, your site's integrity and user trust can be compromised. Security plugins offer robust protection features to keep your website safe from threats. Listing save #### WooCommerce Plugins Running an online store without the right tools can be challenging. Managing products, payments, and customers manually can lead to errors and lost sales. WooCommerce plugins streamline your eCommerce operations, making store management a breeze. Listing save #### Page Builders Designing a stunning website can be daunting without coding skills. Using basic editors can limit your creativity and design flexibility. Page builders offer drag-and-drop functionality, making it easy to design professional websites. Listing save #### Contact Form Plugins Visitors need an easy way to get in touch with you. Complicated or absent contact forms can lead to missed opportunities. Contact form plugins make it simple to create and manage forms, facilitating smooth communication. Listing save #### CRM Plugins Managing customer relationships manually can be time-consuming. Inconsistent follow-ups and missed interactions can cost you loyal customers. CRM plugins help automate and organize customer interactions, enhancing relationship management. Listing save #### Social Media Plugins Engaging your audience on multiple social platforms can be tricky. Inconsistent posting and tracking can dilute your social media presence. Social media plugins simplify sharing and managing content across platforms, boosting engagement. Listing save #### Marketing Plugins Marketing efforts need to be effective and streamlined. Juggling various marketing tasks manually can be overwhelming. Marketing plugins automate and optimize your marketing strategies, driving better results. Listing save #### Backup Plugins Losing your website data due to unforeseen events can be disastrous. Without backups, recovering lost data can be impossible. Backup plugins ensure your site’s data is securely stored and easily retrievable. Listing save #### Email Marketing Plugins Email campaigns need to be targeted and effective. Managing lists and sending emails manually can be inefficient. Email marketing plugins automate email campaigns, enhancing efficiency and targeting. Listing save #### Analytics Plugins Understanding your site's performance is crucial for growth. Without insights, you can't make informed decisions to improve your site. Analytics plugins provide valuable data on your site's performance, helping you optimize it. Listing save #### Membership Plugins Building a membership site requires specialized tools. Without proper management, handling members can be chaotic. Membership plugins help you create and manage membership sites effectively, fostering community. Listing save #### AI-Powered Plugins Boost your website's performance with top AI-powered WordPress plugins, now available at unbeatable Black Friday discounts. Don't miss out on these game-changing deals! Listing save #### Multilingual Plugins Reaching a global audience requires content in multiple languages. Manually translating and managing content can be cumbersome. Multilingual plugins simplify creating and managing translations, broadening your reach. Listing save #### Other Plugins If you are searching for some productive plugin that can assist you to organize your website feel free to check out these deals. Listing save #### Best Bundle Deals Unbeatable Black Friday & Cyber Monday WordPress bundle deals! Limited time offers on premium plugins & themes. Save big now! Listing save ### Best WordPress Themes Deal Explore the world of premium themes and theme builders with exclusive discounts and offers. Discover the latest trends and innovations in website design, and learn how to elevate your online presence with top-quality themes. Whether you're a beginner or an experienced developer, these discounts will help you create stunning websites with ease. Listing save ### Best WordPress Hosting Deals Looking for the best WordPress hosting deals? Look no further! This comprehensive list of the top hosting deals available, including discounts, special offers, and exclusive promotions. Whether you're a beginner or an experienced WordPress user, you'll find the perfect hosting solution for your website. Don't miss out on these amazing deals! Choose Your Ideal Hosting Provider and Take Your Website to the Next Level Today! Listing save Navigate to your desired category from our listings to compare multiple plugins, themes, and hosting options for your business needs. Find the best solutions to enhance your WordPress experience. ## How to Make the Most of Black Friday Deals? I’m pretty sure you have decent knowledge of WordPress, themes, plugins, and hosting. Still, I recommend that you research different types of deals and create a suitable shopping list. Also, it’s better to keep 20% of your budget for Cyber Monday or extra deals. I mean, you should invest 20% of your budget in additional deals that you believe will be worthwhile in the future. Do Proper Research and Create a Plan Before Black Friday, make a list of your desired products. While making the list, I suggest adding alternatives to your desired products. You can take help from ChatGPT or Gemini to find substitutes. Make Your Budget As a tech person, I know it’s easy to overspend in the excitement of Black Friday. I’m no different. No matter how much I try to stick to a budget, every year, I overspend. So it’s natural. Just think carefully about whether you need a tool before making a purchase. Sign Up for Your Preferred Tools Most WordPress deal providers offer newsletters before they release their Black Friday deals. Just sign up and take advantage of these offers. Be Mindful of Return Policies Before purchasing any tools, please read their return policies. This ensures that you can easily return or exchange any items if needed. ## Relevant question for Black Friday Deals (FAQ) I’ve brought some questions from various types of audiences like you. Before jumping to any conclusions, I recommend reviewing the following questions and answers. ### When do these Black Friday deals start and end? Most of my mentioned deals activate during Thanksgiving Week (US) and expire by Cyber Monday. The fourth Friday in November is Black Friday, and three days later, Cyber Monday starts. ### What are the best WordPress theme deals during Black Friday? There are top theme providers like Astra and Divi that offer massive discounts during Black Friday. ### Is Black Friday a good time to buy premium WordPress tools? Absolutely. Black Friday and Cyber Monday deliver the year’s biggest discounts on plugins, themes, page builders, and hosting, often up to 70% off or more on premium tools. ### Are there hosting deals for WordPress during Black Friday? Yes, you can take a look at my Black Friday hosting deals listing and choose the best hosting like Kinsta or Hostinger. Hostinger offers up to 85% off on managed WordPress hosting. ### Do Black Friday deals include updates and support? Yes. Discounted purchases during Black Friday come with the full term of product updates and support. But some companies offer no refunds for discounted products. ### Will there be better deals on Cyber Monday? Normally, 90% of Black Friday deals match Cyber Monday deals. If any of my mentioned deals announce a deeper discount later, I will update the post. ### Are these deals only for new customers? Over 70% apply to new users during purchase. But many tools also offer renewal or upgrade for existing users. ### What should I watch for to avoid missing out or scam deals? Never purchase anything from unofficial websites. There are a lot of nulled plugin provider sites. Stay away from nulled providers and always purchase from the official website. ### Do you have affiliate links? Yes, some of my mentioned plugins, themes, and hosting contain affiliate links. I earn a small commission if you purchase from my referral link. It will not cost you extra, but it helps us research and find the perfect tools for you. ### Can I request a specific deal to be added? Absolutely! Just comment below or contact us via our website contact form. Please mention “Black Friday Collaboration” in your subject line, and I will get in touch with you if I need any additional info regarding listing your deals. ## Conclusion Tech and non-tech people wait a long time to grab the best WordPress Black Friday deals. It’s a win-win situation for both product authors and users. These deals offer an opportunity to save money from the user’s perspective. On the other hand, for plugin or theme authors, Black Friday is a way to attract new customers and boost sales and marketing. Black Friday deals can be especially beneficial for those on a budget, trying to get the maximum number of tools within their limits. If you’d like to kick-start your business in the upcoming year, you shouldn’t miss these Black Friday offers. Wishing you good luck in saving money and time. Happy #Thanksgiving from the WP Adminify Team. Disclosure: This post contains affiliate links. If you click through and make a purchase, I may earn a small commission at no extra cost to you. Thank you for your support! --- # How to Create a Custom WordPress Login Form (3 Methods) URL: https://wpadminify.com/wordpress-custom-login-form Last updated: 2026-08-30 The login form on `wp-login.php` is the one part of that screen whose HTML you cannot touch. The logo, the background, the footer links, all of that is yours to replace. The form markup is rendered by core, and editing core is not an option. So a custom login form for WordPress isn't one job. It's three, and they use three different tools. You can restyle the core form with CSS, rewrite the words in it with a filter, or skip `wp-login.php` entirely and put a real login form on a normal page of your site. Most people who search for this need the first one and end up reading about the third, which is how an afternoon disappears. ![Default WordPress login form on the left beside the same form restyled with custom CSS on wp-login.php on the right](https://d1k2c27psfzbiv.cloudfront.net/wp-content/uploads/2026/08/27121146/wp-login-form-default-vs-styled.webp) ## The three methods, and how to pick one Pick by where the form has to live and what has to change about it. | Method | What it changes | Use it when | | --- | --- | --- | | 1. CSS on `wp-login.php` | Colours, spacing, borders, shadows, focus states | You want a branded login screen for clients and staff, fast | | 2. The `gettext` filter | Label and button text: "Username or Email Address", "Log In" | The wording is wrong for your audience | | 3. `wp_login_form()` | Where the form lives: a page in your theme, header and footer intact | Members should never see a page that looks like the WordPress admin | Methods 1 and 2 stack. They're both operating on the same core form, one on its appearance and one on its strings, and you'll usually want both. Method 3 is a different page altogether, and it does not remove or replace the first two. Building it leaves the core login page exactly where it was. If your goal is the whole login screen rather than just the form inside it, [the full login page customization guide](https://wpadminify.com/customize-wordpress-login-page) covers the logo, background and links as well. This post stays on the form. ## Method 1: restyle the form with CSS The form is standard HTML with stable, predictable classes. Four layers, styled separately, and worth keeping separate in your head because that's how you'll debug them. ![WordPress login form with its four styleable layers annotated: form container, field labels, text and password inputs, and the submit button](https://d1k2c27psfzbiv.cloudfront.net/wp-content/uploads/2026/08/27123644/wp-login-form-four-css-layers-annotated.webp) - The container, `.login form`. Background, padding, border, radius, shadow, width. - The labels, `.login form label`. "Username or Email Address", "Password", "Remember Me". - The inputs, `.login input[type="text"]` and `[type="password"]`. Including the focus state, which most people forget and which is the difference between a form that feels finished and one that doesn't. - The button, `.login .button-primary`. Carries the most visual weight of anything on the screen. ### Enqueue the stylesheet on the login screen only `login_enqueue_scripts` fires on `wp-login.php` and nowhere else, which is exactly what you want. Your login CSS never loads on the front end or in the admin: ``` add_action( 'login_enqueue_scripts', function () { wp_enqueue_style( 'mytheme-login', get_stylesheet_directory_uri() . '/login.css', array(), '1.0.0' ); } ); ``` Put that in a child theme's `functions.php` or, better for anything a client might switch themes on, an mu-plugin. A parent theme update will wipe it out of the parent's `functions.php`. ### The CSS ``` .login form { background: #ffffff; border: none; border-radius: 12px; box-shadow: 0 16px 40px rgba(0, 0, 0, .25); padding: 32px 28px; } .login form label { color: #334155; font-size: 14px; font-weight: 500; } .login input[type="text"], .login input[type="password"] { background: #f8fafc; border: 1px solid #cbd5e1; border-radius: 8px; padding: 10px 12px; box-shadow: none; } .login input[type="text"]:focus, .login input[type="password"]:focus { border-color: #4f46e5; box-shadow: 0 0 0 3px rgba(79, 70, 229, .18); outline: none; } .login .button-primary { background: #4f46e5; border-color: #4f46e5; text-shadow: none; box-shadow: none; border-radius: 8px; height: auto; padding: 10px 20px; font-weight: 600; width: 100%; } ``` The `text-shadow: none` and `box-shadow: none` on the button aren't decoration. Core ships both, they're a holdover from an older admin design, and leaving them in place is what makes an otherwise clean custom button still look like 2013. The wider version of this approach, background and logo and footer links included, is in [customizing the WordPress login page without a plugin](https://wpadminify.com/customize-wordpress-login-page-without-plugin). ### What CSS can't do It can't reorder the fields, add a field, remove the Remember Me checkbox from the DOM, or change any of the text. Reordering and adding fields means method 3. Text means method 2. ## Method 2: rewrite the form's text with the gettext filter WordPress ships "Username or Email Address," which is accurate and clumsy. If your site only accepts an email address, that label asks the user to make a decision they shouldn't have to make. Every visible string on the form goes through translation, so you intercept it with `gettext` and match on the original English: ``` add_filter( 'gettext', 'mytheme_login_labels', 20, 3 ); function mytheme_login_labels( $translated, $original, $domain ) { if ( 'default' !== $domain ) { return $translated; } switch ( $original ) { case 'Username or Email Address': return 'Email'; case 'Password': return 'Your password'; case 'Log In': return 'Sign in'; case 'Lost your password?': return 'Forgotten your password?'; } return $translated; } ``` Two ways to get this wrong, and both of them are quiet. Skip the `$domain` check and you'll rewrite those strings everywhere else on the site too, including in the admin, including inside plugins that happen to use the same phrases. Skip the `return $translated` in the default case and you'll blank out every string WordPress passes through the filter, which is thousands of them, and the site will look like it lost its language pack. On cost: this filter runs on a great many strings per request. Four cases is nothing. If you find yourself writing forty, you've outgrown the filter and a login customizer will be less work and less fragile. One thing changing the label does not do is change behaviour. Label the field "Email" and WordPress will still happily accept a username, because `wp_authenticate()` checks both. Restricting it to email only is a separate job. ## Method 3: put a real login form on a front-end page Now the other job entirely. A login form on a normal page, in your theme, with your header and footer, no admin styling anywhere near it. ### The core function WordPress has shipped `wp_login_form()` for years and it does more than people give it credit for. It renders a working, secure login form anywhere in a template: ```php Signed in as ' . esc_html( $user->display_name ) . '.

'; echo 'Sign out'; } else { wp_login_form( array( 'redirect' => home_url( '/dashboard/' ), 'label_username' => 'Email', 'label_password' => 'Password', 'label_log_in' => 'Sign in', 'remember' => true, ) ); } ?> ``` That's a complete front-end login. It generates its own nonce, posts to `wp-login.php` the way core expects, and hands off session handling to core. Note that `label_username` gets you the same result method 2 needed a filter for, because you're passing arguments to the function rather than intercepting its output. You'll also notice you didn't write any authentication logic. Keep it that way. Hand-rolled login handling is one of the most reliable ways to put a real vulnerability into a WordPress site. ### Turn it into a shortcode So editors can drop it on any page without opening a template file: ``` add_shortcode( 'my_login_form', 'mytheme_login_form_shortcode' ); function mytheme_login_form_shortcode( $atts ) { if ( is_user_logged_in() ) { return '

You are already signed in.

'; } $atts = shortcode_atts( array( 'redirect' => home_url( '/dashboard/' ), ), $atts ); return wp_login_form( array( 'echo' => false, 'redirect' => esc_url_raw( $atts['redirect'] ), 'label_username' => 'Email', 'label_log_in' => 'Sign in', ) ); } ``` Do not leave out `'echo' => false`. Shortcodes have to return their output rather than print it. Without it the form renders at the very top of the page, above the title, nowhere near where the shortcode sits, and you will spend twenty minutes blaming your theme. Then `[my_login_form]` in any post or page, or `[my_login_form redirect="https://example.com/account/"]` to send that particular form somewhere else. ![Custom WordPress login form rendered on a front-end page through a shortcode, inside the active theme with the site header and footer visible](https://d1k2c27psfzbiv.cloudfront.net/wp-content/uploads/2026/08/27134415/wp-login-form-frontend-shortcode-rendered.webp) ### The redirect argument is where this gets useful A single hardcoded `redirect` works when everyone who logs in wants the same destination. That's rarely true past a handful of users. Subscribers want the members area, editors want the posts list, shop managers want orders. The `redirect` argument only takes one URL, so the moment you need it to depend on who's logging in you're either building the logic yourself on `login_redirect` or handing it to a tool that does role-based rules. The full breakdown of both routes is in [redirecting users after login by role](https://wpadminify.com/wordpress-redirect-users-after-login-by-role). ### Styling the front-end form Different selectors from method 1, because this is your theme's stylesheet, not the login screen's: ``` .login-form-wrapper { max-width: 380px; margin: 0 auto; } #loginform p { margin-bottom: 16px; } #loginform label { display: block; margin-bottom: 6px; font-weight: 500; } #loginform .input { width: 100%; padding: 10px 12px; border: 1px solid #cbd5e1; border-radius: 8px; } #loginform .button-primary { width: 100%; padding: 12px; border-radius: 8px; background: #4f46e5; color: #fff; border: none; font-weight: 600; cursor: pointer; } #loginform .login-remember { font-size: 14px; } ``` ### Then check whether anyone's using it After you move members onto a front-end form, check that they're actually logging in through it. This is the step that gets skipped. If half of them are still bookmarking `wp-login.php`, your redirect logic and your nice new page are both doing less than you think. A last-login column in the Users list is the cheapest way to see the pattern, and [adding a last login column to the WordPress users list](https://wpadminify.com/how-to-show-last-login-column-in-wordpress-users-list) walks through it. ## Doing all three with a plugin Every method above has a plugin equivalent, and for a client site the plugin route usually wins on maintenance rather than on capability. CSS you wrote by hand is CSS somebody has to understand in eight months. ### For methods 1 and 2: a login customizer A login customizer exposes the same four layers as controls with a live preview. On [Loginfy](https://wpadminify.com/loginfy) : the Login Form section handles the container, and the Form Fields section handles labels, placeholders and input styling. ![Loginfy - WordPress login page customizer plugin](https://d1k2c27psfzbiv.cloudfront.net/wp-content/uploads/2025/05/28051059/Loginfy-WordPress-login-page-customizer-plugin.webp) The Form Fields section is the one that replaces method 2. It has Label, Placeholder and Style tabs, and the Label tab has editable text for Username, Password, Remember Me, Log In, Register, Lost Password and Back to site. That's every visible string on the form, changed without touching `gettext` and without the risk of leaking your replacements into the rest of the site. The free and pro line runs through the middle of the button controls. On Loginfy 1.0.5 the colours, hover state, text colour, size and padding are all free. Box shadow and blur are pro. If that matters to your design, plan for it before you start. Setup steps are in the [Loginfy login page documentation](https://wpadminify.com/docs/loginfy/customize-wordpress-login-page), and if you'd rather compare options first, [the best WordPress login page plugins](https://wpadminify.com/best-wordpress-login-page-plugin) puts the main ones side by side. ### For method 3: a front-end user plugin If you need registration, lost password and password reset in the theme as well, that's four templates to build. Theme My Login is the long-standing option, It renders login, registration, lost password and reset password inside your active theme. The form inherits the theme completely, which is the part worth looking at in that screenshot. On a well-designed theme that's exactly what you want. On a default theme you get what you see there, which is plain. Theme My Login gives you placement and flow. Styling is still your job, using the CSS from the section above. Worth being clear on the boundary between the two plugin types, because it's a common mix-up. A login customizer styles `wp-login.php`. Theme My Login doesn't style `wp-login.php` at all, it renders its own form inside your theme template. They solve different problems and they can both be installed. ## The form is not the whole screen If you're restyling `wp-login.php`, the form is one element on a page that has three others worth attention, and a form that looks great under the default WordPress logo still looks unfinished. The logo sits directly above the form and is the first thing anyone notices. It's its own hook, its own CSS, and its own guide: [changing the WordPress login logo](https://wpadminify.com/change-wordpress-login-logo). The background sits behind everything and does more for the perceived quality of the screen than the form styling does, covered in [changing the WordPress login page background](https://wpadminify.com/change-wordpress-login-page-background). For agency work there's a further layer, which is removing the WordPress identity from the screen rather than just restyling it. [The white label login page guide](https://wpadminify.com/wordpress-login-page-white-label-guide) covers the approach, and [white labelling the login page for your clients](https://wpadminify.com/white-label-wordpress-login-page-for-your-clients) covers doing it per client on sites you hand over. ## Security rules that apply to all three methods Never write your own authentication. Use `wp_login_form()`, or `wp_signon()` if you genuinely have to handle the POST yourself. Both handle nonces, cookies and session state correctly, and correctly here means correctly against attacks you haven't thought of. HTTPS is not optional. A login form served over HTTP transmits the password in plain text. If the site has no certificate, stop styling and fix that first. Keep error messages generic. A form that says "that username does not exist" has just confirmed which accounts are real. One message for every failure: ``` add_filter( 'login_errors', function () { return 'The email or password you entered is not correct.'; } ); ``` That filter closes one enumeration channel. It doesn't close the others, and the REST API is the one people miss: `/wp-json/wp/v2/users` will list author accounts to anyone who asks unless you've restricted it. [The WordPress REST API leaks usernames](https://wpadminify.com/wordpress-rest-api-leaks-usernames) has the detail and the fix, and it's the sort of thing that makes a generic login error pointless if you leave it alone. A front-end form does not replace `wp-login.php`. This is the misreading that costs the most. The core login page still exists, still accepts logins, and anything on the internet can still post to it directly. Building method 3 and assuming the old door is gone is wrong, and bots find that door by URL, not by following your links. If you want `wp-login.php` unreachable, that takes a URL change: [how to change your WordPress login URL](https://wpadminify.com/change-wordpress-login-page-url). Rate limiting and 2FA are separate. None of the three methods limits how many guesses an attacker gets, and none of them adds a second factor. Both are separate tools. [Two factor authentication for the WordPress admin](https://wpadminify.com/two-factor-authentication-for-wordpress-admin) covers the second one, and the rest of the hardening list sits under [the security features](https://wpadminify.com/features/security). ## Common problems The form submits and lands back on itself. Almost always the `redirect` argument pointing at a page that itself requires login, so WordPress bounces the user back to the form. Send them somewhere public first, or to `admin_url()`. "Cookies are blocked" on submit. A mismatch between your site URL and the URL the form was served from. Usually `www` versus non-`www`, sometimes a half-migrated HTTP and HTTPS setup. Make Settings > General match the address people actually type. The gettext filter changed strings site-wide. The `$domain` check is missing, or the default case isn't returning `$translated`. Both are in method 2 above. Your login CSS isn't applying to the front-end form. Expected. `login.css` loads through `login_enqueue_scripts`, which only fires on `wp-login.php`. The front-end form needs rules in your theme stylesheet, which is why methods 1 and 3 have separate CSS blocks in this post. Something worse: you're locked out. A PHP error in `functions.php` takes down the login screen along with everything else, and you can't fix it from an admin you can't reach. Rename the theme folder over SFTP to force WordPress onto a default theme, then undo your edit. Other lockout causes, white screens and redirect loops included, are worked through in [how to fix WordPress login page issues](https://wpadminify.com/how-to-fix-wordpress-login-page-issues). ## Frequently asked questions ### Does WordPress have a built-in login form shortcode? No. Core gives you the wp_login_form() function but no shortcode. The wrapper in method 3 above turns it into one in about ten lines, or a plugin such as Theme My Login supplies shortcodes for login, registration and password reset. ### Can I add a login form to a widget or a block? Yes. Register the shortcode from method 3 and use a Shortcode block, or call wp_login_form() directly in a block template. WordPress also ships a Login/out block, but be aware it renders a link rather than a full form, which is not the same thing. ### How do I change "Username or Email Address" to just "Email"? On wp-login.php, either use the gettext filter from method 2 or edit the label in a login customizer's Form Fields section. On a front-end form, pass 'label_username' => 'Email' to wp_login_form(). In all three cases the label changes and the behaviour doesn't: WordPress still accepts either a username or an email address unless a plugin restricts it. ### Is a custom login form less secure than the default? Not if you build it with wp_login_form() or a maintained plugin. Both use core authentication, core nonces and core cookie handling, so the security surface is identical to the default form. It becomes less secure the moment you write your own POST handler and password check. ### Can I have both a styled wp-login.php and a front-end form? Yes, and it's a sensible setup rather than a compromise. Staff and clients use the branded wp-login.php, members use the front-end form on a normal page. They share the same authentication, so one account works on both, and you can point each audience at the door that suits them. ### Which method should I start with? Method 1, unless you already know members must never see an admin-styled page. Restyling wp-login.php with CSS is the shortest distance between the default screen and something that looks deliberate, and it's the only one of the three that doesn't change how anyone logs in. ## Next steps Three methods, three different tools, and most sites need one of them rather than all three. Pick by where the form has to live. If you were after a branded admin login, you're most of the way there. [The full login page guide](https://wpadminify.com/customize-wordpress-login-page) covers the rest of that screen. If you were after a members area, method 3 is the form and [role-based login redirects](https://wpadminify.com/wordpress-redirect-users-after-login-by-role) are the part that makes it feel intentional. Either way, whatever you built is still sitting at the URL every bot on the internet checks first. [Moving it](https://wpadminify.com/change-wordpress-login-page-url) is worth doing before you call the job finished. --- # 8 Best WordPress Login Security Plugins (Tested) URL: https://wpadminify.com/best-wordpress-login-security-plugins Last updated: 2026-08-30 Nearly every "best WordPress security plugin" list is the same five suites in a different order. This one is narrower on purpose: these are plugins that protect the login, which is a smaller and more useful question. Every install count, rating and update date below was pulled from the WordPress.org Plugin API on 25 August 2026 and is dated in the text. Where we installed a plugin and drove it on a clean WordPress 7.0.4 site, the entry says so. Where we did not, it says that too. Two things are worth knowing before you read the table, because they change what you should be asking a plugin for. The attack usually starts with reconnaissance, not password guessing, and WordPress hands the reconnaissance over without being asked: [the REST API publishes every author username](https://wpadminify.com/wordpress-rest-api-leaks-usernames) to anyone who loads the endpoint, no login needed. And only three of the eight plugins below do [two-factor authentication](https://wpadminify.com/two-factor-authentication-for-wordpress-admin), which is the one measure that still holds after an attacker has the correct password. One note on the order. These are numbered by where each plugin sits in a stack, working outward from the login page itself to the firewall in front of it. It is not a power ranking, and the numbering is not a claim that number one protects you better than number two. Two of the eight are ours, and both say so where they appear. ## What a login security plugin needs to do Four jobs. Anything else is a bonus. - Two-factor authentication. The only measure that survives a stolen password that happens to be correct. - Rate limiting. Core lets a script try passwords all day. Something has to count the failures. - Enumeration blocking. Usernames leak from the login form, the REST API and author archives, all on a stock install. - Visibility. A log of failed attempts, so you know when you are being targeted. If you want that beyond the login form, covering who changed what once they are inside, that is an [activity log](https://wpadminify.com/how-to-monitor-user-activity-in-wordpress) rather than a security plugin feature. Why they land in that order is worked through in [the WordPress login security checklist](https://wpadminify.com/wordpress-login-security/). Read that one for the principles. This one is about which plugin to install. ## Quick comparison | # | Plugin | Installs | Rating | 2FA | Rate limit | Login URL | Enumeration fix | Free tier | | --- | --- | --- | --- | --- | --- | --- | --- | --- | | 1 | Loginfy | 2,000 | 100/100 (3) | No | No | No | Login form | Most of it | | 2 | Wordfence Security | 5,000,000 | 94/100 (4,979) | Yes | Yes | No | Not tested | Generous | | 3 | WP Adminify | 7,000 | 86/100 (109) | No | No | Pro | REST API, author archives | Partial | | 4 | WPS Hide Login | 2,000,000 | 96/100 (2,111) | No | No | Yes | No | Everything | | 5 | Limit Login Attempts Security | 1,000,000 | 96/100 (1,477) | No | Yes | No | Not tested | Core feature free | | 6 | Kadence Security | 700,000 | 92/100 (3,990) | Yes | Yes | Yes | Not tested | Good | | 7 | WP 2FA | 100,000 | 94/100 (176) | Yes | No | No | No | 2FA free | | 8 | LoginPress | 200,000 | 96/100 (1,075) | No | Add-on | Add-on | Login form | Design only | All figures from the WordPress.org Plugin API, 25 August 2026. Rows are in the same order as the entries below. "Not tested" means we did not install that plugin for this article and will not tick a box we have not seen work. Read that table honestly. Three of the eight do two-factor authentication, the measure that matters most, and Loginfy is not one of them. It sits at the top of the list with the emptiest row because it works on a different layer from everything else here. The next entry says which layer, and why that layer goes first. ## 1. Loginfy 2,000 installs · 100/100 from 3 ratings · v1.0.5 · updated 21 May 2026 · tested to WordPress 7.0.4 ![Loginfy custom WordPress login page customizer plugin banner](https://d1k2c27psfzbiv.cloudfront.net/wp-content/uploads/2026/07/15113309/loginfy-banner.webp) Disclosure: this is our plugin, and it is also the one entry here that is not a security plugin. Both of those are worth holding on to while you read the next few paragraphs. Loginfy customizes the WordPress login page: templates, logo, backgrounds, form styling, field labels. None of that is security. A login page in your brand colours is exactly as attackable as the grey one it replaced. If the design job is what brought you here, [how to customize the WordPress login page](https://wpadminify.com/customize-wordpress-login-page) is the page you actually want. What earns it position one is the Error Messages section, free in 1.0.5, and the ninety seconds it takes to use it properly. ### Why the login page layer comes first On a stock install, a failed login tells you whether the username exists. A username that is not registered gets one message. A real username with the wrong password gets another. That difference is username enumeration, and it is what makes a brute force attack worth running, because the attacker stops burning guesses on accounts that were never there. Set every string in that Error Messages section to the same text and the leak closes. In code it is one filter: ``` add_filter( 'login_errors', function () { return 'The username or password you entered is not correct.'; } ); ``` Settings field or filter, same result. It belongs at the front of the stack because of sequencing: enumeration is reconnaissance, and it happens before the attack the other seven plugins are built to stop. A rate limiter counts failed guesses. It does nothing to stop an attacker working out which four of your forty accounts are real. Close the leak and everything behind it costs more to attack. The detail, including the password reset form that most implementations forget, is in [customizing WordPress login error messages](https://wpadminify.com/wordpress-login-error-messages/). ### The rest of what it contributes - Disable Lost Password. Free in 1.0.5. Removes a second form that leaks whether an address is registered. Only sensible where you handle resets another way. - White-label controls. Stripping the WordPress branding, the wordpress.org logo link and the plugin credit is a design job first. It also stops the login screen naming the software stack to whoever loads it. - Custom CSS and JS. Free, and useful for styling a CAPTCHA widget from one of the plugins below so it does not look bolted on. ### What it does not do There is no two-factor authentication here, no rate limiting, no firewall and no login attempt logging. It also does nothing about the REST API or author archives, which are the two enumeration leaks still open after you have fixed the login form. At 2,000 installs and 3 ratings it has far less field testing behind it than anything else on this page. Wordfence has 4,979 ratings. Read the 100/100 for what a three-vote sample is worth, which is very little in either direction. Loginfy is not a login security answer on its own, and this entry is not pretending otherwise. It closes one specific hole cheaply, and it does the design job while it is there. Everything from entry 2 onward is what stops the attack. Free on [WordPress.org](https://wordpress.org/plugins/loginfy/). Pro is $49/year or $89 lifetime for five sites, $99/year or $199 lifetime for twenty, $149/year or $259 lifetime for a hundred, verified 25 August 2026 on [the Loginfy page](https://wpadminify.com/loginfy). Every feature named in this entry is on the free tier. Choose it if you want the enumeration fix and a branded login page from one plugin, and you are installing something from the rest of this list alongside it. ## 2. Wordfence Security 5,000,000 installs · 94/100 from 4,979 ratings · v9.0.0 · updated 10 August 2026 · tested to WordPress 7.1 ![Wordfence Security plugin banner from the WordPress.org plugin repository](https://d1k2c27psfzbiv.cloudfront.net/wp-content/uploads/2026/08/26124238/wordfence-wordpress-plugin-banner.webp) This is the default answer for login security, and it earns the spot. Wordfence covers all four jobs in one install: two-factor authentication, login attempt limiting, a firewall that drops known bad traffic before it reaches your forms, and a live traffic log detailed enough to be useful during an attack. The two-factor implementation is the strongest part of it. TOTP, downloadable recovery codes and per-role enforcement, all on the free tier. Turning it on for one user is a couple of minutes from the profile screen. The honest downside: it is heavy. The firewall and the scanner both run in PHP on your own server, and on shared hosting you will feel it. If login protection is all you came for, you are installing a lot you will never open. Wordfence also ships a standalone Login Security plugin that cuts the suite down to 2FA and reCAPTCHA, which suits plenty of sites better. Choose it if you want one plugin covering login security, malware scanning and a firewall, and your hosting can carry it. ## 3. WP Adminify 6,000 installs · 86/100 from 109 ratings · v4.3.1 · updated 20 August 2026 · tested to WordPress 7.1 ![WP Adminify plugin banner from the WordPress.org plugin repository](https://d1k2c27psfzbiv.cloudfront.net/wp-content/uploads/2026/08/26124254/wp-adminify-wordpress-plugin-banner.webp) Disclosure: this is our plugin. Treat the entry accordingly and check the claims. WP Adminify is a dashboard toolkit, not a security suite. Its security panel happens to cover the hardening items that every login article lists and most security plugins leave alone. The two that matter most for login work are username enumeration and the REST API. Users Security blocks author enumeration, so `example.com/?author=1` stops resolving to an author archive that names the account. REST API restricts the `/wp-json/wp/v2/users` endpoint to authenticated requests, which is the leak covered in [the WordPress REST API leaks usernames](https://wpadminify.com/wordpress-rest-api-leaks-usernames). Both are settings rather than snippets, which matters if the person maintaining the site is not the person who wrote it. It also handles XML-RPC, disabling it in one toggle where nothing on the site needs it, and on the pro tier Redirect URLs for changing the login path and sending users to role-specific destinations after login, which is covered on its own in [redirecting users after login by role](https://wpadminify.com/wordpress-redirect-users-after-login-by-role). Which of these sit on which tier is listed in [the WP Adminify free versus pro comparison](https://wpadminify.com/wp-adminify-free-vs-pro). The honest limits: there is no two-factor authentication, no rate limiting and no firewall. At 6,000 installs and 109 ratings it has nothing like the field testing behind Wordfence or Kadence Security. It is a hardening layer that sits beside a security plugin. It does not replace one. Choose it if you already run a dashboard toolkit and want the enumeration and REST API items done without a fifth plugin. ## 4. WPS Hide Login 2,000,000 installs · 96/100 from 2,111 ratings · v1.9.19 · updated 13 August 2026 · tested to WordPress 7.1 ![WPS Hide Login plugin banner from the WordPress.org plugin repository](https://d1k2c27psfzbiv.cloudfront.net/wp-content/uploads/2026/08/26124241/wps-hide-login-wordpress-plugin-banner.webp) Two million installs for a plugin that does one thing. We put it on a clean WordPress 7.0.4 site to check the scope, and the scope really is that small. It adds no admin menu of its own. Instead it appends a short section to the bottom of Settings > General with exactly two fields. Login url sets the new path. Redirection url decides where anyone hitting `wp-login.php` or `/wp-admin` while logged out gets sent, usually a 404. That is the entire plugin. What it is worth: automated scanner traffic drops out of your logs almost entirely, because most bots only ever probe the default path. That effect is real and you see it the same day. What it is not: security. The new URL leaks through referrer headers, browser history, password managers and any plugin that links to the login page. There is no 2FA and no rate limiting behind it either, so an attacker who does find the path is back at an unprotected form. File it under noise reduction. The full argument, including how to get back in after you forget the URL yourself, is in [how to change your WordPress login URL](https://wpadminify.com/change-wordpress-login-page-url). Choose it if you want scanner noise gone in two minutes, and you are pairing it with something from the rest of this list. Before you turn it on, make sure you can get back in without it: [WordPress login page not working](https://wpadminify.com/how-to-fix-wordpress-login-page-issues) covers the recovery routes. ## 5. Limit Login Attempts Security 1,000,000 installs · 96/100 from 1,477 ratings · v3.3.5 · updated 12 August 2026 · tested to WordPress 7.0.4 ![Limit Login Attempts Security plugin banner from the WordPress.org plugin repository](https://d1k2c27psfzbiv.cloudfront.net/wp-content/uploads/2026/08/26124245/limit-login-attempts-security-wordpress-plugin-banner.webp) Formerly Limit Login Attempts Reloaded, and the specialist for job two. It counts failed logins, locks the IP for a set period, escalates on repeat offences and logs the lot. Sensible configuration: 5 attempts, 20 minute lockout, longer on repeats, and add your own IP to the allowlist before you start testing. Why it is here despite doing one job: it is small, it is fast, and rate limiting is the second most valuable thing you can add. If your host does nothing at the edge and you do not want a full suite, this plus a 2FA plugin is a complete setup that weighs almost nothing. Watch for: running it alongside Wordfence or Kadence Security, which both rate limit already. Two limiters produce lockouts nobody can trace. When one does lock you out of your own site, the database and WP-CLI routes back in are in [resetting a WordPress admin password](https://wpadminify.com/how-to-change-or-reset-wordpress-admin-password). ## 6. Kadence Security 700,000 installs · 92/100 from 3,990 ratings · v10.0.3 · updated 27 July 2026 · tested to WordPress 7.0.4 ![Kadence Security Basic plugin banner from the WordPress.org plugin repository](https://d1k2c27psfzbiv.cloudfront.net/wp-content/uploads/2026/08/26124248/kadence-security-wordpress-plugin-banner.webp) The name needs a note, because it confuses anyone searching for it. On WordPress.org the slug is still `better-wp-security`. The plugin has been iThemes Security, then Solid Security, and is now Kadence Security. Same lineage, same code, four names floating around the search results. For login work specifically it is the closest thing to Wordfence: 2FA, brute force protection, a login URL change built in, and password requirements enforced per role. It is lighter than Wordfence because it scans less. The honest downside: 3,990 ratings averaging 92/100 means a real minority of unhappy users, and a lot of that history traces back to the rebrands and the upsell changes that arrived with them. Read the recent reviews, not the average. Choose it if you want a login-focused suite with less overhead than Wordfence. ## 7. WP 2FA 100,000 installs · 94/100 from 176 ratings · v4.1.0 · updated 11 August 2026 · tested to WordPress 7.0.4 ![WP 2FA plugin banner from the WordPress.org plugin repository](https://d1k2c27psfzbiv.cloudfront.net/wp-content/uploads/2026/08/26124251/wp-2fa-wordpress-plugin-banner.webp) Two-factor authentication and nothing else, which is the point. The reason to pick a dedicated 2FA plugin over a suite is enforcement. WP 2FA can require 2FA by role, hand people a grace period to enrol before it becomes mandatory, and walk them through the setup in a wizard instead of a settings screen. On a site with thirty editors, that is the difference between 2FA being adopted and 2FA being quietly ignored. Offer it as an optional per-user setting and the people who were going to turn it on turn it on. Require it by role after a grace period and everybody has it. A note on the alternative: the community "Two Factor" plugin has 100,000 installs and a 96/100 rating, and it is the closest thing to an official implementation. As of 25 August 2026 it was last updated on 27 March 2026 and tested only to WordPress 6.9.7, with 7.1 current. That does not make it a bad plugin. It does mean checking those dates yourself before you put it on a client site. Choose it if you already have rate limiting and you need 2FA rolled out across a team. ## 8. LoginPress 200,000 installs · 96/100 from 1,075 ratings · v6.2.5 · updated 10 July 2026 ![LoginPress WordPress plugin banner from the WordPress.org plugin repository](https://d1k2c27psfzbiv.cloudfront.net/wp-content/uploads/2026/08/03063939/loginpress-banner.webp) LoginPress is a login page design plugin first. It earns a slot here because its paid add-ons cover several security jobs, and because plenty of people already run it for the design without knowing where the free line falls. Its own Settings screen answers that. Captchas, Auto Login, Login Redirects, Limit Login Attempts, Hide Login, Social Login and Integrations all sit as add-on cards under an "Upgrade to Pro for More Features" panel, checked on the free 6.2.5 build on 25 August 2026. What the free build does hand you: Force Password Reset, a session expiry setting, Auto Remember Me, custom password fields on registration, login order control (username only, email only, or both), and a registration domain allowlist. Those are real security settings, and they cost nothing. What it does not give you free: limit login attempts, hide login, CAPTCHAs. Those are paid add-ons, bundled into the plans rather than sold separately. LoginPress pricing verified 25 August 2026: Startup $99/year for 2 sites, Agency $199/year unlimited, Lifetime $499 unlimited. No two-factor authentication at any tier, so LoginPress is never a complete login security answer on its own. Choose it if you want design and several security add-ons from one vendor, and you are adding 2FA separately. ## Also considered ![Theme My Login WordPress plugin banner from the WordPress.org plugin repository](https://d1k2c27psfzbiv.cloudfront.net/wp-content/uploads/2026/08/03063945/theme-my-login-banner.webp) Theme My Login Security extension. 60,000 installs on the parent plugin, 74/100 from 460 ratings, updated 13 August 2026. The Security extension adds throttling and lockouts. The plugin's own settings are about flow, not protection: AJAX submission, login type, registration type, self-set passwords and auto-login after registration. Extensions are sold one at a time, $15 for a single site, $30 for two to five, $45 unlimited, billed yearly, checked 25 August 2026. Reasonable enough if you already run Theme My Login for its front-end forms. An odd way to buy rate limiting if you do not, given Limit Login Attempts Security costs nothing. ![miniOrange 2FA plugin banner from the WordPress.org plugin repository](https://d1k2c27psfzbiv.cloudfront.net/wp-content/uploads/2026/08/26124258/miniorange-2fa-wordpress-plugin-banner.webp) miniOrange 2FA. 10,000 installs, 90/100 from 383 ratings, v6.2.9, updated 14 August 2026. A deep 2FA feature set with a long list of methods. The free and paid line moves around, so check what your chosen method costs before you commit to it. ## Two stacks that work The one-plugin stack. Wordfence, configured rather than just installed. 2FA on for administrators and editors, rate limiting on, live traffic log checked once a week. Add WPS Hide Login if the scanner noise in your logs annoys you. Twenty minutes of work, and it covers all four jobs. Whichever stack you pick, spend the extra ninety seconds on generic login error messages. Loginfy does it through a settings field. Wordfence and Kadence Security do not do it at all. One `login_errors` filter does it with no plugin involved. It is the cheapest item in this whole article and the one people skip most. The light stack. WP 2FA for two-factor, Limit Login Attempts Security for rate limiting, and either a snippet or a hardening plugin for the enumeration side. Three small plugins, no firewall, and noticeably less server load than a suite. This is the right answer when your host already runs a WAF at the edge. What does not work is installing four security plugins and configuring none of them. Overlapping rate limiters and duplicate CAPTCHA widgets produce lockouts that take longer to debug than the attacks they were supposed to prevent. ## What none of these fix Two things, and both are on you rather than on a plugin. Reused passwords. Credential stuffing works because the password really is correct. 2FA is the only thing that stops it at the login form, and a unique password per site is the only thing that stops it at the source. Dormant administrator accounts. No plugin will tell you the contractor who left in March still has an admin account. Audit the user list, and make it auditable at a glance by [adding a last login column to the WordPress users list](https://wpadminify.com/how-to-show-last-login-column-in-wordpress-users-list). One more thing worth repeating, since this list contains a design plugin: how a login page looks has no bearing on how hard it is to break into. Entry 1 is on this page for one settings field, not for its templates. ## Frequently asked questions ### What is the best free WordPress login security plugin? Wordfence, assuming your hosting can carry it, because the free tier gives you 2FA with recovery codes, rate limiting and a firewall. For something lighter, WP 2FA and Limit Login Attempts Security cover the two highest-value jobs between them, also free. ### Do I need more than one security plugin? Usually not. One suite covers 2FA, rate limiting and logging between them. The exception worth making is a dedicated 2FA plugin when you need role-based enforcement across a team, which suites handle badly. ### Is WPS Hide Login enough on its own? No. It changes the login URL and stops there. There is no 2FA, no rate limiting and no enumeration blocking in it. Cutting scanner noise is worth having, but it has to be paired with something that actually defends the form. ### Will a security plugin slow down my site? A full suite running a PHP firewall and a malware scanner has a measurable cost, and it shows up most on shared hosting. Single-purpose plugins like WP 2FA or Limit Login Attempts Security cost effectively nothing in performance terms. If your host already runs a WAF at the edge, the light stack gets you most of the protection for almost none of the overhead. ### Does a login page design plugin add security? Styling does not. A branded login page is exactly as attackable as the default one, and no template, background or button colour changes that. The exception is the text on the form. Several login customizers, Loginfy among them, let you rewrite the error messages, and setting them all to one generic string closes username enumeration on the login form. That is a real security gain from a design plugin, and it is the only one it has. It replaces neither two-factor authentication nor rate limiting. Run a design plugin and a security plugin side by side; they do not conflict. For the design side, see the best WordPress login page plugins. ## Next steps Pick a stack, install it, then do the two things no plugin will do for you: turn 2FA on for every administrator, and delete the accounts that should not be there. The full ordering of measures is in [the WordPress login security checklist](https://wpadminify.com/wordpress-login-security/). If CAPTCHA is next on your list, [adding reCAPTCHA to the WordPress login page](https://wpadminify.com/wordpress-login-recaptcha/) covers both the setup and the limits. --- # WordPress Login Redirect Loop: 9 Fixes for WP-Admin (2026) URL: https://wpadminify.com/wp-admin-redirects-to-homepage Last updated: 2026-08-30 Struggling to access your dashboard because wp-admin redirects to homepage? This common issue is widely known as wp admin redirects to homepage or wordpress admin login redirect to homepage. And this can lock you out from entering your site entirely. It might be an unexpected loop, a security setting gone wrong, or a simple misconfiguration causing the wp admin redirect. In this guide, you’ll learn how to fix the wp-admin redirect to homepage problem, troubleshoot wp-admin redirect loop errors, and securely hide the WordPress login URL to protect your site. Whether you're dealing with WordPress login page redirects to homepage, can't login to WordPress dashboard, or want to intentionally redirect wp-admin for better security, we’ve got you covered. We’ll walk through debugging, plugin-free fixes, and pro methods using code or tools like WP Adminify. By the end, you’ll resolve wp redirects, secure your wp admin URL, and regain full control. ## What Is a WordPress Login Redirect Loop (and How Do You Fix It)? A WordPress login redirect loop happens when you enter the correct password but land back on the login page instead of the dashboard. The cause is almost always a rejected authentication cookie: mismatched WordPress Address and Site Address URLs, a corrupted `.htaccess` file, stale cookies, a conflicting plugin, or Cloudflare running in Flexible SSL mode. Work through the fixes below in that order. ## What causes a WordPress login redirect loop? A WordPress login redirect loop almost always means the site URL and the cookie domain disagree. Check that `siteurl` and `home` in `wp_options` match exactly, including https and any www prefix. If they do, clear cookies for the domain, then rename the `plugins` folder over SFTP to rule out a conflict before touching anything else. The reason it feels like a wrong password is that nothing tells you otherwise. WordPress sets an authentication cookie, the browser rejects it because it was issued for a domain that does not match the one you are on, and the next request arrives logged out. There is no failure to report, so you land back on the front page in silence. A genuinely wrong password gives you a red error box, which is a useful thing to check first: silence points at configuration, an error points at credentials. ## Force the right URLs with WP_HOME and WP_SITEURL If the two values in `wp_options` are wrong and you cannot reach the dashboard to fix them, override them from `wp-config.php`. Add these above the line that says stop editing, using your real domain and scheme: ``` define( 'WP_HOME', 'https://example.com' ); define( 'WP_SITEURL', 'https://example.com' ); ``` Constants in `wp-config.php` win over whatever is in the database, so this takes effect immediately and does not need a login. It is also the fastest way to confirm the diagnosis: if the loop stops the moment you add them, the database values were the problem, and you can correct them properly under Settings > General once you are back in. Note that the fields go read-only while the constants are set, which is expected rather than a fault. One related trap after an SSL move. If half your URLs still say http and half say https, the login cookie is issued as secure and then not sent back over the insecure request, which produces the same silent bounce. Both values need the same scheme, and so does the `COOKIE_DOMAIN` constant if a plugin or a previous developer has defined one. A stale `COOKIE_DOMAIN` pointing at an old domain or a missing leading dot for subdomains will loop every time, and it is easy to miss because nothing else on the site looks broken. ## Behind Cloudflare or a Proxy? Fix the HTTPS Redirect Loop If the browser gives up with `ERR_TOO_MANY_REDIRECTS` instead of dropping you back on the login form, the problem sits in front of WordPress rather than inside it. Cloudflare set to Flexible SSL is the classic case. Cloudflare reaches your server over plain HTTP, WordPress sees an insecure request, and because `WP_SITEURL` says https it redirects to https, which Cloudflare downgrades again. The two sides hand the request back and forth until the browser stops trying. Fix it properly by switching the SSL mode to Full (strict) under SSL/TLS > Overview in the Cloudflare dashboard and installing a real certificate on the origin server. If you sit behind a load balancer or another reverse proxy that terminates SSL for you, tell WordPress the request arrived secure by reading the forwarded header in `wp-config.php`, above the line that says stop editing: ``` if ( isset( $_SERVER['HTTP_X_FORWARDED_PROTO'] ) && $_SERVER['HTTP_X_FORWARDED_PROTO'] === 'https' ) { $_SERVER['HTTPS'] = 'on'; } ``` Only add that snippet when a proxy really does terminate SSL for you. On a normal single server it achieves nothing and it masks genuine mixed-content problems. Purge the Cloudflare cache after any change, because a cached redirect keeps looping long after the setting is correct. ## Reset Your Security Salts to Clear a Stuck Login Cookie When the login page simply refreshes and never shows an error, the browser is holding a cookie WordPress no longer recognizes. Regenerating the secret keys and salts invalidates every existing session at once, so the stale cookie is discarded and you are issued a clean one on the next attempt. Fetch a fresh set from [the official WordPress salt generator](https://api.wordpress.org/secret-key/1.1/salt/) and paste it over the eight matching `define()` lines in `wp-config.php`. Replace the whole block, not part of it. Four old salts sitting next to four new ones produce exactly the silent bounce you are trying to remove. Everyone signed into the site gets logged out, including you and any clients, so warn them first on a busy site. Then close the tab, open a private window and log in again. If that works, the loop was a cookie problem and nothing on the server needed touching. ## Why Does WP-Admin Redirect to Homepage? The wp-admin redirect happens when WordPress sends users away from /wp-admin/ or /wp-login.php to the wp homepage (or another page). The most common causes of these are: - Plugin or theme conflicts - Corrupted .htaccess file - Wrong siteurl or home in the database - Random security rules - Cache or cookie issues This leads to frustrating problems like: - Wordpress wp admin redirect problem - Wp-admin too many redirects - Wordpress login not redirecting to dashboard - Can't find my wordpress admin page So on and so forth! But, we got your back. Yes, there’s some easy ways to fix it and take back the ownership you thought was gone. So, let's fix it step by step. ## Enable Debugging using wp-config.php to Find the Issue Before guessing, turn on WordPress debug mode. You need to add a few codes in the wp-config.php file. Copy and paste the following code inside your `wp-config.php` file at the root directory of your WordPress installation. ``` // Enable WP_DEBUG mode define( 'WP_DEBUG', true ); // Enable Debug logging to the /wp-content/debug.log file define( 'WP_DEBUG_LOG', true ); // Disable display of errors and warnings define( 'WP_DEBUG_DISPLAY', false ); @ini_set( 'display_errors', 0 ); // Use dev versions of core JS and CSS files (only needed if you are modifying these core files) define( 'SCRIPT_DEBUG', true ); ``` Now try accessing wp admin login URL: (site)`/wp-admin/`, now visit the `wp-content` directory. Then check the `debug.log` file. You will get the idea which causes the redirection issue. ## Troubleshoot the WP Admin Redirect Problem ### Deactivate All Plugins Start by deactivating all your plugins. If the issue is resolved, reactivate them one by one to identify the culprit. This will help you determine if a particular plugin is causing the redirect. To deactivate all plugins at once, login to your FTP or Cpanel. Then just do the following: - Rename /wp-content/plugins/ → plugins-old - Create a new empty folder named plugins ![Deactivate all plugins at once](https://d1k2c27psfzbiv.cloudfront.net/wp-content/uploads/2023/10/12111909/Deactivate-all-plugins-at-once.webp) If wp-admin redirect to homepage stops, a plugin was the issue. Reactivate one by one to find the culprit. ### Switch to Default Theme Activate a default theme like [Twenty Twenty-Five](https://wordpress.org/themes/twentytwentyfive/) (or similar). No need to delete your other themes. ![twenty twenty one WordPress Theme](https://d1k2c27psfzbiv.cloudfront.net/wp-content/uploads/2023/10/12111916/twenty-twenty-one-WordPress-Theme.webp) If activating the default theme solves the issue, then it's your theme causing the WordPress WP-admin redirects to homepage. ### Reset .htaccess File Sometimes your .htaccess file gets corrupted or misconfigured. So, you need to delete your current .htaccess and replace it with the default WordPress version: Here, I'm mentioning the default WordPress .htaccess file structure. But if you are running multisite, then you must check the [default .htaccess code on the WordPress Codex for reference](https://wordpress.org/documentation/article/htaccess/). ``` # BEGIN WordPress RewriteEngine On RewriteRule .* - [E=HTTP_AUTHORIZATION:%{HTTP:Authorization}] RewriteBase / RewriteRule ^index\.php$ - [L] RewriteCond %{REQUEST_FILENAME} !-f RewriteCond %{REQUEST_FILENAME} !-d RewriteRule . /index.php [L] # END WordPress ``` This will fix the wp redirects caused by bad rewrite rules and conditions. ### Check WordPress URL Settings If the issue still persist, then you need to log in to your Website MySQL Database. In phpMyAdmin, edit wp_options table. Ensure siteurl and home match your domain. So, Log into phpMyAdmin → your database → wp_options table: - Find siteurl and home - Make sure both match your actual domain (e.g., https://yoursite.com) ![MySQL Database siteurl and Home URL change](https://d1k2c27psfzbiv.cloudfront.net/wp-content/uploads/2023/10/12111925/MySQL-Database-siteurl-and-Home-URL-change.webp) This resolves WordPress localhost redirecting to live site or mismatched wp homepage URL. ### Clear Caches and Cookies Sometimes, the issue can rise from corrupted cookies or cached data. So, you can clear your browser caches and cookies to rule out this possibility. Important Note: Make sure to select only the "Cookies and Other site data" option properly. If you select all options then it will delete your history, saved password, logged-in google account, and everything from your browser. ![Clear Browser Cookie and cache](https://d1k2c27psfzbiv.cloudfront.net/wp-content/uploads/2023/10/12111928/Clear-Browser-Cookie-and-cache.webp) Also, you can try to login your hosting and clean your server cache too. It's not necessary, but you can give it a try. I hope everything is okay with your website and now you want to create a new private [WordPress Dashboard login URL](https://wpadminify.com/change-wordpress-login-page-url) or want to redirect all visitors to homepage or any other custom page who tries to log in to your Website Dashboard by example.com/wp-admin. ## How to Hide Login URL & Redirect WP-Admin to Homepage Hiding the WordPress login page and enabling WP admin redirect to homepage boosts security against brute-force attacks. Use WP Adminify plugin or code to hide WP-admin, hide login page WordPress, or disable WordPress login page. In this article, I will show you both methods to redirect the WordPress admin dashboard (wp-admin) to your website's homepage or any custom page. The first way is straightforward and involves the use of a plugin. Alternatively, you can achieve this redirection by implementing a custom code solution. I will provide a step-by-step explanation for the code-based redirection, ensuring that it is accessible for users of all skill levels. However, if you find the coding method complex, you are welcome to apply the [WP Adminify plugin](https://wpadminify.com/pricing) as a simpler alternative. ### WP Admin Redirects to Homepage using Adminify After [installation and activation of the WP Adminify plugin](https://wpadminify.com/docs/adminify/getting-started/pro-installation), make sure to check the Security tab from the plugin settings panel. Ensure that the "Redirect URLs" is enabled there. Otherwise, you can't set your homepage or any custom page for WP-Admin redirects. ![Redirect URLs options](https://d1k2c27psfzbiv.cloudfront.net/wp-content/uploads/2023/10/07061345/Redirect-URLs-options.webp) As soon as you tap on the module name, a Login URL page combined with the "New Login URL" and "Redirect Admin" fields will be presented to you. At this time, you need to fill out both fields with appropriate data. You must input a unique login URL and remember this to login again. This will be your new unique login URL. Make sure to note down this link somewhere so that you don't forget and share it with your co-worker. Then inside the Redirect Admin option, just input your homepage slug, or any custom page, even a 404 page (If you like to redirect wp-admin to 404 page). #### How to get the Homepage Slug? If you can't remember your homepage slug. Then, you need to set "Your Latest Post" from settings> Reading> Your homepage display. Without doing this, you can't check the exact slug of your website homepage. Just navigate to pages> all pages. Now search for your that page which is your homepage. Now Quick edit your homepage and you will get your page slug here. Take a look at the following screenshot. Also, make sure you have set your homepage properly from Settings> Reading option. Finally, click on the Save button and check for the instant changes. If everything goes well, users who are willing to visit the admin page of your site will be driven directly to the homepage. Also, you can [redirect users after login](https://wpadminify.com/docs/adminify/security/redirect-users). ### wp-admin Redirects to Homepage using Function.php There are only 3 steps you should follow carefully. - Access your WordPress site's files, either through FTP or your hosting control panel. (Highly recommended to use FTP or Cpanel instead of default WordPress Admin code editor) - Locate the `functions.php` file in your active theme's directory (usually in `/wp-content/themes/your-theme-name/`). - Open the `functions.php` file using a code editor (Visual Studio, Sublime) and add the following code at the end. ``` function wp_adminify_custom_login_redirect() { if (strpos($_SERVER['REQUEST_URI'], 'wp-admin') !== false && !is_user_logged_in()) { wp_redirect(home_url()); exit; } } add_action('init', 'wp_adminify_custom_login_redirect'); ``` Save the changes and this is the last step. ## Testing the Redirection After implementing either the code-based or plugin-based redirection, it's essential to test it. Try to access your WP-Admin page to ensure that it redirects to the homepage. ![redirect to custom 404 page for WordPress default Login URL](https://d1k2c27psfzbiv.cloudfront.net/wp-content/uploads/2023/06/12111818/redirect-to-custom-404-page-for-WordPress-default-Login-URL.gif) ## Final Words Fixing wp-admin redirects to homepage doesn’t have to be hard. Start with debugging, isolate the cause, then secure your site by hiding the wordpress login redirect path. Whether you use WP Adminify for simplicity or wp_redirect() for control, you now have full power over your wp admin path, admin url for wordpress, and login flow. Take action now: Back up your site, test in staging, and lock down your wp login URL today. ### Related Reading - [WordPress dashboard guide](https://wpadminify.com/complete-guide-to-wordpress-admin-panel-for-beginners) - [dashboard not loading](https://wpadminify.com/guide-to-fixing-wordpress-dashboard-not-loading) ## WordPress Login Redirect Loop FAQs ### What causes WP-Admin to redirect to the homepage unexpectedly? Unexpected redirects often stem from plugin/theme conflicts. This might happen due to a corrupted .htaccess file, mismatched site URLs in the database, or cached data. Start with enabling WP_DEBUG to log errors. Then systematically deactivate plugins and switch themes to detect the issue. This methodical approach prevents guesswork and ensures a quick fix without data loss. ### Is hiding the login URL enough to secure my WordPress site? Hiding the login URL provides useful protection by blocking automated attacks on the default /wp-login.php path. However, it's not enough on its own. Skilled hackers can still guess or scan for it. Combine it with redirects, login attempt limits (using plugins like Loginfy), strong passwords, and two-factor authentication for full security. ### Will adding code to functions.php break my site? If added correctly at the file's end and tested immediately, it shouldn't break anything. But always back up functions.php first. Use FTP for edits to avoid timeouts, and if errors occur, revert the backup. For child themes, this ensures updates don't overwrite your customizations. ### How do I revert the redirect if something goes wrong? To disable a plugin-based redirect, deactivate WP Adminify or toggle off the feature in its settings. For code-based, simply remove the added function from functions.php and save. Clear caches afterward, and if locked out, access via FTP to rename the plugins folder or edit the file directly. ### Can I redirect logged-in users differently from non-logged-in ones? Yes you can. You need to modify the code's condition or use WP Adminify's post-login redirect options. For instance, send admins to the dashboard and subscribers to a welcome page. ### How do I fix a login loop if I cannot get into the dashboard at all? Everything on this page is fixable over SFTP or in your host file manager, no login needed. Set WP_HOME and WP_SITEURL in wp-config.php to override whatever is in the database, then rename the plugins folder to force-deactivate everything at once. Log in, rename it back, and reactivate one plugin at a time until the loop returns, which tells you which one caused it. ### Does this work on multisite installations? For WordPress Multisite, use network-activated plugins like WP Adminify, and adjust .htaccess rules. Code in functions.php applies site-wide. But tests on a staging site first to handle unique multisite redirects without affecting subsites. ### How do I fix a WordPress login redirect loop? Fix a WordPress login redirect loop in this order: clear your browser cookies and cache, deactivate all plugins (rename the plugins folder over FTP), switch to a default theme, and make sure WP_HOME and WP_SITEURL match in wp-config.php. If it persists, regenerate the .htaccess file. Most loops come from incorrect site URLs or a plugin blocking login cookies. ### Does Cloudflare cause a WordPress login redirect loop? Yes, when the SSL mode is set to Flexible. Cloudflare reaches your origin over plain HTTP while WordPress expects HTTPS, so each side redirects the other and the browser reports ERR_TOO_MANY_REDIRECTS. Switch SSL/TLS to Full (strict), install a valid certificate on the origin, then purge the Cloudflare cache before testing again. ### Why does WordPress redirect to the homepage when I am logged in? A redirect that only happens once you are logged in usually comes from a login-redirect rule rather than a broken cookie. Check any membership, security or LMS plugin for a post-login redirect setting, and look for a login_redirect or template_redirect filter in your theme functions.php file. Deactivating plugins in bulk confirms it in a minute. ### Why does my WordPress login page just refresh instead of showing an error? Silence means the password was accepted and the cookie was then rejected, so WordPress has nothing to report. A wrong password always returns a red error box. If you get no error at all, check your site URLs, clear cookies for the domain, and regenerate the salts in wp-config.php before you suspect your credentials. ### Keep Your Dashboard Working for You Once wp-admin loads again, it's worth making it faster and easier to work in. The complete guide to [customizing the WordPress dashboard](https://wpadminify.com/wordpress-dashboard-customization) covers menus, widgets, branding and dark mode - and if slowness was part of the problem, see [why the WordPress admin gets slow](https://wpadminify.com/why-is-my-wordpress-admin-so-slow). --- # How to Customize the WordPress Login Page Without a Plugin? URL: https://wpadminify.com/customize-wordpress-login-page-without-plugin Last updated: 2026-08-26 You can restyle the [WordPress login page](https://wpadminify.com/loginfy) completely with about forty lines of CSS and a handful of PHP hooks. Nothing gets installed, nothing gets written to the database, and there is no settings screen to click through. If you already write CSS, this is the cleanest way to do it. This article is the code method in full: the logo, the background, the form, the button, the links, the error messages, and the one file you must never touch. ![Default WordPress login page](https://d1k2c27psfzbiv.cloudfront.net/wp-content/uploads/2025/07/16040322/Default-WordPress-login-page.webp) ## Never edit wp-login.php The login page lives in `wp-login.php` at the root of your WordPress install. It is a core file. Editing it breaks in two ways, both guaranteed: - The next WordPress update overwrites the file and your changes vanish with no warning. - Some hosts and security scanners flag a modified core file and may block automatic updates entirely, which is a worse outcome than an ugly login page. Everything below works through hooks WordPress provides specifically so you do not have to touch that file. ## Where the code goes Two options, and the choice matters more than most tutorials admit. A child theme. Put the PHP in `functions.php` and the CSS in a file beside it. Correct for a site where the login design is part of the theme's identity. It disappears if you switch themes. A must-use plugin. A single PHP file in `wp-content/mu-plugins/`. It loads automatically, cannot be deactivated from the admin, and survives a theme change. Correct when the login branding belongs to the site rather than the theme, which on a client site it usually does. The code is identical either way. Examples below assume a child theme; to use an mu-plugin, create `wp-content/mu-plugins/login-branding.php`, open it with ` Themes. Then, click Add New at the top of the Themes page. You’ll see a list of available themes. You can also use the search bar if you want specific themes to install. Once you select a theme you like, click Install. After the theme is installed, click Activate to make it your site’s active theme. #### How to Customize Themes in WordPress To customize your active theme, click on Customize under the Appearance menu. This opens the Theme Customizer, where you can make various changes and see a live preview. ![Customize Full site editing theme](https://d1k2c27psfzbiv.cloudfront.net/wp-content/uploads/2024/07/21121753/Customize-Full-site-editing-theme.webp) Common customization options include changing the site title and tagline. Also, modifying colors and fonts, adding a logo is kind of the first thing every site owner does. After you’re happy with your changes, click Publish to save them. WordPress by default gives you notices if a theme has any updates. But, sometimes it might break your current site and you don’t want to update the theme. So, you can [hide this update notice in WordPress](https://master-addons.com/disable-wordpress-admin-notice/). ### How to Create and Manage Menu in WordPress Menus are essential for site navigation. Here’s how to create and manage them. Let me tell you a secret: you can [create custom menus in WordPress Dashboard](https://wpadminify.com/how-to-create-a-custom-menu-in-wordpress). First, you need to navigate to Menus. To do so, click on Appearance from the admin bar and select Menus. Now, click on Create a new menu. Give your menu a name and click Create Menu. Add items to your menu by selecting pages, posts, categories, or custom links. ![Add menu in WordPress frontend](https://d1k2c27psfzbiv.cloudfront.net/wp-content/uploads/2024/07/21122508/Add-menu-in-WordPress-frontend.webp) Now, to manage menus in WordPress, drag and drop menu items to rearrange them. Create sub-menus by dragging an item slightly to the right under another item. Click the arrow next to a menu item to edit its details or remove it from the menu. Use the WP Adminify [menu duplicator](https://wpadminify.com/features/productivity) to easily clone your entire menu or specific menu items. ## How to Install Plugins in WordPress You can’t build a house without tools. Similarly you can’t build a good WordPress website without plugins. Plugins are powerful additions that extend the functionality of your WordPress site. With plugins, you can add new features, enhance security, improve performance, and much more. Let me tell you all about it. ### What are Plugins? Plugins are pieces of software that add specific features to your WordPress site. Think of them as apps for your website. Suppose you want to create a site, then you’ll definitely [need a page builder](https://master-addons.com/). For the contact page you’ll need a contact form plugin. And similarly for every aspect you’ll need plugins that help you with those specific sections for your site. ### Installing Plugins in WordPress First things first, here’s how you can easily install a plugin in your Wordpress website. You need to navigate to the plugins section. Click on Plugins from the admin bar and select Add New. ![Add plugin in WordPress Dashboard](https://d1k2c27psfzbiv.cloudfront.net/wp-content/uploads/2024/07/21122807/Add-plugin-in-WordPress-Dashboard.webp) You’ll see a search bar at the top right. Type in keywords related to the features you need. You’ll see a lot of plugins available for the feature. You can browse through the results to make your pick. Each plugin has a short description, user ratings, and details about its last update. Once you find a plugin you want to use, click Install Now. The button will change to Activate once the installation is complete. Click Activate to enable the plugin on your site. ### How to Manage Plugins in WordPress? After you complete the installation, you can manage your plugins from the Plugins page. To see installed plugins, click on `Plugins > Installed Plugins`to see a list of all the plugins currently active on your site. ### How to Deactivate Plugins in WordPress? To deactivate a plugin, click Deactivate below the plugins name. Deactivating a plugin doesn’t delete it; it simply turns off its functionality. ![Deactivate plugin in WordPress dashboard](https://d1k2c27psfzbiv.cloudfront.net/wp-content/uploads/2024/07/21123030/Deactivate-plugin-in-WordPress-dashboard.webp) You can reactivate a plugin by clicking the Activate button below its name. ### How to Update Plugins in WordPress? Make sure to update your plugins every now and then. It helps fix bugs and glitches. Also, it improves the security and performance. You’ll see a notification in the admin bar when updates are available. To update a plugin, go to `Plugins > Installed Plugins`. Now, you’ll see a Update Now button below the plugin that needs updating. Click on it to update your plugin. ### How to Delete Plugins in WordPress? To delete a plugin you need to deactivate it first. Then, click Delete below its name on the Installed Plugins page. You’ll see a prompt to confirm this for extra safety or misclick. So, if you think you don;t need the plugin anymore, confirm the deletion prompt. This will delete the plugin and its data. You can Reinstall the plugin from the plugin directory mentioned earlier. ## How to Update WordPress Keeping WordPress updated is vital for security and performance. Here’s how to handle updates: Just like themes and plugins, WordPress cores also come with regular updates. It gives you performance updates, bug fixes and new features. So, updating it can be a great way. Note: Please make sure to keep backup of your data before handling core updates. Otherwise you might lose your data or the site might break due to update glitches. ![WordPress core update in Dashboard](https://d1k2c27psfzbiv.cloudfront.net/wp-content/uploads/2024/07/21123219/WordPress-core-update-in-Dashboard.webp) To update WordPress code, you need to navigate to Dashboard > Updates. If a new version of WordPress is available, you’ll see a notification here. Click Update Now to start the update process. ## WordPress Admin Panel - FAQs ### What is the admin panel in WordPress? The WordPress admin panel is the password-protected back end of your site at yourdomain.com/wp-admin. It is where you write posts and pages, upload media, install plugins and themes, manage users, and change every site setting. Visitors never see it - only logged-in users with the right role can open it. ### How do I access the WP admin panel? Type yourdomain.com/wp-admin into your browser and log in with the username and password you set during installation. WordPress then drops you on the Dashboard home screen. If you have forgotten your password, use the Lost your password link on the login page to reset it by email. ### What is the difference between the admin panel and the admin dashboard? They get used interchangeably, but they are not identical. The admin panel is the whole administration area at /wp-admin - every screen in the sidebar. The Dashboard is a single screen inside it, the home page at /wp-admin/index.php where your widgets sit. The dashboard is part of the admin panel, not the other way round. ### What are the default WordPress dashboard widgets? WordPress ships five by default - At a Glance, Activity, Quick Draft, WordPress Events and News, and Welcome - plus the Site Health Status panel. At a Glance counts your content, Activity shows recent posts and comments, and Site Health flags configuration problems worth fixing. ### Can I customize the WordPress admin panel without code? Yes. Screen Options handles basic show-and-hide for free, and a dashboard plugin covers the rest - reordering or hiding admin menu items per user role, swapping in your own widgets, applying your branding, and changing colours. None of it requires editing functions.php or touching core files. ### Why does my WordPress admin panel look different from the screenshots? Hosting providers often pre-install plugins that add their own menu items, and themes, page builders, and admin customization plugins all add screens of their own. A WooCommerce site, for instance, gains entire sections for products and orders. The core screens are still there - there is simply more sitting beside them. ## Conclusion Kudos to you! You’ve reached the end of this article. I’ve tried to cover all the basics you’ll ever need to know to use WordPress. In case you think I've missed something, please let me know in the comment below. And I will definitely add them in the article for others to help. Just like you, there are a lot of people trying to get help. And all I’ve tried is to help you and others understand how easy it is to use WordPress. If you think I’ve done a good job, don’t forget to share it with your friends or someone you know who might get help from this article. You can further customize the WordPress admin Panel with an all-in-one solution like WP Adminify. Explore its [WordPress dashboard customization](https://wpadminify.com/features/dashboard-customization) feature set. Please check it out. It will definitely help you customize your WordPress admin dashboard like a dream. Be confident when working in WordPress, and we are all here to help you out. Cheers! ### Next Step: Make the Admin Panel Yours Once you know your way around wp-admin, the next step is shaping it to your workflow. The complete guide to [customizing the WordPress dashboard](https://wpadminify.com/wordpress-dashboard-customization) covers menus, widgets, branding, dark mode and login page customization - no code required. ## Where to go next Once the admin panel stops feeling unfamiliar, the next question is usually how to bend it to your own workflow - hiding the menus you never open, replacing the default widgets, and giving clients a screen that shows only what they need. Our [WordPress dashboard customization guide](https://wpadminify.com/wordpress-dashboard-customization) covers every method for that, plugin and no-plugin alike. If the menu itself is what feels cluttered, the [admin menu editor](https://wpadminify.com/features/admin-menu-editor) is the quickest place to start. And when it is time to hook up Google Analytics or Search Console, you can [add code to WordPress header without a plugin](https://wpadminify.com/add-code-to-wordpress-header). --- # How to Customize the WordPress Login Page (2026 Guide) URL: https://wpadminify.com/customize-wordpress-login-page Last updated: 2026-08-25 You can customize the WordPress login page three ways: with a login page plugin, with custom code in your theme's `functions.php` file, or with a full white-label tool that brands the login screen and the dashboard together. This guide walks through each method, so you can replace the default WordPress branding and match the login page to your site. (Updated August 2026) ## What does it mean to customize the WordPress login page? Customizing the WordPress login page means changing the design of the `wp-login.php` screen so it carries your branding instead of the stock WordPress logo. You can swap the logo, set a background image or colour, restyle the login form and button, edit the welcome and error messages, and even move the login URL. The goal is a login screen that looks like part of your site, not a generic default login. ## Why customize the WordPress login page? A branded login page builds trust and improves the user experience for everyone who signs in. The default WordPress login screen shows the [WordPress logo](https://wpadminify.com/change-wordpress-login-logo) and links back to wordpress.org, which looks unfinished on a professional site and confusing to clients. Customizing it lets you reinforce your brand, guide users with clear messaging, and, when paired with a URL change, add a layer of login security. For agencies and freelancers, a custom login page is part of the deliverable. When a client opens their WordPress site and sees their own logo on the login screen, the whole build feels bespoke. That is why login customization sits alongside [WordPress dashboard customization](https://wpadminify.com/wordpress-dashboard-customization) in most white-label workflows. ## What can you customize on the WordPress login page? Almost every visible element of the WordPress login screen can be changed. The most common customizations are: - Logo: replace the WordPress logo with your own and change where it links. - Background: set a brand colour, an image, or a gradient behind the login form. - Login form: restyle field borders, labels, width, and the submit button. - Colours and fonts: match the login page typography to your brand. - Messages: edit the welcome text and the error messages users see. - Login URL: move the login page away from the default path for security. - Redirects: send users to a chosen page after they log in, often by role. ## How do you customize the WordPress login page with a plugin? The fastest way to customize the WordPress login page without code is a login page plugin. Install it, open its customizer, then change the logo, background, colours, and form with a live preview before you save. Popular choices include LoginPress, Custom Login Page Customizer by Colorlib, and WP Adminify's Loginfy module. Our roundup of the [best WordPress login page plugins](https://wpadminify.com/best-wordpress-login-page-plugin) compares them in detail. [Loginfy](https://wpadminify.com/loginfy), the login page builder inside WP Adminify, runs in the native WordPress Customizer and ships with 16 ready-made templates. You can change the logo, set a background colour, image, video, or slideshow, and adjust the form and buttons, all with a live preview and custom CSS and JavaScript for finer control. Because it is part of an admin toolkit, the same plugin also brands the dashboard behind the login screen, which keeps the whole experience consistent. https://www.youtube.com/watch?v=YVns3KGbAkY Watch: customize the WordPress login page with no code using Loginfy The plugin route suits most WordPress site owners because it needs no code and shows every change instantly. If you manage one site or fifty, a customizer-based plugin is the safest way to build a custom login page you can update later without touching files. ## How do you customize the WordPress login page with code? You can customize the WordPress login page without a plugin by adding a few hooks to your theme's `functions.php` file or a small site plugin. WordPress exposes dedicated login hooks for exactly this: `login_enqueue_scripts` to add CSS to the login screen head, and the `login_headerurl` and `login_headertext` filters to change where the logo links and its title text. This example replaces the logo and points it at your home page: ``` // Replace the login logo and style the login screen function mysite_login_styles() { ?> #login h1 a { background-image: url('/wp-content/uploads/my-logo.png'); background-size: contain; width: 320px; height: 80px; } body.login { background: #0b1f3a; } Themes. Now, activate a default theme like Twenty Twenty-five. Try FTP or cPanel, if you can’t access the dashboard. Rename the active theme’s folder. WordPress will switch to a default theme automatically . ### Verify File Permissions Wrong file permissions is a reason why the WordPress dashboard fails to load. If WordPress can’t access important files, the admin panel with break. But there's an easy fix for it. Use FTP or hosting cPanel to check file and folder permissions. Set value for the folders to 755 and files to 644. Now apply the changes and refresh your admin panel. ![File permissions](https://d1k2c27psfzbiv.cloudfront.net/wp-content/uploads/2024/09/12113432/File-permissions.webp) ### Increase PHP Memory Limit Low memory is another reason for the issue. You can fix this by increasing the PHP memory limit. Open your site files using FTP or cPanel. Find and edit the wp-config.php file. Add this code before this comment /* That's all, stop editing! */: define('WP_MEMORY_LIMIT', '256M'); It increases the PHP memory limit. This can solve dashboard loading issues caused by low server resources. ![PHP memory limit increase](https://d1k2c27psfzbiv.cloudfront.net/wp-content/uploads/2024/09/12113434/PHP-memory-limit-increase.webp) ### Repair WordPress Database Corrupted anything is bad. And so is for WordPress database. It causes troubled loading for WordPress. But there's a solution. Add the following line to your wp-config.php file: define('WP_ALLOW_REPAIR', true); ![Database repair on wp.config.php file](https://d1k2c27psfzbiv.cloudfront.net/wp-content/uploads/2024/09/12113436/Database-repair-on-wp.config.php-file.webp) Now, Visit http://[yourdomain].com/wp-admin/maint/repair.php. It will give you on-screen instructions to repair your database. Follow it carefully. Don’t forget to remove the repair line from wp-config.php after you're done. ### Re-upload WordPress Core Files Replace Core Files: If your WordPress core files are corrupted, re-uploading fresh copies can resolve the issue. Sometimes the core files of WordPress gets corrupted. The only fix for this is re-uploading the core files. Then extract the files. Now, overwrite your existing wp-admin and wp-includes directories via FTP. Note: This will not remove any current site data. But I strongly recommend to keep a backup. ![File directory](https://d1k2c27psfzbiv.cloudfront.net/wp-content/uploads/2024/09/12113437/File-directory.webp) ### Check Server Logs for Errors Review Server Error Logs: Server errors can give you clues about what’s going wrong. Well, if everything goes in vain, there's a last resort. Check the server error logs. Sometimes they contain important information on why the WordPress is acting weird. You can access the server logs via cPanel or hosting dashboard. Check the recent logs to find any errors. The issues you can see here for example: file permission issues, PHP versions failure, etc,. If you can't find the issue, please contact your hosting provider for assistance. ### Related Reading - [WordPress dashboard guide](https://wpadminify.com/complete-guide-to-wordpress-admin-panel-for-beginners) - [control the Heartbeat API](https://wpadminify.com/how-to-control-wordpress-heartbeat-api) - [WP-Admin redirect fix](https://wpadminify.com/wp-admin-redirects-to-homepage) ## Why does the dashboard look unformatted or unstyled? If wp-admin loads but appears as raw text and broken links, the page itself is fine and only its CSS failed to arrive. Open your browser console and look at the failed requests, because the reason is almost always one of four things. Mixed content. The site runs on HTTPS but admin assets are still requested over HTTP, so the browser blocks them. Check that both the WordPress Address and Site Address use https. A caching or minification plugin is combining admin CSS and serving a stale or corrupt bundle. Exclude wp-admin from optimisation, then clear the cache. A CDN or proxy such as Cloudflare is caching admin assets it should pass through. Purge it and bypass the cache for wp-admin. File permissions on wp-admin or wp-includes are too strict, so the server refuses to serve the stylesheets. If you are styling the admin yourself, a rule that fails to load can look identical to this. Our guide to [custom CSS in the WordPress admin panel](https://wpadminify.com/custom-css-in-wordpress-admin-panel) covers enqueueing correctly so your own styles are not the cause. ## Why is the dashboard blank or completely white? A blank white screen usually means PHP hit a fatal error and stopped before sending any output, so there is nothing to render. Turn on debugging to see the actual error rather than guessing: set `WP_DEBUG` and `WP_DEBUG_LOG` to true in `wp-config.php`, reload, then read `wp-content/debug.log`. The error text names the offending file, which is usually a plugin or theme. Exhausted memory is the other common cause, and that one is worth ruling out first because the fix is a one-line memory limit increase. ## Why are Screen Options and Help missing or unresponsive? Those two tabs are drawn by admin JavaScript, so when they vanish or refuse to open it points to a script error rather than a missing feature. Check the console for a failed script, since one plugin throwing an error early stops every later script on the page, including the ones powering those panels. Some screens genuinely have no Screen Options, and a plugin may be hiding them deliberately for non-administrator roles. Confirm you are on a screen that offers them, and test as an administrator, before treating it as a fault. ## Why is admin JavaScript not working? Symptoms cluster together: drag-and-drop stops, dropdowns stay shut, the media uploader hangs. One broken script breaks the rest, so find the first console error rather than the loudest one. The usual causes are a plugin loading its own jQuery and clashing with core, a minifier concatenating admin scripts in the wrong order, or `SCRIPT_DEBUG` left on while a file is missing. Deactivate plugins in halves to find the culprit quickly instead of one at a time. ## Why are Pages or Posts not showing in the dashboard? If wp-admin loads normally but Pages or Posts shows an empty list, WordPress is not broken. The list table is being filtered before it reaches you, and the content is almost always still in the database. Work through these in order. A status filter is still active. The links above the list (All, Published, Draft, Trash) persist between visits. Click All, then check Trash in case the pages were deleted rather than unpublished. Screen Options is hiding them. Open Screen Options at the top right and raise the pagination value. A site with hundreds of pages and a per-page value of 1 looks empty on every screen except the first. Your role cannot see them. Listing other people's pages requires the `edit_others_pages` capability. A Contributor, or a custom role missing that capability, sees only its own drafts, which may be none at all. A plugin is filtering the query. Anything hooked to `pre_get_posts` or `parse_query` without an `is_admin()` check will empty the admin list table as well as the front end. Disable plugins in halves until the list returns. The post type is no longer registered. If a theme or plugin registered a custom post type and is now inactive, its entries stay in `wp_posts` but the menu item and its list disappear. The tables are corrupted. After a failed import or migration, run a database repair before assuming the content is gone. If the Pages menu item itself is missing rather than the list beneath it, that is a different fault. Our guide to the [WordPress admin menu not showing](https://wpadminify.com/wordpress-admin-menu-not-showing) covers capability and menu registration problems in detail. ## WordPress Dashboard Not Loading FAQs ### Why is my WordPress dashboard not loading? Common causes include plugin conflicts, exhausted PHP memory, corrupted .htaccess file, or database connection issues. Disable plugins one by one to isolate the problem. ### How do I fix a white screen in WordPress admin? Increase PHP memory limit to 256M in wp-config.php, disable all plugins via FTP, and switch to a default theme to test. ### Can a plugin cause the dashboard to stop loading? Yes. A faulty plugin is the most common cause. Access your site via FTP and rename wp-content/plugins to temporarily disable all of them. ### How do I access WordPress admin if the dashboard is broken? Use FTP or your hosting file manager to rename the plugins folder, edit wp-config.php, or access phpMyAdmin to reset your password or disable plugins directly in the database. ### Why is my WP not opening? If nothing opens, front end and admin alike, the fault is upstream of WordPress: DNS, the web server, or PHP itself. Check your host's status page first. If only wp-admin fails while the front end works, it is a WordPress-level fault such as a plugin conflict, a memory limit, or file permissions. ### Why isn't my WordPress page showing up? In the dashboard, an empty Pages list is usually a status filter, a low Screen Options pagination value, or a role without the edit_others_pages capability. On the front end, a page that exists in the dashboard but returns a 404 is nearly always a permalink problem: re-save Settings then Permalinks to flush the rewrite rules. ### Why are my WordPress plugins not showing up on my dashboard? Either the list is being filtered by code hooked to the all_plugins filter, or your role lacks the activate_plugins capability. Only Administrators see the Plugins screen, and on Multisite it stays hidden from site administrators unless the network enables it. ### Why is the WordPress admin not loading CSS and JS? The browser is being refused the admin assets. The usual causes are mixed content (the site runs on HTTPS but assets are requested over HTTP), a minification plugin bundling wp-admin, a CDN caching admin files it should pass through, or permissions on wp-admin and wp-includes that are too strict. Read the blocked requests in the browser console before changing anything. ## Final Thoughts WordPress dashboard not loading issues are quite common. But it can be very frustrating when you need to fix/update something on your site. But I've tried to cover all the aspects of how and why issues might appear. Also I gave the solution to fix them. As we all know prevention is better than cure. So, check these every now and then to avoid sudden collapse of your website. Best of luck! ### After the Fix: Make the Dashboard Yours With the dashboard loading again, consider decluttering it so problems are easier to spot next time: the guide to [customizing the WordPress dashboard](https://wpadminify.com/wordpress-dashboard-customization) shows how to remove unused widgets, simplify menus and speed up wp-admin, and [this breakdown of slow-admin causes](https://wpadminify.com/why-is-my-wordpress-admin-so-slow) helps if loading is still sluggish. --- # White Label WordPress Development: The Agency Process Guide URL: https://wpadminify.com/white-label-wordpress-development Last updated: 2026-08-24 White label WordPress development means building client sites on WordPress while presenting the whole stack, dashboard, login screen, emails and even plugin names, as your agency's own platform. The client sees your brand everywhere. WordPress and its plugin vendors stay invisible. There are two ways to get there: custom code you maintain on every client site, or a [white label WordPress module](https://wpadminify.com/features/white-label) that applies your branding across all of them from one settings panel. This guide covers the deliverables clients actually notice, a repeatable onboarding checklist, and where each approach breaks down. Here, the White Label WordPress Development terms come. With the help of the WP Adminify plugin, you can easily rebrand WordPress default Dashboard. Also, you can [rebrand the WP Adminify plugin as well](https://wpadminify.com/docs/adminify/white-label/rebrand-wp-adminify-plugin). - Your dashboard and your branding - Not WordPress or plugin developers. - A smoother experience for your clients - Free of distractions and confusion. - Less time spent on custom development - Focus on value, not rebuilding interfaces. This guide walks you through what white label WordPress development entails, including essential white label features, to help you build a professional, scalable, and fully branded WordPress experience without unnecessary complexity. Let’s dive in. ## Essential White Label Features for WordPress Development There are a ton of things to consider when you’re delving into white label WordPress development. Custom UIs, workflows, branding, and other various things. In this section, we’ll discuss the exact features you’ll need and the tools that are the best candidates for getting the job done. ## Branding & Customization The starting base for any [White label WordPress development](https://wpadminify.com/docs/adminify/white-label/wordpress-white-label-features) is crafting a unique and cohesive professional experience for clients. From the login screen to the dashboard widgets, everything should reflect the client’s brand or your agency’s identity. ### WordPress Admin panel customization A branded and personalized admin panel makes it faster for users to navigate inside the admin panel. Not only for navigation, it also boost the productivity. Consider while customizing - Replace WordPress Branding: Change the logo on the login page, admin bar, add your footer copyright text. - Remove unwanted Admin Menus: Hide all unwanted admin menu items that can create confusion to your non tech client. - Rearrange Admin widget: Remove unnecessary dashboard widget and drag and drop their position to make a perfect admin panel. - Add Custom Admin Widgets: Include custom messages, support links, or tutorials directly inside the dashboard. There are many tools to get the job done, but by far the most hassle-free plugin to use [WP Adminify](https://wpadminify.com/). WP Adminify is a powerful [WordPress dashboard customization](https://wpadminify.com/features/dashboard-customization) plugin designed to make dashboard branding effortless. Whether you’re managing sites for clients or running an agency, WP Adminify gives you complete control over the look and functionality of the admin area. Why is this the best tool, you ask? WP Adminify doesn’t limit white labeling to only the dashboard, but more on that later. With WP Adminify, you can: Change the dashboard background and colors WP Adminify comes with its own unique dashboard templates as well as the ability to create your own color schemes. Use custom logos for both light and dark modes Yes, WP Adminify also comes with a smart dark mode with time scheduling features on top of the logo changing capabilities. Rename WP Adminify and add custom plugin descriptions to match your brand Use WP Adminify as your own in-house tool with minimal effort. Hide unwanted WordPress elements Keep your dashboard as clean as you need it to be. Add custom dashboard and welcome widgets for a more guided experience Create custom dashboard widgets that help users navigate the dashboard better. Applying these steps can provide you with a cleaner and focused WordPress Dashboard to your clients where they can manage content without hassle. ### White Labeling the WordPress Login Page You know that boring login page you see when you sign into WordPress? The plain one that looks the same on lots of sites? It doesn't really feel like your special website. It can feel a bit cheap. But what if that login page looked like part of your site? Like it belonged? That's where Loginfy comes in! It's a super easy plugin that lets you make your login page look cool and match your brand. Want just your logo? Or maybe change the whole login box? Loginfy makes it simple. You can do it all with easy settings. Key Customizations for the Login Page - Custom Logo & Branding: Replace the WordPress logo with the client’s logo. - Custom Background & Colors: Match the login page design with the website’s brand colors. - Custom Login Form Styling: Modify button styles, input fields, and fonts for a consistent look. - Redirects & User Experience Tweaks: Customize where users are redirected after login to improve workflow. For full control over the WordPress login page, Loginfy is the perfect solution. The best part? You can easily put your own logo right there on the login page. No more boring WordPress logo! This way, people see your brand the very second they sign in. Everything looks like it belongs together right from the start. Change the background, colors, and form styling to create a seamless experience Ensure that your login page fully reinforces your branding. Remove unnecessary login page elements Remove elements such as the "Remember me" button, disable the login shake, lost password buttons as well as other login page elements. Set custom login redirects [BONUS] This is a WP Adminify feature that you can use alongside Loginfy to redirect the login page for better security or guide different types of users to different types of content and pages on both login and log out. Why Branding & Customization Matter WP Adminify and Loginfy serve as a great one-two punch to ensure that all your branding headaches are taken care of. By using WP Adminify for dashboard customization and Loginfy for login page branding, you can offer a fully white-labeled WordPress solution without writing a single line of code. ## Admin & Dashboard Control Not only branding but also controling what your clients see in their dashboard matters on White label development. This ensures that your clients, members will get their necessary access in a clean environment. ### Restricting Admin Menu Access All of your adminstrator or editor don't need full access. For example, it's necessary to provide your client admin access but without some special plugin option or settings or tools menu. Key Customization Options for Admin Menus - Hide Admin Menus: Prevent unwanted changes by your clients with hiding some crucial admin menu items. - Restrict Menu Access by User Role: Block access for specific admin menu items for some user role. - Rename or Reorder Menu Items: Make the navigation process more smoother by reorder the admin menu items and rename default menu label. - Disable Plugin & Theme Editing: Block the option to edit plugin and theme files from editing for clients. This is where WP Adminify’s Admin Menu Editor can be helpful. Admin Menu Editor WP Adminify plugin offers the [admin menu editor](https://wpadminify.com/features/admin-menu-editor) for all users. You can implement all of my mentioned customization with the help of WP Adminify plugin. You can also assign visibility rules based on user roles and create complex submenu structures based on custom requirements to create a completely unique dashboard menu. ### Customizing the Admin Bar The admin bar offers users to quickly access to all necessary option. But by default there is no control. Third party plugin inject their option in the admin bar and there is no way you can add custom links or hide existing items. Key Customizations for the Admin Bar - Hide Items: Remove or hide all unwanted admin bar items that seems unnecessary. - Add Custom Links: Add custom links to access quickly in from anywhere in the WordPress Dashboard. - Change Admin Bar Styling: Customize the background, color, gradient to make the admin bar more apealing. - Restrict Admin Bar Access: Restrict the functionality to preview for some user role or specific user. For complete control over the admin bar, [Admin Bar Editor](https://jeweltheme.com/admin-bar-editor) is the best solution. Admin Bar Editor is a lightweight WordPress plugin that allows you to fully customize the admin bar. With it, you can: Hide or show admin bar items based on user roles You can control what items to show to which user. This ensures that each user sees a unique admin bar based on their capabilities and permissions. Add custom links, support buttons, or internal documentation Replace generic admin bar items with items that serve your use cases better. Completely remove the front-end admin bar for specific users Not everyone needs to see the admin bar on the front end. You can remove it altogether or pick and choose who to show the admin bar for. Apply custom styles to match the brand’s aesthetics Create a custom admin bar that is not unique just in function but also in its looks. With the help of our Admin Bar Editor, you can get the full control over your default WordPress Admin bar. ### Setting Up Role-Based Access Control It's necessary to have control over your user role for differnt adminstrator, editors, authors. Sometimes it's recommaned to modify the default user role permission. [RoleMaster Suite](https://wpadminify.com/rolemaster-suite) is a completely free role manager plugin that allows you to simplify role-based access control across your dashboard. With RoleMaster Suite, you can: Control Visibility Restrict access to specific settings, menus, and plugins based on user roles. Create custom user roles Create new roles with tailored permissions that suits the different kind of users your operation requires. Add Capabilities Create unique and personalized working capabilities for different users on your website. This allows agencies and developers to provide clients with just the right amount of control, without the risk of accidental changes. ### Admin Columns Editor You know that big list of stuff (like posts or products) you see inside WordPress? Those boxes of information across the top? That's what we call the "admin columns." Sometimes, that list shows way too much stuff! Things your client might not even need to see. It can feel messy and confusing for them. But guess what? You can clean it up! You can: - Hide the Extra Stuff: Hide some columns like tags, comment and so on. Less clutter! - Put Important Things First: Move the priority columns first! Put the information your client uses most right up front where it's easy to find. - Show Special Info: Need them to see something specific, like the price of a product? You can add a column just for that! - Rename existing columns: Name something identicial for your default admin columns. Want to do all this easily? There's a super helpful plugin called [Admin Columns Editor](https://wpadminify.com/admin-columns-editor). With it, you can: Add or remove those admin columns for posts, pages, products, taxanomy basically anything! It helps you make the inside of their website neat, helpful, and perfectly customized to their needs. Rearrange Columns Just click and drag to rearrange columns to make the most important data easy to find at a glance. Integrate custom fields Integrate ACF into the columns to give clients access to any custom columns they create. Control column width Manipulate column width to ensure important columns are highlighted. With the help of Admin Columns, you can showcase necessary stuff like thumb image, created or modified date, without navigating the the editor. Why white labeling matters? White labeling doesn't refers only WordPress logo change. You need to provide the best user experience and express brand identitfy in white lableing. Non technical users sometime navigate to different critical settings in your WordPress Dashboard and accidently break something. That's why it's better to provide a better UI and control the visibility for your clients. ### Related Reading [white label WordPress guide](https://wpadminify.com/white-label-wordpress) [WordPress client dashboard](https://wpadminify.com/wordpress-client-dashboard) ## White Label WordPress Onboarding: The Client Handoff Checklist Most of the value of white label WordPress development shows up in the first ten minutes a client spends inside their new site. Before you hand over credentials, walk this list: - Login screen carries your brand, your logo, your colors, your URL. Follow the [WordPress login page white label guide](https://wpadminify.com/wordpress-login-page-white-label-guide) if you have not set this up yet. - Dashboard shows a welcome panel your agency wrote, not the WordPress news feed. A branded [client dashboard](https://wpadminify.com/wordpress-client-dashboard) tells them where everything is and how to reach you. - Menus match the client's role. Editors see content tools; nobody sees settings screens they can break. - Plugin list is clean. [Hide the plugins](https://wpadminify.com/how-to-hide-wordpress-plugins-from-clients) a client never needs to touch, and rebrand the ones they do see. - System emails come from your domain, with WordPress branding stripped from the footer. - Support links point at your help desk, not the WordPress.org forums. New to the concept and want the full picture first? Start with the [white label WordPress guide for agencies](https://wpadminify.com/white-label-wordpress), which covers every rebrandable area, then come back to the process here. When you are choosing tooling, the [best white label WordPress plugins roundup](https://wpadminify.com/best-white-label-wordpress-plugin) compares the options head to head. ## Wrapping up All of my mentioned points can be done by coding. But doing this with our WP Adminify pluigin can faster your White labeling journey. We offers tons of some other features like media folder, Heartbeat API control, Custom Dashboard widget and much more. Now it's your turn to download WP Adminify plugin and create a personalized WordPress Admin panel for your clients. --- # White Label WordPress for Agencies: The Complete Guide (2026) URL: https://wpadminify.com/white-label-wordpress Last updated: 2026-08-24 You hand a finished website to a client, they log in for the first time, and the first thing they see is the WordPress logo, a "Howdy" greeting, and a footer thanking WordPress for the site you spent three weeks building. White labeling WordPress fixes that. It means removing the default branding and replacing every screen a client touches with your own logo, colors, and wording, so the back end looks like software your agency made. This guide covers what you can rebrand, the exact code hooks that do it by hand, and the faster no-code route with a dedicated [white label WordPress](https://wpadminify.com/features/white-label) plugin. By the end you'll know how to brand the login page, dashboard, admin menu, toolbar, footer, and system emails. You'll also know where each method quietly falls apart. ## How to White Label WordPress in 5 Steps To white label WordPress, rebrand every admin screen a client sees. The fastest route is a dedicated plugin like [WP Adminify](https://wpadminify.com/features/white-label); you can also do it by hand in code. Five steps cover the whole job: - Install a white label plugin such as WP Adminify - or add branding snippets to a child theme. - Brand the login page with your logo, colors, and a custom login URL. - Replace the admin logo and favicon, and remove the “Howdy” greeting from the toolbar. - Rebrand the admin footer and trim the admin menu for each user role. - Send system emails from your brand, not from the default WordPress identity. A plugin applies all five in one interface and reuses the same branding profile across client sites; the code route works but breaks more often on major WordPress updates. Each step is detailed below. ## What Is White Label WordPress? White label WordPress is the practice of rebranding the WordPress admin area so it carries your brand instead of the default WordPress identity. Your clients log in and see your agency logo, your colors, your support links, and a dashboard trimmed to the tools they actually use. No WordPress logo, no "Howdy," no version strings that hint at what runs underneath. One point clears up most of the confusion: white labeling only touches the back end. It changes the admin dashboard, the login screen, and the notification emails, which are the parts administrators and editors see every day. It doesn't touch your public site, your theme, or your SEO. Google never crawls wp-admin, so rebranding it changes your rankings by exactly nothing. The phrase "white label" comes from manufacturing, where a generic product ships with a blank label a reseller stamps with their own brand. WordPress fits that model almost perfectly. It's open-source, GPL licensed, and endlessly customizable, which is the reason agencies can legally rebrand it and resell the result as a managed service. [↓ Free Download](https://wordpress.org/plugins/adminify/) [Unlock All Features](https://wpadminify.com/pricing) ## Why White Label WordPress Matters for Agencies An unbranded dashboard quietly undercuts the work you just delivered. Here's what changes once the back end carries your name instead of WordPress's. Perceived value goes up. A client who logs into a clean, branded dashboard feels like they bought custom software, not a free CMS with plugins bolted on. Same site, different feeling. That perception is what lets a studio charge a monthly management fee instead of a one-time build cost. Support requests go down. When a client spots the WordPress logo, they Google "WordPress help" and land on forums, YouTube tutorials, or a competitor's blog, then come back more confused than when they left. A white-labeled dashboard with your support link keeps them in your lane. Every "how do I…?" lands in your inbox, where you control the answer. Retention improves. A branded portal raises switching costs in a subtle way. Leaving "the WordPress site" feels easy. Leaving "the platform my agency built and supports" feels like firing a vendor. That's legitimate, and it works. Editors make fewer mistakes. Half of white labeling is removal: hiding the menus, widgets, and settings a client should never touch. Fewer options means fewer accidental plugin deactivations and fewer 2 a.m. "the site is broken" calls. Honestly, a role-restricted menu prevents more support tickets than any documentation you'll ever write. Quick data point: Rebranding the admin usually replaces 3–5 single-purpose plugins (login customizer, menu editor, dashboard cleanup, footer text, "Howdy" remover) with one settings panel. Fewer plugins means fewer update conflicts and a smaller attack surface. ## What Can You White Label in WordPress? White labeling isn't a single switch. It's a set of touchpoints, and a client notices the ones you skip. Cover all of them and the seams disappear. Here's the full map. | Touchpoint | Default WordPress shows… | White-labeled version | | --- | --- | --- | | Login page | WordPress logo linking to wordpress.org, generic gray form | Your logo linking to your site, branded background and colors | | Admin logo / favicon | WordPress "W" in the toolbar and browser tab | Your mark, with separate light & dark versions | | "Howdy, [name]" | Casual WordPress greeting in the top-right | Your wording, or removed entirely | | Admin toolbar | WordPress logo menu, wp.org links, comments, updates | Cleaned or rebuilt with your own items | | Admin footer | "Thank you for creating with WordPress" | Your agency credit, support line, or legal note | | Admin menu | Every menu, in WordPress order, for every role | Renamed, reordered, hidden per user role | | Dashboard widgets | WordPress News, Site Health, welcome panel | Only widgets that matter, plus custom ones | | System emails | Plain-text notices from "WordPress" | Branded sender name and content | | The customization plugin | The plugin's own name in the menu & plugin list | Renamed to your agency so nothing third-party shows | That last row is the one most agencies forget, and it's the one that gives the game away. More on it in the rebranding the plugin itself section below. ## How to White Label WordPress: The 7 Areas to Rebrand This section walks through each touchpoint in the order clients notice them, starting at the login screen, which is the very first impression they get. For each area you'll see what to change and why it matters. The manual code lives in the code section below; the screenshots here show the no-code route. ### 1. The Login Page The login screen is your client's front door, and by default it's pure WordPress: the dotted "W" logo up top, a link to wordpress.org, and a flat gray form. Branding the login page is the highest-impact change you can make, because it's the screen a client sees before they see anything else. Swap the logo for yours, point the logo link at your own site instead of wordpress.org, and set a background. That can be a solid brand color, a gradient, an image, or a slideshow. WP Adminify's login customizer (Loginfy) ships with 16 ready-made templates, so you start from a designed layout instead of a blank canvas. Step-by-step instructions are in the [WordPress login page white label guide](https://wpadminify.com/wordpress-login-page-white-label-guide), or start smaller and just [change the login logo](https://wpadminify.com/change-wordpress-login-logo). ![White label WordPress login page being designed in the Loginfy customizer with template gallery and branded background](https://d1k2c27psfzbiv.cloudfront.net/wp-content/uploads/2026/07/08052730/03-custom-login-page-loginfy.webp) While you're here, change the login URL too. The default `/wp-admin` and `/wp-login.php` paths are the first thing bots probe. A custom login URL reinforces your brand and cuts down automated login attempts at the same time. Our guide on [changing the WordPress login URL](https://wpadminify.com/change-wordpress-login-page-url) covers the security side in depth. [↓ Download Loginfy](https://wordpress.org/plugins/loginfy/) [Explore Loginfy Features](https://wpadminify.com/loginfy) ### 2. The Admin Logo & Favicon Once a client logs in, the WordPress logo sits in the top-left of the toolbar and the WordPress icon sits in their browser tab. Replace both. Upload a light-mode logo and a dark-mode logo so the mark stays crisp whether the dashboard runs light or dark, and set an admin favicon so even the browser tab reads as yours. ![WP Adminify Customize panel showing admin favicon and Gutenberg editor logo replacement fields for white label WordPress branding](https://d1k2c27psfzbiv.cloudfront.net/wp-content/uploads/2026/07/08052733/04-adminify-branding-favicon-logo.webp) Don't overlook the Gutenberg editor logo, the small WordPress mark in the top-left of the block editor. It's easy to brand the dashboard chrome and leave that one WordPress "W" staring back at every editor who writes a post. ### 3. The "Howdy" Greeting & Admin Toolbar "Howdy, Admin" is charming WordPress trivia and completely off-brand for a professional deliverable. Replace it with "Welcome," your brand name, or nothing at all. In the same pass, clean the toolbar: hide the WordPress logo menu (the one linking to About WordPress, the support forums, and Feedback), and toggle off the items a client never needs. ![Admin Bar Editor with the WordPress logo toggle switched off to remove WordPress branding from the toolbar](https://d1k2c27psfzbiv.cloudfront.net/wp-content/uploads/2026/07/08052736/05-adminbar-editor-remove-wp-logo.webp) The toolbar is also where clients accidentally wander off to wordpress.org. Removing the WordPress logo node closes that exit. If you want to go further, the Admin Bar Editor lets you add your own toolbar items: a link to your support desk, a "report a bug" form, or a jump straight to the page they edit most. [↓ Download Admin Bar Editor](https://wordpress.org/plugins/admin-bar/) [Explore Admin Bar Editor Features](https://jeweltheme.com/admin-bar-editor) ### 4. The Admin Footer Text At the bottom of every admin screen, WordPress prints "Thank you for creating with WordPress." Rewrite it. This is prime space for your agency credit, a support number, a "maintained by" line, or a link back to your site. It's a small change that shows up on every page of the dashboard, which makes it one of the highest-frequency brand impressions you get. You can also strip the WordPress version string that sits on the footer's right side. That's handy for branding and for not advertising which version you're running to anyone poking around. ### 5. The Admin Menu (Per Role) The left-hand admin menu is where white labeling stops being cosmetic and starts being functional. By default every role sees a long list of menus in WordPress's order. With an admin menu editor you can rename items (turn "Dashboard" into "Admin Panel," "Posts" into "Articles"), reorder them, assign custom icons, and hide menus per user role. ![WordPress Admin Menu Editor renaming the Dashboard menu item and setting a custom icon for a white-labeled admin experience](https://d1k2c27psfzbiv.cloudfront.net/wp-content/uploads/2026/07/08052739/06-admin-menu-editor-rename.webp) Role-based visibility is the feature that makes a client dashboard genuinely safe. An editor doesn't need Plugins, Tools, or Settings. Hide those and the interface gets simpler and harder to break in the same move. Our walkthrough on [using the WordPress admin menu editor](https://wpadminify.com/how-to-use-the-wordpress-admin-menu-editor) covers reordering and per-role rules step by step. ### 6. Dashboard Widgets & the Welcome Panel The default dashboard greets clients with a welcome panel, a "WordPress News" feed, a Site Health box, and an At a Glance widget that cheerfully announces "WordPress 7.0 running Hello Elementor theme." None of that belongs in a branded portal. Remove the widgets that leak the WordPress brand or clutter the view, and add your own: a welcome message, a text widget with your support hours, an embedded how-to video, or an RSS feed from your blog. ![Default WordPress dashboard before white labeling, showing Site Health, At a Glance, WordPress News and welcome widgets](https://d1k2c27psfzbiv.cloudfront.net/wp-content/uploads/2026/07/08052724/01-default-wordpress-dashboard.webp) The [welcome widget](https://wpadminify.com/how-to-remove-wordpress-welcome-widget-from-dashboard) is the one to remove first. It links straight to WordPress documentation and undoes the branding you set everywhere else. ### 7. System & Notification Emails Password resets, new-user notices, and comment alerts all go out from "WordPress" by default, with a `wordpress@yourdomain.com` sender. To a client, that reads like a message from a stranger. Rebrand the sender name and address so these emails clearly come from your agency or their own site. It's the least visible touchpoint and the one that quietly breaks the illusion when a client forwards you a "why is WordPress emailing me?" screenshot. ## White Label WordPress Without a Plugin (The Code Method) You can white label parts of WordPress with nothing but `functions.php` and a few filters. This route is free, adds no plugin, and is worth knowing even if you end up using a plugin, because it shows you which WordPress hooks actually do the work. Here are the ones that matter. Replace the login logo and its link: ``` function agency_login_logo() { ?> #login h1 a { background-image: url('/img/agency-logo.png'); background-size: contain; width: 100%; } home_url() ); add_filter( 'login_headertext', fn() => get_bloginfo( 'name' ) ); ``` Rewrite the admin footer text: ``` function agency_admin_footer_text() { return 'Built & maintained by Your Agency.'; } add_filter( 'admin_footer_text', 'agency_admin_footer_text' ); ``` Replace the "Howdy" greeting: ``` function agency_replace_howdy( $wp_admin_bar ) { $account = $wp_admin_bar->get_node( 'my-account' ); if ( ! $account ) return; $wp_admin_bar->add_node( array( 'id' => 'my-account', 'title' => str_replace( 'Howdy,', 'Welcome,', $account->title ), ) ); } add_action( 'admin_bar_menu', 'agency_replace_howdy', 25 ); ``` Remove the WordPress logo from the toolbar and clean the dashboard: ``` // Drop the WP logo menu from the admin bar add_action( 'admin_bar_menu', function ( $bar ) { $bar->remove_node( 'wp-logo' ); }, 999 ); // Remove WordPress News + the welcome panel add_action( 'wp_dashboard_setup', function () { remove_meta_box( 'dashboard_primary', 'dashboard', 'side' ); remove_action( 'welcome_panel', 'wp_welcome_panel' ); } ); ``` Where the code route stops working: These snippets cover logos, footer, "Howdy," and a few widgets. They won't give you per-role menu visibility, a designed login page, branded emails, plugin renaming, or a settings screen a non-developer can touch. And every snippet lives in a child theme you have to copy to each client site and re-check after major WordPress updates. On one or two sites, fine. Across a portfolio, it turns into unpaid maintenance. If you want to push the manual route further, our honest guides to [custom admin CSS](https://wpadminify.com/custom-css-in-wordpress-admin-panel) and [WordPress admin customization](https://wpadminify.com/wordpress-admin-customization) cover the code methods and their limits without pretending code solves everything. ## White Label WordPress With WP Adminify (The No-Code Method) A dedicated plugin turns everything above into a settings panel. WP Adminify handles the full set of touchpoints (login page, logos, "Howdy," toolbar, footer, menus, widgets) from one White Label screen, with role-based controls and no code to babysit through updates. ![WP Adminify WordPress White Label settings page showing Admin Bar Cleanup, Admin Footer options, footer credit toggle and footer text editor](https://d1k2c27psfzbiv.cloudfront.net/wp-content/uploads/2026/07/08052727/02-wordpress-white-label-settings.webp) Setup takes about 15 minutes end to end. A sensible order: - Install and activate WP Adminify. The free version handles the branding basics. - Open WP Adminify → White Label. - Upload your light and dark logos plus an admin favicon, set your footer text, and replace the "Howdy" greeting. - Under Admin Bar Cleanup, hide the WordPress logo, comments, updates, and anything clients don't need. - Open the Admin Menu Editor and set which menus each role can see, then rename and reorder to taste. - Open the Login Customizer (Loginfy), pick a template, and brand the login screen. - Log in with a test editor account to check the client-facing view. This is the step most people skip and later regret. ### Manual code vs plugin, side by side | Task | functions.php | WP Adminify | | --- | --- | --- | | Login page branding | Logo + CSS only | 16 templates, background, form & button styling | | Per-role menu visibility | Complex, manual | Toggle per role | | "Howdy" & footer | Yes (filters) | Yes (UI) | | Branded emails | Extra plugin/code | Built in | | Rename the tool itself | Not possible | Yes | | Survives WP updates | Needs re-checking | Maintained by the plugin | | Editable by non-developers | No | Yes | For the full list of branding options, the [white label feature page](https://wpadminify.com/features/white-label) shows what the free and Pro tiers each unlock. ## Rebranding the Plugin Itself Here's the step that separates real white labeling from a paint job: the plugin you used to brand everything shouldn't advertise itself to your client. If the dashboard is spotless but the admin menu still says "Adminify" and the plugins list still links to a third-party vendor, the illusion breaks the second a curious client clicks it. WP Adminify's plugin white label option replaces its own name, description, menu label, icon, and links with your details. Set the Plugin Name to "My Agency," set the menu label to match, and the sidebar entry that used to read "Adminify" now reads as your brand. ![WP Adminify plugin white label settings renaming the plugin to My Agency, with the admin menu sidebar now showing the agency brand instead of Adminify](https://d1k2c27psfzbiv.cloudfront.net/wp-content/uploads/2026/07/08052742/07-plugin-white-label-my-agency.webp) You can also hide the plugin's row meta links, remove its action links (Upgrade, License, Settings), and if a client should never see the branding controls at all, force-disable the White Label panel so it's hidden completely. Pair this with [hiding plugins from clients](https://wpadminify.com/how-to-hide-wordpress-plugins-from-clients) and the whole toolset goes invisible. What's left is a dashboard with no third-party branding anywhere, which is the entire point. ## White Label WordPress vs a "White Label CMS" Agencies searching for a "white label CMS" often assume they need to abandon WordPress for a purpose-built reseller platform. In practice, a white-labeled WordPress site gets you the same outcome, a branded back end your clients recognize as yours, while keeping the plugins, themes, and developer skills you already have. You're not migrating to a new platform. You're rebranding the one that already runs most of the web. There's also a specific plugin called White Label CMS, and it's worth being precise about the difference. It handles basic branding (login logo, dashboard panels, a few menu tweaks) and does that job fine. A full admin suite goes further, covering the login page design, per-role menus, toolbar, emails, security hardening, and the plugin's own branding in one place. | Capability | White Label CMS (plugin) | Custom code | WP Adminify | | --- | --- | --- | --- | | Login & dashboard branding | Yes (basic) | Yes (manual) | Yes (advanced) | | Designed login templates | Limited | No | 16 templates | | Per-role menu control | Partial | Hard | Full | | Toolbar / "Howdy" editor | Partial | Manual | Full | | Rename the plugin itself | No | No | Yes | | Security + performance tools | No | Manual | Included | | Breaks on WP update? | Rarely | Often | Rarely | We compared the two approaches line by line in [WP Adminify vs White Label CMS](https://wpadminify.com/wp-adminify-vs-white-label-cms) if you want the full breakdown. ## White Label WordPress for Client Portals The biggest payoff for white labeling is agency client management. When a client logs into a branded portal, sees only the tools they need, and reaches your support link instead of the WordPress forums, the whole relationship reads as more professional. Some studios build this branded experience into a monthly retainer. The client isn't paying for "a WordPress site," they're paying for access to a platform your agency runs. The login screen is where that impression starts: here is how to [white label the WordPress login page for your clients](https://wpadminify.com/white-label-wordpress-login-page-for-your-clients). A good client portal usually combines four of the pieces above: a branded login page, a role-restricted admin menu, a custom dashboard with a welcome widget and support links, and the plugin renamed so nothing third-party shows. Add activity logs if you manage the site on the client's behalf and want a record of who changed what. Our [WordPress client dashboard guide](https://wpadminify.com/wordpress-client-dashboard) walks through the full portal build, and the [white label WordPress development](https://wpadminify.com/white-label-wordpress-development) overview covers the agency workflow around it. ## White Label WordPress Plugins vs White Label WordPress Agencies: Which Do You Need? Search "white label WordPress" and you'll get two very different things. A white label plugin rebrands the admin area of a site you already run. A white-label WordPress agency is an outsourcing partner that builds sites under your name. If you want a client's dashboard to say your studio's name, you need the plugin. If you need someone else to do the build, you need the partner. ### When a white label partner makes sense White label agencies sell development capacity. You resell their work as your own, and the white label partner handles design, plugin development, WordPress support, or ongoing WordPress management behind the scenes. That's a staffing decision, not a branding one, and it costs a share of every project. Agencies looking to scale delivery without hiring often start there. ### Done-for-you: hire the team that builds WP Adminify Short on time, or rolling out across a fleet of client sites? You can hand the entire rebrand to the people who build the plugin. Pixar Labs runs a [done-for-you WordPress white label service](https://pixarlabs.com/wordpress-white-label-service) that configures all 60+ WP Adminify features on your sites - login, admin theme, menus, dashboard, and system emails - and delivers a fully branded dashboard in a few business days, tested against the latest WordPress. Prefer to do it yourself? The seven areas above, plus a [WP Adminify Pro license](https://wpadminify.com/pricing), cover exactly the same surfaces. The [white label setup service](https://pixarlabs.com/wordpress-white-label-service) just removes the per-site configuration work when you are managing many client sites at once. ### When a white label plugin is all you need If you already have a team of WordPress experts - or you're a solo freelancer building WordPress sites yourself - the gap isn't capacity. It's that the finished product still looks like generic WordPress. A white label plugin closes that gap in an afternoon: rebrand the WordPress admin interface, replace the WordPress logo, restyle the WordPress login page, rewrite the WordPress footer text, and hand over a dashboard that carries your branding on every screen. ## How Do You Choose a White Label WordPress Plugin? (2026 Checklist) Choosing a white label WordPress plugin comes down to coverage, roles, and scale. The right white label plugin rebrands every surface a client touches - not just the login screen - lets you vary what each role sees, and applies the same profile across multiple WordPress installs without re-doing the work per site. ### The seven criteria that actually matter - Full-surface coverage. Can it rebrand the entire WordPress dashboard - custom login page, admin logo, favicon, toolbar, footer, and system emails - or does it stop at the login screen? Partial coverage is the most common disappointment. - Role-aware control. Your client shouldn't see the same admin dashboard you do. Look for a plugin that hides menus, notices, and widgets per user role rather than globally. - Reusable profiles. If you're managing multiple WordPress projects, exporting one branding profile and importing it elsewhere saves hours per client. - Own-branding on the plugin itself. A rebranded dashboard with an unbranded plugin name still in the menu leaks the trick. Check whether the plugin can rename itself. - No conflict with WordPress core updates. Branding should be applied through hooks and filters, not by editing WordPress core files or a theme's templates. Anything that patches core will break on the next update. - Performance cost. White label performance matters because these tweaks load on every admin page view. Measure admin load before and after. - Support and licensing. Check whether the licence covers the number of client sites you run, and what happens to the branding if the licence lapses. ### Free white label plugins vs paid ones There are free white label WordPress plugins in the [WordPress.org plugin directory](https://wordpress.org/plugins/search/white+label/), and for a single site with light needs they're often enough. The limits show up at agency scale: no per-role rules, no reusable profiles, no email branding, and no way to white label the WordPress admin across a portfolio of sites. That's the line where paid tools like White Label CMS, White Label Pro, and [WP Adminify's white label module](https://wpadminify.com/features/white-label) earn their keep. If you're weighing one specific alternative, we compared them directly in [WP Adminify vs White Label CMS](https://wpadminify.com/wp-adminify-vs-white-label-cms), and the [pricing page](https://wpadminify.com/pricing) lists what each licence tier covers. For a side-by-side ranking of the leading options, see our roundup of the [best white label WordPress plugins](https://wpadminify.com/best-white-label-wordpress-plugin). ## Best Practices & Common Mistakes A few patterns separate a convincing white label from an obvious one. - Always test with a non-admin account. You configure branding as an administrator, but your client is usually an editor. Role-based rules mean the two see different dashboards, so verify the one the client actually gets. - Don't forget the login URL and emails. Agencies polish the dashboard and leave `/wp-login.php` and "WordPress" emails untouched. Those two leaks undo a lot of careful work. - Set both light and dark logos. If a client flips the dashboard to dark mode and your dark logo is missing, your branding disappears into the background. - Rebrand the tool itself. The single most common miss. A branded dashboard with an unbranded plugin name in the sidebar is a half-finished job. - Hide, don't just rename. Renaming "Plugins" to "Add-ons" still lets a client deactivate something critical. For roles that shouldn't touch it, hide the menu outright. - Keep a documented setup. If you white label a lot of sites, save your logo files, footer text, and menu rules as a repeatable checklist so every build starts from the same branded baseline. ## White Label WordPress - FAQ ### Is white labeling WordPress legal? Yes. WordPress is released under the GPL, which explicitly grants the right to modify, rebrand, and redistribute it. Rebranding the admin panel and reselling a managed WordPress service sits well inside the license. You can read the terms on the [WordPress.org license page](https://wordpress.org/about/license/). ### Does white labeling WordPress affect SEO? No. White labeling changes only the back end: the admin dashboard, login screen, and notification emails. Your public site, content, page speed, and search rankings stay exactly as they were, because search engines never crawl wp-admin. Rebranding the admin has zero SEO impact in either direction. ### Can I white label WordPress for free? Yes, up to a point. You can rebrand the login logo, footer text, and a few dashboard widgets with free functions.php code, and WP Adminify's free version covers the branding basics through a UI. The advanced pieces (designed login templates, per-role menu rules, branded emails, and renaming the plugin itself) sit in the Pro tier - the current plans are listed on the [WP Adminify pricing page](https://wpadminify.com/pricing). ### Which plugin is best for white labeling WordPress? For full coverage, WP Adminify handles the most touchpoints from one plugin: login page, logos, "Howdy," toolbar, footer, per-role menus, emails, and its own branding. White Label CMS is a lighter option for basic logo-and-dashboard branding. The right pick depends on whether you need a complete client portal or just a branded login and dashboard. ### What's the difference between white labeling and hiding WordPress? White labeling rebrands the admin experience so clients see your brand instead of WordPress's. It's a presentation change on the back end. It doesn't hide the fact that the site runs on WordPress from the public or from a developer who inspects the code. The goal is a professional, branded workspace, not concealment. ### Will white labeling break when WordPress updates? Custom code can break after major WordPress releases, since it leans on hooks and markup that occasionally change, so you have to re-test it each time. A maintained plugin absorbs those changes for you, which is a big reason agencies running several sites prefer the plugin route over scattered snippets. ### Do I need a white label WordPress agency or a white label plugin? It depends on what's missing. If you need someone to build the site, a white-label WordPress agency sells you development capacity you resell as your own. If you already build the sites and only want the admin to carry your branding, a white label WordPress plugin does that for a fraction of the cost. If you would rather not configure it yourself, Pixar Labs runs a done-for-you white label setup service that does the whole rebrand for you. ### Can you white label the entire WordPress dashboard, not just the login page? Yes. A full white label setup covers seven surfaces: the custom login page, the admin logo and favicon, the toolbar and "Howdy" greeting, the WordPress footer text, the admin menu per role, dashboard widgets, and system emails. Login-only branding is the most common half-measure clients notice. ### How do I white label WordPress across multiple client sites? Build the branding once, then reuse it. Look for a plugin that exports its settings so you can import the same profile on the next install, and check that your licence covers the number of WordPress sites you manage. Doing it by hand in each site's functions.php doesn't scale past a few clients. ### Can I customise the WordPress admin for each client? Yes. With per-role rules you can give each client a different admin experience on the same site - their own menu items, dashboard widgets, and colour theme tied to their user role. WP Adminify sets this per role, so an agency can brand and simplify the dashboard differently for every client account. ### How do I white label WordPress? White label WordPress in five steps: (1) install a white label plugin such as WP Adminify, or add branding code to a child theme; (2) brand the login page with your logo and a custom URL; (3) replace the admin logo and remove the ‘Howdy’ greeting; (4) rebrand the admin footer and trim the menu per user role; (5) send system emails from your brand. A plugin applies all five without code and reuses the same profile across client sites. ### How much does it cost to white label WordPress? You can white label the basics for free with the WP Adminify free plugin or a little child-theme code. Full white labeling - designed login pages, per-role menus, branded emails, and renaming the plugin - is a paid feature. WP Adminify Pro starts at $79 a year, with Business and Agency tiers on the pricing page. ## Conclusion White labeling WordPress is one of the cheapest ways to make your agency look more professional, and it takes about 15 minutes once you know the seven touchpoints. To recap: - White labeling only affects the back end, so it has no effect on your public site or SEO. - Cover all the touchpoints: login, logos, "Howdy," toolbar, footer, menus, widgets, and emails. - Code handles the basics for free; a plugin handles the full set without per-site maintenance. - Don't skip the two steps everyone misses: branded emails and renaming the tool itself. Start with the login page and dashboard. Those two alone reset the entire first impression a client gets. When you're ready to do the whole set from one panel, the [WP Adminify white label feature](https://wpadminify.com/features/white-label) covers every screen a client touches, and its [Loginfy login customizer](https://wpadminify.com/loginfy) gives you the designed login page to match. ## Where to go next Want to go beyond branding? Our full [WordPress dashboard customization](https://wpadminify.com/wordpress-dashboard-customization) guide walks through reorganizing menus, widgets, and the whole admin experience - the natural next step after white labeling. --- # How to Hide WordPress Plugins from Clients Without Breaking the Site URL: https://wpadminify.com/how-to-hide-wordpress-plugins-from-clients Last updated: 2026-08-24 Have you ever wanted to hide WordPress plugins from the installed plugins list? If you are a freelancer or run a WordPress agency, then you may want to hide plugins from your clients. There are certain reasons behind hiding plugins for clients or a specific user role. I can mention 3 reasons that I faced while working for a client's website - Accidental Update:  My clients sometimes update plugins without notifying me and that sometimes breaks the website. Protection: Sometimes I wanted to hide a special plugin from my clients and didn’t want them to know the actual plugin name that I have used. Finicky Clients: I faced some clients who always question why I installed this plugin, what’s the use of that plugin, why you can’t develop something like WooCommerce for my store? I used to install plugins, but hide some selected plugins for this type of user. Your reason may be different then mine, but our goal is the same, and it's to hide WordPress plugins from clients or personal websites. If you have any other reason, can you drop your reason in the comment box and let us (me and other readers) know about your interesting reason. Now you know the pros of hiding WordPress plugins, but there a major cons too. If you want to deactivate a plugin in the future that is hidden, you need to unhide this from your code, and then you will be able to deactivate it. Otherwise, you need to log in to your FTP or cPanel, then rename the plugin folder. Where there's a challenge, there's always a way forward. To resolve this plugin deactivation issue, I would like to mention the [WP Spotlight plugin](https://wpspotlight.pro/). You can use the Spotlight search system and deactivate or delete any active or installed plugin from your WordPress Dashboard. To add WP Spotlight, just navigate to Plugins> Add New and search for WP Spotlight. Install the plugin. Deactivate Elementor plugin from Spotlight search Within the setup wizard you will get a keyboard shortcut to enable the spotlight search enabled in your WordPress Dashboard. For Mac it’s `options + S` for windows it’s `Alt + S`. With the help of WP Spotlight, you can navigate through your WordPress Dashboard easily and take action. ## How to Hide a Plugin from the WordPress Plugins List To hide a plugin from the WordPress plugins list, hook a function to the `all_plugins` filter and unset the plugin's basename - the folder name, a slash, then the main PHP file, for example `woocommerce/woocommerce.php`. The plugin keeps running and its admin menus stay where they are; it simply stops appearing under Plugins > Installed Plugins. ## How to hide WordPress plugins for all users? Just copy and paste the following code in your`functions.php` file (Recommend child Theme). No need to modify the code except one line `'plugin-folder/main-index-file.php',` . Here `plugin-folder` refers the folder name of your installed plugin and `main-index-file.php` refers the main index file of your plugin. ``` function hide_specific_plugins_adminify( $plugins ) { $plugins_to_hide = array( 'plugin-folder/main-index-file.php', // Add more plugins here if needed. ); foreach ( $plugins_to_hide as $plugin ) { if ( isset( $plugins[ $plugin ] ) ) { unset( $plugins[ $plugin ] ); } } return $plugins; } add_filter( 'all_plugins', 'hide_specific_plugins_adminify' ); ``` For example: WooCoomerce plugins folder name is “`woocommerce`” and the main file is “`woocommerce.php`”. First, check the following screenshot, or you can [watch the video on our Facebook page](https://www.facebook.com/wpadminify/videos/1872868403557420). You will get a clear idea of how to hide any WordPress plugins from your installed plugin library. In the screenshot, you can see that WooCommerce is hidden from the installed plugin page, but you can see all functionality of WooCommerce in the admin menu. ![hide WordPress plugins for all users](https://d1k2c27psfzbiv.cloudfront.net/wp-content/uploads/2025/07/26051531/hide-WordPress-plugins-for-all-users.webp) ## How to hide WordPress plugins for a specific username? This is one of the most interesting part, you can hide any plugin for specific username. Just copy the following code and paste it inside your functions.php file. ``` function hide_plugins_for_specific_user_adminify( $plugins ) { if ( ! is_admin() ) { return $plugins; } $current_user = wp_get_current_user(); if ( 'set-username' === $current_user->user_login ) { $plugins_to_hide = array( 'woocommerce/woocommerce.php', // Add additional plugins as needed. ); foreach ( $plugins_to_hide as $plugin_file ) { if ( isset( $plugins[ $plugin_file ] ) ) { unset( $plugins[ $plugin_file ] ); } } } return $plugins; } add_filter( 'all_plugins', 'hide_plugins_for_specific_user_adminify' ); ``` Those are the two main 2 code snippets I used to hide WordPress plugins from the plugin installed page and make it suitable for my clients. ![hide WordPress plugins for a specific username](https://d1k2c27psfzbiv.cloudfront.net/wp-content/uploads/2025/07/26052030/hide-WordPress-plugins-for-a-specific-username.webp) ## Where to Put the Code: functions.php or a Must-Use Plugin Both snippets above run fine from `functions.php`, but that file belongs to the theme. Switch themes, reset a child theme, or hand the site to a developer who rebuilds the front end, and the hidden plugins quietly come back. A must-use plugin is the more durable home: create `wp-content/mu-plugins/hide-plugins.php`, add a plugin header and the same function, and WordPress loads it on every request, under every theme, with no activation step and no row in the Plugins list for a client to switch off. Renaming is the softer sibling of hiding. WP Adminify's [plugin white label](https://wpadminify.com/features/plugin-white-label) module changes a plugin's name, logo and description on the Installed Plugins screen, so the client sees your agency's tool rather than a third-party one - and the row stays visible, which means updates keep working normally. ### Hide Must-Use and Drop-In Plugins Too The `all_plugins` filter only reaches ordinary plugins. Must-use plugins and drop-ins such as `object-cache.php` get their own tabs on the Plugins screen, fed by a different array. WordPress 6.3 added the `plugins_list` filter for exactly this: it receives every group at once, keyed as `all`, `mustuse` and `dropins`, so you unset the entry inside whichever group it belongs to. ``` add_filter( 'plugins_list', function ( $list ) { unset( $list['mustuse']['hide-plugins.php'] ); return $list; } ); ``` ### Hide Plugins from Every Admin Except You Worth knowing before you write role logic: Editors, Authors and Subscribers never see the Plugins screen at all, because it needs the `activate_plugins` capability that only Administrators hold. So on a client site, "hide from users" almost always means hide from the other administrator - the account you handed over at launch. Inverting the username check does that in one condition. ``` function hide_plugins_except_me_adminify( $plugins ) { $my_login = 'your-username'; if ( $my_login === wp_get_current_user()->user_login ) { return $plugins; // you see everything } $plugins_to_hide = array( 'woocommerce/woocommerce.php', // Add more plugins here if needed. ); foreach ( $plugins_to_hide as $plugin ) { unset( $plugins[ $plugin ] ); } return $plugins; } add_filter( 'all_plugins', 'hide_plugins_except_me_adminify' ); ``` ### How to See a Hidden Plugin Again Because `all_plugins` is applied by the admin list table and not by `get_plugins()`, WP-CLI never sees your filter. `wp plugin list` shows every plugin on the site and `wp plugin deactivate woocommerce` switches one off, hidden or not - which is the quickest way to recover without editing files. Failing that, comment the snippet out, or rename the plugin folder over SFTP to force a deactivation. Keep a note of what you hid. Six months later, a plugin that is invisible in wp-admin but still loading is the hardest kind of bug to find, and the person debugging it may not be you. ## Let’s Wrap UP! In summary, hiding WordPress plugins can reduce the plugin list and limit the exposure of internal plugins that aren’t meant for regular interaction. However, deactivating a plugin can make troubleshooting and debugging more challenging. ## Hide WordPress Plugins FAQs ### How do I hide a plugin from the WordPress plugins list? Add a function to the `all_plugins` filter that unsets the plugin's basename, for example `woocommerce/woocommerce.php`. Put it in a must-use plugin or in your child theme's functions.php. The plugin keeps running and its menus stay visible - it just disappears from Plugins > Installed Plugins. ### Should I put the code in functions.php or a must-use plugin? A must-use plugin at `wp-content/mu-plugins/hide-plugins.php` is safer. Code in functions.php belongs to the theme, so switching or resetting the theme un-hides everything. Must-use plugins load on every request regardless of theme and cannot be deactivated from the dashboard. ### How do I hide plugins from every admin except me? Invert the username check: return the full plugin array when `wp_get_current_user()->user_login` matches your own account, and unset the plugins you want hidden for everyone else. Editors and Authors do not need this - they cannot open the Plugins screen at all. ### Can I hide a must-use or drop-in plugin from the Plugins page? Yes, but not with `all_plugins`. WordPress 6.3 added the `plugins_list` filter, which receives every group keyed as `all`, `mustuse` and `dropins`. Unset your entry inside the correct group and the tab and its count both update. ### How do I deactivate a plugin that is hidden? Use WP-CLI: `wp plugin deactivate woocommerce` works even when the plugin is hidden, because the filter only runs in the admin list table. Otherwise comment the snippet out and reload the Plugins screen, or rename the plugin folder over SFTP to force WordPress to deactivate it. ### Does hiding a plugin from the list make WordPress more secure? No. Hiding a plugin from the Plugins screen is housekeeping, not hardening - the files still load, the readme is still public, and a scanner can fingerprint it from the front end. Use it to keep client dashboards calm and prevent accidental deactivation, and rely on updates, roles and a firewall for actual security. ### How do I hide a plugin on WordPress Multisite? The same `all_plugins` filter runs on each site's Plugins screen and on Network Admin > Plugins, so one must-use plugin in `wp-content/mu-plugins/` covers the whole network. Network-activated plugins are usually the ones worth hiding, since site admins cannot deactivate them anyway. ### Complete the Client-Ready Dashboard Hiding plugins is one part of preparing a site for clients. Pair it with the full walkthrough on [customizing the WordPress dashboard](https://wpadminify.com/wordpress-dashboard-customization) and [white labeling wp-admin](https://wpadminify.com/features/white-label) so the whole admin area matches your brand. For the end-to-end process - login page, admin logo, footer text, and client emails - follow the [white label WordPress guide](https://wpadminify.com/white-label-wordpress). --- # WordPress Toolbar Editor - Hide, Add links to Admin Bar URL: https://wpadminify.com/wordpress-toolbar-editor Last updated: 2026-08-23 The Admin Bar in WordPress offers the most necessary options from different plugins. By default, it offers howdy text with your nickname, a New button, a Comment icon, Site name, and getting-started documentation. When plugin installation grows over time, we notice our admin toolbar is also flooded with a lot of items. Then we feel the necessity to create a personalized Admin Bar? I recommend, not waiting till then to start admin bar customization. Because Smart people learn from their mistakes and Wise people learn from others mistakes. Here, the WordPress Toolbar Editor will solve your every problem regarding admin bar. Without wasting your valuable time, let me share a screenshot with you. Can you relate the issue to yourself? ![Broken admin bar in default WordPress Dashboard](https://d1k2c27psfzbiv.cloudfront.net/wp-content/uploads/2024/04/19072349/Broken-admin-bar-in-default-WordPress-Dashboard.webp) This is a messy screenshot with some admin bar items, and I have only installed 14 necessary plugins. You can see how the howdy text took position under the main admin bar pointed with the right side arrow. The Clear Rest Cache item took position before the dashboard menu item pointed with the left side arrow. If you are a developer and work for your client's site, then I am pretty sure you don’t want to deliver a project like this to your clients. At the end of this blog post, you will be able to create a personalized WordPress admin bar for your clients like the following screenshot, with limited accessibility. ![Clean WordPress Admin bar for clients](https://d1k2c27psfzbiv.cloudfront.net/wp-content/uploads/2024/04/19072723/Clean-WordPress-Admin-bar-for-clients.webp) ## What is the WordPress admin bar? The WordPress admin bar, also called the toolbar, is the dark strip across the top of the screen that only logged-in users see. It shows up in two places: inside wp-admin, and on the front end of your site while you browse it. Core puts a handful of shortcuts there, including the site name, a New button for creating content, the comment count, update notices, and the Howdy account menu on the right. Core only adds those first few. Everything after that arrives on its own, because any plugin can hook `admin_bar_menu` and drop in an entry without asking. That is how a site running a cache plugin, an SEO plugin and a page builder ends up with a toolbar that wraps onto a second line. The only control core offers is a per-user checkbox under Users > Profile that hides the bar on the front end. Everything past that needs a WordPress toolbar editor, which is a settings screen that lists every registered admin bar item and lets you hide it, rename it, reorder it or point it somewhere else, per user role. That is what the rest of this guide walks through. ## How Do You Customize the WordPress Admin Bar? To customize the WordPress admin bar, open WP Adminify → Admin Bar Editor and drag, hide, reorder, or restrict toolbar items by user role - no code required. Prefer code? Use the `admin_bar_menu` hook with `remove_node()` to remove items, or `show_admin_bar(false)` to hide the bar for specific roles. Toolbar work rarely stands alone. Agencies handing a site over usually strip the toolbar, then [hide the comments menu](https://wpadminify.com/hide-comments-menu-from-wordpress-admin-panel) and rebrand the rest of the admin under [white label](https://wpadminify.com/features/white-label), so the client never sees a plugin name they did not buy. ## Getting started with WordPress toolbar editor Before diving, let me share the proper plan with you for customizing the WordPress Toolbar. I have tried my best to find out all possible ways that will help you to customize WordPress admin bar. But still, I may have missed something. Please feel free to comment, and I will try to provide a solution and also update the blog post. WordPress Admin bar not showing: This is a common issue for WordPress beginners. I will explain a possible issue that can hide the WordPress Admin bar. Hide WordPress Admin Bar: I will guide you on how to hide admin bar items for a specific user, user role. Hide Front end Admin Bar: Instead of hiding front end admin bar from the profile page, I will show you the way to hide front end toolbar dynamically for any user or user role. Add a link to WordPress Admin Bar: Learn how easily you can create a custom link or menu item in the Admin bar. You can create submenu items for custom links or any existing items from the 3rd level. Disable Admin bar except Administrator: In this section, you will get the guidelines on how to disable WordPress admin bar for all users except administrators. Define Admin Bar location: It’s not necessary to keep the Admin bar position always on top, but you can define the Admin bar position to the bottom too. Style customization for Admin Bar: Adding a color or gradient to the Admin bar background can provide an extra personalized feel to your Admin Bar. Plus you can change the text and new button colors that match your brand. I am going to use the [Admin Bar Editor plugin](https://jeweltheme.com/admin-bar-editor) and will share the necessary code snippet for the developers. Make sure to download the plugin and install it in your WordPress Dashboard. [Free Download](https://wordpress.org/plugins/admin-bar/) | [Admin Bar Editor PRO ](https://jeweltheme.com/admin-bar-editor/pricing) ## WordPress Admin bar not showing You wake up from bed and visit your website and notice the admin bar is missing, though you have logged into your dashboard. This is a common issue for beginner WordPress users. ![WordPress website without Admin bar in frontend](https://d1k2c27psfzbiv.cloudfront.net/wp-content/uploads/2024/04/19073105/WordPress-website-without-Admin-bar-in-frontend.webp) First of all, navigate to `WP Admin > Profile`. Now, check if "Show Toolbar when viewing site "option is checked or not. If it’s unchecked, then check this setting and save. You should preview the admin bar in the front end now. ![Check the show toolbar when viewing site](https://d1k2c27psfzbiv.cloudfront.net/wp-content/uploads/2024/04/19073110/Check-the-show-toolbar-when-viewing-site.webp) ## Hide WordPress Admin Bar There are four ways to hide the WordPress admin bar. Each user can untick Show Toolbar when viewing site under Users > Profile. A toolbar editor hides the bar, or single items in it, per role. The `show_admin_bar` filter switches it off in code. The `admin_bar_menu` hook removes one item at a time. | Method | What it removes | Who it applies to | Code needed | | --- | --- | --- | --- | | Users > Profile checkbox | The front end bar only | One user, set by that user | No | | Admin Bar Editor visibility rules | The whole bar, or single items | Any role or named user | No | | `show_admin_bar` filter | The whole bar, front end and back | Everyone, or a role you test for | Yes | | `admin_bar_menu` and `remove_node()` | One named item, such as the logo | Everyone the hook runs for | Yes | Pick the profile checkbox when one person wants a clean front end. Pick the toolbar editor when the rule has to hold for a role, which is the usual case on a client site. Drop to code only when the rule belongs in version control. If you want to remove one entry rather than the whole strip, see [how to remove the WordPress logo from the admin bar](https://wpadminify.com/remove-wordpress-logo-from-admin-bar), and for a per-role rule read [hide the admin bar based on user roles](https://wpadminify.com/hide-admin-bar-based-on-user-roles). The [hide some admin bar items](https://wpadminify.com/docs/adminify/customize/hide-some-admin-bar-items) doc lists every toggle. The code route is two lines. Drop this in your theme's `functions.php` or a snippet plugin to hide the admin bar for everyone who cannot manage options, which leaves it in place for administrators. ``` add_action( 'after_setup_theme', function () { if ( ! current_user_can( 'manage_options' ) ) { show_admin_bar( false ); } } ); ``` Do you like to hide specific Admin bar items, or the entire Admin bar? Have you ever wanted to hide some of the admin bar items for a specific user role or user name? All of my mentioned questions have a solution in the following guideline. Navigate to your WordPress Dashboard and click on the Admin bar Editor option. (Make sure you have [installed the admin bar editor plugin](https://jeweltheme.com/docs/admin-bar-editor/plugin-installation).) Note: You can notice the Admin bar editor option inside the WP Adminify menu. It’s because I have installed the [WP Adminify plugin](https://wpadminify.com/) on my local server. WP Adminify and Admin Bar Editor are both 100% compatible with each other. Using both plugins can help you create a fully [customized WordPress client Dashboard](https://wpadminify.com/how-to-create-wordpress-custom-user-dashboard-without-coding). ### Hide backend Admin bar for specific user Inside the Admin bar editor option, you can see the "Backend", "Frontend", and "Advanced" options. By default, the "backend" is selected. ![Admin bar Editor plugin option panel](https://d1k2c27psfzbiv.cloudfront.net/wp-content/uploads/2024/04/19073954/Admin-bar-Editor-plugin-option-panel.webp) Let’s assume that we would like to hide the "Rank Math SEO" from another administrator. (I have installed Rank Math and created an admin account called "admin-client") Now click on the [Rank Math SEO](https://rankmath.com/?ref=jemeeroy) item and it will expand some options called "Menu title", "Menu link", "Hidden for rules", and "Set custom icon". You have to click on "hidden for rules" and select the username. For me, I will select "admin-client" user name. ![Hide admin bar for user](https://d1k2c27psfzbiv.cloudfront.net/wp-content/uploads/2024/04/19074112/Hide-admin-bar-for-user.webp) After saving the settings, try to log in with your selected admin username and password. You will notice the admin menu item is hidden from the backend. Here is a screenshot from my "admin-client" dashboard. ![Hidden rank math SEO admin bar item for user](https://d1k2c27psfzbiv.cloudfront.net/wp-content/uploads/2024/04/19074253/Hidden-rank-math-seo-admin-bar-item-for-user.webp) ### Hide the admin bar for all users Hiding admin bar items is very simple, you can see an "on/off switcher" beside each admin bar item. Just toggle the switch off for which item you like to hide for all users. I have hidden a lot of items for all users in the following screenshot, and you can see the admin bar gets a cleaner view. ![Hide WordPress Admin Bar backend for all users](https://d1k2c27psfzbiv.cloudfront.net/wp-content/uploads/2024/04/19074421/Hide-WordPress-Admin-Bar-backend-for-all-users.webp) Also, you can hide your existing admin menu items for a specific user with the help of the [Admin Menu editor](https://wpadminify.com/features/admin-menu-editor) by the [WP Adminify free plugin](https://wordpress.org/plugins/adminify). ## Hide Front end Admin Bar Like the backend, you can control whether you want to hide the frontend admin bar for all users or like to limit the frontend admin bar items for specific user roles or user names. ### Hide the front end Admin bar for all users Click on the Frontend option, then make the switcher "yes" from "no" for "Disable Frontend Admin Bar?". Now you can see another "yes/no switcher" for "Hide Admin Bar for All Users". Make it yes, too, then save the settings. ![Hide WordPress Admin Bar for all users](https://d1k2c27psfzbiv.cloudfront.net/wp-content/uploads/2024/04/19074912/Hide-WordPress-Admin-Bar-for-all-users.webp) Now visit your website frontend, and you will notice the Admin bar is hidden. Now the admin bar is hidden for all users, no matter he/she is logged in as administrator or editor, or subscriber. ![Admin bar is hidden for all users](https://d1k2c27psfzbiv.cloudfront.net/wp-content/uploads/2024/04/19074959/Admin-bar-is-hidden-for-all-users.webp) ## Add a link to WordPress Admin Bar Adding a custom item or link to WordPress admin bar provides better control over your users. There are different types of use cases for different agencies. But I am going to explain this feature from an editorial perspective. If you run a WordPress blog site and have multiple editors, then you can create some custom links for - Quick Access to Posts: You can put a categorized post list inside the admin bar. Media Library Shortcut: Maybe you manage an external service for media uploading where your designer upload media files, like Google Drive. You can link the drive folder or anything directly to the admin bar. Custom Shortcodes & Templates: If there are any shortcodes & templates for CTA or layout, then you can put the necessary links directly to the admin toolbar. To add a link, navigate to the Admin Bar Editor. Scroll down and click on "Add Item" button. This will be your primary item. Under this primary item, you can create sub-menu items just like I did in the following screenshot. I named "Blog Post Category" as the primary item and added 2 category items as sub-items. ![Add a link to WordPress Admin Bar](https://d1k2c27psfzbiv.cloudfront.net/wp-content/uploads/2024/04/19075214/Add-a-link-to-WordPress-Admin-Bar.webp) Take a look at the following screenshot. This is the output of my previous settings. You can create sub-menu items under a sub-menu. ![Added multiple links to WordPress Admin Bar for editor](https://d1k2c27psfzbiv.cloudfront.net/wp-content/uploads/2024/04/19075255/Added-multiple-links-to-WordPress-Admin-Bar-for-editor.webp) ## Disable Admin bar except Administrator To disable WordPress admin bar for all users except administrators, you need to create a conditional display on the frontend option. Turn on the Yes/No switch for "Disable Frontend Admin Bar?" option. Now take a look at the last option called "Disabled For", and besides this option, there is a button called "Add new conditions". Click on this button and select all user roles except the Administrator user role. ![disable wordpress admin bar for all users except administrators](https://d1k2c27psfzbiv.cloudfront.net/wp-content/uploads/2024/04/19075442/disable-wordpress-admin-bar-for-all-users-except-administrators.webp) Then save the settings, and now the admin bar is disabled for all users except administrators. ## Define Admin Bar location Navigate to `Admin Bar Editor > Advanced option`. The first option is "Adminbar Position" which is selected by default. You can define whether you like to keep your admin bar at the top or the bottom. ## Style customization for Admin Bar Inside this advanced option, there is a tab called "Styles". Just click on this style option, and you will get all color customization options for your Admin bar background and text. I have added a gradient color as the admin bar background and changed the font color and background hover color. ![Admin bar style customization](https://d1k2c27psfzbiv.cloudfront.net/wp-content/uploads/2024/04/19075706/Admin-bar-style-customization.webp) Let me clarify that changing the admin bar colors will not affect the admin menu background color. I have used the Admin Menu editor to [customize the admin menu's background and text colors](https://wpadminify.com/docs/adminify/admin-menu/styles). ## What is the difference between the admin bar and the admin menu? The admin bar is the horizontal strip along the top. The admin menu is the vertical sidebar down the left. They sit next to each other and get talked about together, but they are separate systems with separate editors. The admin bar follows you out onto the front end of the site; the admin menu only exists inside wp-admin. They are styled separately too, which catches people out halfway through a branding job. Recolouring the toolbar does nothing to the sidebar, and changing the sidebar leaves the toolbar exactly as it was. To make a dashboard look deliberate you set both, then the login screen, then the widgets. Our [WordPress dashboard customization](https://wpadminify.com/features/dashboard-customization) page walks through that order, and the [admin menu editor](https://wpadminify.com/features/admin-menu-editor) covers the sidebar half. ## WordPress Admin Bar FAQs ### How do I hide the WordPress admin bar for all users except administrators? Go to WP Adminify → Admin Bar Editor and open the visibility rules, then set the toolbar to appear only for the Administrator role. Editors, authors, and subscribers then load the site with no admin bar. Prefer code? Wrap show_admin_bar(false) in a check like if (!current_user_can('manage_options')) inside functions.php. ### Can I hide the WordPress admin bar for specific user roles? Yes. WP Adminify's Admin Bar Editor lets you toggle the toolbar per user role, so you can hide it for subscribers or customers while keeping it for your team. You can also hide individual items - like the New button or Comments icon - for chosen roles instead of removing the whole bar. It's built into [WP Adminify](https://wpadminify.com/pricing). ### How do I add a custom link to the WordPress admin bar? Open WP Adminify → Admin Bar Editor, click Add New Item, then enter a title, URL, and an optional parent item to build a dropdown. The link appears instantly in the toolbar for the roles you choose - useful for pointing clients to support, docs, or a dashboard without editing functions.php. ### How do I hide the admin bar on the frontend of my site? To hide the toolbar only on the front end while keeping it inside wp-admin, use the front-end visibility toggle in WP Adminify's Admin Bar Editor. Manually, each user can also uncheck 'Show Toolbar when viewing site' under Users → Profile, which hides the bar for that person on the live site. ### How do I remove items from the WordPress admin bar? In WP Adminify → Admin Bar Editor, switch off any item you don't need - Howdy text, the WordPress logo, Comments, or plugin entries - with a single toggle. For a code approach, hook into admin_bar_menu and call $wp_admin_bar->remove_node('item-id') to strip specific nodes by their ID. ### Why is the WordPress admin bar not showing? The admin bar usually disappears when 'Show Toolbar when viewing site' is unchecked in your profile, your theme is missing the wp_footer() call, or a plugin disabled it. Re-enable it under Users → Profile, confirm your theme outputs wp_footer(), or manage visibility centrally in our [WordPress dashboard customization](https://wpadminify.com/wordpress-dashboard-customization) toolkit. ### How do I customize the WordPress admin bar? Open WP Adminify then Admin Bar Editor and drag, hide, reorder, or restrict toolbar items by user role - no code needed. Prefer code? Hook admin_bar_menu and call add_node() to add your own items or remove_node() to strip the default logo, comments, and New buttons in functions.php. ### How do I remove the WordPress admin bar programmatically? Add show_admin_bar( false ) inside an after_setup_theme action in functions.php or a snippet plugin. Wrap it in a capability check such as if ( ! current_user_can( 'manage_options' ) ) so administrators keep the bar. To strip one entry instead, hook admin_bar_menu and call remove_node() with that item's ID. ### Where is the Show Toolbar when viewing site setting? It sits under Users then Profile, in the Toolbar row near the top of your own profile screen. Unticking it hides the admin bar on the front end for that one account only, and it has no effect inside wp-admin. Each user sets it for themselves, so it does not work as a site-wide rule. ## Let’s Wrap UP! I hope you got a clear idea on how you can control your WordPress Admin bar for specific users instead of showing it for all users. Still, if there is something that I have missed, please comment below. I will try to provide you solution and will update the Admin Bar Editor plugin for you. ### The Toolbar Is Just the Top Layer Once the admin bar looks right, the rest of wp-admin deserves the same treatment. The complete guide to [customizing the WordPress dashboard](https://wpadminify.com/wordpress-dashboard-customization) covers menus, widgets, fonts, dark mode and login page customization in one place. --- # Introducing some powerful Admin Columns for WordPress Admin URL: https://wpadminify.com/necessary-admin-columns-for-wordpress Last updated: 2026-08-22 Picture this: You're managing 500+ blog posts for a client, and they ask, "Which posts haven't been updated in 6 months?" Without custom admin columns, you'd need to open each post individually, taking hours. With the right admin columns setup, you'll see last modified dates, authors, categories, and custom fields at a glance. That's the difference between drowning in data and having complete control. ## What Are WordPress Admin Columns? WordPress admin columns are the vertical data fields in the list tables for posts, pages, users, media and custom post types. WordPress ships with only title, author, categories, tags and date. Adding columns such as word count, permalink, status, thumbnail and post ID lets you read, sort and compare content without opening a single post. Admin columns sit inside the wider practice of [WordPress admin customization](https://wpadminify.com/wordpress-admin-customization), and they can surface data that other plugins own, including [ACF field columns](https://wpadminify.com/how-to-add-acf-field-to-admin-column), WooCommerce product fields and [the last login column in the users list](https://wpadminify.com/how-to-show-last-login-column-in-wordpress-users-list). You can add these columns across your posts, pages, and custom post types with the Admin Column module in the [WP Adminify plugin](https://wpadminify.com/features), then reorder or hide them per post type with drag and drop. Once you customize some insightful and substantive [admin columns in your WordPress admin section](https://developer.wordpress.org/reference/hooks/manage_posts_custom_column), you can get rid of the restrictions of the built-in columns available in different areas. The admin area will show you much more information about all post types to help you get deep insight into all of your content without having to navigate to individual posts. [Menu Editor](https://wpadminify.com/how-to-use-the-wordpress-admin-menu-editor) Do you know what admin columns are ready to deploy in the Admin Column module? You may not, as the plugin is constantly integrating more and more cues to help you easily tackle tons of content. Don’t worry, this content is curated with a view to introducing some mighty admin columns for the WordPress admin section. So, let’s delve deeper! ## Admin Columns in WP Adminify The WordPress Admin panel has turned out to be more functional, revamped, and neatly organized with the innovation of the [WP Adminify Admin Columns Editor addon](https://wpadminify.com/admin-columns-editor). You can now look into exhaustive information on your pages, and posts - thanks to the integration of some convenient, appealing, and impactful admin columns that do not exist in WordPress. All those powerful admin columns will offer you some custom solutions to keep track of the entire website content by checking the perfectly filled associated fields and observing a myriad of criteria that make content compelling. Just take a glance at the following section: ### Word count Of all the necessary admin columns for getting a general sense of WordPress posts, the word count seems to be a must-have one. The core objective of the column is to showcase the total word count of a particular piece of content. Once you see the total words of an individual post, you can easily determine whether it has thin or rich content. Considering the keyword intent, you can understand whether the content requires more or fewer words to convey meaningful information to the reader. You can decide if you should update the existing content to fulfill your marketing goal. ![Word Count for Admin Column](https://d1k2c27psfzbiv.cloudfront.net/wp-content/uploads/2023/09/12112242/Word-Count-for-Admin-Column.webp) What if you don’t have the privilege to apply such a useful column? Of course, it will cost you time and downgrade the posts’ performance. To get rid of all the potential difficulties, WP Adminify comes with the functionality of a straightforward integration of the word count admin column. In every single post, you can check the total number of words once you configure the column properly. You can also delete, personalize, and update the word column as per your desire. That means WP Adminify’s word count admin column will benefit you immensely to improve your working flow and momentum. And ultimately, it will contribute significantly to the success of the business by acquiring the targeted outcomes. ### Permalink On the WordPress admin page, all post types consist of some crucial columns; the permalink is, beyond doubt, one of them. In short, the permanent address of a specific piece of content is stored on the permalink, from which you can trigger the content on your website. As the permalink provides a secure and full URL address for a specific post or page, you can access, edit, copy, and open the link anytime from the admin page to see the structural version of the post or page. Apart from helping you navigate through all post types, the permalinks can improve the performance of search engine optimization to a great extent. ![Permalink Admin Column](https://d1k2c27psfzbiv.cloudfront.net/wp-content/uploads/2023/09/12112249/Permalink-Admin-Column.webp) Besides, you will have a naturally flowing page hierarchy and an easy search engine crawling process once your entire content is addressed by permalinks. By keeping all those benefits and conveniences in mind, WP Adminify developed the Admin Column module, which allows you to insert stable permalinks in all post types. It also enables you to delete and change the permalinks immediately. Without having to face any setbacks, it lets you fix the permalink breakage. And the most interesting fact is that you can carry out all those tasks with a simple drag-and-drop interface. No additional plugins or codes are required to access a specific piece of content by clicking on a permalink, as long as you have the majestic WP Adminify plugin. ### Status Having deep insight into the post's status is imperative to making decisions and further moves on the admin page. Once the status admin column is active, you can see the current condition of your posts. For example, the column will show "published" if a piece of content has already been published on your website. Similarly, you can notice a draft, pending, trash, auto-draft, or inherit status if the content belongs to any of the conditions.The column will demonstrate the "new" status if a post was just created. That means you could inspect how the posts are being handled by the website currently in the status column. Isn’t it helpful? No doubt and that’s why WP Adminify allows you to add this column to your WordPress admin from its Admin Column module. ![Post Status Column](https://d1k2c27psfzbiv.cloudfront.net/wp-content/uploads/2023/09/12112245/Post-Status-Column.webp) Apart from the built-in status, the plugin will enable you to add custom statuses that you’re currently in need of. For handling e-commerce websites, it will give you the ability to include some meaningful statuses such as pending, processing, etc. Whenever you want, you can change or modify the status without even writing a line of code. ### Show Thumbnail Column A thumbnail column is mandatory to display a thumbnail of the feature image for every single post. It helps to sort out the posts from an abundance and informs you if any content is missing an image. Interestingly, WP Adminify has incorporated a special, unique, and creative option called "Show Thumbnail Column" to allow you to include a thumbnail column. Under the module settings, it features the Post Status/Column option, where the “Show Thumbnail Column" is available. You need to navigate to the location and enable the "SHOW" option to display a thumbnail column in the WordPress admin. Keep in mind that only enabling the option won’t do; you need to add the column from the Admin Column module of the plugin. ![Thumbnail Image Column](https://d1k2c27psfzbiv.cloudfront.net/wp-content/uploads/2023/09/12112244/Thumbnail-Image-Column.webp) Once you add and activate the column in the post or page, you will find it aligned with the main column. Another interesting aspect of the option is that you can set a default thumbnail image for posts that are missing specific images. That means none of the posts or pages will be shown without an image if you configure the option properly. ### Show Post/Page ID Column WP Adminify offers some special admin columns; the Show Post/Page ID Column is definitely the core one. What is the use of that admin column? It’s mainly developed to display an ID column for post and page table lists. That means you can include an ID for each post or page by setting up this excellent admin column. ![Post and Page ID Column](https://d1k2c27psfzbiv.cloudfront.net/wp-content/uploads/2023/09/12112247/Post-ID-Column.webp) How to enable it? It’s super easy. All you need to do is click the module settings and head over to the Post Status/Column option. There, you will discover the "Show Post/Page ID Column", which you need to enable. Then you have to move to the Admin Column module and add the recently configured column to the pages or posts. ## Does WP Adminify support Advanced Custom Fields? The [Advanced Custom Fields or ACF](https://wpadminify.com/how-to-add-acf-field-to-admin-column) enables users to have more detailed data on all types of posts by creating and modifying custom fields in the WordPress admin. Without writing code, you can add customized fields across your admin column options as long as you have the ACF integrated into your website. As both ACF and WP Admnify work similarly to enrich WordPress content information, what if you utilized them together on your website? Of course, it would offer additional convenience by displaying the necessary data to read all the details of your posts or pages. And luckily, you can integrate the holistic advanced custom fields with WP Adminify to enhance its versatility, flexibility, and functionality. Once you configure the ACF, you can add all the existing ACF fields to all the post types under the Admin Column module. Isn’t it good? ### Related Reading [WordPress admin customization](https://wpadminify.com/wordpress-admin-customization) ## Final words WP Adminify comes with a feature-enriched module: Admin Columns. The module helps users include, delete, and customize numerous admin columns in all post types. Depending on your needs and preferences, you can add ready-made or personalized columns to read extensive information about your vast content. Later on, you can adopt the requisite measures by inspecting the all-out information of posts on your website to enhance performance. The procedure for adding and customizing admin columns is straightforward, secure, and fast. However, in the meantime, we’ve outlined insightful content for you with a view to introducing some powerful admin columns for WordPress admin. We hope you now have a solid understanding of those columns and their operations. If you can utilize them properly, you will surely benefit in the long run. ## WordPress Admin Columns FAQs ### What are WordPress admin columns? Admin columns are the vertical data sections in your WordPress post/page list tables. They display information like title, author, date, categories, and custom fields without opening each post. ### Can I add custom columns without coding? Yes! WP Adminify's Admin Columns module lets you add 30+ column types through a visual interface, with no PHP or hooks required. ### Will custom columns slow down my admin area? Not noticeably. WP Adminify loads columns efficiently and only queries the data you actually display. Most users see no performance impact. ### Can I reorder or hide admin columns? Absolutely. Drag-and-drop to reorder columns, and toggle visibility per post type. You control exactly what your team sees. ### Do admin columns work with custom post types? Yes! Admin columns work with posts, pages, products, and any custom post type from WooCommerce, ACF, or other plugins. ### Can different user roles see different columns? Yes, use role-based visibility settings to show relevant columns to editors, hide sensitive data from authors, and keep things clean for contributors. ### How do I add a column to the WordPress users table? Open the Admin Columns module and switch the list type to Users, then add columns such as user ID, role, registration date or last login. WP Adminify writes them straight into the users list table with no code, and you can sort by any of them. ### Is there a free WordPress admin columns plugin? Yes. WP Adminify is listed free on WordPress.org and the Admin Columns module is part of it, so word count, permalink, status, thumbnail and post ID columns cost nothing. Codepress Admin Columns also publishes a free version on WordPress.org. --- # How to Fix WordPress Login Page Issues? URL: https://wpadminify.com/how-to-fix-wordpress-login-page-issues Last updated: 2026-08-19 Locked out of your WordPress site at 2 AM? You type your password. Hit enter. And... nothing. Or worse, it kicks you back to the login page in an endless loop. Panic sets in. Your site is down. Clients are waiting. Revenue is leaking. Here's the good news: 95% of WordPress login issues fix in under 10 minutes. I've rescued hundreds of sites from login hell. This guide gives you the exact steps, no fluff, no guesswork. Let's get you back in. ## Common WordPress Login Page Issues I've noted some common WordPress login page issues. Here's the list of them. ## Page Redirection or Continuous Reload The login screen continues to refresh after you log in, but the login doesn't complete. Or, it takes you to the homepage or another page. This happens when: - Cookie issues. - The URL for the site and the URL for the home page don't match. - A caching plugin is saving the wrong session. - A rule in .htaccess instructing the server to redirect. How to Fix it: Here's what you can do to fix this issue: - Delete all the cookies of the browser. - Temporarily disable the caching plugin. - Check for mismatched database URLs. - Create a new .htaccess file from Settings > Permalinks Still caught in an endless cycle where a correct password just reloads the login screen? That specific fault is a [WordPress login redirect loop](https://wpadminify.com/wp-admin-redirects-to-homepage), and our dedicated guide walks through every fix in order. ## White Screen on Login You see a blank screen after login. This happens due to PHP errors. These PHP errors include: - Conflict with plugins or themes - Exhausted PHP memory - Corrupted core files How to Fix it: Here's what you can do to fix this issue: - Increase the PHP memory. I.e; (define('WP_MEMORY_LIMIT', '256M')). - Disable all plugins via FTP. - Switch to a default WordPress theme. - Enable debug mode to see the error. ## Login Credentials Not Working You type the right username and password, but WordPress says it's wrong. This issue might occur for: - A hacked site with changed credentials. - Databases get corrupted. - Login limits from a security plugin. How to Fix it: Here's what you can do to fix this issue: - Reset password via phpMyAdmin - Disable security plugins - Use the Emergency Password Reset Script from WordPress.org ## 403 Forbidden Error on Login This happens when your server blocks access to wp-login.php or wp-admin. This issue might occur for: - IP blocked by any security plugins. - Incorrect file permissions. - Server firewall settings. How to Fix it: Here's what you can do to fix this issue: - Check .htaccess rules and remove blocks - Disable security plugin via FTP - Set correct file permissions (e.g., 644 for files, 755 for folders) ## 500 Internal Server Error This general error can crash your login and admin pages. This issue might occur for: - Plugin or theme with fatal PHP error. - Broken .htaccess file. - Low PHP memory limit. How to Fix it: Here's what you can do to fix this issue: - Rename the .htaccess and log in again. - Disable all plugins. - Increase memory limit. - Turn on debugging to trace the error ## Unresponsive Login Button You've entered your credentials. But the login button does nothing when clicked. This issue might occur for: - JavaScript conflict with a plugin or theme. - A broken login form. - A Browser extension is blocking script. How to Fix it: Here's what you can do to fix this issue: - Try in incognito mode or another browser. - Disable plugins via FTP. - Switch to a default theme. - Temporarily turn off all browser extensions. ## Quick Pre-Checks Before Troubleshooting Before troubleshooting, do these following checks to avoid extra hassle. ## Clear Browser Cache and Cookies Old cache data can block proper login sessions. Clear them fully. ## Try a Different Browser or Device Browser-specific issues or extensions often cause login problems. Testing elsewhere rules this out. ## Disable Browser Extensions Temporarily Ad blockers or script blockers may prevent login JavaScript from working. ## How to Fix WordPress Login Page Redirection Loop - Open phpMyAdmin → wp_options table - Make sure siteurl and home match your actual site URL - Disable any caching plugins - Rename .htaccess and regenerate We have also created a detailed guide for login page redirection. Do check it out to learn [step by step process to fix login page redirection](https://wpadminify.com/wp-admin-redirects-to-homepage). For complete dashboard control, grab [WP Adminify](https://wpadminify.com/pricing) to prevent these issues proactively. ## How to Fix Plugin Conflicts You can fix this by Disabling plugins via FTP or File Manager. - Go to wp-content/ - Rename plugins folder to plugins-disabled - Try logging in - If login works, restore the folder and activate plugins one by one ## How to Fix Theme Conflicts That Block Login Just switch to a default theme via file manager. - Go to wp-content/themes/ - Rename your current theme folder - WordPress will switch to a default theme (if installed) - Login and troubleshoot the broken theme ## How to Reset WordPress Password via phpMyAdmin - Log into your hosting panel - Open phpMyAdmin - Find your WordPress database → wp_users table - Click Edit on your user row - In the password field, select MD5, and enter a new password We have created a detailed guide on this. Check out [how to change or reset WordPress admin password to do it easily](https://wpadminify.com/how-to-change-or-reset-wordpress-admin-password). Want to secure your login further? [WP Adminify's security features](https://wpadminify.com/features) help prevent unauthorized access. ## How to Fix .htaccess File Problems Corrupt rules in .htaccess can break login redirection. To fix this: - Rename .htaccess to .htaccess_old - Log in again - Go to Settings > Permalinks > Save to regenerate ## How to Increase PHP Memory Limit Here's how to increase the PHP memory limit: - Edit wp-config.php - Add this line of code: define('WP_MEMORY_LIMIT', '256M'); Here's an in depth guide on [how to increase PHP memory limit](https://jeweltheme.com/blog/how-to-increase-php-memory-limit-in-wordpress). ## How to Fix Login Page Not Found or 404 Errors - Re-upload wp-login.php from a clean WordPress copy - Regenerate .htaccess ## How to Enable Debug Mode for Login Issues Debugging will help you trace what's wrong with the issue. - Edit wp-config.php - Add or modify the following lines of code: define('WP_DEBUG', true); define('WP_DEBUG_LOG', true); define('WP_DEBUG_DISPLAY', false); - Check wp-content/debug.log for exact errors ## How to Disable Security Plugins That Block Access If you've set up login protection (like IP whitelisting or captcha), it could be blocking you. To fix it: - Disable the plugin folder via FTP - Check .htaccess for IP blocks - Remove any custom firewall rules in functions.php ## How to Restore Missing or Corrupted wp-login.php File - Download the latest WordPress version - Extract the zip - Copy wp-login.php from the fresh folder - Upload it to your root WordPress directory ## How to Check Site URL in WordPress Database Wrong siteurl or home values cause login loops. You can fix it from PHP MyAdmin. - Go to wp_options - Edit siteurl and home - Make sure they match your live domain, with correct http or https ## How to Emergency Password Reset When all else fails, you can emergency reset your password. WordPress created an in-depth documentation for it. Check [how to reset your password](https://wordpress.org/documentation/article/reset-your-password/). ## How to Prevent Future WordPress Login Page Issues There are easy ways to prevent these login page issues. You can also change the default login URL so bots cannot hammer wp-login.php, and swap the stock screen for a stable, branded login page. See how to [change the WordPress login page URL](https://wpadminify.com/change-wordpress-login-page-url), or build a custom one with [Loginfy](https://wpadminify.com/loginfy). For the full walkthrough of every design option, read our guide on how to [customize the WordPress login page](https://wpadminify.com/customize-wordpress-login-page). https://www.youtube.com/watch?v=JOZm-pErAgg Change the WordPress login page URL and redirect users with WP Adminify. ## Use a Login Security Plugin You can use login security plugins to limit login attempts. - Wordfence - Limit Login Attempts Reloaded - Defender Security ## Enable Two-Factor Authentication You can use 2FA to protect your login page. Use Google Authenticator or Authy to secure login beyond just a password. ## Monitor WordPress Activity Logs Now it's easy to track login attempts, changes to login files and plugin edits. Plugins like WP Activity Log can help you track these quite easily. [WP Adminify includes activity logging](https://wpadminify.com/activity-logs) to monitor all admin actions. ## Why does WordPress say login temporarily disabled? WordPress core has no lockout of its own, so a message like "login temporarily disabled", "too many failed login attempts" or "this feature is forbidden temporarily for security reason" is coming from a security plugin or your host, not from WordPress. It means the attempt limiter has locked your IP after repeated failures, and the wait is usually 15 to 60 minutes. You do not have to wait it out if you have file access. Rename the security plugin's folder in `wp-content/plugins` over FTP or your host's file manager, which deactivates it and clears the block, then log in and rename it back. If your own address keeps getting locked, add it to the plugin's allowlist. And if the lockouts are constant with no failed attempts of yours, that is a brute force attempt against your site rather than a fault, so keep the limiter on and see the prevention section above. One caveat worth knowing: if your host sits behind a proxy or CDN, the limiter can see the proxy address instead of the real visitor and lock everyone out at once. Hosts usually expose a setting for that. ## What are the wp-login.php form fields and cookies? Useful when you are debugging a login that fails silently, or automating a sign-in. The form posts to `wp-login.php` with `log` for the username, `pwd` for the password, `wp-submit` for the button, and `redirect_to` for the destination after a successful login. A hidden `testcookie` field is sent too. That test cookie is the piece that trips people up. WordPress sets `wordpress_test_cookie` first and checks it came back on submit, and if it did not you get "cookies are blocked" instead of a password error, even when the password was correct. On success you receive `wordpress_logged_in_[hash]`, which is what actually keeps you signed in. So a login that returns to the form with no error usually means cookies are not surviving the round trip. Mismatched WordPress Address and Site Address values, a stale caching layer serving the login page, or a browser blocking third-party cookies are the three causes to check first. ## WordPress Login Issues: Frequently Asked Questions save ### Why does my WordPress login page keep refreshing or redirecting? A refresh or redirect loop usually means a cookie problem, a mismatch between your WordPress Address and Site Address, a caching plugin storing the wrong session, or a bad .htaccess rule. Clear cookies, confirm siteurl and home match in wp_options, disable caching, and regenerate .htaccess from Settings then Permalinks. ### Why is my WordPress password not working even though it is correct? If the credentials are right but rejected, the account may be locked by a security plugin, the database row may be corrupted, or the site may be compromised. Reset the password directly in phpMyAdmin using the MD5 option on the wp_users table, then disable the security plugin to confirm. ### How do I fix a 403 Forbidden error on the WordPress login page? A 403 on wp-login.php means the server is blocking access. It is usually a security plugin blocking your IP, wrong file permissions, or a firewall rule. Disable the plugin folder via FTP, set files to 644 and folders to 755, and remove IP blocks from .htaccess. ### How do I log into WordPress when the login page will not load at all? Work through the file system instead of the browser. Rename the plugins folder via FTP to rule out conflicts, switch to a default theme, re-upload a clean wp-login.php, and reset your password in phpMyAdmin. Turn on WP_DEBUG to read the exact error in wp-content/debug.log. ### Why do I see a white screen after logging into WordPress? The white screen after login points to a PHP error, usually a plugin or theme conflict, exhausted memory, or a corrupted core file. Raise the memory limit in wp-config.php, disable plugins via FTP, switch to a default theme, and enable debug mode to trace it. ### How do I stop WordPress login problems from happening again? Prevention is mostly hardening. Limit login attempts with a security plugin, turn on two-factor authentication, change the default login URL so bots cannot target wp-login.php, and keep an activity log of admin actions. These steps cut out most brute-force lockouts and conflict-driven login failures. ## The Bottom Line Most WordPress login problems are fixable within minutes. Whether it's a bad plugin, broken theme, or server error, this guide gives you the tools to fix it fast. Login page issues are very common for WordPress sites. But most WordPress login page issues are fixable within minutes. Whether it's a faulty plugin/theme or server error, you can fix it within minutes with the help from this guide. A tip for you, don't forget to use 2FA for extra protection and security. And you can avoid some unnecessary login issues and conflicts. Good Luck! Ready to take control? [Get WP Adminify](https://wpadminify.com/pricing) and transform your dashboard today. --- # How to Redirect Users After Login by Role in WordPress (No Code) URL: https://wpadminify.com/wordpress-redirect-users-after-login-by-role Last updated: 2026-08-19 By default, everyone who logs into WordPress lands on the same screen: `wp-admin`. That's fine when you're the only person on the site. Add clients, customers, contributors, or members, and it stops making sense. A subscriber has no reason to see the admin dashboard. A WooCommerce customer wants their account page. A client on a care plan should open the dashboard you built for them, not a wall of plugin notices. This guide shows you how to send each role where it actually belongs after login. We'll do it the no-code way with [WP Adminify](https://wpadminify.com/) first (that's the method in the video screenshots below), then cover a `functions.php` snippet for people who'd rather write the filter themselves, plus logout redirects and how to test the result. ## Quick answer To redirect users after login by role in WordPress, install WP Adminify, open Adminify → Security → Redirect URLs, switch it to Show, go to the Roles Redirect tab, click Add New Login Redirect, pick a user role, enter the destination page slug or full URL, and save. Each role now lands on its own page after logging in. No code, no separate plugin. ## Why redirect users by role at all? Role-based login redirects fix a few real problems: - Clients and editors: skip the cluttered default dashboard and open straight to the page they actually use, like a [custom client dashboard](https://wpadminify.com/wordpress-client-dashboard) or the post list. - Customers and members: send WooCommerce customers or membership subscribers to their account or members area instead of the backend. - Security and tidiness: keep non-admins out of `wp-admin` entirely. This pairs well with [trimming the admin menu](https://wpadminify.com/remove-admin-menu-items) and [hiding plugins from clients](https://wpadminify.com/how-to-hide-wordpress-plugins-from-clients). - Onboarding: drop brand-new users on a welcome or getting-started page the first time they sign in. WordPress core gives you none of this. You either write a filter or use a plugin. WP Adminify is already an [all-in-one admin toolkit](https://wpadminify.com/best-wordpress-dashboard-plugin), so if you run it you don't need to stack a single-purpose redirect plugin on top. ## Method 1 - redirect by role with WP Adminify (no code) WP Adminify's [Redirect URLs feature](https://wpadminify.com/features/url-redirection) handles both login and logout redirects, and it can target a user by role, username, or capability. Here's the full walkthrough. ### Step 1: open the Security tab and turn on Redirect URLs From your dashboard, go to Adminify and open the Security tab along the top. Find the Redirect URLs row (described as "Login and logout redirects based on user roles") and flip the toggle to Show. Two sub-tabs appear: Login/Register URL and Roles Redirect. ![WP Adminify Security tab with the Redirect URLs option toggled to Show, revealing the Login/Register URL and Roles Redirect sub-tabs](https://d1k2c27psfzbiv.cloudfront.net/wp-content/uploads/2026/06/09103356/wp-adminify-security-redirect-urls.png) ### Step 2: open Roles Redirect and add a new login rule Click the Roles Redirect sub-tab. Under Redirect Rules Type, leave it on Login Redirect (we'll get to Logout Redirect later). Then click Add New Login Redirect to create your first rule. ![Roles Redirect tab in WP Adminify showing the Login Redirect rule type selected and the Add New Login Redirect button](https://d1k2c27psfzbiv.cloudfront.net/wp-content/uploads/2026/06/09103400/wp-adminify-roles-redirect-add-new-login-redirect.png) ### Step 3: choose the user role A rule card opens. For User Types, select User Role. Open the Role dropdown and pick the role this rule applies to: Administrator, Editor, Author, Contributor, Subscriber, or any custom role your plugins have registered. The screenshot shows a few extra roles added by a CRM plugin, which is exactly the kind of thing you'll want to target on a real site. ![WP Adminify login redirect rule with User Role selected and the Role dropdown open listing Administrator, Editor, Author, Contributor, Subscriber and custom roles](https://d1k2c27psfzbiv.cloudfront.net/wp-content/uploads/2026/06/09103406/wp-adminify-login-redirect-choose-user-role.png) ### Step 4: enter the redirect URL and save In the Redirect URL field, type where this role should land. You can use a relative page slug like `my-dashboard`, or a full URL like `https://yoursite.com/account`. On a multisite network, use the full URL so cross-site redirects resolve to the right site. Click Save Settings and you'll see a "Settings saved" confirmation. ![WP Adminify redirect URL field filled with a destination page for the Administrator role and the Settings saved confirmation showing](https://d1k2c27psfzbiv.cloudfront.net/wp-content/uploads/2026/06/09103410/wp-adminify-redirect-url-field-saved.png) Want different destinations for different roles? Click Add New Login Redirect again and repeat, one rule per role. A typical agency setup looks like this: Administrators to `wp-admin`, Editors to the post list, Subscribers to a members page, Customers to `/my-account`. ### Step 5: test the redirect Log out, then log back in as a user with the role you configured. Once the credentials go through, WordPress hands off to your redirect URL instead of the default dashboard. One tip: test in a private window or a second browser so you don't log yourself out of your main admin session. If the login page itself is acting up, our guide on [fixing WordPress login page issues](https://wpadminify.com/how-to-fix-wordpress-login-page-issues) covers the usual suspects. ## Beyond roles: redirect by username or capability Roles cover most cases, but sometimes you need finer control. In the same rule card, switch User Types to one of these: - User Name: target one specific person. Handy when you want to send a single client to their own landing page without affecting everyone who shares their role. - User Capability: match anyone who holds a given capability, like `manage_options` or `edit_posts`. Useful when several custom roles share a permission and should all land in the same place. Capability rules age the best. Add a new role six months from now that carries the same capability, and it inherits the redirect with no extra setup. ## Set a logout redirect too The default WordPress logout dumps users back on the login form with a "You are now logged out" notice. You can send them somewhere friendlier instead: your homepage, a "see you soon" page, or a clean re-login screen. In the Redirect URLs module, change Redirect Rules Type to Logout Redirect, click Add New, choose the role, and enter the URL. Same flow as the login rule, just the opposite event. ## Method 2 - redirect by role with code (functions.php) Heads-up: a malformed rule in this filter is a classic trigger for a [WordPress login redirect loop](https://wpadminify.com/wp-admin-redirects-to-homepage). If signing in just bounces you back to the login screen, break the loop first, then set up your role-based rules. Prefer to keep it in code, or just want to see what the plugin does under the hood? WordPress exposes the `login_redirect` filter. Drop this into your child theme's `functions.php` or a site-specific snippet: ``` add_filter( 'login_redirect', 'custom_login_redirect_by_role', 10, 3 ); function custom_login_redirect_by_role( $redirect_to, $requested_redirect_to, $user ) { // Bail if there's no valid user object. if ( ! isset( $user->roles ) || ! is_array( $user->roles ) ) { return $redirect_to; } if ( in_array( 'administrator', $user->roles, true ) ) { return admin_url(); // admins -> dashboard } if ( in_array( 'editor', $user->roles, true ) ) { return home_url( '/edit-hub/' ); // editors -> custom page } if ( in_array( 'subscriber', $user->roles, true ) ) { return home_url( '/members/' ); // subscribers -> members area } return $redirect_to; // everyone else -> default } ``` This works, but it has costs. Every new role or destination means editing live code, one typo can lock people out, and the logic sits in a file your client can't see or change. The plugin route gives you the same behaviour in a safe UI with no chance of a fatal error. If you do go the code way, edit through a child theme or a code snippets tool, never the parent theme. ## Troubleshooting role-based redirects | Symptom | Likely cause and fix | | --- | --- | | Redirect ignored, lands on dashboard | Another login plugin (security suite, membership plugin, social login) is also filtering `login_redirect` and running last. Disable the duplicate redirect, or raise WP Adminify's priority. | | Admin gets redirected away from wp-admin | You created a rule for the Administrator role. Remove it, or point Administrators back to `wp-admin` on purpose. | | Redirect loop or "too many redirects" | The destination page itself requires login and bounces back. Send the role to a page it can actually view with its capability. | | Works for some users, not others | Those users hold more than one role. Use a User Capability rule instead of a single role to catch them. | | Nothing changes at all | The Redirect URLs toggle is still off, or the settings didn't save. Re-open Security → Redirect URLs, confirm it's set to Show, and save again. | ## Where this fits in a client-ready setup Login redirects are one piece of handing a site to a client cleanly. They work alongside a few other WP Adminify moves: - Build the destination first, a [custom user dashboard without coding](https://wpadminify.com/how-to-create-wordpress-custom-user-dashboard-without-coding), then point the role at it. - [White-label the login page](https://wpadminify.com/white-label-wordpress-login-page-for-your-clients) so the whole sign-in experience is branded. To pick the right customizer, compare the [best WordPress login page plugins](https://wpadminify.com/best-wordpress-login-page-plugin), or follow the full guide to [customize the WordPress login page](https://wpadminify.com/customize-wordpress-login-page). - Add [two-factor authentication](https://wpadminify.com/two-factor-authentication-for-wordpress-admin) and [activity logging](https://wpadminify.com/how-to-monitor-user-activity-in-wordpress) so you know who logged in and when. ## Login Redirect by Role FAQs ### Can I redirect users after login by role without a plugin? Yes. The login_redirect filter in functions.php does it with code. The catch is you're editing live PHP for every change, with a real risk of a fatal error. A plugin like WP Adminify gets you the same result through a UI with no code. ### Does WP Adminify support both login and logout redirects? Yes. The Redirect URLs module has a Redirect Rules Type switch for Login Redirect and Logout Redirect, so you control where users go in both directions, per role. ### Can I redirect a single specific user instead of a whole role? Yes. Set User Types to User Name and target that individual. There's also a User Capability option for matching anyone with a given permission. ### Will this work on WordPress Multisite? Yes. For multisite or any cross-site destination, enter the full URL (not just a slug) in the Redirect URL field so the redirect resolves to the correct site. ### What URL format should I use in the redirect field? A relative page slug like my-dashboard works for pages on the same site. Use a full https:// URL for external destinations, account pages on a different domain, or multisite redirects. ### Why are my admins being logged out or redirected unexpectedly? You almost certainly added a redirect rule that matches the Administrator role. Delete that rule, or set the admin destination back to wp-admin. Also check for a second plugin running its own login redirect. ## Wrapping up Sending each role to the right page after login takes about a minute in WP Adminify: turn on Redirect URLs under Security, add a Roles Redirect rule, pick the role, enter the URL, save. No filters to babysit, nothing for a client to break. And since it lives inside the same plugin that handles your [dashboard customization](https://wpadminify.com/wordpress-dashboard-customization), menus, and login branding, you're setting up the whole sign-in experience in one place. Ready to fix where your users land? [Get WP Adminify](https://wpadminify.com/) and set up role-based login redirects today. --- # WordPress Performance Optimization in 2026: A Complete Guide URL: https://wpadminify.com/wordpress-performance-optimization Last updated: 2026-08-18 Slow websites are frustrating. Or we can say Diabolical. Slow websites makes visitors frustrated. And mostly the SEO rankings go down making business fall apart. But what if I tell you that speeding up your WordPress site doesn’t have to be a headache? We’ve spent over a decade in the WordPress industry and tried every trick in the book under WordPress performance optimization. There are many tips and tricks to you'll see when you search. But the valid question is, is there a simpler and faster solution in reality? My answer is YES! We developed WP Adminify so that you don’t have to struggle through online forums trying to find speed hacks. Let's look at how you can use WP Adminify to improve WordPress website speed. ## What Is WordPress Performance Optimization? (Updated August 2026) WordPress performance optimization is the work of reducing how much your site does on each request so pages load faster and your Core Web Vitals stay green. The biggest levers, in order of impact, are fast hosting, page and object caching, image optimization, a lean plugin set, a current PHP version, and a clean database. WP Adminify handles the script, style, and dashboard-cleanup layer from one panel. If it's specifically the WordPress admin that drags rather than the whole site, read our guide on [why your WordPress admin is slow](https://wpadminify.com/why-is-my-wordpress-admin-so-slow). ## Why WordPress Performance Optimization Is Important Here’s a damning statistic: On average for every extra second your website takes to load your conversion rates fall by [2.11%](https://thrivemyway.com/site-speed-stats/#:~:text=For%20each%20additional%20second%20that%20it%20takes%20for%20your%20website%20to%20load%20between%200%2D9%20seconds%2C%20conversion%20rates%20will%20drop%202.11%25.). Now think about your own site. Every extra second it takes to load could mean losing potential customers or readers. Speeding up WordPress site isn’t just about keeping people happy; it’s about survival. A fast website ranks higher on Google. Which leads to getting more conversions, and increased traffic. So, let me tell you how to optimize your WordPress website with WP Adminify. ## How Do You Optimize WordPress Performance? The 7 Core Levers (2026) Beyond any single plugin, WordPress performance optimization comes down to seven levers you control: hosting, caching, images, your plugin set, PHP version, your database, and a CDN. Fix them roughly in that order of impact. Here is what each one does and how to get it right in 2026, before you fine-tune the asset layer with WP Adminify. ### 1. Start With Fast, Right-Sized Hosting Hosting sets your ceiling; no plugin can rescue an overloaded shared server. Aim to keep server response time (TTFB) under roughly 200ms. Pick a host with enough CPU and RAM for your traffic, SSD or NVMe storage, and a modern stack. For busy or commercial sites, managed WordPress or VPS hosting usually beats budget shared plans. ### 2. Add Page and Object Caching Caching is the single biggest software win. Page caching stores a ready-built HTML copy so your server skips rebuilding the page on every visit, while object caching (Redis or Memcached) reuses repeated database query results. Together they cut TTFB sharply. A dedicated caching plugin or your host's built-in cache handles both layers for you. ### 3. Compress, Resize, and Lazy-Load Images Images are usually the heaviest bytes on a page. Serve them in modern formats such as WebP or AVIF, at the dimensions they actually display, then compress them so quality stays high and file size drops. WordPress lazy-loads images natively since version 5.5; an image-optimization plugin automates the format conversion and compression at scale. ### 4. Keep PHP Current (8.3 or Greater) Updating PHP is a free speed and security win most sites skip. WordPress.org [recommends PHP 8.3 or greater](https://wordpress.org/about/requirements/), and newer versions run the same code noticeably faster than PHP 7.4, which reached end of life in November 2022 and no longer receives security fixes. Test on staging, then switch versions from your host's dashboard. ### 5. Audit and Trim Your Plugins It is not the number of plugins that slows you down, it is what each one loads on every request. Plugins that inject scripts, styles, or database queries site-wide are the real drag. Audit which ones load everywhere, remove anything unused, and consolidate several single-purpose tools into one; WP Adminify replaces a whole stack of admin and cleanup tweaks. ### 6. Clean and Optimize Your Database Over time your database fills with post revisions, expired transients, spam, and orphaned metadata that bloat queries. Periodically remove old [post revisions](https://wpadminify.com/wordpress-revisions), clear expired transients, and optimize tables. A lean database shortens query time on every page load, and the effect is largest on dynamic, logged-in pages like WooCommerce carts and the admin. ### 7. Use a CDN and Measure Core Web Vitals A CDN serves static files from a location near each visitor, cutting latency for a global audience. Then measure the outcome with Core Web Vitals, Google's field metrics: aim for [LCP under 2.5s, INP under 200ms, and CLS under 0.1](https://web.dev/articles/vitals), assessed at the 75th percentile of real visits. [Google PageSpeed Insights](https://wpadminify.com/google-pagespeed-insights) shows where you stand today, and WP Adminify's built-in PageSpeed addon lets you run those checks and track your mobile and desktop scores over time from inside wp-admin. To switch it on, [create a free Google PageSpeed Insights API key](https://wpadminify.com/docs/google-pagespeed-insights/api-key-configuration) and paste it into WP Adminify. ### Which Lever Fixes Which Symptom? | Symptom you see | Most likely cause | First fix to try | | --- | --- | --- | | Slow server response / high TTFB | Weak hosting, no page cache | Better hosting + page caching | | Slow largest image / poor LCP | Large unoptimized images | WebP or AVIF + compression + lazy-load | | Sluggish clicks / poor INP | Heavy JavaScript on the page | Defer and reduce JS, trim plugins | | Layout jumps / poor CLS | Missing image dimensions, injected content | Set width and height, reserve space | | The admin specifically is slow | Bloated database, Heartbeat, too many plugins | Clean the database, [limit Heartbeat](https://wpadminify.com/how-to-control-wordpress-heartbeat-api), audit plugins | If it is specifically the dashboard that drags rather than the whole site, work through [why your WordPress admin is slow](https://wpadminify.com/why-is-my-wordpress-admin-so-slow) next. Once the fundamentals above are in place, the WP Adminify [performance](https://wpadminify.com/features/performance) settings below trim the remaining asset-layer weight from one panel. ## How Do You Measure WordPress Performance? (Tools and Benchmarks) You measure WordPress performance with two kinds of data: field data from real visitors (via the Chrome User Experience Report) and lab data from a simulated test. Google ranks on field data, so start with [PageSpeed Insights](https://pagespeed.web.dev/), then use lab tools to reproduce and fix whatever it flags. Always test before you change anything and again after each fix — otherwise you're optimizing blind. If the front end tests well but the dashboard still drags, the bottleneck is server-side: see [why your WordPress admin is slow](https://wpadminify.com/why-is-my-wordpress-admin-so-slow) and profile the queries and PHP behind it before touching the theme. | Tool | What it measures | Best for | | --- | --- | --- | | PageSpeed Insights | Field Core Web Vitals (CrUX) plus a lab Lighthouse score | Your official, ranking-relevant snapshot | | Lighthouse (Chrome DevTools) | Lab performance, accessibility, and SEO | Debugging one page as you edit it | | GTmetrix | Request waterfall, load time, and page size | Spotting heavy assets and slow requests | | WebPageTest | Multi-location runs, filmstrip, and TTFB | Deep, repeatable diagnostics | | Query Monitor | Database queries, slow PHP, and hook timing | Finding what makes the admin slow | ### What Core Web Vitals scores should you aim for? Google grades each metric at the 75th percentile of your real users, so 75% of visits must hit "good" for a page to pass. Aim for the green column: | Metric | Good | Needs improvement | Poor | | --- | --- | --- | --- | | Largest Contentful Paint (LCP) | 2.5s or less | 2.5–4s | Over 4s | | Interaction to Next Paint (INP) | 200ms or less | 200–500ms | Over 500ms | | Cumulative Layout Shift (CLS) | 0.1 or less | 0.1–0.25 | Over 0.25 | Time to First Byte (TTFB) isn't itself a Core Web Vital, but it's the earliest warning of a slow server — [web.dev](https://web.dev/articles/vitals) recommends keeping it under 800ms. A high TTFB on WordPress almost always traces back to missing caching, a bloated plugin stack, or under-powered hosting — the first three levers above. When the numbers are healthy across a full test, keep them there with the [WP Adminify performance tools](https://wpadminify.com/features/performance). ## What Are the Different Types of WordPress Caching? Caching stores a ready-made copy of work WordPress would otherwise repeat on every request, so the server does less and pages arrive faster. It is not one setting — it is several layers, and each removes a different bottleneck. Stacking them is how you turn a sluggish site into one that passes Core Web Vitals. | Cache type | What it stores | Biggest win | | --- | --- | --- | | Page caching | The full HTML of a rendered page | Skips PHP and database work on every visit — the largest TTFB drop | | Browser caching | Static assets on the visitor's device | Repeat visits reuse local files instead of re-downloading them | | Object caching (Redis or Memcached) | Results of repeated database queries | Speeds up dynamic, logged-in, and admin pages that skip page cache | | Opcode caching (OPcache) | Compiled PHP bytecode | Cuts PHP execution time site-wide; on by default in modern PHP | | CDN caching | Copies of assets at edge locations worldwide | Shorter distance to the visitor means lower latency | ### Which caching type should you enable first? Start with page caching — it delivers the biggest speed gain for the least effort and fixes the most common complaint, a slow first byte on anonymous traffic. Once the front end is fast, add object caching if your dashboard, cart, or logged-in pages still drag, because those pages deliberately bypass the page cache. OPcache usually ships enabled on PHP 8.x, so you rarely touch it, and a CDN pays off most when your audience is spread across regions. One caveat trips up almost everyone: the wp-admin area is never page-cached, so a heavily cached front end can hide a painfully slow back end. If that sounds familiar, diagnose it separately — see [why your WordPress admin is slow](https://wpadminify.com/why-is-my-wordpress-admin-so-slow) and lean on object caching plus a lighter dashboard rather than another front-end plugin. ## How Much Does Your Hosting Plan Affect WordPress Speed? Hosting sets the ceiling on how fast your site can ever be. It decides your Time to First Byte, how many PHP workers can answer requests at once, and how much memory each process gets. No plugin fully compensates for underpowered hardware — caching and image optimization reduce the load, but a server that responds slowly when idle will still respond slowly under traffic. If you have optimized everything and speed is still capped, hosting is usually the reason. | Hosting type | How it behaves | Best for | | --- | --- | --- | | Shared hosting | Cheapest tier; CPU and memory are shared, so response times spike when neighboring sites get busy | Small, low-traffic sites on a tight budget | | VPS | A guaranteed slice of CPU and RAM; faster and more predictable, but expects some server management | Growing sites that want control and headroom | | Managed WordPress hosting | A tuned stack with server-level caching and updates handled for you | Store owners and agencies who want speed without server ops | | Dedicated or cloud | A whole server or scalable cloud resources you can grow on demand | High-traffic, revenue-critical sites | ### Signs you have outgrown your hosting Watch for a rising Time to First Byte, a dashboard that lags whenever traffic climbs, intermittent 500 or timeout errors, and PHP memory-limit warnings. When those appear despite caching and a trimmed plugin stack, moving to a stronger tier does more than any single tweak. Once the server is solid, keep the software side lean too — compare what the performance and admin tools in [WP Adminify Pro](https://wpadminify.com/pricing) add on top of good hosting so both layers pull in the same direction. ## 7 WordPress Performance Optimizations Using WP Adminify I've gathered some interesting and effective ways to upgrade your website speed using WP Adminify's optimization settings. These aren’t just random tips. These [performance optimization](https://wpadminify.com/docs/adminify/performance/disable-gutenberg) technique will make your website super fast. So, let's get started. ### 1. Remove Unnecessary Scripts and Styles Think of your site like a backpack. The more junk you carry, the slower you move. WP Adminify helps you lighten the load: Remove Dashicons for Public Visitors: ![Dashicons in WordPress website](https://d1k2c27psfzbiv.cloudfront.net/wp-content/uploads/2024/12/30112635/Dashicons-in-WordPress-website.webp) Unless you’re a logged-in user, Dashicons serve no purpose. Turn them off for frontend visitors under WP Adminify > [Performance.](https://wpadminify.com/features/performance) ![performance optimization option by WP Adminify](https://d1k2c27psfzbiv.cloudfront.net/wp-content/uploads/2024/12/31062125/performance-optimization-option-by-WP-Adminify.webp) ![remove Dashicons for public visitors](https://d1k2c27psfzbiv.cloudfront.net/wp-content/uploads/2024/12/30112652/remove-Dashicons-for-public-visitors.webp) Disable Emoji Scripts: ![Remove All Emoji styles and scripts from head section](https://d1k2c27psfzbiv.cloudfront.net/wp-content/uploads/2024/12/30113245/Remove-All-Emoji-styles-and-scripts-from-head-section.webp) Emojis are fun, but the scripts they load? Not so much. Disable them to shave precious milliseconds off your load time. ![All Emoji styles and scripts from head section](https://d1k2c27psfzbiv.cloudfront.net/wp-content/uploads/2024/12/30113252/All-Emoji-styles-and-scripts-from-head-section.webp) Remove jQuery Migrate: If your plugins don’t rely on outdated jQuery, disable this script to cut down on unnecessary processing. ### 3. Defer JavaScript for Faster Page Loads JavaScript is essential, but it’s also a resource hog. WP Adminify lets you defer parsing JavaScript to the footer, so your critical content loads first. Just go to WP Adminify > Performance and toggle the "Defer Parsing JS to Footer" option. Boom, faster site. ![Enable Defer Parsing JS to Footer](https://d1k2c27psfzbiv.cloudfront.net/wp-content/uploads/2024/12/31061901/Enable-Defer-Parsing-JS-to-Footer.webp) ### 4. Clean Up the Head Section: Less Clutter, More Speed Your site’s head section often becomes a dumping ground for unnecessary elements. WP Adminify can help you declutter by: Removing WordPress Generator Version and other metadata that serves no real purpose. ![Remove WordPress generator version in frontend](https://d1k2c27psfzbiv.cloudfront.net/wp-content/uploads/2024/09/28041952/Remove-WordPress-generator-version-in-frontend.webp) Disabling XML-RPC and limiting REST API access to authenticated users. ![Disable XML RPC in WordPress for security](https://d1k2c27psfzbiv.cloudfront.net/wp-content/uploads/2024/09/28040812/Disable-XML-RPC-in-WordPress-for-security.webp) Cutting out redundant feed links to reduce server requests. ![Remove feed links from WordPress Head](https://d1k2c27psfzbiv.cloudfront.net/wp-content/uploads/2024/09/28053619/Remove-feed-links-from-WordPress-Head.webp) Head to WP Adminify > [Security](https://wpadminify.com/features/security) to activate these options. Some scripts do belong in the head, like analytics and verification tags. Learn how to [insert code in your WordPress header](https://wpadminify.com/add-code-to-wordpress-header) without stuffing it into theme files. ### 5. Kick Gutenberg Scripts to the Curb (If You’re Not Using It) Gutenberg is great for some users, but if you’re using a different page builder, its scripts and styles are just dead weight. WP Adminify allows you to: Disable Backend Gutenberg Scripts for posts and pages. Plus, Remove Frontend Gutenberg Styles to streamline CSS loading. ![Disable Gutenberg editor and styles script](https://d1k2c27psfzbiv.cloudfront.net/wp-content/uploads/2024/10/12150552/Disable-Gutenberg-editor-and-styles-script.webp) These settings are under WP Adminify > Performance. ### 6. Disable Embeds: Say Goodbye to Slow External Requests Every time someone embeds a video or tweet, it adds extra requests to your site. With WP Adminify, you can: Completely disable embeds to prevent external scripts from slowing down your site. ![Disable Embeds in WordPress Editor](https://d1k2c27psfzbiv.cloudfront.net/wp-content/uploads/2024/09/25104824/Disable-Embeds-in-WordPress-Editor.webp) Stop REST API embed results from being processed unnecessarily. Find this feature under WP Adminify > Performance. ### 7. Declutter Your Dashboard and Widgets Unused widgets not only waste space but also consume resources. WP Adminify lets you: Remove Dashboard Widgets to keep your admin area lean and mean. Turn off Sidebar Widgets to avoid unnecessary queries and script loads. To find this feature just go to WP Adminify > Productivity. Scroll to the bottom. ![Sidebar and Dashboard widget removal](https://d1k2c27psfzbiv.cloudfront.net/wp-content/uploads/2024/08/12110201/Sidebar-and-Dashboard-widget-removal.webp) ## Pro Tips with WP Adminify Pro WP Adminify's free version is plenty capable of resolving any WordPress site speed issues on its own but if you're looking for some serious speed, WP Adminify Pro has you covered: Custom Admin Pages: Replace heavy default pages with lightweight custom ones using your favorite page builder. ![Create custom admin page in WordPress Dashboard](https://d1k2c27psfzbiv.cloudfront.net/wp-content/uploads/2024/09/26063150/Create-custom-admin-page-in-WordPress-Dashboard.webp) Login/Logout Redirects: Redirect users based on roles to skip unnecessary loading of default admin screens. ![Login and logout based redirection](https://d1k2c27psfzbiv.cloudfront.net/wp-content/uploads/2024/08/12110740/Login-and-logout-based-redirection.webp) Hide Update Notices: Clean up your admin area to focus on what matters most. Hide admin notices to improve loading speed across your dashboard. ![Hide Plugin Update Notice in WordPress](https://d1k2c27psfzbiv.cloudfront.net/wp-content/uploads/2024/09/25062619/Hide-Plugin-Update-Notice-in-WordPress.webp) There are many more such [features](https://wpadminify.com/features) in WP Adminify that you can use to achieve pro levels of productivity and output on your WordPress dashboard as well as website. ## WordPress Performance Best Practices: A Quick Checklist These WordPress performance best practices distill the whole guide into a checklist you can act on. Work through them in order and re-run a speed test after each change so you can see which one actually moved the needle. Small, measured steps beat one big rewrite every time — and they keep improving performance without breaking the site. Pick a capable hosting provider — it caps your server performance and page load time before any plugin runs. Keep WordPress core, themes, and plugins updated; outdated code is a common source of performance issues. Resize and lazy-load images so heavy media never blocks the first paint. Enable page and object caching, and add a content delivery network if your audience is global. Run regular database cleanup so bloat and stale data stop dragging queries. Trim unused plugins and scripts to cut requests and speed up WordPress. Track real performance metrics with a speed test tool before and after every change. ## WordPress Performance FAQs ### How do I speed up my WordPress website? Start with fast, well-resourced hosting, then add a caching plugin for page cache and browser caching. Compress and lazy-load images, trim unused plugins, defer JavaScript, and keep PHP current. A CDN shortens load time for distant visitors. WP Adminify removes emoji, Dashicons, jQuery Migrate, and Gutenberg assets so there's simply less to load. ### Does WP Adminify improve WordPress performance? Yes, on the front-end asset layer. It strips Dashicons and emoji scripts for visitors, defers JavaScript to the footer, disables jQuery Migrate and embeds, cleans the head section, and turns off Gutenberg assets when you use another builder. It complements a caching plugin and good hosting rather than replacing them. ### Why is WordPress very slow? A slow WordPress site usually comes down to weak shared hosting, no caching, oversized unoptimized images, too many heavy plugins, an outdated PHP version, or a bloated database. Run PageSpeed Insights to see which resource hurts your load time most, then fix the biggest offender before the smaller ones. ### Does caching really make WordPress faster? Yes, dramatically. A caching plugin stores a ready-made copy of each page so your server skips rebuilding it on every visit, and browser caching keeps static files local so repeat visitors don't re-download them. Pair page cache with object caching and a CDN for the largest, most consistent speed gains. ### Do too many plugins slow down WordPress? It's not the count, it's what each plugin loads. Plugins that add scripts, styles, or database queries on every page are the real drag. Audit which ones load site-wide, deactivate anything unused, and replace several single-purpose tools with one multi-feature plugin like WP Adminify to cut overhead. ## Ready to Optimize Your WordPress Website? Performance optimization should be easy. And WP Adminify surely excels in that. WP Adminify gives everything you need to make your site faster and more efficient. Everything inside just a single plugin. And performance optimization is just one of the things WP Adminify gives you. There’s extensive features that go into [dashboard customization](https://wpadminify.com/wordpress-dashboard-customization), productivity, security to name a few. You can try the [demo](https://demo.pixarlabs.com/?pl-product=adminify) to get a clearer picture of all the features or even just download the [free version](https://wordpress.org/plugins/adminify/) which is packed to the brim with features as well. However to get the maximum benefits of WP Adminify the [Pro](https://wpadminify.com/pricing) is a no brainer. Learn [why WP Adminify Pro is more powerful than ever.](https://wpadminify.com/what-is-new-in-wp-adminify-v4-0) --- # Why is My WordPress Admin So Slow? Causes & Top Fixes URL: https://wpadminify.com/why-is-my-wordpress-admin-so-slow Last updated: 2026-08-18 A sluggish WordPress admin is one of the most frustrating problems to work around. Every save, every plugin screen, every dashboard load makes you wait, and it quietly drains hours out of your week. The good news: admin slowness almost always traces back to a handful of fixable causes, and most take only a few minutes to sort out. This same principle applies when your WordPress admin is slow. It almost always results in frustration. It can set you back considerably in terms of productivity. And when it comes to running a website or business on WordPress it might fall apart. In this article, we’ll explore all the reasons why your WordPress admin panel is slow. And I'll try my best to give you working solutions to speed things up. Quick answer: The WordPress admin is slow because wp-admin is never page-cached. Every click boots the full PHP stack, queries the database live, and runs background admin-ajax traffic. A low PHP memory limit, resource-heavy plugins, constant Heartbeat API polling, too many dashboard widgets, an outdated PHP version, or a bloated `wp_options` table pile onto that load, and underpowered shared hosting amplifies all of it. Fixing the biggest one or two normally restores a fast dashboard. ## Why is my WordPress Admin So Slow? (Common Causes) A slow WordPress admin panel is a major setback to your website management experience. Imagine if you need to fix something urgently and its acting slow. The frustration level goes up. And the desperation of fixing it will flabbergast you. So, to avoid that, here are the most common factors behind a slow WordPress admin dashboard. ### The Admin Area Is Never Cached Before any specific cause, there is one structural reason the dashboard behaves differently from the public site. Page caching, CDNs and static HTML all serve logged-out visitors. wp-admin is deliberately excluded, because you need to see live data. So every dashboard screen you open runs PHP from scratch, queries the database, and waits on whatever plugins hook into the admin. That is why a site can score well on a front-end speed test and still crawl the moment you log in. It also explains why the usual advice, install a caching plugin, barely touches the problem. The fixes that work on the admin side are the ones that reduce how much work each request has to do. ### Base Factors Outdated WordPress Version In digital platforms, old is not always the gold. New versions always comes with bug fixes and optimizations. So, if you're still using older version of WordPress, there's a high chance of you admin panel to work slow. It is a must to update WordPress once the stable release appears. But if you're running a business, kindly avoid a few days before updating. There might be some unseen bugs that might hamper your running website. So, wait for a few days and check what other users are saying. And then update your WordPress version. ![Outdated WordPress Version](https://d1k2c27psfzbiv.cloudfront.net/wp-content/uploads/2024/06/12112757/Outdated-WordPress-Version.webp) Outdated PHP Version Old versions sometimes have minor bugs which can lead to crashes in future. Because in digital sector everything is updating and upgrading continuously. Old versions were optimized during a specific time and works for a certain period. And this is a major thing for WordPress sites. ![Outdated PHP Version](https://d1k2c27psfzbiv.cloudfront.net/wp-content/uploads/2024/06/12112758/Outdated-PHP-Version.webp) ### Resource Constraints Insufficient Server RAM If you're running a WordPress website, you're using multiple plugins. And to run those plugins smoothly, you need sufficient server memory. If your hosting plan offers limited ram, you'll definitely get slow loading and performance issue. If you're struggling with your hosting speed, switching providers is the real fix. Kinsta can be your next-level hosting provider - [managed WordPress hosting](https://kinsta.com/?kaid=JJQTDBDTIGRX) with decent uptime and the performance headroom to handle a growing plugin list. [WP Adminify](https://wordpress.org/plugins/adminify/) can help you in this. It offers dedicated settings for server performance monitoring. You'll find all the server optimization related settings. And that will help you fix the server and its memory related issues. ![Server information check using WP Adminify](https://d1k2c27psfzbiv.cloudfront.net/wp-content/uploads/2024/06/12112812/Server-information-check-using-WP-Adminify.webp) Low PHP Memory Limit Low PHP memory limit is another cause of slow performance. If you're using heavy plugins or themes, increasing it will solve the issue. ![Low PHP Memory Limit](https://d1k2c27psfzbiv.cloudfront.net/wp-content/uploads/2024/06/12112843/Check-Low-PHP-Memory-Limit.webp) Shared Hosting Limitations Shared hosting can be optimal for starters. But, once the site gain larger traffic, it fails to allocate resources optimally. So, due to high traffic and low available resourced you will see a potential drop on performance. ![Shared Hosting Limitations](https://d1k2c27psfzbiv.cloudfront.net/wp-content/uploads/2024/06/12112802/Shared-Hosting-Limitations.webp) ### Plugins and Themes Now, let's go to the heard of WordPress website. Yes, I'll now talk about themes and plugins. How, they can affect the overall performance might shock you. Inefficient Plugins People by instinct use plugins or themes just by face value. They don't have the knowledge to check it thoroughly nor they should. But, it affects the performance without saying. Poorly coded, unoptimized and outdated plugins and theme are root cause of this. Some plugins might look low in size. But due to there poor optimization, you'll face slow performance as it might create bottleneck in your site. Theme Bloat Complex themes are another major reason of bad performance. Themes with extra codes or useless features leads to a slow overall experience. It increases the loading time, or sometimes breaks the site temporarily. And this will hamper the performance without your knowledge. Plugin and Theme Conflicts Compatibility is another concern for worse performance. While most plugins/themes claims to be compatible with major plugins, reality is different. They sometimes conflict with each other due to incompatibility. This might occur during WordPress code update or plugin/theme update. And the reason might code related conflicts or resource management. ### Database Issues Large or Unoptimized Database Just like humans, WordPress database accumulate junk files. This includes post revisions, spam comments, and temp data. With time, these junk files gets bigger in size. And this causes slower query execution leading poor performance. Database Corruption This might be once in a while situation, but database corruption might occur randomly. And this not only breaks the site sometimes it results in just sluggish performance. ### External Factors The overall site performance are not only based on the internals but also some external factors. let's take a look at them. Slow Web Host Hosting is one the major reasons your WordPress site is slow. While trying to save money we often look for cheap web hosting. But, they use outdated hardware or low quality servers. And these leads to less to minimum performance on your site. Large Image Uploads [Uploading large images](https://wordpress.org/plugins/increase-maximum-upload-file-size-limit/) to your site can significantly slow it down. It increasing the overall loading speed of the site both in frontend and backend. With large number of media files, you'll see a major loading speed issue when trying to enter WordPress media library. WP Adminify solves this issue with [advance media management](https://wpadminify.com/how-to-organize-wordpress-media-library-with-folders). You can create folders and subfolders to sort your media items. And doing that will help you avoid duplication. Which will lead to faster loading times Corrupted WordPress Core Files Sometimes due to plugin conflicts or update errors the core files WordPress get corrupted. These will lead low low and slow performance. Even in rare cases, the site goes unavailable. ### Other Potential Causes Security Measures As you know, security plugins are essential for website security. some plugins can hamper your website's performance. It impacts the admin dashboard loading. No Caching Plugin Caching plugins act like memory banks for your website. it stores frequently accessed data. Without one, the system has to constantly re-fetch information for each action. This repetitive process can lead to a slow admin experience. ![Install a Caching plugin in your Dashboard](https://d1k2c27psfzbiv.cloudfront.net/wp-content/uploads/2024/06/12112815/Install-a-Caching-plugin-in-your-Dashboard.webp) Brute force attacks on WP login page A bot attack or brute force attacks on your login page can slow down overall site speed. And sometimes DDOS might be the reason. Multiple failed login attempts overloads the server with extreme processing. It uses resources heavily casing bottleneck to the site performance. These are all the common causes of a slow WordPress site and admin dashboard. Now, let's move forwards with the solution to speed up your WordPress admin dashboard. ## How to Speed Up Your WordPress Admin Panel There are many different kind of diagnoses when it comes to fixing a slow WordPress dashboard. Let's look at the different lines of troubleshooting that can resolve this nagging issue. It also helps to benchmark your front-end speed first: a quick [Google PageSpeed Insights](https://wpadminify.com/google-pagespeed-insights) check shows which assets are slowing your pages down. ### How to Find What Is Actually Slowing Down Your Admin Changing six settings at once tells you nothing about which one helped. Spend ten minutes measuring before you touch anything. - Install Query Monitor. It is free on WordPress.org and adds a toolbar panel showing slow database queries, HTTP API calls and PHP errors for the exact admin screen you are on, with the plugin or theme responsible named beside each one. - Open Tools then Site Health then Info. WordPress reports your PHP version, memory limit and database size there, so you can rule those three out in seconds. - Bisect your plugins safely. The Health Check and Troubleshooting plugin disables plugins for your session only, so you can isolate the culprit on a live site without taking it down for visitors. - Rule out the browser. If the dashboard is slow only for you, retry it in a private window with extensions disabled. The admin is JavaScript heavy, and a loaded browser profile can make a healthy server feel sluggish. - Account for what is installed. WooCommerce stores and page builders such as Elementor load extra admin scripts and admin-ajax requests, so a store dashboard needs more headroom than a blog before anything is technically wrong. Once you know which plugin or query is heavy, work through the fixes below in order. First things first, we have to check if we have all our bases covered which means checking if everything is running on its latest version. ### WordPress Core Updates WordPress release updates at a regular interval. These update contains security issue fixes, performance improvements and new features. WordPress 6.5 came with [110+ performance updates](https://wordpress.org/documentation/wordpress-version/version-6-5/#from-fast-to-faster-performance-updates). It increased about 25% loading speeds overall. This means is you must update the core WordPress once it drops. This will help you maintain a healthy and optimized website. So, if you don't know how to update the WordPress here's how you can do it. #### The Easy Way: One-Click Update Log in to your WordPress admin dashboard. Then navigate to Dashboard > Updates. If an update is available, you'll see a notification of "Update Now". Click on it and WordPress will start updating. ![WordPress Core Updates in one click](https://d1k2c27psfzbiv.cloudfront.net/wp-content/uploads/2024/06/12112817/WordPress-Core-Updates-in-one-click.webp) Some plugins/themes might get deactivated during the upgrade. Reactivate them to keep your site up and running. #### For Advanced Users: Manual Update You can update WordPress manually using FTP. This method requires some technical knowledge. But here's a easy guide of doing it: Important Note: Backup the wp-config.php file before trying this. Go to WordPress.org website and [download the latest version](https://wordpress.org/download/). Extract the downloaded zip file. You'll find a folder named "WordPress". Connect to your website using an FTP client. Then upload all the extracted files (except the "readme.html" and "wp-content" folders). You need to upload them in your root directory. Also, you'll need to overwrite existing files. Sometimes you have to do a manual database upgrade. You can do it by accessing a specific URL provided on-screen. ### Plugin and Theme Performance Let's check out how to identify and address performance issues caused by plugins and themes: #### Inefficient Plugins Low quality plugins might hamper the performance. So finding them is important. Here's how to find them: Use a Performance Plugin: Use plugin like [Query Monitor](https://wordpress.org/plugins/query-monitor/) or P3 Plugin Performance Profiler. These plugins shows the low quality plugins causing performance issue. Deactivate Suspects: If you think of a plugin causing slow performance, temporarily deactivate it. If your site and dashboard feels faster, try changing the culprit with another solution. Keep Plugins Updated: Regularly update all your plugins to their latest versions. This will keep your site and performance fast. #### Theme and Admin Bloat First, you need to take a critical look at all the features your theme offers. Are you really using everything? Are you really using the quick draft widget to breathe life into your "spontaneous content ideas"? The answer will usually be no. If it is a no, consider deactivating unused widgets from the screen options at the top of the dashboard. This will remove the widget for your specific account. But what if you want to remove the widget or better yet stop it loading entirely for all the users across your website? [WP Adminify](https://wpadminify.com) has you covered. Download and activate the plugin and navigate to Widget settings ==> Dashboard Widgets. Here you can: - Disable Widgets: Pick which widget you want to fully disable. - Set Visibility: Selectively apply these changes for all or specific users. It’s a similar approach for themes as well. Switch to a more lightweight theme that serves your needs without increasing CPU usage. Do keep in mind to test the changes on a test site rather than your live site. Sudden theme changes on your live site can cause issues for your customers. #### Plugin and Theme Conflicts Incompatible plugins/themes conflicts with each other. This leads to performance issues like a slow admin dashboard. Here's how to fix these conflicts: - Deactivate and Reactivate: Try deactivating all your plugins and then reactivating them one by one. This can help you identify the problematic plugin. - Check Plugin Compatibility: Before installing a new plugin, check if its compatible with your current system. - Update for Harmony: Regularly update your plugins and themes. Updates often address compatibility issues and improve overall performance. Even though we’ve already mentioned this once. Do keep in mind to experiment with these changes on a test site as opposed to your live site. ### Checking and Updating Your Current PHP Version PHP is the programming language that powers WordPress. So consequentially, it is the 2nd most important base that needs covering. PHP releases regular updates that improve performance, address security vulnerabilities, and introduce new features. Keep your PHP version up to date to ensure a smooth dashboard experience. To check the PHP version history, go to the WordPress dashboard. Then navigate to Tools > Site Health. Under the Info tab, look for the PHP Version entry. Here's how to update PHP from cPanel: Most hosting providers offer a way to update your PHP version through their cPanel. Login to your hosting provider's dashboard. Select the site you want to update. Get to the cPanel. Click on the "MultiPHP Manager". Now select the version you want to use. ![MultiPHP INI Manager Editor](https://d1k2c27psfzbiv.cloudfront.net/wp-content/uploads/2024/06/12112820/MultiPHP-INI-Manager-Editor.webp) ### Low PHP memory limit Before addressing the PHP memory limit it’s important that you know where to find it. To locate the PHP memory limit for your website just go to your WordPress dashboard, go to Tools ===> Site health. ![Check PHP memory limit from tools option](https://d1k2c27psfzbiv.cloudfront.net/wp-content/uploads/2024/06/12112824/Check-PHP-memory-limit-from-tools-option.webp) Then navigate to ===> Info tab. Here you’ll find the PHP memory limit if you scroll down a little a click on Server. ![Check PHP memory limit from server info in site health](https://d1k2c27psfzbiv.cloudfront.net/wp-content/uploads/2024/06/12112827/Check-PHP-memory-limit-from-server-info-in-site-health.webp) You can update the PHP memory limit from your web hosting provider's control panel. Increase the PHP memory limit to 256MB. If you face any trouble please contact your hosting provider for guidance. However if you want to adjust the value yourself, here's what to do. Navigate to your hosting account dashboard and locate the MultiPHP INI Editor under "Software". ![increase PHP memory limit from multiphp ini editor](https://d1k2c27psfzbiv.cloudfront.net/wp-content/uploads/2024/06/12112822/increase-PHP-memory-limit-from-multiphp-ini-editor.webp) Now, choose your website from the top menu and then set the PHP memory limit 256MB. ### Insufficient Server Ram & Shared Hosting There are two pretty straightforward solutions to fixing an insufficient server RAM issue. Either you reduce your CPU usage or upgrade your hosting to a plan with greater server resources. Try to host your website with the best provider like Hostinger. ![Insufficient Server RAM](https://d1k2c27psfzbiv.cloudfront.net/wp-content/uploads/2024/06/12112800/Insufficient-Server-RAM.webp) Shared hosting plans are often the go-to choice for smaller businesses or ones that are just starting to keep their overheads low but sadly, running out of server resources is quite common for those using shared hosting plans; upgrading is usually the only way to solve this. ### Optimizing Your WordPress Database Here's how to optimized you WordPress database: Use a Database Optimization Plugin: Install a plugin i.e., WP-Optimize or Advanced Database Cleaner. These will help you to: - Remove old post revisions - Delete spam and trashed comments - Clear temporary data - Remove unused tags and categories Limit Post Revisions: WordPress saves multiple versions of your posts. This is helpful, but it can slow your database. Add this following line to your wp-config.php file to limit revisions: This keeps only the last 5 revisions of each post. Keeping your database clean is an ongoing task. Set a reminder to check and optimize it every few months to keep your WordPress admin speedy. ### Dealing with Database Corruption Database corruption is a rare yet major issues some users face. Let's look at how to fix this problem. Signs of Database Corruption: You might have a corrupted database if you notice: - Error messages when trying to access certain pages - Missing content or scrambled text on your site - Inability to log in to your admin area - Extremely slow loading times across your site #### How to Fix It? Important Note: back up your entire site. Use WordPress's Built-in Repair Tool: WordPress provides a default repair tool. To use it: - Open your wp-config.php file - Add this line: define('WP_ALLOW_REPAIR', true); - Save the file and upload it back to your server - Visit [yoursite].com/wp-admin/maint/repair.php - Choose "Repair Database" or "Repair and Optimize Database" ![WordPress built in database repair tool](https://d1k2c27psfzbiv.cloudfront.net/wp-content/uploads/2024/06/12112829/WordPress-built-in-database-repair-tool.webp) Check If It Worked: After running the repair, see if your admin area is faster. ![WordPress Database Repair tool result](https://d1k2c27psfzbiv.cloudfront.net/wp-content/uploads/2024/06/12112841/WordPress-Database-Repair-tool-result.webp) Try a Database Plugin: Plugins like [WP-DBManager](https://wordpress.org/plugins/wp-dbmanager/) can help repair and optimize your database. Restore from a Backup: You might need to restore your site from a backup. This is why regular backups are so important! Get Professional Help: Having trouble? Contact your hosting provider or a WordPress professional to diagnose and fix tricky database issues. ### Hide Your Login Page or Redirect the URL WordPress being a premier CMS faces up to [90,000 attacks](https://www.getastra.com/blog/security-audit/hacking-statistics/) per day. Brute force attacks on your website login page can severely paralyze your server resources. Every login attempt ties up a little bit of the CPU. Now imagine hundreds of login attempts coming into your server every second concurrently. It WILL take up all your server resources. The solution is a two pronged approach: - Hiding the Login URL: Edit the core files or using a security plugin. - Redirecting Login Attempts: Change the login page URL to avoid unrecognized login attempts. This is where a plugin like WP Adminify comes in handy again. As it handles both. #### WP Adminify's Redirect URLs Module ![WP Adminify's Redirect URLs Module](https://d1k2c27psfzbiv.cloudfront.net/wp-content/uploads/2024/06/12112831/WP-Adminifys-Redirect-URLs-Module.webp) WP Adminify allows you to easily set up a custom login URL. You can choose to redirect login attempts to a specific page (like a 404 page). This can create a more secure admin experience. ### Use Caching Plugins Caching plugins store frequently accessed data, reducing the strain on your server. This translates to quicker page loads, and that benefit extends to the admin area as well. These plugins can minimize database queries and page refreshes by caching frequently used elements within the dashboard (without compromising security). The result? A some what smoother and more responsive admin experience. ### Disable or Customize The WordPress Admin Bar The WordPress admin bar offers a easy way to access essential features It comes with important links and settings. However for larger sites it becomes messy very quickly. But WP Adminify gives you an easy workaround. #### Disabling vs Customization Disabling the Admin Bar is a pretty straightforward process. Just navigate the Users. Select "Edit" for the user you want to disable the admin bar for. Uncheck the "Show Toolbar when viewing site" option. Update profile settings. ![Admin bar Editor plugin overview](https://d1k2c27psfzbiv.cloudfront.net/wp-content/uploads/2024/04/12112645/Admin-bar-Editor-plugin-overview.gif) Introducing the Admin Bar Editor Plugin The [Admin Bar Editor plugin](https://jeweltheme.com/admin-bar-editor) lets you to customize the admin bar for a more hands on approach. You can even completely disable the admin bar on the front end. ### Rein In the Heartbeat API and admin-ajax.php One of the most common reasons a WordPress admin feels sluggish is the Heartbeat API. It fires an AJAX request to `admin-ajax.php` every 15 to 60 seconds while a dashboard or post-editor tab is open, and each pulse runs PHP and database queries in the background. On shared hosting, or with the editor left open all day, those repeated requests pile up and make every click feel slow. The fix is to throttle or disable Heartbeat where you do not need it. You can slow its frequency on the dashboard and post list while keeping it active in the editor so autosave still works, or turn it off entirely on screens that do not need live updates. WP Adminify's [Heartbeat Control](https://wpadminify.com/features/heartbeat-control) handles this from one panel with no code. For a step-by-step walkthrough, see our guide on [how to control the WordPress Heartbeat API](https://wpadminify.com/how-to-control-wordpress-heartbeat-api), alongside the wider [admin performance controls](https://wpadminify.com/features/performance) that ship with it. https://www.youtube.com/watch?v=xALg4WWZ_bE WP Adminify's performance options, including Heartbeat control. ### Related Reading - [control Heartbeat API](https://wpadminify.com/how-to-control-wordpress-heartbeat-api) - [WordPress dashboard guide](https://wpadminify.com/complete-guide-to-wordpress-admin-panel-for-beginners) - [Google PageSpeed Insights for WordPress](https://wpadminify.com/google-pagespeed-insights) ## Slow WordPress Admin FAQs ### Why is my WordPress admin so slow? The common causes are a low PHP memory limit, resource-heavy or poorly coded plugins, the WordPress Heartbeat API firing every few seconds, too many dashboard widgets, an outdated PHP version, and a bloated options table. Weak shared hosting amplifies each one. Diagnose with Query Monitor to find the biggest culprit first. ### How do I speed up the WordPress admin dashboard? Update PHP to a current version, raise the PHP memory limit, deactivate plugins you do not need in the admin, throttle the Heartbeat API, remove unused dashboard widgets, and clean the options table. On shared hosting, add an object cache or move to a faster host. WP Adminify bundles Heartbeat control and widget cleanup. ### Does the WordPress Heartbeat API slow down the admin? Yes. The Heartbeat API sends an admin-ajax request every 15 to 60 seconds while you are logged in, and on shared hosting that constant polling can make the dashboard feel sluggish. Throttling or disabling it on admin screens, which WP Adminify can do, often gives an immediate speed-up. ### Can too many dashboard widgets slow WordPress admin? Yes. Each dashboard widget runs its own queries and sometimes external HTTP calls on every load, so a cluttered dashboard is slower to render. Removing widgets you never read, or hiding them per user role with a plugin like WP Adminify, reduces the work the admin does on each page load. ### Why is my WordPress editor slow when the front end is fast? The admin runs code the front end never touches: admin-ajax, the Heartbeat API, autosaves, and plugins that only load in wp-admin. A fast cached front end does not exercise any of that, so the editor can crawl while visitors see a quick site. Optimise the admin-side load specifically. ### How do I find which plugin is slowing down my WordPress admin? Install Query Monitor, open a slow admin screen, then read its Queries and HTTP API panels. Both name the plugin or theme responsible for each slow call. To confirm, use the Health Check and Troubleshooting plugin, which disables plugins for your own session only, so you can isolate the culprit on a live site without affecting visitors. ### Why is my WooCommerce backend so slow? WooCommerce adds its own admin screens, scheduled actions and admin-ajax traffic on top of core WordPress, and order and product tables grow far faster than a blog. Slow store dashboards usually trace back to an oversized action scheduler table, product meta bloat, or shared hosting with no persistent object cache. More PHP memory and an object cache help most. ### Can my browser make the WordPress admin feel slow? Yes. The dashboard and block editor are JavaScript heavy, so a browser carrying many extensions can feel sluggish even when server response times are fine. If the admin is slow only on your own machine, test it in a private window with extensions disabled before you change anything on the server. ## Final Thoughts Slow and steady wins the race was a myth for todays world. And, speed is the new champ. The speedier you are the more chance you'll get. It's true for real life as well as in WordPress. So, I've tried to handle all the mishaps that makes your WordPress admin panel slow. And tried to give you solution to avoid or completely mitigate the reasons of being slow. Regular maintenance is a must for any case. But with advanced optimization techniques I shared today will surely help you get rid of the slow speed of your WordPress admin panel. So, give this article a through read again if you've skipped some part! Best of luck! ## Where to go next Once your admin loads quickly again, the next win is making it easier to work in. Our guide to [WordPress dashboard customization](https://wpadminify.com/wordpress-dashboard-customization) covers decluttering widgets, reorganizing the admin menu, and building a cleaner workspace for you and your clients, many of the same changes that keep the dashboard light also keep it fast. --- # Customize WordPress Admin Dashboard: Default UI vs WP Adminify (Before & After) URL: https://wpadminify.com/default-wordpress-admin-ui-vs-adminify Last updated: 2026-08-17 Open any fresh WordPress install and the admin dashboard looks the same as it did a decade ago: a gray sidebar, a "Howdy" greeting, a pile of widgets you never asked for, and a menu that gets messier with every plugin you add. For a personal blog, that's fine. The moment you manage client sites, run a WooCommerce store, or hand the backend to a non-technical teammate, that default UI starts costing you time and credibility. This guide puts the default WordPress admin dashboard next to the same dashboard after you customize the WordPress admin dashboard with WP Adminify. You get honest pros and cons of both, a real before/after, the code-only route for developers, and a straight answer on when the plugin is worth installing and when it isn't. ![Before Adminify installed vs after install](https://d1k2c27psfzbiv.cloudfront.net/wp-content/uploads/2026/06/17060141/Adminify-before-and-after.gif) ## What is the WordPress admin dashboard (wp-admin)? The WordPress admin dashboard, usually called `wp-admin`, is the backend control panel where you write posts, install plugins, manage users, and change settings. It sits behind the login wall at `yoursite.com/wp-admin` and only logged-in users see it. Every WordPress site ships with the same default admin interface: a collapsible left menu, a top admin bar (toolbar), and a main dashboard "home" screen built from movable widget boxes. WordPress runs roughly 43% of all websites, so this exact screen is one of the most-used interfaces on the web. It's deliberately generic. It has to serve a hobby blogger and a 50-person agency equally well, and that neutrality is the root of both its strengths and its frustrations. Knowing what's actually in the default UI is the first step to deciding whether you need to change it. ## The default WordPress admin UI: what you get out of the box A standard WordPress dashboard hands every user the same furniture, no matter their role or what they came to do. Here's what loads on a clean install: - The admin menu (left sidebar). Dashboard, Posts, Media, Pages, Comments, Appearance, Plugins, Users, Tools, Settings, in a fixed order you can't change without code. Every plugin you activate injects its own item, usually near the top, shoving core items around. - The admin bar (top toolbar). The WordPress logo, your site name, comments, "+ New," and a "Howdy, [name]" greeting on the right. - The Dashboard home screen. A grid of widgets: Welcome panel, At a Glance, Activity, Quick Draft, WordPress Events & News, Site Health Status. Most of it is noise for someone who just came to edit a page. - The default color scheme. A light gray-and-blue theme. Users can pick from eight built-in schemes under Users > Profile, but there's no dark mode and no brand color option. - The login page. The WordPress logo linking back to wordpress.org, on a plain white background. - The Media Library. A flat grid of every file you've ever uploaded, with a date filter and search and nothing else. ![default WordPress dashboard preview](https://d1k2c27psfzbiv.cloudfront.net/wp-content/uploads/2026/06/17060752/default-wordpress-dashboard-preview.webp) None of this is broken. But look at what's missing: no way to hide a menu item from a client without code, no folders for 2,000 media files, no branding, no control over which widgets a Subscriber or Editor sees. The default UI assumes one kind of user, usually the developer, and shows that same view to everyone. ## Default WordPress admin UI: pros and cons Before you reach for any plugin, it's worth being honest about where the native dashboard already wins. Customization isn't free, and sometimes the default is the right call. ### Pros of the default WordPress admin UI - Zero overhead. No extra plugin to install, update, or audit for security. Fewer moving parts, fewer things that break on a core update. - Universally familiar. Anyone who has touched WordPress recognizes it on sight. Every tutorial and support thread references this exact layout. - Stable and well-tested. The core team maintains it across every WordPress version, so it's about as compatible and accessible as the platform gets. - Fast on a clean install. With no customization layer, the dashboard loads only what core needs. ### Cons of the default WordPress admin UI - Cluttered by design. Welcome panels, news feeds, and widgets you can only hide one at a time through Screen Options, and the choice doesn't carry across users. - No role-based control. An Editor or a client sees the same menu sprawl the administrator does. You can't hide Tools, Plugins, or a noisy SEO menu without code. - No branding. The wordpress.org logo greets your clients on the login screen and in the admin bar. On a handed-off site, it reads as unfinished. - Disorganized media. The flat Media Library falls apart past a few hundred files. No folders, no categories. - Menu chaos from plugins. Every plugin adds a top-level item wherever it wants. Ten plugins later your sidebar is a wall of unranked links. - No dark mode. Long editing sessions on a bright gray UI, with no native way to dim it. If those cons describe your week, you have two paths: write and maintain custom code, or install a dedicated customization plugin. We'll cover both. ## What changes after you activate WP Adminify WP Adminify is an all-in-one admin customization plugin with 60+ features, running on 20,000+ active sites with a 4.7/5 rating on WordPress.org. Activating it doesn't replace WordPress. It layers controls on top of the existing admin so you can reshape the UI without writing code. The moment it's active, that same dashboard gains options the default never had. ![The WordPress admin dashboard after activating WP Adminify, showing a modern UI template, organized menu, and custom branding replacing the default gray interface](https://d1k2c27psfzbiv.cloudfront.net/wp-content/uploads/2026/06/17060755/WIth-Adminify-plugin-activated-in-WordPress.webp) Here's what opens up right away, grouped by the problem it solves: - Dashboard UI templates and dark mode. Swap the gray home screen for Light, Dark, Modern, or Glass templates, set brand colors and fonts, and schedule [dark mode](https://wpadminify.com/how-to-enable-wordpress-dark-mode) to switch on by itself at night. - Admin Menu Editor. Drag every menu item into the order you want, rename them, swap icons, add separators, and hide items per role, no `remove_menu_page()` snippets required. - White label. Replace the WordPress logo, favicon, footer text, and "Howdy" greeting with your own brand across the whole admin. - Login customizer (Loginfy). Brand the login page with a custom logo, a background image or gradient, and a styled form. - Media folders. Add real drag-and-drop folders and subfolders to the Media Library. - Admin Columns Editor. Add, remove, and reorder columns on post and page list screens, including ACF and WooCommerce fields. - Productivity tools. Silence admin notices, drop the welcome panel, duplicate posts and pages in one click, and build custom dashboard widgets. - Security hardening. Change the login URL, disable XML-RPC, restrict the REST API, and throttle the Heartbeat API. The real difference from the default: every one of these is role-aware. You decide what an administrator, an editor, and a client each see when they log in. ## Before & after: side-by-side comparison This is the comparison most tutorials skip. The table below maps each default-admin pain point to what changes once the plugin is active. | Area | Default WordPress admin UI | After WP Adminify | | --- | --- | --- | | Dashboard home | Fixed widget grid (Welcome, News, At a Glance) | UI templates, custom widgets, removable panels | | Color theme | 8 fixed schemes, no dark mode | Light/Dark/Modern/Glass, scheduled dark mode, brand colors | | Admin menu | Fixed order, plugin clutter, code to hide items | Drag to reorder, rename, custom icons, hide by role | | Branding | WordPress logo and "Howdy" everywhere | Full white label: logo, favicon, footer, greeting | | Login page | Default WordPress logo on white | Custom logo, background, and form styling | | Media Library | Flat grid, no folders | Drag-and-drop folders and subfolders | | List columns | Fixed columns per post type | Add/remove/reorder columns incl. ACF & WooCommerce | | Role control | Everyone sees the same UI | Per-role menus, widgets, and visibility | | Plugin count | 5–8 single-purpose plugins to match these features | One plugin covers all of the above | ## Feature map: which Adminify module fixes which default pain If you only customize one thing, make it the area that wastes the most of your time. Each H3 below takes a specific default-admin weakness and shows the fix, both the visual route and, where it applies, the code route a developer would otherwise write. ### Dashboard customization and dark mode The default dashboard home is a fixed grid you can only thin out through Screen Options, one user at a time. WP Adminify swaps it for selectable UI templates and lets you set brand colors, fonts, and a scheduled dark mode. For agencies, this is where a handed-off site stops looking like stock WordPress. Go to WP Adminify > Dashboard, pick a template, set your accent color, and you're done. The full workflow lives in our guide to [WordPress dashboard customization](https://wpadminify.com/wordpress-dashboard-customization). ![WP Adminify dashboard customization panel showing UI template options and the dark mode scheduling toggle](https://d1k2c27psfzbiv.cloudfront.net/wp-content/uploads/2026/06/17061025/adminify-dark-mode-preview-in-wordpress.webp) The manual equivalent means dequeuing widgets and writing admin CSS by hand: ``` // Native way: remove default dashboard widgets function adminify_remove_dashboard_widgets() { remove_meta_box('dashboard_primary', 'dashboard', 'side'); // WordPress News remove_meta_box('dashboard_quick_press', 'dashboard', 'side'); // Quick Draft remove_meta_box('dashboard_activity', 'dashboard', 'normal'); // Activity } add_action('wp_dashboard_setup', 'adminify_remove_dashboard_widgets'); ``` ### Admin menu editor The most common reason people customize the admin is the menu. By default it's fixed, and every plugin elbows its way in. With the [admin menu editor](https://wpadminify.com/how-to-use-the-wordpress-admin-menu-editor) you drag items into any order, rename "Posts" to "Articles," drop in a custom Dashicon or SVG, add separators, and hide a whole menu for specific roles. The native alternative is a snippet per item: ``` // Native way: hide menu items you'd otherwise drag away function adminify_hide_menus() { remove_menu_page('edit-comments.php'); // Comments remove_menu_page('tools.php'); // Tools } add_action('admin_menu', 'adminify_hide_menus', 999); ``` That snippet hides those items for everyone. To hide them from Editors but keep them for admins, you'd add capability checks and maintain the whole thing forever. That role logic is exactly what the plugin handles in a checkbox. ### White label and branding On a client site, the wordpress.org logo in the corner and the "Howdy" greeting quietly announce "this is just WordPress." White labeling strips all default WordPress branding from the admin and drops in your own logo, favicon, footer text, and greeting. It's the line between handing a client a generic CMS and handing them their platform. Our [white label WordPress development](https://wpadminify.com/white-label-wordpress-development) guide walks through the whole approach. ![White labeling login page](https://d1k2c27psfzbiv.cloudfront.net/wp-content/uploads/2021/08/16100409/White-labeling-login-page.webp) ### Login page customization The login screen is the first thing a client sees, and by default it's a WordPress logo on white that links back to wordpress.org. The Loginfy module lets you set a custom logo, a background image or gradient, and styled form fields. A login CSS rule is the manual route for the logo: ``` /* Native way: swap the login logo with CSS */ function adminify_login_logo() { ?> #login h1 a { background-image: url('/wp-content/uploads/brand-logo.png'); background-size: contain; width: 220px; height: 80px; } ``` That covers the logo. Backgrounds, gradients, and form styling each need more CSS, or a few clicks in the customizer. ### Media folders and admin columns Two quieter wins that pay off every day. The default Media Library is a flat, folderless grid; WP Adminify adds real drag-and-drop folders and subfolders so a library of thousands of files stays navigable. The Admin Columns Editor lets you add, remove, and reorder columns on any list screen: show a featured-image thumbnail on the Posts list, surface an ACF field, or display WooCommerce SKUs without leaving the table. Neither has a native UI equivalent. Both otherwise mean custom plugins or hooks. ### Productivity and security tools Rounding out the suite: one-click duplicate for posts, pages, and custom post types; an admin notices manager that mutes the endless plugin upsell banners; custom dashboard widgets for text, RSS, or an embedded report; plus security controls to change the login URL, disable XML-RPC, restrict the REST API, and throttle the Heartbeat API to ease server load. These stand in for a handful of single-purpose plugins, which is the real argument for an all-in-one tool. ## WP Adminify admin UI: pros and cons A balanced look, because no plugin is the right answer for every site. ### Pros of the WP Adminify admin UI - One plugin replaces 5 to 8. Menu editor, white label, login customizer, media folders, duplicate post, disable comments. Features that would each be a separate plugin now live under one update and one support contact. - Role-based everything. The control the default UI lacks completely. Decide what each role sees, from menus to widgets to the admin bar. - No code required. Everything the snippets above do, and a lot more, happens in toggles, so non-developers can maintain it. - Real branding. Full white label makes client sites feel finished instead of stock. - Active development. Monthly updates and a support team that actually replies, which reviewers mention again and again. - A free tier that's worth using. Menu editing, dashboard widgets, and core cleanup are all in the free version before you pay anything. ### Cons of the WP Adminify admin UI - It's a dependency. Deactivate it and your custom menus, branding, and folders revert to default. That's true of any customization plugin, but plan for it. - A learning curve. 60+ features means more settings to poke through than a single-purpose plugin has. The payoff is consolidation; the cost is a busier settings area at first. - Some overhead. Any plugin adds load. Adminify is built light and ships Heartbeat and performance controls to offset it, but the truly minimal answer is always no plugin at all. - Client onboarding. If you change a UI a client already knows, walk them through the new layout once. A changed dashboard can throw people mid-project. - Some features are Pro. The deeper white label, scheduling, and addon modules sit behind the paid tier (more on that below). ## The code-only alternative for developers You can do most of this with no plugin at all. The snippets in this guide are real and they work. The honest trade-off is maintenance: a child theme's `functions.php` stuffed with `remove_menu_page()`, `remove_meta_box()`, and login CSS becomes its own thing to test on every WordPress and plugin update, and it gives non-technical teammates no way to adjust anything. For one site you fully control, code is lean and dependency-free. Across ten client sites where the brief changes monthly, a settings panel almost always wins on time. If you go the manual route, the WordPress developer reference documents the hooks, starting with [add_menu_page()](https://developer.wordpress.org/reference/functions/add_menu_page/) and the [admin_menu](https://developer.wordpress.org/reference/hooks/admin_menu/) action. | Factor | Code-only method | WP Adminify | | --- | --- | --- | | Setup time | High (write and test each snippet) | Low (toggle settings) | | Maintenance | You own it across every update | Plugin author maintains it | | Role-based control | Manual capability checks | Built-in checkboxes | | Non-dev friendly | No | Yes | | Dependency | None | One plugin | ## Why install WP Adminify? The problems it solves Strip away the feature list and the case for installing comes down to four problems the default UI can't solve on its own: - Client confusion and support tickets. A cluttered, unbranded backend breeds "where do I find…" emails. A simplified, role-filtered dashboard cuts them off. If decluttering is your main goal, here's how to [simplify the WordPress dashboard](https://wpadminify.com/simplify-wordpress-dashboard). - Plugin bloat. Most sites pile up a menu editor, a duplicate-post plugin, a disable-comments plugin, a media-folders plugin, and a login customizer. That's five plugins, five update streams, five chances for a conflict, folded into one. - Unprofessional handoffs. Agencies and freelancers lose polish when clients log into a generic WordPress screen. White labeling closes that gap. - Lost time on repetitive admin work. Reordering menus, duplicating content, digging through a flat media library. Small frictions that compound across dozens of sites. If none of these sound like your situation, you may not need it. Which is exactly the next section. ## When you need WP Adminify, and when you don't The most useful thing a comparison can do is tell you when not to act. Use this rubric. | Your situation | Recommendation | | --- | --- | | Solo blogger, single site, you're the only user | Probably skip it. The default UI plus Screen Options is enough. Customize only if dark mode or menu clutter genuinely gets under your skin. | | Freelancer handing sites to clients | Strong fit. White label and role-based menus make every handoff look professional and cut support questions. | | Agency managing 10+ client sites | Best fit. Consolidating plugins and standardizing a branded admin across sites is exactly the time saver it's built for. | | WooCommerce or membership store | Good fit. Admin Columns (SKUs, stock), media folders, and a decluttered order workflow add up fast. | | Developer who prefers code and runs one site | Optional. Snippets may be leaner. Worth it if non-technical teammates need to adjust the UI themselves. | | Tiny site on minimal hosting, no customization need | Skip it. Don't add a dependency you won't use. | Short version: the more users, sites, and clients you manage, the stronger the case. The more you're a solo operator happy with the defaults, the weaker it gets, and that's a fine place to land. ## Free vs Pro: what's actually gated WP Adminify's free version on WordPress.org is genuinely usable, not a trial. It covers the admin menu editor, dashboard widgets, basic cleanup, and core productivity tools, which is enough to declutter and reorganize most sites. The Pro tier unlocks the deeper agency features: full white label, dashboard UI templates with scheduled dark mode, the login customizer's advanced styling, media folders, the Admin Columns Editor, and addons like Activity Logs and RoleMaster Suite. Our honest take: start free, and upgrade only when a specific gated feature, usually white label or media folders, solves a problem you actually have. The [pricing page](https://wpadminify.com/pricing) has the full breakdown, and the [white label feature page](https://wpadminify.com/features/white-label) shows what the top tier includes. ## Common issues and fixes - "My custom menu order reverted." Menu changes save per the role you configured. Check you edited the menu for the right user role, and that no other menu-management plugin is active and fighting it. - "White label logo isn't showing." Clear any caching plugin and your browser cache after uploading. Logos pull from the Media Library, so a deleted source image breaks the reference. - "The admin feels slower after install." Turn on Heartbeat API control under the performance settings to cut background admin-ajax calls, and switch off any modules you aren't using. For a wider diagnosis, our guide on [why the WordPress admin is slow](https://wpadminify.com/why-is-my-wordpress-admin-so-slow) covers the usual suspects. - "A client can still see a menu I hid." Hidden menus are role-scoped, not a hard security wall. A user with a higher role, or direct URL access, can still reach the page. Pair menu hiding with proper capability and role settings for real restriction. FAQ ### What's the difference between the default WordPress admin and a custom admin? The default WordPress admin is the same generic gray dashboard on every install: fixed menu order, no branding, no role-based control, no folders. A custom admin reshapes that UI with reordered and role-filtered menus, your own branding, dark mode, organized media, and tailored list columns. The default treats every user the same; a customized admin shows each role what it needs. ### Can you customize the WordPress admin without a plugin? Yes. You can hide menu items with remove_menu_page(), drop dashboard widgets with remove_meta_box(), and restyle the login screen with CSS in your theme's functions.php. The trade-off is maintenance: you own and test that code on every update, and there's no interface for non-developers to adjust it. A plugin swaps that for a settings panel anyone can use. ### Does a dashboard customization plugin slow down WordPress? Any plugin adds some load, but admin customization runs in wp-admin, not on your public site, so visitors aren't affected. WP Adminify is built to be lightweight and includes Heartbeat API and performance controls that can actually reduce admin resource use. Switch off modules you don't need to keep it lean. ### Is it safe to customize the WordPress admin dashboard? Yes, when you use a maintained tool or tested code. Customization plugins layer on top of WordPress without touching core files, so updates stay clean and changes reverse the moment you deactivate. One caution: hiding a menu is a UI convenience, not a security boundary. Lock down sensitive areas with proper user roles and capabilities, not just by hiding the link. ### What is the best free plugin to customize the WordPress dashboard? WP Adminify's free version is a strong choice because one plugin covers menu editing, dashboard widgets, and admin cleanup that would otherwise take several single-purpose plugins. It runs on 20,000+ sites with a 4.7/5 rating. Weigh the options in our roundup of the [best WordPress dashboard plugins](https://wpadminify.com/best-wordpress-dashboard-plugin) before you decide. ### How do I add dark mode to the WordPress admin? WordPress has no native dark mode. The eight built-in color schemes are all light-to-mid tones. For a true dark admin you need a customization plugin: WP Adminify ships Dark, Modern, and Glass templates plus scheduling so dark mode flips on by itself at night. There's no maintainable code-only way to get a full dark UI. ### How do I white-label the WordPress admin for clients? White labeling replaces all default WordPress branding, the logo, favicon, footer text, "Howdy" greeting, and login logo, with your own. A few pieces you can do with CSS and filters, but full coverage across the admin and login screen is fastest through a white label module, which keeps every branding element in one place. ### Will I lose my customizations if I deactivate the plugin? Yes. The admin reverts to its default state when you deactivate a customization plugin, since the changes live in the plugin's settings, not in core. Your content, users, and media are never touched; only the UI layer returns to default. Reactivate and your configuration comes back. ## Conclusion The default WordPress admin UI is stable, familiar, and perfectly fine for a solo site. It's also deliberately generic, with no branding, no role-based control, and a menu that degrades as you stack plugins. Customizing it closes those gaps; the only open question is whether you do it with maintained code or a plugin. The takeaways: - The default is fine for solo, single-user sites. Don't add a dependency you won't use. - The case for customizing grows with users, clients, and sites. Agencies and freelancers gain the most. - Code works, but you maintain it. A plugin trades that for a settings panel anyone can use. - Start free and upgrade only when a specific gated feature solves a real problem. If you manage more than your own blog, the math usually tips toward customization. Look through the [WordPress admin theme](https://wpadminify.com/features/dashboard-customization) and dashboard customization feature set to see what the after-state looks like on your own admin, then start with the free version and shape the dashboard around how you actually work. ### Ready to Move Beyond the Default UI? If the comparison convinced you the default wp-admin isn't enough, start with the complete guide to [customizing the WordPress dashboard](https://wpadminify.com/wordpress-dashboard-customization) - it walks through every change shown above, with and without WP Adminify. --- # How to Use the Free WordPress Admin Color Generator (Design, Download, Install) URL: https://wpadminify.com/how-to-change-the-admin-color-scheme-in-wordpress Last updated: 2026-08-17 WordPress ships with eight admin color schemes, and they haven't changed in years. If you want your dashboard to match your brand, or you just want each client site to look different enough that you never publish to the wrong one, those presets won't get you there. That's why we built a free WordPress admin color generator: pick your colors, watch a demo dashboard restyle itself live, then export the whole thing as a tiny plugin you can install on any site. You don't touch code, and you can try the whole thing without signing up. This guide walks through the full workflow, from the first color pick to activating the generated plugin in wp-admin. Every screenshot below comes from a real session with the tool. ## What is the WordPress Admin Color Generator? The [WordPress Admin Color Generator](https://wpadminify.com/tools/color-generator) is a free browser-based tool that recolors a live WordPress dashboard preview as you edit color tokens, then packages your palette as an installable plugin or a block of admin CSS. The generated plugin works on any WordPress site. It doesn't need WP Adminify installed, and there's no API key or subscription attached. The screen is split in two. On the left, a settings panel with three tabs: Palette, Advanced, and Typography. On the right, a full WordPress admin demo (you can even switch the simulated WordPress version from the dropdown at the top) that re-renders the moment you change anything. ![WordPress admin color generator tool showing the palette panel next to a live WordPress dashboard preview](https://d1k2c27psfzbiv.cloudfront.net/wp-content/uploads/2026/07/16103853/admin-color-generator-tool.webp) The palette panel groups every part of the admin UI into color tokens: - Base colors: background, heading, and body text - Admin Menu colors: the left sidebar background, text, and hover states - Notification colors: success, warning, and error notices - Primary and Secondary colors: buttons and accents - Link color - Border/Input/Ring colors: form fields and focus outlines - Odd/Even colors: table row striping on list screens - Unapprove/Approve/Trash colors: the status accents you see on the Comments and Posts screens Each token shows its CSS variable name and hex value, with a copy button next to it. Handy if you keep brand colors in a style guide and want to lift a value straight out of the tool. ## Why bother changing WordPress admin colors? A custom admin color scheme sounds cosmetic until you manage more than one site. A few situations where it earns its keep: - Environment safety. Give staging a loud orange menu and production a calm navy one. You will never again wonder which tab you're typing in. - Client branding. Agencies hand over dashboards that match the client's brand palette. It reads as polish, and clients notice. It pairs well with a full [white label setup](https://wpadminify.com/features/white-label) where the WordPress branding disappears entirely. - Readability. The default gray-on-dark-gray admin menu is not kind to everyone's eyes. Higher-contrast palettes are a legitimate accessibility fix. - Team recognition. On multisite networks, per-site colors help editors tell at a glance which site they're editing. You could do some of this natively. Every user can pick one of the stock schemes under Users > Profile > Admin Color Scheme (see the [Users Profile screen documentation](https://wordpress.org/documentation/article/users-profile-screen/)), and WordPress developers can register new schemes with the [wp_admin_css_color()](https://developer.wordpress.org/reference/functions/wp_admin_css_color/) function. The catch: the native route means writing and maintaining a full CSS file yourself. Here's roughly what the manual registration looks like: ``` // functions.php — register a custom admin color scheme manually function myagency_admin_color_scheme() { wp_admin_css_color( 'myagency', __( 'My Agency', 'myagency' ), get_stylesheet_directory_uri() . '/admin-colors/myagency.css', array( '#1d446b', '#335978', '#e7e4e4', '#d64e07' ) ); } add_action( 'admin_init', 'myagency_admin_color_scheme' ); ``` That CSS file needs to cover the admin menu, buttons, notices, form fields, and list tables. Several hundred lines if you're thorough. The generator writes all of it for you, which is the whole point. ## Step 1: Start from a theme preset Don't build from a blank slate. Open the Theme presets dropdown at the top of the palette panel and you'll find ready-made schemes: Default (Modern), Fresh, Light, Modern Blue, Midnight, Coffee, Ectoplasm, Ocean, and Sunrise. WordPress veterans will recognize a few of those names from the stock profile-page schemes; the presets here are rebuilt versions of them plus a set of originals. There's also a Community section below the built-ins with palettes other users have published. ![Theme presets dropdown in the admin color generator listing Fresh, Light, Modern Blue, Midnight, Coffee, Ectoplasm, Ocean and Sunrise schemes](https://d1k2c27psfzbiv.cloudfront.net/wp-content/uploads/2026/07/16103910/wordpress-admin-theme-presets.webp) Click any preset and the entire demo dashboard repaints. Pick whichever is closest to your target palette and treat it as your base (Midnight is the one I kept coming back to while testing). The shuffle icon next to the Download button generates a random palette if you want a starting point you'd never have picked yourself, and the moon icon flips the preview into dark mode. ## Step 2: Fine-tune colors with the live preview Now open any token group and click a swatch. A color picker pops up with a saturation field, a hue slider, and a hex input, so you can either eyeball it or paste an exact brand value like `#335978`. ![Color picker editing the admin menu background token while the WordPress dashboard preview updates live](https://d1k2c27psfzbiv.cloudfront.net/wp-content/uploads/2026/07/16103856/admin-menu-color-picker-live-preview.webp) The part that saves real time: the preview on the right is a functioning mock of wp-admin, not a static image. Change the menu background and you see it against real menu items, notices, and the Welcome panel. Notification colors render as actual admin notices at the top of the demo Dashboard screen. If those notices are the problem rather than their colour, you can [hide WordPress admin notices](https://wpadminify.com/features/disable-admin-notices) per plugin instead of restyling them. Odd/Even colors show up when you open the demo Posts list. You catch contrast problems immediately instead of after installing something on a live site. A workflow tip from building a few schemes with it: set your Admin Menu colors first, since the sidebar dominates the screen, then tune Primary colors (buttons), and only then touch notification and table-striping colors. Check the demo Posts screen before you export, because row striping and status accents are easy to forget. If you also want to change the admin typeface, the Typography tab handles that. Fonts are their own topic, and we've covered them in detail in our guide to [changing the WordPress admin font](https://wpadminify.com/change-wordpress-admin-font). ## Step 3: Export your scheme Happy with the preview? Click the black Download button in the top-right corner. The export dialog gives you a plugin name field (default: "Custom WordPress Admin") and two output formats: ![Export WordPress admin colors dialog with Admin CSS Code and Download as Plugin tabs showing the generated admin styles](https://d1k2c27psfzbiv.cloudfront.net/wp-content/uploads/2026/07/16103904/export-wordpress-admin-colors-plugin.webp) - Admin CSS Code is the raw stylesheet, with a Copy button. Use this if you'd rather paste the styles into an existing setup, for example the [custom CSS field in your admin panel](https://wpadminify.com/custom-css-in-wordpress-admin-panel) or your child theme's admin stylesheet. - Download as Plugin gives you a zip file containing a small standalone plugin that enqueues the same CSS on every admin page. The plugin route is the one we recommend for most people. It survives theme switches, applies to every user on the site, and uninstalls cleanly: deactivate it and the dashboard snaps back to stock colors. Nothing is written to the database. Name the plugin something recognizable (the name shows up in your Plugins list later), switch to the Download as Plugin tab, and click Download. ## Step 4: Grab the download link by email Before the zip lands, the tool asks for your name and email and sends the download link there. This also stores your palette at that link, so you can come back to the exact scheme later and keep editing instead of rebuilding it from memory. Tick the checkbox if you also want WP Adminify tips along with it; leave it unticked for just the link. A Cloudflare check runs inline, then hit Email me the link. ![Get your colour scheme form asking for name and email before sending the WordPress admin colors plugin download link](https://d1k2c27psfzbiv.cloudfront.net/wp-content/uploads/2026/07/16103901/download-color-scheme-plugin-form.webp) Check your inbox, click the link, and you'll have a file in zip version. Don't unzip it. WordPress wants plugin uploads as zip files. ## Step 5: Install and activate the plugin in wp-admin Now for the site you actually want to recolor. This is the standard manual plugin install, and it takes about a minute: - Log in to your WordPress dashboard and go to Plugins > Add Plugin. - Click the Upload Plugin button at the top of the page. - Click Choose file, select `color-admin.zip` from your downloads, and click Install Now. ![Uploading the color-admin.zip file on the WordPress Add Plugins screen with the Install Now button](https://d1k2c27psfzbiv.cloudfront.net/wp-content/uploads/2026/07/16103907/upload-color-admin-plugin-wordpress.webp) WordPress unpacks the zip and confirms the install. Click Activate Plugin on the next screen. ![WordPress showing plugin installed successfully from color-admin.zip with the Activate Plugin button](https://d1k2c27psfzbiv.cloudfront.net/wp-content/uploads/2026/07/16103850/activate-color-admin-plugin.webp) The color scheme applies as soon as the plugin activates. You'll see the Plugins page itself repaint. Your generated plugin now sits in the Installed Plugins list like any other: ![Custom WordPress Admin plugin activated in the WordPress plugins list with the new color scheme already applied](https://d1k2c27psfzbiv.cloudfront.net/wp-content/uploads/2026/07/16103858/custom-wordpress-admin-plugin-activated.webp) And the Dashboard matches what the tool previewed: ![WordPress dashboard displaying the custom admin color scheme generated and installed as a plugin](https://d1k2c27psfzbiv.cloudfront.net/wp-content/uploads/2026/07/16103913/wordpress-dashboard-new-admin-color-scheme.webp) That's the whole loop: design in the browser, download, upload, activate. To change the scheme later, generate a new zip and replace the plugin. To go back to default WordPress colors, deactivate it. ## Which approach should you use? There are four realistic ways to change WordPress admin colors. They solve different problems: | Method | Effort | Applies to | Best for | | --- | --- | --- | --- | | Built-in schemes (Users > Profile) | None | One user | Quick personal preference, no branding | | Admin Color Generator plugin (this tool) | Minutes | Every user on the site | Brand-matched dashboards without code | | Manual `wp_admin_css_color()` + CSS | Hours | Per user (selectable) | Developers shipping schemes inside a theme/plugin | | WP Adminify UI templates | Minutes | Every user, role-aware | Full dashboard redesign: templates, dark mode, menus, white label | The generator covers colors. If you find yourself wanting more than colors (reordered admin menus, a dark mode schedule, hidden notices, your own logo in place of the WordPress one), that's the point where a single-purpose color plugin stops being enough and a broader [dashboard customization](https://wpadminify.com/wordpress-dashboard-customization) setup makes sense. WP Adminify ships a full [WordPress admin theme](https://wpadminify.com/features/dashboard-customization) system with ready-made UI templates (you can spot them in the tool's demo preview), and the same plugin handles [dark mode](https://wpadminify.com/how-to-enable-wordpress-dark-mode) and the rest of the admin. The generator is free either way, and the plugin it produces runs fine with or without WP Adminify installed. ## Troubleshooting and small print - The download email hasn't arrived. Check spam first; the sender is the WP Adminify mailer. If the form showed a network error when you submitted, just submit it again. Your palette is still loaded. - Colors look different on my site than in the preview. Another admin-styling plugin is usually the culprit. Two plugins both restyling wp-admin will fight over specificity, so deactivate the older one. - Some screens kept default colors. Plugins with heavily custom admin pages (page builders, some SEO suites) draw their own UI and ignore admin-wide styles. That's a limitation of any CSS-based scheme, including WordPress's own. - I want to tweak the scheme. Reopen the palette link from your email, adjust, and download a fresh zip. Upload it and WordPress will offer to replace the existing version. - Reverting. Deactivate the plugin. There are no database entries to clean up. ## WordPress Admin Color Scheme FAQs ### Is the WordPress admin color generator really free? Yes. Designing a scheme, previewing it, and downloading the plugin or CSS costs nothing, and there's no account to create. You provide a name and email to receive the download link, and that's the extent of it. ### Does the generated plugin require WP Adminify? No. The download is a self-contained plugin that enqueues one stylesheet in wp-admin. It works on any WordPress site regardless of theme or other plugins, though it pairs naturally with WP Adminify if you later want menu editing, white labeling, or dark mode. ### Will the color scheme apply to all users or just me? All users. Unlike the per-user scheme picker under Users > Profile, the generated plugin styles the admin globally, which is what you want for client handovers and team consistency. Individual profile scheme choices stop mattering while it's active. ### Does it slow down my WordPress admin? No measurable impact. The plugin adds a single CSS file to admin pages and loads nothing on the front end. If your dashboard feels slow, the cause is elsewhere. Our guide on [why the WordPress admin gets slow](https://wpadminify.com/why-is-my-wordpress-admin-so-slow) covers the usual suspects. ### Can I edit the colors after installing the plugin? Yes, two ways. Reopen your palette from the emailed link, adjust, and upload the new zip over the old plugin. Or open the plugin's CSS file and edit hex values directly; every token is a plain CSS variable like `--menu-background`. ### Is it safe to upload a generated plugin zip? Yes. The zip contains a short PHP loader and a stylesheet you can read in any text editor before installing. It makes no external requests, collects no data, and writes nothing to your database. ## Wrap-up The short version: - Start from a preset in the [free admin color generator](https://wpadminify.com/tools/color-generator), then fine-tune tokens against the live preview. - Export as a plugin (recommended) or copy the raw admin CSS. - Install it under Plugins > Add Plugin > Upload Plugin, activate, done. Deactivate to revert. It's a ten-minute job the first time and faster after that. And if recoloring the dashboard gets you thinking about menus, notices, login screens, and client-proofing, take a look at what [WP Adminify's full feature set](https://wpadminify.com/features) can do with the same no-code approach. --- # How to Control the WordPress Heartbeat API to Reduce Server Load? URL: https://wpadminify.com/how-to-control-wordpress-heartbeat-api Last updated: 2026-08-16 We’re excited to release a new feature in WP Adminify. The WordPress Control Heartbeat API. This feature gives you total control over one of WordPress's essential background functions. And allows you to optimize your site's performance and reduce unnecessary server load. The Heartbeat API is the engine behind real-time interactions on your WordPress site. It powers features like autosaving, session management, and user notifications. While it is important to keep it running but the Heartbeat API can also consume a significant amount of resources. This causes major issues on high-traffic sites or shared hosting environments. That’s where WP Adminify steps in. It gives you WordPress Control Heartbeat API - see the [Heartbeat Control feature](https://wpadminify.com/features/heartbeat-control) for a no-code overview. You can customize, optimize, or completely disable the Heartbeat API wherever you feel it ain't required. ## What is the WordPress Control Heartbeat API? The WordPress Heartbeat API is like the pulse of your WordPress site. It enables real-time communication between your browser and the server. And that powers autosaves, session management, and more. However, it can also lead to unnecessary server usage. ## What Does the WP Adminify WordPress Control Heartbeat API Offers? WP Adminify offers the ability to customize the WordPress Control Heartbeat API across three key areas of your WordPress site. Why don't I tell you about them. WordPress Dashboard: The [WordPress Control Heartbeat API](https://wpadminify.com/docs/adminify/performance/control-hearbeat-api) here manages notifications, session data, and other background tasks. With WP Adminify, you can keep it at the default interval, modify it to reduce its frequency, or disable it entirely if the dashboard doesn’t require constant updates. ![WordPress Heartbeat Control for Dashboard](https://d1k2c27psfzbiv.cloudfront.net/wp-content/uploads/2025/01/04092156/WordPress-Heartbeat-Control-for-Dashboard.webp) Post Editor: Autosave and real-time collaboration are valuable for content creation. But not every site needs them operating continuously. WP Adminify lets you adjust the interval or turn the Heartbeat API off for the post editor. ![WordPress Heartbeat Control for add new post or page](https://d1k2c27psfzbiv.cloudfront.net/wp-content/uploads/2025/01/04092150/WordPress-Heartbeat-Control-for-add-new-post-or-page.webp) Frontend: The Heartbeat API basically handles options like live updates for frontend pages. WP Adminify allows you to either customize the API’s frequency or disable it totally. It is especially beneficial for static sites or pages with low interactivity. ![Disable WordPress Heartbeat Control for frontend](https://d1k2c27psfzbiv.cloudfront.net/wp-content/uploads/2025/01/04093037/Disable-WordPress-Heartbeat-Control-for-frontend.webp) You can manage the WordPress Control Heartbeat API to each of these areas. And this will significantly reduce CPU usage and improve overall site performance. And, that too without compromising the important features.. ## How WordPress Control Heartbeat API Matters for Users? I've compiled a short list of ways the WordPress Control Heartbeat API helps you in running a website in a more optimized way. - Improved Site Performance: Limiting or completely disabling WordPress Control Heartbeat API in less critical areas reduces server loads. This ensures faster performance, especially on shared hosting. - More Control: You can decide where and how the WordPress Control Heartbeat API works. Customizing the its uses in areas of your choice. - Optimized Workflows: By limiting the API in the post editor or frontend, you can minimize distractions and focus on key tasks. ## How to Use WordPress Control Heartbeat API with WP Adminify? You need to install and activate WP Adminify first. That's obvious, so let's move forward. https://www.youtube.com/watch?v=jkF8gNQq44w First, you need to navigate to the Performance section in WP Adminify settings panel. Here you can see and enable the "Control Heartbeat API" option. After enabling it, you can Customize the settings for WordPress Dashboard, Post Editor, and Frontend as per your needs. - Go to WP Adminify -> Settings -> Performance and enable Control Heartbeat API. - For the Frontend, choose Disable so visitor page loads stop polling admin-ajax.php. - For the Dashboard, set the interval to around 60 seconds, or disable it if you don't need live notices. - For the Post Editor, keep a 60–120 second interval so autosave and edit locks still work, then save. ![WordPress Heartbeat Control](https://d1k2c27psfzbiv.cloudfront.net/wp-content/uploads/2025/01/04074108/WordPress-Heartbeat-Control-API-customization.webp) No coding is required, so anyone can use it. The settings are also intuitive and will have no issues to understand. ## Should You Disable or Limit the WordPress Heartbeat API? (Updated August 2026) For most sites the safest setup is to disable the Heartbeat API on the frontend, slow it down on the dashboard, and keep a short interval in the post editor so autosave still works. Turning it off everywhere saves the most CPU, but you lose autosave and edit-lock warnings. | Where | Recommended action | Why | | --- | --- | --- | | Frontend | Disable | Visitors never need admin-ajax polling — the biggest, safest saving | | Dashboard | Limit to ~60 seconds (or disable) | Cuts admin-ajax.php requests while keeping admin notices usable | | Post editor | Limit to 60–120 seconds | Keeps autosave and post-lock warnings without polling every 15 seconds | By default WordPress fires a Heartbeat tick roughly every 15 seconds while you edit a post and about every 60 seconds on the dashboard, and each tick is a POST request to `admin-ajax.php`. The [official Heartbeat API reference](https://developer.wordpress.org/plugins/javascript/heartbeat-api/) documents this cadence, which is why trimming it lowers server load. With WP Adminify you set each area from the [Heartbeat Control](https://wpadminify.com/features/heartbeat-control) panel, with no code. ## Bonus: Control WordPress Revisions to Keep Your Database Lean WP Adminify also ships WordPress Control Revisions. For the full walkthrough, see our guide on [WordPress revisions — how to view, restore, limit, and clean them up](https://wpadminify.com/wordpress-revisions). Every time you update a post or page, WordPress saves a revision. While these revisions are useful for undoing changes, they can quickly pile up. And this consumes database space which results in slowing down your site With WP Adminify WordPress Control Revisions, you can: - Set a Maximum Number of Revisions: Decide how many past versions of a post or page to keep. You can increase or reduce this based on your needs. - Apply Limits Selectively: Choose whether to use limits on posts, pages, or both. This gives you the flexibility to optimize storage without sacrificing essential revision history. ![Control Heartbeat API and post Revisions](https://d1k2c27psfzbiv.cloudfront.net/wp-content/uploads/2024/07/12113055/Control-Heartbeat-API-and-post-Revisions.webp) By limiting the revisions, you can ensure a lighter database. And this will result in faster queries, and a more responsive website. This is particularly valuable for sites with frequent updates, like blogs, news platforms, and e-commerce stores, where revisions can accumulate quickly. Also, you can [disable Rest API](https://wpadminify.com/docs/adminify/security/disable-rest-api) as well. Unlock WP Adminify Pro – Get WordPress Heartbeat Control! Upgrade to WP Adminify Pro and master your WordPress Heartbeat settings. Boost performance and optimize your site with our powerful Heartbeat Control API! [Choose Your Plan](https://wpadminify.com/pricing) [See How It Works](https://demo.pixarlabs.com/?pl-product=adminify) ### Related Reading [The complete WordPress dashboard guide](https://wpadminify.com/wordpress-dashboard-guide) [Why is my WordPress admin so slow?](https://wpadminify.com/why-is-my-wordpress-admin-so-slow) [WordPress performance optimization in 2026](https://wpadminify.com/wordpress-performance-optimization) [WordPress revisions: view, restore, limit & clean them up](https://wpadminify.com/wordpress-revisions) ## WordPress Heartbeat API — Frequently Asked Questions ### Should you disable the WordPress Heartbeat API completely? Not usually. Disabling it everywhere gives the biggest CPU saving, but you lose autosave, post-lock warnings, and any plugin features that rely on it. On most sites it's better to disable Heartbeat on the frontend, slow it on the dashboard, and keep a 60-120 second interval in the editor. ### Does controlling the Heartbeat API break autosave? Only if you turn it off inside the post editor. Autosave and edit-lock warnings run on Heartbeat, so keeping a 60-120 second interval there preserves them while still cutting requests. Disabling Heartbeat on the frontend and dashboard has no effect on editor autosave at all. ### How much can Heartbeat control reduce server load? It depends on your traffic and how many admin tabs stay open, but every idle editor or dashboard tab sends an admin-ajax.php request every 15 to 60 seconds. On shared hosting or with several logged-in users, cutting that polling noticeably lowers CPU time and admin-ajax load without changing anything visitors see. ### Can you control the Heartbeat API without a plugin? Yes. You can deregister the Heartbeat script in your theme's functions.php with wp_deregister_script, or slow it using the heartbeat_settings filter. That approach is all-or-nothing and needs code. WP Adminify gives you separate toggles for the dashboard, editor, and frontend with no code. ### What Heartbeat interval should you set? WordPress accepts 15 to 120 seconds, and some setups allow up to 600. A practical config is about 60 seconds on the dashboard, 60-120 seconds in the editor, and Heartbeat disabled on the frontend. Raise the interval or disable more areas if your host still reports heavy admin-ajax.php usage. ## Conclusion The WordPress Control Heartbeat API might not seem a major feature for the new WordPress users. But advanced and experienced users know how important it is for their sites. And that's why we brought out this feature, so websites works fast and reduce the loading time on the frontend. We are hoping to continue these updates with further features and advanced control. Stay with WP Adminify and enjoy the ultimate WordPress dashboard customization freedom! --- # How to Change the WordPress Admin Font? URL: https://wpadminify.com/change-wordpress-admin-font Last updated: 2026-08-16 Are you a WordPress user who spends most of the time in dashboard? Want to customize it according to your will? But don't know how to? Would love to change the fonts to your WordPress admin dashboard? Well, let me tell you a secret. You can change the WordPress admin font. And it's very easy to do so. If you're someone who loves customization and want to know how to change the WordPress admin font, you've reached the right article. Let me tell you how to do in the easiest way possible. I'll try covering all the methods available to change the fonts. Let's not waste any time and move directly to reveal each methods to change WordPress admin fonts. ## Method 1: How to Change WordPress Admin Font Using WP Adminify Using a plugin is the easiest way to change WordPress admin font. WP Adminify is one such plugin to help you do that without any extra effort. WP Adminify is a powerful [dashboard customizer](https://wpadminify.com/wordpress-dashboard-customization) for WordPress. It lets you change the WordPress admin font quickly. Here is a step by step guide on how to change WordPress admin font with WP Adminify. ### Step 1: Install and Activate WP Adminify Go to your WordPress dashboard and navigate to Plugins > Add New. Search for “WP Adminify.” 3Click Install Now, then Activate once the installation is complete. Check this [installation guide](https://wpadminify.com/docs/adminify/getting-started/free-installation) if don't know how to do it. ### Step 2: Navigate to Adminify Customization Settings After activation, go to WP Adminify > [Customize](https://wpadminify.com/features/dashboard-customization) Section in your WordPress dashboard. Now, enable the Adminify UI. This will in turn enable the “Body font” option. ### Step 3: Customize the Admin Font In the Body Font settings, you can: Select a font family from the dropdown list (includes Google Fonts and recommendations for safe web fonts). Adjust the font size, weight, and style to fit your preferences. Preview font changes in real time as you adjust the settings. Save your changes when you’re satisfied. ### Step 4: Review Your Dashboard Once saved, the admin dashboard will instantly change to the new font. Here’s what it looks like for the “Times New Roman” font: ### Why Choose WP Adminify? WP Adminify doesn’t just let you change WordPress admin font. It also provides a full on dashboard customization freedom. In short, WP Adminify is a one-stop solution for customized WordPress admin experience. ![WordPress Dashboard Customization](https://d1k2c27psfzbiv.cloudfront.net/wp-content/uploads/2021/07/09132519/Adminify-WordPress-Dashboard-Customization.webp) If you’re looking for a simple, no-code solution, WP Adminify is your best choice! Check out the [free version](https://wordpress.org/plugins/adminify/) or just go to our [live demo](https://demo.pixarlabs.com/?pl-product=adminify) for a faster test run. ![WP Adminify Plugin options panel](https://d1k2c27psfzbiv.cloudfront.net/wp-content/uploads/2024/08/12101135/WP-Adminify-Plugin-options-panel.webp) Customize With Absolute Freedom Harness the power of advanced dashboard customization with WP Adminify. [Choose Your Plan](https://wpadminify.com/pricing) [See How It Works](https://demo.pixarlabs.com/?pl-product=adminify) ## Option 2: How to Change the WordPress Admin Font with Custom CSS You can manually change WordPress admin font using Custom CSS. But remember, this method is ideal for users comfortable with coding. So, here's how to do with custom CSS. ### Step 1: Access the WordPress Customizer or Theme Editor Navigate to your WordPress dashboard. Go to Appearance > Customize and open the Additional CSS panel. You can also go to Appearance > Theme File Editor. But note that this might break your site. NOTE: Always backup your website data before editing the theme files. Bonus tip: WP Adminify also lets you add custom CSS. Just go to the the [Code Snippets](https://wpadminify.com/features/code-snippets) section > Admin Scripts tab > Paste your code in the Custom CSS box. ### Step 2: Add Custom CSS Code for Admin Fonts To target the WordPress admin dashboard, you need to modify the admin.css file. Here’s how to do it: Open your theme’s functions.php file and enqueue a custom CSS file for the admin dashboard. ``` function custom_admin_fonts() { wp_enqueue_style('custom-admin-fonts', get_template_directory_uri() . '/admin.css'); } add_action('admin_enqueue_scripts', 'custom_admin_fonts'); ``` Create an admin.css file in your theme folder and add the following CSS to specify the desired font: ``` body, #wpadminbar, #adminmenu, .wrap { font-family: 'Open Sans', sans-serif; font-size: 14px; } ``` ### Step 3: Save and Verify Changes Now, all you need to do is, save the changes to your files. Then a simple refresh and you'll see the changed font. ## Option 3: Changing the Admin Font via Functions.php Another method for changing the WordPress admin font is by editing your functions.php file. Here's how to do it: ### Step 1: Access the Functions.php File Go to your WordPress dashboard. For older themes(Twenty-Twenty One or older), navigate to Appearance > Theme File Editor. For the newer Gutenberg themes, you need to access the functions.php file [through the cPanel or FTP](https://www.youtube.com/watch?v=QwxDT-bLmvk). ### Step 2: Add Codes for Custom Fonts Add the following code to the functions.php file. This will load and apply a custom font to the admin dashboard: ``` function custom_admin_font() { echo ''; } add_action('admin_head', 'custom_admin_font'); ``` Note: This code specifies the Roboto font. But you can replace it with any other font of your choice. ### Step 3: Use Google Fonts for More Variety To use Google Fonts, first include the font in your code. For example: ``` function custom_admin_font() { echo ''; echo ''; } add_action('admin_head', 'custom_admin_font'); ``` ### Step 4: Save and Check the Dashboard Click Update File to save your changes. Refresh your WordPress admin dashboard to see the new font applied. Do you know? You also [change the WordPress body font](https://wpadminify.com/docs/adminify/customize/change-the-body-font) with WP Adminify? ## Conclusion Now, you have your answer of how to change the WordPress admin fonts. I've tried to give you a detailed step by step guide for each available methods. So, even if you're just a beginner, you can follow this article to change the fonts quickly and easily. Please select the method you prefer. But by far WP Adminify gives you the easiest way out. So, don't forget to enjoy your customized WordPress experience with WP Adminify. ### Fonts Are One Piece of the Puzzle Typography changes the feel of wp-admin instantly - and it pairs well with colors, menus and widgets. The complete guide to [customizing the WordPress dashboard](https://wpadminify.com/wordpress-dashboard-customization) covers all of it, including [the exact Body Font setting](https://wpadminify.com/docs/adminify/customize/change-the-body-font) this post uses. --- # 7 Best WordPress Admin Menu Plugins for 2026 (Free & Pro, Tested) URL: https://wpadminify.com/best-wordpress-admin-menu-plugin Last updated: 2026-08-16 Install a plugin, get a menu item. Install thirty plugins over three years and your `wp-admin` sidebar turns into a scroll of labels you stopped reading months ago. A WordPress admin menu plugin fixes that: you reorder what you use daily, rename the labels that confuse clients, and hide everything an editor has no business clicking. We tested the main options on a live WordPress 7.0 install and kept seven. One of them handles the top toolbar instead of the sidebar, and one is a login page customizer that snuck onto the list because it finishes the job the other six start. Short on time? [WP Adminify](https://wordpress.org/plugins/adminify/) is what we'd install on most sites: drag-and-drop menu editing with role-based visibility, custom menu items, and SVG icon support, inside a toolkit that also cleans up the rest of the backend. ## Best WordPress admin menu plugins at a glance - WP Adminify - drag-and-drop menu editing plus role-based visibility, inside a full dashboard toolkit with white labeling. - Admin Bar Editor - the top toolbar gets the same treatment: hide, reorder, and restrict admin bar items per role. - Loginfy - a login page customizer, not a menu editor. It's here because a branded backend starts at the login screen. - Admin Menu Editor - the sidebar menu specialist that's been maintained for over a decade. - Adminimize - checkbox-based hiding of menu items, meta boxes, and admin bar elements per role. Fully free. - WPFront User Role Editor - menu control through roles and capabilities rather than a visual editor. - Ultimate Dashboard - dashboard widget replacement first, with a Pro menu editor for client sites. ## What is a WordPress admin menu plugin? A WordPress admin menu plugin gives you an interface for editing the left-hand navigation inside `wp-admin`. WordPress itself has no screen for this. The menu order and labels come from core and from whatever each plugin registers via `add_menu_page()`, and if you want to change any of it without a plugin, you're writing PHP. A menu plugin adds the missing interface, so you can: - Reorder items so the screens you open daily sit at the top. - Rename labels that confuse clients. Most clients look for "Blog Articles", not "Posts". - Hide items entirely, or hide them only for certain user roles. - Add custom items like internal docs, external tools, or a support link. - Swap icons so people can scan the menu instead of reading it. The practical payoff shows up in your support inbox. Editors can't break what they can't see, and clients call less when the dashboard only shows what they need. ## 1. WP Adminify - best all-in-one admin menu editor ![WP Adminify plugin free version](https://d1k2c27psfzbiv.cloudfront.net/wp-content/uploads/2022/08/02094912/WP-Adminify-plugin-banner.webp) Full disclosure: [WP Adminify](https://wordpress.org/plugins/adminify/) is our plugin. We built it because we kept stacking the same five or six admin cleanup plugins on every client site, and the [WordPress admin menu editor](https://wpadminify.com/features/admin-menu-editor) is the module that gets turned on first. It's proper drag and drop: grab any top-level or submenu item, drop it where you want it, rename it inline, and toggle visibility per user role. Custom menu links, SVG icon uploads, and section dividers all live on the same settings screen. The difference from a single-purpose editor is what ships around the menu module. Media library folders, a dark-mode dashboard, login page customization, admin columns, activity logs, and white-label controls are all in the same install. If you hand sites to clients, that's one plugin to update instead of five, and one fewer chance for two cleanup plugins to fight over the same hook. - Active installs: 7,000+ · Rating: 4.3/5 - Key menu features: drag-and-drop reordering, inline renaming, hide per role, custom links, SVG icons - Beyond the menu: white labeling, media folders, dark mode, dashboard widgets, security tweaks - Best for: freelancers and agencies who want menu control plus full backend customization in one toolkit Pricing: free core plugin; Pro unlocks the advanced modules. ## 2. Admin Bar Editor - best for toolbar customization ![Admin Bar Editor WordPress toolbar customization plugin banner](https://d1k2c27psfzbiv.cloudfront.net/wp-content/uploads/2026/07/15113304/admin-bar-banner.webp) The sidebar is only half the clutter problem. The top toolbar collects junk just as fast, and almost nobody cleans it up. [Admin Bar Editor](https://wordpress.org/plugins/admin-bar/) from Jewel Theme does for the admin bar what menu editors do for the sidebar: drag-and-drop reordering, per-item show/hide toggles, and separate control for the backend and frontend bars. Setup takes a minute. After activation, go to Settings → AdminBar Editor, pick Backend or Frontend, and start toggling. The free version covers existing toolbar items and the global frontend bar. Pro adds custom menu entries, per-role visibility, and color and style controls. If your cleanup priority is the toolbar rather than the sidebar, this is the tool for that specific job, and it pairs well with WP Adminify's sidebar editor since neither steps on the other. - Key features: hide/show/reorder toolbar items, frontend bar control, admin bar position - Pro adds: custom toolbar links, role-based visibility, custom colors and styles - Best for: membership sites, support teams, and agencies that need a clean, role-aware toolbar ## 3. Loginfy - best login page companion ![Loginfy custom WordPress login page customizer plugin banner](https://d1k2c27psfzbiv.cloudfront.net/wp-content/uploads/2026/07/15113309/loginfy-banner.webp) Fair warning: [Loginfy](https://wordpress.org/plugins/loginfy/) is not an admin menu editor, and we're not going to pretend it is. It's on this list because a customized admin menu only fixes what people see after login. If the login page still says "Powered by WordPress" over the default blue form, the branding job is half done. Loginfy plugs into the native WordPress Customizer, so every change previews live before you publish. You get 16+ pre-built templates, two-column layouts, and backgrounds that go past a static image: gradients, videos, slideshows. Every text string on the page is editable, including error messages, which matters more than it sounds. The default WordPress login error confirms whether a username exists, and rewriting it closes that gap. White-label options strip the WordPress branding entirely. Weighing your options? Compare the [best WordPress login page plugins](https://wpadminify.com/best-wordpress-login-page-plugin) before you commit. - Key features: live Customizer preview, 16+ templates, video/slideshow backgrounds, Google Fonts - White label: remove WordPress branding, custom error messages, full text control - Best for: agencies and freelancers finishing a branded client backend ## 4. Admin Menu Editor - best single-purpose specialist ![Admin Menu Editor WordPress plugin banner](https://d1k2c27psfzbiv.cloudfront.net/wp-content/uploads/2026/07/15113315/admin-menu-editor-banner.webp) [Admin Menu Editor](https://wordpress.org/plugins/admin-menu-editor/) has been doing one job for over a decade: drag-and-drop reordering of top-level and submenu items, renaming, custom menu entries, and capability-based access control. At 300,000+ active installs and a 4.6-star rating, it has more production mileage than anything else here. If it broke things, we'd know by now. The trade-off is scope, and one quirk worth knowing before you install. The free version restricts access by capability, not by role, so "hide this from Editors" takes some mental translation to "hide this from anyone without `manage_options`". Per-role permissions, menu export/import, and toolbar editing all sit behind the Pro upgrade. If you want a menu editor and nothing else in your plugin list, this is the proven pick. - Active installs: 300,000+ · Rating: 4.6/5 - Key features: drag-and-drop editing, renaming, custom items, capability-based access - Pro adds: per-role permissions, export/import, admin bar editing - Best for: site owners who want a focused, long-maintained menu tool ## 5. Adminimize - best free role-based hiding ![Adminimize WordPress admin cleanup plugin banner](https://d1k2c27psfzbiv.cloudfront.net/wp-content/uploads/2026/07/15113319/adminimize-banner.webp) [Adminimize](https://wordpress.org/plugins/adminimize/) goes the other way: no drag and drop, no Pro tier, just a huge grid of checkboxes. Every menu item, submenu item, meta box, and admin bar element gets a row. Every user role gets a column. Tick a box and that element disappears for that role. It's completely free and GPL-licensed, with 200,000+ installs and a 4.7-star rating. The interface looks like it hasn't changed since WordPress 3.x, because it mostly hasn't, and you can't reorder or rename anything. This is a hiding tool, not an editor. But if the whole job is "strip the dashboard down per role and spend zero dollars", nothing else on this list does it better. - Active installs: 200,000+ · Rating: 4.7/5 - Key features: per-role hiding of menus, submenus, meta boxes, and admin bar items - Limitations: no reordering, no renaming, checkbox-only interface - Best for: budget-conscious sites that only need to hide things per role ## 6. WPFront User Role Editor - best for permissions-first control ![WPFront User Role Editor WordPress plugin banner](https://d1k2c27psfzbiv.cloudfront.net/wp-content/uploads/2026/07/15113324/wpfront-user-role-editor-banner.webp) [WPFront User Role Editor](https://wordpress.org/plugins/wpfront-user-role-editor/) comes at the menu from the permissions side. You don't edit the menu directly. You create, clone, and edit user roles, and the menu follows, because WordPress decides what to show based on capabilities. The free version covers full role management plus basic navigation permissions. Pro adds a dedicated admin menu editor on top. This is the right starting point for membership sites and multi-author publications where "who can do what" is the actual question and the messy menu is just the visible symptom. Fix the roles and half the menu problem fixes itself. - Active installs: 30,000+ · Rating: 4.5/5 - Key features: create/edit/clone roles, capability management, navigation permissions - Pro adds: dedicated admin menu editor - Best for: membership sites and teams managing complex role structures ## 7. Ultimate Dashboard - best for client dashboards ![Ultimate Dashboard WordPress client dashboard plugin banner](https://d1k2c27psfzbiv.cloudfront.net/wp-content/uploads/2026/07/15113328/ultimate-dashboard-banner.webp) [Ultimate Dashboard](https://wordpress.org/plugins/ultimate-dashboard/) is a dashboard widget tool before it's a menu tool. The free version removes the default WordPress widgets and replaces them with your own icon cards, text widgets, and video embeds. Menu editing only arrives with Pro, which adds a per-role admin menu editor with custom items and separators. That ordering tells you who it's for. If the deliverable is a branded "welcome" screen on every client site, with menu cleanup as part of the package rather than the headline, this is the pick. It has 60,000+ installs and a 4.6-star rating, and agencies are clearly its core audience. - Active installs: 60,000+ · Rating: 4.6/5 - Key features (free): remove/replace dashboard widgets, icon and text widgets - Pro adds: per-role menu editor, custom menu items, separators, white label - Best for: agencies designing complete branded client dashboards ## Comparison: WordPress admin menu plugins for 2026 | Plugin | Drag & drop | Role-based visibility | Custom menu items | Free version scope | | --- | --- | --- | --- | --- | | WP Adminify | Yes | Yes | Yes | Menu editor + full toolkit modules | | Admin Bar Editor | Yes (toolbar) | Pro | Pro | Toolbar hide/reorder, frontend bar | | Loginfy | - (login customizer) | - | - | Templates + Customizer editing | | Admin Menu Editor | Yes | Pro (capability-based in free) | Yes | Sidebar menu editing | | Adminimize | No | Yes | No | Everything (fully free) | | WPFront User Role Editor | Pro | Yes (via roles) | Pro | Role management | | Ultimate Dashboard | Pro | Pro | Pro | Dashboard widgets | ## How do you choose the right admin menu plugin? - Want visual reordering, renaming, and a broader cleanup toolkit? WP Adminify. - Is the top toolbar your main clutter problem? Admin Bar Editor. - Finishing a white-labeled backend for clients? Add Loginfy for the login page. - Want only a menu editor, nothing more? Admin Menu Editor. - Need free per-role hiding? Adminimize. - Is the real issue permissions? WPFront User Role Editor. - Is the dashboard landing page the deliverable? Ultimate Dashboard. ## How do you edit the WordPress admin menu? For a full walkthrough of every option, see our guide on [how to use the WordPress admin menu editor](https://wpadminify.com/how-to-use-the-wordpress-admin-menu-editor). With WP Adminify installed, the whole thing takes about two minutes: - Install and activate WP Adminify from Plugins → Add New. - Go to WP Adminify → Menu Editor. - Drag items into the order you want. Nested submenu items move the same way. - Click any item to rename it, change its icon, or hide it for specific roles. Sites that do not accept comments often [hide admin menu items like Comments](https://wpadminify.com/hide-comments-menu-from-wordpress-admin-panel) right here. - Add custom links or separators where they help, then save. Reload the dashboard and the new menu is live for every user, filtered by whatever role rules you set. ## WordPress Admin Menu Plugin FAQs ### Can I edit the WordPress admin menu without a plugin? Yes, if you're comfortable writing PHP: hook admin_menu, call remove_menu_page(), and re-register items in a custom order. It works until a plugin update changes a menu slug and your code silently stops matching. It also gives clients no interface at all. A menu plugin does the same job with an undo button. ### Will hiding a menu item stop users from accessing that screen? Not by itself. Hiding is cosmetic, and a user with the right capability can still open the screen by typing the URL. For actual restriction, use a plugin that ties visibility to roles and capabilities, like WP Adminify's role-based rules or WPFront User Role Editor. ### Do admin menu plugins slow down my site? Not for visitors. These plugins load only inside wp-admin, so public pages are untouched. There's a small cost inside the dashboard itself, usually a query or two per admin page load, which is fine on most hosts. In practice a decluttered menu feels faster because there's less to scan. ### Is Loginfy an admin menu plugin? No. Loginfy customizes the login page, not the admin menu. We included it because the login screen is the first thing anyone sees in a branded backend, and it pairs with any menu editor on this list. ### What happens to my menu changes if I deactivate the plugin? The menu reverts to the WordPress default. Changes live in the plugin's settings, not in core, so deactivating is a safe, instant rollback. ## The bottom line For most sites, start with WP Adminify: a real drag-and-drop menu editor with role-based visibility, in a toolkit that also covers white labeling, media folders, and dashboard cleanup. Add Admin Bar Editor if the toolbar needs the same discipline, and Loginfy to carry the branding through the login screen. If you'd rather run a single-purpose specialist, Admin Menu Editor has earned its 300,000 installs, and Adminimize is still the best fully free way to hide clutter per role. Pick one and spend the twenty minutes. The default menu is the only part of WordPress that gets worse with every plugin you add, and it's the easiest to fix. ## Where to go next A tidy menu is one module of a bigger job. If you want the rest of the backend to match - dashboard widgets, admin columns, dark mode, and the rest - our guide to [WordPress dashboard customization](https://wpadminify.com/wordpress-dashboard-customization) walks through the full cleanup in order. And if these sites go out to clients, the menu is only the part they scroll; [white labeling WordPress](https://wpadminify.com/white-label-wordpress) covers removing the logos, the "Howdy", and the footer credit so the whole admin reads as yours. --- # WP Adminify vs UiPress: Which WordPress Admin Plugin Is Better for Agencies? URL: https://wpadminify.com/wp-adminify-vs-uipress Last updated: 2026-08-15 2026 Update: UIPress rebranded to uiXpress in 2025. The plugin retains its core DNA - modern UI overhaul + privacy-focused analytics - but has continued expanding its analytics dashboard capabilities with 15+ new cards. All references to UIPress in this article now refer to uiXpress. The WordPress admin plugin landscape has two standout products for teams that care deeply about the admin experience: WP Adminify and uiXpress (formerly UIPress). Both have active development teams, growing feature sets, and passionate communities. This is a genuine comparison, not a one-sided takedown. That said, after evaluating both plugins across every major dimension in 2026, WP Adminify emerges as the stronger choice for most users, especially agencies, developers, and anyone who wants to replace multiple plugins with one. Here's why. ## What is uiXpress (formerly UIPress)? ![UIpress wordpress plugin banner](https://d1k2c27psfzbiv.cloudfront.net/wp-content/uploads/2022/08/18103332/UIpress-wordpress-plugin-banner.webp) uiXpress is a complete WordPress admin UI overhaul plugin. It replaces the default WordPress admin design with a modern, clean, and customizable interface. Key capabilities include: - Full UI redesign: Sidebar navigation, color schemes, typography, and spacing, all completely customizable - Privacy analytics: Built-in analytics dashboard powered by your own site data (no Google Analytics required) - 15+ dashboard cards: Traffic, top pages, forms, WooCommerce stats, and more - Admin page builder: Drag-and-drop interface for building custom admin pages - Templates: Pre-built admin templates for rapid deployment - White label basics: Logo and branding replacement uiXpress's biggest strength is aesthetics and analytics. If the goal is a stunning-looking WordPress admin with built-in traffic data, uiXpress delivers beautifully. ## What is WP Adminify? ![WP Adminify option panel with Adminify UI](https://d1k2c27psfzbiv.cloudfront.net/wp-content/uploads/2026/04/19081551/WP-Adminify-option-panel-with-Adminify-UI.webp) https://www.youtube.com/watch?v=wytlIbQY4SY Watch: a tour of WP Adminify, the complete WordPress dashboard solution WP Adminify takes a different approach. Rather than focusing on visual redesign, it focuses on functional depth, giving admins, developers, and agencies the tools they need to control every aspect of WordPress administration. It covers [WordPress dashboard customization](https://wpadminify.com/wordpress-dashboard-customization), admin menu management, full white labeling, login page customization, dark mode, heartbeat control, code snippets, media folders, activity logs, and more, all in one plugin. The result is a plugin that replaces 5-10 other plugins at once. For [WordPress admin customization](https://wpadminify.com/wordpress-admin-customization) that goes beyond looks and into functionality, WP Adminify is the professional's choice. ## Feature Comparison: WP Adminify vs uiXpress | Feature | WP Adminify | uiXpress | | --- | --- | --- | | Complete UI Redesign | Partial (admin enhancements) | Full redesign | | Built-in Analytics Dashboard | Via integrations | Native privacy analytics | | Admin Menu Editor | Full drag-and-drop + roles | Basic reordering | | Dark Mode (Scheduled) | Yes, time-based + per-user | Basic toggle | | Login Page Templates | 16 templates (Loginfy) | Limited | | White Label (Agency-grade) | Full agency white label | Basic branding | | Plugin White Label | Yes, hide/rename plugins | No | | Heartbeat API Control | Full granular control | No | | Code Snippets Manager | Built-in PHP/CSS/JS | No | | Media Folder Organization | Drag-and-drop folders | No | | Activity Logs | Detailed user activity | No | | Client Dashboard | Full client area builder | Via admin builder | | Performance Tools | Multiple optimization tools | Minimal | | Dashboard Widget Customization | Full | Full (15+ cards) | | Role-based Access | Granular per-role control | Basic | | Free Version Quality | Excellent, major features free | Good core features | ## Where WP Adminify Wins ### 1. Agency White Label, No Contest WP Adminify's [White Label](https://wpadminify.com/features/white-label) system is built for agencies who deliver client sites. You can replace every piece of WordPress and WP Adminify branding with your own: custom logo, admin colors, footer text, admin bar customization, custom help links, and more. The [Plugin White Label](https://wpadminify.com/features/plugin-white-label) feature goes even further, it hides WP Adminify from the plugins list entirely, or renames it to your agency's product. Clients never know which tools power their site. This is the gold standard for [white label WordPress development](https://wpadminify.com/white-label-wordpress-development). uiXpress has basic white label (logo/branding) but nothing approaching WP Adminify's depth here. ### 2. Login Page Customization (16 Templates) WP Adminify's [Loginfy](https://wpadminify.com/loginfy) module includes 16 professionally designed login page templates that can be customized with your brand colors, logo, and background. Creating a branded client login experience takes minutes, not hours. Our guide on [WordPress login page white label](https://wpadminify.com/wordpress-login-page-white-label-guide) covers exactly how to set this up. uiXpress has limited login customization, it simply cannot match the template variety and polish that Loginfy provides. ### 3. Dark Mode Scheduling WP Adminify's [Dark Mode](https://wpadminify.com/features/dark-mode) is a system, not just a toggle. Schedule automatic dark mode activation (e.g., 7 PM to 7 AM), let users set individual preferences, and choose from multiple dark color palettes. This is how dark mode should work in a professional context. uiXpress offers a basic dark mode toggle. For teams with diverse work schedules across time zones, WP Adminify's scheduling is the better solution. Learn how to configure it with our guide on [how to enable WordPress dark mode](https://wpadminify.com/how-to-enable-wordpress-dark-mode). ### 4. Heartbeat API Control The WordPress Heartbeat API sends AJAX requests every 15-60 seconds to keep sessions alive and enable auto-saving. On busy sites or shared hosting, this creates real performance issues. WP Adminify's [Heartbeat Control](https://wpadminify.com/features/heartbeat-control) lets you fine-tune the frequency or disable it entirely on specific contexts, the post editor, dashboard, and frontend separately. This directly improves admin panel responsiveness and reduces server load. See the full guide on [how to control the WordPress Heartbeat API](https://wpadminify.com/how-to-control-wordpress-heartbeat-api). uiXpress has no heartbeat management. For those focused on [WordPress performance optimization](https://wpadminify.com/wordpress-performance-optimization), this is a significant differentiator. ### 5. Code Snippets and Developer Tools WP Adminify's [Code Snippets](https://wpadminify.com/features/code-snippets) module gives developers a safe, organized way to manage custom PHP, CSS, and JavaScript directly from the admin. Each snippet is independent and can be toggled without affecting others, dramatically reducing the risk of site-breaking edits. uiXpress has no code snippet management. Developers using uiXpress still need a separate snippets plugin, whereas WP Adminify consolidates this capability natively. ### 6. Media Library Folders As sites scale, the WordPress media library becomes unmanageable without folders. WP Adminify's [Media Folder](https://wpadminify.com/features/wordpress-media-folder) feature adds drag-and-drop folder management natively, with no additional plugin required. Our guide on [how to organize WordPress media library with folders](https://wpadminify.com/how-to-organize-wordpress-media-library-with-folders) explains the full workflow. ### 7. Admin Menu Editor WP Adminify's [Admin Menu Editor](https://wpadminify.com/features/admin-menu-editor) is enterprise-grade: full drag-and-drop reordering, icon customization, role-based visibility, menu item renaming, and separator management. It's one of the most complete menu editors available in any plugin. uiXpress has basic menu reordering within its UI builder. For granular per-role menu control, essential for client sites, WP Adminify's implementation is far superior. Read our full guide on [how to use the WordPress admin menu editor](https://wpadminify.com/how-to-use-the-wordpress-admin-menu-editor). ## Where uiXpress Wins ### 1. Visual Design and UI Modernization uiXpress is genuinely beautiful. The admin redesign is one of the most visually impressive in the WordPress ecosystem. If you or your clients want the WordPress admin to look like a modern SaaS application dashboard rather than the classic WordPress layout, uiXpress delivers this better than WP Adminify. ### 2. Built-in Privacy Analytics uiXpress's native analytics dashboard is a genuine differentiator. With 15+ analytics cards covering traffic, top content, WooCommerce revenue, form submissions, and more, all powered by first-party data without Google Analytics, it's a compelling feature for site owners who want insights inside the dashboard. WP Adminify does not have built-in analytics. If in-dashboard analytics is a top priority, uiXpress wins this specific area. ## WP Adminify Replaces More Plugins One of the strongest arguments for WP Adminify is plugin consolidation. Consider what it replaces: - Admin Menu Editor Pro, replaced by WP Adminify's [menu editor](https://wpadminify.com/features/admin-menu-editor) - WP Dark Mode, replaced by WP Adminify's [dark mode](https://wpadminify.com/features/dark-mode) - [White Label CMS](https://wpadminify.com/wp-adminify-vs-white-label-cms), replaced by WP Adminify's [white label](https://wpadminify.com/features/white-label) - Code Snippets, replaced by WP Adminify's [snippets manager](https://wpadminify.com/features/code-snippets) - FileBird or similar, replaced by WP Adminify's [media folders](https://wpadminify.com/features/wordpress-media-folder) - Heartbeat Control plugins, replaced by WP Adminify's [heartbeat control](https://wpadminify.com/features/heartbeat-control) - Custom Login Page plugins, replaced by [Loginfy](https://wpadminify.com/loginfy) - Activity Log plugins, replaced by WP Adminify's activity logs That's 8+ plugins replaced by one. Fewer plugins means better performance, fewer compatibility conflicts, and lower maintenance overhead. This is the core value proposition that makes WP Adminify exceptional for any serious [WordPress client dashboard](https://wpadminify.com/wordpress-client-dashboard) setup. ## Pricing (2026) ### WP Adminify - Free: WordPress.org, excellent free tier with core features - Personal: $79/year, 1 site - Business: $129/year, 5 sites - Agency: $299/year, unlimited sites - Lifetime Bundle: $799 one-time, all products, unlimited sites ### uiXpress (formerly UIPress) - Free: Core UI features available - Pro: Per-site pricing with analytics and advanced features WP Adminify's Agency plan at $299/year for unlimited sites is outstanding value for any agency. When you factor in all the plugins it replaces, the ROI is clear. uiXpress's per-site pricing model adds up quickly for agencies managing dozens of client sites. [See WP Adminify Pricing, Start Free Today](https://wpadminify.com/pricing) ## Who Should Choose Each Plugin? ### Choose WP Adminify if you: - Run an agency and need professional-grade white labeling and plugin white label - Want to replace multiple admin plugins with one consolidated solution - Need advanced login page customization with multiple templates - Care about server performance and heartbeat optimization - Want the best admin menu editor with per-role control - Need code snippet management and developer tools built-in - Want unlimited site licensing at a fixed annual price ### Choose uiXpress if you: - Want a complete visual overhaul of the WordPress admin interface - Need built-in privacy-focused analytics without Google Analytics - Value aesthetics and modern design as the primary goal - Run a single site or a small number of sites where per-site pricing is acceptable ## Looking for a UiPress Alternative? WP Adminify is the most complete UiPress alternative for WordPress in 2026. It covers the core ground uiXpress users rely on, dashboard customization, admin menu control, branding, and adds the pieces uiXpress doesn't have: agency-grade [white label](https://wpadminify.com/features/white-label), plugin white label, 16 login page templates, heartbeat control, code snippets, media folders, and activity logs. All of it under one license that covers unlimited sites. Three practical reasons people switch from uiXpress to WP Adminify: - Pricing at scale: uiXpress charges per site. WP Adminify's Agency plan is $299/year for unlimited sites, so the gap widens with every client site you add. - Plugin consolidation: one install replaces 8+ single-purpose plugins, menu editor, dark mode, login customizer, snippets, media folders, heartbeat control, which means fewer updates and fewer conflicts in the admin area. - Client-proof white labeling: the [plugin white label](https://wpadminify.com/features/plugin-white-label) module hides or renames WP Adminify itself, something uiXpress has no answer to. The honest trade-off: if your main reason for using uiXpress is the full visual redesign or the built-in privacy analytics, WP Adminify won't replicate those one-for-one. Every other workflow, the [admin menu editor](https://wpadminify.com/features/admin-menu-editor), role-based access, branded login pages, dashboard widgets, transfers over, and usually with more depth. If you're weighing other WordPress dashboard plugin options too, our [WP Adminify vs Ultimate Dashboard](https://wpadminify.com/wp-adminify-vs-ultimate-dashboard) and [WP Adminify vs ASE](https://wpadminify.com/wp-adminify-vs-ase) comparisons cover the rest of the field. You can test the switch risk-free: install the [free version from WordPress.org](https://wordpress.org/plugins/adminify/) alongside uiXpress on a staging site, mirror your menu and branding setup, then decide before spending anything. ## Final Verdict uiXpress is a genuinely good plugin. The visual redesign is stunning, the analytics dashboard is unique, and the development team is clearly talented. It earns its place in the WordPress ecosystem. But WP Adminify wins this comparison for the majority of users because it does more, replaces more, and costs less at scale. The 8+ plugins it consolidates into one, combined with features like plugin white label, 16 login templates, heartbeat control, and granular role-based menu management, make it the more complete platform. For agencies, there is no question: WP Adminify's unlimited-site Agency plan at $299/year, combined with its plugin consolidation capability, delivers exceptional value that uiXpress cannot match on a per-site pricing model. Bottom line: uiXpress wins on style. WP Adminify wins on substance, value, and depth. For most professionals in 2026, substance wins. [Try WP Adminify Free, Compare for Yourself](https://wpadminify.com/pricing) ## WP Adminify vs UiPress FAQs ### Is UIPress now called uiXpress? Yes. UIPress rebranded to uiXpress in 2025. The plugin retains its core functionality, admin UI redesign and privacy analytics, but continues to expand with new features including 15+ analytics dashboard cards. ### WP Adminify vs UIPress: which is better? WP Adminify wins on functional depth, offering plugin white label, 16 login templates, heartbeat control, code snippets, media folders, and activity logs that uiXpress lacks. uiXpress wins on UI modernization and built-in analytics. For agencies and developers, WP Adminify is the stronger choice overall. ### Does WP Adminify have analytics like uiXpress? WP Adminify does not have built-in privacy analytics like uiXpress. However, it integrates with analytics solutions and focuses on admin management features. For native in-dashboard analytics, uiXpress has a clear advantage. ### Can WP Adminify replace uiXpress? WP Adminify covers most of uiXpress's functionality (dashboard customization, white label, admin management) but does not replicate the full UI redesign or the built-in privacy analytics dashboard. For agencies needing functional depth over visual overhaul, WP Adminify is the better replacement. ### Does uiXpress have plugin white label? No. uiXpress does not offer plugin white label, the ability to hide or rename the plugin itself in the WordPress plugin list. WP Adminify's plugin white label feature lets agencies completely brand or hide the plugin from clients. ### Which is better for agency client sites: WP Adminify or uiXpress? WP Adminify is better for agency client sites. It offers deeper white labeling, plugin white label, more login templates, unlimited site licensing at a flat rate, activity logs, and the admin menu editor with per-role control, all essential for professional agency delivery. ### Is WP Adminify cheaper than uiXpress? WP Adminify's Agency plan at $299/year covers unlimited sites, making it significantly cheaper than uiXpress for agencies managing multiple client sites. WP Adminify also offers a lifetime bundle at $799 for unlimited sites. ### Does WP Adminify have heartbeat control that uiXpress doesn't? Yes. WP Adminify includes a dedicated Heartbeat Control module that lets you adjust or disable the WordPress Heartbeat API frequency on specific areas (dashboard, post editor, frontend). uiXpress does not have this feature. Heartbeat control can meaningfully improve admin panel performance on shared hosting. ### What is the difference between WP Adminify and UIPress? WP Adminify offers 60+ features including white label, login customizer, admin columns, and activity logs. UIPress focuses on dashboard redesign with a drag-and-drop builder but lacks built-in login customization and admin columns. ### Is WP Adminify free? Yes. WP Adminify has a free version on WordPress.org with core features. Pro plans start at $79/year for advanced features like admin columns, activity logs, and scheduled dark mode. --- # How to Create a Custom Admin Page in WordPress (No Code) URL: https://wpadminify.com/how-to-create-custom-admin-page-in-wordpress Last updated: 2026-08-13 Most WordPress tutorials tell you to drop a snippet into `functions.php` the moment you want a new screen in `wp-admin`. That works until the page has to actually look like something: a client welcome screen, an internal SOP hub, a branded onboarding page. Now you're writing HTML by hand inside a PHP callback. This guide takes a faster route. You'll learn how to create a custom admin page in WordPress and design it visually with Elementor, no code required, using the Admin Pages feature in WP Adminify. By the end you'll have a fully designed page living in your admin sidebar, with its own menu item, icon, and role-based access. ## What is a custom admin page in WordPress? A custom admin page is a screen that lives inside the WordPress dashboard (the `wp-admin` area) with its own item in the left-hand admin menu. Unlike a regular post or page, it's only visible to logged-in users and sits behind the login wall. Developers usually register these pages with the `add_menu_page()` and `add_submenu_page()` functions, then render the content inside a callback. The catch is that the callback expects you to echo raw markup. No visual editor, no layout system, no styling out of the box. So while spinning up a blank admin page takes a few lines of PHP, building one that actually looks professional means writing and maintaining your own HTML and CSS. That's the gap a page builder closes. ## Why build a custom admin page? Custom admin pages solve one specific problem: the default WordPress dashboard is generic, and your clients or teammates rarely need everything it shows. A purpose-built screen gives them exactly what they need on login. - Client onboarding. Agencies hand off sites with a branded "Start Here" page that explains how to update content, who to contact, and where billing lives, instead of dropping clients into a raw dashboard. - Internal documentation. Keep standard operating procedures, brand guidelines, or support contacts one click away inside the admin, where your team already works. - Custom tools and embeds. Surface a Looker Studio report, an internal form, or a knowledge base directly in `wp-admin` without sending people to an external tab. - White-label polish. A designed admin page reinforces your brand and makes a handed-off site feel finished instead of like a stock WordPress install. This pairs naturally with a [custom WordPress client dashboard](https://wpadminify.com/wordpress-client-dashboard). The admin page becomes the landing spot, and the dashboard widgets fill in the details. ## Method 1: The manual code method (add_menu_page) If you're a developer and only need a bare screen, the native WordPress approach is the registration hook. Add this to your theme's `functions.php` or a small plugin: ``` function adminify_register_custom_page() { add_menu_page( 'About Us', // Page title (browser tab) 'About Us', // Menu label in the sidebar 'manage_options', // Capability required to see it 'about-us', // Unique menu slug 'adminify_render_page',// Callback that prints the content 'dashicons-info', // Dashicon for the menu item 25 // Menu position ); } add_action('admin_menu', 'adminify_register_custom_page'); function adminify_render_page() { echo '
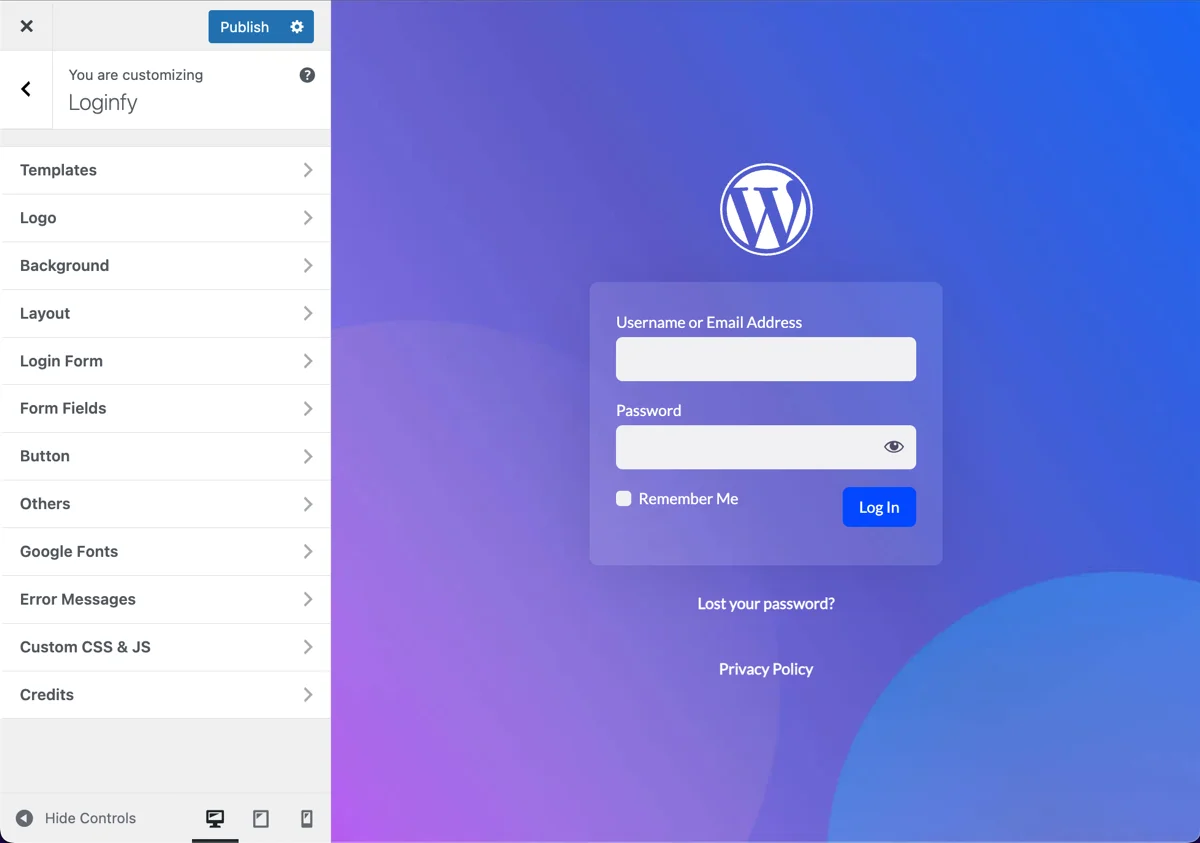





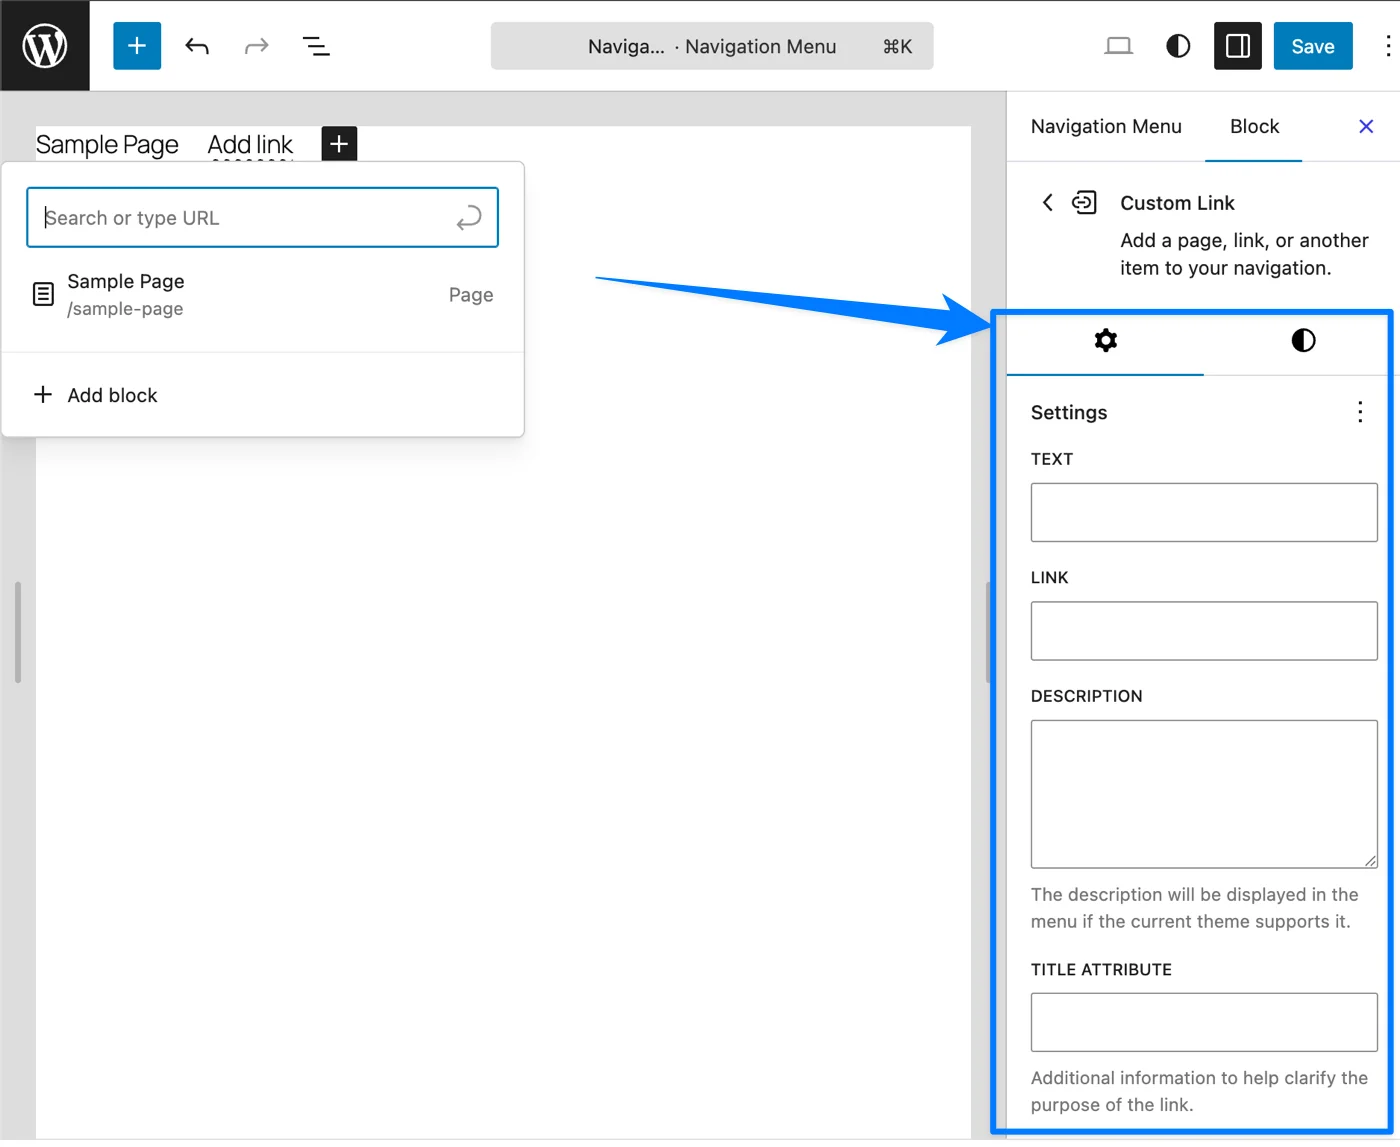
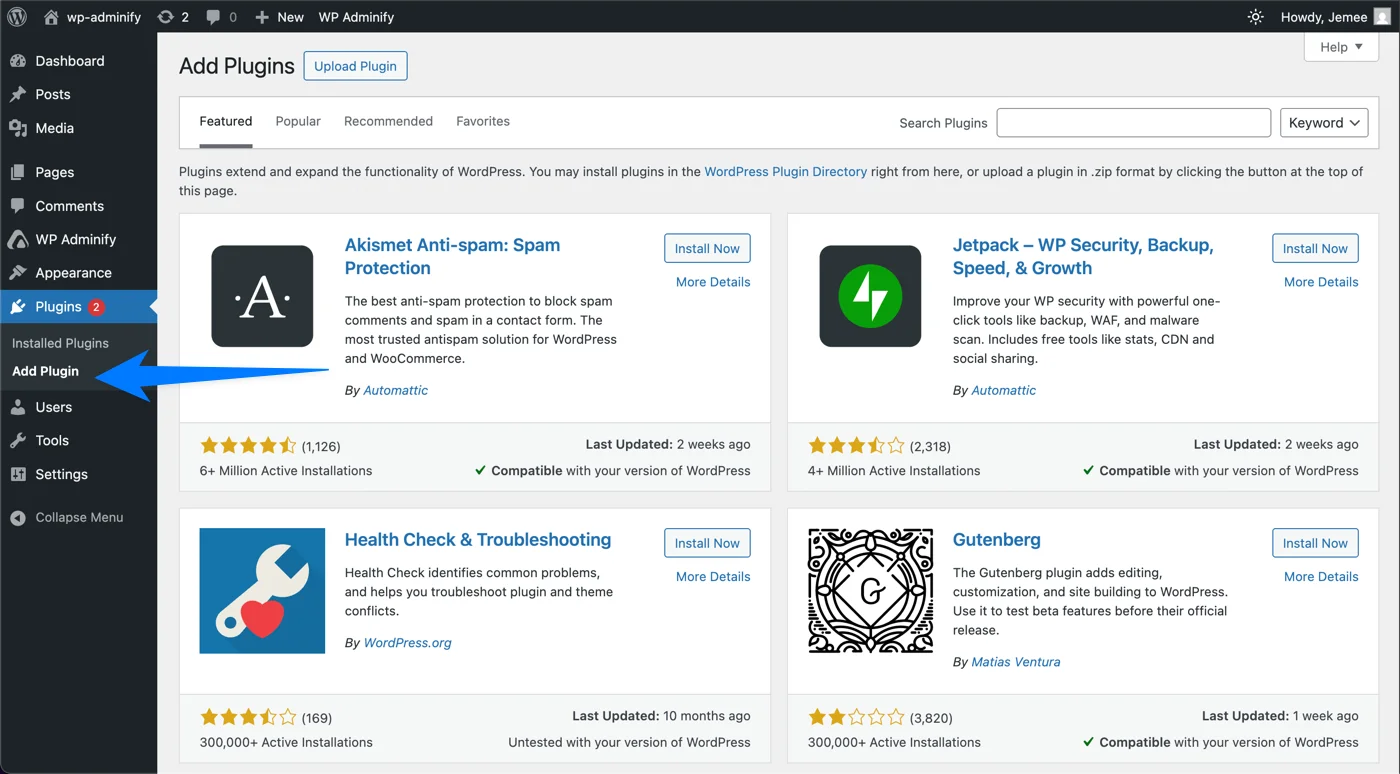
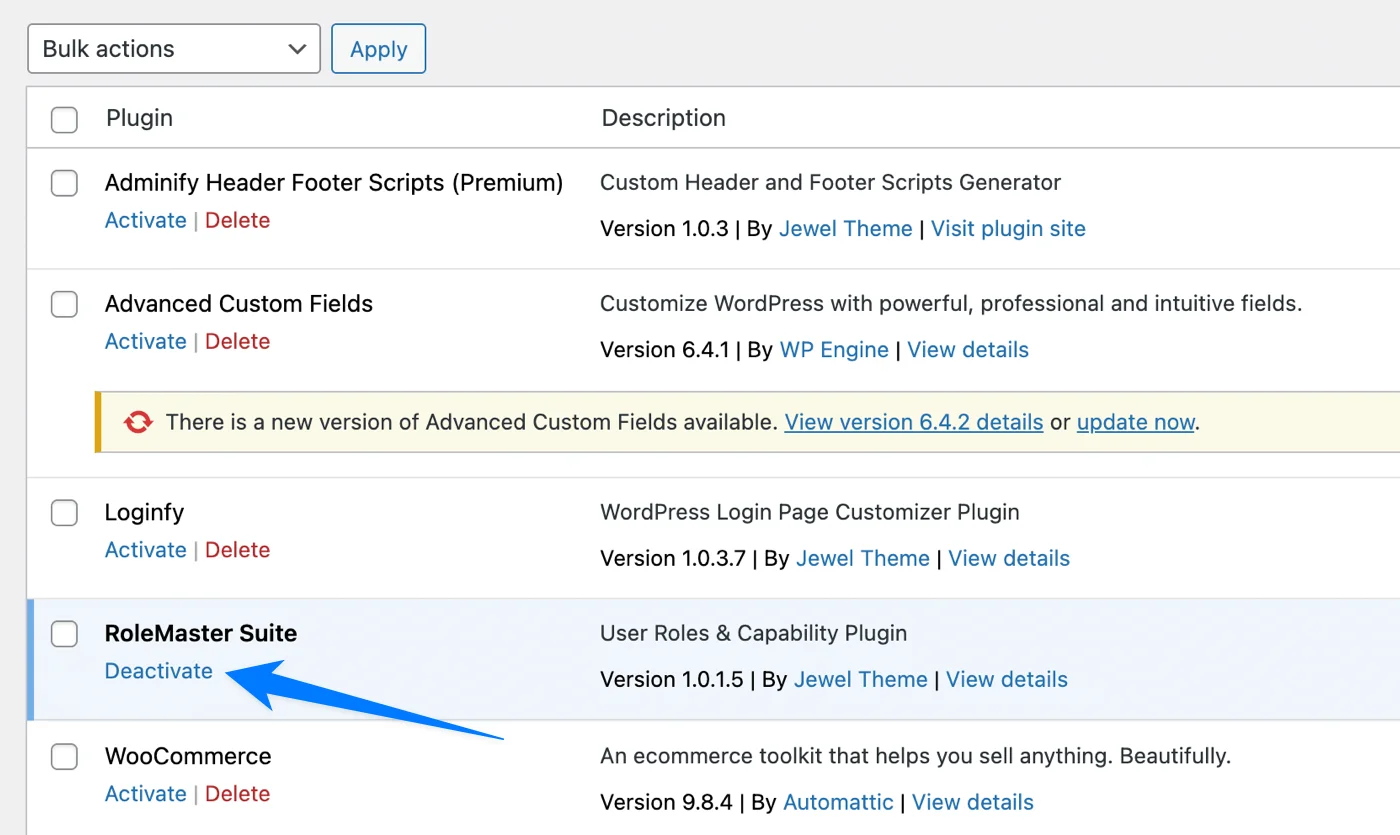

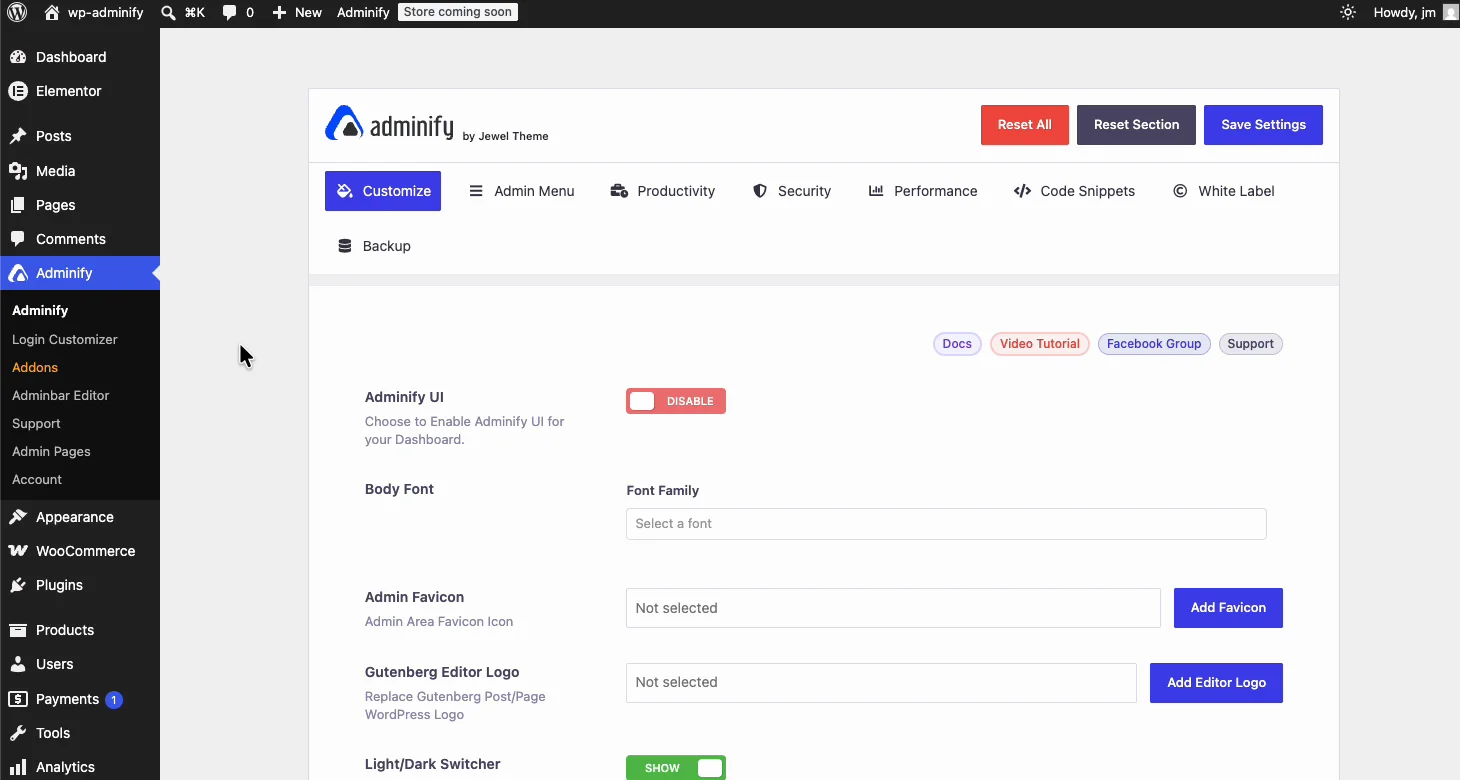
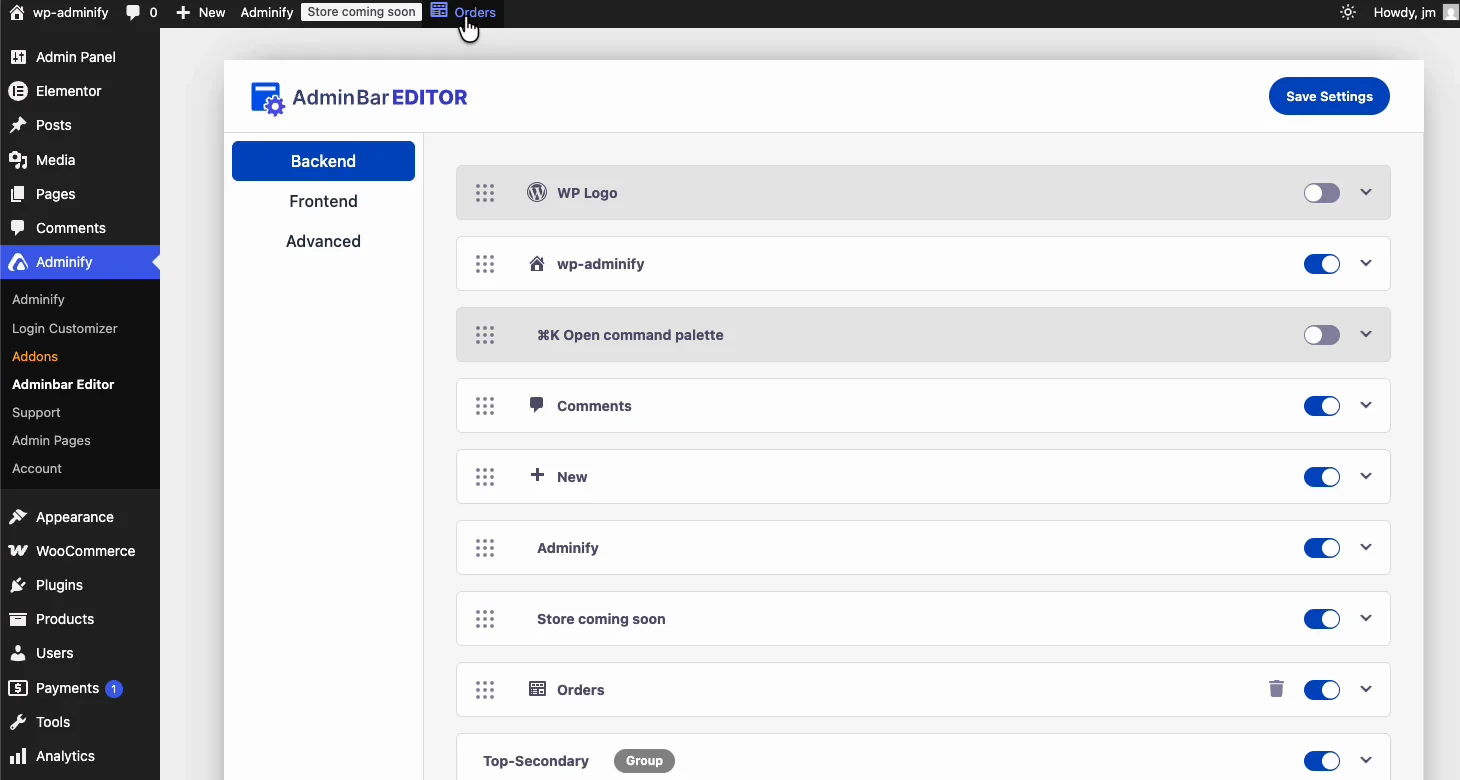
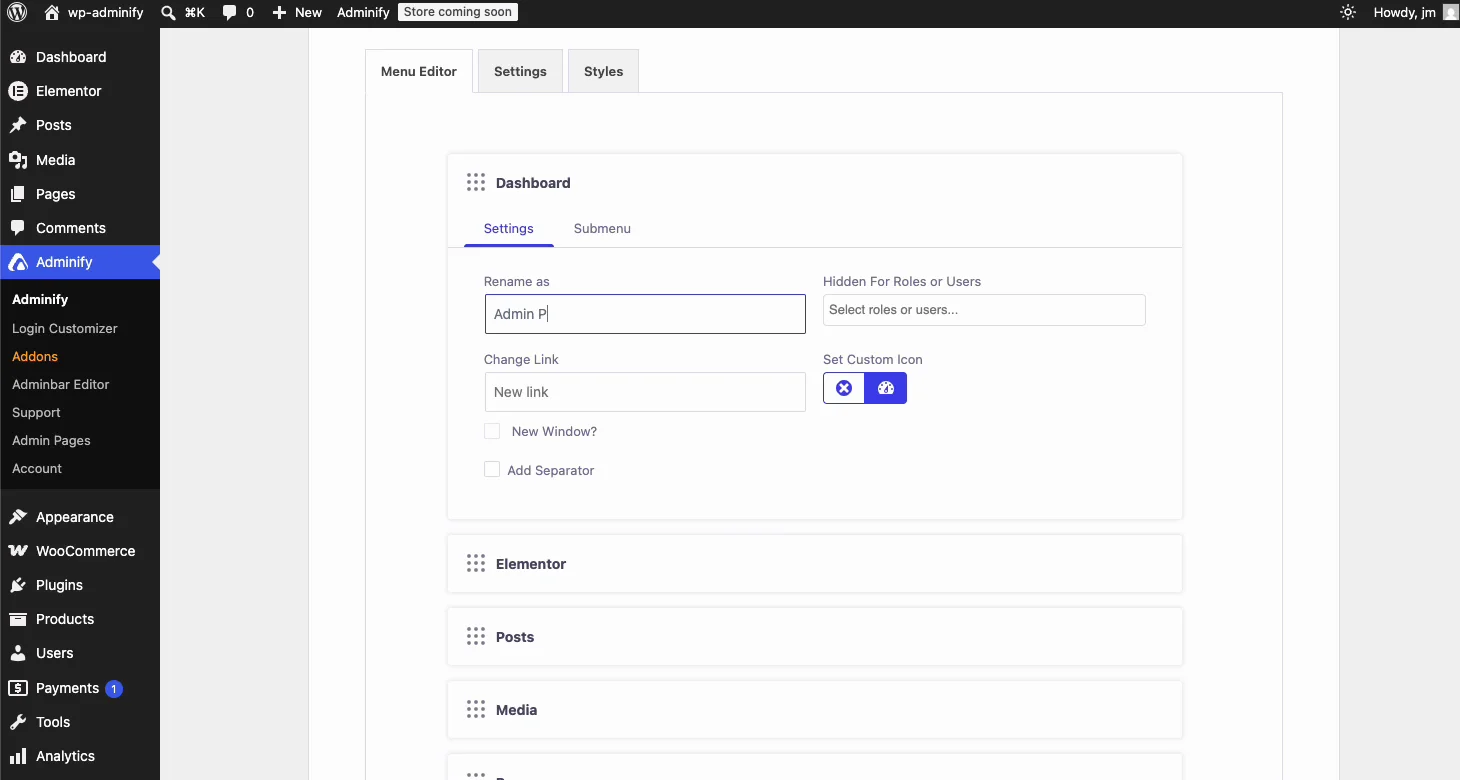
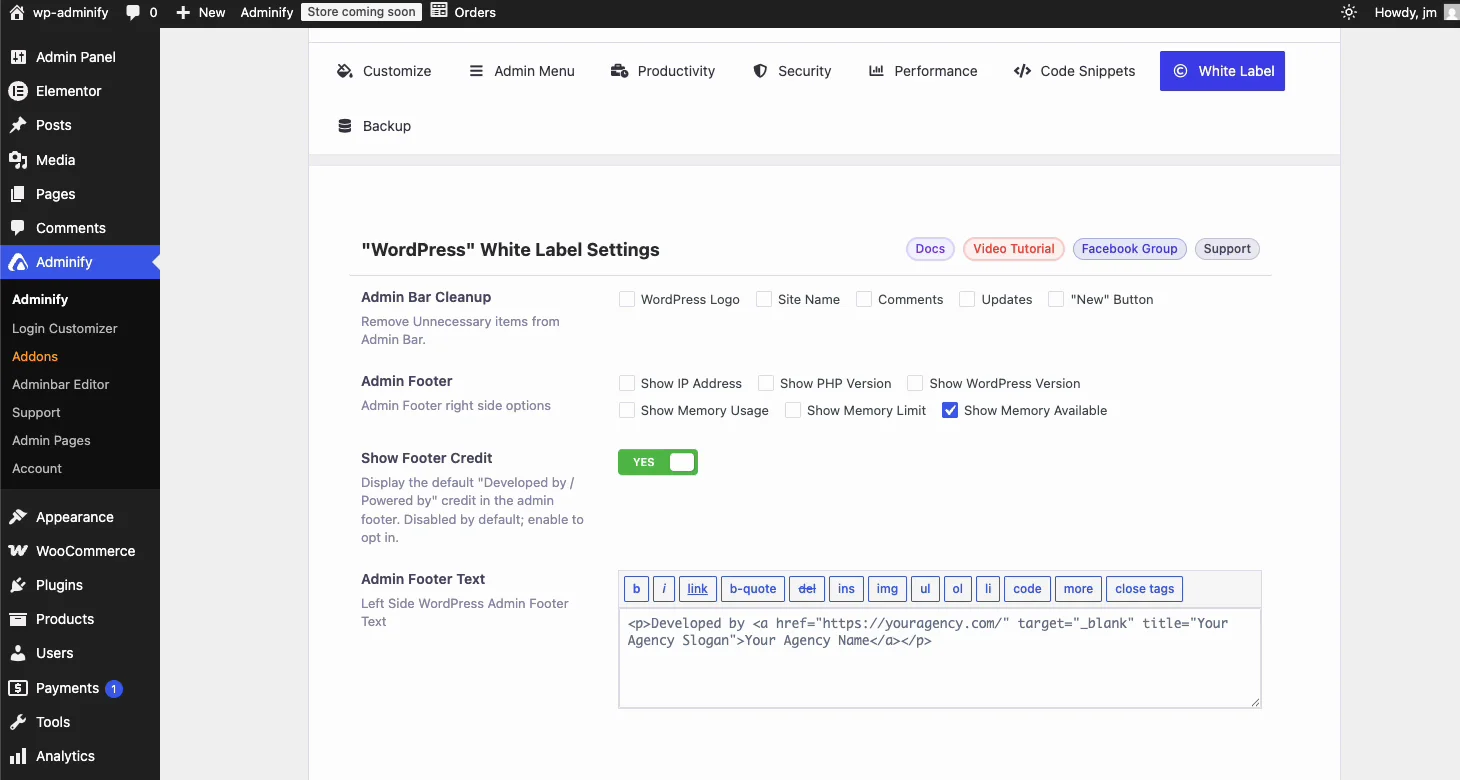
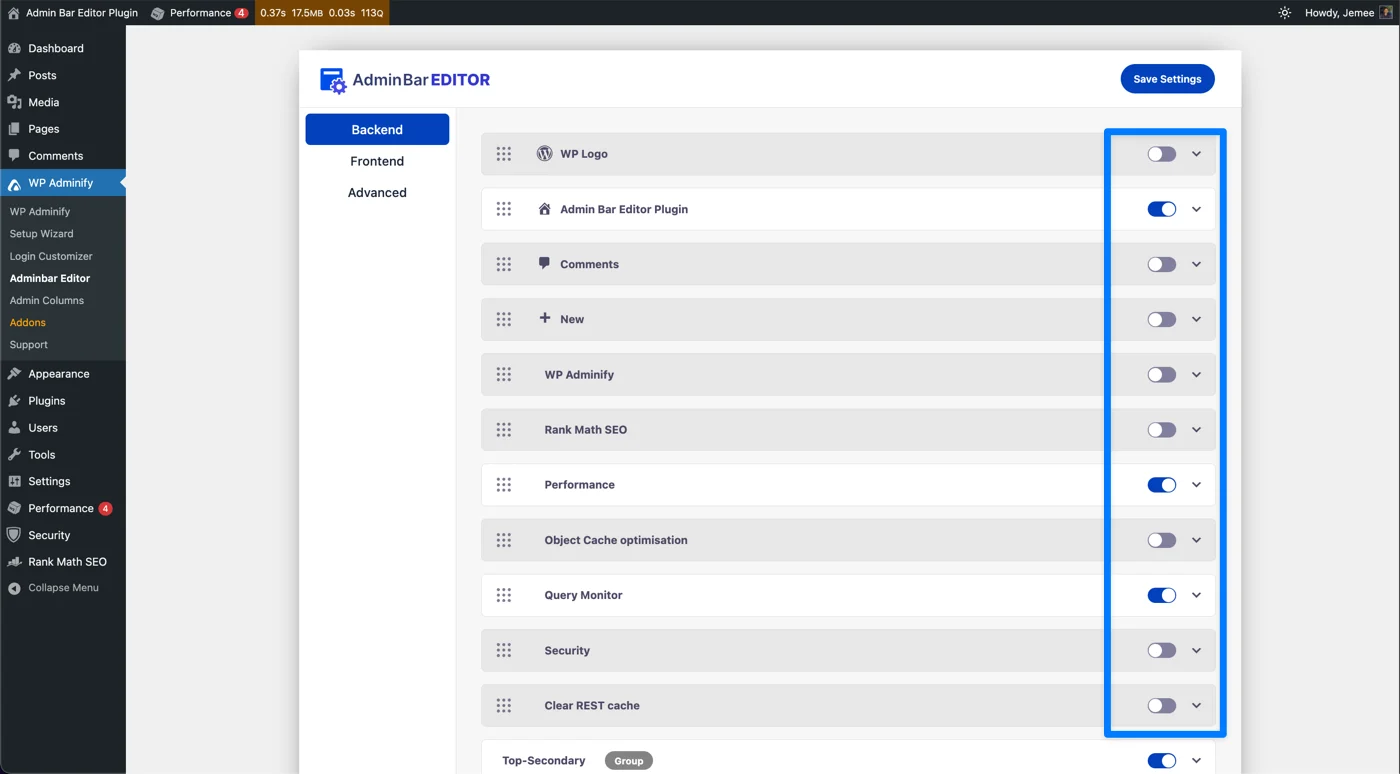
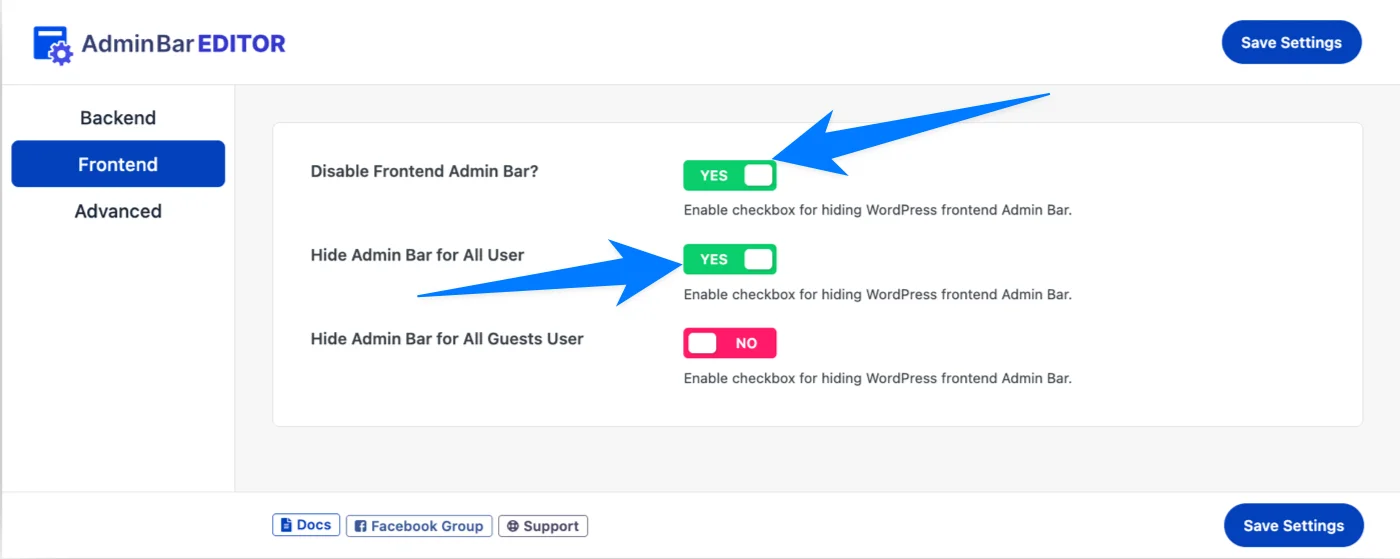
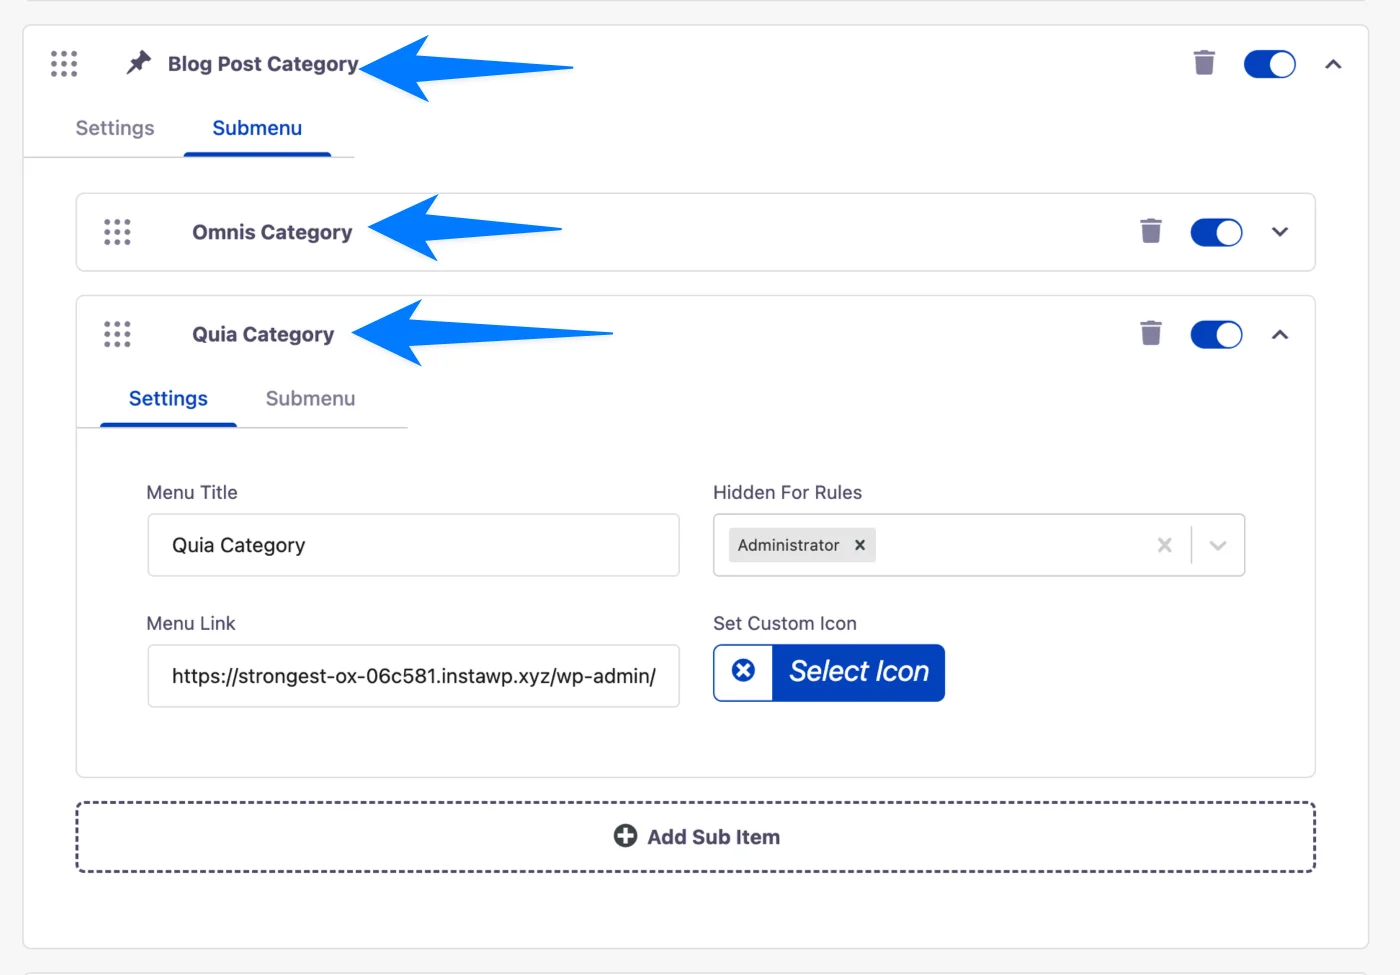
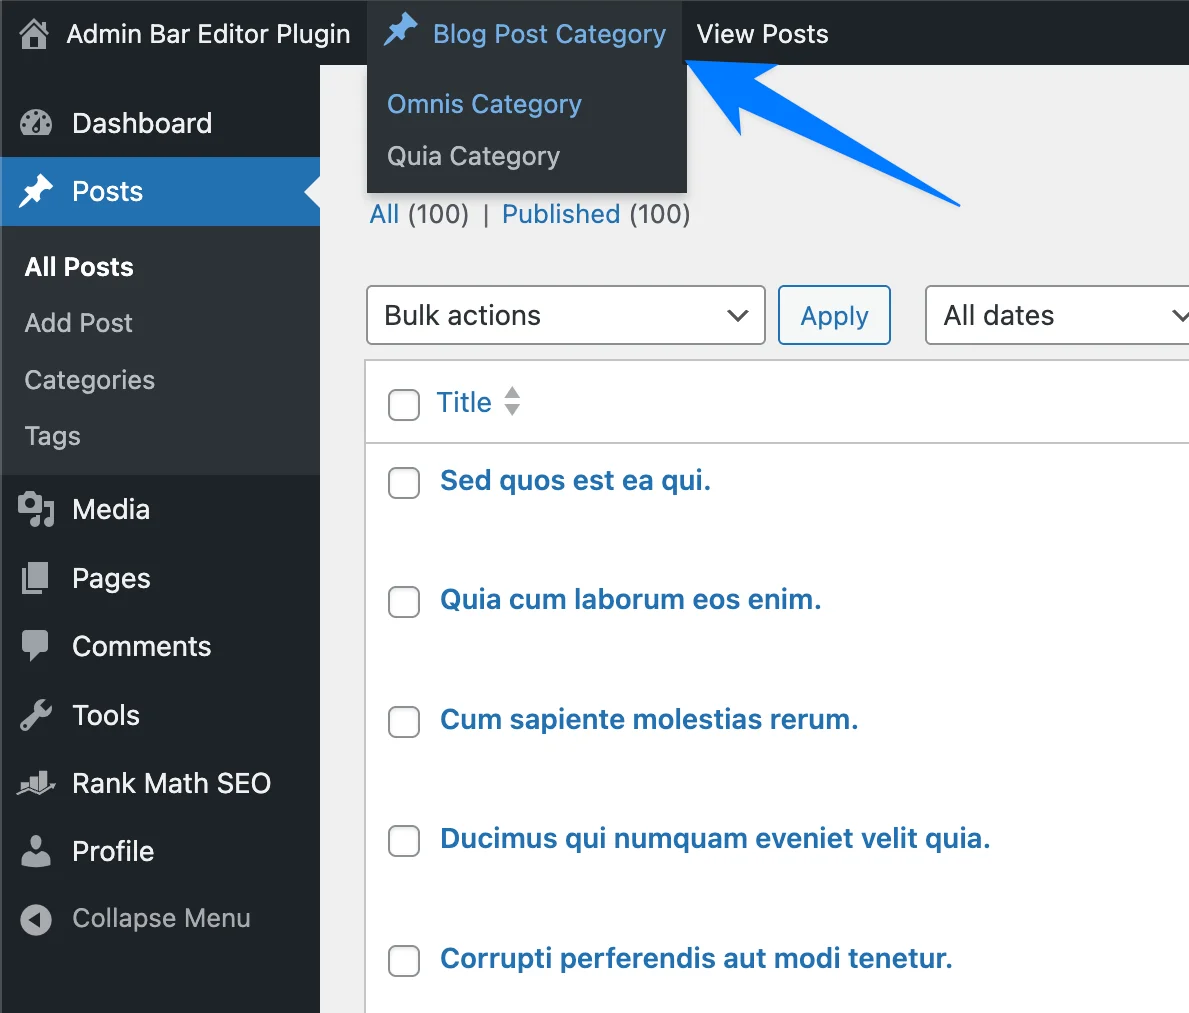
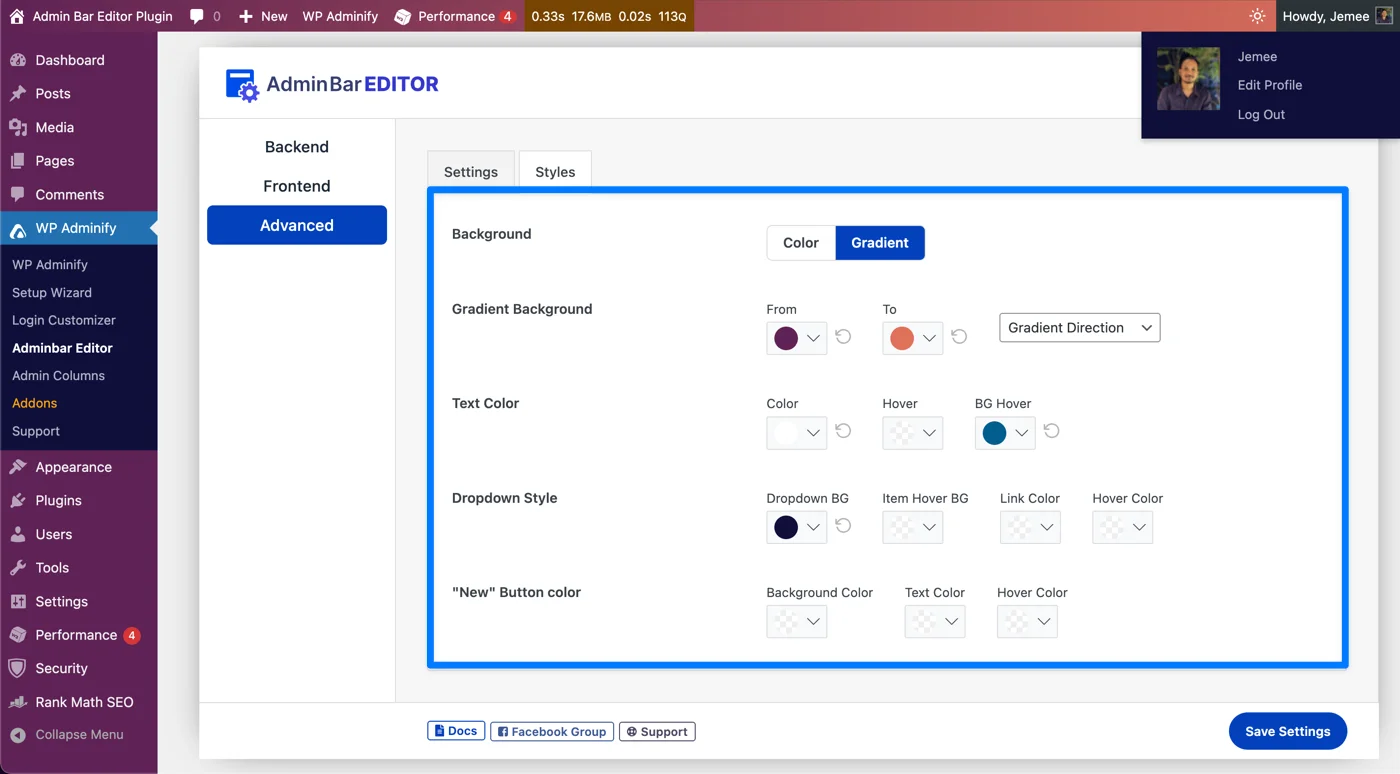
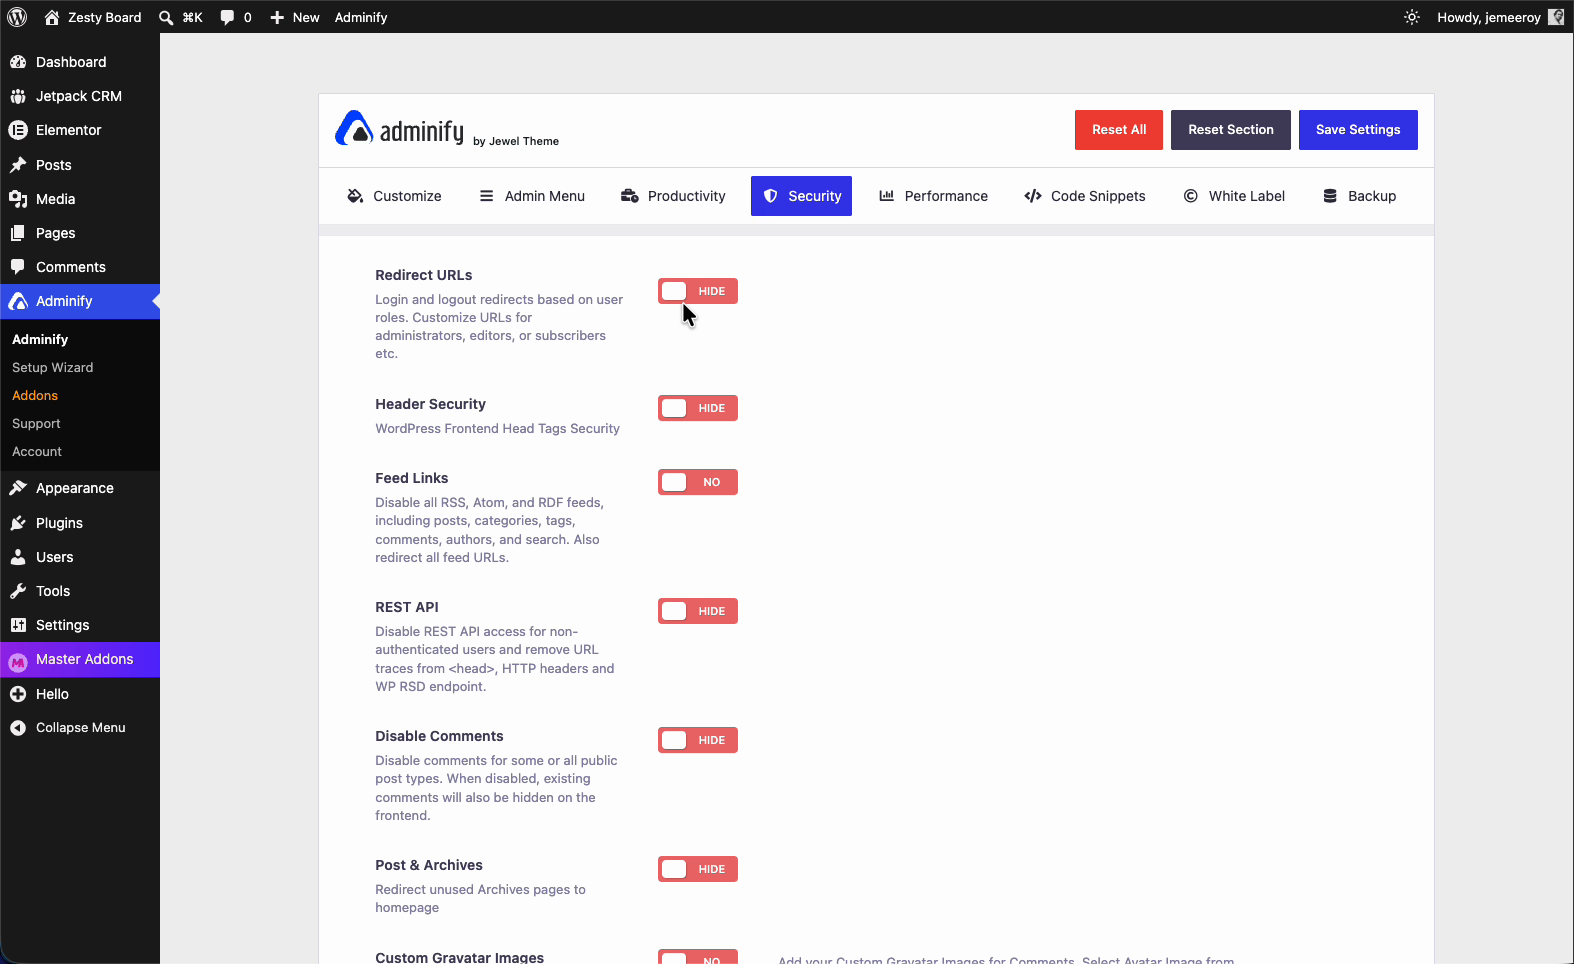

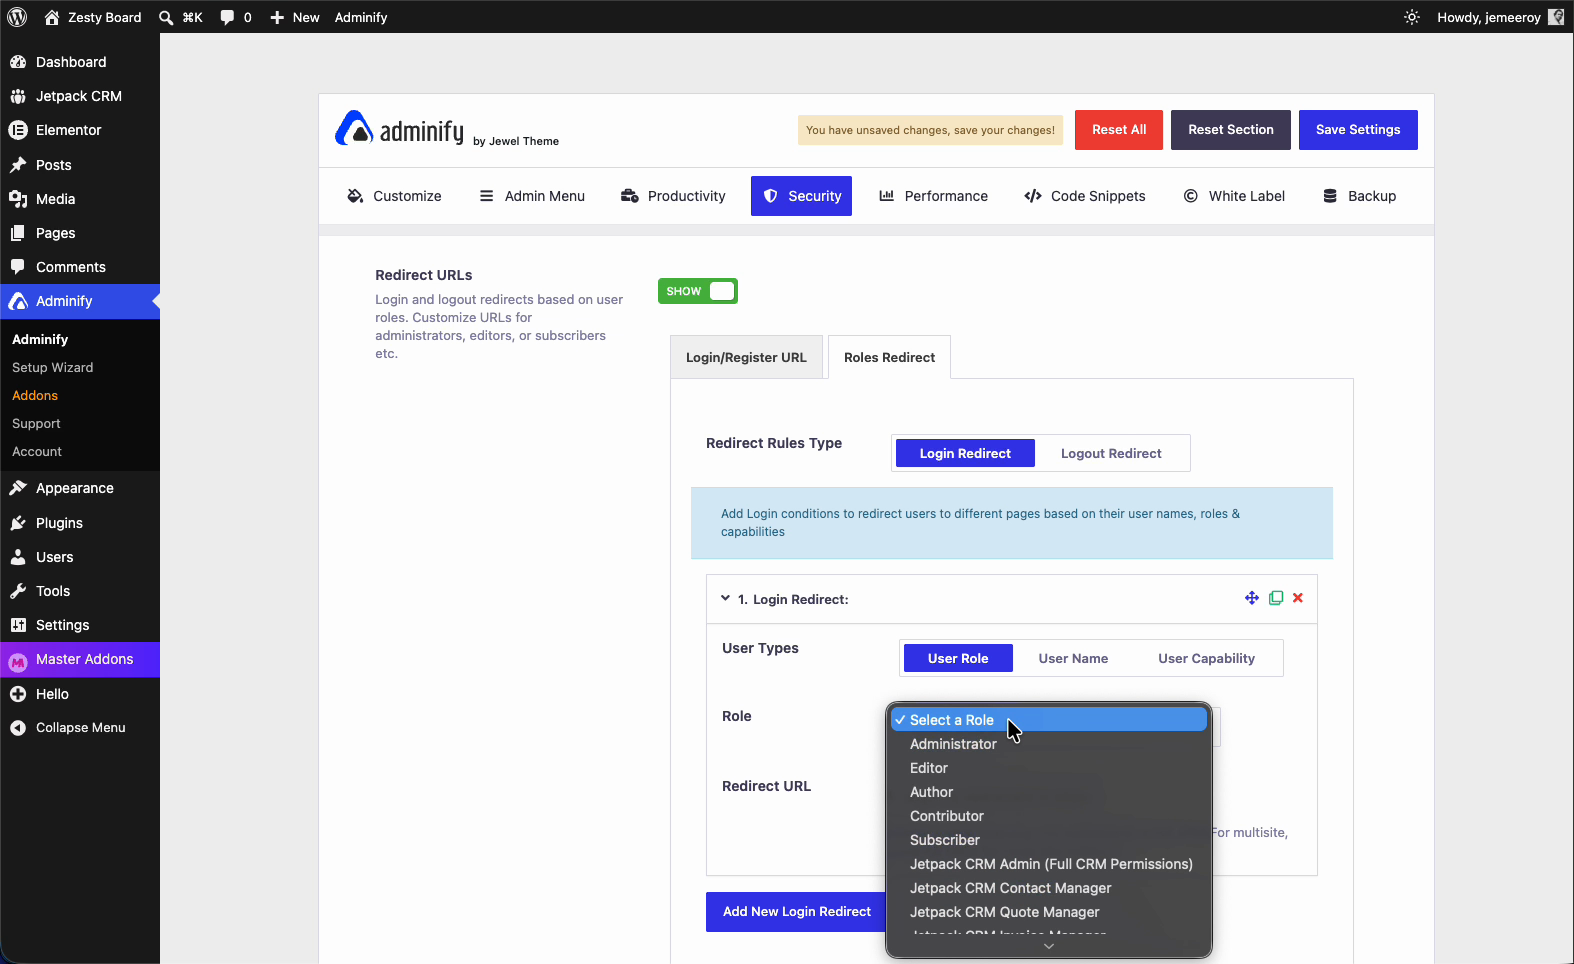
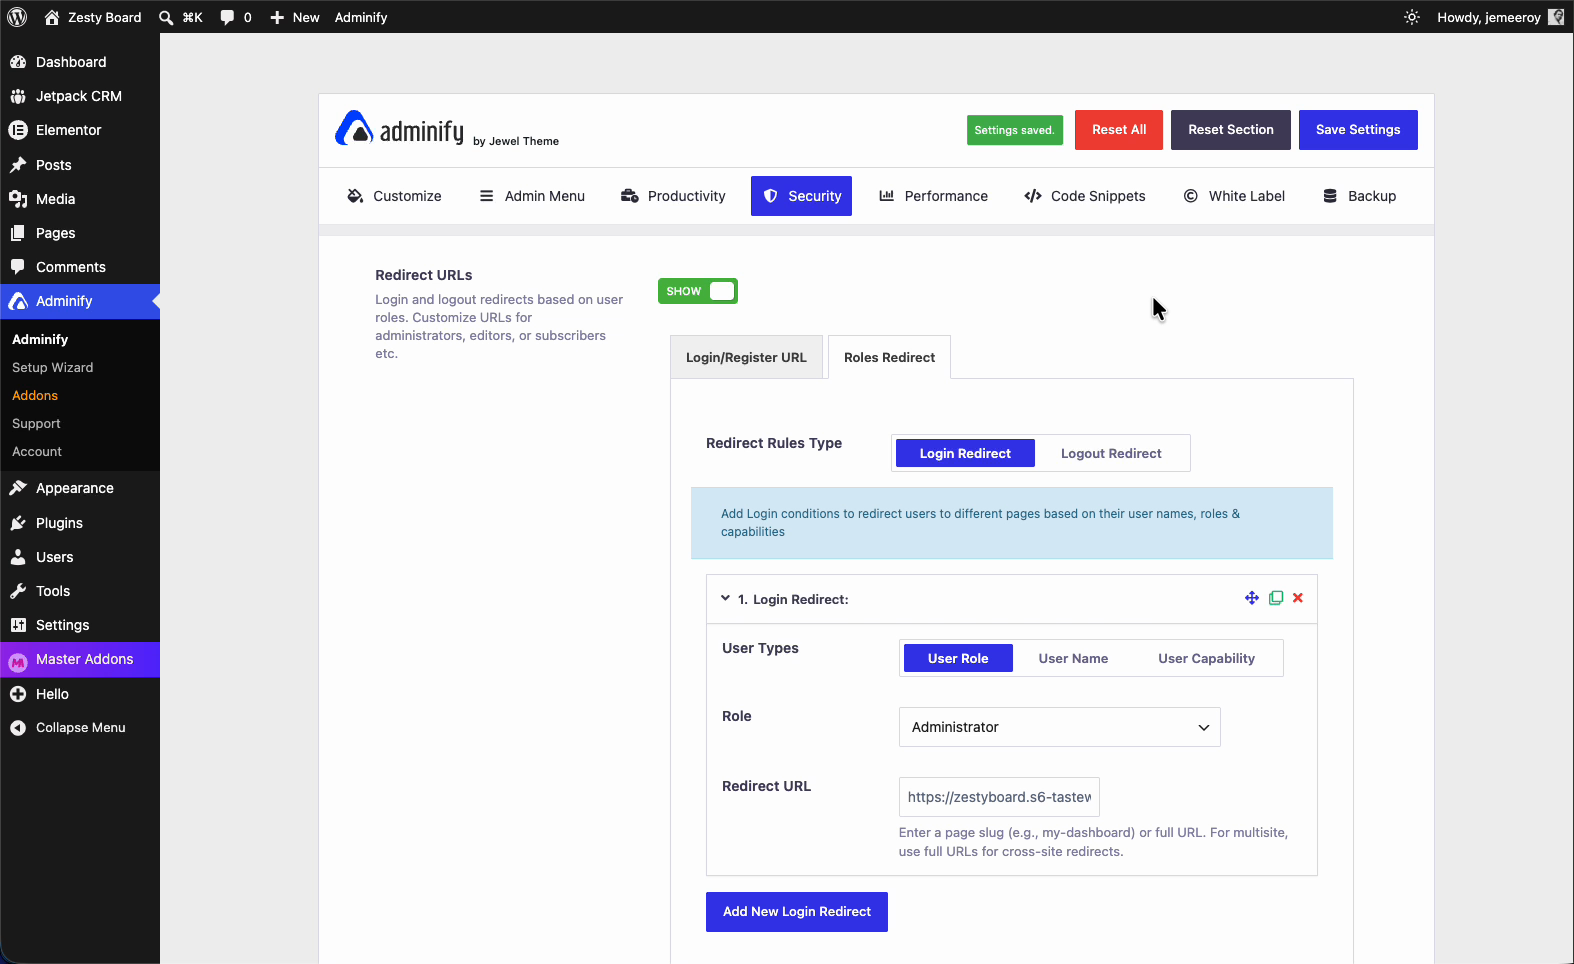
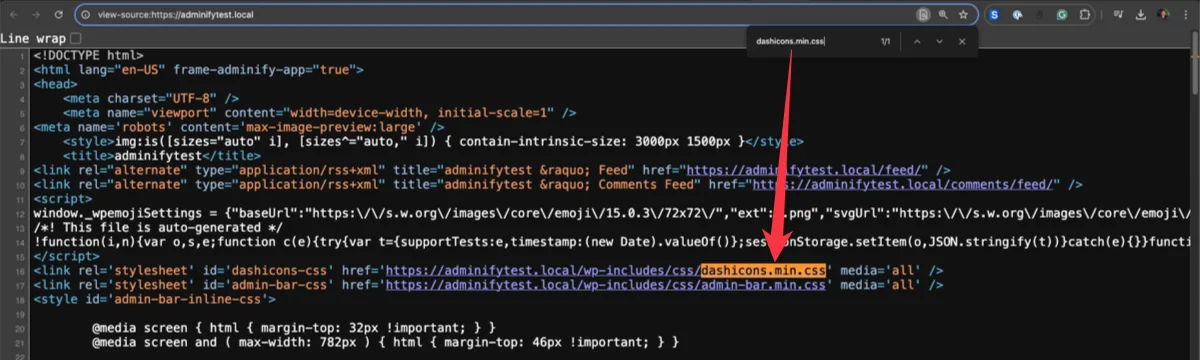
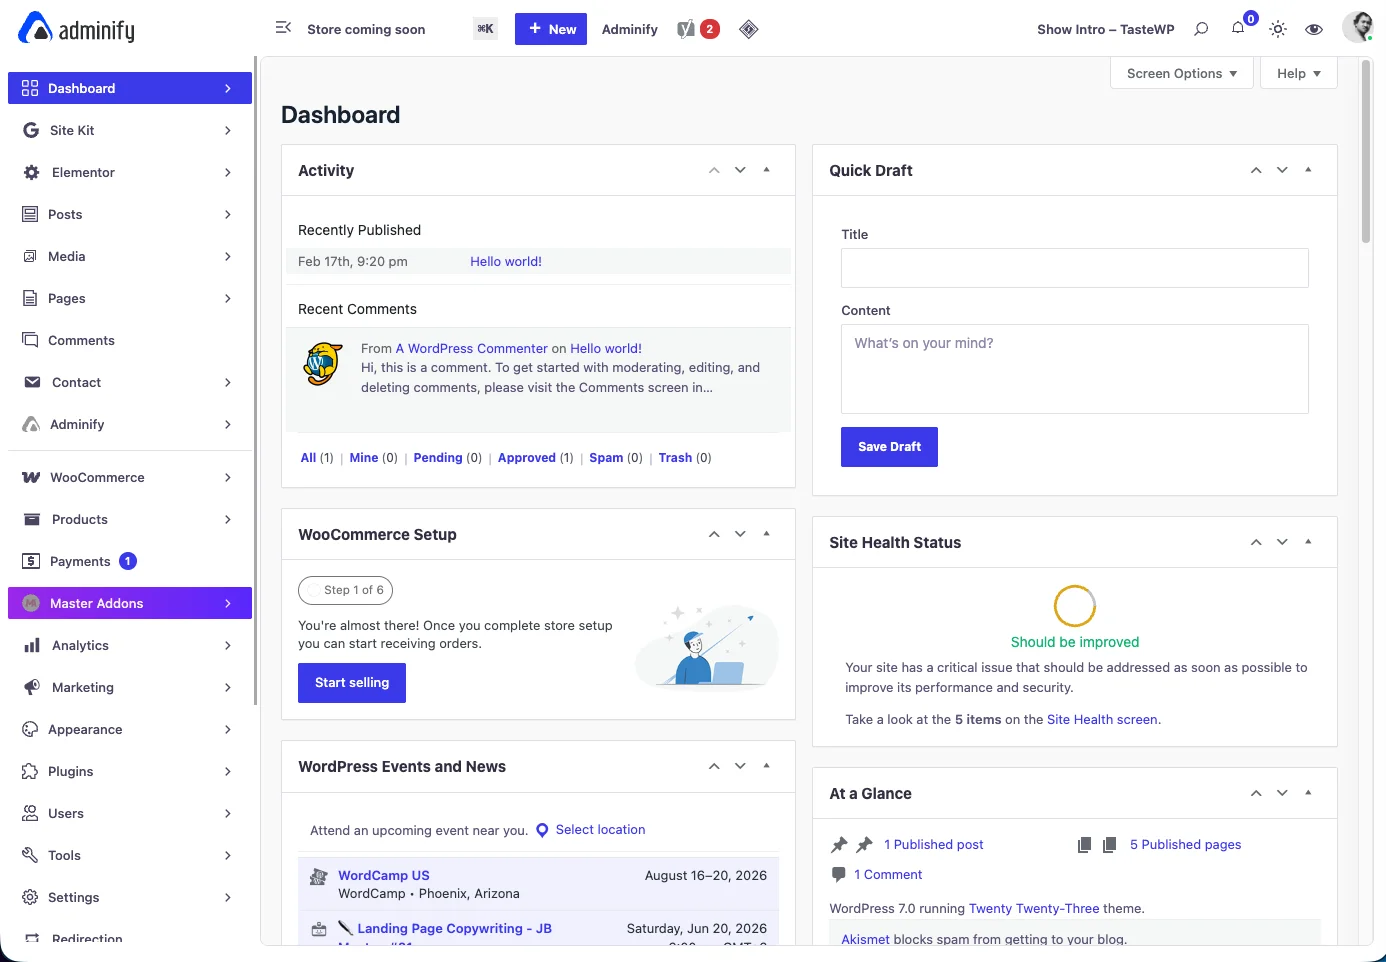
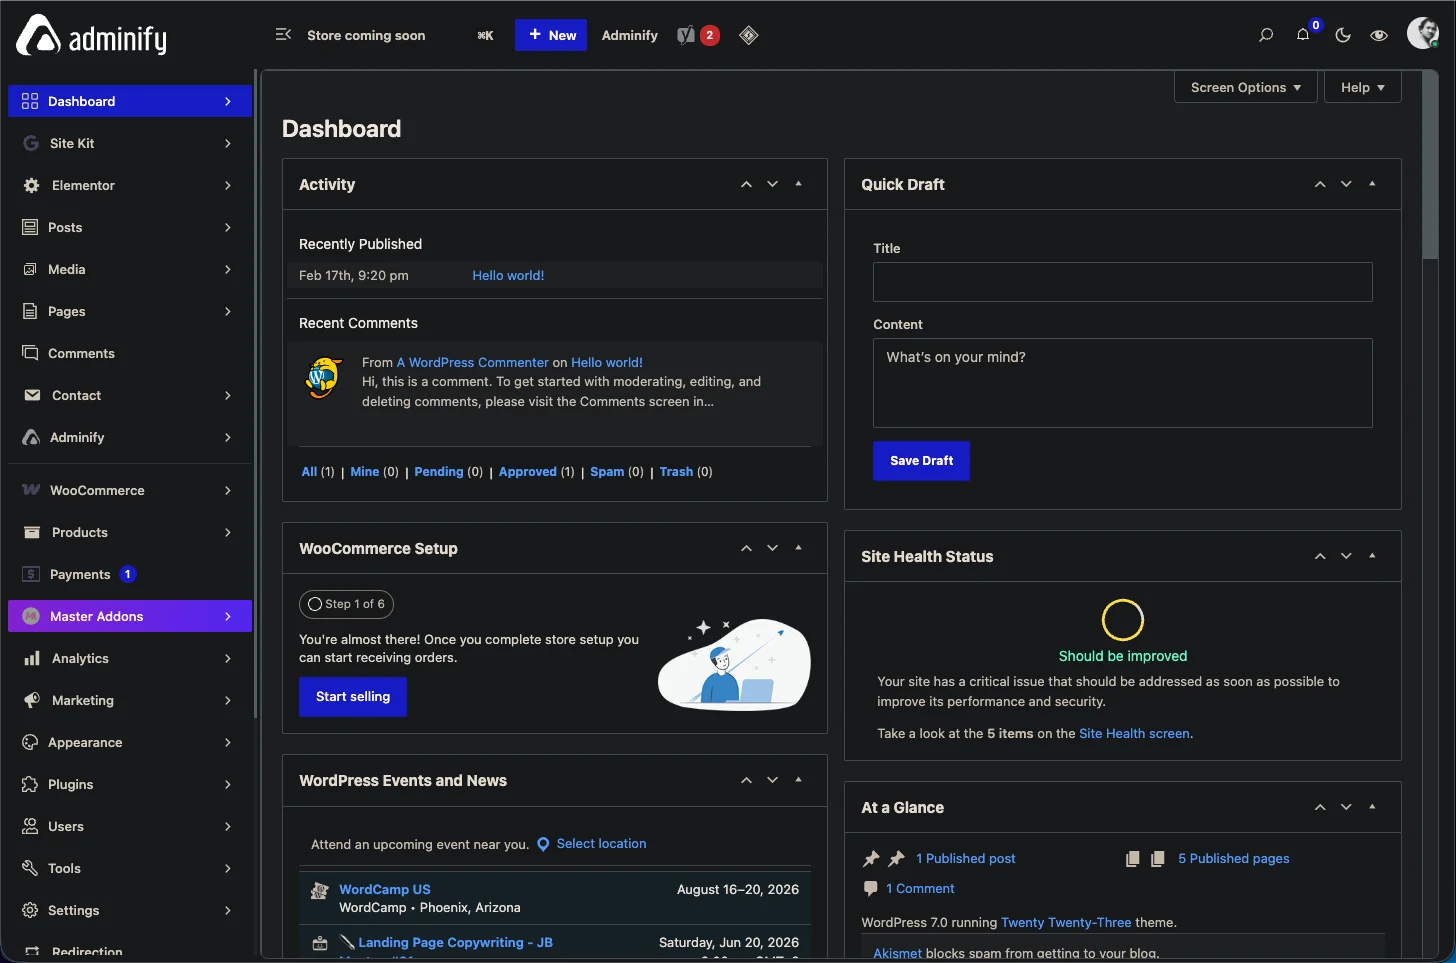
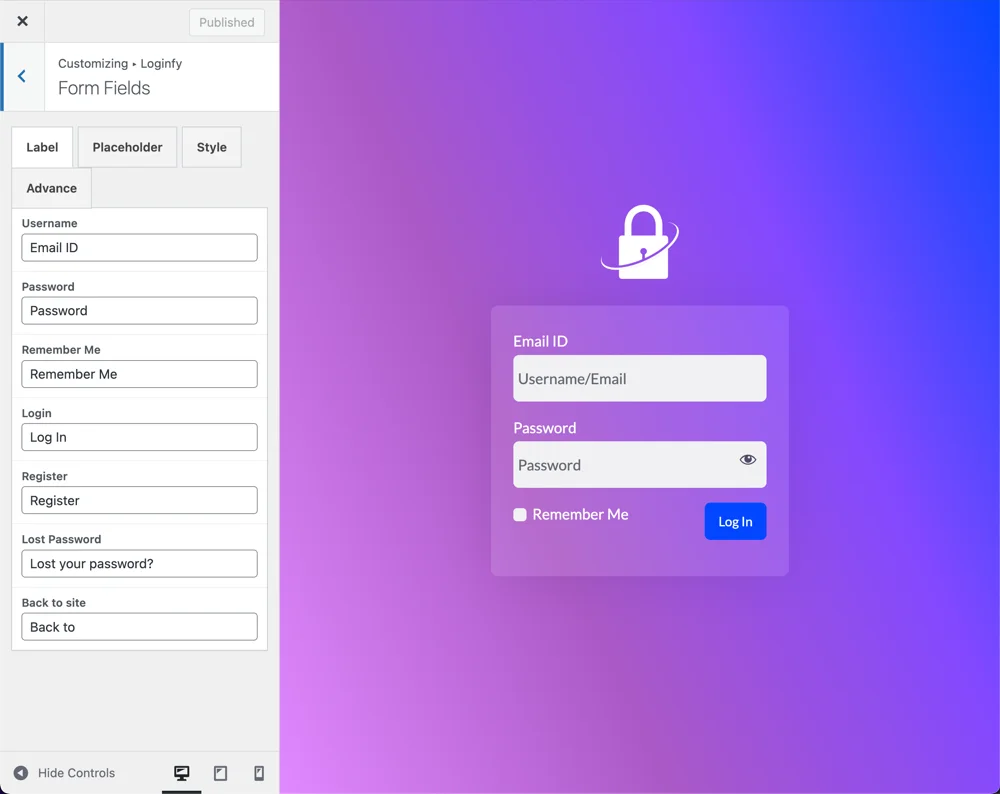
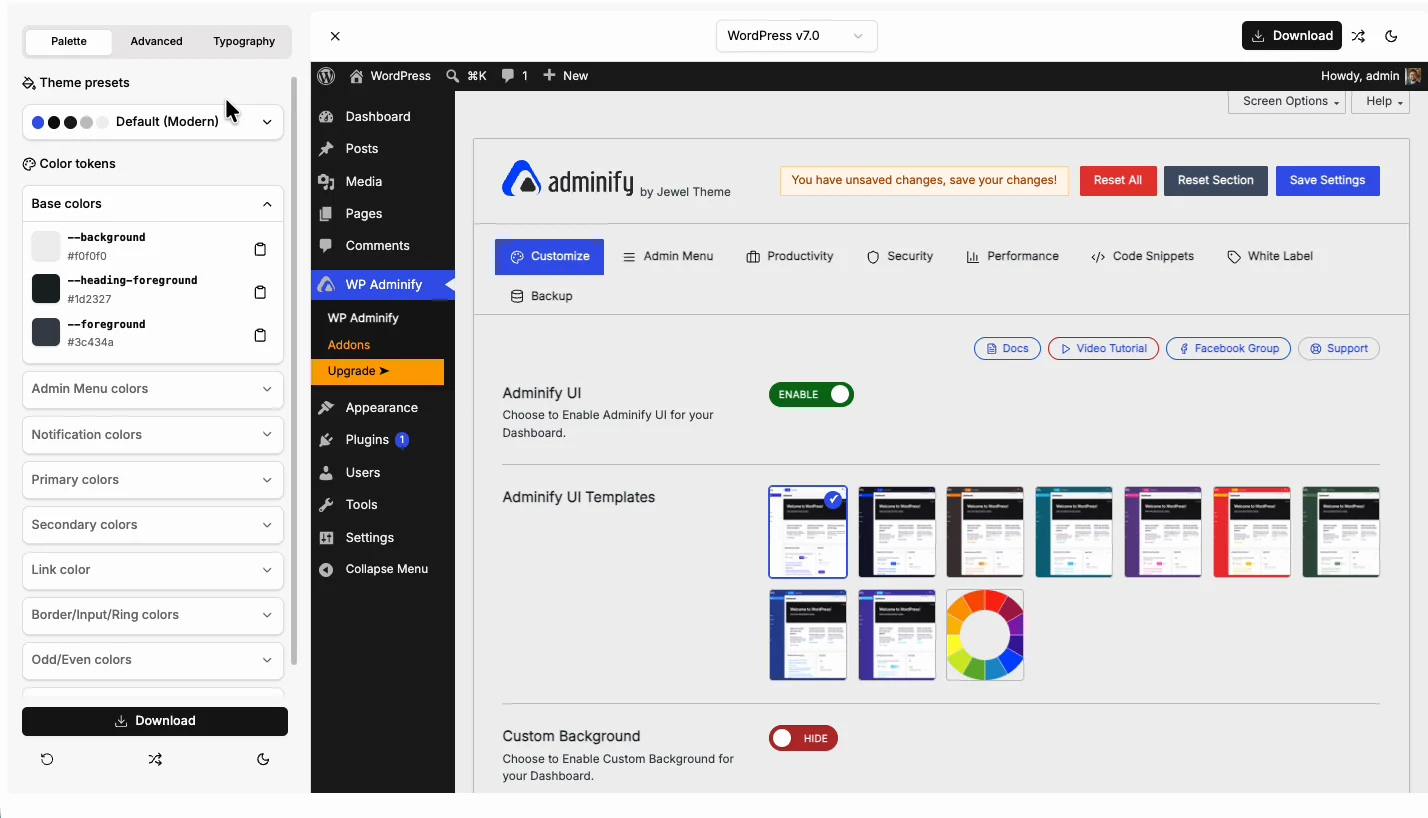
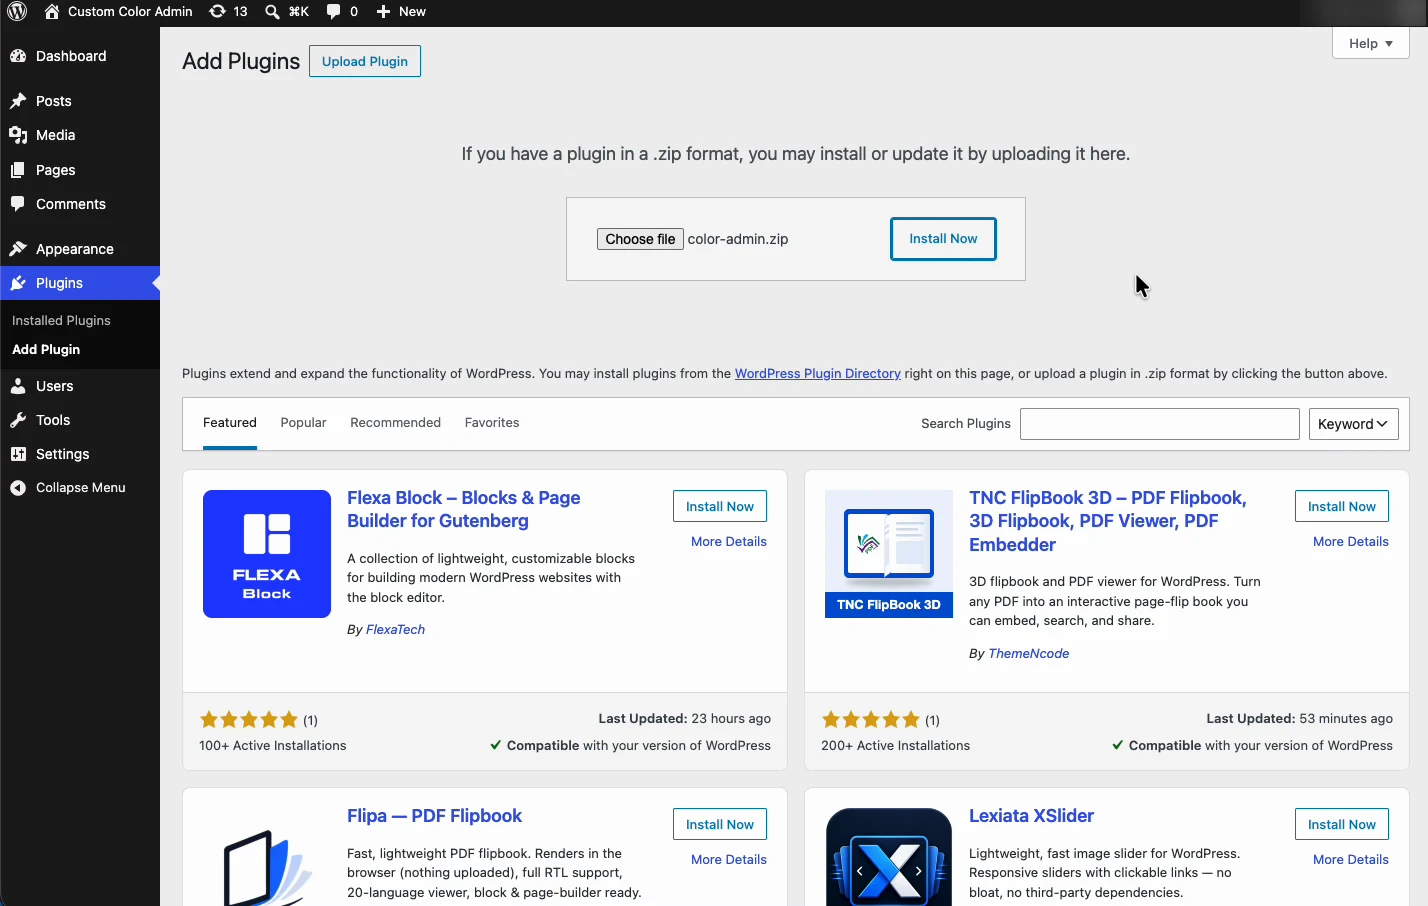
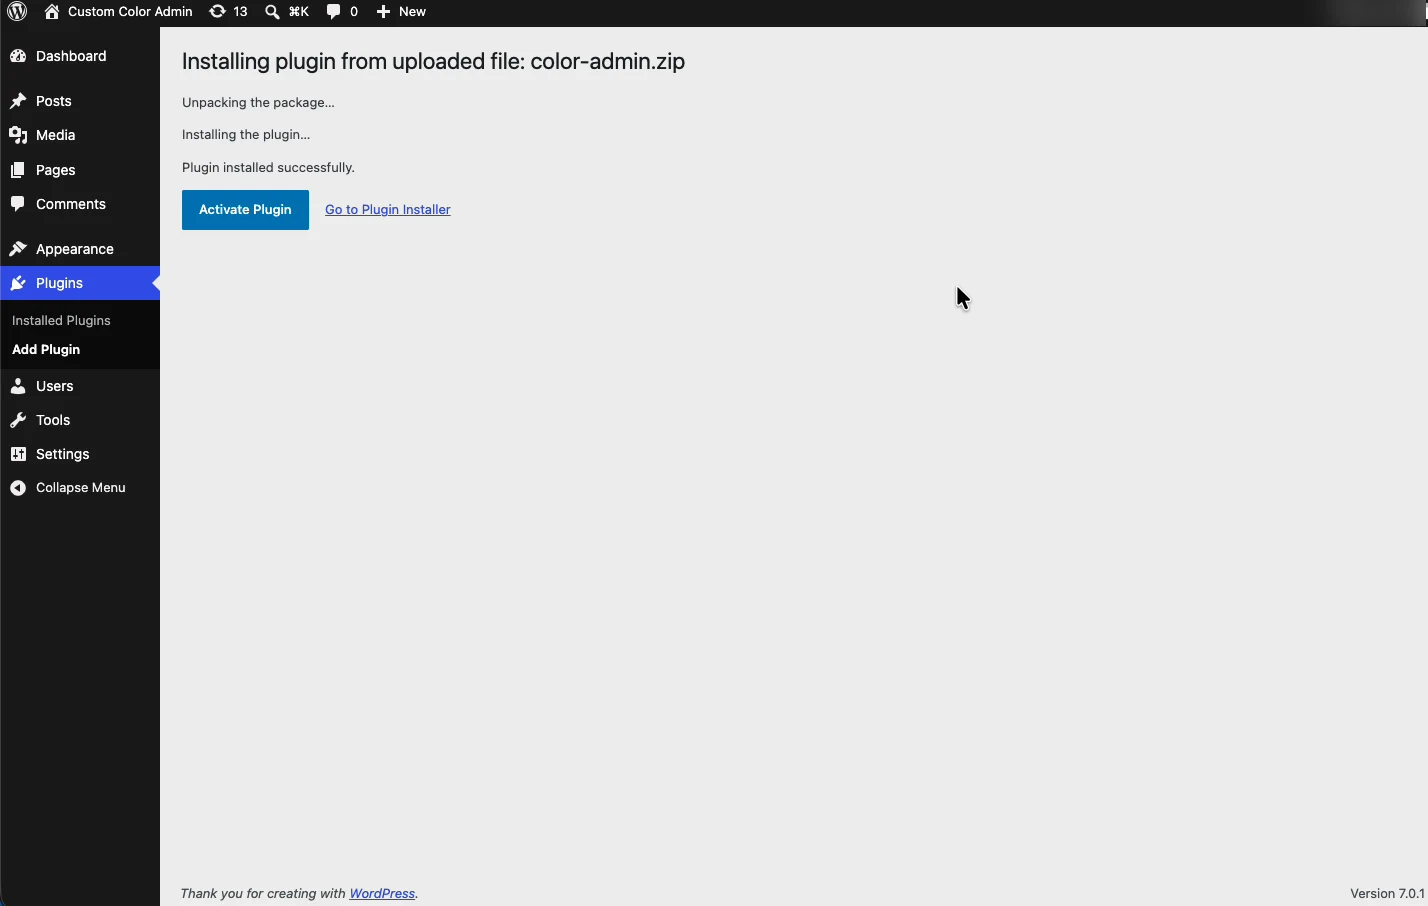
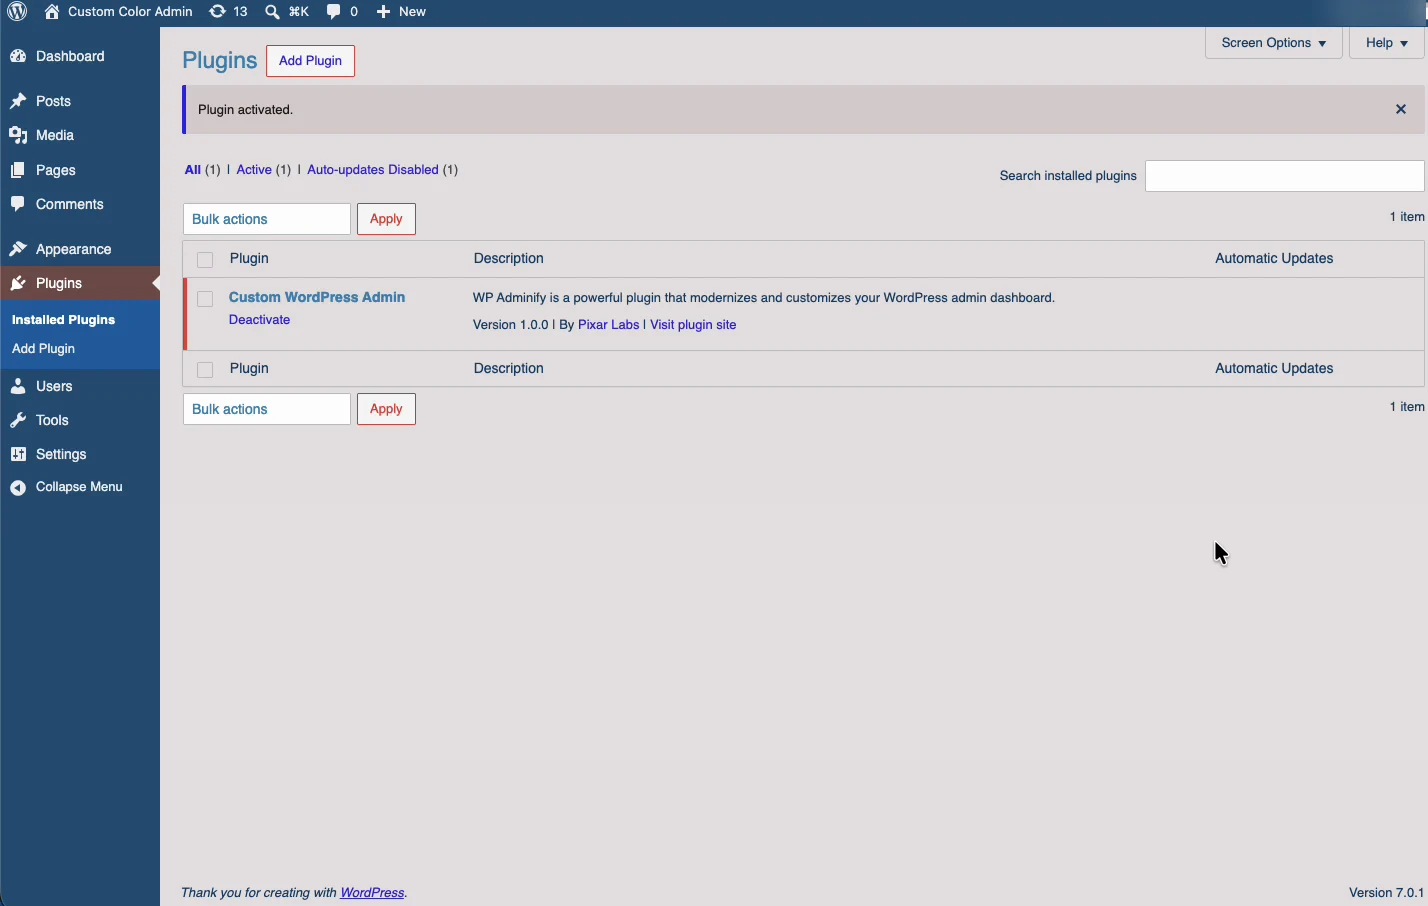




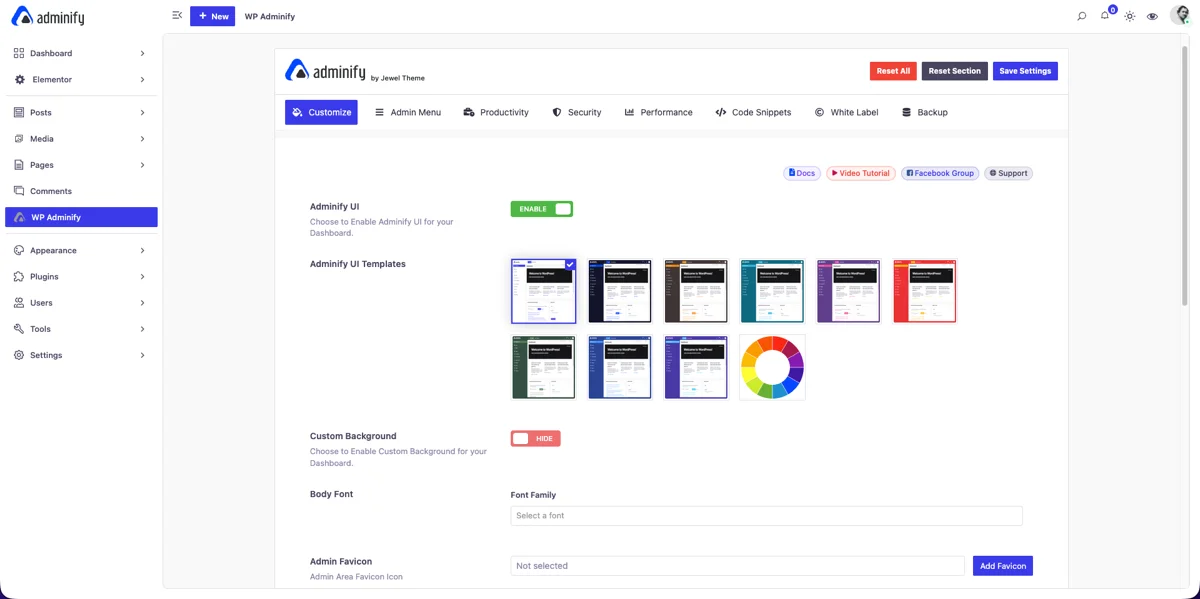
'; echo '

About Us

'; echo '

Everything you build here is hand-written HTML.

'; echo '
'; } ``` This registers the menu item and prints a heading. It works, and the [official add_menu_page() reference](https://developer.wordpress.org/reference/functions/add_menu_page/) documents every argument. But look at what's missing: layout, columns, images, buttons, spacing, responsiveness. All of it is now your job, in PHP strings, edited over FTP. For anything past a text dump this gets expensive fast, and it's not something you can hand to a non-technical client to maintain. ## Method 2: The no-code method with WP Adminify + Elementor WP Adminify's [Admin Pages feature](https://wpadminify.com/features/custom-admin-page) registers the page for you and hands the content over to a page builder. You enable the feature, create a page, choose where it sits in the menu, then click Edit with Elementor and design it like any front-end page. WP Adminify supports Gutenberg, Elementor, Bricks, Oxygen, and Divi, so you can use whichever builder your stack already runs. The walkthrough below uses Elementor on a WordPress 7.0 install. The whole thing takes a few minutes and never touches a code file. Here's each step. ## Step 1: Enable the Admin Pages feature From your WordPress dashboard, go to Adminify → Productivity. Scroll to the Admin Pages row and switch its toggle to YES. The description spells out what it does: "Custom Admin Pages for Creating Top Level or Sub Level Menu. Supports all page builders - Gutenberg, Elementor, Bricks, Oxygen, Divi etc." Click Save Settings in the top right. ![Enabling the Admin Pages feature toggle under the Productivity tab in WP Adminify settings](https://d1k2c27psfzbiv.cloudfront.net/wp-content/uploads/2026/06/13054100/01-enable-admin-pages-feature.png) This one toggle unlocks the rest of the workflow. Until it's on, the Admin Pages screen and the Elementor integration stay hidden. The feature sits next to the other [productivity tools](https://wpadminify.com/features/productivity) like the admin columns editor and post duplicator, so it's worth a look at those while you're on this tab. ## Step 2: Add a new admin page Once the feature is active, open the Admin Pages screen. It starts empty, with one obvious call to action: an Add Admin Page button at the top, and a table that will list every page you create along with its menu icon, parent menu, and the user roles allowed to see it. ![The Admin Pages list screen in WP Adminify with the Add Admin Page button and an empty page table](https://d1k2c27psfzbiv.cloudfront.net/wp-content/uploads/2026/06/13054106/02-add-admin-page-button.png) Click Add Admin Page. This opens a familiar block editor with one extra panel on the right labeled Admin Page. Give the page a title (this walkthrough builds an "About Us" page) and WP Adminify auto-generates a slug from it. Everything else is configured from that right-hand panel and the meta boxes below the editor, which we'll cover next. ## Step 3: Set the menu attributes (type, order, icon) The Menu Attributes section in the Admin Page panel controls where and how the page shows up in your admin sidebar. Three settings matter here: - Menu Type. Pick Top Level Menu to add a brand-new item to the main sidebar, or Sub Level Menu to nest the page under an existing menu (under Settings or Tools, say). Top level is best for pages clients should notice. Sub level keeps secondary pages tidy. - Menu Order. A number that decides where the item sits vertically in the sidebar. Lower numbers float higher. Default is 10. Drop it to 2 or 3 to push the page near the top, above Posts and Media. - Icon. Click Add to pick an icon for the menu item. This is the equivalent of the Dashicon you'd otherwise pass to `add_menu_page()`, except you choose it visually instead of by slug. ![Setting the Menu Type, Menu Order, and Icon in the WP Adminify Admin Page panel](https://d1k2c27psfzbiv.cloudfront.net/wp-content/uploads/2026/06/13054109/03-admin-page-menu-attributes.png) If you're building several related screens, this is also where the structure of your [custom admin menu](https://wpadminify.com/how-to-create-a-wordpress-custom-admin-menu) takes shape. Use a top-level parent page and nest the rest underneath it as sub-level menus for a clean hierarchy. ## Step 4: Configure display options Below the editor sits a Meta Boxes area with a Display Options panel. This is where you strip away the default WordPress chrome so your design renders cleanly, without the usual admin framing fighting your layout. The Enable/Disable tab gives you three toggles: - Remove Page Title hides the default heading WordPress prints at the top, so your Elementor hero section starts at the very top. - Remove Page Margin removes the default padding around the content area, letting full-width designs reach edge to edge. - Remove Admin Notices suppresses plugin and update notices on this page, which keeps a client-facing screen free of clutter. ![The Display Options meta box showing Remove Page Title, Remove Page Margin, and Remove Admin Notices checkboxes](https://d1k2c27psfzbiv.cloudfront.net/wp-content/uploads/2026/06/13054113/04-display-options-metabox.png) For a branded look, turn on all three. You end up with an admin page that behaves like a blank canvas rather than a standard settings screen. If you'd rather keep the native title and spacing (for an internal docs page where consistency with the rest of `wp-admin` matters), leave them unchecked. There's also a Custom CSS/JS tab here if you ever need to fine-tune beyond what the builder offers. ## Step 5: Restrict access by user role The User Roles Access tab decides who can see the page. In the Allow users to access this page field, add the roles that should have access. Administrator is selected by default. Add Editor, Author, or any custom role from your [role setup](https://wpadminify.com/rolemaster-suite), and remove Administrator if the page is meant only for a specific group. ![The User Roles Access panel allowing the page to be shown only to the Administrator role](https://d1k2c27psfzbiv.cloudfront.net/wp-content/uploads/2026/06/13054118/05-user-roles-access.png) This is a real advantage over the hand-coded route. With `add_menu_page()`, access is tied to a single capability string like `manage_options`, and supporting multiple roles means writing extra capability checks. Here you pick roles from a list. A client onboarding page can be visible to the client's Editor account but hidden from your agency's developer logins, and a sensitive internal page can be locked to Administrators only, all without code. ## Step 6: Design the page with Elementor Now the part that makes this worth doing. At the top of the editor, click Edit with Elementor. WP Adminify loads the page inside the Elementor editor exactly as if it were a front-end page. You get the full widget panel (containers, headings, images, buttons, videos, dividers) plus the template library, so you can drop in a pre-built block and adapt it instead of starting blank. ![Designing the custom admin page inside the Elementor editor using the widget panel](https://d1k2c27psfzbiv.cloudfront.net/wp-content/uploads/2026/06/13054123/06-edit-with-elementor-widgets.png) Build the page like you would any landing page. Drag in a container, add a hero with a heading and call-to-action buttons, embed a video, lay out feature columns. Because the display options from Step 4 stripped the default title and margins, your design fills the admin content area naturally. This is the whole reason the workflow exists: a non-developer can produce a screen that would otherwise need hand-written markup inside a PHP callback. ![A finished About Us admin page designed in Elementor with a hero section, video, and call-to-action buttons, ready to publish](https://d1k2c27psfzbiv.cloudfront.net/wp-content/uploads/2026/06/13054128/07-design-admin-page-elementor.png) The same no-code idea powers a [custom user dashboard without coding](https://wpadminify.com/how-to-create-wordpress-custom-user-dashboard-without-coding). If you've used a builder to design a front-end page, you already know everything you need to design an admin one. When the layout looks right, hit Publish in Elementor. ## Step 7: Publish and view the live admin page After publishing, your new item shows up in the WordPress admin sidebar with the icon you chose. Click it, and the Elementor-designed page renders right there inside `wp-admin`: heading, video, buttons, columns, all of it, framed by the normal admin chrome but built entirely with your layout. ![The finished custom admin page live in the WordPress admin sidebar, showing the Elementor design inside wp-admin](https://d1k2c27psfzbiv.cloudfront.net/wp-content/uploads/2026/06/13054133/08-custom-admin-page-live.png) That's the full loop. Enable the feature, create the page, set the menu and access, design in Elementor, publish. No FTP, no `functions.php`, no hand-written HTML, and the page is editable any time by reopening it in the builder. You can hand a client an account that logs straight into a screen built for them. ## Code method vs no-code method Both approaches register a real admin page. The difference is who can build it and how much it costs to maintain. | Factor | Manual code (add_menu_page) | WP Adminify + Elementor | | --- | --- | --- | | Skill required | PHP and HTML | None, visual builder | | Layout and design | Hand-coded HTML/CSS | Drag-and-drop in Elementor | | Menu position and icon | Function arguments | Visual fields and icon picker | | Role-based access | Single capability + custom checks | Multi-role selector | | Editing later | Edit code over FTP | Reopen in the builder | | Client can maintain it | No | Yes | The code method is fine for a developer who needs a quick utility screen and will never restyle it. The no-code method wins the moment the page needs to look designed, support multiple roles, or get edited by someone who doesn't write PHP. ## Common issues and fixes - The "Edit with Elementor" button is missing. Check that Elementor is installed and active, and that you saved the admin page as a draft first. The builder hands off from an existing post, so the page has to exist before Elementor can open it. - The page doesn't show in the sidebar. Re-check the User Roles Access tab. If your current role isn't on the allow list, the menu item is hidden from you by design. Add your role and refresh. - The design has unwanted spacing at the top. Go back to the Display Options meta box, turn on Remove Page Title and Remove Page Margin, then update the page. - Two menu items collide in the same position. Adjust the Menu Order number so each page has a distinct value. Identical orders can render in an unpredictable sequence. ## Custom Admin Page FAQs ### Can you create a custom admin page in WordPress without coding? Yes. With WP Adminify's Admin Pages feature you enable the option under Productivity, click Add Admin Page, then design the page with Elementor, Gutenberg, Bricks, Oxygen, or Divi. The plugin registers the menu item and renders your design inside wp-admin, so no PHP or HTML is required. ### Does this work with Elementor free or only Elementor Pro? It works with the free version of Elementor. The Admin Pages feature loads the admin page into whatever Elementor build you have installed. Elementor Pro adds more widgets and template kits, but the core ability to design and publish a custom admin page doesn't depend on it. ### How is this different from add_menu_page in functions.php? The add_menu_page() function registers a blank admin screen that you fill with hand-written HTML inside a PHP callback. WP Adminify registers the same kind of page but lets you build the content visually with a page builder, set the menu position and icon through form fields, and control access by user role, all without writing code. ### Can I control which user roles see the custom admin page? Yes. Each admin page has a User Roles Access setting where you list the roles allowed to view it. Administrator is selected by default, and you can add or remove roles like Editor or Author. This keeps client-facing or internal pages visible only to the right people. ### Can I add the page as a submenu under an existing menu? Yes. In the Menu Attributes section, set Menu Type to Sub Level Menu to nest the page under an existing parent, or keep it as Top Level Menu to add a new item to the main sidebar. The Menu Order field then controls its vertical position. ### Will the custom admin page slow down my dashboard? The page only loads when a permitted user opens it, so it doesn't affect other admin screens. As with any Elementor page, keep the design lean: compress images and avoid heavy embeds to hold load times down. For wider admin performance, check WP Adminify's Heartbeat and asset controls. ## Conclusion Building a custom admin page in WordPress no longer means living inside `functions.php`. WP Adminify's Admin Pages feature handles the registration, menu placement, role control, and rendering for you, and Elementor gives you a real design surface inside the dashboard. - Enable Admin Pages under Adminify → Productivity. - Create the page and set its menu type, order, and icon visually. - Use display options and user roles access to control how it looks and who sees it. - Design with Elementor and publish, no code at any step. If you manage client sites or your own multi-author setup, a branded admin page is one of the highest-impact, lowest-effort upgrades you can ship. Try it with [WP Adminify's Custom Admin Page feature](https://wpadminify.com/features/custom-admin-page), then pair it with a clean [admin menu editor](https://wpadminify.com/features/admin-menu-editor) setup to round out the experience. ### Admin Pages Are Better on a Custom Dashboard A custom admin page lands best inside a dashboard that already feels like yours. The guide to [customizing the WordPress dashboard](https://wpadminify.com/wordpress-dashboard-customization) ties it together - menus, widgets, branding - and the [admin pages doc](https://wpadminify.com/docs/adminify/productivity/custom-admin-pages) covers every setting. --- # Replace 50+ WordPress Plugins with One: The WP Adminify Guide (2026) URL: https://wpadminify.com/replace-wordpress-plugins-with-wp-adminify Last updated: 2026-08-13 Every plugin you install on a WordPress site adds weight - extra database queries, HTTP requests, potential security vulnerabilities, and update fatigue. If you manage client sites, the problem multiplies fast. A typical agency WordPress install stacks 8-12 admin-focused plugins just to customize the dashboard, secure the login page, organize media, and clean up notices. What if you could replace over 50+ of those plugins with a single, actively maintained solution? [WP Adminify](https://wpadminify.com/) consolidates 60+ admin customization, security, and productivity features into one plugin - eliminating plugin conflicts, reducing server load, and giving you a single settings panel instead of a dozen. In this guide, we break down exactly which plugins WP Adminify replaces, feature by feature, with real comparisons. - 50+ Plugins Replaced by WP Adminify - Security Plugins Replaced by WP Adminify - Productivity plugins Replaced by WP Adminify - Performance plugins Replaced by WP Adminify ## The Real Cost of Plugin Bloat Plugin bloat is more than a performance issue - it is a compounding maintenance and security risk. Every active plugin on your WordPress site introduces: Additional database queries on every page load, even in the admin area JavaScript and CSS files that queue up and slow down the dashboard Security surface area - each plugin is a potential entry point for attackers. According to [Patchstack's 2024 WordPress Security Report](https://patchstack.com/whitepaper/state-of-wordpress-security-in-2024/), 97% of WordPress vulnerabilities originate from plugins Update fatigue - more plugins means more updates to track, test, and deploy. Miss one critical update and you're exposed Plugin conflicts - the more plugins interacting with the same WordPress hooks (like `admin_menu`, `login_head`, or `wp_dashboard_setup`), the higher the chance of incompatibility Licensing overhead - if even 5 of your admin plugins are premium, you're managing 5 separate licenses, renewal dates, and support channels For agencies managing 10, 20, or 50+ client sites, this problem doesn't scale. You need fewer moving parts, not more. The math is simple: If each plugin adds an average of 2 database queries and 1 CSS/JS file to the admin, 50 plugins means 100 extra queries and 50 additional file requests on every dashboard page load. Consolidating to one plugin cuts that dramatically. ## Customization Plugins WP Adminify Replaces Dashboard customization is where most WordPress sites start accumulating single-purpose plugins. You install one for dark mode, another for custom fonts, a third for color-coded post statuses, and before long, your plugin list has grown by half a dozen entries - each doing one small thing. WP Adminify's [Dashboard Customization](https://wpadminify.com/features/dashboard-customization) feature and [White Label WordPress](https://wpadminify.com/features/white-label) features cover all of this in a single settings panel. ### Dark Mode & Light Mode Toggle Plugin it replaces: Darklup – Dark & Light Mode Many site owners want a dark mode for the WordPress admin - especially developers who spend hours in the backend. Darklup is a popular standalone plugin for this. WP Adminify includes a built-in [Light and Dark Mode](https://wpadminify.com/features/dark-mode) toggle with auto-scheduling. You can set the dashboard to automatically switch between light and dark modes based on time of day. It also supports independent logo uploads for each mode, so your white-label branding looks correct regardless of the active theme. Navigate to WP Adminify > Customize > Dark Mode to enable it. ![WP Adminify dark mode settings panel showing the light/dark toggle and scheduling options](https://d1k2c27psfzbiv.cloudfront.net/wp-content/uploads/2024/03/12112554/WP-Adminify-Dark-mode-Enhanced.gif) ### Custom Admin Fonts Plugin it replaces: Custom Fonts (400,000+ active installs) The Custom Fonts plugin by Brainstorm Force lets you host Google Fonts locally or upload custom font files. For the admin area specifically, WP Adminify lets you change dashboard typography directly through its UI Customization settings - no separate plugin needed. Navigate to WP Adminify > Customize > Body Font to choose your admin font family, size, and weight. ![change WordPress Admin Font](https://d1k2c27psfzbiv.cloudfront.net/wp-content/uploads/2026/04/08095936/change-WordPress-Admin-Font.webp) ## Media & Folder Plugins WP Adminify Replaces Organizing the WordPress media library has been a pain point since the platform's inception. The default media library is a flat, date-based structure with no folders - leading to the rise of several popular folder organization plugins. Plugins it replaces: | Plugin | Active Installs | Rating | | --- | --- | --- | | Folders | 90,000+ | 5.0/5 | | FileBird | 200,000+ | 4.7/5 | | Media Library Folders | 10,000+ | 4.3/5 | | Media Library Enable Infinite Scrolling | 8,000+ | 5.0/5 | WP Adminify's [Media Library Folders](https://wpadminify.com/features/wordpress-media-folder) module provides: - Drag-and-drop folder creation with unlimited nesting - Subfolder support for organizing media by project, client, or content type - Folder-based filtering to quickly locate files - Bulk move - select multiple files and drop them into a folder Bulk drag and drop images into folders in WP Adminify media library This eliminates the need for dedicated media organization plugins like FileBird (200,000+ installs) or Folders (90,000+ installs). For sites with large media libraries (5,000+ images), having the folder functionality integrated into the same plugin that handles your admin menu, dashboard, and security means fewer plugin interactions competing for the same WordPress hooks - reducing the chance of conflicts. ## Post Status Background Colors Plugin it replaces: Colored Admin Post (500+ active installs) This niche plugin highlights rows in the post list with background colors based on status (Draft = yellow, Pending = orange, Published = green). WP Adminify includes post status color customization as part of its admin UI enhancements, giving you the same visual cues without a dedicated plugin. ![WordPress post list with color-coded status rows in WP Adminify](https://d1k2c27psfzbiv.cloudfront.net/wp-content/uploads/2024/09/24060024/Post-Status-Background-Colors.webp) ### Full Admin Interface Customization Plugins it replaces: | Plugin | Active Installs | Rating | What It Does | | --- | --- | --- | --- | | WP Custom Admin Interface | 30,000+ | 4.7/5 | Customize admin menu, toolbar, login page | | AGCA – Custom Dashboard & Login Page | 20,000+ | 4.5/5 | Customize admin panel, login page, admin bar | | White Label CMS | 200,000+ | 4.7/5 | White label branding for client dashboards | These three plugins each offer partial admin customization. White Label CMS handles branding, AGCA handles granular admin element hiding, and WP Custom Admin Interface covers menu and toolbar tweaks. WP Adminify replaces all three with its [White Label](https://wpadminify.com/features/white-label) module - covering custom logo, favicon, admin footer text, "Howdy" replacement, WordPress branding removal, admin bar customization, and full UI templating (Light, Dark, Modern, Glass morphism styles). The key difference: These plugins were last updated 10-11 months ago (tested only up to WP 6.8.5), while WP Adminify receives monthly updates and is tested with the latest WordPress releases. For developers who prefer code-level control, you can achieve basic white labeling with `functions.php`: ``` // Replace "Howdy" text in admin bar function adminify_replace_howdy( $wp_admin_bar ) { $my_account = $wp_admin_bar->get_node( 'my-account' ); $new_title = str_replace( 'Howdy,', 'Welcome,', $my_account->title ); $wp_admin_bar->add_node( array( 'id' => 'my-account', 'title' => $new_title, ) ); } add_filter( 'admin_bar_menu', 'adminify_replace_howdy', 25 ); ``` But once you need logo replacement, footer customization, UI templates, and role-based visibility - managing all of that through code snippets becomes impractical. That's where WP Adminify's GUI saves hours. ![WP Adminify White Label settings panel showing logo upload, footer text, and Howdy replacement fields](https://d1k2c27psfzbiv.cloudfront.net/wp-content/uploads/2022/10/07111438/WP-Adminify-plugin-white-label.webp) ## Security Plugins WP Adminify Replaces WordPress security is a domain where plugin stacking gets out of hand fast. One plugin to hide the login URL, another to disable XML-RPC, a third for REST API restrictions, and so on. Each addresses a single hardening measure. WP Adminify's [Security feature](https://wpadminify.com/features/security) bundles the most commonly needed hardening features into one place. ### Hide Login URL & Login Redirects Plugins it replaces: | Plugin | Active Installs | Rating | What It Does | | --- | --- | --- | --- | | WPS Hide Login | 2,000,000+ | 4.8/5 | Changes the login page URL from `/wp-admin` to a custom slug | | LoginWP | 90,000+ | 4.8/5 | Role-based login/logout redirects | WPS Hide Login is one of the most popular security plugins in the WordPress ecosystem with over 2 million active installs. It does exactly one thing: change the login URL. WP Adminify includes [Change Login URL](https://wpadminify.com/change-wordpress-login-page-url) functionality plus [role-based login and logout redirects](https://wpadminify.com/features/url-redirection) - combining what both WPS Hide Login and LoginWP do separately. You can send administrators to the dashboard, customers to their account page, and editors to the post list - all from a single settings screen. Navigate to WP Adminify > Security > URL Redirection to configure both. ![How to Change WordPress login page URL](https://d1k2c27psfzbiv.cloudfront.net/wp-content/uploads/2022/03/18103401/How-to-Change-WordPress-login-page-URL.webp) Pro Tip: When changing your login URL, always test it in an incognito browser window before logging out. If you forget your custom URL, you can deactivate WP Adminify via FTP/SFTP to restore the default `/wp-login.php` path. ### Disable XML-RPC Plugin it replaces: Disable XML-RPC-API (100,000+ active installs) The XML-RPC protocol is a legacy WordPress interface that's frequently exploited for brute-force amplification attacks and DDoS. Most modern WordPress sites don't need it - the REST API handles remote communication now. WP Adminify includes a [Disable XML-RPC](https://wpadminify.com/features/security) toggle in its Security module. One click, done. For developers, the manual approach: ``` // Disable XML-RPC completely add_filter( 'xmlrpc_enabled', '__return_false' ); // Also remove the X-Pingback header add_filter( 'wp_headers', function( $headers ) { unset( $headers['X-Pingback'] ); return $headers; }); ``` ### Disable Self-Pings Plugin it replaces: No Self Ping (10,000+ active installs) When you link to your own posts, WordPress sends itself a pingback request - cluttering your comments with self-referential notifications. WP Adminify eliminates this with a simple toggle. ![Disable self ping and input self websites](https://d1k2c27psfzbiv.cloudfront.net/wp-content/uploads/2026/04/08081903/Disable-self-ping-and-input-self-websites.webp) ### Remove Meta Generator & Version Info Plugin it replaces: Meta Generator and Version Info Remover (10,000+ active installs, 5.0/5 rating) Exposing your WordPress version number in the HTML source (``) gives attackers a quick way to identify which known vulnerabilities apply to your site. WP Adminify's Clean Up Head Section feature removes the generator tag, RSD link, WLW Manifest, shortlinks, and version strings from enqueued scripts and stylesheets. ![Remove WordPress generator version in frontend](https://d1k2c27psfzbiv.cloudfront.net/wp-content/uploads/2024/09/28041952/Remove-WordPress-generator-version-in-frontend.webp) ### Disable RSS Feeds Plugin it replaces: Disable Feeds WP (10,000+ active installs) Some sites - particularly client portals, membership sites, and internal tools - have no use for RSS feeds. Leaving them active exposes content to scrapers. WP Adminify can disable all RSS/Atom/RDF feeds and redirect feed URLs to the homepage. ### Disable REST API for Logged-Out Users Plugin it replaces: Disable WP REST API (30,000+ active installs) The WordPress REST API exposes endpoints like `/wp-json/wp/v2/users/` that can leak author usernames to unauthenticated visitors. WP Adminify's Restrict REST API feature blocks access for non-authenticated users while keeping it functional for logged-in administrators and editors. ### Disable Comments Globally Plugin it replaces: Disable Comments (1,000,000+ active installs, 4.7/5 rating) Disable Comments by developer Flavor is one of the most widely used utility plugins, with over 1 million installs. It removes the entire comment system - comment forms, admin menu items, dashboard widgets, and toolbar links. WP Adminify includes a [Disable Comments](https://wpadminify.com/features/disable-comments-on-wordpress) toggle that does the same thing: removes comment fields globally, hides related admin menu items, and closes comments on all existing posts and pages. ![Disable comments in WordPress Website](https://d1k2c27psfzbiv.cloudfront.net/wp-content/uploads/2024/08/12110755/Disable-comments-in-WordPress-Website.webp) ## Admin Menu Plugins WP Adminify Replaces The WordPress admin sidebar is the primary navigation interface - and it's one of the first things agencies customize for clients. Hiding complex options, reordering items, and adding custom links typically requires multiple plugins. WP Adminify's [Admin Menu Editor](https://wpadminify.com/features/admin-menu-editor) handles all of this with a visual drag-and-drop interface. ### Admin Menu Editor Plugin it replaces: Admin Menu Editor (400,000+ active installs, 4.6/5 rating) The standalone Admin Menu Editor plugin is the most popular in this category. WP Adminify offers the same drag-and-drop reordering, plus additional capabilities: | Feature | Admin Menu Editor (Free) | WP Adminify | | --- | --- | --- | | Drag & drop reorder | Yes | Yes | | Hide menu items | Yes | Yes | | Rename menu items | Yes | Yes | | Custom SVG icons | No | Yes | | Role-based visibility | Limited | Full (per role, User name) | | Custom menu items (external URLs) | Pro only | Pro only | | Menu separators | No | Yes | | Admin bar editing | No | Yes (addon) | | White label integration | No | Yes | | Custom icons (Dashicons) | Yes | Yes | ### Hide Admin Menu by Role Plugin it replaces: Hide Admin Menu (20,000+ active installs) WP Adminify's menu editor includes role-based visibility built directly into the drag-and-drop interface. Select a user role, then toggle which menu items that role can see. No separate plugin required. ### Menu Separators Plugin it replaces: Add Menu Separators (900+ active installs) WP Adminify lets you insert custom separators and dividers between menu groups, improving the visual organization of the sidebar. ### Set Width to Admin Menu Plugin it replaces: Wider Admin Menu (2,000+ active installs) WP Adminify's admin UI customization includes menu width controls, so you can adjust the sidebar width from the default 160px to whatever suits your workflow. ![Font settings and styles for Admin menu](https://d1k2c27psfzbiv.cloudfront.net/wp-content/uploads/2024/09/24095642/Font-settings-and-styles-for-Admin-menu.webp) ## Activity Log Plugins WP Adminify Replaces Plugins it replaces: | Plugin | Active Installs | Rating | What It Does | | --- | --- | --- | --- | | WP Activity Log | 300,000+ | 4.75 | Comprehensive activity logging for all WordPress events | | User Login History | 10,000+ | 4.6/5 | Tracks login/logout times, IP addresses, browsers | WP Adminify's [Activity Logs addon](https://wpadminify.com/activity-logs) tracks user actions across your WordPress site logins, logouts, post changes, option updates, and plugin activity. It provides the core functionality that most site managers need: knowing who did what and when. For enterprise-grade audit requirements (compliance logging, email notifications, external log storage), WP Activity Log's premium tier offers more advanced features. But for the majority of WordPress sites that need basic activity tracking and user login monitoring, WP Adminify's built-in addon eliminates the need for two additional plugins. ## Productivity Plugins WP Adminify Replaces This is the category where plugin sprawl hits hardest. Every small annoyance in the WordPress admin - unwanted notices, the welcome panel, update nags, missing dashboard widgets - typically gets solved with a micro-plugin. WP Adminify's [Productivity](https://wpadminify.com/features/productivity) module consolidates all of these. ### Enable Media Replace Now you can replace existing media file with WP adminify plugin. It supports Gutenberg editor plus WordPress list + Grid media view. You can replace similar type of media file like jpg with jpg. Even you can undo your replacement that other plugin hardly offers. Multi-step Back to Original after replacing media This feature replace the "Enable Media replace" plugin. If you are a WP Adminify plugin user you don't need to install this plugin. ### Admin Notice Management Plugins it replaces: | Plugin | Active Installs | Rating | | --- | --- | --- | | Disable Admin Notices | 100,000+ | 4.7/5 | | Hide Admin Notices – Admin Notification Center | 8,000+ | 5.0/5 | | No Update Nag | 1,000+ | 5.0/5 | WordPress admin notices are one of the most complained-about UX issues. Plugin authors use them for promotions, upsells, review requests, and update warnings. On a site with 20+ plugins, logging into the dashboard can mean scrolling past a wall of notices before reaching actual content. WP Adminify lets you [disable admin notices](https://wpadminify.com/features/disable-admin-notices) per plugin and per role, so the update warnings survive and the upsells do not. WP Adminify's Admin Notices Manager lets you disable all notices globally, hide them per plugin, or collect them into a notification center. It also removes the WordPress core update nag that appears at the top of all admin pages. ### Dashboard Widgets & Welcome Panel Plugins it replaces: | Plugin | Active Installs | Rating | | --- | --- | --- | | Dashboard Welcome for Elementor | 20,000+ | 4.1/5 | | Dashboard Widgets Suite | 4,000+ | 4.9/5 | | Remove Site Health From Dashboard | 1,000+ | 4.0/5 | WP Adminify gives you full control over the WordPress dashboard: - Remove the Welcome Panel with a single toggle - Add custom dashboard widgets - text widgets, RSS feed widgets, or iframe widgets to display client instructions, support links, or analytics - Hide default widgets like Site Health, Quick Draft, WordPress Events and News, or At a Glance - Create branded welcome panels without needing a page builder plugin ### Update Management & Version Info Plugins it replaces: | Plugin | Active Installs | Rating | | --- | --- | --- | | Webcraftic Updates Manager | 9,000+ | 4.5/5 | | Version Info | 10,000+ | 5.0/5 | WP Adminify provides environment info display (PHP version, WordPress version, MySQL version) in the admin footer and can control update visibility per user role. ### Header & Footer Scripts Plugin it replaces: Code Snippets (1,000,000+ active installs, 4.7/5 rating) Code Snippets is a powerhouse plugin with 1 million+ installs - and for good reason. It's a full code snippet manager that replaces `functions.php` editing. WP Adminify's Header & Footer Scripts addon handles the most common use case: injecting tracking codes (Google Analytics, Facebook Pixel, custom CSS/JS) into the header or footer without editing theme files. If your needs are limited to script injection rather than full code snippet management, WP Adminify covers it. Want the exact steps? Our guide on how to [add code to the WordPress header and footer](https://wpadminify.com/add-code-to-wordpress-header) walks through the whole setup. Honest note: If you heavily rely on Code Snippets for dozens of PHP snippets across your site, it serves a broader purpose than what WP Adminify's Header & Footer Scripts addon is designed for. WP Adminify replaces the script injection use case, not the full code management platform. ### Floating Quick Menu Plugin it replaces: Float Menu (30,000+ active installs) WP Adminify includes a [Quick Menu feature](https://wpadminify.com/quick-menu) - a floating action panel providing shortcuts to frequently used admin pages. Instead of navigating through the sidebar for common actions (new post, new page, settings), you can access them from a floating button anywhere in the admin. ## Admin Column Plugins WP Adminify Replaces Plugin it replaces: Admin Columns (100,000+ active installs, 4.9/5 rating) The default WordPress post list shows a limited set of columns - Title, Author, Categories, Tags, Date. If you need to see featured images, custom fields, SEO scores, or WooCommerce product data at a glance, you typically need the Admin Columns plugin. WP Adminify's [Admin Columns Editor](https://wpadminify.com/admin-columns-editor) provides: | Feature | Admin Columns (Free) | WP Adminify | | --- | --- | --- | | Add/remove columns | Yes | Yes | | Reorder columns | Yes | Yes | | Custom field support (ACF, MetaBox, Pods) | Pro only ($89/yr) | Included | | WooCommerce columns (SKU, stock, price) | Pro only | Included | | Featured image thumbnail | Limited | Yes | | Post ID display | No | Yes | | Slug column | No | Yes | | Last login column | No | Yes | This also replaces several micro-plugins: - Featured Image Admin Thumb (20,000+ installs) - Shows featured image thumbnails in the post list - When Last Login (50,000+ installs) - Adds a "Last Login" column to the Users list - Admin Slug Column (5,000+ installs) - Shows URL slugs in the post list - Reveal IDs (40,000+ installs) - Displays post/page/user IDs in admin lists That's 5 plugins - Admin Columns plus 4 micro-plugins - replaced by a single WP Adminify module. ## Performance Plugins WP Adminify Replaces Plugins it replaces: | Plugin | Active Installs | Rating | Last Updated | | --- | --- | --- | --- | | Disable Embeds | 10,000+ | 4.3/5 | 12 months ago | | Heartbeat Control | 80,000+ | 4.2/5 | 3 years ago (WP 6.3) | | Disable Gutenberg | 600,000+ | 5.0/5 | 2 weeks ago | ### Heartbeat API Control The WordPress Heartbeat API sends AJAX requests every 15–60 seconds to keep sessions alive and autosave content. On shared hosting or high-traffic sites, this creates significant server load. Heartbeat Control is one of the most commonly recommended performance plugins - but it hasn't been updated in 3 years and is only tested up to WordPress 6.3. That's a major red flag. WP Adminify's Control Heartbeat API feature lets you modify the interval or disable the heartbeat entirely in specific areas (dashboard, post editor, frontend). It's actively maintained and tested with current WordPress releases. ![Disable WordPress Heartbeat Control for frontend](https://d1k2c27psfzbiv.cloudfront.net/wp-content/uploads/2025/01/04093037/Disable-WordPress-Heartbeat-Control-for-frontend.webp) ### Disable Embeds WordPress oEmbeds allow external sites to embed your content - and vice versa. This loads an additional JavaScript file (`wp-embed.min.js`) on every page. If you don't need embed functionality, WP Adminify can disable it entirely from the Security module. ### Disable Gutenberg (Classic Editor) WP Adminify includes options to disable the Gutenberg block editor and revert to the Classic Editor for specific post types, user roles, or globally. This replaces the dedicated Disable Gutenberg plugin (600,000+ installs). ## Post & Content Management Plugins WP Adminify Replaces Several single-purpose plugins handle post ordering, duplication, and content management tweaks. WP Adminify bundles these commonly needed features. ### Post & Taxonomy Ordering Plugins it replaces: | Plugin | Active Installs | Rating | | --- | --- | --- | | Post Types Order | 600,000+ | 4.5/5 | | Intuitive Custom Post Order | 400,000+ | 4.4/5 | WP Adminify includes drag-and-drop post ordering for posts, pages, and custom post types - letting you rearrange content directly from the post list screen without a separate plugin. ![WooCommerce Post Type Order Plugin](https://d1k2c27psfzbiv.cloudfront.net/wp-content/uploads/2022/01/12101529/WooCommerce-Post-Type-Order.gif) ### Post & Menu Duplication Plugins it replaces: | Plugin | Active Installs | Rating | | --- | --- | --- | | Yoast Duplicate Post | 4,000,000+ | 4.7/5 | | Menu Duplicator | 10,000+ | 4.7/5 | [WP Adminify's Duplicate Posts](https://wpadminify.com/features/duplicate-post), Pages, & CPTs feature adds a "Duplicate" action to the post list for any post type. One click creates a draft clone of the selected content - no additional plugin needed. Honest note: Yoast Duplicate Post (4M+ installs) offers advanced features like Rewrite & Republish (edit a published post as a draft without affecting the live version). If you rely on that specific workflow, Yoast's plugin serves a broader purpose. For standard post cloning, WP Adminify covers the use case. ### RSS Feed Thumbnails Plugin it replaces: WP Feed Post Thumbnail (2,000+ active installs) WP Adminify can include featured images in your RSS feed output via MRSS namespace - useful for email marketing tools and feed readers that display thumbnails. ### Custom Gravatar Plugin it replaces: Gravatar Enhanced (100,000+ active installs) WP Adminify allows you to set a custom default Gravatar image for users who haven't configured one - maintaining brand consistency across the admin area and frontend comments. ![Add custom gravater image in WordPress website](https://d1k2c27psfzbiv.cloudfront.net/wp-content/uploads/2024/08/12110800/Add-custom-gravater-image-in-WordPress-website.webp) ### Display Last Updated Date Plugin it replaces: WP Last Modified Info (40,000+ active installs) WP Adminify can display the last modified/updated date on posts and pages, both in the admin list view and on the frontend - providing content freshness signals important for SEO. ### RoleMaster Suite (User Role Editor) Plugin it replaces: PublishPress Capabilities (100,000+ active installs, 4.7/5 rating) WP Adminify's RoleMaster Suite addon is a comprehensive user role editor. Create custom roles, edit capabilities, clone existing roles, and manage fine-grained permissions - all integrated with WP Adminify's role-based menu visibility and dashboard customization. ## Full Replacement Table: 50+ Plugins at a Glance Here's every plugin WP Adminify can replace, organized by category: ### Customization (6 plugins replaced) | # | Plugin | Active Installs | WP Adminify Feature | | --- | --- | --- | --- | | 1 | [Darklup](https://wordpress.org/plugins/darklup-lite-wp-dark-mode/) [– Dark & Light Mode](https://wordpress.org/plugins/flavor/) | 1000+ | Dashboard UI > Dark Mode | | 2 | [Custom Fonts](https://wordpress.org/plugins/custom-fonts/) | 400,000+ | Dashboard UI > Typography | | 3 | [Colored Admin Post List](https://wordpress.org/plugins/colored-admin-post-list/) | 500+ | Admin UI Post Status Colors | | 4 | [WP Custom Admin Interface](https://wordpress.org/plugins/wp-custom-admin-interface/) | 30,000+ | White Label + Admin Menu Editor | | 5 | [AGCA – Custom Dashboard & Login](https://wordpress.org/plugins/ag-custom-admin/) | 20,000+ | White Label + Loginfy | | 6 | [White Label CMS](https://wordpress.org/plugins/white-label-cms/) | 200,000+ | White Label Module | ### Security (8 plugins replaced) | # | Plugin | Active Installs | WP Adminify Feature | | --- | --- | --- | --- | | 7 | [WPS Hide Login](https://wordpress.org/plugins/wps-hide-login/) | 2,000,000+ | Security > Change Login URL | | 8 | [LoginWP (Peter's Login Redirect)](https://wordpress.org/plugins/peters-login-redirect/) | 90,000+ | Security > Login/Logout Redirects | | 9 | [Disable XML-RPC-API](https://wordpress.org/plugins/disable-xml-rpc-api/) | 100,000+ | Security > Disable XML-RPC | | 10 | [No Self Ping](https://wordpress.org/plugins/no-self-ping/) | 10,000+ | Security > Disable Self-Pings | | 11 | [Meta Generator & Version Info Remover](https://wordpress.org/plugins/meta-generator-and-version-info-remover/) | 10,000+ | Security > Clean Head Section | | 12 | [Disable Feeds WP](https://wordpress.org/plugins/disable-feeds-wp/) | 10,000+ | Security > Disable RSS Feeds | | 13 | [Disable WP REST API](https://wordpress.org/plugins/disable-wp-rest-api/) | 30,000+ | Security > Restrict REST API | | 14 | [Disable Comments](https://wordpress.org/plugins/disable-comments/) | 1,000,000+ | Security > Disable Comments | ### Admin Menu (4 plugins replaced) | # | Plugin | Active Installs | WP Adminify Feature | | --- | --- | --- | --- | | 15 | [Admin Menu Editor](https://wordpress.org/plugins/admin-menu-editor/) | 400,000+ | Admin Menu Editor (Drag & Drop) | | 16 | [Hide Admin Menu](https://wordpress.org/plugins/hide-admin-menu/) | 20,000+ | Admin Menu Editor > Role Visibility | | 17 | [Add Menu Separators](https://wordpress.org/plugins/mhm-menu-separator/) | 900+ | Admin Menu Editor > Separators | | 18 | [Wider Admin Menu](https://wordpress.org/plugins/wider-admin-menu/) | 2,000+ | Dashboard UI > Menu Width | ### Activity & Logging (2 plugins replaced) | # | Plugin | Active Installs | WP Adminify Feature | | --- | --- | --- | --- | | 19 | [WP Activity Log](https://wordpress.org/plugins/wp-security-audit-log/) | 300,000+ | Activity Logs Addon | | 20 | [User Login History](https://wordpress.org/plugins/user-login-history/) | 10,000+ | Activity Logs Addon | ### Productivity (10 plugins replaced) | # | Plugin | Active Installs | WP Adminify Feature | | --- | --- | --- | --- | | 21 | [Disable Admin Notices](https://wordpress.org/plugins/disable-admin-notices/) | 100,000+ | Admin Notices Manager | | 22 | [Admin Notification Center](https://wordpress.org/plugins/wp-admin-notification-center/) | 8,000+ | Admin Notices Manager | | 23 | [No Update Nag](https://wordpress.org/plugins/no-update-nag/) | 1,000+ | Admin Notices Manager | | 24 | [Dashboard Welcome for Elementor](https://wordpress.org/plugins/dashboard-welcome-for-elementor/) | 20,000+ | Custom Dashboard Widgets | | 25 | [Dashboard Widgets Suite](https://wordpress.org/plugins/dashboard-widgets-suite/) | 4,000+ | Custom Dashboard Widgets | | 26 | [Remove Site Health From Dashboard](https://wordpress.org/plugins/remove-site-heath-from-dashboard/) | 1,000+ | Dashboard Widget Control | | 27 | [Updates Manager](https://wordpress.org/plugins/webcraftic-updates-manager/) | 9,000+ | Update Visibility Controls | | 28 | [Version Info](https://wordpress.org/plugins/version-info/) | 10,000+ | Admin Footer Info | | 29 | [Code Snippets](https://wordpress.org/plugins/code-snippets/) (script injection use case) | 1,000,000+ | Header & Footer Scripts Addon | | 30 | [Float Menu](https://wordpress.org/plugins/float-menu/) | 30,000+ | Quick Menu Feature | | 31 | [Enable Media Replace](https://wordpress.org/plugins/enable-media-replace/) | 600,000+ | Media Replace feature | ### Media & Folders (4 plugins replaced) | # | Plugin | Active Installs | WP Adminify Feature | | --- | --- | --- | --- | | 32 | [Folders](https://wordpress.org/plugins/folders/) | 90,000+ | Media Library Folders | | 33 | [FileBird](https://wordpress.org/plugins/filebird/) | 200,000+ | Media Library Folders | | 34 | [Media Library Folders (Plus)](https://wordpress.org/plugins/media-library-plus/) | 10,000+ | Media Library Folders | | 35 | [Media Library Infinite Scrolling](https://wordpress.org/plugins/media-library-enable-infinite-scrolling/) | 8,000+ | Media Library Enhancements | ### Admin Columns (5 plugins replaced) | # | Plugin | Active Installs | WP Adminify Feature | | --- | --- | --- | --- | | 36 | [Admin Columns](https://wordpress.org/plugins/codepress-admin-columns/) | 100,000+ | Admin Columns Editor | | 37 | [Featured Image Admin Thumb](https://wordpress.org/plugins/featured-image-admin-thumb-fiat/) | 20,000+ | Admin Columns > Image Column | | 38 | [When Last Login](https://wordpress.org/plugins/when-last-login/) | 50,000+ | Admin Columns > Last Login | | 39 | [Admin Slug Column](https://wordpress.org/plugins/admin-slug-column/) | 5,000+ | Admin Columns > Slug Column | | 40 | [Reveal IDs](https://wordpress.org/plugins/reveal-ids-for-wp-admin-25/) | 40,000+ | Admin Columns > ID Column | ### Performance (3 plugins replaced) | # | Plugin | Active Installs | WP Adminify Feature | | --- | --- | --- | --- | | 41 | [Heartbeat Control](https://wordpress.org/plugins/heartbeat-control/) | 80,000+ | Security > Control Heartbeat | | 42 | [Disable Embeds](https://wordpress.org/plugins/disable-embeds/) | 10,000+ | Security > Disable Embeds | | 43 | [Disable Gutenberg](https://wordpress.org/plugins/disable-gutenberg/) | 600,000+ | Classic Editor Toggle | ### Post & Content Management (8 plugins replaced) | # | Plugin | Active Installs | WP Adminify Feature | | --- | --- | --- | --- | | 44 | [Post Types Order](https://wordpress.org/plugins/post-types-order/) | 600,000+ | Post Type Ordering | | 45 | [Intuitive Custom Post Order](https://wordpress.org/plugins/intuitive-custom-post-order/) | 400,000+ | Post Type Ordering | | 46 | [Yoast Duplicate Post](https://wordpress.org/plugins/duplicate-post/) | 4,000,000+ | Duplicate Posts & Pages | | 47 | [Menu Duplicator](https://wordpress.org/plugins/menu-duplicator/) | 10,000+ | Menu Duplication | | 48 | [WP Feed Post Thumbnail](https://wordpress.org/plugins/wp-feed-post-thumbnail/) | 2,000+ | Feed Thumbnail Support | | 49 | [Gravatar Enhanced](https://wordpress.org/plugins/gravatar-enhanced/) | 100,000+ | Custom Gravatar | | 50 | [WP Last Modified Info](https://wordpress.org/plugins/wp-last-modified-info/) | 40,000+ | Last Updated Date Display | | 51 | [PublishPress Capabilities](https://wordpress.org/plugins/capability-manager-enhanced/) | 100,000+ | RoleMaster Suite Addon | Combined active installs of plugins replaced: 11,000,000+ ## Frequently Asked Question before migrate to WP Adminify ### Can WP Adminify really replace 50+ plugins? Yes. WP Adminify consolidates 60+ features across dashboard customization, white labeling, admin menu editing, security hardening, media organization, admin columns, and productivity tools. Each feature listed in this guide maps to a specific WP Adminify module or addon that performs the same function as the standalone plugin it replaces. ### Will my site speed improve by switching to WP Adminify? In most cases, yes. Each WordPress plugin loads its own CSS, JavaScript, and runs database queries. Consolidating 10-15 admin plugins into one reduces the total number of enqueued assets and database calls. The impact is most noticeable in the admin dashboard, where multiple plugins compete for the same hooks. ### Is WP Adminify free or do I need the Pro version? WP Adminify offers a generous free version with core features including the admin menu editor, white label basics, security tools, media folders, and dashboard customization. Pro unlocks advanced features like the Admin Columns Editor, Activity Logs, RoleMaster Suite, and priority support. Check the [pricing page](https://wpadminify.com/pricing) for current plans. ### How do I migrate from my existing plugins to WP Adminify? The migration is straightforward - install WP Adminify, configure the equivalent feature, verify it works, then deactivate and delete the old plugin. We recommend migrating one category at a time (start with security, then admin menu, then productivity) rather than replacing everything at once. This lets you isolate any issues. ### What if WP Adminify conflicts with one of my existing plugins? WP Adminify is designed to coexist with other plugins. If you encounter a conflict - typically caused by two plugins hooking into the same WordPress action (like `admin_menu`) - deactivate the conflicting plugin since WP Adminify likely already covers its functionality. For unresolved conflicts, [contact WP Adminify support](https://wpadminify.com/contact) - their team is known for fast, hands-on assistance. ### Does WP Adminify work with WooCommerce, ACF, and Elementor? Yes. WP Adminify is compatible with WooCommerce (custom admin columns for products, orders, and customers), Advanced Custom Fields (display ACF field values in admin columns), Elementor, and all major WordPress plugins. The Admin Columns Editor specifically supports ACF, MetaBox, and Pods custom field plugins. ## Conclusion Plugin bloat isn't just a performance issue - it's a maintenance burden, a security risk, and a workflow killer. Every additional plugin is another update to track, another potential conflict, another license to manage. Here's what consolidating to WP Adminify gives you: - 50+ fewer plugins to update, monitor, and troubleshoot - One settings panel instead of a dozen scattered settings pages - Reduced server load from fewer enqueued scripts, styles, and database queries - Smaller attack surface - one well-maintained plugin vs. 50 with varying update cadences (some not updated in 3+ years) - Consistent role-based controls across all features - menu visibility, dashboard widgets, admin notices, and security settings all respect the same user role configuration. [Download WP Adminify free](https://wordpress.org/plugins/adminify/) from WordPress.org and start consolidating today. For agencies and developers managing multiple client sites, [the Pro version](https://wpadminify.com/pricing) unlocks the full 60+ feature set. --- # WordPress Admin Menu Not Showing? 10 Ways to Fix It (2026) URL: https://wpadminify.com/wordpress-admin-menu-not-showing Last updated: 2026-08-13 You log in and half the sidebar is gone. Or the site loads on the front end and the dark toolbar across the top has vanished. Both problems get searched as "WordPress admin menu not showing," but they're separate features that fail for separate reasons. Start with the diagnostic table below to match your exact symptom, then work through the ten fixes in order, from a thirty-second role check to repairing a corrupted capabilities row in the database. Most people are done before fix five. ## Why is my admin menu not showing in WordPress? A WordPress admin menu goes missing for one of five reasons: the logged-in account lacks the capability to see certain screens, a plugin or code snippet hides items deliberately, a block theme has moved those screens into the Site Editor, the user's capabilities row in the database is corrupted, or a fatal error stops the page from rendering. The front-end admin bar is a sixth case with its own causes: a profile setting, a theme missing wp_footer(), or a cache serving logged-out pages. Match your symptom before you change anything. Guessing costs more time than diagnosing. | What you see | Most likely cause | Go to fix | | --- | --- | --- | | Appearance > Menus, Widgets and Customize are gone | A block theme moved them into the Site Editor | #2 | | Sidebar is full for you, thin for a client or colleague | Their account role has fewer capabilities | #1 | | One or two items missing for some users only | A hide rule in a menu customization tool | #3 | | Items vanished after installing or updating a plugin | Plugin conflict or a deliberate hide feature | #5 | | Nearly everything gone even though the role says Administrator | Corrupted capabilities in the database | #6 | | Sidebar loads blank or the page is white | A fatal PHP error | #7 | | Toolbar missing on the front end only | Profile setting, missing wp_footer(), or caching | #8–#10 | ## How to fix missing sidebar menu items Start with the account, then the theme, then whatever else is installed. Most of the "missing menu" tickets we see from WP Adminify users close on the first two checks, and neither one touches a line of code. ### 1. Confirm the account's role and capabilities Go to Users > All Users, open the profile in question, and read the Role field. WordPress builds the sidebar from capabilities: Editors never see Plugins, Users, Settings or Appearance, because those screens require capabilities like `activate_plugins`, `list_users` and `manage_options` that only Administrators carry. Editors do keep Tools, since that screen only asks for `edit_posts`. That's why a client's sidebar can look almost right and still be missing the screens they need. The full role-to-capability map is in the [WordPress roles and capabilities documentation](https://wordpress.org/documentation/article/roles-and-capabilities/). ![WordPress All Users](https://d1k2c27psfzbiv.cloudfront.net/wp-content/uploads/2025/10/12092600/WordPress-All-Users.webp) If you're helping someone who says their menu "disappeared," check their role before anything else. In most of these cases someone changed it, or they were never an Administrator to begin with. ### 2. Check whether you're running a block theme Block themes (Twenty Twenty-Four, Twenty Twenty-Five, and most new themes since WordPress 5.9) replace Appearance > Menus, Widgets and Customize with a single Appearance > Editor screen. WordPress didn't break or hide anything; those tools now live inside the [Site Editor](https://wordpress.org/documentation/article/site-editor/), where navigation menus are edited as blocks. To confirm, go to Appearance > Themes and check whether the active theme is described as a block theme. Switching temporarily to a classic theme brings the old menu items back, which settles the diagnosis in under a minute. ![Full site editor option in default WordPress block Theme](https://d1k2c27psfzbiv.cloudfront.net/wp-content/uploads/2024/07/12113101/Full-site-editor-option-in-default-WordPress-block-Theme.webp) ### 3. Look for a hide rule in your menu editor Any tool that customizes the admin sidebar, whether that's WP Adminify, Admin Menu Editor, or a role manager, can hide items per role. Those rules survive plugin and WordPress updates, and sites inherited from another developer often carry rules nobody remembers setting. In WP Adminify, open WP Adminify > Menu Editor and check each missing item's visibility settings, including rules that apply to your own role. A rule you set months ago is easy to forget, and it looks exactly like a bug. Clear the rule, save, and reload. The [admin menu editor walkthrough](https://wpadminify.com/how-to-use-the-wordpress-admin-menu-editor) shows where every visibility switch lives. ![Admin menu editor Hidden for rules fixed](https://d1k2c27psfzbiv.cloudfront.net/wp-content/uploads/2024/03/12112558/Admin-menu-editor-Hidden-for-rules-fixed.webp) ### 4. Search your theme and snippets for remove_menu_page() Developers hide sidebar items in code with [remove_menu_page()](https://developer.wordpress.org/reference/functions/remove_menu_page/) and `remove_submenu_page()`. Inherited sites often carry a snippet like this in `functions.php` or a code snippets plugin: ``` add_action( 'admin_menu', 'legacy_hide_admin_menus' ); function legacy_hide_admin_menus() { remove_menu_page( 'edit-comments.php' ); // Comments remove_menu_page( 'tools.php' ); // Tools remove_submenu_page( 'options-general.php', 'options-discussion.php' ); } ``` Search the active theme folder and any snippet manager for `remove_menu_page`. Comment the call out, reload wp-admin, and the item returns. If you want the item hidden but not lost forever, move the rule into a settings screen instead (more on that in the last section) so it stays visible and reversible. ### 5. Rule out a plugin conflict Deactivate every plugin from Plugins > Installed Plugins using Bulk Actions > Deactivate, confirm the sidebar is whole again, then reactivate one at a time until the item disappears. That plugin is your culprit. Check its settings for a menu, role or permissions section before deleting it, because many plugins hide items by design rather than by accident. ![Deactivate all plugins at once](https://d1k2c27psfzbiv.cloudfront.net/wp-content/uploads/2023/10/12111909/Deactivate-all-plugins-at-once.webp) If you're locked out of wp-admin entirely, connect over SFTP and rename `wp-content/plugins` to `plugins-off`. WordPress deactivates everything it can no longer find, which gets you back in. Rename the folder back afterwards and reactivate selectively. ### 6. Repair corrupted user capabilities in the database This is the fix most guides skip, and it explains the strangest version of the problem: the Users screen says Administrator, but the sidebar shows only Dashboard and Profile. WordPress stores each user's capabilities in the `wp_usermeta` table, and a broken migration, a buggy membership plugin, or a changed table prefix can corrupt that row. Check it with WP-CLI if your host provides it: ``` wp user list --fields=ID,user_login,roles ``` If your account shows no role, reassign it: ``` wp user set-role your_username administrator ``` ![phpMyAdmin showing the wp_users row with user_login field highlighted for edit]](https://d1k2c27psfzbiv.cloudfront.net/wp-content/uploads/2026/05/03074038/phpMyAdmin-showing-the-wp_users-row-with-user_login-field-highlighted-for-edit.webp) Without WP-CLI, open phpMyAdmin, find your user's ID in `wp_users`, then locate the `wp_capabilities` row for that ID in `wp_usermeta`. It should read `a:1:{s:13:"administrator";b:1;}`. One gotcha catches nearly everyone after a migration: the meta key must match your actual table prefix. On a site with a custom prefix it's `xyz_capabilities`, not `wp_capabilities`, and a mismatch produces exactly this symptom. Back up the database before editing anything here. ### 7. Turn on debugging if the sidebar is blank A blank or white sidebar area isn't a hiding problem. It's a fatal PHP error interrupting the page render. Enable logging in `wp-config.php` per the [official debugging guide](https://developer.wordpress.org/advanced-administration/debug/debug-wordpress/): ``` define( 'WP_DEBUG', true ); define( 'WP_DEBUG_LOG', true ); define( 'WP_DEBUG_DISPLAY', false ); ``` ![WordPress debug mode and error log](https://d1k2c27psfzbiv.cloudfront.net/wp-content/uploads/2021/08/12105648/WP-Debug-mode-and-log.jpg) Reload the dashboard, then read `wp-content/debug.log`. The file path in the fatal error tells you which plugin or theme to deactivate. If the whole dashboard is affected rather than just the menu, our [guide to fixing a WordPress dashboard that will not load](https://wpadminify.com/guide-to-fixing-wordpress-dashboard-not-loading) covers the full recovery process. ## How to fix the admin bar missing on the front end The toolbar across the top of your live pages is a separate feature from the sidebar, so it fails separately. Three checks cover almost every case. ### 8. Switch the profile option back on Go to Users > Profile and tick "Show Toolbar when viewing site," then save and reload the front end. It's a per-user setting, which is why the bar can be missing for you and present for a colleague on the same install. One of you unticked it, possibly years ago. ![Check the show toolbar when viewing site](https://d1k2c27psfzbiv.cloudfront.net/wp-content/uploads/2024/04/19073110/Check-the-show-toolbar-when-viewing-site.webp) ### 9. Make sure the theme calls wp_footer() WordPress prints the admin bar through the `wp_footer` hook. A hand-built or heavily stripped theme that omits the call from `footer.php` loses the bar, along with every plugin script that loads in the footer, which is why other features often break quietly on the same theme. Add the call immediately before the closing body tag: ```php ``` ### 10. Clear every layer of cache Page caching frequently serves a logged-out copy of a page to a logged-in visitor, and the logged-out copy never contains the admin bar. Purge in this order: caching plugin, host-level cache, CDN, then a hard browser refresh. Most caching plugins also have a "don't cache pages for logged-in users" setting. Turn it on and the problem stops recurring. ## How to stop menu items disappearing again Almost every recurring case traces back to hiding done in code. The `remove_menu_page()` snippet from fix #4 works, but it's invisible to anyone who doesn't read functions.php, and it hides the item from everyone, including you. The next developer inherits a mystery. Managing visibility from a settings screen keeps every rule listed and reversible, attached to a named role, so anyone can audit it later. That's what the [WP Adminify admin menu editor](https://wpadminify.com/features/admin-menu-editor) is built for: drag-and-drop reordering, per-role visibility, custom icons and separators, with the front-end bar handled by the [toolbar editor](https://wpadminify.com/wordpress-toolbar-editor). The free version on [WordPress.org](https://wordpress.org/plugins/adminify/) already includes menu hiding and reordering. If you only need to strip a few items and want to compare approaches first, our guide to [removing admin menu items](https://wpadminify.com/remove-admin-menu-items) walks through both the code and the no-code route. ## WordPress Admin Menu Not Showing FAQs ### Why is my menu not showing up in WordPress? Usually the account lacks the right role, or a plugin or code snippet hides the item on purpose. Block themes are the other common answer: they move Menus, Widgets and Customize into the Site Editor. Check the role first, then the theme, then deactivate plugins one at a time. ### How do I show the admin bar in WordPress? Go to Users, then Profile, tick Show Toolbar when viewing site, and save. If the bar still doesn't appear, confirm your theme calls wp_footer() in footer.php and purge every cache layer, since a cached logged-out page never includes the bar. ### Why does my admin account show almost no menu items? The capabilities row in the database is corrupted or mismatched. Run wp user list with the roles field to check whether the account actually holds the administrator role, and reassign it with wp user set-role. After a migration, also verify the wp_capabilities meta key matches your table prefix. ### How do I add an admin menu in WordPress? Developers register one with add_menu_page() in a plugin or functions.php. If you'd rather not maintain code, a menu editor adds custom items, sets the icon and link, and restricts each one to chosen roles from a settings screen. ### Menu items vanished right after I installed a plugin. What now? Deactivate that plugin and reload. If the items return, open its settings and look for a menu, role or permissions section before removing it, because many tools hide items by design. Clear the rule, then reactivate. ### Can I hide menu items from clients without breaking my own access? Yes. Apply the hide rule to the client's role (Editor, or a custom role) rather than hiding the item globally, and review the rule list from the same screen whenever something looks off. Role-scoped rules are reversible in one click. Code snippets aren't. ## Conclusion Key takeaways: - The sidebar menu and the front-end admin bar are separate features. Diagnose them separately using the symptom table. - Most missing-item cases are a role issue or a block theme, not a bug. Check both before touching plugins. - An Administrator with an almost-empty sidebar means corrupted database capabilities. Check `wp_capabilities` against your table prefix. - Hide rules managed from a settings screen stay auditable; hide rules in functions.php become the next developer's mystery. If you customize the admin menu regularly, [WP Adminify's menu editor](https://wpadminify.com/features/admin-menu-editor) keeps every visibility rule in one reversible list - which is the difference between a five-minute fix and an afternoon of grepping functions.php. --- # 7 Best White Label WordPress Plugins for 2026 (Tested & Compared) URL: https://wpadminify.com/best-white-label-wordpress-plugin Last updated: 2026-08-13 The best white label WordPress plugin in 2026 depends on how much of the admin you want to rebrand. For an all-in-one agency toolkit, [WP Adminify](https://wpadminify.com/white-label-wordpress) combines branding, an admin menu editor, a login customizer, and dashboard themes in one tool. Admin Bar Editor rebrands the toolbar specifically, and Loginfy handles the login page on its own. White Label CMS, Ultimate Dashboard, Branda, and Ultimate Client Dash each win a narrower use case. (Updated July 2026.) ## Best white label WordPress plugins at a glance These white-label WordPress plugins all strip out the default WordPress branding and let you rebrand the admin bar, the dashboard, and the login page. Every rating below comes straight from each plugin's live WordPress.org listing in July 2026, so you can compare like for like before you install anything. | Plugin | Best for | Rating | Price | | --- | --- | --- | --- | | WP Adminify | All-in-one agency branding + admin toolkit | 4.3★ | Free + Pro from $79/yr | | Admin Bar Editor | Rebranding and cleaning the admin toolbar | 4.3★ | Free + Pro | | Loginfy | Custom branded login pages | 5.0★ | Free + Pro | | White Label CMS | Free, simple client dashboards | 4.7★ | Free | | Ultimate Dashboard | Custom client dashboard widgets | 4.6★ | Free + Pro | | Branda | Full rebrand + multisite + system emails | 4.5★ | Free + Pro | | Ultimate Client Dash | Client roles + coming-soon pages | 4.8★ | Free + Pro | ## What is a white label WordPress plugin? A white label WordPress plugin replaces WordPress's default branding in the admin area with your own. It swaps the WordPress logo, the login screen, the admin footer, the color scheme, and the "Howdy" greeting so clients see your agency's identity instead of WordPress. Most also let you customize the admin per user role, add a custom logo, hide menus, and clear dashboard clutter, which leaves each client with a clean admin they can actually find their way around. You can learn the full workflow in our [white label WordPress guide](https://wpadminify.com/white-label-wordpress). ## The 7 best white label WordPress plugins for 2026 ### 1. WP Adminify - best all-in-one white label toolkit ![WP Adminify WordPress White Label settings page showing Admin Bar Cleanup, Admin Footer options, footer credit toggle and footer text editor](https://d1k2c27psfzbiv.cloudfront.net/wp-content/uploads/2026/07/08052727/02-wordpress-white-label-settings.webp) [WP Adminify](https://wordpress.org/plugins/adminify/) is the pick if you want white labeling and a full admin toolkit in a single, actively developed plugin. Beyond swapping the admin logo, favicon, footer text, and "Howdy" greeting, it bundles a drag-and-drop [admin menu editor](https://wpadminify.com/features/admin-menu-editor), a login customizer, dark-mode [dashboard themes](https://wpadminify.com/features/dashboard-customization), media-library folders, an admin columns editor, and role-based security controls. That breadth is what separates it from single-purpose tools: you restyle and reorganize the whole admin from one settings panel instead of stacking five plugins that each own a piece of it. The white labeling also goes one step further than most rivals: WP Adminify can rename itself. Swap the plugin name, menu label, and icon for your agency brand and clients never see "Adminify" anywhere in their dashboard. Its latest release shipped on July 15, 2026, and updates land roughly every couple of weeks. ![WP Adminify plugin white label settings renaming the plugin to My Agency, with the admin menu sidebar now showing the agency brand instead of Adminify](https://d1k2c27psfzbiv.cloudfront.net/wp-content/uploads/2026/07/08052742/07-plugin-white-label-my-agency.webp) - Pros: Most features in one place; frequent releases; role-based menu and login rules built for client sites; can white-label its own plugin name. - Cons: Full white-label controls sit in Pro; smaller install base than legacy tools. - Best for: Agencies and freelancers who want branding plus admin cleanup from one plugin. The free version covers logo, footer, and admin-bar branding. [Pro plans](https://wpadminify.com/pricing) start at $79/year and unlock the complete white-label suite. See exactly what's included on the [white label feature page](https://wpadminify.com/features/white-label), or read the head-to-head [WP Adminify vs White Label CMS](https://wpadminify.com/wp-adminify-vs-white-label-cms) comparison. ### 2. Admin Bar Editor - best for rebranding the WordPress toolbar ![Admin Bar Editor with the WordPress logo toggle switched off to remove WordPress branding from the toolbar](https://d1k2c27psfzbiv.cloudfront.net/wp-content/uploads/2026/07/08052736/05-adminbar-editor-remove-wp-logo.webp) Clients see the admin bar on every page they visit, front end and back end, yet most white label plugins barely touch it. [Admin Bar Editor](https://wordpress.org/plugins/admin-bar/) (3,000+ installs, 4.3 stars) is built for exactly this job. One toggle removes the WordPress logo from the toolbar. From the same panel you can hide, rename, or reorder any admin bar item, add your own links, and set different toolbar layouts per user role. That per-role control is the agency win. Give editors a toolbar with just the shortcuts they need, strip the comments icon for authors, and keep the full bar for yourself. It covers the front-end toolbar too, so logged-in clients browsing their own site see a clean, branded bar instead of WordPress defaults. - Pros: Deepest admin bar control of any plugin here; role-based toolbar rules; front-end and back-end coverage; lightweight single-purpose footprint. - Cons: Scope is the toolbar only, so pair it with a login and dashboard tool for a full rebrand. - Best for: Developers who want precise, per-role control over the one UI element clients always see. ### 3. Loginfy - best for custom branded login pages ![White label WordPress login page being designed in the Loginfy customizer with template gallery and branded background](https://d1k2c27psfzbiv.cloudfront.net/wp-content/uploads/2026/07/08052730/03-custom-login-page-loginfy.webp) The login page is the front door of every client site, and [Loginfy](https://wordpress.org/plugins/loginfy/) (2,000+ installs, a perfect 5.0-star rating) replaces the default WordPress login with something that looks designed rather than installed. You pick a ready-made template, then adjust the logo, background, form, and colors in a live customizer that previews every change as you make it. Backgrounds go well beyond a static image: gradients, image slideshows, self-hosted video, even YouTube video backgrounds. It also strips the WordPress logo and links from the login screen entirely, which is the detail clients notice first. If you already run WP Adminify you can install Loginfy as its login module. Standalone, it stays lean and only loads on the login page, so your front end never carries its weight. - Pros: Live-preview customizer with templates; video, slideshow, and gradient backgrounds; highest rating on this list; works standalone or with WP Adminify. - Cons: Login page only, so dashboard and admin bar branding need a companion plugin; smaller install base. - Best for: Freelancers and agencies who want the client's first login to look fully custom in minutes. ### 4. White Label CMS - best free, simple option ![White Label CMS WordPress plugin banner from the WordPress.org plugin directory](https://d1k2c27psfzbiv.cloudfront.net/wp-content/uploads/2026/07/25063214/white-label-cms-banner.webp) [White Label CMS](https://wordpress.org/plugins/white-label-cms/) is the most popular option on this list with 200,000+ active installs and a 4.7-star rating. It stays deliberately simple: a setup wizard walks you through styling the login page, header, footer, and dashboard in a few clicks, and you can add a custom welcome panel plus hide menus so clients don't stumble into settings they shouldn't touch. Everything is free, with no paid upgrade to nudge you toward. - Pros: 100% free; fastest setup thanks to the wizard; huge, proven user base. - Cons: No admin menu editor or dashboard themes; codebase is older and less feature-rich than newer tools. - Best for: Developers who just need clean, branded client dashboards without extra features. ### 5. Ultimate Dashboard - best for custom dashboard widgets ![Ultimate Dashboard WordPress plugin banner from the WordPress.org plugin directory](https://d1k2c27psfzbiv.cloudfront.net/wp-content/uploads/2026/07/25063219/ultimate-dashboard-banner-1.webp) [Ultimate Dashboard](https://wordpress.org/plugins/ultimate-dashboard/) (60,000+ installs, 4.6 stars) focuses on turning the WordPress dashboard home screen into a custom launchpad. You remove the default widgets and replace them with your own icon, text, and HTML widgets that point clients to the pages they use most. The free version includes a login customizer and custom admin pages. Full white-label control, dark mode, and the admin menu editor live in Ultimate Dashboard PRO. If dark mode is the part you actually want, WP Adminify includes [dark mode for the dashboard](https://wpadminify.com/features/dark-mode) in its free version. - Pros: Excellent custom-widget builder; clean, lightweight; strong login customizer. - Cons: Deep white-label controls are Pro-only; less frequent updates than some rivals. - Best for: Agencies that want a curated dashboard home screen for each client. Weighing it against WP Adminify? Read the [WP Adminify vs Ultimate Dashboard](https://wpadminify.com/wp-adminify-vs-ultimate-dashboard) comparison for a feature-by-feature breakdown. ### 6. Branda - best for full rebrand and multisite ![Branda white labeling WordPress plugin banner from the WordPress.org plugin directory](https://d1k2c27psfzbiv.cloudfront.net/wp-content/uploads/2026/07/25063224/branda-white-labeling-banner.webp) [Branda](https://wordpress.org/plugins/branda-white-labeling/) by WPMU DEV (20,000+ installs, 4.5 stars) ships more than 30 modules and restyles parts of WordPress most tools ignore, including system emails, the database-error page, and maintenance or coming-soon pages. It's genuinely free with most features unlocked, and it's multisite-ready, so it's a strong fit if you white label an entire network rather than single sites. - Pros: Most complete free makeover; system-email and multisite coverage; frequently updated. - Cons: 30+ modules can feel heavy for a simple site; some promotion of other WPMU DEV plugins. - Best for: Agencies white labeling multisite networks or WordPress emails end to end. ### 7. Ultimate Client Dash - best for client roles and landing pages ![Ultimate Client Dash WordPress plugin banner from the WordPress.org plugin directory](https://d1k2c27psfzbiv.cloudfront.net/wp-content/uploads/2026/07/25063230/ulimate-client-dash-banner.webp) [Ultimate Client Dash](https://wordpress.org/plugins/ulimate-client-dash/) (2,000+ installs, 4.8 stars) is built specifically for handing sites to clients. Alongside login and dashboard styling, it adds a dedicated "Client" user role with limited capabilities, a modern admin theme, and built-in coming-soon and under-construction landing pages with analytics tracking. The Pro version extends client capability management and custom CSS. - Pros: Purpose-built client role; landing pages included; second-highest review score on this list. - Cons: Small install base; no full multisite network activation. - Best for: Freelancers who want to restrict client access and ship a launch page from one plugin. ## Why white label your WordPress admin area? White labeling turns a generic WordPress backend into an admin that carries your client's identity instead of the default WordPress logo. For agencies, that polish justifies your fee: a branded login page, a tidy dashboard, and your own footer credit signal a finished product rather than an off-the-shelf install. It also cuts support requests, because a simplified dashboard hides the menus and settings that confuse non-technical clients. Most tools here let you assign user roles, upload a custom logo, and add custom CSS and JavaScript to fine-tune things further. None of it touches theme files, and the free versions are often enough to start. Pro plans mostly buy you deeper rebranding controls and per-role rules. ## How to choose a white label WordPress plugin (2026 checklist) Match the plugin to the job rather than chasing the longest feature list. Run through these questions before you commit: - Scope: Do you only need branding, or branding plus menu, login, and dashboard control? All-in-one tools like WP Adminify save you from stacking plugins; single-purpose tools like Admin Bar Editor and Loginfy go deeper on one surface. - Budget: White Label CMS and Branda cover a lot for free; paid tiers unlock advanced rebranding and support. - Client access: If you hand sites to non-technical clients, prioritize role-based menu hiding and a dedicated client role. - Multisite: Networks need multisite-ready branding. Branda is the standout here. - Maintenance: Check the "last updated" date on WordPress.org; an actively maintained plugin is safer long term. - Performance: Prefer plugins that load assets only in the admin (or only on the login page, like Loginfy) so your front end stays fast. For a wider view of admin tools beyond branding, see our guide to the [best WordPress dashboard plugins](https://wpadminify.com/best-wordpress-dashboard-plugin) and the full [WordPress dashboard customization](https://wpadminify.com/wordpress-dashboard-customization) pillar. ## White Label WordPress Plugin FAQs ### What is the best white label WordPress plugin? WP Adminify is the best all-in-one choice because it combines branding with an admin menu editor, login customizer, and dashboard themes in one plugin. Admin Bar Editor is the best pick for toolbar-only rebranding, Loginfy for the login page, and White Label CMS for a free, simple client dashboard. The right pick depends on whether you need branding only or a full admin toolkit. ### Can you white label WordPress for free? Yes. White Label CMS is 100% free and Branda unlocks most of its 30+ modules for free, so you can rebrand the login page, dashboard, admin footer, and menus without paying. The free versions of WP Adminify, Admin Bar Editor, and Loginfy also cover core branding: logo swaps, toolbar cleanup, and custom login templates. Pro tiers add the advanced controls. ### What does a white label plugin actually change? A white label plugin replaces WordPress branding across the admin area. It swaps the login logo and background, the admin bar and sidebar logos, the footer text, the color scheme, and the Howdy greeting. Most also hide default dashboard widgets and menus, so clients see a clean, branded control panel instead of the standard WordPress interface. ### Which white label plugin is best for agencies with many clients? For agencies managing many client sites, WP Adminify and Ultimate Client Dash stand out because they offer role-based menu hiding and dedicated client roles. Pair WP Adminify with Admin Bar Editor for per-role toolbar control on top. If you run a multisite network, Branda is the strongest fit thanks to network-wide branding. ### Do white label plugins slow down WordPress? Well-built white label plugins load their assets only inside the WordPress admin, so your public site speed isn't affected. WP Adminify doesn't enqueue its files on the front end, and Loginfy loads only on the login page. To stay fast, avoid running several overlapping branding plugins at once and only enable the modules you actually use for each site. ### Can I use Admin Bar Editor and Loginfy together with WP Adminify? Yes, and that combination covers the full white label surface. WP Adminify handles the dashboard, menus, and overall branding; Admin Bar Editor adds fine-grained, per-role toolbar control; Loginfy gives the login page templates, video backgrounds, and slideshow options. Loginfy also installs directly as a WP Adminify module if you prefer managing everything from one panel. --- # How to Customize WordPress Dashboard (2026) - 7 Easy Methods URL: https://wpadminify.com/wordpress-dashboard-customization Last updated: 2026-08-12 Try WP Adminify! This little tool lets you change your WordPress dashboard any way you like. Add new admin pages, move menu items, drop in custom widgets anything you can imagine! ## How Do You Customize the WordPress Dashboard? (Quick Answer) You customize the WordPress dashboard in one of three ways: with the built-in Screen Options and drag-and-drop controls for quick layout changes, with code in your theme's `functions.php` for full control, or with an admin customization plugin when you need menu editing, custom widgets, branding and per-role dashboards without writing PHP. Free, built-in changes take about two minutes and cover hiding widgets, rearranging panels and picking an admin colour scheme. Anything client-facing, removing menu items per user role, replacing the WordPress logo, or building a branded client dashboard, needs either custom code or a plugin. ### The 7 methods at a glance | Method | What it changes | Needs code? | Free? | | --- | --- | --- | --- | | Screen Options | Show/hide dashboard widgets and columns | No | Yes (built in) | | Drag and drop | Reorder dashboard widgets | No | Yes (built in) | | Admin colour scheme | Dashboard colours, per user | No | Yes (built in) | | Admin menu editor | Rename, reorder, hide sidebar menu items | No (with a plugin) | Free tier | | Custom dashboard widgets | Add your own panels and content | `wp_add_dashboard_widget`, or a plugin | Free tier | | White label / branding | Replace the WordPress logo, login page and footer text | No (with a plugin) | Paid | | Per-role dashboards | A different admin view for clients vs editors vs admins | No (with a plugin) | Paid | ### What WP Adminify does WP Adminify is a WordPress admin customization plugin that replaces the stock dashboard with a configurable one. It lets you rename, reorder and hide admin menu items per user role; remove or add dashboard widgets; apply dark mode and custom admin themes; white-label the logo, login page and footer; manage media in folders; and add sortable admin columns, all from a settings screen rather than PHP. The core plugin is free on [WordPress.org](https://wordpress.org/plugins/adminify/), where it has been downloaded 327,000+ times and holds a 4.3/5 rating from 107 reviews (version 4.2.21, tested up to WordPress 7.0.2). White label, per-role dashboards and the login customizer are Pro features, see [pricing](https://wpadminify.com/pricing) for current plans. ## Getting started with WordPress Dashboard Customization - Install WP Adminify & run Setup Wizard - Pick your favorite colors and upload a logo. - Drag remaining items into the perfect order. - In just a few clicks, your dashboard will look and feel like it was made just for you! ### Replace WordPress logo with yours Right off the bat, let's get into the branding. ![WP Adminify plugin basic options](https://d1k2c27psfzbiv.cloudfront.net/wp-content/uploads/2022/10/07095506/WP-Adminify-plugin-basic-customize-options.webp) Get started your Dashboard customization journey with the basic option like changing logo, UI Template, Configure dark and light mode. Installing the [Loginfy](https://wpadminify.com/loginfy) addon for customizing the login page. For a full comparison, see our guide to the [best WordPress login page plugins](https://wpadminify.com/best-wordpress-login-page-plugin). ![Change logo for the WordPress login page](https://d1k2c27psfzbiv.cloudfront.net/wp-content/uploads/2022/03/18103358/Change-logo-for-the-WordPress-login-page.webp) ### Admin Footer WordPress Branding Text Navigate to `WP Adminify Option Panel > White Label> Write footer text`. Now write your copyright text inside "Admin Footer Text" area. This will change the WordPress Branding from your Dashboard Footer area. ![WP Adminify Dashboard Footer Text](https://d1k2c27psfzbiv.cloudfront.net/wp-content/uploads/2022/02/12110329/WP-Adminify-Dashboard-Footer-Text.webp) ### Customize Dashboard Body Color Inside the Adminify Option panel, you will see a [customize tab](https://wpadminify.com/features/dashboard-customization). Inside this tab, there are 9 pre-built Adminify UI Templates. If you don't like any pre-built template, then just click on the color picker option and define your colors for Background, Button, Menu, and Notification yourself. 9 Pre Built Dashboard UI Templates ### WordPress Admin Menu Editor Customizing the WordPress dashboard sidebar menu is a great way to organize and streamline your site. [Admin Menu Editor by WP Adminify](https://wpadminify.com/features/admin-menu-editor) can be used to edit the sidebar menu quickly and easily. This module allows you to hide, show, or re-order all of your WordPress admin panels. You can also import and export menus so that you can share them with other site owners as well as groups of users. #### Modify Admin Menu item Hover on WP Adminify menu then click on "Menu Editor". All your existing Admin menu items are ready to edit here. Just click on any menu item, then rename it, input icons, and url. ![Admin Menu Editor for WordPress Dashboard](https://d1k2c27psfzbiv.cloudfront.net/wp-content/uploads/2022/02/12115132/Admin-Menu-Editor-for-WordPress-Dashboard.webp) #### Hide Dashboard menu item for User rules Click on "Hidden for Rules" option, select your desired user rules. Remember, it will hide that specific menu item from your selected user rules. ![User role selection for Admin Menu Item](https://d1k2c27psfzbiv.cloudfront.net/wp-content/uploads/2022/02/12115134/User-role-selection-for-Admin-Menu-Item.webp) ### Custom WordPress admin page With the Admin Page module, you can create an unlimited number of [Admin Pages for your WordPress Dashboard](https://wpadminify.com/features/custom-admin-page). It lets you to add a custom page to your Dashboard and design it with any page builder like Elementor, Visual Composer, Gutenberg, etc. Define your custom Admin Page as a top label menu or submenu anytime. If you like to edit this Custom WordPress Admin page using any page builder, then make sure to select "Admin Page" post type in your page builder settings panel. #### Create New Admin Page Login to your Website Dashboard and hover on WP Adminify. You will see a submenu item called "Admin Pages", click on this option. Now you are ready to create a new Admin Page. "Admin Pages" by WP Adminify is a post type, you can create unlimited Admin Pages and assign them as top level menu or submenu for existing admin menu items. ![Create custom admin page in WordPress Dashboard](https://d1k2c27psfzbiv.cloudfront.net/wp-content/uploads/2024/09/26063150/Create-custom-admin-page-in-WordPress-Dashboard.webp) #### Admin Page as Main Menu or Submenu Take a look at the right sidebar. There is a block for "Menu Attributes", You can select menu type as "Top Level Menu" or "Sub menu", then menu order value and custom icon for the admin page. ![Admin Pages Menu Attribute](https://d1k2c27psfzbiv.cloudfront.net/wp-content/uploads/2022/02/12115138/Admin-Pages-Menu-Attribute.webp) #### User Roles for Admin Page You can enable or disable Page Title, Page Margin, Admin Notices for your New Admin page. Also able to define who can see your Admin Pages by using the "User Roles Access" option. Finally, if you need more customization, then feel free to write Custom CSS and JS for your Custom Admin Page. ![User role Access for Admin Page](https://d1k2c27psfzbiv.cloudfront.net/wp-content/uploads/2022/02/12110335/User-role-Access-for-Admin-Page.webp) ### Create Custom Dashboard Widgets [Custom Dashboard Widget](https://wpadminify.com/features/custom-dashboard-widget) or a custom Welcome Panel is a great way to personalize your site Dashboard. Dashboard Widget module by WP Adminify offers the following features: - Widget Position - Default WordPress Editor - Icon Widget - Video Widget - Shortcode For Widget - RSS Feed - Allowed User Roles selection - Welcome Widget Design #### Contact Form 7 in Dashboard Widget First, design your contact form the way you need. Then click on add new dashboard widget. Select the Widget type as "Shortcode". Now paste your Contact Form 7 Shortcode and save everything. Now navigate to your website Dashboard and reload it. ![Contact Form 7 Shortcode in WordPress Dashboard Widget](https://d1k2c27psfzbiv.cloudfront.net/wp-content/uploads/2022/02/12115148/Contact-Form-7-Shortcode-in-WordPress-Dashboard-Widget.webp) #### Dashboard Welcome Widget Customization Design your new Welcome Widget via any page builder or the default WordPress editor. For default WP Editor, just create a new page and write down your all welcome widget content. Perhaps, you can design your page with any page builder and also use Elementor saved section too. ![Create custom welcome widget for WordPress Dashboard](https://d1k2c27psfzbiv.cloudfront.net/wp-content/uploads/2024/09/26083017/Create-custom-welcome-widget-for-WordPress-Dashboard.webp) ### WordPress Admin Column Editor You can easily show or hide Post or Page Admin Columns by using the default Screen Option. What if you like to modify the column width and need more customization flexibility? Here [Admin Column editor by WP Adminify](https://wpadminify.com/admin-columns-editor) will assist you. Not only for post type but also you can modify taxonomies admin columns too. Just navigate to Admin Columns option and you will see something like the following screenshot. ![WordPress Admin Column Editor Plugin](https://d1k2c27psfzbiv.cloudfront.net/wp-content/uploads/2022/02/12115159/WordPress-Admin-Column-Editor-Plugin.webp) Select your desired post type and click on any existing column name which you like to modify. Here you can rename your admin column label text, select column type, and define width in px or percentage. You are free to remove all unwanted columns to make it cleaner and user-friendly. ![Change Admin Column title and width](https://d1k2c27psfzbiv.cloudfront.net/wp-content/uploads/2022/02/12115202/Change-Admin-Column-title-and-width.webp) ### Change WordPress Login URL In short, it can enhance the security of your WordPress Website. Have you been a victim of a brute force attack? If yes, then you know how painful it is. A Brute Force Attack is a form of hacking where an intruder tries to guess your password or username by systematically guessing different combinations. WP Adminify comes with [URL Redirection](https://wpadminify.com/features/url-redirection) feature. It will help you to change your [WordPress login](https://wpadminify.com/change-wordpress-login-page-url) URL & boost your Dashboard Security. Enable this module from the WP Adminify modules manager. Then you will notice a new submenu called "Redirect URLs" under WP Adminify. Just click on this submenu and you are ready to set a new Login URL and redirect the default Admin URL. ![Redirect WP Admin Login URL](https://d1k2c27psfzbiv.cloudfront.net/wp-content/uploads/2022/06/12110415/Redirect-WP-Admin-Login-URL.webp) ## WordPress Login Page Customizer Your WordPress login page is often the first thing customers or user’s encounter when visiting your site. It’s where they enter their name and password. If those credentials are accepted, it takes them to the dashboard, which is where they will spend most of their time on your website. The login page has to be welcoming, informative for the users. [Login Customizer by WP Adminify](https://wpadminify.com/loginfy) lets you customize your WordPress login page via default customizer. You can visually check whatever you are doing inside your Editor. Some important features you will get in this WP Adminify login page customizer: - 16 Pre-built Template - Text Logo, Image Logo for login page - Image, color, Slideshow, Video Background - 2 Column Layout - Login Form customization - Login Form Fields Text customization - Button Style - Login shake remove - Lost Your Password remove - Back to website remove - Error Message customization - Google Fonts for Login page After login to your Dashboard just navigate to WP Adminify> Login Customizer. It will redirect you to the login page customizer panel which looks something like the following screenshot. ![WordPress Login page customizer plugin](https://d1k2c27psfzbiv.cloudfront.net/wp-content/uploads/2022/02/12115204/WordPress-Login-page-customizer-plugin.webp) Select your desired template from 16 pre-built login page templates. Change your login page logo, background, layout, login form, fields content, button style, Customize error message and many more. ![WordPress Custom Login Page Template](https://d1k2c27psfzbiv.cloudfront.net/wp-content/uploads/2021/07/12105603/WordPress-Custom-Login-page-template.webp) ### WordPress Dashboard Dark Mode [Light / Dark mode module by WP Adminify](https://wpadminify.com/features/dark-mode) offers a one-click switcher to turn your WordPress Dashboard into Dark and Light mode. This is a great feature for those who work on Dashboard during the night. Not only one click switcher, but also you can schedule Dark Mode for WordPress Dashboard. There is an option to define Operating system-based dark mode too. One click WordPress Dark Mode Navigate to WP Adminify Option panel and then click on Light/ Dark mode. Scroll down a little bit and define your specific time or turn on system-based mode. ![Schedule and System Dark Mode](https://d1k2c27psfzbiv.cloudfront.net/wp-content/uploads/2022/02/12115206/Schedule-and-System-Dark-Mode.webp) ### Folder Plugin for Media & Post Type The most common issue is people think that adding a page, post or image into a folder will change its URL. But it doesn’t. Folders by WP Adminify plugin create virtual folders, it doesn’t create actual folders in your server. You are free to delete or rename your folder whenever you need. ![WordPress Media folder plugin](https://d1k2c27psfzbiv.cloudfront.net/wp-content/uploads/2022/02/12115208/WordPress-Media-folder-plugin.webp) Using the plugin is simple! Once you install it, all you need to do to create your folder then drag your post type or media content. If you click the "create new" button, it will ask you to type your folder name. Input your folder name and then any items (such as post, page, post type, images, videos, or audio) can be added to those folders. Features you will get in this [Folder Module](https://wpadminify.com/features/wordpress-media-folder): - Unlimited folder - Drag and drop any post type, and media library - Drag and drop folders, change order, and tree view - Search folder by names - Sort your folders based on the name - Rename folders - Compatible with RTL Dashboard ### Dashboard Admin Notice Removal Have you ever noticed a plugin asks you to upgrade and starts showing a bunch of banner notices? Every time you close them out, they pop open again and distract you from your work. WP Adminify offers a one-click [WordPress Dashboard Notice removal](https://wpadminify.com/features/disable-admin-notices) option. If you like to get rid of all admin notices for different themes or plugins, then just turn on the option and reload your Dashboard. The following features you will get inside Disable Admin notice module. - Hide All "Admin Notices" - Remove Welcome Panel - Remove "PHP Update Required" Notice - WordPress Core/Theme/Plugin Notices - Remove "Try Gutenberg" Panel ![Cleaner WordPress admin screen with unneeded notices removed](https://d1k2c27psfzbiv.cloudfront.net/wp-content/uploads/2022/10/07102236/Hide-admin-notice-and-nags-from-Dashboard.webp) Watch this video to learn more about [Disable Admin Notice](https://www.youtube.com/watch?v=j9L1injE1fk). Each step is very simple and anyone can do this. Just don't miss the step as mentioned in the video. ### WP Dashboard Activity Logs Module Monitoring and tracking are essential for any business, and WordPress websites need to check each change. With the Activity Log module by WP Adminify, you'll be able to see everything happening on your WordPress website. In short, get a complete insight into exactly who does what and when. [Activity logs by WP Adminify](https://wpadminify.com/activity-logs) come with a rich filter system. It tracks login, post changes, delete, upload, theme-plugin changes, activation, and many more. ![WordPress Dashboard Activity logs plugin](https://d1k2c27psfzbiv.cloudfront.net/wp-content/uploads/2022/02/12115211/WordPress-Dashboard-Activity-logs-plugin.webp) Let's take a look at the following features: - WordPress Updates record - Theme & Plugin active and deactivate info - Post type information - General Post and Page update, delete, create info - Filter by specific user name or user role - Filter by a time duration - User login and log out information - and many more ## WordPress Admin Dashboard without Plugins While plugins offer easy customization options, you can modify your WordPress dashboard using built-in features and custom code. Here are several ways to customize your dashboard without relying on plugins: ### Screen Options At the top-right of most dashboard pages, you'll find a "Screen Options" tab. Click it to show/hide various dashboard elements, rearrange widgets, or adjust the number of items displayed. ![WordPress Dashboard Screen Options](https://d1k2c27psfzbiv.cloudfront.net/wp-content/uploads/2022/03/12110435/WordPress-Dashboard-Screen-Options.webp) ### Drag and Drop Many dashboard elements can be rearranged by simply dragging and dropping them. This allows you to prioritize the information most important to you. ### Remove Dashboard Widgets Add this code to your theme's functions.php file to remove all default Dashboard widget: ``` function wporg_remove_all_dashboard_metaboxes() { // Remove Welcome panel remove_action( 'welcome_panel', 'wp_welcome_panel' ); // Remove the rest of the dashboard widgets remove_meta_box( 'dashboard_primary', 'dashboard', 'side' ); remove_meta_box( 'dashboard_quick_press', 'dashboard', 'side' ); remove_meta_box( 'health_check_status', 'dashboard', 'normal' ); remove_meta_box( 'dashboard_right_now', 'dashboard', 'normal' ); remove_meta_box( 'dashboard_activity', 'dashboard', 'normal'); } add_action( 'wp_dashboard_setup', 'wporg_remove_all_dashboard_metaboxes' ); ``` Reference: [https://developer.wordpress.org/apis/dashboard-widgets/#removing-default-dashboard-widgets](https://developer.wordpress.org/apis/dashboard-widgets/#removing-default-dashboard-widgets) ### Add Custom Dashboard Widgets Create your own widgets with this code in functions.php: ``` /** * Add a widget to the dashboard. * * This function is hooked into the 'wp_dashboard_setup' action below. */ function wporg_add_dashboard_widgets() { wp_add_dashboard_widget( 'wporg_dashboard_widget', // Widget slug. esc_html__( 'Example Dashboard Widget', 'wporg' ), // Title. 'wporg_dashboard_widget_render' // Display function. ); } add_action( 'wp_dashboard_setup', 'wporg_add_dashboard_widgets' ); /** * Create the function to output the content of our Dashboard Widget. */ function wporg_dashboard_widget_render() { // Display whatever you want to show. esc_html_e( "Howdy! I'm a great Dashboard Widget.", "wporg" ); } ``` ### Customize the Admin Color Scheme Users can choose from predefined color schemes in their profile settings. To add a custom color scheme, use the wp_admin_css_color() function in your theme's functions.php file. ``` function custom_admin_color_scheme() { wp_admin_css_color( 'my_custom_scheme', // Unique slug for your scheme __('My Custom Scheme', 'textdomain'), // Display name get_template_directory_uri() . '/my_custom_scheme.css', // Path to your CSS file array('#737373', '#ffcd00', '#c7a589', '#9ea476'), // Color values array('base' => '#f3f2f1', 'focus' => '#fff', 'current' => '#fff') // Additional styles ); } add_action('admin_init', 'custom_admin_color_scheme'); ``` We are not done yet. Now to get the final output, create an Admin color scheme CSS file. Checkout the following CSS code, and feel free to customize the color based on your demand. The following CSS is a minified version, you can uniminify this code and customize it. ``` #adminmenu, #adminmenuback, #adminmenuwrap, #wpadminbar { background: #737373; } body { background: #fff; } a { color: #0073aa; } .wp-core-ui input[type="reset"]:active, .wp-core-ui input[type="reset"]:hover, a:active, a:focus, a:hover { color: #0096dd; } #post-body #visibility:before, #post-body .misc-pub-post-status:before, #post-body .misc-pub-revisions:before, .curtime #timestamp:before, span.wp-media-buttons-icon:before { color: currentColor; } input[type="checkbox"]:checked::before { content: url("data:yourimagehere"); } input[type="radio"]:checked::before { background: #ffcd00; } input[type="checkbox"]:focus, input[type="color"]:focus, input[type="date"]:focus, input[type="datetime-local"]:focus, input[type="datetime"]:focus, input[type="email"]:focus, input[type="month"]:focus, input[type="number"]:focus, input[type="password"]:focus, input[type="radio"]:focus, input[type="search"]:focus, input[type="tel"]:focus, input[type="text"]:focus, input[type="time"]:focus, input[type="url"]:focus, input[type="week"]:focus, select:focus, textarea:focus { border-color: #585858; box-shadow: 0 0 0 1px #585858; } .wp-core-ui .button, .wp-core-ui .button-secondary { color: #c7a589; border-color: #c7a589; } .wp-core-ui .button-secondary:focus, .wp-core-ui .button-secondary:hover, .wp-core-ui .button.focus, .wp-core-ui .button.hover, .wp-core-ui .button:focus, .wp-core-ui .button:hover { border-color: #bf9878; color: #bf9878; } .wp-core-ui .button-secondary:focus, .wp-core-ui .button.focus, .wp-core-ui .button:focus { border-color: #c7a589; color: #bf9878; box-shadow: 0 0 0 1px #c7a589; } .wp-core-ui .button:active { background: #bf9878; border-color: #bf9878; } .wp-core-ui .button.active, .wp-core-ui .button.active:focus, .wp-core-ui .button.active:hover { border-color: #bf9878; color: #bf9878; box-shadow: inset 0 2px 5px -3px #bf9878; } .wp-core-ui .button-primary { background: #c7a589; border-color: #c7a589; color: #fff; } .wp-core-ui .button-primary:focus, .wp-core-ui .button-primary:hover { background: #ccad93; border-color: #c29d7f; color: #fff; } .wp-core-ui .button-primary:focus { box-shadow: 0 0 0 1px #fff, 0 0 0 3px #c7a589; } .wp-core-ui .button-primary:active { background: #bf9878; border-color: #bf9878; color: #fff; } .wp-core-ui .button-primary.active, .wp-core-ui .button-primary.active:focus, .wp-core-ui .button-primary.active:hover { background: #c7a589; color: #fff; border-color: #ae7d55; box-shadow: inset 0 2px 5px -3px #37271a; } .wp-core-ui .button-primary.button-primary-disabled, .wp-core-ui .button-primary.disabled, .wp-core-ui .button-primary:disabled, .wp-core-ui .button-primary[disabled] { color: #d1ccc7 !important; background: #ba906d !important; border-color: #ba906d !important; text-shadow: none !important; } .wp-core-ui .button-group > .button.active { border-color: #c7a589; } .wp-core-ui .wp-ui-primary, .wrap .add-new-h2:hover, .wrap .page-title-action:hover, body.more-filters-opened .more-filters { color: #f2ff8d; background-color: #737373; } .view-switch a.current:before, .wp-core-ui .wp-ui-text-primary { color: #737373; } #adminmenu a:hover, #adminmenu li.menu-top:hover, #adminmenu li.opensub > a.menu-top, #adminmenu li > a.menu-top:focus, .wp-core-ui .wp-ui-highlight { color: #f2ff8d; background-color: #585858; } #adminmenu .wp-has-current-submenu .wp-submenu a:focus, #adminmenu .wp-has-current-submenu .wp-submenu a:hover, #adminmenu .wp-has-current-submenu.opensub .wp-submenu a:focus, #adminmenu .wp-has-current-submenu.opensub .wp-submenu a:hover, #adminmenu .wp-has-current-submenu.opensub .wp-submenu li.current a:focus, #adminmenu .wp-has-current-submenu.opensub .wp-submenu li.current a:hover, #adminmenu .wp-submenu a:focus, #adminmenu .wp-submenu a:hover, #adminmenu .wp-submenu li.current a:focus, #adminmenu .wp-submenu li.current a:hover, #adminmenu a.wp-has-current-submenu:focus + .wp-submenu a:focus, #adminmenu a.wp-has-current-submenu:focus + .wp-submenu a:hover, #adminmenu a.wp-has-current-submenu:focus + .wp-submenu li.current a:focus, #adminmenu a.wp-has-current-submenu:focus + .wp-submenu li.current a:hover, #collapse-button:focus, #collapse-button:hover, #wpadminbar #wp-admin-bar-user-info a:hover .display-name, #wpadminbar .menupop .menupop > .ab-item:hover:before, #wpadminbar .quicklinks .ab-sub-wrapper .menupop.hover > a, #wpadminbar .quicklinks .ab-sub-wrapper .menupop.hover > a .blavatar, #wpadminbar .quicklinks .menupop ul li a:focus, #wpadminbar .quicklinks .menupop ul li a:focus strong, #wpadminbar .quicklinks .menupop ul li a:hover, #wpadminbar .quicklinks .menupop ul li a:hover strong, #wpadminbar .quicklinks .menupop.hover ul li a:focus, #wpadminbar .quicklinks .menupop.hover ul li a:hover, #wpadminbar .quicklinks li a:focus .blavatar, #wpadminbar .quicklinks li a:hover .blavatar, #wpadminbar li #adminbarsearch.adminbar-focused:before, #wpadminbar li .ab-item:focus .ab-icon:before, #wpadminbar li .ab-item:focus:before, #wpadminbar li a:focus .ab-icon:before, #wpadminbar li.hover .ab-icon:before, #wpadminbar li.hover .ab-item:before, #wpadminbar li:hover #adminbarsearch:before, #wpadminbar li:hover .ab-icon:before, #wpadminbar li:hover .ab-item:before, #wpadminbar.mobile .quicklinks .ab-icon:before, #wpadminbar.mobile .quicklinks .ab-item:before, #wpadminbar.nojs .quicklinks .menupop:hover ul li a:focus, #wpadminbar.nojs .quicklinks .menupop:hover ul li a:hover, #wpadminbar:not(.mobile) > #wp-toolbar a:focus span.ab-label, #wpadminbar:not(.mobile) > #wp-toolbar li.hover span.ab-label, #wpadminbar:not(.mobile) > #wp-toolbar li:hover span.ab-label, .folded #adminmenu .wp-has-current-submenu .wp-submenu a:focus, .folded #adminmenu .wp-has-current-submenu .wp-submenu a:hover, .theme-browser .theme.add-new-theme a:focus span:after, .theme-browser .theme.add-new-theme a:hover span:after, .wp-core-ui .wp-ui-text-highlight, .wp-pointer .wp-pointer-content h3:before { color: #585858; } #wpadminbar #wp-admin-bar-recovery-mode, .wp-core-ui .wp-ui-notification { color: #f2ff8d; background-color: #ccaf0b; } .view-switch a:hover:before, .wp-core-ui .wp-ui-text-notification { color: #ccaf0b; } #adminmenu div.wp-menu-image:before, #collapse-button, #wpadminbar #adminbarsearch:before, #wpadminbar .ab-icon, #wpadminbar .ab-icon:before, #wpadminbar .ab-item:after, #wpadminbar .ab-item:before, #wpadminbar .menupop .menupop > .ab-item:before, #wpadminbar .quicklinks li .blavatar, #wpadminbar.mobile .quicklinks .hover .ab-icon:before, #wpadminbar.mobile .quicklinks .hover .ab-item:before, .wp-core-ui .wp-ui-text-icon, .wp-responsive-open #wpadminbar #wp-admin-bar-menu-toggle .ab-icon:before, div#wp-responsive-toggle a:before { color: #f3f1f1; } #adminmenu .wp-has-current-submenu.opensub .wp-submenu li.current a, #adminmenu .wp-submenu li.current a, #adminmenu a, #adminmenu a.current:hover div.wp-menu-image:before, #adminmenu a.wp-has-current-submenu:focus + .wp-submenu li.current a, #adminmenu li a:focus div.wp-menu-image:before, #adminmenu li.menu-top:hover div.wp-menu-image:before, #adminmenu li.opensub div.wp-menu-image:before, #adminmenu li.opensub > a.menu-top div.wp-menu-image:before, #adminmenu li.wp-has-current-submenu a:focus div.wp-menu-image:before, #adminmenu li.wp-has-current-submenu div.wp-menu-image:before, #adminmenu li.wp-has-current-submenu.opensub div.wp-menu-image:before, #adminmenu li:hover div.wp-menu-image:before, #wpadminbar #wp-admin-bar-recovery-mode .ab-item, #wpadminbar #wp-admin-bar-recovery-mode a.ab-item, #wpadminbar #wp-admin-bar-user-info .display-name, #wpadminbar .ab-item, #wpadminbar a.ab-item, #wpadminbar:not(.mobile) li:hover #adminbarsearch:before, #wpadminbar:not(.mobile) li:hover .ab-icon:before, #wpadminbar:not(.mobile) li:hover .ab-item:after, #wpadminbar:not(.mobile) li:hover .ab-item:before, #wpadminbar > #wp-toolbar span.ab-label, #wpadminbar > #wp-toolbar span.noticon, .ie8 #adminmenu li.opensub div.wp-menu-image:before, .widgets-chooser li.widgets-chooser-selected:before, .widgets-chooser li.widgets-chooser-selected:focus:before, body.more-filters-opened .more-filters:before, body.more-filters-opened .more-filters:focus:before, body.more-filters-opened .more-filters:hover:before { color: #f2ff8d; } .about-wrap .nav-tab-active, .nav-tab-active, .nav-tab-active:hover { background-color: #fff; border-bottom-color: #fff; } #adminmenu .wp-has-current-submenu .wp-submenu, #adminmenu .wp-has-current-submenu.opensub .wp-submenu, #adminmenu .wp-submenu, #adminmenu a.wp-has-current-submenu:focus + .wp-submenu, #wpadminbar .menupop .ab-sub-wrapper, .folded #adminmenu .wp-has-current-submenu .wp-submenu, .wp-responsive-open #wpadminbar #wp-admin-bar-menu-toggle a { background: #616161; } #adminmenu li.wp-has-submenu.wp-not-current-submenu.opensub:hover:after { border-right-color: #616161; } #adminmenu .wp-has-current-submenu .wp-submenu a, #adminmenu .wp-has-current-submenu.opensub .wp-submenu a, #adminmenu .wp-submenu .wp-submenu-head, #adminmenu .wp-submenu a, #adminmenu a.wp-has-current-submenu:focus + .wp-submenu a, #wpadminbar #wp-admin-bar-user-info .username, #wpadminbar .ab-submenu .ab-item, #wpadminbar .quicklinks .menupop ul li a, #wpadminbar .quicklinks .menupop.hover ul li a, #wpadminbar.nojs .quicklinks .menupop:hover ul li a, .folded #adminmenu .wp-has-current-submenu .wp-submenu a { color: #ccd585; } ul#adminmenu a.wp-has-current-submenu:after, ul#adminmenu > li.current > a.current:after { border-right-color: #fff; } #adminmenu li.current a.menu-top, #adminmenu li.wp-has-current-submenu .wp-submenu .wp-submenu-head, #adminmenu li.wp-has-current-submenu a.wp-has-current-submenu, .folded #adminmenu li.current.menu-top { color: #f2ff8d; background: #585858; } #adminmenu .awaiting-mod, #adminmenu .update-plugins { color: #f2ff8d; background: #ccaf0b; } #adminmenu li a.wp-has-current-submenu .update-plugins, #adminmenu li.current a .awaiting-mod, #adminmenu li.menu-top:hover > a .update-plugins, #adminmenu li:hover a .awaiting-mod { color: #f2ff8d; background: #616161; } #wpadminbar { color: #f2ff8d; } #wpadminbar .ab-top-menu > li.menupop.hover > .ab-item, #wpadminbar.nojq .quicklinks .ab-top-menu > li > .ab-item:focus, #wpadminbar.nojs .ab-top-menu > li.menupop:hover > .ab-item, #wpadminbar:not(.mobile) .ab-top-menu > li:hover > .ab-item, #wpadminbar:not(.mobile) .ab-top-menu > li > .ab-item:focus { color: #585858; background: #616161; } #wpadminbar .quicklinks .menupop ul.ab-sub-secondary, #wpadminbar .quicklinks .menupop ul.ab-sub-secondary .ab-submenu { background: #858585; } #wpadminbar > #wp-toolbar > #wp-admin-bar-top-secondary > #wp-admin-bar-search #adminbarsearch input.adminbar-input:focus { color: #f2ff8d; background: #858585; } #wpadminbar .ab-top-menu > #wp-admin-bar-recovery-mode.hover > .ab-item, #wpadminbar.nojq .quicklinks .ab-top-menu > #wp-admin-bar-recovery-mode > .ab-item:focus, #wpadminbar:not(.mobile) .ab-top-menu > #wp-admin-bar-recovery-mode:hover > .ab-item, #wpadminbar:not(.mobile) .ab-top-menu > #wp-admin-bar-recovery-mode > .ab-item:focus { color: #f2ff8d; background-color: #b89e0a; } #wpadminbar .quicklinks li#wp-admin-bar-my-account.with-avatar > a img { border-color: #858585; background-color: #858585; } .wp-pointer .wp-pointer-content h3 { background-color: #585858; border-color: #4b4b4b; } .wp-pointer.wp-pointer-top .wp-pointer-arrow, .wp-pointer.wp-pointer-top .wp-pointer-arrow-inner, .wp-pointer.wp-pointer-undefined .wp-pointer-arrow, .wp-pointer.wp-pointer-undefined .wp-pointer-arrow-inner { border-bottom-color: #585858; } .media-item .bar, .media-progress-bar div { background-color: #585858; } .details.attachment { box-shadow: inset 0 0 0 3px #fff, inset 0 0 0 7px #585858; } .attachment.details .check { background-color: #585858; box-shadow: 0 0 0 1px #fff, 0 0 0 2px #585858; } .media-selection .attachment.selection.details .thumbnail { box-shadow: 0 0 0 1px #fff, 0 0 0 3px #585858; } .mce-container.mce-menu .mce-menu-item-normal.mce-active, .mce-container.mce-menu .mce-menu-item-preview.mce-active, .mce-container.mce-menu .mce-menu-item.mce-selected, .mce-container.mce-menu .mce-menu-item:focus, .mce-container.mce-menu .mce-menu-item:hover, .theme-browser .theme.active .theme-name, .theme-browser .theme.add-new-theme a:focus:after, .theme-browser .theme.add-new-theme a:hover:after { background: #585858; } .theme-filter.current, .theme-section.current { border-bottom-color: #737373; } .widgets-chooser li.widgets-chooser-selected, body.more-filters-opened .more-filters:focus, body.more-filters-opened .more-filters:hover { background-color: #585858; color: #f2ff8d; } .wp-responsive-open div#wp-responsive-toggle a { border-color: transparent; background: #585858; } ``` ![Customize the Admin Color Scheme](https://d1k2c27psfzbiv.cloudfront.net/wp-content/uploads/2022/03/12110351/Customize-the-Admin-Color-Scheme.webp) ### Modify the Admin Footer Change the admin footer text with this code: ``` function custom_admin_footer() { echo 'Powered by WordPress | Customized by Your Name'; } add_filter('admin_footer_text', 'custom_admin_footer'); ``` ### Hide Admin Menu Items You can hide all unwanted admin menu items by the following line of code. But as a recommendation, you can check out the [Admin Menu Editor by WP Adminify](https://wpadminify.com/features/admin-menu-editor), which will help you to hide admin menu items based on their user role, change text, icons, and create a custom menu. For a worked example, see how to [hide the Comments menu from the WordPress admin panel](https://wpadminify.com/hide-comments-menu-from-wordpress-admin-panel) with both the code snippet and the plugin. ``` function remove_menu_items() { remove_menu_page('edit.php'); // Removes Posts remove_menu_page('edit-comments.php'); // Removes Comments } add_action('admin_menu', 'remove_menu_items'); ``` ### Custom CSS Add custom CSS to style your dashboard: ``` function custom_admin_styles() { echo '#your_CSS_here'; } add_action('admin_head', 'custom_admin_styles'); ``` ### Related Reading - [Admin Menu Editor - Rearrange & hide menu items](https://wpadminify.com/features/admin-menu-editor) - [Dashboard UI Templates - 9 pre-built designs](https://wpadminify.com/features/dashboard-customization) - [Custom Dashboard Widgets - Add welcome panels](https://wpadminify.com/features/custom-dashboard-widget) - [White Label WordPress - Rebrand for clients](https://wpadminify.com/features/white-label) - [Login Page Customizer - Brand your login](https://wpadminify.com/loginfy) ## Role-Based Dashboards for Clients and Teams A custom WordPress dashboard gets far more useful the moment you tailor it per user role. An administrator needs everything; an editor needs posts and media; your client usually needs a simple, branded client dashboard that can't break anything. When you customize your WordPress dashboard around roles, support requests drop and the whole content workflow gets faster. Three building blocks make this work. First, the [admin menu editor](https://wpadminify.com/features/admin-menu-editor) lets you [hide admin menu items by user role](https://wpadminify.com/docs/adminify/admin-menu/hide-admin-menu-by-user-roles), so each role sees only what it needs. Second, custom [dashboard widgets](https://wpadminify.com/features/custom-dashboard-widget) replace the default screens with role-specific welcome panels, onboarding notes for editors, support contacts for clients. Third, the [white label module](https://wpadminify.com/features/white-label) re-brands the admin bar, login page and footer, which matters when you create a custom WordPress dashboard for client handoffs. For the complete agency playbook on rebranding every corner of wp-admin, read our [white label WordPress guide](https://wpadminify.com/white-label-wordpress). If you're comparing tools for this, the same role-based approach is what separates full dashboard suites from single-purpose plugins, see our [WP Adminify vs Ultimate Dashboard comparison](https://wpadminify.com/wp-adminify-vs-ultimate-dashboard) for how the two handle roles, widgets and white labeling. And unlike page builder templates that only restyle the frontend, dashboard customization changes the workspace your team actually works in every day. ## How Do You Customize the WordPress Admin Dashboard Step by Step? (Updated July 2026) Open Screen Options on the dashboard home to hide or reorder panels, set your colour scheme under Users → Profile, then add an admin plugin when you need menu editing, branding or per-role views. The table below shows exactly where each setting lives on any WordPress site. ### Where does each dashboard setting live? Most people lose time hunting for the right screen rather than making the change. Use this as a lookup table: the middle column is what ships with the default WordPress dashboard, the right column is the equivalent screen in WP Adminify when the built-in route needs code. | What you want to change | Built-in WordPress location | With WP Adminify | | --- | --- | --- | | Hide or reorder dashboard widgets | Dashboard → Screen Options (top right), then drag the panels | WP Adminify → Custom Dashboard Widgets | | Change admin colours / dark mode | Users → Profile → Admin Color Scheme | WP Adminify Option Panel → Light/Dark mode | | Rename, reorder or hide sidebar menu items per user role | `remove_menu_page()` in `functions.php` | WP Adminify → Admin Menu | | Replace the WordPress logo and admin footer text | Custom filters in `functions.php` | WP Adminify Option Panel → White Label | | Redesign the WordPress login page | `login_enqueue_scripts` hook plus custom CSS | WP Adminify → Login Customizer | | Change the columns in post, page and user list tables | `manage_posts_columns` filter | WP Adminify → Admin Columns | | Build custom admin pages or a client dashboard | `add_menu_page()` in code | WP Adminify → UI Templates | ### How do you create a custom WordPress dashboard for a client in 6 steps? A client-ready admin area takes about fifteen minutes. Work in this order, layout first, permissions second, branding last, so you are not re-hiding menu items after you have already set roles. - Strip the default dashboard. Log in, open Screen Options on the Dashboard home and untick WordPress Events, Activity and Quick Draft. This alone removes most of the noise from the WordPress admin area. - Add the panels the client actually needs. A support link, a how-to video or your contact details. Use `wp_add_dashboard_widget()` in code, or add them from [Custom Dashboard Widgets](https://wpadminify.com/features/custom-dashboard-widget) if you would rather not touch PHP. - Trim the sidebar per user role. Hide Plugins, Tools and Settings from editors and clients so they cannot break the site. If items vanish for the wrong people afterwards, see [WordPress admin menu not showing](https://wpadminify.com/wordpress-admin-menu-not-showing). - Tidy the admin bar. Remove the WordPress logo menu and any plugin entries the client will never use. The [WordPress admin bar editor](https://wpadminify.com/wordpress-toolbar-editor) lets you hide, reorder, and add items without code. - Apply your branding. Swap the logo, admin footer text and colours for the agency's. This is the step that turns a generic install into something you can hand over, see the [white label module](https://wpadminify.com/features/white-label) for what can be rebranded. - Customise the login page. The login screen is the first thing the client sees, so match it to the dashboard you just built. ### Do you need a plugin to customize the WordPress admin dashboard? No. Steps 1 and 4 are built into WordPress, and every other step can be written by hand with the hooks listed in the table. A plugin is worth it once you are repeating the same work across several sites, or when per-role rules and branding would otherwise mean maintaining custom code on every WordPress site you manage. If you are choosing between tools, we compare the options side by side in [best WordPress dashboard plugins](https://wpadminify.com/best-wordpress-dashboard-plugin), narrow it to the sidebar in [best WordPress admin menu plugin](https://wpadminify.com/best-wordpress-admin-menu-plugin), and put WP Adminify head to head with [Ultimate Dashboard](https://wpadminify.com/wp-adminify-vs-ultimate-dashboard). Feature limits per plan are on the [pricing page](https://wpadminify.com/pricing). ## WordPress Dashboard Customization, FAQs ### How do I customize my WordPress dashboard? Use Screen Options to show or hide widgets, drag and drop to rearrange, or install WP Adminify for full control over colors, menus, and branding. ### What is the best dashboard customization plugin? WP Adminify offers 60+ features including menu editor, white label, custom widgets, dark mode, and login page customization. ### Can I create a custom dashboard for clients? Yes. WP Adminify lets you white label the admin, hide menus per role, add custom welcome widgets, and rebrand the login page. ### How do I change the WordPress dashboard theme? WordPress has no built-in admin-theme switcher, so you change the dashboard look with a plugin. WP Adminify ships nine ready-made admin templates: open WP Adminify, pick an Adminify UI theme, then fine-tune colours, logo, and fonts. The change applies only to wp-admin, not your site's front-end theme. ### Why does my WordPress dashboard look different? Usually an admin-customization plugin or a theme is restyling wp-admin. WP Adminify, Ultimate Dashboard, or a saved admin colour scheme can replace the default look. Check Plugins for anything admin-related, and in WP Adminify switch the Adminify UI toggle off to return to the stock WordPress dashboard. ### How do I hide unnecessary items from the WordPress admin? For a quick cleanup, use Screen Options at the top right of the dashboard to hide widgets and columns. To remove menu items, meta boxes, or notices for specific user roles, use an admin plugin: WP Adminify's menu editor hides items per role so clients see only what they need. ### How do I create a custom menu in the WordPress dashboard? Use an admin menu editor to rename, reorder, hide or add items, no code needed, or register menus programmatically with add_menu_page(). The step-by-step for both methods is in our [custom admin menu guide](https://wpadminify.com/how-to-add-menu-in-wordpress-admin-dashboard). ### How do I organize pages in the WordPress dashboard? Two features help: folders (group pages, posts and media into drag-and-drop folders) and custom admin columns (sort and filter by the fields you care about). Both are covered in the [folders doc](https://wpadminify.com/docs/adminify/productivity/create-folder-for-post-types) and the [admin columns editor](https://wpadminify.com/admin-columns-editor). ### How do I customise the WordPress admin dashboard? Exactly the same way, customise (British spelling) and customize (American) mean the same thing here, and every step on this page applies. Use Screen Options and drag-and-drop for the built-in changes, or a plugin like WP Adminify when you need menu editing, custom widgets, branding, dark mode or per-role dashboards. --- # How to Reset a WordPress Admin Password (5 Ways, Even Without Email) URL: https://wpadminify.com/how-to-change-or-reset-wordpress-admin-password Last updated: 2026-08-12 Locked out of WordPress, or just need to change the password on an admin account? There are five reliable ways to reset a WordPress admin password, from the one-click email link to database-level resets that work even when nothing else does. Start with Method 1 and move down the list; each method works in situations where the previous one fails. ## Method 1: Reset Your Password via Email (Lost Password Link) The fastest way to reset your WordPress password when you can't log in: - Go to your login page (yoursite.com/wp-login.php) and click Lost your password? - Enter your username or the email address on the admin account. - WordPress sends a password reset link to that email, click it and choose a new password. If the reset email never arrives, check spam first, then your site's ability to send email at all, many servers can't send mail without an SMTP plugin. If email is broken, use one of the methods below, then fix deliverability so future resets work. ## Method 2: Change the Password from the WordPress Dashboard Already logged in (or another administrator is)? Changing your WordPress password takes a minute: - Go to Users → Profile (or Users → All Users → pick the admin user). - Scroll to Account Management → Set New Password. - WordPress generates a strong password, use it or type your own, then click Update Profile. An administrator can reset the password for any user this way, handy when a team member is locked out and email reset isn't working for them. ## Method 3: Reset the Password via phpMyAdmin (Database) When you can't receive the reset email and no other admin exists, reset the password directly in the MySQL database using phpMyAdmin: - Open phpMyAdmin from your hosting control panel (cPanel, hPanel, Plesk) and select your site's database. - Open the wp_users table and click Edit on the admin user's row. - In the user_pass field, paste your new password and select MD5 in the Function dropdown. - Click Go, the new password works immediately (WordPress upgrades the MD5 hash to its stronger format on your next login). Tip: your table prefix may differ (e.g. wp7a_users instead of wp_users). Always back up the database before editing it. ## Method 4: Reset via WP-CLI (Command Line) If you have SSH access, WP-CLI is the cleanest server-side reset. List users to find the right ID, then update the password: ``` wp user list wp user update 1 --user_pass="your-new-strong-password" ``` Replace `1` with the admin user's ID. This bypasses email entirely and takes effect instantly, the go-to method for developers and agencies managing many sites. ## Method 5: Reset from cPanel / Softaculous If your host installed WordPress through Softaculous, you can change the admin password without touching the database: open Softaculous in cPanel, find your WordPress installation, click Edit Details, and set a new Admin Password. Some hosts (Hostinger, SiteGround, Bluehost) also offer their own one-click password reset in the hosting panel, worth checking before editing the database by hand. ## When the Reset Email Never Arrives A missing reset email is the most common reason people end up locked out. Work through these before assuming the account is broken: - Check spam and promotions folders, and search your inbox for "wordpress" in case a filter hid the message. - Confirm the admin email is correct. If the address on the account is old or wrong, the link goes nowhere. Verify or change it with the dashboard method above, or in the database (wp_users). See [how to change the WordPress admin email](https://wpadminify.com/how-to-change-wordpress-admin-email). - Test whether the site can send mail at all. Many servers cannot send email out of the box, so no WordPress notification arrives. Installing an SMTP plugin and sending through a real mail service (your host, Gmail, SendGrid, Brevo) fixes it for good. - Reset another way in the meantime. Use phpMyAdmin, WP-CLI, or the code method below to get back in now, then fix deliverability so future resets and notifications work. ## Advanced: Reset the Password with Code If you have file access but no database tool or SSH, you can force a reset with a short PHP snippet. Add this to your theme's functions.php (or a small plugin), load any page of your site once, then remove the line immediately: ``` // Temporary: set user ID 1 to a new password, then DELETE this line. wp_set_password( 'your-new-strong-password', 1 ); ``` The `wp_set_password()` function hashes the password correctly and clears the old one. Because it runs on every page load, you must remove the snippet as soon as you can log in, or WordPress will keep resetting the password and trap you in a loop. ### The Emergency Password Reset Script For the worst case (no admin access, no database tool, and email is down), WordPress.org publishes a standalone Emergency Password Reset script. You place emergency.php in your site root, open it in the browser, enter the admin username and a new password, then delete the file the moment it finishes. It does not check who is running it, so leaving it in place is a serious security hole. See the official [reset your password](https://wordpress.org/documentation/article/reset-your-password/) documentation for the current script. ## After the Reset: Lock the Door Properly A password reset is a good moment to harden the login itself. Use a unique, generated password (a password manager beats memorable phrases), enable two-factor authentication if your security plugin offers it, and consider [changing your WordPress login URL](https://wpadminify.com/change-wordpress-login-page-url) so bots can't hammer wp-login.php. If you manage client sites, [role-based login redirects](https://wpadminify.com/wordpress-redirect-users-after-login-by-role) also keep users away from screens they don't need. WP Adminify's [security module](https://wpadminify.com/features/security) covers both without extra plugins. ## WordPress Admin Password FAQs ### How do I reset my WordPress admin password without email access? Use phpMyAdmin (edit the user_pass field in wp_users with the MD5 function), WP-CLI (wp user update), or Softaculous in cPanel. All three work with no email involved. ### Why is my WordPress password reset email not arriving? Usually the server can't send mail. Check spam first, then install an SMTP plugin so WordPress sends through a real mail service. Until that's fixed, reset via the database or WP-CLI instead. ### Can I change another user's password as an administrator? Yes, go to Users then All Users, edit the user, and use Set New Password under Account Management. The change applies immediately and logs out that user's active sessions if you also click Log Out Everywhere. ### Is editing the database to reset a password safe? Yes, if you change only the user_pass field with the MD5 function and back up the database first. WordPress automatically re-hashes the password with its stronger algorithm the next time you log in. ### How do I reset a WordPress password using functions.php? Add wp_set_password( 'new-password', 1 ); to your theme's functions.php, where 1 is the user ID, then load any page of your site once. Delete the line immediately afterward, or WordPress resets the password on every request and locks you out again. ### What is the WordPress emergency password reset script? It is a standalone emergency.php script from WordPress.org that resets the main admin password when you have no dashboard, database, or email access. You upload it to the site root, run it once in the browser, then delete it right away because it performs no permission checks and is unsafe to leave online. ### The reset link says it has expired or is invalid. What now? Reset links are single-use and expire after 24 hours, so request a fresh one from the Lost your password page and use the newest email. If the new link still fails or no email arrives, the site likely cannot send mail, so reset through phpMyAdmin, WP-CLI, or the code method instead. ## Related Reading - [WordPress Login Page Not Working? Fixes for Every Error](https://wpadminify.com/how-to-fix-wordpress-login-page-issues) - [How to Change the WordPress Login Page URL](https://wpadminify.com/change-wordpress-login-page-url) - [How to Change the WordPress Admin Email](https://wpadminify.com/how-to-change-wordpress-admin-email) --- # How to Add Code to WordPress Header and Footer? - Easy Fix URL: https://wpadminify.com/add-code-to-wordpress-header Last updated: 2026-08-12 It’s an evergreen problem for WordPress administrators to add code to WordPress Header or Footer. You will get a lot of freemium plugins available in the market that do this job properly. But the question is, why do you need to depend on a plugin always if there is a good solution already available? My first choice is to add code to WordPress Header is Google Tag Manager. This is one of the most underrated but powerful tools available in the market, which offers so much at no cost. If you don’t prefer the Google Tag Manager, just skip to the next section of this content. I have sharedd a total of 10+ ways on how you can add code in the WordPress header or Footer area. ## Add Code to WordPress Header with Google Tag Manager Setting up [Google Tag Manager](https://tagmanager.google.com/) for your Website is super easy. If you haven’t tried this yet, just [read this simple documentation](https://support.google.com/tagmanager/answer/14842164?hl=en) by Google, and you can do it within a few minutes. If you are confused about the installation of Google Tag Manager, then don’t skip this post, at the last of this post I have shared the easiest way to install Google Tag Manager in your WordPress Website. After setting up your website in Google Tag Manager, you will get a Custom HTML tag in the tag manager type listing. With the help of Custom HTML, you can insert code in your WordPress Header.  Also, there are a few [header security settings](https://wpadminify.com/docs/adminify/security/enable-header-security) available in WP Adminify. ### Limitations of GTM (Google Tag Manager) Let’s talk about the limitation first. You can’t insert any PHP code from GTM. As soon as you try to add a PHP Code via this Custom HTML, you will get an error like the following screenshot while previewing or deploying your tag. ![Error while adding PHP code in Custom HTML via GTM](https://d1k2c27psfzbiv.cloudfront.net/wp-content/uploads/2025/02/18103454/Error-while-adding-PHP-code-in-Custom-HTML-via-GTM.webp) ### Best use of GTM for Adding Code in WordPress You can add the following code easily with the help of GTM. - HTML - CSS - JavaScript Though the list seems very short but it’s too powerful and can do the best job for you. Most of the tracking, analytics, advertising, and security verification offer JavaScript code. I think that’s the reason why people search for adding code to WordPress header keyword. If you are someone who is searching for something different, feel free to comment. Let’s explore some real use cases of GTM in my WordPress Website. In the following screenshot, you can notice that I have integrated a live chat service for my website with the help of GTM. I used to copy and paste the code in my theme's header.php file 2 years ago. ![Tawk live chat added in website via GTM](https://d1k2c27psfzbiv.cloudfront.net/wp-content/uploads/2025/02/18103453/Tawk-live-chat-added-in-website-via-GTM.webp) Here is another example of my Ahrefs tracking code. I have added my Ahrefs tracking code in my website with the help of GTM. ![Ahrefs website analysis added in website via GTM](https://d1k2c27psfzbiv.cloudfront.net/wp-content/uploads/2025/02/18103452/Ahrefs-website-analysis-added-in-website-via-GTM.webp) ### How to add Code in the header with GTM? Navigate to`Tags > New`and name your tag something identical so that you can understand the use of your tag in the future. Believe me, it’s necessary; otherwise, you may mix up things. ![Add new tags in Google Tag Manager](https://d1k2c27psfzbiv.cloudfront.net/wp-content/uploads/2025/02/18103451/Add-new-tags-in-Google-Tag-Manager.webp) Now, click on Tag Configuration and search with `Custom`word in the tag type library. Select the custom HTML tag and you will get the field to input your code. Make sure to copy and paste the code properly. ![Rename and add custom HTML](https://d1k2c27psfzbiv.cloudfront.net/wp-content/uploads/2025/02/18103450/Rename-and-add-custom-HTML.webp) Then you have to select where you would like to trigger the Custom Code. You can select All Page if you want to run your code entier website. If there is any specific requirement and needs to trigger the code in a specific page or archive page, then create a trigger based on your requirement and apply. ![Select All Page for Trigger](https://d1k2c27psfzbiv.cloudfront.net/wp-content/uploads/2025/02/18103448/Select-All-Page-for-Trigger.webp) That’s all about adding code in the WordPress header with the help of GTM. Now just click on the save button and be ready to test before deploying the code. ![Save Google Tag Manager before preview](https://d1k2c27psfzbiv.cloudfront.net/wp-content/uploads/2025/02/18103447/Save-Google-Tag-Manager-before-preview.webp) That’s one of the most interesting parts, you can preview and check if your code is triggered properly or not, without directly implementing it in your website. Just click on this preview button, and you will notice a popup which requests you to connect tag assistant to your website. ![Connect tag assistant to preview data](https://d1k2c27psfzbiv.cloudfront.net/wp-content/uploads/2025/02/18103446/Connect-tag-assistant-to-preview-data.webp) As soon as you click on Connect, you will notice your homepage opens with parameters like `?gtm_debug=yourid` and you can see that the tag assistant is connected at the bottom right corner. ![Tag assistant is connected notice in homepage](https://d1k2c27psfzbiv.cloudfront.net/wp-content/uploads/2025/02/18103445/Tag-assistant-is-connected-notice-in-homepage.webp) Now, go back to your tag assistant tab, and you will see a list of active tags that trigger on your homepage. Carefully check if your added tags are available here. If they are, that means you are done, and you need to deploy your code. ![Preview Google Tag fired or not](https://d1k2c27psfzbiv.cloudfront.net/wp-content/uploads/2025/02/18103444/Preview-Google-Tag-fired-or-not.webp) Now, click on the submit button beside preview, and you will get some options like the following screenshot. Just input whatever you have added and hit the publish button. ![Submit tag configuration for final deploy](https://d1k2c27psfzbiv.cloudfront.net/wp-content/uploads/2025/02/18103443/Submit-tag-configuration-for-final-deploy.webp) You will get a simple notice that tells you to sing like no one is listening. Within seconds, it will be published and deployed to your live website. ![Sing like no one is listening notice](https://d1k2c27psfzbiv.cloudfront.net/wp-content/uploads/2025/02/18103442/Sing-like-no-one-is-listening-notice.webp) That’s all about adding code to the WordPress header, and it’s one of the safest ways, based on my preference. ## Get Started with WP Adminify Today This plugin can help you to rebrand your personal or clients website and lift it to a new height of professionalism. Control Dashboard UI with White Label development. [Choose Your Plan](https://wpadminify.com/pricing) [Live Demo](https://demo.pixarlabs.com/?pl-product=adminify) ![WP Adminify Plugin Dashboard](https://d1k2c27psfzbiv.cloudfront.net/wp-content/uploads/2025/03/07061351/WP-Adminify-Plugin-Dashboard.webp) ## Add Code to WordPress Header with functions.php If you are an advanced WordPress user and know the basic functionality of WordPress, then this method is for you. Note: Make sure you have a [child theme installed](https://developer.wordpress.org/themes/advanced-topics/child-themes/) in your WordPress Dashboard. If you follow my steps and do changes in your main Themes file, then as soon as you update your theme, all your customization will be vanished like they never existed. I will never recommend anyone to make changes to the main theme. I will explain how you can add Custom CSS, JavaScript, and PHP via functions.php file. ### Adding Custom CSS code in WordPress Header There are two popular ways for adding custom CSS in WordPress header with the help of the functions.php file. The first method is creating a CSS file and linking it to the header with the help of the functions.php file. It’s perfect for those user who needs to change CSS regularly, instead of customizing from the functions.php file - they can change it in the CSS file and it will be implemented instantly. If your theme has and CSS folder then then just create a `custom-style.css` file inside the folder and paste the following code in your child themes functions.php file. ``` function add_custom_styles() { wp_enqueue_style('custom-style', get_template_directory_uri() . '/css/custom-style.css'); } add_action('wp_enqueue_scripts', 'add_custom_styles'); ``` Now, try to add any CSS and save the file, then reload your website to see the changes. The second method is adding CSS code in an inline style directly to the functions.php file. This method is suitable for the user who doesn’t need to update the style regularly. To apply this, you don’t need to create any custom style file for CSS, just do all the CSS inside the` `tag and update your functions.php file. ``` function add_inline_custom_styles() { echo ''; } add_action('wp_head', 'add_inline_custom_styles'); ``` ### Add JavaScript code to WordPress Header There are multiple use cases for adding JavaScript code in the WordPress header. You can add JavaScript code to a specific page, add inline JavaScript, or use an external JavaScript file to your website too. Add JavaScript to a Specific Page To apply your JavaScript code for a specific page, you need to identify the page ID first. To get the page ID you can navigate to the editor and look at the URL, there is a number after `?post=123`. This 123 will be the page ID. ``` function add_js_specific_page() { if (is_page(42)) { // Replace 42 with your page ID echo ''; } } add_action('wp_head', 'add_js_specific_page'); ``` Inside the ` ` tag, write or paste your JavaScript properly. One single mistake can terminate your website; make sure to keep a backup of your functions.php file or, if possible, your entire site backup. Add External JavaScript file via `wp_enqueue_script` This is easier than before, just make sure your function name is unique, otherwise you will face a critical error in your WordPress website. Just copy and paste the following code and carefully create `custom-script.js` file inside the js folder (generally theme offers a js folder). ``` function add_custom_js() { wp_enqueue_script('custom-script', get_template_directory_uri() . '/js/custom-script.js', array(), '1.0', true); } add_action('wp_enqueue_scripts', 'add_custom_js'); ``` Add Inline JavaScript to Header You don’t need to enqueue anything just need to echo the script with a unique function name. For demo purposes, copy the following code and paste it inside your functions.php file. ``` function add_inline_js() { echo ''; } add_action('wp_head', 'add_inline_js'); ``` Suggestion: It’s better to customize your code in a code editor like [Visual Studio Code](https://code.visualstudio.com/) instead of directly modifying the code in your main functions.php file. ### Add Custom PHP code to WordPress Header There are different types of use cases for adding PHP Code in the WordPress header, but it depends on your choice. I will cover 3 main use cases. In short, I will use the `wp_head hook` to run the code in WordPress header. Add Custom PHP Code to WordPress Header Just like I mentioned before that your function name should always be unique. Rename my default function to something unique, then you can use the following format to insert PHP-generated content directly to your header. ``` function custom_header_code() { echo ''; echo ''; } add_action('wp_head', 'custom_header_code'); ``` Add logo or image to your WordPress Header Use the `get_template_directory_uri()`to add any logo in your WordPress header area. This is the best use case until now. ``` function add_custom_logo() { echo 'Custom Logo'; } add_action('wp_head', 'add_custom_logo'); ``` Verification code via PHP in WordPress Header Generally, people prefer JavaScript for a verification system, but there is a way to do this via PHP. Use the following code and add your verification code in the content area. ``` function add_tracking_code() { echo ''; } add_action('wp_head', 'add_tracking_code'); ``` ## Add Code to WordPress Header with WP Adminify https://www.youtube.com/watch?v=7OKYdNLQGO4 Watch: add custom code and snippets to WordPress with WP Adminify Finally, I would like to mention how the WP Adminify plugin can help you to add custom CSS and JavaScript in your WordPress website. You can add Custom CSS and JS code in both the WordPress Dashboard and the Frontend. You can take a look at our [Code Snippet feature](https://wpadminify.com/features/code-snippets). With the help of our Code snippet feature you can add custom CSS, JS to anywhere in your WordPress Website. You can display your code to full website, Post, Page, archive and much more. That’s not the end, you can also target a specific device plus set location - for example, Head, Before content, After Content, Footer. Make sure to install the WP Adminify plugin and our [header and Footer Code snippet](https://wpadminify.com/header-footer-scripts) addon properly. Now navigate to `WP Adminify > Code Snippets > Frontend scripts`. You will notice an interface like the following screenshot. Now, click on the Add New snippet button. ![Add new snippet with Header Footer scripts addon](https://d1k2c27psfzbiv.cloudfront.net/wp-content/uploads/2025/02/18103440/Add-new-snippet-with-Header-Footer-scripts-addon.webp) This is the main option panel for adding custom Code to the WordPress header with the WP Adminify plugin. You can define whether your code is CSS or JS, then input the title of your code (helps you identify from 100+ snippets). ![Add code to WordPress header option panel](https://d1k2c27psfzbiv.cloudfront.net/wp-content/uploads/2025/02/18103434/Add-code-to-WordPress-header-option-panel.webp) In the following steps, I am going to change my single blog post title color to blue (#0000FF) with the help of this code snippet addon. Also note that you can add as many code snippets as you need. Add CSS to WordPress Website with Code Snippet The steps I followed to configure my personalized code snippet. I renamed my code snippet title to change blog post title color > selected specific post type > Posts > Location header > Show on all devices> Snippet Type is CSS > Added my CSS code > Save the settings. ![change blog post title color to blue by code snippet](https://d1k2c27psfzbiv.cloudfront.net/wp-content/uploads/2025/02/18103433/change-blog-post-title-color-to-blue-by-code-snippet.webp) Now let me share the output. Take a look at the following screenshot, you can notice the blog post title color has changed to blue. Also, if you take a closer look then you can notice my code appeared in the inspect element too. That’s the final confirmation on how the WP Adminify code snippet works. ![Output for blog post title color change](https://d1k2c27psfzbiv.cloudfront.net/wp-content/uploads/2025/02/18103432/Output-for-blog-post-title-color-change.webp) How to Add JS to WordPress Head with Code Snippet? In the first step, I have explained how to add code to WordPress head with Google Tag Manager, but first, you need to install Google Tag Manager properly in your WordPress Dashboard. I will take this as an example and will install Google Tag Manager JavaScript code with the help of the WP Adminify plugin's Code Snippet feature. I navigated to Google Tag Manager and copied my tracking code. ![Copy Google Tag manager installation code](https://d1k2c27psfzbiv.cloudfront.net/wp-content/uploads/2025/02/18103431/Copy-Google-Tag-manager-installation-code.webp) Now, just like adding CSS, this time I will select Full site instead of only post > the Snippet Type as JS and paste my Google Tag Manager code inside the JS code area. Then save the settings and navigate to any page in the frontend. ![Instal Google Tag Manager with WP Adminify Code snippet](https://d1k2c27psfzbiv.cloudfront.net/wp-content/uploads/2025/02/18103430/Instal-Google-Tag-Manager-with-WP-Adminify-Code-snippet.webp) Take a look at the following screenshot, you can notice my tag manager is working fine, and the live chat already appears instantly because the live chat is configured in my tag manager. ![GTM installation complete with WP Adminify Code snippet](https://d1k2c27psfzbiv.cloudfront.net/wp-content/uploads/2025/02/18103428/GTM-installation-complete-with-WP-Adminify-Code-snippet.webp) ## Let’s Wrap UP That’s how you can add code to WordPress Header area. Now the choice is yours, I have shared all the best and safest solutions that will never break down your website. Google Tag Manager is not only for adding code to WordPress head, but it offers tons of features that are necessary for any website. You can go with this solution and I believe it will never disappoint you. On the other hand, custom code with functions.php is critical, but if you are a tech people and has decent technical knowledge in WordPress, you can go with this functions.php solution. Finally, WP Adminify and Header Footer Scripts addon - This is not only a header footer scripts plugin. You can [customize your WordPress Dashboard](https://wpadminify.com/wordpress-dashboard-customization) and create a proper [White Label Dashboard for your clients](https://wpadminify.com/wordpress-client-dashboard). It offers a lot of feature in free version but feel free to upgrade and believe me it’s a value for money. ## How do you add code to the WordPress footer? Same idea as the header, different hook. Where the header uses `wp_head`, the footer uses `wp_footer`, and everything else about the snippet stays identical. Put analytics and verification tags in the header, and move anything heavy to the footer so it loads after your content rather than blocking it. Chat widgets, support bubbles and non-critical tracking all belong in the footer for that reason. If a vendor tells you their script must run before the page paints, that is the exception and it goes in the header. ## How do you add code immediately after the body tag? Some tags cannot go in the head at all. Google Tag Manager is the common one: it ships two snippets, and while the first goes in the header, the second is a ` ` block that Google requires immediately after the opening body tag. Drop it in the header and GTM's own tag assistant will flag the container as incorrectly installed. The hook for that position is `wp_body_open`, available since WordPress 5.2. Most modern themes call it, but a few older ones do not, and if the hook is missing your snippet silently never appears. Test by adding a comment through the hook and viewing source before you trust it with a real tag. ## How do you add a site verification meta tag? Google Search Console, Bing Webmaster Tools and Pinterest all verify ownership the same way: they give you a meta tag that must appear in the head of your home page. Paste it as header code exactly as issued, then click verify. Do not alter the content value, and do not paste it into the footer, because the verifier only reads the head. Once verification succeeds you can leave the tag in place. Removing it later can un-verify the property, which is a surprisingly common way for people to lose Search Console access to their own site. ## How do you add code to one page only? Loading a script everywhere when it is needed on one page is wasted weight on every other page. Wrap the output in a conditional so it only fires where it matters: `is_page()` for a single page, `is_single()` for one post, or `is_front_page()` for the home page. A landing-page conversion pixel is the clearest example. Fire it on the thank-you page alone and your numbers stay accurate, whereas a site-wide pixel counts every visitor as a conversion. ## WordPress Header and Footer Code FAQs save ### How do I add code to the WordPress header without a plugin? Add a function to your child theme's functions.php that echoes the code on the wp_head hook, or edit header.php directly. The hook method is safer, because a bad edit to header.php can break the site and is lost on theme updates. A code snippet tool like WP Adminify's Header and Footer Scripts avoids file editing entirely. ### Where do I paste header code in WordPress? It belongs inside the head section, which WordPress prints through the wp_head hook. In WP Adminify you paste it into the Header Scripts box and it loads site-wide. With code, you hook it to wp_head in functions.php so it outputs on every page. ### Is it safe to add code to the WordPress header? Yes, when the code is valid and you keep a backup. Use a code snippet plugin or a child theme so a broken snippet is easy to remove. Editing the parent theme's header.php is riskier, because updates overwrite it and a single syntax error can take the site down. ### How do I add a Google Analytics or verification tag to the header? Copy the tag from Google or your tool, paste it into WP Adminify's Header Scripts, and save. You can also add it in functions.php on the wp_head hook. Then confirm it fires using your browser's network tab or Google Tag Assistant. ### What is the difference between header and footer scripts? Header scripts load in the head before the page renders, which suits verification tags and consent scripts. Footer scripts load before the closing body tag, which suits analytics and chat widgets so they do not delay the first paint. Put performance-sensitive scripts in the footer. ### Will adding code to the header slow down my site? A few small tags will not. Heavy third-party scripts can, so load non-critical ones in the footer or defer them. Keep the header for code that must run early, such as site verification and consent management. --- # WP Adminify Plugin Temporarily Closed For "WP" Trademark Issue URL: https://wpadminify.com/wp-adminify-plugin-temporarily-closed-for-wp-naming-issue Last updated: 2026-08-12 We want to inform our users and community that the WP Adminify plugin has been temporarily closed on WordPress.org for review. This is not a security malware issue, or vulnerability-related closure. The issue is related to WordPress.org plugin guideline compliance, specifically around branding and naming usage inside our plugin readme and promotional content. Our plugin included terms such as "WP", "WordPress", and other branding references in ways that require adjustment according to the latest review standards. ![Naming issues in the plugin](https://d1k2c27psfzbiv.cloudfront.net/wp-content/uploads/2026/05/09061756/naming-issue-in-wp-adminify-plugin.webp) We are already working on the required updates and improvements to fully comply with the WordPress.org guidelines and review requirements. A corrected version has been prepared and going to submit it for review. We sincerely apologize for the inconvenience and appreciate the patience and support from our users, customers, and the WordPress community. Thank you for supporting WP Adminify --- # How to Remove the WordPress Logo From the Admin Bar (4 Ways, 2026) URL: https://wpadminify.com/remove-wordpress-logo-from-admin-bar Last updated: 2026-08-12 The fastest way to remove the WordPress logo from the admin bar is a plugin toggle. In WP Adminify, open White Label, tick WordPress Logo under Admin Bar Cleanup, and save. Prefer code? Three lines in your theme's `functions.php` do the same thing. And if you need per-role control (hide it for editors, keep it for admins), the Admin Bar Editor plugin handles that with a visual toggle. This guide covers all four methods with screenshots, plus fixes for when the logo won't go away. (Updated July 2026) ## What is the WordPress logo in the admin bar? The WordPress logo is the small "W" icon in the top-left corner of the admin bar (also called the toolbar). Click it and a dropdown opens with links to WordPress.org, the documentation, and the support forums. It shows on every wp-admin screen, and on the front end of your site whenever you're logged in. WordPress registers this icon as an admin bar node with the ID `wp-logo`. That ID matters: every removal method in this guide targets it, whether through a checkbox or a line of code. ### Why remove it? Three reasons keep coming up: - Client sites. Agencies hand over dashboards that should carry the agency's brand, not WordPress branding. A logo that links out to WordPress.org support forums invites clients to wander off and file questions there instead of contacting you. - Cleaner toolbar. The logo's submenu (About WordPress, WordPress.org, Documentation, Support, Feedback) is dead weight for most people. Removing it frees space for links that actually get clicked. - White labeling. If you're already replacing the login page, footer credit, and dashboard branding, the admin bar logo is the last visible piece of WordPress identity. On client handovers I treat this as part of the same checklist as the login page and the footer credit. If the client paid for a custom build, nothing in their dashboard should point away from you. ## How to remove the WordPress logo from the admin bar You can remove the WordPress logo from the admin bar in four ways: a no-code plugin setting, a snippet in your theme, a dedicated admin bar plugin with role rules, or CSS. Pick the one that matches how comfortable you are editing code and how much control you need. | Method | Best for | Code needed | Role-based control | | --- | --- | --- | --- | | WP Adminify White Label | Full white labeling in one plugin | No | Yes (via role settings) | | functions.php snippet | Developers, no extra plugin | Yes | Yes (with extra code) | | Admin Bar Editor plugin | Visual control of every toolbar item | No | Yes (built-in "Hidden For" rules) | | CSS hiding | Quick visual fix only | Minimal | No | ### Method 1: Remove it with a WP Adminify setting (no code) The no-code route lives in WP Adminify's White Label module. Here's the full path: - Go to `WP Adminify > White Label` in your dashboard. - Find the Admin Bar Cleanup row. - Tick the WordPress Logo checkbox. - Click Save Settings. ![Hide WordPress logo comments from admin bar](https://d1k2c27psfzbiv.cloudfront.net/wp-content/uploads/2024/09/25085017/Hide-WordPress-logo-comments-from-admin-bar.webp) The logo disappears from wp-admin and the front-end toolbar as soon as you save. This is the method I use on client sites, mostly because the same row also hides the site name, comments icon, update notifications, and the "New" button. One save and the whole bar reads as yours. ![WordPress Admin Bar cleanup - dashboard customization guide](https://d1k2c27psfzbiv.cloudfront.net/wp-content/uploads/2024/08/12110821/Admin-Bar-cleanup.webp) The White Label module goes well past the admin bar. The same screen controls the admin footer text, footer credit, and version info: everything a client sees that says "WordPress" instead of your agency name. ![WP Adminify WordPress White Label settings page showing Admin Bar Cleanup, Admin Footer options, footer credit toggle and footer text editor](https://d1k2c27psfzbiv.cloudfront.net/wp-content/uploads/2026/07/08052727/02-wordpress-white-label-settings.webp) White Label is a Pro feature. See [WP Adminify pricing](https://wpadminify.com/pricing) for what's included. ### Method 2: Remove the logo with code in functions.php If you'd rather not add a plugin, drop this snippet into your active theme's `functions.php` file (or a code-snippets plugin). It hooks the admin bar menu and removes the logo node: ``` add_action( 'admin_bar_menu', function( $bar ) { $bar->remove_node( 'wp-logo' ); }, 999 ); ``` The [admin_bar_menu](https://developer.wordpress.org/reference/hooks/admin_bar_menu/) action passes the `WP_Admin_Bar` object, and `remove_node( 'wp-logo' )` deletes the logo along with its whole submenu. The priority of `999` makes the snippet run after WordPress has added the logo, so there's something to remove. It works in wp-admin and on the front-end toolbar at once. Two practical notes: - Use a child theme. A theme update overwrites `functions.php` and takes your snippet with it. A child theme or a snippets plugin survives updates. - Want it role-based? Wrap the removal in a capability check: ``` add_action( 'admin_bar_menu', function( $bar ) { if ( ! current_user_can( 'manage_options' ) ) { $bar->remove_node( 'wp-logo' ); } }, 999 ); ``` That version keeps the logo for administrators and hides it for everyone else. Useful when you still want quick access to the WordPress docs yourself but a clean bar for clients and editors. ### Method 3: Use the Admin Bar Editor plugin If you want visual control over every toolbar item, not just the logo, [Admin Bar Editor](https://wpadminify.com/admin-bar-editor) shows the full admin bar as a drag-and-drop list. Every node gets its own on/off toggle, and the WP Logo sits right at the top: ![Admin Bar Editor with the WordPress logo toggle switched off to remove WordPress branding from the toolbar](https://d1k2c27psfzbiv.cloudfront.net/wp-content/uploads/2026/07/08052736/05-adminbar-editor-remove-wp-logo.webp) Switch the WP Logo toggle off, hit Save Settings, done. Separate Backend and Frontend tabs let you treat wp-admin and the front-end toolbar differently: remove the logo in both, or only where clients see it. The part a code snippet can't easily match is per-item role rules. Expand the WP Logo row and the Hidden For Rules field lets you pick exactly which roles stop seeing it: ![Backend admin bar options](https://d1k2c27psfzbiv.cloudfront.net/wp-content/uploads/2026/02/04124225/Backend-admin-bar-options.webp) In the screenshot the logo is hidden for the Editor role only; admins keep it. You can also swap the WordPress icon for a custom one instead of removing it, which is a lighter form of white labeling. ### Method 4: Hide it with CSS (quick, but not recommended) You'll see this suggested in forums: ``` #wpadminbar #wp-admin-bar-wp-logo { display: none; } ``` It works, but only visually. The logo's markup and links still load in the page; CSS just paints over them. A curious client can still find the WordPress.org links in the page source, and screen readers still announce the menu. Fine as a stopgap. For anything a client will see, use one of the first three methods. ## Remove the WordPress logo from the front-end toolbar too The same logo appears in the front-end admin bar, the dark strip across the top of your site while you're logged in. Methods 1 and 2 remove it in both places automatically. In Admin Bar Editor, flip to the Frontend tab and toggle the logo off there as well. If you'd rather hide the entire toolbar for certain roles instead of just the logo, Admin Bar Editor's Frontend tab has a Disabled For condition. Pick the roles that should never see the toolbar and administrators keep it. The usual setup for membership sites: disable it for everyone except admins. ![disable wordpress admin bar for all users except administrators](https://d1k2c27psfzbiv.cloudfront.net/wp-content/uploads/2024/04/19075442/disable-wordpress-admin-bar-for-all-users-except-administrators.webp) ## WordPress logo still showing after you removed it? If the logo is still there after you saved the setting or added the code, nine times out of ten a cache is serving the old admin bar. Work through this table: | Symptom | Likely cause | Fix | | --- | --- | --- | | Logo still shows after saving | Cached admin screen | Purge your caching plugin and hard-refresh (Ctrl+Shift+R / Cmd+Shift+R) | | Logo gone in wp-admin but visible on the front end | Page cache serving the logged-in toolbar | Purge the page cache; exclude logged-in users from caching | | No White Label menu at all | Running the free plugin | White Label is a Pro module, so upgrade to unlock it | | Code snippet had no effect | Wrong theme, wrong priority, or syntax error | Add it to the active theme, keep priority 999, check for a missing semicolon | | Logo returns after a theme update | Snippet lived in the parent theme's functions.php | Move it to a child theme or a code-snippets plugin | ## Should you remove or replace the WordPress logo? Removing the logo cleans up the admin bar. Replacing it with your own is full white labeling. To rearrange, hide, or add toolbar items across the whole bar, use the [WordPress Toolbar Editor](https://wpadminify.com/wordpress-toolbar-editor). If you build sites for clients, swapping the WordPress branding for your agency's logo, footer text, and login page is worth the extra step. An empty space where a logo used to be looks unfinished; your own mark there looks intentional. Our [complete guide to white labeling WordPress](https://wpadminify.com/white-label-wordpress) and the [White Label feature overview](https://wpadminify.com/features/white-label) walk through the full setup, and the [best white label plugins roundup](https://wpadminify.com/best-white-label-wordpress-plugin) compares your options. ## WordPress Admin Bar Logo FAQs ### How do I remove the WordPress logo from the admin bar? You have three main options. In WP Adminify, open White Label, tick WordPress Logo under Admin Bar Cleanup, then Save Settings. Or add an admin_bar_menu action that calls remove_node with wp-logo in your theme functions.php. Or install Admin Bar Editor and switch the WP Logo toggle off. ### How do I remove the WordPress logo without a plugin? Add a short snippet to your active theme functions.php file. Hook the admin_bar_menu action, then call remove_node with wp-logo on the passed admin bar object. It removes the logo in wp-admin and on the front-end toolbar. Use a child theme so a theme update doesn't undo it. ### Why is the WordPress logo still showing after I removed it? Almost always a cache is serving the old admin bar. Purge your caching plugin and object cache, then hard-refresh with Ctrl+Shift+R or Cmd+Shift+R. If the setting itself is missing, check that you're on WP Adminify Pro, since White Label is a Pro module. ### Can I hide the WordPress logo for some user roles but not others? Yes. Admin Bar Editor has a Hidden For Rules field on every toolbar item. Add the roles that shouldn't see the logo, such as Editor or Author, and administrators keep it. In code, wrap remove_node in a current_user_can check so the removal only runs for non-admins. ### Can I replace the WordPress logo with my own? Yes. Admin Bar Editor lets you set a custom icon on the WP Logo item, and a white label plugin swaps WordPress branding for your agency logo across the admin bar, footer, and login page. That's the better choice for client sites, where consistent branding matters more than a blank space in the toolbar. ### Does removing the logo hide the whole admin bar? No. Removing the wp-logo node only deletes the WordPress icon and its submenu; the rest of the admin bar stays. If you want the entire toolbar gone for some users, disable the admin bar per user role in Admin Bar Editor or with the show_admin_bar filter. ## Where to go next - [White Label WordPress: The Agency Owner's Complete Guide](https://wpadminify.com/white-label-wordpress) - [White Label feature overview](https://wpadminify.com/features/white-label) - [Admin Bar Editor plugin](https://wpadminify.com/admin-bar-editor) - [7 Best White Label WordPress Plugins for 2026](https://wpadminify.com/best-white-label-wordpress-plugin) - [See WP Adminify Pro pricing](https://wpadminify.com/pricing) --- # WP Adminify vs Ultimate Dashboard: Which WordPress Admin Plugin Wins? URL: https://wpadminify.com/wp-adminify-vs-ultimate-dashboard Last updated: 2026-08-12 ## WP Adminify vs Ultimate Dashboard (2026): The Definitive Comparison Choosing the right WordPress admin plugin can transform how you - and your clients - experience the WordPress backend. In 2026, two names come up repeatedly in this space: WP Adminify and Ultimate Dashboard. Both promise to improve the WordPress admin experience, but they take dramatically different approaches. This in-depth comparison covers features, pricing, use cases, and performance to help you make an informed decision. Spoiler: the gap between these two plugins is wider than ever in 2026. ## Overview: What Each Plugin Does ![WP Adminify vs Ultimate Dashboard](https://d1k2c27psfzbiv.cloudfront.net/wp-content/uploads/2022/11/12111452/WP-Adminify-vs-Ultimate-Dashboard.webp) ### WP Adminify WP Adminify is a comprehensive WordPress admin management suite that has grown into one of the most feature-rich admin plugins available. It covers [WordPress dashboard customization](https://wpadminify.com/wordpress-dashboard-customization), admin menu editing, white labeling, login page redesign, dark mode, performance optimization, code snippet management, media folder organization, and much more - all from a single plugin. The philosophy behind WP Adminify is simple: replace a dozen separate plugins with one well-integrated suite. Agencies, developers, and power users love it because it handles everything from [WordPress admin customization](https://wpadminify.com/wordpress-admin-customization) to deep client-facing white labeling without needing to juggle multiple tools. ### Ultimate Dashboard Ultimate Dashboard, by contrast, is a focused widget-based dashboard plugin. It lets you add custom widgets to the WordPress dashboard - including text, icon, and page builder widgets (Elementor, Beaver Builder support). It is lightweight, easy to use, and does its narrow job well. The problem? Dashboard widgets are only a tiny slice of what modern WordPress admins need. Ultimate Dashboard hasn't significantly expanded its feature set in recent years, and in 2026 it still covers roughly 15 features compared to WP Adminify's 60+. ## Feature-by-Feature Comparison ![WP Adminify Vs Ultimate Dashboard](https://d1k2c27psfzbiv.cloudfront.net/wp-content/uploads/2022/11/12111503/WP-Adminify-Vs-Ultimate-Dashboard-1.webp) | Feature | WP Adminify | Ultimate Dashboard | | --- | --- | --- | | Dashboard Widgets | Full customization | Core strength | | Admin Menu Editor | Full drag and drop | Not available | | Dark Mode | Scheduled + per-user | Not available | | Login Page Customization | 16 templates + Loginfy | Not available | | White Label (Full) | Agency-grade | Basic only | | Plugin White Label | Hide and rename plugins | Not available | | Activity Logs | Detailed logging | Not available | | Heartbeat API Control | Full control | Not available | | Code Snippets Manager | Built-in | Not available | | Media Folder Organization | Drag and drop folders | Not available | | Performance Optimization | Multiple tools | Not available | | Page Builder Widget Support | Yes | Elementor/Beaver | | Multi-site Support | Full | Limited | | Role-based Access Control | Granular | Basic | | Client Dashboard | Full client area | Not available | ## Deep Dive: WP Adminify's Winning Features ### 1. Admin Menu Editor WP Adminify's [Admin Menu Editor](https://wpadminify.com/features/admin-menu-editor) is one of its most powerful features. You can reorder, rename, hide, add icons, and completely restructure the WordPress admin menu per user role. This is critical for client sites where you do not want clients seeing menu items they should not access. Ultimate Dashboard has no equivalent feature. If admin menu management matters to you (and it should), WP Adminify wins this category outright. Learn more in our detailed guide on [how to use the WordPress admin menu editor](https://wpadminify.com/how-to-use-the-wordpress-admin-menu-editor). ### 2. Dark Mode WP Adminify's [Dark Mode](https://wpadminify.com/features/dark-mode) is not just a simple color inversion - it is a proper, scheduled dark mode system. You can set automatic switching times (e.g., switch to dark at 6 PM), allow individual users to set their own preference, and choose from multiple dark color palettes. Ultimate Dashboard has no dark mode support whatsoever. Check out our guide on [how to enable WordPress dark mode](https://wpadminify.com/how-to-enable-wordpress-dark-mode) to see how easy it is to set up. ### 3. White Label and Plugin White Label For agencies, [WP Adminify's White Label](https://wpadminify.com/features/white-label) system is a game-changer. You can replace the WordPress branding with your own agency brand - custom logo, custom admin color scheme, custom footer text, custom admin bar - all without writing a line of code. Even more powerful is the [Plugin White Label](https://wpadminify.com/features/plugin-white-label) feature, which lets you hide the "Powered by WP Adminify" branding and even rename the plugin itself in the plugin list. Clients see your brand everywhere. This is essential for professional [white label WordPress development](https://wpadminify.com/white-label-wordpress-development). Ultimate Dashboard offers only the most basic white labeling - it cannot come close to WP Adminify's depth here. ### 4. Heartbeat API Control WordPress's Heartbeat API can quietly drain server resources, causing slow admin panels and high CPU usage. WP Adminify's [Heartbeat Control](https://wpadminify.com/features/heartbeat-control) lets you adjust the frequency or disable the Heartbeat API on specific pages (post editor, frontend, dashboard) individually. This is a genuine performance optimization that can make a measurable difference on shared hosting. See our guide on [how to control the WordPress Heartbeat API](https://wpadminify.com/how-to-control-wordpress-heartbeat-api). Ultimate Dashboard does not touch performance optimization at all. ### 5. Code Snippets Manager WP Adminify's [Code Snippets](https://wpadminify.com/features/code-snippets) module lets you safely add PHP, CSS, and JavaScript snippets to your site without touching theme files. Each snippet can be toggled on/off independently, reducing the risk of breaking your site. This replaces the need for a separate code snippets plugin entirely. Ultimate Dashboard does not offer this capability. ### 6. Media Folder Organization The [WordPress Media Folder](https://wpadminify.com/features/wordpress-media-folder) feature in WP Adminify brings drag-and-drop folder organization to your media library. As sites grow, the media library becomes chaotic - WP Adminify solves this without any additional plugin. Learn more in our guide on [how to organize WordPress media library with folders](https://wpadminify.com/how-to-organize-wordpress-media-library-with-folders). ### 7. Activity Logs Know exactly who did what and when on your WordPress site. WP Adminify's activity logs track user actions, plugin changes, post updates, and more. This is indispensable for multi-user sites and client sites where accountability matters. ### 8. Login Page Customization WP Adminify includes [Loginfy](https://wpadminify.com/loginfy) - a powerful login page builder with 16 pre-built templates. You can create branded login pages that match your client's brand identity in minutes. This guide on [WordPress login page white label](https://wpadminify.com/wordpress-login-page-white-label-guide) walks you through the full process. ## Dashboard Customization: Where Ultimate Dashboard Shines To be fair to Ultimate Dashboard, it does excel at its core mission: dashboard widget management. It offers a clean, intuitive interface for adding custom welcome widgets, text widgets, and page builder-powered widgets to the WordPress dashboard. If your only need is a polished client welcome screen with no other customization requirements, Ultimate Dashboard is perfectly adequate. However, WP Adminify's [Dashboard Customization](https://wpadminify.com/features/dashboard-customization) module covers the same ground and more, making Ultimate Dashboard redundant for anyone already using WP Adminify. Check out our comprehensive guide on [WordPress dashboard customization](https://wpadminify.com/wordpress-dashboard-customization) to see the full capabilities. ## Pricing Comparison (2026) ### WP Adminify Pricing - Free: Available on WordPress.org - includes substantial features - Personal: $79/year - 1 site - Business: $129/year - 5 sites - Agency: $299/year - unlimited sites - Lifetime Bundle: $799 one-time - all products, unlimited sites ### Ultimate Dashboard Pricing - Free: Available on WordPress.org - basic dashboard widgets - Pro: Per-site pricing (varies by plan) The value proposition is stark: WP Adminify's free tier already beats Ultimate Dashboard Pro in feature depth. When you compare WP Adminify's $79/year Personal plan against Ultimate Dashboard Pro, you get 4x more features for a comparable price point. For agencies managing multiple client sites, WP Adminify's $299/year unlimited-sites Agency plan is an extraordinary value - one price for all your clients versus paying per-site with Ultimate Dashboard. [See WP Adminify Pricing - Start Free](https://wpadminify.com/pricing) ## Use Case Analysis ### Choose WP Adminify if you: - Manage client sites and need professional white labeling - Want to consolidate multiple admin plugins into one - Need admin menu control, dark mode, activity logs, or heartbeat management - Run an agency building WordPress sites for clients (see our guide on [WordPress client dashboard](https://wpadminify.com/wordpress-client-dashboard)) - Care about site performance and want to optimize the admin experience - Want the best value-per-dollar in WordPress admin tools ### Choose Ultimate Dashboard if you: - Only need basic dashboard widget customization - Already use page builders and want integrated dashboard widgets - Have an extremely simple use case and want minimal overhead In practice, almost any use case for Ultimate Dashboard is fully covered by WP Adminify - often better. The reverse is not true. ## Performance Impact Both plugins add some overhead to the WordPress admin area, but WP Adminify is built with performance in mind. Its modular architecture lets you enable only the features you need, keeping the footprint minimal. The built-in [Heartbeat Control](https://wpadminify.com/features/heartbeat-control) can actually improve overall WordPress performance - something that gives back more than it costs. WP Adminify is also actively developed with regular performance audits. For agencies focused on [WordPress performance optimization](https://wpadminify.com/wordpress-performance-optimization), this matters enormously. ## Final Verdict: WP Adminify Wins Decisively In 2026, the comparison between WP Adminify and Ultimate Dashboard is not particularly close. Ultimate Dashboard is a solid, narrow tool for dashboard widgets. WP Adminify is a complete WordPress admin platform that happens to include dashboard customization as just one of its 60+ features. The decision is simple: if you want only dashboard widgets with page builder support and nothing else, Ultimate Dashboard works fine. For everything else - and for any serious WordPress admin work in 2026 - WP Adminify is the better choice by a wide margin. WP Adminify's free version is more capable than Ultimate Dashboard Pro. The paid plans offer agency-grade features at developer-friendly pricing. There is simply no contest on features, value, or long-term platform viability. [Try WP Adminify Free - No Credit Card Required](https://wpadminify.com/pricing) ## WP Adminify vs Ultimate Dashboard FAQs ### Is WP Adminify better than Ultimate Dashboard? Yes. WP Adminify offers 60+ features compared to Ultimate Dashboard's ~15. WP Adminify's free version already surpasses Ultimate Dashboard Pro in feature depth, making it the better choice for virtually all use cases. ### Can WP Adminify replace Ultimate Dashboard? Absolutely. WP Adminify includes a full dashboard customization module that covers everything Ultimate Dashboard does, plus admin menu editing, dark mode, white labeling, heartbeat control, activity logs, and much more. ### Does WP Adminify work with Elementor for dashboard widgets? Yes. WP Adminify's dashboard customization supports page builder-powered widgets. You can create rich, branded dashboard experiences for clients using your preferred page builder. ### Is WP Adminify free? Yes. WP Adminify has a generous free version available on WordPress.org that includes substantial features. Paid plans start at $79/year for 1 site (Personal), $129/year for 5 sites (Business), and $299/year for unlimited sites (Agency); a $799 lifetime bundle is also available. ### Does WP Adminify slow down WordPress? No - in fact, WP Adminify can improve WordPress admin performance through its built-in Heartbeat API control and other performance optimization tools. Its modular design means you only load features you actually use. ### What makes WP Adminify good for agencies? WP Adminify is purpose-built for agencies. It includes agency-grade white labeling, plugin white label (hide WP Adminify branding), unlimited site licensing, client dashboard creation, role-based access control, and activity logs - all the tools agencies need for professional client site delivery. ### Does Ultimate Dashboard have dark mode? No. Ultimate Dashboard does not include a dark mode feature. WP Adminify provides a full scheduled dark mode system that lets users toggle dark mode manually or set automatic time-based switching. ### Which is better for client sites: WP Adminify or Ultimate Dashboard? WP Adminify is significantly better for client sites. It provides complete white labeling, branded login pages, a dedicated client dashboard, activity logging, role-based menu control, and plugin white label - far beyond what Ultimate Dashboard offers. ### Can I switch from Ultimate Dashboard to WP Adminify? Yes. Install WP Adminify from WordPress.org, set up the dashboard widgets, menu, and white-label options you need, and confirm everything works before you deactivate Ultimate Dashboard. Migrate one feature at a time so you can isolate any issue. Your posts, pages, and settings stay untouched - only the admin customization layer changes. Still weighing your options? See our full roundup of the [best WordPress dashboard plugin](https://wpadminify.com/best-wordpress-dashboard-plugin) picks for 2026 - WP Adminify leads the field as the top all-in-one choice, ahead of Ultimate Dashboard and White Label CMS. --- # How to Remove WordPress Dashboard Welcome Widget? URL: https://wpadminify.com/how-to-remove-wordpress-welcome-widget-from-dashboard Last updated: 2026-08-12 As a novice, you will initially see a default welcome widget when you visit the WordPress admin dashboard. This [Dashboard Welcome Widget](https://wpadminify.com/features/productivity) includes a variety of shortcuts for new users as well as a greeting from WordPress. Even yet, anyone who is a beginner may benefit much from this area and build a fantastic website on their own. But as time goes on, you could begin to find these welcomes to be a bit monotonous. The majority of professionals utilize this part to provide helpful information, market their services, or include content that inspires others. But for you, simply adding some navigation or reminder alerts to help you concentrate on your task can be a bold move. Fortunately, removing these welcome widgets is simple. To get rid of this at any moment, click the close icon in the upper right corner. By doing this, you may quickly concentrate on something significant that will increase the visitors' use of your website. However, it will reappear when you refresh your website in order to save the changes you made. In this post, we'll show you how to quickly remove the welcome page by editing the admin dashboard. Don't worry if you're concerned about permanently erasing something you might need in the future. The welcome panel is simple to activate whenever you need it. ## Remove Welcome Widget from WordPress Dashboard You may delete the WordPress welcome widget from your dashboard in a hundred different ways. But in this section, we'll talk about the simplest options to spare you time and distress. ### Dismiss from the Dashboard Out of everything you can discover online, this one is the simplest. Simply select "Dismiss" to remove the welcome panel. Anytime you feel like it, you can always switch it back on. Look at the welcome panel's upper right corner to dismiss the welcome widget. A "Dismiss" button may be found there. Your welcome widget will disappear forever with only one click. ![Dismiss option for Welcome widget](https://d1k2c27psfzbiv.cloudfront.net/wp-content/uploads/2023/03/12111803/Dismiss-option-for-Welcome-widget.webp) But you can easily find the "Screen Option" in the sidebar and switch it back on. When you open it, there are several checkboxes. Simply select the "welcome" option, save your work, and then reload your dashboard. Your welcome panel will be restored exactly as it was if you do that. From here you can also remove the panel by just unchecking the box. One click to remover default WordPress Dashboard widget ### Remove Welcome widget using WP Adminify The best choice is Adminify, which will make your job really simple. In order for you to work smoothly, Adminify is primarily focused on controlling the WordPress Dashboard UI. It's a really simple plugin that will enable you to do your task in just a few clicks. And there are many options available for free exploration. Please allow us to demonstrate how to remove welcome widgets using Adminify. - Instal & activate WP Adminify - Navigate to WP Adminify Option Panel - Click on "Admin Notices" option - Search "Remove Welcome Panel" option and enable it. - Save & reload. TADA! You are now free from WordPress’s boring Welcome Panel Notification. ![hide welcome widget permanently](https://d1k2c27psfzbiv.cloudfront.net/wp-content/uploads/2023/03/08045008/hide-welcome-widget-permanently.webp) ## Why Remove Welcome Widget? A sort of meta box introduced for new users of this platform is the WordPress welcome panel. It displays several shortcuts for using various tools. However, these shortcuts lose their usefulness for you as you grow more accustomed to using WordPress. Additionally, users have the ability to shift widgets and important alerts to the bottom. reducing their visibility. You may utilize this area as a notice bar for your business if you are the administrator of a corporate website and other employees visit your WordPress admin panel. Alternatively, you may add your preferred shortcut there. ## Customize Your Welcome Panel The dashboard widgets as a whole, as well as your welcome panel, may all be customized using Adminify. However, we advise that you choose what to keep and what to remove from your dashboard first. Because other installed applications or plugins may be able to display shortcuts and significant notifications on your dashboard. And eliminating them all could be your worst choice. Anyway, let's look at how to use Adminify to [modify your welcome widgets](https://wpadminify.com/docs/adminify/productivity). Hover on the WP Adminify option in your Admin Menu, click on "Dashboard Widget" You can see the "Welcome Widget" tab, by default it's disabled. Enable it and you will see options like the screenshot. Let the "Dismissible" option be enabled. If you want to allow people close this Welcome Widget. The last one is for special users. If you want to be more specific and show your welcome panel to only some selected users then you can add their roles from here. You need to design your Welcome widget content via Default WordPress Page or Elementor Saved Template. You can assign Elementor template or WordPress Pages content inside the Welcome Widget. ![WordPress Dashboard Welcome Widget customization](https://d1k2c27psfzbiv.cloudfront.net/wp-content/uploads/2023/03/12111808/Welcome-Widget-customization.webp) After all, just save them & reload your dashboard. ![Custom Welcome widget design](https://d1k2c27psfzbiv.cloudfront.net/wp-content/uploads/2025/03/11101835/Custom-Welcome-widget-design.webp) In this article, we have shown you the easiest ways to remove your welcome widgets from the WordPress dashboard. We really recommend you use "Adminify". It can do much more than you can imagine. Most of your WordPress problems can be solved by only this plugin and it enables you to customize your dashboard, WordPress background, and others. Let us know how this post helped you and what we need to upgrade in the comment section. ## Where to go next Removing the Welcome panel clears the single biggest block of wasted space, but the dashboard underneath it is still the stock WordPress one. Our [WordPress dashboard customization guide](https://wpadminify.com/wordpress-dashboard-customization) walks through the rest - trimming the remaining default widgets, reordering the admin menu, and setting up role-based views. And if you would rather put something useful in the space you just freed up, here is [how to add a custom dashboard widget](https://wpadminify.com/custom-dashboard-widget-in-wordpress). --- # 50+ Highly Requested Issues Fixed - Check What You'll Get URL: https://wpadminify.com/updates-209 Last updated: 2026-08-12 You guys suggested us a lot of features. As promised, we've brought some new features and fixes for you. Thanks to you for your kind suggestion and support. We've dug into WP Adminify and found out some issues ourselves too. In short, this update is very mature and solved the maximum issues that we received from you. If you noticed your requested feature is missing in the following list, don't worry. It's on our queue list. Without further delay, let's try to find out if your suggestion is on the following list or not. Table of Contents Add a header to begin generating the table of contents On the other hand, if you are someone who likes to request a feature or report a bug - Please use this [Contact Page](https://wpadminify.com/contact). And, Don't forget to invest your precious 2 minutes in the [Features](https://wpadminify.com/features) and [Pricing](https://wpadminify.com/pricing) Page for better clarification. ## WP Adminify Newly Added Features ### Redirect URL's (New Module): We just released a highly requested feature in this WP Adminify 2.0.9 version. We've received over 100 requests for adding the "Redirect Admin URL" feature. As promised, now you can change the WordPress Login URL. Also, redirect those people to a specific page, who is snooping to login to the admin via WP-Admin. ![Redirect WP Admin Login URL](https://d1k2c27psfzbiv.cloudfront.net/wp-content/uploads/2022/06/12110415/Redirect-WP-Admin-Login-URL.webp) ### JS Code Support for Custom Dashboard Widget: We got a few feature requests from our beloved customers to enable JavaScript Code for [Custom Dashboard Widgets](https://wpadminify.com/features/dashboard-customization). It will help you to input any type of JS code now. For example, you can easily showcase charts and stats in your Website Dashboard. ![JavaScript Code for Dashboard Widget](https://d1k2c27psfzbiv.cloudfront.net/wp-content/uploads/2022/06/12110417/JavaScript-Code-for-Dashbaord-Widget.webp) ### Menu Label & Remove Action Links not working: If you're an Agency owner, you know the importance of White Label. There were some issues with Menu Label and Remove Action Links options. These issues are fixed and you can change the WP Adminify menu label text to anything you prefer. ![Menu Label Text modify for White Label](https://d1k2c27psfzbiv.cloudfront.net/wp-content/uploads/2022/06/12110439/Menu-Label-text-change-in-White-label.webp) ### WordPress Dashboard Welcome Widget Compatibility: Many of you use a customized Welcome Widget. Where you welcome your users with some important links or a warm happy message. We've provided Welcome Widget dependency for the latest [WordPress 6](https://wordpress.org/download/) version, and 5.x.x, 4.x.x versions. ![WordPress 6.0 welcome Widget](https://d1k2c27psfzbiv.cloudfront.net/wp-content/uploads/2022/06/12110420/WordPress-6.0-welcome-Widget.webp) ### Login Customizer Template Responsive: We've made all [login customizer](https://wpadminify.com/loginfy) Templates and Customization responsive. The design will be pixel-perfect on any device. ### Global Dashboard Font Selection Option: You don't need to navigate on each menu to select font for different settings panels. Now selecting Google font for Dashboard is very easy for you. Just navigate to WP Adminify Option Panel> Customize > Body Font and define your font. Your entire Dashboard font will be changed including Admin Menu, Dashboard Body, Admin Bar, etc. ### "New" Button Disable For: Have you ever wanted to disable the "New" button for certain user roles? This feature is added in this latest WP Adminify. The "New" button is located at the [Admin Bar](https://jeweltheme.com/docs/admin-bar-editor/plugin-installation). It's not a good idea to showcase this button for all users who don't need this. Just navigate to WP Adminify Plugin Options > Admin Bar > "New" Button Disable for option. ### WP Adminify Upgrade to Pro, Review Notice: Pro Customers will not see any Upgrade to pro, and Review notice. They can only see the updates changelogs notice. We think it's necessary to check what is actually solved in an update. This idea is requested by Jim robarts. ### Text Logo Typography Customization: Don't worry if you haven't made your Dashboard Logo yet. You can select Logo Type as Text and customize the typography now. Select your desired font from Google library then define text weight, line height, font size based on your criteria. ## Best WP Dashboard Customizer Plugin Increase your sites's efficiency by powering up your WordPress Admin Dashboard [Purchase Now](https://wpadminify.com/pricing) ## Fixed the Following WP Adminify Issues ### Fixed SVG Icons Background color on Hover: Most of the plugins and themes use SVG icons as the Admin Menu Icon. On hover, the Background color turns black and it was not user-friendly for lots of our customers. In this latest version we’ve figured out a solution for this issue. ### Dashboard Widget Title Hide Issue: Maybe you like to use WP Adminify with the default WordPress Dashboard UI. When you enable Default UI from Adminify option panel, it hides the Dashboard Widget Title. Now, it's perfect and you are free to use WP Adminify UI or WordPress Default UI. ### WP Adminify pricing page Removed for pro users: If you are a pro user of WP Adminify, then you don't need to see the pricing page. We've removed the pricing page for pro users. ### List Table Header Issue: For example, If you have navigated to the plugins page you have noticed that the "All", "Active", "Inactive", "Updates Available", "Auto Update Disabled" content are hidden due to text color. This is the option called "List Table Header". The same goes for posts, Page, Media, and some other pages too. We've fixed this list table header issue. ![List Table Header color issue](https://d1k2c27psfzbiv.cloudfront.net/wp-content/uploads/2022/06/12110452/List-Table-Header-color-issue.webp) ### Admin notice doesn't close, Complained by [David McCan](https://www.facebook.com/davidcmccan): Our Admin Notice doesn't close though you click on the close icon. We've modified this admin notice system and now it's perfect. ### Blank Welcome Widget in WordPress 6.0: If you are WordPress 6.x.x version user and enabled the welcome widget, it showcases a blank welcome widget in your Dashboard. But now, WP Adminify is perfect for any WordPress 4.x.x users. ### Dashicons, Font awesome icons issue in Quick Menu: In the previous version only "Simple line icons" was working for the [Floating Dashboard Menu](https://wpadminify.com/quick-menu). One of our users notified us about this issue and now [Dashicons](https://developer.wordpress.org/resource/dashicons/#admin-site-alt) and [Font Awesome](https://fontawesome.com/) icons work perfectly for the quick menu module. ### The horizontal menu is not working: The Horizontal Menu is a unique feature by WP Adminify. It was overlapping with the Admin bar in the previous version. Now we've retouched both the Admin bar and Horizontal menu module. ![WordPress RTL Offcanvas Admin Menu Issue fixed](https://d1k2c27psfzbiv.cloudfront.net/wp-content/uploads/2022/06/12110454/WordPress-RTL-Offcanvas-Admin-Menu-Issue-fixed.webp) ### WooCommerce Products "Screen Options" issue: Have you ever felt the pain of having 20+ admin columns on your Products page, where maximum columns are unnecessary? Now the issue is fixed and you can easily remove the products admin column via screen options or our [Admin Column](https://wpadminify.com/admin-columns-editor) addon. ### Adminify Pro on RTL: In this version, WP Adminify is 100% compatible with the RTL version. There was an issue with the Admin Offcanvas menu on RTL. After expanding the offcanvas menu, the close button was not working. It was impossible to close this menu without reloading your browser. ### Bottom Dashboard submenu blink issue: Entire Admin Menu and submenu items were fine except for the very bottom menu. When you hover on the last menu item, it starts blinking - which is very annoying for users. We've fixed this blink issue and now you can navigate to the bottom menu without any issue. ### "Light/Dark Mode" renamed to "Logo Options": The functionality is same, we've only changed the option name. As many of you find it hard to configure your brand logo inside your Dashboard, the option is now renamed "Logo Options". ### "New" Button style not working: Inside the Admin bar, you have noticed there is a "New" button. Somehow it was not working properly. Though we've the options but our users unable to customize this button. Within this update, you are free to customize the button properly. ### Admin Bar Menu Dropdown Background Transparent issue: Most of you guys love to configure a Custom UI for your WordPress Dashboard. When you enable the custom UI, the Admin Bar menu dropdown BG and [Dark/ Light Mode](https://wpadminify.com/features/dashboard-customization) switcher button turn into transparent. That's why it loses its readability, the solution is available in this 2.0.9 Update. ### Admin Pages not working by user roles: [Admin Page](https://wpadminify.com/features/productivity) one of the best module by [WP Adminify](https://wpadminify.com/). User Roles selection is a very important feature for this module, which was not working properly. Now you can define some specific user or user roles, for those you like to showcase your Admin page. ### Custom Dashboard Widget Roles not working: Showcasing special Dashboard Widget for specific user roles was not perfect. Our Devs team worked hard and solved it for you. Now you can add a new Dashboard Widget and present it for only Editor, Author, any other user roles or specific user. ### Tweaks option update: WP Adminify has Generator Meta removal tweaks for different plugins like WooCommerce, Slider Revolution, Visual Composer, Yoast SEO. If you are not a WooCommerce user, then you will not see this tweak in our plugin options page. Simply if you have installed any of our supported plugins, you will see the meta generator removal option for this plugin. ## Finishing With Issues Checklist It's time for a checklist. We've done the following fixing as well in this WP Adminify 2.0.9 update. Maybe your issues are in the following list. You can look at our Changelogs page for an overview of what we've actually done so far. - Custom Font(Google Font) not working on Admin Panel - Remove ID from Taxonomy(Category, tags) - Adminify Admin bar show/hide on Front end - Admin Bar font settings option available - The SEPPress PlugIn Dashboard icon issue - Option added to select a Page for "Welcome Widget" in the free version - Admin Column in Media is not removing via "Screen Option" - Gutenberg Editor Save button is hidden below Admin bar - Advanced TinyMCE Editor Plugin Conflict - Horizontal Menu Folders overlap - Betterlinks plugin Submenu not changing - "Select Icon" button empty on Menu Editor icon upload options - Fix scss deprecated errors - jQuery Error Fixed - Wasted Space Folders in responsive fixed - Mini Menu turns white issue fixed - Classic Editor Plugin option overlapping in editor Check the full [WP Adminify 2.0.9 changelog](https://wpadminify.com/changelogs). There's more fixing we've done in this update. --- # WP Adminify vs ASE: Which WP Admin Plugin Wins 2026? URL: https://wpadminify.com/wp-adminify-vs-ase Last updated: 2026-08-12 Short answer: WP Adminify is the better pick if you want a visually branded WordPress dashboard - [custom UI templates](https://wpadminify.com/features/dashboard-customization), [dark mode](https://wpadminify.com/features/dark-mode), [drag-and-drop menu editor](https://wpadminify.com/features/admin-menu-editor), and a [pixel-perfect login page](https://wpadminify.com/loginfy) for client dashboards. ASE is the better pick if you want a backend toolkit - 57 free modules that replace a dozen single-purpose plugins (2FA, CAPTCHA, code snippets, form builder, custom post type and taxonomy registration). Both plugins shipped their last update this month (the current version of WP Adminify is 4.1.10 on April 11, ASE 8.6.2 on April 13, 2026), so you're not choosing between an abandoned project and an active one. You're choosing between two philosophies of what a WordPress dashboard plugin should do - and this post will simplify that decision. To help you choose the right WordPress plugin, I've organized the features you need side-by-side, compared pricing, and flagged where each tool lands for WordPress development, site management, and [custom WordPress dashboard work](https://wpadminify.com/wordpress-dashboard-customization). I build the WP Adminify plugin as part of the Pixar Labs team, so I'm biased - but I've also installed ASE on three client sites this year to stress-test the comparison. This post is the head-to-head I wish existed when clients ask "which one should I buy?" ## WP Adminify vs ASE at a Glance | | WP Adminify | ASE (Admin and Site Enhancements) | | --- | --- | --- | | Best for | Agencies, white-label dashboards, branded client experiences | Plugin consolidation, backend hardening, developer workflow | | Founded | 2021 | 2022 | | Latest version | 4.1.10 (Apr 11, 2026) | 8.6.2 (Apr 13, 2026) | | Author | Liton Arefin | Bowo | | Free modules | 60+ in the free version | 57 free modules | | Pro modules | Addons incl. Loginfy, Activity Logs, RoleMaster Suite | 17 Pro-only + 31 with Pro extensions | | Dark mode | Yes (with auto-schedule) | No | | UI templates / skins | Light, Dark, Gradient, Glass | None | | Drag-and-drop menu editor | Yes | Reorder only (no new custom menu items in free) | | Login page customizer | Loginfy - template-based designer | Pro-only, simpler | | Media folders | Yes (native drag-and-drop) | Media Categories (Pro) | | Activity log | Yes (via addon) | No | | Quick Menu / Spotlight search | Yes | No | | Pricing (Personal) | $49/yr | $39/yr | | Lifetime deal | Available | $99–$599 LTD tiers | Verdict at a glance: If your first thought is "how does my admin look," pick WP Adminify. If your first thought is "how many plugins can I delete," pick ASE. ## What is WP Adminify? ![WP Adminify option panel with Adminify UI](https://d1k2c27psfzbiv.cloudfront.net/wp-content/uploads/2026/04/19081551/WP-Adminify-option-panel-with-Adminify-UI.webp) WP Adminify is a WordPress admin customizer and plugin designed for agencies and freelance developers who ship a wordpress site to clients. It's the go-to plugin for anyone who needs to optimize your wordpress admin without writing a single line of code. The point of the plugin is not to add features for site visitors - it's to transform the WordPress admin experience so the person logging in (you, your team, or your client) spends less time hunting and more time working. WP Adminify provides a single admin page where you control every module. The free version on the [WordPress.org plugin directory](https://wordpress.org/plugins/adminify/) ships with over 60 features: admin menu editor, admin bar editor, dashboard widget control, dark mode, login page tweaks, and the full white-label foundation. WP Adminify includes a drag-and-drop dashboard widget panel that lets you add custom RSS or iframe widgets, plus native tools to customize admin columns for every post type. The Pro version of WP Adminify unlocks deeper addons like Loginfy (template-based login designer for the wordpress login experience), Activity Logs, RoleMaster Suite, and admin columns editing for WooCommerce and any custom post type. ## Who WP Adminify is built for - WordPress agencies handing sites to non-technical clients - Freelance developers who want a branded admin instead of the default WordPress look - Power users running multi-site networks who want a consistent admin experience - WooCommerce store owners managing products through custom admin columns ### What WP Adminify is not - It's not a security plugin. There's no 2FA module, no brute-force limiter, no malware scanner. Pair it with a dedicated security plugin. - It's not a form builder. You still need Gravity Forms, Fluent Forms, or WPForms. ## What is ASE (Admin and Site Enhancements)? ![WP Ase option panel](https://d1k2c27psfzbiv.cloudfront.net/wp-content/uploads/2026/04/19081549/WP-Ase-option-panel.webp) ASE stands for "Admin and Site Enhancements," and the name gives away the philosophy - it's not one tool, it's dozens stuffed into a single plugin. Built and maintained by a single developer named Bowo since October 2022, ASE has shipped [276 releases](https://wordpress.org/plugins/admin-site-enhancements/) (as of version 8.6.2) and sits at 200,000+ active installations with a perfect 5.0 rating across 403 reviews on WordPress.org. The pitch: instead of installing separate plugins for duplicate posts, SVG upload, custom admin CSS, limit login attempts, CAPTCHA, 2FA, redirect manager, code snippets, file manager, and a form builder, you install ASE once and toggle the modules you need. Users in the WordPress subreddit routinely report replacing 10–14 plugins with it. ASE's other selling point: it's the most-cited WordPress admin enhancement plugin in Reddit threads, consistently praised in "adminify is good but..." posts where commenters suggest ASE as a complement. The plugin offers dozens of toggles in one Settings panel, which is a real productivity enhancement for anyone who customizes the wordpress admin weekly. ### ASE module categories - Content Management - custom content types, content duplication, media categories, SVG and AVIF upload, external permalinks - Admin Interface - clean admin bar, hide notices, admin menu organizer, admin columns manager, wider admin menu - Log In / Log Out - change login URL, login page customizer (Pro), login redirects by role, last login column - Custom Code - code snippets manager (CSS/JS/HTML/PHP), custom admin CSS, insert head/body/footer code - Disable Components - disable Gutenberg, comments, REST API, feeds, embeds, updates, author archives - Security - limit login attempts, CAPTCHA (ALTCHA/reCaptcha v2-v3/Cloudflare Turnstile), 2FA with TOTP, email obfuscation - Optimizations - image upload control with WebP conversion, revisions control, heartbeat control - Utilities - SMTP email delivery, form builder (Pro), file manager (Pro), maintenance mode, password protection, redirect manager ### Who ASE is built for - Developers trying to cut their plugin count for performance - Site owners who want a single Settings panel for dozens of admin tweaks ## Feature-by-Feature Comparison | Feature | WP Adminify | ASE | | --- | --- | --- | | Admin menu editor (drag & drop) | ✅ Full drag-and-drop with role rules | ⚠️ Organizer (reorder, rename, hide); add custom items in Pro | | Admin menu custom icons | ✅ Dashicons + SVG upload | ⚠️ Pro only | | Admin bar editor | ✅ Full editor (addon) | ✅ Clean Up + Custom Elements (Pro) | | Dashboard UI templates (skins) | ✅ Light/Dark/Gradient/Glass | ❌ None | | Dark mode (admin) | ✅ Auto-schedule + per-user | ❌ Not included | | Custom dashboard widgets | ✅ Text, RSS, iframe, Video, Script | ⚠️ Disable only | | Welcome panel removal | ✅ | ✅ | | Hide admin notices | ✅ | ✅ | | Admin columns editor | ✅ (addon) with ACF/MetaBox/Pods | ⚠️ Admin Columns Manager (Pro) with ACF/Meta Box | | Custom admin CSS / JS | ✅ | ✅ | | Custom admin footer text | ✅ | ✅ | | Login page customizer | ✅ Loginfy - 16+ templates | ⚠️ Pro only, simpler | | Change login URL | ✅ | ✅ | | Login / logout redirects by role | ✅ | ✅ (separate URL per role in Pro) | | White label WordPress | ✅ Deep (logo, title, admin bar, favicon, footer) | ⚠️ Admin Logo in Pro | | Rebrand the plugin itself (for agencies) | ✅ Agency plan | ❌ | | Media library folders | ✅ Native | ⚠️ Media Categories (Pro) | | Duplicate posts / pages / CPTs | ✅ | ✅ (role restriction in Pro) | | Activity log | ✅ Addon | ❌ | | Google PageSpeed in dashboard | ✅ Addon | ❌ | | User role editor | ✅ RoleMaster Suite | ⚠️ View Admin as Role + Multiple User Roles | | Disable comments globally | ✅ | ✅ | | Heartbeat control | ✅ | ✅ | | Quick Menu (Spotlight-style search) | ✅ | ❌ | The pattern you're seeing: WP Adminify wins on presentation and UI transformation; ASE wins on breadth of backend utilities and security. Few features overlap exactly, which is why a lot of agencies end up using both. ## Dashboard Customization and Dark Mode This is the most visible difference between the two plugins, and usually the one that makes the decision for agencies. WP Adminify ships four UI templates out of the box - Light, Dark, Gradient, and Glass morphism - that completely replace the default WordPress admin skin. I switched a client's dashboard to the Glass template last month and the client's exact words were "wait, is this still WordPress?" You can set custom primary colors, custom admin fonts (the Inter typeface renders well on retina screens), and toggle light/dark mode per user, with optional auto-scheduling that follows sunrise/sunset or system preference. If you need to create custom dashboard layouts for different user roles, WP Adminify lets you drop custom dashboard widgets into each role's view - a simple workflow to customize the admin for editors, subscribers, and WooCommerce customers separately. ASE doesn't touch the admin's visual design at all. The wordpress admin area still looks like vanilla WordPress after you install ASE - because ASE's design goal is to add utility without imposing an aesthetic. If you're running a dev site and you want dark mode badly, pair ASE with a dedicated dark-mode plugin, because ASE won't do it. ASE also doesn't offer dashboard UI skins or custom admin bar themes; its enhancements are functional, not visual. Bottom line for this category: WP Adminify is the only choice if you care about visual branding. ASE is fine if you're happy with the default WordPress look. Related reading: [WP Adminify Dashboard Customization](https://wpadminify.com/features/dashboard-customization) and [Dark Mode feature](https://wpadminify.com/features/dark-mode). ## Admin Menu Editor: Drag-and-Drop vs Organizer Both plugins reorder the WordPress admin menu. The difference is how far they go. ### WP Adminify's admin menu editor WP Adminify plugin basic options for Admin menu - Full drag-and-drop interface - grab a menu item, drop it in a new position - Drag a submenu out to promote it to a top-level menu - Drag a menu out to the "Hidden" column to remove it - Add custom menu items to create custom admin pages that point to internal WordPress admin URLs, external URLs, or custom admin pages built with Elementor or Gutenberg - Role-based visibility: show "Posts" to editors, hiding admin items like "Plugins" from subscribers, restrict "Settings" to admins only - Custom Dashicons or uploaded SVG icons per menu item - Separators and dividers for visual grouping ### ASE's admin menu organizer - Reorder the existing menu (drag-and-drop) - Rename menu items - Hide items - Adding new custom menu items, always-hiding items for specific roles, and submenu reordering are Pro-only features For a simple "hide Plugins from subscribers" task, ASE free handles it. For a full custom client dashboard where "Posts" becomes "Articles," "Media" becomes "Assets," and a new "Client Brief" menu links to an Elementor page, you want WP Adminify's admin menu editor. Among WordPress dashboard plugins, this is the clearest functional gap between the two - ASE's free organizer is adequate for reordering; WP Adminify is built to customize admin navigation end to end. Related: [Admin Menu Editor feature page](https://wpadminify.com/features/admin-menu-editor). ## Login Page Customizer: Loginfy vs ASE Pro If you've ever handed off a client site and watched the client log in to `/wp-login.php` and see a WordPress logo instead of their brand, you know why this module matters. WP Adminify's Loginfy is a pre-built template library. It's the customizer most agencies use to deliver a branded dashboard for clients alongside a matching login screen. You pick from 16+ login page designs, upload a background image (or slideshow), set your logo, tweak the form's width, border radius, button hover color, and typography - all through a point-and-click UI. You can drop in custom CSS for the last 5% of polish. It's the same approach as page builders like Elementor: start from a template, customize, save. ASE's Login Page Customizer is Pro-only and takes a different route. It's a flat form with color pickers and a logo upload - simpler, faster to configure, but without templates to start from. You get to a branded login page, just less dramatically. If the login page is going to be a talking point in your client pitch, Loginfy wins. If you just want the client's logo instead of the WordPress logo, ASE Pro is enough. ## White Label WordPress: Who Does It Better? White labeling is where the agency audience lives. Both plugins try to remove WordPress branding, but the depth differs. WP Adminify white label covers: - WordPress admin bar logo replacement and custom admin bar styling (WP Adminify's admin bar editor is an addon in the free version) - Admin menu logo - Browser tab title (replace "WordPress" with your brand) - Admin footer text (remove "Thank you for creating with WordPress") - Custom favicon for the admin area - Rebrand the "Howdy" greeting - Dashboard and login page branding (via Loginfy) - Rebrand the WP Adminify plugin itself (Agency plan - show your agency's name and logo instead of ours in the plugin list and settings) ASE's white-label footprint: - Admin Logo module (Pro) - adds your logo to the admin bar or top of the admin menu - Custom admin footer text - Site identity on the login page (uses WordPress's native site icon) ASE's approach is minimal - it adds a logo and changes the footer. WP Adminify treats white label as a strategy, not a toggle. If your agency's selling point is "we build WordPress sites that don't look like WordPress," the difference is substantial. Related: [White Label feature page](https://wpadminify.com/features/white-label) and [Plugin White Label (agency rebrand)](https://wpadminify.com/features/plugin-white-label). ## Security Tools This is the category where ASE genuinely wins, and I'll say it plainly even as the WP Adminify author: if security-hardening matters to you, ASE has the deeper toolkit. ### What ASE offers - Limit Login Attempts (free) - blocks IPs after N failed attempts - CAPTCHA Protection (Pro) - integrates ALTCHA (self-hosted, GDPR-compliant, free), Google reCaptcha v2 and v3, and Cloudflare Turnstile across login, password reset, registration, and comment forms (WooCommerce-compatible) - Two-Factor Authentication (Pro) - TOTP authenticator apps, recovery codes, email-based 2FA, per-role grace periods - Disable XML-RPC - protects against XML-RPC brute force and DDoS - Obfuscate Author Slugs - prevents `?author=1` username enumeration - Disable REST API for unauthenticated users (Pro) with route-level exclusions ### What WP Adminify offers - Change the login URL (e.g., `/custom-slug` instead of `/wp-login.php`) - which stops 95% of automated bot login attempts - Login / Logout redirects by user role - Disable XML-RPC and restrict REST API access (limited) - Clean up ` ` - remove generator tags, RSD links, WLW manifests WP Adminify treats security as a layer, not the main event. ASE treats it as a core module category. If you're evaluating plugins purely on security depth, ASE wins. If you want a branded admin with baseline security and plan to run a dedicated security plugin like Wordfence or Solid Security alongside it, WP Adminify is fine. ## Productivity Add-ons Here's where the two plugins have the least overlap - they each carved out different productivity corners. Bulk drag and drop images into folders in WP Adminify media library ### WP Adminify's unique productivity features - Quick Menu - a Spotlight-style keyboard-shortcut command palette. Press a hotkey, type "pages," jump straight to the pages list. Install-on-every-site-level useful if you manage WordPress full-time. - Activity Logs (addon) - every admin action, login, plugin activation, option change logged with the user, date, and IP. Critical for multi-user sites and site users audits. - [Google PageSpeed Insights](https://wpadminify.com/google-pagespeed-insights) inside the dashboard - run PSI without leaving WordPress. - RoleMaster Suite - full user role editor (create, clone, edit capabilities) - Media Library Folders - drag-and-drop folder organization for the WordPress media library - Duplicate Post / Page / CPT - one-click clone - Admin Color Scheme customization - override the default admin color scheme per user ### ASE's unique productivity features - Form Builder (Pro) - full-featured form builder with 33 field types including NPS, Likert, Matrix, entry management, auto-responder, webhooks to Zapier/n8n - File Manager (Pro) - a WordPress admin file manager with folder tree navigation and code editing - Code Snippets Manager (Pro) - CSS, SCSS, JS, HTML, PHP snippets with syntax highlighting and safe mode (replaces the [Code Snippets plugin](https://wordpress.org/plugins/code-snippets/)) - Custom Content Types (Pro) - custom post types, taxonomies, field groups, options pages with Gutenberg + Elementor + Bricks + Oxygen compatibility (ACF Pro alternative) - Media Categories (Pro) - SMTP Email Delivery - replaces separate SMTP plugins - Image Upload Control with WebP conversion (Pro) - resize + convert on upload - Redirect Manager (Pro) - wildcards, regex If you're building sites that use custom post types, custom forms, and custom redirects, ASE consolidates those into one plugin. WP Adminify doesn't try to compete in those areas. Related: [Admin Columns Editor](https://wpadminify.com/admin-columns-editor), [Activity Logs](https://wpadminify.com/activity-logs), [Media Folders](https://wpadminify.com/features/wordpress-media-folder). ## Pricing Comparison | Tier | WP Adminify | ASE | | --- | --- | --- | | Free version | 60+ features | 57 modules | | Entry Pro (annual) | $49–79 (Personal, 1 site) | $39/yr (single site) | | Mid Pro (annual) | $129/yr (Business, 3 sites + multisite) | Tiered up to $499/yr | | Agency annual | $249–299/yr (50 sites, rebrand plugin) | - | | Lifetime deals | Available (check [pricing page](https://wpadminify.com/pricing)) | $99 (3 sites) / $149 (10) / $199 (25) / $299 (50) / $399 (100) / $599 (200) | | Support window | Priority for Pro | 1 year on LTD, then support plan | | Money-back guarantee | 14 days | Standard | What this means in practice: - For a single site, ASE is cheaper ($39 vs $49-79/yr). - For an agency managing 10+ client sites, ASE's $149 lifetime deal is aggressive - but it doesn't include the UI transformation and branding depth that usually justifies the upsell to clients. - For a multisite network, WP Adminify officially supports multisite on the Business plan; ASE "works in user reports" but isn't officially supported. - For plugin rebranding (your agency's logo in the plugin list), only WP Adminify's Agency plan offers it. ## Performance and Compatibility Both plugins are built with modular architecture - you enable only the modules you need, and disabled modules don't load. WP Adminify loads scripts only on the admin side (not the frontend), so site speed for visitors stays untouched - your site without WP Adminify's admin overhead on public pages is identical in speed. The Adminify settings panel itself is lightweight. Tested against PHP 8.3 and WordPress 6.7+. Compatible with Elementor, Gutenberg, WooCommerce, and most page builders. The Jewel Theme / Pixar Labs team actively patches security issues - for example, [CVE-2024-8959](https://www.wiz.io/vulnerability-database/cve/cve-2024-8959) was fixed in the changelog within 48 hours of disclosure. ASE is explicitly marketed as "lightweight" and the review threads back that up - users consistently mention replacing 10+ plugins without a visible slowdown. Requires PHP 5.6+ (broad compatibility) and tested up to WordPress 6.9.4. Works with Gutenberg, block themes, Bricks, Breakdance, Oxygen, Elementor. ASE does NOT officially support multisite. Compatibility caveat: Both plugins modify the admin menu and admin bar. If you run both at once, enable the admin menu editor in ONE plugin - not both - or you'll get conflicting order changes. Same rule for admin notices: pick one plugin to [manage admin notices](https://wpadminify.com/features/disable-admin-notices) and turn the feature off in the other. ## When to Choose WP Adminify Among WordPress dashboard plugins available today, including alternatives like Ultimate Dashboard and UiPress, pick WP Adminify if two or more of these apply: - You're an agency building client sites and your brand shows up in the admin (logo, footer, login screen, plugin list) - You need dark mode for your own sanity during late-night work sessions - You care about admin design - templates, custom fonts, custom colors - You need a drag-and-drop menu editor with role-based visibility out of the box in the free tier - You want a client dashboard that doesn't look like vanilla WordPress - You manage WordPress full-time and want a Spotlight-style Quick Menu for keyboard navigation - You already have a security plugin (Wordfence, Solid Security, Sucuri) and don't need 2FA/CAPTCHA from your admin customizer ## When to Choose ASE Pick ASE if two or more of these apply: - You need custom post types, taxonomies, and field groups (ACF Pro alternative) - You build sites with custom forms and want a bundled form builder - You want image upload control with WebP conversion - You don't care about admin visual design - vanilla WordPress is fine ## Can You Use Both Together? Yes, with caveats. I've run both plugins on the same WordPress installation for testing and they coexist - as long as you don't enable overlapping modules simultaneously. Safe combinations I've tested: - WP Adminify for dashboard UI templates + admin menu editor + Loginfy login page. ASE for 2FA + CAPTCHA + limit login attempts + custom post types + form builder. - WP Adminify for Activity Logs + Quick Menu + white label. ASE for SMTP + code snippets + image optimization. Disable one of each pair to avoid conflicts: - Admin menu editor - pick WP Adminify's (more powerful) and disable ASE's Admin Menu Organizer - Admin bar customization - pick one - Login page customizer - pick one - Admin notices management - pick one - Change login URL - pick one My own rule of thumb: use WP Adminify for everything user-facing (how it looks, white label, menus, login) and ASE for everything backend (security, content types, forms, code snippets, SMTP). They complement each other more than they compete. ## Question came from real WP Adminify Customers ### What's the main difference between WP Adminify and ASE? WP Adminify focuses on visual transformation of the WordPress admin - UI templates, dark mode, drag-and-drop menu editor, branded login page, white labeling. ASE focuses on plugin consolidation - it ships 57 free modules that replace dozens of single-purpose plugins for security, content types, forms, code snippets, and SMTP. Different goals, different winners depending on what you need. ### Is ASE free forever, or do I need Pro? ASE's free version on WordPress.org is genuinely feature-complete - 57 modules including limit login attempts, change login URL, disable Gutenberg, disable REST API, SMTP email, heartbeat control, and more. ASE Pro unlocks 17 additional modules (form builder, file manager, code snippets, custom post types, 2FA, CAPTCHA, WebP conversion). Start with the free version; upgrade when you hit a wall. ### Does WP Adminify slow down WordPress? No. WP Adminify loads its scripts only on admin pages (/wp-admin URLs), not on the frontend that visitors see. Your site speed, Core Web Vitals, and Largest Contentful Paint for visitors are unaffected. The admin itself loads quickly because modules are lazy-loaded - if you disable the admin columns editor, its code never loads. ### Can WP Adminify replace ASE? Partially. WP Adminify covers admin menu editor, admin bar editor, login customizer, white labeling, dashboard UI, dark mode, media folders, activity log, and admin columns. It doesn't cover 2FA, CAPTCHA, custom post types, form building. If you use ASE mainly for the UI modules, WP Adminify replaces it. If you use ASE for content architecture, WP Adminify doesn't. ### Do WP Adminify and ASE conflict with each other? Not by default, but disable overlapping modules. If both plugins try to reorder the admin menu, you'll get inconsistent order. Pick WP Adminify for admin menu editing (it's deeper), disable ASE's Admin Menu Organizer, and you're fine. Same rule for admin bar, login URL change, and admin notices management - pick one plugin to own each of these areas. ### Which plugin is better for WordPress agencies? WP Adminify - specifically because of plugin white-labeling (rebrand the plugin itself with your agency's name on the Agency plan), deeper login page customization, UI templates, and official multisite support. ASE is better for agencies doing performance cleanups where the goal is to rip out 12 plugins per site and bill the time savings. Many agencies run both. ### Does ASE work with multisite? Not officially. ASE's WordPress.org page states multisite is unsupported. Users report it works when activated per-subsite, but not network-activated. WP Adminify officially supports multisite on the Business and Agency plans. ### Does WP Adminify or ASE have dark mode? WP Adminify includes a full scheduled dark mode for the WordPress admin, with automatic time-based switching and per-user preferences. ASE (Admin and Site Enhancements) does not include a dark mode, so if a modern dark admin interface matters to you or your clients, WP Adminify is the better fit. ### Is WP Adminify or ASE better for white labeling client sites? WP Adminify is better for white labeling. It rebrands the entire admin - logo, the Howdy greeting, the footer, the login page (16 templates), and even the plugin list itself through plugin white label - which is ideal for agencies handing dashboards to clients. ASE focuses on backend utility modules rather than full client-facing white label branding. ### Which is better for a branded login page, WP Adminify or ASE? WP Adminify, through its built-in Loginfy module, offers 16 login templates with live customization for branded client login screens. ASE Pro includes a lighter login page option, but WP Adminify gives noticeably more design control. ## Final Verdict There's no universal winner here. The plugins solve different problems. If I had to make the decision for a new agency onboarding 30 client sites this quarter, I'd install WP Adminify on every site (for white label, menu editor, login page, dark mode, and admin top bar customization) and ASE on sites where clients specifically need security hardening, custom post type registration, or form building. That's roughly what I actually do - and it's why WP Adminify's approach to customize the wordpress admin lives next to ASE's backend toolkit on my production sites without conflicts. If budget forces a single pick: pick the one that solves your biggest pain. If your clients keep asking "why does the admin look like this," pick WP Adminify. If your clients keep asking "why do we have 15 plugins slowing down the site," pick ASE. If you can't decide, install both free versions today, disable overlapping modules, and use them side-by-side. Next step: [Try WP Adminify free](https://wordpress.org/plugins/adminify/) from the WordPress.org directory, or [compare the Pro plans here](https://wpadminify.com/pricing). --- # How to Create a WordPress Custom Admin Menu (2026 Guide) URL: https://wpadminify.com/how-to-create-a-wordpress-custom-admin-menu Last updated: 2026-08-12 ## Your WordPress Admin Menu Is a Mess. Let us Fix It. You log into your WordPress dashboard. What do you see? Clutter. Dozens of menu items you never use. Client sites bloated with plugin menus that confuse everyone. Your team wastes minutes every day hunting for the right settings. Here is the truth: a chaotic admin menu kills productivity. It frustrates your team. It confuses your clients. And it makes WordPress feel harder than it needs to be. Good news? You can fix this today. In this guide, I will show you exactly how to create a WordPress custom admin menu, tailored to your workflow. No fluff. Just actionable steps. Let us build a dashboard that actually works for you. ## Why Your Admin Menu Needs a Cleanup (Right Now) WordPress installs with a default menu structure. Then every plugin adds its own menu item. Before you know it, you have 30+ menu items. Most sit unused. All create visual noise. For agencies managing client sites, this is worse. Your clients do not need to see WooCommerce settings. They do not need SEO plugin menus. They need a clean, focused dashboard that lets them do their job, without calling you for help. ## Method 1: Create a Custom Admin Menu with Code (For Developers) If you are comfortable with PHP, this method gives you full control. You will create a custom plugin that adds your own menu structure. ### Step 1: Create Your Custom Plugin Navigate to `wp-content/plugins/` via FTP or cPanel. Create a folder called `my-custom-admin-menu`. Inside, create a file: `my-custom-admin-menu.php`. Add this plugin header: ```php

Welcome to My Custom Admin Page!

This is your custom admin page content.

Custom Submenu Page

This is the content for the submenu page.

Add Plugin`” button from the WordPress Dashboard. Search for "Loginfy" then install and activate the plugin. Once done, you’ll get access to all the options. Loginfy gives you a lot of options, but let’s not lose track of our custom login screen. ### Login Page Customizer Click on the WP Adminify from your [WordPress admin dashboard menu](https://wpadminify.com/features/admin-menu-editor). Now, go to `Loginfy > customizer`. ![Loginfy plugin options](https://d1k2c27psfzbiv.cloudfront.net/wp-content/uploads/2024/06/13063726/Loginfy-plugin-options.webp) If you are using WP Adminify. Then navigate to `WP Adminify > Addons > Install Loginfy`. (You need to activate the addon after installation.) ![Install Loginfy addon from WP Adminify](https://d1k2c27psfzbiv.cloudfront.net/wp-content/uploads/2025/03/18103517/Install-Loginfy-addon-from-WP-Adminify.webp) ### Login Page Templates For beginners, templates are the best choice. Because you don't have to create them from scratch. You’ll get professionally pre-designed templates available in WP Adminify. You can use some of them for free. Meanwhile, you can use the premium templates by activating the premium plan. ![WordPress login page templates by WP Adminify](https://d1k2c27psfzbiv.cloudfront.net/wp-content/uploads/2023/01/12111615/WordPress-login-page-templates-by-WP-Adminify.webp) ### Logo Customization for the Login Page Logo is one of the primary factors users want to customize. So, start by selecting the "Logo" option. If you want to display your [logo on the login screen](https://wpadminify.com/docs/loginfy/customize-wordpress-login-page). You’ll have the option to select logos based on texts, images or both (combination of text and image). If you select only text, your logo will be whatever you enter in the "Text Logo" field. When you select the logo option, a window will appear where you can upload an image. If you select image & text then both options for the logo and image will be accessible. You can also make the logo clickable with a link. Simply click the “Add Link” button and enter your destination URL. Additionally, you can customize the logo's design by changing height, and width. Also, you can add a title to the login page. However, in order to access those wonderful writing styles and features, such as text padding, you must purchase a premium subscription. ![Change WordPress login page logo](https://d1k2c27psfzbiv.cloudfront.net/wp-content/uploads/2023/01/12111621/Change-WordPress-login-page-logo.webp) ### Background The background is a pretty good way to highlight any differences. You can change the backdrop color with this option. Set a picture, or a video, or add a slideshow of your greatest work to promote your products or services. You can select whatever color you like from the color & gradient choices. Also, you can manage it using the overlay option. Most of the time, when you submit a picture for your backdrop, it won't appear exactly where you want it to. But Loginfy takes you out of any hassles! Once you upload an image, you can select its placement. Also, you can choose if it will be repeated or not. Also, you can set the backdrop attachment to scroll or fixed along with its size. Sounds interesting, isn’t it? ![WordPress login page background customizer](https://d1k2c27psfzbiv.cloudfront.net/wp-content/uploads/2023/01/12111626/WordPress-login-page-background-customizer.webp) ### Layout Want something a bit more fun? Use the layout section. With this, you can split your login screen into two sections. And, you can choose where the login box will appear. Six alignments are available for you. And you can add an image and edit it much like the backdrop section. ![WordPress tutorial - WordPress login page layout change comprehensive guide](https://d1k2c27psfzbiv.cloudfront.net/wp-content/uploads/2023/01/12111632/WordPress-login-page-layout-change.png) ### Login Form Most plugins only let you edit a small area of the login page. But, Loginfy gives you the full customization for the whole login page. You get the login form settings to fully customize your form. You can upload an image or modify the login form's color. You can also change the entire background design. Other settings, such as border, width, and height, are available to everyone. You also get features like border, padding, or box shadow that require a premium membership. ![WordPress login form customization](https://d1k2c27psfzbiv.cloudfront.net/wp-content/uploads/2023/01/12111653/WordPress-login-form-customization.webp) ### Form Fields Want to personalize the login screen with texts and boxes? You have the form fields option to do that with 4 different settings. - Label: This allows you to change the names of the login, registration, remember me, forgotten password, and back-to-site options. - Placeholder: You can choose what will appear in this text box instead of the default login and password. - Style: You can choose the label font size, the field's height and width, and the label color using this option. - Advance: This part contains spread, location, color, blur, horizontal and vertical alignment, and field padding. ![WordPress login page form fields customization](https://d1k2c27psfzbiv.cloudfront.net/wp-content/uploads/2023/01/12111640/WordPress-login-page-form-fields-customization.webp) ### Button The button option relates to all the buttons present in the login form. You can pick the color of the text and the button from the "regular" option. There is also an option named “hover”. Which can help to choose the color when anyone hovers their mouse over a button. You can also customize the buttons' margin, padding, and border using the advanced settings. ![WordPress login page button cusotmization](https://d1k2c27psfzbiv.cloudfront.net/wp-content/uploads/2023/01/12111647/WordPress-login-page-button-cusotmization.webp) ### Others Want to take full control over your login form? The Others section lets you remove or adjust default WordPress options that you might not need. Here, you can: - Hide the Remember Me checkbox - Disable the Login Shake animation - Remove the Lost/Forgot Password link - Disable the Back to Website link - Hide the Privacy Policy link - Disable the Language Switcher dropdown These options are designed for users who want a cleaner, distraction-free login page. We recommend disabling them only if you have a specific reason. If you have security concerns, branding preferences, or simplifying the user experience, you should go for it. ![Others tweaks for WordPress login page](https://d1k2c27psfzbiv.cloudfront.net/wp-content/uploads/2023/01/12111657/Others-tweaks-for-WordPress-login-page.webp) ### Google Fonts Google Fonts are one of the most popular choices for website owners. And obviously for good reason. The library offers hundreds of stylish, professional, and easy-to-read fonts. With this option enabled, you can instantly apply any Google Font to your login page and create a design that perfectly matches your brand’s personality. Take full control of how your login form text looks with Typography settings. You can fine-tune every detail, including: - Font Family - Font Style - Subset - Text Align - Text Transform - Text Decoration - Font Size - Line Height - Letter Spacing - Word Spacing - Font Color Make your login screen not just functional, but visually memorable. ### Error Message Whenever someone enters an incorrect login detail, like the wrong email or password, WordPress shows a default error message. So, what’s the issue? It’s the same generic message that’s been there since day one. With the Error Messages option, you get the freedom to make those messages your own. Customize them for: - Invalid or incorrect usernames - Empty fields - Existing usernames - Wrong email or password entries Instead of boring, outdated text, you can customize messages that are helpful. Whether you want to guide users politely or add a touch of personality this tool gives you full control. Why settle for the same old message when you can turn errors into opportunities, Right? ![Customize WordPress login page error page](https://d1k2c27psfzbiv.cloudfront.net/wp-content/uploads/2023/01/12111701/Customize-WordPress-login-page-error-page.webp) ### Custom CSS & JS The Custom CSS & JavaScript option can be one of the most powerful features for developers. If you love writing code, this section gives you complete freedom to extend and personalize your login page. Add custom styles, extra features, or even interactive elements. CSS Editor lets you write and apply your own styles to the login page. Note: Custom CSS won’t reflect live until you Save Settings and refresh or Preview the login page. JS Editor lets you add custom JavaScript to enhance your login page functionality. Note: Custom JS also requires saving and refreshing or previewing to take effect. Even if you’re not a programmer, this option is a great way to hand over creative control to your developer. It’s a flexible feature designed for those who want complete customization beyond the basics. ### Credits If you enjoy using Loginfy, you can show your support by adding a small “Powered by Loginfy” logo to your login page. Options you can control: - Enable or disable credits - Choose the text color - Adjust the position of the logo We’ve built this tool to be free and accessible for everyone. By enabling credits, you’re helping us spread the word so more people can discover Loginfy. It’s a simple way to give back. And who knows, someone visiting your site might find the premium features they’ve been looking for. Of course, the choice is yours. Whether you enable it or not, we’re grateful to have you as part of the Loginfy community. ## Ways to Make Your Login Screen More Trust Worthy According to Salesforce.com, 95% of customers stick with the brand they like, and 92% are more inclined to buy more items from their go-to retailer. This statistic demonstrates how important design is in building a trustworthy website. Due to the abundance of spams websites today, even a simple login page might drive away a consumer. Here are some suggestions for improving the credibility of your website and even the login page. - First, add SSL & HTTPS to your website. - Show your trust seals & certificates. A login page is an ideal option to showcase your security certificates. - Add a social profile in the footer of every page. Highlight them on the login page so that no one hesitates when creating an account. - Add a live chat option on the login page. - Make every page in a way that can build a great first impression. - Use a user-friendly design. - Enable comments for posts. - Build an emotional appeal across all touch points. If you face any other issues regarding the login page, I recommend you to check out this [how to fix the login page error](https://wpadminify.com/how-to-fix-wordpress-login-page-issues) blog post. ## Do’s & Don’ts for Login Screen Design Designing a login page isn’t as simple as it looks. Every detail matters! And overlooking even the smallest element can reduce the user experience. This might discourage people from signing in or joining your website. The good news? Creating a great login page doesn’t have to be complicated. All you need is a clear plan and a focus on the basics. To help you get started, here are some of the top Dos and Don’ts of login page design. Some practical tips that will make the process easier and ensure your login page is both functional and user-friendly. Do - Keep it simple & clear: You can’t go wrong with a straightforward login form and a clean layout. Users will quit the website if the page is messy and the login forms are hidden or hard to find. - Differentiate Registration & Login: Never combine signing up with signing in. Since they both appear identical, most users first choose the sign-in option before becoming irritated. - Add Social Profile Login: Social profile login is easy and quick. - Solve the CAPS Lock Issue. Don't - Avoid Pop-up Logins - Avoid Modal or Tabbed Logins - Avoid Putting Restriction on Username or Password: let the user choose what he likes, don’t put some rules that your password needs to be this or that. - Remove All Hidden Fields. - Don’t Restrict Long Password. ## Importance of Custom Login Background - From User’s Aspect Users are constantly looking for reliable sources. Most websites in this era of internet commerce offer one thing while providing another. They look for the same product on several websites, but they only make purchases from those they trust. Therefore, you must keep it in mind while creating not only the WordPress Login Screen but the entire website in order to make it trustworthy. Try to keep the login page's design as straightforward and lovely as possible. Users don't want to have to go through a lot of security hoops to register an account. Therefore, make the selections clear and avoid using similes in the sign-up process. Only give users a few options, but if your website sells important goods and has a large audience, consider adding extra layers that can be activated from the user profile. Make sure that the login page responsiveness is always good. If not then you will lose most of the customers for sure. Now social profile logins are much easier. You can try them too. ## Reasons to Customize WordPress Login Page - Owner’s Benefits A person's decision to browse your website or not is made in less than a second, according to Tylor & Francis Online. If they have a positive first impression, they could browse it. This claim encapsulates the significance of a well-designed website and its login page. According to a study by socialmediatoday.com, a well-designed login page gets a customer response 12 times faster than a typical website login page. Spiceworks.com reports that 95% of B2B buyers desire visual material. All these data show us how even a login page can make a difference. We all know that writing all those emails, usernames and passwords is really boring and that is the main reason most users won’t log in to any new websites. But what about VOGUE or any other top brands? The only difference they made all the difference from the beginning. They made everything user-friendly as well as special so that you are happy & trust them. Look at them how they are getting traffic day by day. So after all this, you can say that even a WordPress login screen customization can bring you some good change. ### Related Reading - [white label WordPress guide](https://wpadminify.com/features/white-label) - [Loginfy login customizer](https://wpadminify.com/loginfy) - [change login logo](https://wpadminify.com/change-wordpress-login-logo) ## General question for Login Page Customization (FAQs) ### Can I restore the default WordPress login screen anytime? Yes, with just one click. Loginfy is simple for everyone. It doesn’t overwrite WordPress core files. If you deactivate or reset the plugin, WordPress automatically falls back to its default login page. This makes it completely safe to experiment with designs without worrying about breaking anything. ### What if I want to run seasonal promotions on my login screen? That’s a great idea! With Loginfy, you can change out the background, logos, or even add a slideshow/video for seasonal campaigns. For example, showcase a holiday sale banner directly on the login screen. It’s a smart way to turn a functional page into a marketing opportunity without any coding. ### Do I need the premium version to get a professional-looking login page? Not necessarily. The free version of Loginfy already gives you access to essentials like logo upload, background customization, and layout changes. If you want advanced features like premium templates, Google Fonts, detailed form styling, or button hover animations, then the premium plan is worth considering. It’s mostly about how much design control you want. ### What happens if I disable or uninstall the Loginfy addon? If you deactivate or remove Loginfy, your login page will automatically revert back to the default WordPress login screen. This means you won’t lose any website data or lock yourself out. Your customization settings will stay stored until you decide to reinstall and re-enable the addon again. ### Can I customize the login page without coding knowledge? Absolutely! That’s one of the best things about Loginfy. You get a visual customizer with advanced settings. Everything including logo, background, colors, fonts, buttons, and error messages can be customized without writing a single line of code. However, if you’re a developer, you’ll also get the option to add custom CSS and JS for advanced customization. ## Where to go next A branded login screen is the first step, but clients spend the rest of their time inside the dashboard itself. For the full picture - rebranding wp-admin, hiding the WordPress logo and "Howdy" greeting, white-labeling plugin names, and handing over a site that looks like yours end to end - read our [complete guide to white label WordPress](https://wpadminify.com/white-label-wordpress). If you also want to reshape what clients actually see once they're logged in, the [WordPress dashboard customization guide](https://wpadminify.com/wordpress-dashboard-customization) covers every method, plugin and code alike. --- # 10 Best Affiliate Marketing Plugins for WordPress in 2026 URL: https://wpadminify.com/best-affiliate-marketing-plugins-for-wordpress Last updated: 2026-08-12 Affiliate marketing is one of the most profitable performance-based marketing strategies which is projected to reach $42.6 billion this year. As we move further into 2026, over 90% of eCommerce businesses are expected to start their own affiliate programs. The best part? The WordPress ecosystem is full of powerful plugins ready to help you create and grow your affiliate network. Whether you're a WordPress store owner, beginner or expert affiliate marketer, having the best WordPress affiliate marketing plugins can make a world difference in your revenue. In this article, we'll introduce ten must-have WordPress affiliate marketing plugins to 10X your revenue. ## 1. AffiliatePress ![AffiliatePress WordPress affiliate marketing plugin dashboard](https://d1k2c27psfzbiv.cloudfront.net/wp-content/uploads/2026/06/29111701/affiliatepress-wordpress-affiliate-plugin.webp) Want to create your own affiliate marketing program with zero coding? [AffiliatePress](https://www.affiliatepressplugin.com) is the best choice among all WordPress affiliate plugins. Integrating with WooCommerce and 23+ other WordPress plugins in just one-click, this plugin tracks all affiliate sales in real time. The coolest part? AffiliatePress allows you to create multiple smart commission structures such as recurring, tiered-based, lifetime, and a lot more, to fit in your business model. From your powerful affiliate management dashboard, you can approve affiliates, assign custom commissions, automate payouts and track their performance. ### Standout Features of AffiliatePress: - Custom signup form. - Pay commission in 1-click or automatically via PayPal or Stripe. - Affiliate statistics & reports. - Smart fraud detection. - Unlimited creatives like banners, links, images, etc. - Affiliate landing pages. - Unique QR code and coupon code tracking. - Powerful affiliate management. AffiliatePress pricing is also simple to understand. It offers a generous free version with unlimited affiliates, payouts, and commissions as well as including all 23+ integrations. For advanced features and commissions models, its premium version starts from $79/Year only. [Get AffiliatePress Now](https://www.affiliatepressplugin.com/pricing/) ## 2. PrettyLinks ![Pretty Links WordPress affiliate link management and cloaking plugin](https://d1k2c27psfzbiv.cloudfront.net/wp-content/uploads/2026/06/29111705/pretty-links-wordpress-affiliate-link-management.webp) Pretty Links is one of the best WordPress plugins for managing affiliate links. Trusted by thousands of affiliate marketers and content creators, Pretty Links turns any "ugly" or "messed up" affiliate URL into clean, professional links with your own domain name. ### Standout Features of Pretty Links: - Link Shortening & Cloaking. - Detailed analytics. - Keyword replacement. - Dynamic redirects. - Product display. This WordPress affiliate marketing plugin offers a free version for basic link shortening, tracking and redirection. For unlocking advanced features lie broken link detection and auto-linking, the pro version starts from $249/Year. ## 3. ThirstyAffiliates ![ThirstyAffiliates WordPress affiliate link cloaking and management plugin](https://d1k2c27psfzbiv.cloudfront.net/wp-content/uploads/2026/06/29111708/thirstyaffiliates-affiliate-link-cloaking-plugin.webp) ThirstyAffiliates is another great WordPress affiliate marketing plugin for publishers and bloggers who wants to manage, cloak and monetize outbound affiliate links. Although it shares many features with Pretty Link, this plugin is well-known among serious affiliate marketers for its dedicated tools. ### Standout Features of ThirstyAffilates: - Amazon uncloaking. - Built-in Geolocation targeting. - Link health checker. - Automatic keyword linking. - Affiliate link cloaking. - Detailed reporting. ThirstyAffiliates is a freemium WordPress affiliate plugin, yet for advanced features, its pro plan starts from $249/Year. ## 4. YITH WooCommerce Affiliates ![YITH WooCommerce Affiliates referral program plugin for WordPress stores](https://d1k2c27psfzbiv.cloudfront.net/wp-content/uploads/2026/06/29111711/yith-woocommerce-affiliates-plugin.webp) If you run a WooCommerce store and wish to launch your own referral program, then YITH WooCommerce Affiliates is worth the shot. As its name suggests, this plugin is specially designed for WooCommerce store owners only who want to build a complex and automated affiliate system. What stood out most about YITH WooCommerce Affiliates is its deep integration with the YITH ecosystem. You can create highly customized and automated workflows that most standalone plugins struggle to match. ### Standout Features of YITH WooCommerce Affiliates: - Unique permanent commission logic. - Vast ecosystem to add features like Store Credit Rewards, Loyalty points, etc. - Priority-based commission rules. - Custom registration form builder. - Automated refund handling. Its pricing plan is simple to understand. YITH WooCommerce Affiliates has a free version in the WordPress plugin directory. The premium version starts from $179.99/year. ## 5. Easy Affiliate ![Easy Affiliate all-in-one affiliate management plugin for WordPress](https://d1k2c27psfzbiv.cloudfront.net/wp-content/uploads/2026/06/29111714/easy-affiliate-wordpress-plugin.webp) Easy Affiliate is an all-in-one affiliate management plugin for WordPress. Just like AffiliatePress, it allows business owners to create and run their own referral program. On top of that, what makes it stand out is its simple and user friendly interface. So, whether you're a beginner in affiliate marketing or new to WordPress, Easy Affiliate is made to make affiliate marketing easy. ### Standout Features of Easy Affiliate: - Real time reports. - Integrates with several email marketing tools. - Rock-Solid Tracking, - 2000+ Integrations with Zapier. - Automatic Fraud Detection. - One-Click PayPal Payouts. Despite having almost the same features as AffiliatePress, Easy Affiliate has no free version. You have no choice but to buy the premium version which starts from $249/Year. ## 6. AAWP (Amazon Affiliate WordPress Plugin) ![AAWP Amazon Affiliate WordPress Plugin product comparison boxes](https://d1k2c27psfzbiv.cloudfront.net/wp-content/uploads/2026/06/29111717/aawp-amazon-affiliate-wordpress-plugin.webp) AAWP (Amazon Affiliate WordPress Plugin) is another premium WordPress affiliate management plugin, especially designed for Amazon Associates. If you want to increase your conversions by showing your products dynamically, then AAWP is the best-pick. It pulls real-time data directly from the Amazon Product Advertising API to make sure your site remains compliant with Amazon's strict pricing and availability policies. ### Standout Features of AAWP: - Dynamic comparison table. - Automated bestseller list. - New release lists. - Conversion optimized product boxes. - Geotargeting. What sets it apart from other premium affiliate marketing plugins is despite being paid-only, it offers a 30-days money-back guarantee. Plus, the pricing plan is also affordable starting at €79/Year (means $93 approx. per year). ## 7. MonsterInsights ![MonsterInsights Google Analytics plugin tracking affiliate link clicks in WordPress](https://d1k2c27psfzbiv.cloudfront.net/wp-content/uploads/2026/06/29111720/monsterinsights-affiliate-link-tracking.webp) MonsterInsights is the most popular Google Analytics plugin for WordPress. It brings all complex data right into your WordPress dashboard. While Google Analytics (GA4) can be intimidating, MonsterInsights simplifies it into human readable reports. You don't need to touch a single line of code to set up advanced tracking like file downloads, form conversions or outbound link clicks. For affiliate marketers, its standout feature is its ability to track affiliate links clicks automatically with no manual setup. ### Standout Features of MonsterInsights (for affiliate marketing): - Affiliate link tracking. - Real time statistics. - Performance Ads tracking. - Enhanced eCommerce tracking. - Page level insights. MonsterInsights has a free version, and the premium plan starts from $199.00/Year. ## 8. OptinMonster ![OptinMonster conversion optimization plugin capturing affiliate site visitors](https://d1k2c27psfzbiv.cloudfront.net/wp-content/uploads/2026/06/29111723/optinmonster-conversion-optimization-plugin.webp) MonsterInsights' sister plugin, OptinMonster, is the most powerful conversion optimization plugin for WordPress. While other plugins are busy managing links or tracking, OptinMonster captures the visitor's attention and directs them toward your affiliate offers before they leave your site. Affiliate sites sometimes suffer from high "bounce rates" where potential customers simply read a review and leave. OptinMonster turns that passive traffic into active subscribers. By moving potential customers from your blog to an email list, you can promote affiliate products to them again-and-again via newsletters rather than relying on a single visit. ### Standout Features of OptinMonster (for Affiliate Conversion): - Exit-Intent® technology. - Onsite retargeting. - Geo-Location Targeting. - Content Locking. - Smart Tags. OptinMonster has a free version in the WordPress plugin directory. The premium version starts from $210.00/Year. ## 9. Elementor ![Elementor drag and drop WordPress page builder for affiliate landing pages](https://d1k2c27psfzbiv.cloudfront.net/wp-content/uploads/2026/06/29111726/elementor-wordpress-page-builder.webp) Elementor is a well-known WordPress tool that lets you create high-converting pages. It is the most popular drag and drop page builder for WordPress, allowing affiliate marketers to create their own professional product reviews, comparison hubs and affiliate landing pages with zero coding. ### Standout Features: - Drag and drop editor. - Advanced theme builder. - Dynamic Tags. - Popup builder. (similar to OptinMonster, but built directly into your page builder) - WooCommerce Builder (If you use YITH WooCommerce Affiliates, Elementor Pro lets you customize your shop and product pages) Elementor gives you a basic drag-and drop editor and 30+ basic widgets in the free version. For more, you can opt for its Pro plan starting at $60/Year. ## 10. FluentAffiliate ![FluentAffiliate modern affiliate management plugin for WordPress](https://d1k2c27psfzbiv.cloudfront.net/wp-content/uploads/2026/06/29111729/fluentaffiliate-affiliate-management-plugin.webp) Developed by the creators of FluentCRM and Fluent Forms, FluentAffiliate is a modern affiliate management plugin for WordPress. Similar to Easy Affiliate and AffiliatePress, it allows business owners to run their own self hosted affiliate marketing program. What makes it stand out is that FluentAffiliate works natively with the "Fluent" Suite. Thus you can FluentCRM to automate affiliate onboarding emails, and Fluent Forms to create custom affiliate registration pages. ### Standout Features: - Deep ecosystem integration. - Real time tracking. - Multi-domain support. - One-click migration. - Smart commission rules. Fluent Affiliate comes with a free version in the WordPress plugin directory. The premium plan starts from $199 for lifetime licence. ## Quick Comparison: Best WordPress Affiliate Marketing Plugins To sum it up, here's a quick recap of all the best affiliate marketing plugins for WordPress. | Plugin | Type | Free Version | Best For | Starting Price | | --- | --- | --- | --- | --- | | AffiliatePress | Affiliate Program + Management. | Yes | All-in-one affiliate system. | $79/Year | | Pretty Links | Link Management. | Yes | Link cloaking & tracking. | $249/Year | | ThirstyAffiliates | Link Management. | Yes | Bloggers & publishers. | $249/Year | | Easy Affiliate | Affiliate Program. | No | Membership & course sites. | $249/Year | | YITH WooCommerce Affiliates | Affiliate Program. | Yes | WooCommerce stores. | $179.99/Year | | AAWP | Amazon Affiliate Tool. | No | Amazon affiliates. | $93/Year | | MonsterInsights | Analytics & Tracking. | Yes | Performance tracking. | $199/Year | | OptinMonster | Conversion Optimization. | Yes | Lead generation & conversions. | $210/Year | | Elementor | Page Builder. | Yes | Landing pages & design. | $60/Year | | FluentAffiliate | Affiliate Program. | Yes | Modern affiliate systems. | $199 (Lifetime) | ## Conclusion In a nutshell, these are the best WordPress affiliate marketing plugins in 2026. We've made sure to list down all the best WordPress plugins for running a successful affiliate program in WordPress. Yet, if you are still confused, here are the top 3 WordPress affiliate marketing plugins: - If you want to create your own affiliate program → AffiliatePress is the best-fit. - If you want to manage affiliate links → Go with ThirstyAffiliates. - Want to track and analyze your complete affiliate program performance → Choose MonsterInsights. Ready to start your affiliate marketing journey? Pick the top WordPress affiliate plugins today! ### Keep Your Dashboard Manageable Every plugin on this list adds its own menus, widgets, and notices to wp-admin, and an affiliate stack can clutter the backend fast. If your dashboard is getting noisy, our guide to [customizing the WordPress dashboard](https://wpadminify.com/wordpress-dashboard-customization) shows how to reorganize it, and the [admin menu editor](https://wpadminify.com/features/admin-menu-editor) lets you tuck plugin menus wherever they make sense for your workflow. --- # WordPress 7.0 Features: Complete Guide to All New Features (2026) URL: https://wpadminify.com/whats-new-in-wordpress-7-0-version Last updated: 2026-08-12 WordPress 7.0 is officially live. Released on April 9, 2026 - shipped during Contributor Day at [WordCamp Asia 2026](https://asia.wordcamp.org/2026/) in Mumbai - this is the largest WordPress update since the block editor was introduced. It marks the official start of Phase 3 of the Gutenberg project, focused on collaboration. But most WordPress update posts read like a changelog. You scan through feature names, nod along, and move on without really knowing what changed for you. This post is different. We'll walk through every major feature in WordPress 7.0 and explain exactly what it means when you're building pages, editing content, managing a team, or running a client site - starting right now. Quick context: WordPress 7.0 also raises the minimum PHP requirement to PHP 7.4 (with PHP 8.3+ strongly recommended). Sites running PHP 7.2 or 7.3 will stay on the WordPress 6.9 branch and won't receive this update. Check your PHP version at Tools > Site Health before updating. Table of Contents - How to Update to WordPress 7.0 - Three Big Themes: Collaboration, Customization, Developer Tools - Real-Time Collaboration - Edit With Your Team Simultaneously - The Notes System - Inline Feedback Without Leaving WordPress - Admin Gets a Visual Overhaul - DataViews, Transitions, and Command Palette - Font Library - A Proper Dashboard for Managing Fonts - In-Editor Revisions That Show What Actually Changed - Responsive Editing Mode - Design for Every Screen - Smarter Design Tools in the Block Editor - New Blocks: Breadcrumbs, Icons, Heading Variations, Cover Video - Pattern Editing Gets Hands-On - Site Editor Quick Edit - Now Rock Solid - Native AI Integration - The WP AI Client - Client-Side Media Processing - More Block Improvements Worth Knowing - For Developers: The APIs You've Been Waiting For - How WP Adminify Works With WordPress 7.0 - FAQ - What This Means for Your WordPress Workflow ## How to Update to WordPress 7.0 WordPress 7.0 is now available through your standard update process. Navigate to Dashboard > Updates and click "Update to WordPress 7.0." Before you do, here's a quick pre-update checklist: ![WordPress 7.0 Admin UI](https://d1k2c27psfzbiv.cloudfront.net/wp-content/uploads/2026/02/19093748/WordPress-7.0-Admin-UI.webp) - Check your PHP version. Go to Tools > Site Health > Info > Server. WordPress 7.0 requires PHP 7.4 minimum. PHP 8.3 or higher is recommended for best performance. - Back up your site. Use your hosting provider's backup tool or a plugin like UpdraftPlus. Always back up before a major version update. - Test on staging first. If you run a production site with custom themes or plugins, update your staging environment first. Check for visual or functional issues before pushing to live. - Update your plugins and theme. Make sure everything is running the latest version. Most major plugins have already shipped WordPress 7.0 compatibility patches. If you want to test before committing, you can still use [WordPress Playground](https://developer.wordpress.org/playground/) to try WordPress 7.0 instantly in your browser - no installation required. ## Three Big Themes: Collaboration, Customization, Developer Tools WordPress 7.0 isn't a scattered collection of minor improvements. Everything in this release falls under three clear priorities that reflect where WordPress is heading: - Collaboration  - Real-time multi-user editing, inline notes, visual revisions. WordPress is catching up to Google Docs and Notion for team workflows. - Customization  - Responsive editing controls, new design tools, video backgrounds, font management, and smarter blocks. The native editor is closing the gap with page builders like Elementor. - Developer Tools  - Native AI client API, DataViews for admin tables, PHP-only blocks, Block Bindings, and new APIs that lay the foundation for the next generation of plugins. Let's break each one down. ## Real-Time Collaboration - Edit With Your Team Simultaneously Real-time collaboration in WordPress 7.0 allows multiple users to edit the same post or page simultaneously, with changes syncing live between all connected editors - similar to how Google Docs works, but inside your WordPress block editor. If you've ever worked with a client or teammate on the same WordPress page, you know the chaos. Someone edits the hero section, someone else overwrites it, and you end up with two versions and zero clarity on what changed. WordPress 7.0 eliminates this with peer-to-peer real-time editing. Here's how it works in practice: - Multiple editors open the same post or page. Each person sees colored cursors and selections from other users - you always know who is editing where. - When a collaborator finishes typing in a block and pauses (or moves to another block), their changes push to all connected users instantly. A brief highlight animation shows which block just changed. - Editors working on different sections of a long post can do so in parallel without stepping on each other's work. - Offline editing works too. If your connection drops, you can keep editing. Changes sync automatically when you reconnect - no lost work, no conflict errors. For agencies managing client sites, content teams publishing daily, and freelancers coordinating with clients on page edits - this alone justifies the upgrade. Your feedback loop just collapsed from "email a screenshot, wait for a reply, make the change, email again" to "edit together, right now." ## The Notes System - Inline Feedback Without Leaving WordPress WordPress 7.0's Notes system is a full inline commenting and feedback layer built directly into the block editor. You can leave rich-text notes on specific blocks - or even on specific text fragments within a block - like sticky comments on a design file. While a basic version appeared in WordPress 6.9, version 7.0 expands this into a complete communication suite: - Block-level notes: Click any block, hit the keyboard shortcut, and leave a note. "Client needs to approve this hero image." "Update this CTA after the sale ends." "Legal team - please review this paragraph." - Text-level notes: Highlight specific text within a block and attach a note to that exact selection. - Rich text formatting: Notes support bold, italic, links, and lists - not just plain text. - Note counts in Quick Edit: The Site Editor's Quick Edit view now shows how many notes are attached to each page or template. At a glance, you can see which content needs attention before you even open it. Your entire editorial review process - feedback, approvals, revision requests - can now live inside WordPress itself. No more Slack threads, email chains, or Google Doc comments that exist in a separate universe from the actual content. ![Add Notes in Gutenberg Editor](https://d1k2c27psfzbiv.cloudfront.net/wp-content/uploads/2026/02/19093740/Add-Notes-in-Gutenberg-Editor.webp) ## Admin Gets a Visual Overhaul - DataViews, Transitions, and Command Palette WordPress 7.0 introduces three interconnected improvements that make the admin dashboard feel like a modern application rather than a 2010-era web interface. ### DataViews Replace Legacy Admin Tables DataViews is a new system that replaces traditional WordPress List Tables (the tables you see on the Posts, Pages, and Users screens) with a modern, app-like interface. Think consistent spacing, inline filtering without page reloads, and visual alignment between classic admin panels and the block editor. This affects how you browse and manage posts, pages, custom post types, and users. The experience is faster, more visually consistent, and designed to feel like a single cohesive application rather than a patchwork of different admin screens built over 20 years. ![The new DataViews interface on the Posts screen — showing inline filters, grid/list toggle, and modern table layout](https://d1k2c27psfzbiv.cloudfront.net/wp-content/uploads/2026/02/09065358/new-DataViews-interface-on-the-Posts-screen.webp) ### Smooth Transitions Across wp-admin Page-to-page transitions are now enabled across wp-admin, adding smooth animations that make navigating between admin screens feel noticeably more responsive. It's the difference between a native app and a clunky web page - small in description, significant in daily use. If you spend hours in the WordPress backend every day, this makes the experience materially less fatiguing. Simple Transitions in WordPress Admin panel ### Command Palette in the Admin Bar The new Command Palette - accessible via Cmd+K (Mac) or Ctrl+K (Windows) - is now embedded directly in the admin bar as the Omnibar. One shortcut opens a search-and-action palette that lets you jump to any admin screen, search content, run commands, and access tools without clicking through menus. ![Command Palette in the Admin Bar](https://d1k2c27psfzbiv.cloudfront.net/wp-content/uploads/2026/02/09065852/Command-Palette-in-the-Admin-Bar.webp) If you've used the command palette in VS Code, Figma, or Notion, this will feel instantly familiar. For power users who navigate WordPress dozens of times a day, it's a genuine time-saver. ### New Design System Behind the scenes, WordPress 7.0 introduces a more consistent Design System through new UI component libraries (`@wordpress/theme` and `@wordpress/ui`). This means the admin interface is more visually consistent across different screens and plugins - buttons, spacing, typography, and color usage follow unified rules rather than each screen having its own visual personality. ## Font Library - A Proper Dashboard for Managing Fonts The WordPress Font Library is a dedicated admin page that lets you upload, preview, and apply custom fonts across your entire site - without code, CDN links, or third-party plugins. It works with block themes, classic themes, and hybrid themes. Before WordPress 7.0, managing custom fonts was either a plugin dependency (like Custom Fonts or Easy Google Fonts) or a manual job involving CSS `@font-face` declarations and file uploads. Now your brand fonts live in WordPress natively. Navigate to Appearance > Fonts to: - Upload custom font files (WOFF2, WOFF, TTF, OTF) - Browse and activate Google Fonts directly from the dashboard - Preview fonts before applying them site-wide - Assign fonts to headings, body text, and other elements For designers and business owners maintaining multiple sites with specific brand guidelines, this eliminates a real friction point. Your fonts are now a first-class WordPress setting, not an afterthought buried in CSS. New fonts option in default WordPress ## In-Editor Revisions That Show What Actually Changed Visual revision diffs inside the block editor are one of the most underrated improvements in WordPress 7.0. Instead of switching to a separate revisions screen and reading raw text comparisons, you can now see exactly what was added, removed, or changed - right inside the editor with visual highlights. Additions show in green. Deletions show in red. Changed blocks are highlighted so you can spot modifications without reading every paragraph. For editorial workflows where multiple writers touch the same content, and for client reviews where you need to say "here's exactly what we changed since your last review," this is transformative. No more toggling between tabs. No more "I think this paragraph is different but I can't tell." The diff is right there, in context, in the editor you're already using. ![WordPress editor revisions are more better now](https://d1k2c27psfzbiv.cloudfront.net/wp-content/uploads/2026/02/19093750/WordPress-editor-revisions-are-more-better-now.webp) ## Responsive Editing Mode - Design for Every Screen Without Leaving the Editor Responsive Editing Mode in WordPress 7.0 lets you show or hide individual blocks based on screen size - desktop, tablet, or mobile - directly from the block toolbar, with no CSS required. You build a beautiful desktop layout, switch to mobile preview, and half your blocks look broken or cluttered. Sound familiar? WordPress 7.0 fixes this with device-specific block visibility controls: - Per-block visibility: Select any block and choose which screen sizes it should appear on. Show a detailed feature grid on desktop, hide it on mobile, and show a simplified list instead. - Viewport preview modal: Preview desktop, tablet, and mobile layouts without leaving the editor. See exactly what your visitors will see on each device. - Visibility notices: For blocks hidden on certain screens, WordPress displays a notice explaining why it's hidden. No more confused clients asking "where did that section go?" - Simplified toolbar for hidden blocks: Blocks hidden on the current preview size show a reduced toolbar so you don't accidentally edit elements your visitors won't see. This pushes the native WordPress editor significantly closer to what page builders like Elementor have offered for responsive design - but it's built directly into Core, with no plugin needed. ![hide specific gutenberg block for device](https://d1k2c27psfzbiv.cloudfront.net/wp-content/uploads/2026/02/19093741/hide-specific-gutenberg-block-for-device.webp) ## Smarter Design Tools in the Block Editor WordPress 7.0 adds a range of new design controls that were previously only possible through custom CSS, page builder plugins, or workarounds: | Design Tool | What It Does | Why It Matters | | --- | --- | --- | | Text indent support | Indent the first line of paragraphs | Format blog posts and editorial content like a proper publication layout | | Text column support | Split text into multi-column layouts | Create magazine-style layouts without needing a Columns block wrapper | | Aspect ratio for images | Lock aspect ratios on wide/full-width images | No more images stretching unpredictably across different screen sizes | | Width & height controls | Set explicit dimensions on blocks | Define consistent sizing rules without repetitive inline CSS | | Dimension presets | Save and reuse size configurations | Maintain visual consistency across pages without manual measurement | Combined with the responsive editing mode, these tools mean you can now build sophisticated, device-aware layouts entirely within the native block editor. For many sites, the gap between "what Core offers" and "what I need a page builder for" just got a lot smaller. ## New Blocks: Breadcrumbs, Icons, Heading Variations, Cover Video ### Breadcrumbs Block The Breadcrumbs Block is a new native block that adds structured breadcrumb navigation to any page or template. Breadcrumbs help visitors know exactly where they are on your site - but until now, adding them required a plugin (like Yoast SEO or Breadcrumb NavXT) or manual PHP coding. WordPress 7.0's Breadcrumbs Block lets you customize the separator character, styling, and display logic directly from the block editor. It works seamlessly inside the Site Editor as a template part, meaning you can add breadcrumbs to your page template once and have them appear on every page automatically. For blogs, WooCommerce stores, and multi-level sites with deep page hierarchies, this improves both user navigation and SEO - search engines use breadcrumb markup to understand site structure and display breadcrumb trails in search results. ![Breadcrumbs Block: Smarter Navigation Right Out of the Box](https://d1k2c27psfzbiv.cloudfront.net/wp-content/uploads/2026/02/19101508/breadcrumbs-block-got-better.webp) ### Icons Block WordPress 7.0 adds a dedicated Icons block for inserting and styling scalable, accessible icons anywhere on your page. No icon plugin, no custom code, no SVG embedding workarounds. Select from a built-in icon set, adjust size and color, and drop them into your layout. ![WordPress 7.0 adds a dedicated Icons block](https://d1k2c27psfzbiv.cloudfront.net/wp-content/uploads/2026/02/09070509/WordPress-7.0-adds-a-dedicated-Icons-block.webp) ### Heading Block Variations Each heading level (H1 through H6) is now its own block variation. Instead of inserting a generic Heading block and then changing the level from a toolbar dropdown, you can pick H1, H2, H3, and so on directly from the block inserter before you start typing. ![Heading Block: Pick Your Heading Level Like a Block Variation](https://d1k2c27psfzbiv.cloudfront.net/wp-content/uploads/2026/02/19101858/Heading-Block-Pick-Your-Heading-Level-Like-a-Block-Variation.webp) This sounds small, but it changes how writers and editors think about headings. Instead of treating heading levels as a formatting afterthought, you now select them as intentional content elements - which encourages better document structure, cleaner heading hierarchies, and more SEO-friendly pages from the start. ### Cover Block Video Backgrounds You can now embed videos directly as backgrounds inside the Cover block - natively. Drop your video file in, and it plays behind your content automatically. No more custom HTML embeds, third-party plugins, or CSS hacks. The Focal Point picker in the sidebar panel lets you control exactly how the video (or poster image) is positioned. This is particularly useful for homepage hero sections, promotional banners, and landing pages where a looping background video adds visual energy without requiring extra tools. ![Cover Block: Set Videos as Full Background Without a Plugin](https://d1k2c27psfzbiv.cloudfront.net/wp-content/uploads/2026/02/19102249/Cover-Block-Set-Videos-as-Full-Background-Without-a-Plugin.webp) ## Pattern Editing Gets Hands-On Patterns - reusable design blocks you can drop anywhere on your site - get a significant usability upgrade in WordPress 7.0. You can now edit patterns directly in context, meaning you see exactly how your changes look on the actual page rather than inside a separate, isolated pattern editor screen. This works for both types of patterns: - Contextual patterns (tied to a specific location like a hero section) - edit them where they live and see the surrounding content. - Synced patterns (global patterns that update everywhere) - edit once and watch the change propagate to every page that uses it, while viewing the live result in context. Patterns also now default to Content-Only editing mode. This presents content fields organized with block icons and grouped attributes in flyout menus, reducing visual clutter for content creators who need to update text and images without worrying about layout structure. ![Pattern Editing inside the editor](https://d1k2c27psfzbiv.cloudfront.net/wp-content/uploads/2026/02/19093745/Pattern-Editing-inside-the-editor.webp) If your call-to-action pattern is used across 20 pages, you can edit the copy once and see it update everywhere - all while seeing exactly how it looks on the page you're currently working on. ## Site Editor Quick Edit - Now Rock Solid If you've used the Quick Edit modal in the Site Editor before, you've probably hit moments where it felt buggy or unreliable. WordPress 7.0 makes it fully stable - you can now confidently edit page titles, slugs, statuses, and other fields directly from the Site Editor list view without jumping into the full editor. ![Site Editor Pages in WordPress 7.0](https://d1k2c27psfzbiv.cloudfront.net/wp-content/uploads/2026/02/19093746/Site-Editor-Pages-in-WordPress-7.0.webp) Quick Edit now also displays the note count for each page or template, tying directly into the Notes system. At a glance, you can see which content has pending feedback or review comments before you open it. For teams managing large sites with multiple editors, this small addition saves a surprising amount of context-switching. ## Native AI Integration - The WP AI Client WordPress 7.0 introduces a standardized AI client API built into Core. This is not WordPress adding its own AI features - it's WordPress creating a universal interface that lets plugins integrate any AI provider through a consistent, standardized API. The system is built around the `php-ai-client` package, with three provider packages already available in the Plugin Directory: - OpenAI (GPT-4, GPT-4o, etc.) - Google (Gemini) - Anthropic (Claude) For developers, this means you can write AI-powered features once against the shared interface, and switching AI providers becomes a configuration change rather than a code rewrite. For site owners, it means AI-powered plugins will work more consistently and you'll have more choice over which AI service your site uses. This is foundational infrastructure, not a flashy user-facing feature - but it sets the stage for a wave of AI-powered WordPress plugins built on a common standard rather than each plugin inventing its own integration approach. ## Client-Side Media Processing WordPress 7.0 shifts media processing - image resizing, compression, format conversion - from your web server to the user's browser. This means: - Faster uploads: Images are resized and compressed before they leave your browser, reducing upload time and server load. - Better format support: Client-side processing enables more advanced image formats and compression techniques that would be difficult or slow to handle server-side. - Reduced server demand: Your hosting doesn't need to spend CPU cycles processing every uploaded image. This especially matters on shared hosting or sites with high upload volume. For WooCommerce stores uploading dozens of product images daily, or content teams publishing image-heavy blog posts, this makes the media upload workflow noticeably faster without changing anything about how you work. ## More Block Improvements Worth Knowing Beyond the headline features, WordPress 7.0 includes several block-level improvements that add up to a better editing experience: - Navigation Block - Custom Menu Overlays: Build fully custom menu overlays, including mobile-specific versions, as reusable template parts. Design your hamburger menu or full-screen overlay once, save it as a template, and reuse it across your entire site. - Gallery Block - Built-in Lightbox: Image galleries now open in a native lightbox when clicked. Visitors get a clean, focused image viewing experience without you installing a lightbox plugin. - Dynamic URLs in Navigation Links: Navigation links can now use dynamic URLs that adapt based on context - like automatically pointing to the current user's profile page or a filtered archive - instead of being manually hardcoded. - Grid Block - Responsive Enhancements: The Grid block now supports responsive controls, making it easier to create fluid layouts that adapt gracefully to different screen sizes. ## For Developers: The APIs You've Been Waiting For If you build plugins or custom themes, WordPress 7.0 lays significant groundwork for the future. Here's what's new and why each one matters: ### Abilities & Workflows API An experimental system to define what specific users or roles can do - and map those permissions to UI workflows. Think granular permission management built into Core, beyond the existing capabilities system. This opens the door for plugins to create sophisticated role-based experiences without reinventing permission logic. ### DataViews & DataForm APIs A structured foundation to build admin tables, filters, and forms - with built-in validation, error messages, and new input controls like combobox and `adaptiveSelect`. If you've ever built a custom admin table from scratch, you know how much boilerplate this eliminates. ### Block Bindings API Connect dynamic data sources to blocks, override pattern content on a per-instance basis, and build data-driven interfaces with a cleaner UI. This makes it practical to create blocks that pull content from custom fields, external APIs, or computed values without hardcoding templates. ### Field API Now automatically formats numbers and dates based on the user's locale. A small detail, but essential for international sites where "1,234.56" in one locale is "1.234,56" in another. ### PHP-only Blocks Register blocks entirely from PHP on the server, with auto-generated inspector controls. This is ideal for performance-critical use cases where JavaScript-heavy block registration adds unnecessary overhead. If your block doesn't need client-side interactivity in the editor, you can now skip the JS entirely. ### @wordpress/boot Package Build custom site editor pages from plugins. This is the foundation for the next generation of plugin-powered admin experiences - plugins can now create rich, editor-quality admin screens that feel like native WordPress rather than bolted-on settings pages. ## How WP Adminify Works With WordPress 7.0 WordPress 7.0 introduces a refreshed admin experience with DataViews, transitions, and a new design system. But it still gives you the same default WordPress branding, the same admin menu structure, and the same login screen. If you're an agency delivering client sites, or a freelancer who wants a polished, branded admin experience, WordPress 7.0's improvements are the foundation - but customization still requires the right tools. That's where [WP Adminify](https://wpadminify.com/) continues to add value on top of WordPress 7.0: - White label the new admin: WordPress 7.0's cleaner admin is still branded as "WordPress." With WP Adminify, you can [replace all WordPress branding](https://wpadminify.com/features/white-label) - logo, footer text, "Howdy" greeting - with your own agency's identity. - Customize the admin menu: DataViews improves how content tables look, but the admin sidebar menu is still the same default structure. WP Adminify's [Admin Menu Editor](https://wpadminify.com/features/admin-menu-editor) lets you drag-and-drop reorder, hide, or add custom menu items - with role-based visibility so different users see different menus. - Brand the login screen: WordPress 7.0 doesn't touch the login page. [Loginfy](https://wpadminify.com/loginfy) lets you customize the logo, background, form styling, and button colors so clients see your brand from the moment they log in. - Dashboard customization with dark mode: The new design system makes the admin more consistent, but WP Adminify's [dashboard templates](https://wpadminify.com/features/dashboard-customization) (Light, Dark, Modern, Glass) take the visual experience further - including scheduled dark mode that switches automatically based on time of day. - Organize media with folders: WordPress 7.0 improves media processing speed, but doesn't add any organizational tools. WP Adminify's [Media Folders](https://wpadminify.com/features/wordpress-media-folder) let you organize your library into drag-and-drop folders with color coding - for media files, posts, pages, and WooCommerce products. - Security hardening: The new AI client and APIs expand WordPress's surface area. WP Adminify's [security tools](https://wpadminify.com/features/security) - change login URL, disable XML-RPC, restrict REST API, control Heartbeat API = help you lock down the admin alongside the new features. WP Adminify is free on WordPress.org with 60+ features. It works alongside WordPress 7.0's native improvements rather than competing with them = think of it as the customization layer on top of a better foundation. [Download it here](https://wordpress.org/plugins/adminify/) or learn more at [wpadminify.com/features](https://wpadminify.com/features). ## Frequently Asked Questions About WordPress 7.0 ### When was WordPress 7.0 released? WordPress 7.0 was released on April 9, 2026. It shipped during Contributor Day at WordCamp Asia 2026 in Mumbai, India. It's available now through your standard WordPress update process at Dashboard > Updates. ### What PHP version does WordPress 7.0 require? WordPress 7.0 requires PHP 7.4 as the minimum version. Sites running PHP 7.2 or 7.3 will not receive this update and will remain on the WordPress 6.9 branch. The WordPress core team strongly recommends PHP 8.3 or higher for optimal performance and security in 2026. ### Is WordPress 7.0 safe to update to right away? For most sites running up-to-date themes and plugins, yes. However, if you run custom themes, heavily customized plugins, or business-critical sites, test on a staging environment first. Major version updates occasionally introduce compatibility issues with older or poorly maintained plugins. ### Does real-time collaboration work with the Classic Editor? No. Real-time collaboration is a block editor feature. If you're still using the Classic Editor plugin, you won't have access to simultaneous editing, Notes, or visual revision diffs. This may be a reason to consider migrating to the block editor if you haven't already. ### Will my existing plugins work with WordPress 7.0? Most actively maintained plugins will work fine. Major plugins like WooCommerce, Yoast SEO, ACF, Elementor, and WP Adminify have already shipped compatibility updates. Check the "Tested up to" version on each plugin's WordPress.org page, and always test on staging before updating production sites. ### What happened to the WordPress admin design - does it look completely different? The admin has a refreshed appearance with smoother transitions, consistent spacing via the new design system, and DataViews replacing old-style list tables - but it's an evolution, not a complete redesign. Navigation, menus, and core screens are in the same locations. The experience is more polished and modern without being disorienting. ## What This Means for Your WordPress Workflow WordPress 7.0 is the most significant release since the block editor was introduced. Here's what matters most depending on who you are: - Content teams and editors: Real-time collaboration and Notes replace your email/Slack feedback loops. Visual revision diffs make content reviews instant. The Font Library eliminates plugin dependencies for brand typography. - Designers and page builders: Responsive editing mode, text columns, aspect ratio controls, and Cover block video backgrounds reduce your dependence on page builder plugins. The native editor keeps closing the gap. - Developers: The AI client API, Block Bindings, PHP-only blocks, and DataViews APIs are foundational infrastructure. Start learning them now - they'll shape how WordPress plugins and themes are built for the next several years. - Agency owners and freelancers: Real-time collaboration transforms client workflows. DataViews modernizes the admin. And tools like [WP Adminify](https://wpadminify.com/) let you white-label and customize the new, cleaner admin experience before handing it over to clients. Update to WordPress 7.0 today. Back up first, test on staging if you can, and start exploring the features that matter most to your workflow. What feature in WordPress 7.0 makes the biggest difference for your daily workflow? Drop your thoughts in the comments. --- # WordPress Revisions Explained: View, Restore, Limit & Clean Them Up URL: https://wpadminify.com/wordpress-revisions Last updated: 2026-08-12 You just mangled a post you spent hours on, or a client "fixed" a page and deleted half of it. WordPress revisions are the undo button that saves you here: every saved version of a post or page is kept in the database, and you can roll back to any of them in two clicks. That's the good half of the story. The other half is that WordPress keeps unlimited revisions by default. A page edited weekly for three years carries 150+ old copies of itself in your `wp_posts` table. This guide covers both sides: restoring an old version first (that's usually the urgent one), then limiting, disabling, and cleaning up revisions so they stop piling up. ## What are WordPress revisions? A WordPress revision is a snapshot of a post or page saved in the database every time you click Update, Publish, or Save Draft. Each revision stores the full content, title, and excerpt of that version, along with who made it and when. Revisions live in the same `wp_posts` table as your real posts, with the type `revision`, and they let you compare or restore any earlier version of your content. Two things revisions do not capture: featured images, categories, tags, and most custom fields (they track the main content fields only), plus anything from plugins that store data outside the post content. Roll back a revision and your SEO plugin's meta description stays as it is. ACF fields are the notable exception, since ACF hooks into the revisions system and its field values get versioned and restored along with the content. WordPress has stored revisions this way since version 2.6 in 2008, so any site you inherit will have them, often years' worth. A quick way to see how many you're carrying: install WP-Optimize (covered below) and open its Database tab, or run `SELECT COUNT(*) FROM wp_posts WHERE post_type = 'revision';` in phpMyAdmin. Numbers in the tens of thousands are common on older content sites, and nobody notices until a migration or backup starts crawling. ## How to view, compare, and restore a revision The urgent scenario first. To roll a post back to an earlier version- - Open the post or page in the editor. - In the Settings sidebar (the gear icon), look at the Post tab. You'll see a Revisions entry with a count, e.g. "Revisions (12)". Click it. In the Classic Editor, the Revisions box sits on the Publish meta box with a "Browse" link. ![Revisions entry with a revision count highlighted in the Post tab of the WordPress block editor settings sidebar](https://d1k2c27psfzbiv.cloudfront.net/wp-content/uploads/2026/07/29084255/wordpress-revisions-link-editor-sidebar.png) - The revisions viewer opens with a slider across the top. Drag it to move through versions. Removed content is highlighted red, added content green, and the Revision panel on the right shows the author and when that version was created. - Found the version you want? Click Restore in the top-right corner (or Exit to leave without changes). WordPress makes the rollback itself a new revision, so restoring is non-destructive - you can always roll forward again. ![WordPress revisions comparison screen with the version slider at the top, added content highlighted in green, and the Restore and Exit buttons in the top corner](https://d1k2c27psfzbiv.cloudfront.net/wp-content/uploads/2026/07/29084258/wordpress-revisions-compare-restore-screen.png) Need to diff two arbitrary versions instead of adjacent ones? Click Open classic revisions screen in the Revision panel and tick the Compare any two revisions checkbox there. Useful when you know roughly when the content was right and want to see everything that changed since. Two practical notes from doing this on client sites. First, the restore replaces the entire content with the old version; if the post got good edits after the bad one, copy those out before restoring, then paste them back in. Second, if the Revisions entry is missing from the sidebar, the post simply has no saved revisions yet (a single-save post won't show it), or revisions are disabled on the site. Check `wp-config.php` for a `WP_POST_REVISIONS` line before assuming the editor is broken. ![WordPress editor revisions are more better now](https://d1k2c27psfzbiv.cloudfront.net/wp-content/uploads/2026/02/19093750/WordPress-editor-revisions-are-more-better-now.webp) ## Autosaves vs revisions: not the same thing WordPress also autosaves your work every 60 seconds while you edit. Autosaves look similar but behave differently: | | Revision | Autosave | | --- | --- | --- | | Created when | You click Update / Publish / Save Draft | Every 60 seconds while editing | | How many kept | Unlimited by default | One per post per user - each autosave overwrites the last | | Shown in | Revisions browser | Top of the revisions slider, labeled "Autosave", plus the "restore the backup" notice after a crash | | Database impact | Grows forever if not limited | Constant - one row that gets replaced | So when your browser crashes mid-edit and WordPress offers to restore a backup, that's the autosave. Autosaves are never the bloat problem; revisions are. (The same editor polling that powers autosaves runs on the Heartbeat API. If you want to slow that down too, see our guide to [controlling the WordPress Heartbeat API](https://wpadminify.com/how-to-control-wordpress-heartbeat-api).) ## How to limit WordPress revisions You rarely need 150 versions of a page. Keeping the last 5–10 gives you all the rollback safety with a fraction of the storage. Two ways to set the cap: ### Option 1: The WP_POST_REVISIONS constant Add one line to `wp-config.php`, above the `/* That's all, stop editing! */` comment: ``` define( 'WP_POST_REVISIONS', 5 ); ``` That keeps the 5 most recent revisions per post and silently discards older ones as new revisions are created. Edit the file over SFTP or your host's file manager, and back it up first; a syntax error in `wp-config.php` takes the whole site down. ![Cpanel editor for wp-config file](https://d1k2c27psfzbiv.cloudfront.net/wp-content/uploads/2016/08/05040216/Cpanel-editor-for-wp-config-file.webp) Note the constant only applies going forward. It doesn't delete the revisions you already have. Cleanup is covered below. ### Option 2: One toggle in WP Adminify (no file editing) If you'd rather not touch `wp-config.php`, [WP Adminify](https://wpadminify.com/)'s Tweaks settings expose the same control as a field: go to Adminify → Tweaks, find Post Revisions, and set the number to keep (or disable them entirely). Same result as the constant, no SFTP session, and no chance of white-screening the site with a stray character. ![Control Heartbeat API and post Revisions](https://d1k2c27psfzbiv.cloudfront.net/wp-content/uploads/2024/07/12113055/Control-Heartbeat-API-and-post-Revisions.webp) The same panel handles Heartbeat frequency and autosave interval, so the editor-related database churn gets managed from one place. It's part of the same toolkit that covers [performance tweaks](https://wpadminify.com/features/performance) across the admin. ## How to disable revisions completely Set the constant to `false` (or `0`): ``` define( 'WP_POST_REVISIONS', false ); ``` Our advice: don't, on most sites. Revisions have saved more client relationships than they've slowed databases. Disabling makes sense on specific setups, like heavily automated sites that programmatically update thousands of posts, or staging sites nobody writes on. For a normal blog or business site, a limit of 5–10 is the better call. WordPress keeps autosaves working either way, so crash recovery survives. ## How to delete old revisions Limiting stops future growth; it doesn't remove the thousands of revisions already sitting in `wp_posts`. Two cleanup routes: ### With a plugin (recommended) [WP-Optimize](https://wordpress.org/plugins/wp-optimize/) is the standard tool: install it, open WP-Optimize → Database, tick Clean all post revisions, and run the optimization. It shows the revision count before deleting and can keep the newest few per post. Always take a database backup first. Deletions are permanent. ![WP Optimize database optimizations](https://d1k2c27psfzbiv.cloudfront.net/wp-content/uploads/2024/09/12113440/WP-Optimize-database-optimizations.webp) ### With SQL (no plugin) In phpMyAdmin or Adminer, after backing up: ``` DELETE FROM wp_posts WHERE post_type = 'revision'; ``` Adjust the `wp_` prefix if yours differs. WP-CLI users can do the same with the wp-revisions-cli package, or per-post with `wp post delete $(wp post list --post_type=revision --format=ids)`. The SQL route deletes every revision including recent ones, so prefer the plugin if you want to keep the last few per post. One follow-up step people skip: after a big deletion, the table still occupies the same space on disk until it's optimized. WP-Optimize does this as part of its run; with raw SQL, finish with `OPTIMIZE TABLE wp_posts;` to actually reclaim the space. Orphaned rows in `wp_postmeta` that belonged to deleted revisions are worth sweeping too. Again, the plugin handles that, the one-line SQL doesn't. ## Do revisions slow down WordPress? Short answer: revisions do not slow down your public pages, but they can slow down parts of the admin and they do bloat your database. Most posts on this topic get this wrong in both directions, so here's the precise version: - Front-end page speed: no effect. WordPress queries published content by post type and status; revision rows are simply never part of the query that renders a page for a visitor. A million revisions won't change your LCP. - Database size: real effect. Every revision is a full copy of the post content in `wp_posts`. On content-heavy sites revisions routinely make up 60–80% of that table. That means bigger backups, longer migrations, and more disk usage on hosts that meter it. - Admin queries: sometimes. Search in the admin, some page builders, and poorly written plugins that query `wp_posts` without filtering post type all get slower as the table grows. If your [wp-admin feels sluggish](https://wpadminify.com/why-is-my-wordpress-admin-so-slow) on a big old site, revision bloat is one of the usual suspects, alongside heavier ones like plugins and Heartbeat. So: cleaning up revisions won't make your homepage faster, and anyone promising that is selling something. It will make your database smaller, backups quicker, and some admin operations snappier. Worth doing as part of general [WordPress performance maintenance](https://wpadminify.com/wordpress-performance-optimization), with the right expectations. ## WordPress Revisions FAQs ### Where are WordPress revisions stored? In the wp_posts table of your database, as rows with the post type revision, linked to the original post by the post_parent column. Related metadata lives in wp_postmeta. They are not stored as separate files anywhere on the server. ### How many revisions does WordPress keep? Unlimited, by default. Every save creates a new revision and none are ever removed. You cap it with define( 'WP_POST_REVISIONS', 5 ); in wp-config.php or with a revisions setting in a plugin like WP Adminify's Tweaks panel. ### Does deleting revisions break anything? No. Revisions are self-contained copies; your published posts, pages, media, and settings don't depend on them. The only thing you lose is the ability to roll back to those older versions, which is why you take a backup before bulk-deleting. ### Can I restore a deleted revision? Not from WordPress. Once a revision row is deleted it's gone, and your only route back is a database backup taken before the cleanup. That's also the practical reason to keep the last 5-10 revisions rather than disabling them outright. ### Do revisions work on custom post types? Only if the post type declares support for them. Posts and pages support revisions out of the box; a custom post type needs 'revisions' in its supports array when registered, or a call to add_post_type_support( 'your_cpt', 'revisions' ). ## The short version - Restore an old version from the editor sidebar: Revisions, drag the slider, click Restore. Restoring is non-destructive. - WordPress keeps unlimited revisions by default. Cap them at 5–10 with `WP_POST_REVISIONS` or the toggle in WP Adminify's Tweaks panel. - Limits only apply going forward. Clean up existing bloat with WP-Optimize or a single SQL delete, after a backup. - Revisions never slow your public pages. They bloat the database and can drag on admin queries, and that's the real reason to manage them. If you're already running WP Adminify for its admin cleanup tools, the revisions limit is sitting in the same Tweaks panel. Set it once per site and the problem stays solved. Pairs well with the [duplicate page workflow](https://wpadminify.com/wordpress-duplicate-page) when you'd rather experiment on a copy than lean on rollbacks at all. --- # WP Adminify Summer Sale Is Live URL: https://wpadminify.com/wp-adminify-summer-sale Last updated: 2026-08-12 Summer runs hot, and so does a WordPress dashboard you've stopped maintaining. Menus you never click, widgets nobody reads, a login page that looks like every other site. The WP Adminify Summer Sale is our answer to that, and it's live right now. For a limited time you can get Flat 50% off the WP Adminify Bundle, every WP Adminify Pro plan, Loginfy, and Admin Bar Editor. This post covers what's in the sale, why the bundle is the one to look at first, and the exact steps to claim each discount at checkout. ## What's in the WP Adminify Summer Sale Four things are discounted during this sale: - The WP Adminify Bundle – our full product stack in one lifetime license, at the deepest discount of the sale. - WP Adminify Pro – every plan, single site to unlimited, annual and lifetime. - Loginfy – the standalone WordPress login page builder. - Admin Bar Editor – the standalone WordPress admin toolbar customizer. The coupon rules are slightly different for each, so read the "how to claim" section below before you check out. Get it wrong and you'll pay full price. [Get The Bundle](https://wpadminify.com/pricing) ## The star of the sale: the WP Adminify Bundle If you only look at one thing in this sale, make it the bundle. It's a single lifetime license that packs the tools most of us end up buying one at a time anyway: - WP Adminify – the admin customization plugin itself. Menu editor, dashboard widgets, admin columns, dark mode, activity logs, white label, and 60+ modules. - Loginfy – a login page that finally looks like your brand instead of the default WordPress screen. - WP Spotlight – jump anywhere in WordPress with a quick keyboard search, the way you'd switch files in a code editor. - Header and Footer – drop in scripts and tracking codes without touching theme files. The WP Adminify Bundle is a one-time lifetime license, so there are no yearly renewals. It scales by site count, and the summer prices below are what you pay after you apply the SUMMERSALE coupon at checkout: | WP Adminify Bundle (Lifetime) | Sites | Price with SUMMERSALE | | --- | --- | --- | | Bundle | 200 sites | $299.50 | | Bundle | 500 sites | $374.50 | | Bundle | Unlimited sites | $399.50 | If you run a few dozen client sites, unlimited sites for $399.50 once works out cheaper than renewing a single annual plan for three years. That's the case for the bundle in one line. Buy these plugins one at a time and the cost stacks up fast. The bundle folds them into a single license you maintain once. One renewal date to forget about, one invoice instead of four. ## How to claim your discount (read this before checkout) The coupon works differently depending on what you buy. Here's the exact process for each. ### Buying the WP Adminify Bundle? Apply the coupon manually The bundle discount is not automatic. You have to enter the coupon code yourself on the checkout page. Use this code at checkout: SUMMERSALE - Choose your WP Adminify Bundle site tier (200, 500, or unlimited). - On the checkout page, find the coupon field. - Type SUMMERSALE and apply it. - Confirm the discounted total updates before you pay. ![apply SUMMERSALE coupon in wp adminify. bundle](https://d1k2c27psfzbiv.cloudfront.net/wp-content/uploads/2026/06/15072005/apply-SUMMERSALE-coupon-in-wp-adminify.-bundle.webp) If the total still shows full price, the coupon hasn't applied. Don't complete the purchase until you see the discount. ### Buying a WP Adminify plan, Loginfy, or Admin Bar Editor? For any WP Adminify Pro plan, the Loginfy plugin, or the Admin Bar Editor plugin, the discount is applied automatically. You don't type anything. Click the Purchase Now button on the plan you want and the sale price is already in your cart. The SUMMERSALE code is only for the bundle. ## WP Adminify Pro pricing during the sale These are the summer sale prices for WP Adminify Pro. The discount is already applied when you click Purchase Now, so you don't need a coupon for these plans. | Sites | Yearly (sale) | Lifetime (sale) | Best for | | --- | --- | --- | --- | | Single site | $39.50/yr | $64.50 | One site you own | | 5 sites | $64.50/yr | $124.50 | Freelancers, small studios | | 200 sites | $124.50/yr | $164.50 | Busy agencies | | 1000 sites | $149.50/yr | $199.50 | Large agencies | | Unlimited sites | $174.50/yr | $249.50 | High-volume teams | Lifetime plans are a one-time payment with no renewals. Pick lifetime if you plan to keep the sites running more than a couple of years. ![adminify coupon is auto applied just checkout](https://d1k2c27psfzbiv.cloudfront.net/wp-content/uploads/2026/06/15072131/adminify-coupon-is-auto-applied-just-checkout.webp) ## Loginfy pricing during the sale (50% off) Why you'd want it: the default WordPress login screen carries the WordPress logo and looks the same on every site. Loginfy is a login page builder with 16 ready-made templates, so you can match the login page to your brand or your client's brand in minutes, no CSS required. On client work it's the small touch that makes the whole handoff feel finished. The prices below already include the 50% summer discount, applied automatically at checkout: | Sites | Yearly (50% off) | Lifetime (50% off) | | --- | --- | --- | | 5 websites | $24.50/yr | $44.50 | | 20 websites | $49.50/yr | $99.50 | | 100 websites | $74.50/yr | $129.50 | ## Admin Bar Editor pricing during the sale (50% off) Why you'd want it: the WordPress admin bar is the toolbar across the top of every page when you're logged in. Out of the box it's full of links you never click and items clients shouldn't see. Admin Bar Editor lets you add, remove, reorder, and rebrand those items, so the toolbar shows exactly what each user role needs and nothing more. The prices below already include the 50% summer discount, applied automatically at checkout: | Sites | Yearly (50% off) | Lifetime (50% off) | | --- | --- | --- | | 5 websites | $14.50/yr | $44.50 | | 15 websites | $19.50/yr | $64.50 | | 100 websites | $49.50/yr | $139.50 | Reminder: Adminify Bundle and Admin Bar Editor needs the SUMMERSALE code typed in at checkout. ## What WP Adminify actually does for your dashboard WP Adminify is a WordPress admin customization plugin that can replace 50+ single-purpose plugins. Instead of stacking one plugin for the menu, one for columns, one for the login page, and one for white labeling, you run one plugin and switch on the modules you need. The modules I turn on first on a new client site: - Menu Editor – reorder, rename, and hide admin menu items per role, so client editors only see what they need. - White Label – hand clients a branded dashboard with no trace of the plugin underneath. - Admin Columns Editor – show the post data you care about right in the list view. - Dashboard Widgets – replace the noisy default home screen with widgets that matter. - Activity Logs – see who changed what, which saves you on multi-author and client sites. Every module has its own on/off toggle. Leave the rest off and the plugin stays light. ## Why the bundle beats buying plugins one by one You can buy WP Adminify on its own and add Loginfy later. Most people who manage more than a handful of sites don't. They want the login customizer, then the quick search, then a clean way to drop in scripts, and they buy the bundle anyway, at full price, three months later. The summer sale is the moment to skip that and get all of it at once for a single lifetime payment. Buy once, never renew, and the whole stack is yours. ## When does the WP Adminify Summer Sale end? The sale runs for a limited window this summer. Once it closes, prices go back to standard and the SUMMERSALE code stops working. If your dashboard has felt heavier every year, this is the cheapest it'll be to fix. ## WP Adminify Summer Sale FAQs ### Do I need a coupon code for the WP Adminify Summer Sale? Only for the WP Adminify Bundle. Enter SUMMERSALE on the checkout page to get the bundle discount. For any WP Adminify Pro plan, Loginfy, or Admin Bar Editor, the discount applies automatically when you click Purchase Now, with no code needed. ### What's included in the WP Adminify Bundle? The bundle includes WP Adminify, Loginfy, WP Spotlight, Header and Footer script, Admin Bar Editor in one lifetime license, available for 200 sites, 500 sites, or unlimited sites. ### How much is the WP Adminify Bundle? During the summer sale, with the SUMMERSALE code applied, the lifetime bundle is $299.50 for 200 sites, $374.50 for 500 sites, and $399.50 for unlimited sites. Apply the SUMMERSALE code at checkout to get these prices. ### Is the WP Adminify Bundle a one-time payment? Yes. The bundle is a lifetime license, so there are no yearly renewals. You pay once and keep updates and support. ### Can I use WP Adminify on client sites? Yes. The White Label module lets you rebrand the dashboard for clients, and the Agency, Enterprise, and Bundle licenses cover multiple sites. ### When does the sale end? The summer sale runs for a limited time. Once it ends, standard pricing returns and the SUMMERSALE coupon expires. --- # WP Adminify Free vs Pro: Which One Do You Actually Need? (2026) URL: https://wpadminify.com/wp-adminify-free-vs-pro Last updated: 2026-08-12 Most WordPress plugins follow the same playbook: give you just enough in the free version to get hooked, then lock everything useful behind a paywall. WP Adminify splits its features differently, which is what makes this comparison worth writing. "Should I upgrade to Pro?" is the question we hear most from the WP Adminify community, and the honest answer depends on who you are and what you need. So instead of guessing, we opened the actual WP Adminify settings panel and went through every tab, noting which features are free, which require Pro, and which sit in the Agency plan. This is what's actually behind each toggle, so you can settle the WP Adminify free vs Pro question for your own situation in one read. ## WP Adminify Free vs Pro: The Short Answer The free version of WP Adminify is enough if you want to customize the WordPress dashboard for yourself. You get the admin menu editor, dark mode, media folders, custom dashboard widgets, and admin columns without paying. You upgrade to Pro when you need the client facing layer: white label branding, custom admin pages, role-based redirects, and [hiding admin notices](https://wpadminify.com/features/disable-admin-notices). | Feature | Free | Pro | | --- | --- | --- | | Dashboard UI templates | 2 built-in | 10 (8 premium templates) | | Light / dark mode + custom logo | ✅ | ✅ | | Custom background, body font, admin favicon | - | ✅ | | Admin menu editor: 6 menu styles, full color control | ✅ | ✅ | | User info block, custom separators, custom menu items | - | ✅ | | Media folders + post & page folders | ✅ | ✅ | | Dashboard widget builder & custom dashboard widgets | ✅ | ✅ | | Custom admin columns | ✅ | ✅ | | Hide admin notices, screen options & help tab | - | ✅ | | Custom admin pages (Gutenberg, Elementor, Bricks, Oxygen, Divi) | - | ✅ | | Infinite scroll for the media library | - | ✅ | | Control Heartbeat API | - | ✅ | | Disable embeds | - | ✅ | | Post status background colors | - | ✅ | | Smart login redirects (role-based) | - | ✅ | | Change WordPress login URL | - | ✅ | | Schedule dark mode | - | ✅ | | Admin menu search | - | ✅ | | Security cleanup (REST API, feeds, comments, headers) | ✅ | ✅ | | Full white label / client rebrand | - | Agency plan | Everything below is the long answer: a tab-by-tab walkthrough of the entire settings panel, documented in July 2026 against WP Adminify version 4.2. ## What Is WP Adminify? WP Adminify is a WordPress admin dashboard customization plugin built by the team at Jewel Theme. It changes the look, feel, and functionality of your WordPress backend (the dashboard skin, the admin menu, the media library, security hardening, performance cleanup) without you writing a line of code. The numbers back it up: 324,000+ total downloads and 81 five-star ratings on [WordPress.org](https://wordpress.org/plugins/adminify), with updates still shipping monthly as of July 2026. ![WP Adminify plugin basic options](https://d1k2c27psfzbiv.cloudfront.net/wp-content/uploads/2022/10/07095506/WP-Adminify-plugin-basic-customize-options.webp) Whether you're a solo blogger who wants a cleaner dashboard, a freelancer handing polished sites to clients, or an agency building white-labeled WordPress sites at scale, the plugin is organized into 8 main settings tabs: - Customize - dashboard look and feel - Admin Menu - full menu control - Productivity - tools that speed up your workflow - Security - lockdown and cleanup - Performance - optimize resource usage - Code Snippets - CSS/JS injection - White Label - branding and identity - Backup - import/export settings Below, each tab gets the same treatment: what's free, what needs Pro, and what's Agency-only. ### Plans Overview Before we get into the tabs, here's how WP Adminify's plans are structured: | Plan | Best For | | --- | --- | | Free | Individual users, bloggers, developers | | Pro | Freelancers, site owners, power users | | Agency | Agencies, white-label client work | You can install the free version directly from WordPress.org. Pro and Agency plans are on the [pricing page](https://wpadminify.com/pricing). Pro tip: Start with the free version. It covers more than you'd expect, and depending on your use case you may never need to upgrade. The sections below will help you figure that out. ## Customize - Dashboard Look & Feel This is the first thing you see when you open WP Adminify settings, and it's where the dashboard makeover starts. ![WP Adminify UI Customization in WordPress Dashboard](https://d1k2c27psfzbiv.cloudfront.net/wp-content/uploads/2025/05/28051404/WP-Adminify-UI-Customization-in-WordPress-Dashboard.webp) ### Free Features in the Customize Tab Adminify UI Toggle This single toggle is the most useful free option in the plugin. Flip it on and your whole WordPress admin switches from the default look to a clean, modern interface. No configuration needed. 2 Built-in UI Templates Free users get two dashboard templates: a clean light layout and a dark-themed version. Both look far better than the default WordPress admin and work instantly. Light/Dark Mode Enable Light Mode, Dark Mode, or follow the user's OS setting. The Layout Mode toggle, the logo upload fields, and the mini logo for the collapsed sidebar are all free. Custom Logo Upload your own logo for the admin dashboard, as an image or text, with full size control (width, height, px/%/em units). You can also set a mini logo that appears when the sidebar is collapsed. Header Elements Show or hide the Search Form, Notifications icon, and the light/dark mode switcher in the admin header bar. ### Pro Features in the Customize Tab 8 Additional Premium UI Templates Pro unlocks 8 more dashboard templates: bold accent colors, dark sidebars, and a color wheel picker for building an entirely custom palette. Custom Background Set a fully custom background for the admin area: solid color, gradient, or image. ![Custom Image background](https://d1k2c27psfzbiv.cloudfront.net/wp-content/uploads/2024/08/12110024/Custom-Image-background.webp) Body Font Change the global font family used across the entire admin dashboard to match your brand or your client's style guide. A small detail that matters a lot in branded setups. Admin Favicon Upload a custom favicon for the admin area. When your client opens `/wp-admin/`, they see your branded favicon in the browser tab, not the WordPress logo. Gutenberg Editor Logo Replace the block editor logo with your own, so clients see your agency's mark instead of the WordPress "W" every time they edit a page. Post Status Background Colors Color-code post rows by publication status: Published (green), Pending (yellow), Draft (grey), Future (blue), Private (purple), Trash (red). A real workflow improvement on content-heavy sites. ![WordPress post list with color-coded status rows in WP Adminify](https://d1k2c27psfzbiv.cloudfront.net/wp-content/uploads/2024/09/24060024/Post-Status-Background-Colors.webp) ### Customize Tab Verdict ## Admin Menu - Total Menu Control The Admin Menu tab is where WP Adminify separates itself from the competition, and what's remarkable is how much of it is completely free, including features other plugins charge for. If you want the deep dive, the [admin menu editor feature page](https://wpadminify.com/features/admin-menu-editor) covers every option. ![WP Adminify Admin Menu Editor with drag and drop menu customization](https://d1k2c27psfzbiv.cloudfront.net/wp-content/uploads/2022/12/19103312/WordPress-Admin-menu-editor-by-WP-Adminify.webp) ### Free Features in the Admin Menu Tab Full Drag-and-Drop Menu Editor Reorder any admin menu item by dragging it. Rename items, change icons, hide items from specific user roles, all without code. This one feature replaces dedicated admin menu editor plugins entirely. Menu Type: Vertical or Horizontal Switch between the classic vertical sidebar and a horizontal navigation bar across the top of the admin area. The horizontal menu gives the dashboard an app-like feel and shows up often in agency client handoffs. Menu Mode Three display modes: - Default - the standard expanded sidebar - Folded - collapsed to icons-only by default - Rounded - card-style menu items with a softer aesthetic Sub Menu Style Control exactly how submenus behave: - Two Step - WordPress default behaviour - Accordion - smooth open/close animation - Toggle - instant show/hide Full Typography Controls Set font size, line height, and letter spacing for all admin menu items. Free. Menu Width & Padding Controls Adjust sidebar width, wrapper padding, parent item vertical padding, submenu wrapper padding, and submenu item padding. Granular layout control at no cost. Full Color Customization Unusual for a free feature. You get total color control over: - Parent menu: background, hover background, text, text hover, active background, active text - Submenu: the same six color states - Notification badge: background and text color ### Pro Features in the Admin Menu Tab User Info with Avatar Display the logged-in user's avatar and display name on the admin sidebar. It adds a personalized, polished touch to client dashboards. Custom Separators Add your own separators to replace the default WordPress admin menu dividers and group related menu items visually. ![Add custom separator in Admin menu](https://d1k2c27psfzbiv.cloudfront.net/wp-content/uploads/2024/10/07061247/Add-custom-separator-in-Admin-menu.webp) Custom Menu Items Create your own main menu and submenu items, not just rearrange the existing ones. Point them at any URL or admin page. ### Admin Menu Tab Verdict Ready to try it? [Download WP Adminify Free →](https://wordpress.org/plugins/adminify) ## Productivity - Work Smarter, Not Harder The Productivity tab is the most feature-dense tab in the plugin. WP Adminify replaces several separate plugins here with one unified toolset, and the majority of it is free. ![Productivity options panel](https://d1k2c27psfzbiv.cloudfront.net/wp-content/uploads/2024/08/12101153/Productivity-options-panel.webp) ### Free Features in the Productivity Tab Media Folders Organize the media library into folders and subfolders directly from the Media Library screen. Create folders, drag files in, and find assets in seconds instead of scrolling through hundreds of unorganized files. Works with all media file types, and replaces premium media folder plugins. Post & Page Folders The same folder system for your Posts and Pages list views. Useful for editorial teams or anyone managing a large content library. Dashboard & Welcome Widget Builder Build custom dashboard widgets with a rich text editor. Add welcome messages, embed YouTube videos, display RSS feeds, insert shortcodes, or write onboarding instructions for clients. All free. ![Custom welcome widget in WordPress dashboard with quick links for clients](https://d1k2c27psfzbiv.cloudfront.net/wp-content/uploads/2022/10/07095345/Custom-welcome-widget-in-Client-Dashboard.webp) Post Types Order Reorder any post type with drag-and-drop: posts, pages, WooCommerce products, or any registered custom post type. Menu Duplicator Duplicate any WordPress navigation menu in one click. Handy when building similar menus for staging and production. Post Duplicator Clone posts, pages, and custom post types, including WooCommerce products, in a single click. Compatible with Gutenberg, Elementor, Divi, Bricks, and other major page builders. Draft, published, and pending posts can all be duplicated. Custom Admin Columns Add custom columns to any post type list screen to surface extra data (custom field values, ACF fields, metadata) right in the post list. Media Settings, RSS Thumbnails, Widget Removal, Classic Widgets Smaller but useful toggles: attachment page control, featured images in RSS feeds, removing unwanted default dashboard and sidebar widgets, and switching the Widgets screen back to the classic interface instead of the block editor. ### Pro Features in the Productivity Tab Hide Admin Notices The Pro feature people mention most. WordPress plugins love to shout at you: update notices, review requests, promotional banners, license reminders. One toggle silences all of it and gives you a clean, distraction-free dashboard. If you manage sites for clients, this one isn't optional. No client should log in and see a wall of plugin alerts. ![Cleaner WordPress admin screen with unneeded notices removed](https://d1k2c27psfzbiv.cloudfront.net/wp-content/uploads/2022/10/07102236/Hide-admin-notice-and-nags-from-Dashboard.webp) Hide Screen Options & Help Tab Remove the "Screen Options" dropdown and "Help" tab from the top of admin screens. These controls confuse clients and clutter the UI; Pro hides them globally. Admin Pages (Custom Admin Pages) Create fully custom admin pages and place them anywhere in the admin menu as top-level or submenu items. Pages support all major page builders: Gutenberg, Elementor, Bricks, Oxygen, and Divi. Use cases: client onboarding pages, branded help documentation, internal resource libraries, custom tool pages. Things that would otherwise need custom plugin development. See the [custom admin page feature](https://wpadminify.com/features/custom-admin-page) for examples. Action Workflows for Folders Extend the folder system with automated action workflows for advanced content organization. Infinite Scroll for Media Library Re-enable infinite scrolling in the media library grid view. Much smoother than paginating through large collections. ### Productivity Tab Verdict ## Security - Protect and Clean Up Your Site ![Security options by WP Adminify](https://d1k2c27psfzbiv.cloudfront.net/wp-content/uploads/2024/10/12144728/Security-options-by-WP-Adminify.webp) ### Free Features in the Security Tab Header Security Remove WordPress-generated traces from your site's ` `: the generator meta tag, Windows Live Writer manifest, RSD link, and other tags that advertise your site runs WordPress. Hiding these reduces the surface area for bots that target WordPress-specific vulnerabilities. Disable Feed Links (RSS / Atom / RDF) One toggle disables all feeds (post, category, tag, comment, author, and search feeds) and redirects the feed URLs so they don't 404. Useful when you don't need RSS, since unused feeds expose your content structure to scrapers. REST API Restriction Disable [REST API](https://developer.wordpress.org/rest-api/) access for logged-out users and remove REST API URL traces from the head tag, HTTP headers, and the RSD endpoint. One of the most important WordPress hardening steps you can take, and it's free here. Disable Comments Turn off comments globally or per post type. Existing comments are hidden on the frontend and the Comments menu disappears from the sidebar. Fully replaces the standalone "Disable Comments" plugin. Post & Archives Redirect Redirect unused archive pages (date and author archives) to your homepage, so thin, low-value pages stop getting crawled. A minor SEO win included free. Custom Gravatar Images Upload your own default avatar for the comments system instead of the mystery-man silhouette. Selected via Settings → Discussion. ### Pro Feature in the Security Tab Redirect URLs (Role-Based Login/Logout Redirects) After login or logout, WordPress sends everyone to the same place. With Pro, you set custom redirect URLs per user role: administrators to the full dashboard, editors to the post list, subscribers to their profile, clients to your custom onboarding page. ![User role based login and log out redirection](https://d1k2c27psfzbiv.cloudfront.net/wp-content/uploads/2024/07/12112911/User-role-based-login-and-log-out-redirection.webp) This creates a tailored experience for every type of user on your site, without custom code. ### Security Tab Verdict ## Performance - Speed Up Your Admin A slow WordPress admin is frustrating. The Performance tab gives you practical tools to reduce backend load and strip unnecessary scripts, most of them free. (If your dashboard is already crawling, start with our guide on [why the WordPress admin gets slow](https://wpadminify.com/why-is-my-wordpress-admin-so-slow).) ![WP Adminify V4.0 - Performance options](https://d1k2c27psfzbiv.cloudfront.net/wp-content/uploads/2024/07/12113147/WP-Adminify-V4.0-Performance-options.webp) ### Free Features in the Performance Tab Performance Enhancements (8 individual checkboxes) Each one is an independent toggle: - Remove Dashicons from the frontend for public visitors - WordPress loads its icon font even for logged-out visitors who never see the admin bar. Disabling it saves an HTTP request on every page load. - Remove version numbers from styles/scripts - strips `?ver=x.x.x` query strings from CSS and JS files, improving caching behavior and reducing version fingerprinting. - Remove Gravatar query strings - cleans up Gravatar image URLs, which some caching systems handle more efficiently. - Remove all emoji styles and scripts from the head section - WordPress ships a JS file and CSS block just to render emojis. If you don't use them, this removes the weight entirely. - Remove frontend jQuery Migrate script - Migrate exists for backwards compatibility with old plugins; on modern sites it's usually dead weight. - Remove backend jQuery Migrate script - same, but for the admin area. (Can occasionally conflict with older plugins. Test before enabling.) - Enable defer parsing of JS to footer - moves JavaScript execution after the HTML loads, improving perceived page speed. - Enable browser cache expires & GZIP compression - adds cache headers and GZIP, shrinking transfer sizes for repeat visitors. ![performance optimization option by WP Adminify](https://d1k2c27psfzbiv.cloudfront.net/wp-content/uploads/2024/12/31062125/performance-optimization-option-by-WP-Adminify.webp) Disable Gutenberg for Specific Post Types Limit the block editor to only the content types that need it, cutting unnecessary script loading everywhere else. ### Pro Features in the Performance Tab Disable Embeds WordPress loads oEmbed support everywhere: the REST API, the head tag, TinyMCE, remote results. Unless you rely on embedding external content, that's pure overhead. Pro disables all embeds globally in one click. Control Heartbeat API The Pro feature with the biggest server-side payoff, especially on shared hosting or a small VPS. The [WordPress Heartbeat API](https://developer.wordpress.org/plugins/javascript/heartbeat-api/) sends AJAX requests to your server every 15–60 seconds to power autosave, post locking, and login expiry detection. On busy sites or CPU-limited servers, that constant polling adds up fast. WP Adminify Pro lets you change the Heartbeat interval or disable it completely, configured separately for three contexts: - Admin pages (dashboard, settings screens) - Post creation/edit screens (where autosave matters most) - Frontend (where Heartbeat is almost never needed) ![Control Heartbeat API and post Revisions](https://d1k2c27psfzbiv.cloudfront.net/wp-content/uploads/2024/07/12113055/Control-Heartbeat-API-and-post-Revisions.webp) Standalone Heartbeat control plugins exist just for this; Pro includes it at no extra cost. We cover the details in our [Heartbeat API control guide](https://wpadminify.com/how-to-control-wordpress-heartbeat-api). ### Performance Tab Verdict ## Code Snippets - Add CSS & JS Without a Plugin The Code Snippets tab is one of WP Adminify's most underrated features, and it's entirely free. ### Free Features in the Code Snippets Tab (All Free) The tab is organized into two sub-tabs: Admin Scripts and Frontend Scripts. Admin Scripts → Custom CSS Write and inject your own CSS into the WordPress admin without touching theme or plugin files. Tweak colors, adjust spacing, hide elements, all in a clean, syntax-highlighted editor. Admin Scripts → Custom JavaScript Inject custom JavaScript into the admin area: custom interactions, third party scripts, small functionality extensions. No custom plugin required. Frontend Scripts (via Custom Header & Footer addon) The Frontend Scripts sub-tab integrates with the [Header & Footer Scripts addon](https://wpadminify.com/header-footer-scripts) to inject CSS and JavaScript into your site's frontend ` ` and footer, also free once the companion plugin is active. ### Code Snippets Tab Verdict ## White Label - Brand the Dashboard as Your Own The White Label tab is where agencies and freelancers who build sites for clients get their money's worth. (New to the concept? Start with the [white label feature overview](https://wpadminify.com/features/white-label).) ![WP Adminify V4.0 - White label options](https://d1k2c27psfzbiv.cloudfront.net/wp-content/uploads/2024/07/12113200/WP-Adminify-V4.0-White-label-options.webp) ### Free Features in the White Label Tab Admin Footer - Right Side System Info The bottom-right corner of every admin page normally shows just "WordPress" and a version number. WP Adminify replaces it with a configurable system info bar. Show or hide any of these, free: - IP Address - PHP Version - WordPress Version - Memory Usage - Memory Limit - Memory Available A useful at-a-glance readout for developers and site managers. Admin Footer Text - Left Side Custom Text Replace "Thank you for creating with WordPress" with anything: your agency name, a support link, contact info. Rich text and full HTML supported. Free. ### Agency Plan Features in the White Label Tab The following settings are labeled "Agency or Higher Plan Only": ![WP Adminify White Label settings panel showing logo upload, footer text, and Howdy replacement fields](https://d1k2c27psfzbiv.cloudfront.net/wp-content/uploads/2022/10/07111438/WP-Adminify-plugin-white-label.webp) Light Logo & Dark Logo - replace the WP Adminify logo in the settings panel with your agency's, separately for light and dark mode. Plugin Name - change the display name. Instead of "WP Adminify Pro" in the plugins list and admin menu, clients see your product name, like "Acme Dashboard Pro." Plugin Description - replace the description shown in the Plugins list with your own. Developer/Agency Name - set the developer name in the plugin meta. Menu Label - rename the WP Adminify item in the admin sidebar to anything you choose. Menu Icon - upload a custom sidebar icon to replace the Adminify one. Plugin URL - point the plugin name link at your own website or client portal instead of wpadminify.com. Hide All Row Meta Links - hide all plugin meta links (Upgrade, Settings, Account) from the plugins list row so nothing reveals the plugin's origin. Remove Specific Action Links - selectively remove individual action links: Upgrade, Activate/Change License, Settings, and Account. Force Disable White Label - a safety toggle that completely hides the White Label settings from the panel. Getting them back requires deactivating and reactivating the plugin, which stops clients or other admins from stumbling onto your white-label configuration. ### White Label Tab Verdict ## Backup - Import & Export Settings ### Free Features in the Backup Tab (All Free) Export & Download Settings Export your entire WP Adminify configuration as a JSON file in one click: dashboard templates, menu settings, productivity toggles, security options, performance settings, code snippets, and white label configuration, all in a single file. Import Settings Paste a previously exported JSON config and click Import to restore the whole setup instantly. Perfect for: - Migrating settings from staging to production - Replicating your setup across multiple client sites - Backing up before major changes - Creating agency templates you apply to every new client build Both import and export are free for all users, with no plan restriction. ### Backup Tab Verdict ## Stick with the Free Plan If… You're a blogger, solo site owner, or developer managing your own WordPress site, and you primarily want: - A clean, modern dashboard without the clutter - Full admin menu control: reordering, renaming, hiding items, colors, and typography - Productivity basics: post duplicator, media folders, custom dashboard widgets - Security hardening: disabling comments, RSS feeds, REST API for guests, header cleanup - Performance cleanup: emoji scripts, version strings, jQuery Migrate, and friends - Custom CSS/JS in the admin area without a separate plugin - Settings backup and restore across sites The free version will serve you well. You get 52 of the plugin's 76 features without paying, and for personal sites that covers nearly everything you'll reach for day to day. [→ Download WP Adminify Free from WordPress.org](https://wordpress.org/plugins/adminify) ## Upgrade to Pro If… You're a freelancer, professional developer, or power user who: - Manages sites for clients and needs a clean, professional backend to hand off - Is tired of plugin notification banners on every login (Hide Admin Notices) - Wants custom onboarding or help pages inside the admin, built with your page builder (Admin Pages) - Needs different user roles redirected to different pages after login (Redirect URLs) - Is on shared hosting or a budget VPS and wants to stop Heartbeat from hammering the server every 15–60 seconds (Heartbeat API Control) - Wants premium UI templates, a branded admin favicon, a custom body font, and post status color-coding - Builds WordPress sites and wants everything from media library UX to admin performance under tight control Pro is the right toolset for delivering polished, professional WordPress sites, for yourself and for clients, without building anything custom. [→ View WP Adminify Pro Plans & Pricing](https://wpadminify.com/pricing) ## Upgrade to Agency If… You're an agency, studio, or developer building and handing off WordPress sites at scale, and: - You deliver finished sites under your own brand, not WP Adminify's - You want clients to see your logo, your plugin name, and your company identity everywhere in the backend, with zero trace of WP Adminify - You need to fully rebrand the plugin: rename it, replace its logo, change the sidebar icon, set your own plugin URL - You want the branding settings locked down so clients can never discover or change them (Force Disable White Label) - You manage 10, 20, or 50+ client sites and want a consistent agency-branded WordPress experience on all of them For an agency that hands sites to clients under its own brand, the white-label features aren't a nice-to-have; they're the whole point. One client who stays longer because of a great dashboard experience more than covers the cost. [→ Get the WP Adminify Agency Plan](https://wpadminify.com/pricing) ## Final Verdict After going through every option in the WP Adminify settings panel - all 8 tabs, all 76 features - here's our honest conclusion: WP Adminify's free version is one of the most generous free plans in the WordPress plugin ecosystem. Most admin customization plugins gate everything meaningful behind a paywall. WP Adminify gives you a modern dashboard skin, a full drag-and-drop menu editor with complete color and typography control, a post duplicator, media folders, a dashboard widget builder, security hardening, performance cleanup, and custom CSS/JS injection, all free. That's not common. The Pro plan is a legitimate upgrade, not a cash grab. The features behind Pro (Heartbeat control, Hide Admin Notices, Admin Pages, role-based redirects, premium templates, Disable Embeds) solve real problems rather than manufacturing artificial scarcity. If you run client sites or a professional WordPress workflow, you'll reach for them regularly. The Agency plan is built for one specific person: the agency owner who sells WordPress sites. If that's not you, you don't need it. If it is you, it's not optional. ## Our Rating | | Free | Pro | Agency | | --- | --- | --- | --- | | Value for Money | ⭐⭐⭐⭐⭐ | ⭐⭐⭐⭐⭐ | ⭐⭐⭐⭐⭐ | | Best For | Solo users & developers | Freelancers & power users | Agencies & client work | | Features Unlocked | 52 / 76 | 65 / 76 | 76 / 76 | ## Try It Yourself WP Adminify has a free version you can install right now from WordPress.org, with no credit card and no commitment. See the new dashboard in under a minute, then decide whether Pro or Agency fits. [Download Free on WordPress.org →](https://wordpress.org/plugins/adminify) [See Pro & Agency Plans →](https://wpadminify.com/pricing) Want to see every Pro and Agency feature in action first? [Explore the live demo](https://demo.pixarlabs.com/?pl-product=adminify) - no WordPress install needed. ## WP Adminify Free vs Pro FAQs ### Can I use WP Adminify on multiple sites with one license? Yes. WP Adminify offers multi-site licensing options. Check the pricing page for site limits per plan. ### Is there a money-back guarantee? Yes. WP Adminify offers a refund policy. See the [refund policy page](https://wpadminify.com/refund-policy) for full details. ### Can I upgrade from Free to Pro later without losing my settings? Yes. Your settings are preserved when you upgrade. The additional Pro features simply unlock, with no reconfiguration needed. ### Does WP Adminify slow down my site? No. WP Adminify only loads its scripts in the WordPress admin area, and it ships built-in performance tools that help you remove unnecessary WordPress overhead. ### What page builders does Admin Pages support? Admin Pages supports all major page builders: Gutenberg, Elementor, Bricks, Oxygen, and Divi. ## Where to Go Next Still deciding how far to take your dashboard? Start with our [WordPress dashboard customization guide](https://wpadminify.com/wordpress-dashboard-customization) - it covers every method, plugin and no-plugin alike. Comparing tools rather than tiers? See the [best WordPress dashboard plugins](https://wpadminify.com/best-wordpress-dashboard-plugin) roundup, or go straight to the two modules people upgrade for: the [admin menu editor](https://wpadminify.com/features/admin-menu-editor) and [white label](https://wpadminify.com/features/white-label). Already know you need Pro? The [pricing page](https://wpadminify.com/pricing) lists what's in each plan, and every tier is covered by the refund policy. --- # How the WordPress REST API Leaks Your Usernames (and How to Stop It) URL: https://wpadminify.com/wordpress-rest-api-leaks-usernames Last updated: 2026-08-12 Type `yoursite.com/wp-json/wp/v2/users` into any browser and hit enter. On a default WordPress install, you'll usually get back a block of JSON listing every author on the site: display names, IDs, and a `slug` that on most sites is the exact username someone types to log in. No password. No login. No tooling. WordPress hands your author list to anyone who asks, and the endpoint is on out of the box. This guide walks through how the leak works, why a leaked username is a real security problem and not a cosmetic one, and how to close it. You get both routes: a couple of lines of code, or a single toggle in WP Adminify's security panel. ## What is the WordPress REST API? The WordPress REST API is a built-in interface that lets applications read and write your site's data over HTTP as JSON, instead of loading full web pages. It has shipped enabled by default on every install since WordPress 4.7 (December 2016), living under the `/wp-json/` path. The block editor, mobile apps, headless front ends, and a lot of plugins lean on it to fetch posts, pages, media, and users. That's the useful half. The catch is that a few of these endpoints are readable by visitors who aren't logged in at all. The `users` endpoint is the one this article cares about. It exists so a headless site can display author bylines, but the side effect is that it publishes your author list to the open internet. If you run a normal blog or brochure site that never calls the API from an outside app, you get the exposure and none of the benefit. The full endpoint reference lives in the official [WordPress REST API Users handbook](https://developer.wordpress.org/rest-api/reference/users/). Worth knowing: listing users is documented, intended behaviour, not a bug. That's the reason most site owners never think to close it. ## How the REST API leaks your usernames User enumeration through the REST API means pulling a site's valid account names from a public endpoint without logging in. On WordPress it happens two ways, and both work in a plain browser. ### The full author list Request the collection endpoint and you get back every user who has published content: ``` https://yoursite.com/wp-json/wp/v2/users ``` The response is a JSON array. Three fields per author do the damage: - `id` - the numeric user ID. User 1 is usually the original admin. - `name` - the public display name. - `slug` - the author slug. On most sites this is identical to the actual login username, because WordPress builds the slug from the username unless someone changes it by hand. ![WordPress REST API users endpoint returning JSON with author name id and slug username exposed to an unauthenticated visitor](https://d1k2c27psfzbiv.cloudfront.net/wp-content/uploads/2026/07/12102437/rest-api-users-endpoint-exposed.webp) The screenshot above was taken in a private browser window with nobody logged in. The endpoint returns `"id": 1`, `"name": "jemee"`, and the one that matters, `"slug": "jemee"`, plus an author link of `/author/jemee/`. The `slug` is the leak. Here `jemee` is the real login username for the site's first admin. An attacker no longer has to guess whether "admin," "jemee," or "editor2" exists. The API confirms it, for free. ### Probing a single user by ID Even when the collection endpoint is partly locked down, you can often still query IDs one at a time: ``` https://yoursite.com/wp-json/wp/v2/users/1 https://yoursite.com/wp-json/wp/v2/users/2 ``` Walk the IDs from 1 upward and you map out the accounts request by request. It's trivial to script. A short loop pulls every username on a site in seconds. Here's the round trip: ![Flow diagram showing an unauthenticated visitor requesting the wp-json users endpoint and WordPress returning JSON that exposes the login username slug](https://d1k2c27psfzbiv.cloudfront.net/wp-content/uploads/2026/07/12102452/rest-api-username-leak-flow.webp) ## Why a leaked username is a real security risk The common reaction is "so what, the username isn't the password." True, but it misses how account attacks actually run. A WordPress login needs two secrets: a username and a password. The REST API gives away the first one, which turns a two-unknown problem into a one-unknown problem. ![Comparison diagram showing that with the REST API off both username and password are unknown but with it on the username is leaked](https://d1k2c27psfzbiv.cloudfront.net/wp-content/uploads/2026/07/12102457/username-half-the-login-diagram.webp) Here's what a confirmed username buys an attacker: - Targeted brute-force attacks. Instead of guessing username and password together, they lock the username and hammer the password field alone. Automated tools chew through millions of passwords much faster against a known account. - Credential stuffing. Billions of email and password pairs float around from old breaches. If your username matches a login someone reused elsewhere, a confirmed valid username tells the attacker exactly which stuffing lists to run. - Spear-phishing. Real display names and roles make a "your account needs verification" email far more convincing to the exact person who can approve it. - Admin targeting. User ID 1 is nearly always the founding administrator, so that's the account attackers go after first. None of this guarantees a breach on its own. But hardening is mostly about taking away free wins, and a public username list is one of the easiest wins there is. Pair the leak with a weak password or no [two-factor authentication](https://wpadminify.com/two-factor-authentication-for-wordpress-admin), and the risk stops being theoretical. ## Other ways WordPress exposes usernames The REST API is the loudest leak, not the only one. Close it and leave these open and you've locked the front door while the side door stays ajar: - Author archive enumeration. Visit `yoursite.com/?author=1` and WordPress redirects to `/author/realusername/`, printing the login name in the URL. Bump the number and you enumerate users the same way the API does. - oEmbed endpoint. The `/wp-json/oembed/1.0/embed` endpoint returns an `author_name` for a given post URL, which tells you who wrote each piece. - Login error messages. Default WordPress replies "The password you entered for the username johndoe is incorrect," which confirms johndoe is a valid account. So treat username exposure as one problem with a few outlets, not a single endpoint to patch. ## Fix it with code (functions.php) If you're comfortable editing theme files, two hooks shut the main leaks. Drop this in your child theme's `functions.php` or a site-specific plugin. First, pull the `users` endpoints from the REST API for anyone who isn't logged in: ``` // Block REST API user enumeration for unauthenticated requests function adminify_block_rest_user_enum( $endpoints ) { if ( isset( $endpoints['/wp/v2/users'] ) ) { unset( $endpoints['/wp/v2/users'] ); } if ( isset( $endpoints['/wp/v2/users/(?P[\d]+)'] ) ) { unset( $endpoints['/wp/v2/users/(?P[\d]+)'] ); } return $endpoints; } add_filter( 'rest_endpoints', 'adminify_block_rest_user_enum' ); ``` Next, kill the `?author=N` archive redirect so the URL trick stops working: ``` // Block ?author=N author enumeration function adminify_block_author_enum() { if ( is_admin() ) { return; } if ( isset( $_GET['author'] ) && is_numeric( $_GET['author'] ) ) { wp_redirect( home_url(), 301 ); exit; } } add_action( 'template_redirect', 'adminify_block_author_enum' ); ``` Common issue: if the block editor starts throwing "cannot load user data" errors after you add the first snippet, the filter is stripping the endpoint for logged-in editors too. Wrap the `unset()` calls in `if ( ! is_user_logged_in() )` so authenticated users keep API access and only the public loses it. The cost of the code route is maintenance. Every snippet is one more thing to retest on each WordPress core update, and one typo white-screens the site. ## Fix it with WP Adminify (no code) If you'd rather not touch `functions.php`, WP Adminify gives you the same protection as a single toggle in its [security module](https://wpadminify.com/features/security). The exact path: - In your WordPress dashboard, open WP Adminify > Settings. - Select the Security tab from the module list. - Find the REST API section and flip its master switch to SHOW to reveal the options. - Tick Disable REST API. This blocks REST API access for non-authenticated users and strips the API URL traces from your ` `, HTTP headers, and the WP RSD endpoint, which closes the enumeration hole without breaking the editor for logged-in users. - Optionally tick Remove "X-Powered-By:..." from Server Response HTTP headers to hide server fingerprinting details as well. - Click Save Settings in the top right. Adminify keeps showing a "You have unsaved changes, save your changes!" banner until you do, and the toggle isn't live until it's saved. ![WP Adminify Security settings REST API section with Disable REST API checkbox ticked and the Save Settings button](https://d1k2c27psfzbiv.cloudfront.net/wp-content/uploads/2026/07/12102442/wp-adminify-security-disable-rest-api.webp) Because Adminify only disables the API for non-authenticated visitors, the block editor, your logged-in team, and any authenticated integrations keep working. The public just stops receiving the user list. Save it, then reload `yoursite.com/wp-json/wp/v2/users` in a private window. Instead of the JSON author list, the endpoint now returns an error: ``` { "code": "rest_api_authentication_required", "message": "The REST API has been restricted to authenticated users.", "data": { "status": 401 } } ``` The `401` status and that message are the confirmation. The slug `jemee`, the author list, and the ID probe all stop responding to anonymous visitors, and your logged-in editor still has full access. ![WordPress REST API users endpoint after enabling WP Adminify Disable REST API showing a 401 rest_api_authentication_required response](https://d1k2c27psfzbiv.cloudfront.net/wp-content/uploads/2026/07/12102447/rest-api-disabled-after.webp) How the two routes stack up: | Factor | functions.php code | WP Adminify toggle | | --- | --- | --- | | Setup time | ~15 min + testing | Under 1 minute | | Risk of breaking the site | Syntax error can white-screen | None, reversible toggle | | Blocks `?author=N` too | Only with a second snippet | Covered by the security module | | Survives theme switch | No (lives in theme) | Yes (plugin-level) | | Non-developer friendly | No | Yes | The security tab keeps related hardening in one place: [changing the login URL](https://wpadminify.com/change-wordpress-login-page-url), disabling XML-RPC, and [controlling the Heartbeat API](https://wpadminify.com/how-to-control-wordpress-heartbeat-api). That's the point of turning one plugin on instead of stacking a single-purpose plugin for each gap. ## Should you disable the REST API entirely? Be deliberate here. The REST API is genuinely useful, and switching it off blindly breaks things. Disable public access when: - Your site is a normal blog, portfolio, or business site that no outside app talks to. - You don't run a headless front end, a companion mobile app, or a third-party service that reads your content over the API. - You want to shrink the attack surface and stop username enumeration. Keep it on, and lock down only the `users` endpoint, when: - You run a headless or decoupled setup (Next.js, Gatsby, a mobile app) that fetches content through `/wp-json/`. - A plugin or outside integration depends on public API reads. Contact forms, some SEO tools, and page builders sometimes do. The safe middle ground is exactly what Adminify's "disable for non-authenticated users" option does. Authenticated requests still flow, so the editor and legitimate integrations keep working, and anonymous enumeration stops. One more step worth doing whatever you decide about the API: if your author slug still matches your login, [change the WordPress username](https://wpadminify.com/how-to-change-wordpress-username) or set a distinct display name so the two never line up. The full [security feature set](https://wpadminify.com/features/security) covers the rest of the hardening toggles. ## WordPress REST API Security FAQs ### Does the WordPress REST API expose passwords? No. The REST API never returns passwords or password hashes to unauthenticated requests. It exposes usernames, display names, and user IDs through the users endpoint. The risk is that a confirmed username removes half of what an attacker needs, which makes password-guessing attacks much more effective. ### Will disabling the REST API break my WordPress site? It can if you're careless about it. The block editor and plenty of plugins use the API internally. The safe move is to disable it only for non-authenticated (logged-out) visitors, which is what WP Adminify's Disable REST API option does. Logged-in users and the editor keep full access while anonymous enumeration is blocked. ### How do I check if my usernames are already leaking? Open an incognito window and visit yoursite.com/wp-json/wp/v2/users. If you see JSON with name and slug values, your usernames are public. Then test yoursite.com/?author=1. If it redirects to a /author/username/ URL, that's leaking too. ### Is the author slug always the same as the login username? Not always, but often. WordPress builds the author slug from the username by default, so unless you or a security plugin changed it, the leaked slug is your real login name. Setting a different display name and nickname doesn't change the slug on its own. ### Does disabling REST API help SEO or performance? A little. Removing the API's URL traces from your and HTTP headers trims a bit of markup and hides server fingerprinting, but the real payoff is security, not ranking or speed. Treat it as a hardening step, not an SEO tactic. ## Conclusion The REST API leaks usernames because a public, unauthenticated endpoint was built to serve author data, and on most sites that data includes the exact login names attackers want. The upside is that closing the hole is quick: - The `/wp-json/wp/v2/users` endpoint and the `?author=N` redirect both hand valid usernames to anyone. - A leaked username turns a two-secret login into a one-secret target, which powers brute-force and credential-stuffing attacks. - You can block enumeration with a couple of `functions.php` hooks, or with one toggle in a security plugin. - Disable public API access only if no outside app depends on it. Otherwise restrict it to authenticated users. If flipping a switch beats maintaining code for you, WP Adminify's Security module disables REST API access for non-authenticated users and cleans the related traces from your head and headers in one click. The full [WP Adminify security toolkit](https://wpadminify.com/features/security) closes the rest of the common WordPress leaks in the same spot. Closing off enumeration is one piece of a dashboard you actually control. If you are tidying the admin more broadly - menus, widgets, roles, and branding - the full [WordPress dashboard customization guide](https://wpadminify.com/wordpress-dashboard-customization) walks through every method, and agencies handing finished sites to clients should read the [white label WordPress guide](https://wpadminify.com/white-label-wordpress) next. --- # WordPress Redirects: The Complete Guide (301, 302, Plugins & htaccess) URL: https://wpadminify.com/wordpress-redirect Last updated: 2026-08-12 Every WordPress site eventually needs a redirect. You change a permalink and the old URL starts returning 404s. You migrate to a new domain. You delete a product but its page still ranks. You want subscribers to land on their account page instead of `wp-admin` after login. All of these are redirect problems, and each one has a right answer, plus a couple of wrong ones that quietly cost you traffic. This guide covers the whole topic in one place: what each redirect type actually does, when a WordPress redirect plugin beats `.htaccess` or Nginx rules (and when it doesn't), how to redirect users by role after login, how to find and fix redirect chains, and what Google has actually said about redirects and SEO. Where a section deserves more depth, we link out to a dedicated walkthrough. ## What is a WordPress redirect? A WordPress redirect is an instruction that sends visitors (and search engine crawlers) from one URL to another automatically. When someone requests the old URL, the server responds with an HTTP status code in the 3xx range plus the new location, and the browser loads the new URL instead. Redirects are how you keep traffic, backlinks, and rankings when URLs change. Redirects can live in three places on a WordPress site: - At the server level: rules in `.htaccess` (Apache/LiteSpeed) or the Nginx config. Fastest, because they run before WordPress loads a single line of PHP. - At the application level: a plugin or PHP code that runs after WordPress boots. Easier to manage, slightly slower. - At the page level: meta refresh tags or JavaScript. Avoid these. Crawlers treat them as second-class and visitors sit through a visible delay. ## Redirect types explained: 301, 302, 307, and 308 The number is the HTTP status code the server returns. Browsers treat most of them the same way (the visitor still ends up at the new URL), but search engines read them differently, and that's where the wrong pick gets expensive. | Code | Name | Meaning | Passes link equity? | Cached by browsers? | Typical use | | --- | --- | --- | --- | --- | --- | | 301 | Moved Permanently | The URL has moved for good | Yes | Yes, aggressively | Changed permalinks, domain migration, HTTP→HTTPS, deleted content with a replacement | | 302 | Found (temporary) | The URL is temporarily elsewhere | Yes (Google treats long-lived 302s like 301s) | No | A/B tests, temporary promos, maintenance detours | | 307 | Temporary Redirect | Strict temporary redirect; request method preserved | Yes | No | Temporary moves involving form submissions (POST) | | 308 | Permanent Redirect | Strict permanent redirect; request method preserved | Yes | Yes | Permanent moves of API endpoints or forms | ![Diagram comparing a 301 permanent redirect and a 302 temporary redirect in WordPress, showing the browser request, the server status code response, and the final destination URL](https://d1k2c27psfzbiv.cloudfront.net/wp-content/uploads/2026/07/29081342/wordpress-301-vs-302-redirect-diagram.png) ### When to use each type In practice the decision is simpler than the table looks: - Use a 301 whenever the change is permanent. That's the right call at least 90% of the time on a typical WordPress site: changed slugs, merged posts, retired products, new domains. - Use a 302 only when the original URL is coming back. If a "temporary" 302 is still there six months later, Google starts treating it as permanent anyway, but browsers never cache it, so every visit pays the redirect cost again. - Use 307/308 when you're redirecting endpoints that receive POST data (forms, webhooks, REST calls) and the request method has to survive the hop. For normal pages, stick with 301/302. One warning about 301s: browsers cache them hard. Point a 301 at the wrong destination and visitors keep landing on the wrong page even after you fix the rule, until their cache expires. Test permanent redirects in a private window, and if you're not 100% sure of the destination, start with a 302 and upgrade it once confirmed. We've had to talk more than one panicked site owner through this exact mistake. ## Method 1: Set up redirects with a plugin For most site owners a plugin is the right tool. You get a UI, logging, 404 monitoring, and you can't take the whole site down with a typo in a server file. The realistic options: | Plugin | Free? | Redirect types | 404 logging | Regex | Best for | | --- | --- | --- | --- | --- | --- | | Redirection | Yes | 301, 302, 307, 308 | Yes | Yes | Dedicated redirect management on any site | | WP Adminify (URL Redirection module) | Core plugin free; module in Pro | 301, 302, 307 | - | - | Sites already using Adminify - no extra plugin needed | | Rank Math | Yes (redirects in free tier) | 301, 302, 307, 410, 451 | Yes | Yes | Sites already using Rank Math for SEO | | Yoast SEO Premium | No | 301, 302, 307, 410, 451 | Yes | Yes (Premium) | Sites already paying for Yoast | | 301 Redirects | Yes | 301, 302, 307 | Pro | Pro | Simple one-off redirects | Notice the pattern: if you already run an SEO plugin or an admin toolkit, you probably already have redirect management and don't need another single-purpose plugin for it. Plugin sprawl is its own performance problem. We've written about [replacing stacks of single-purpose plugins](https://wpadminify.com/replace-wordpress-plugins-with-wp-adminify) before, and redirects are a textbook example. ### Walkthrough: the Redirection plugin [Redirection](https://wordpress.org/plugins/redirection/) is the most-installed dedicated option on WordPress.org (2+ million active installs) and a sensible default if you want a standalone tool: - Install and activate it from Plugins → Add New, then run the setup wizard under Tools → Redirection. Enable the options to monitor permalink changes and keep a log of 404 errors. Both save you work later. - Open the redirect manager and click Add New to open the Add Redirection form. - In Source URLs, enter the old path (e.g. `/old-post-slug/`) and pick the match type. Exact covers most cases. Click Add another to send several sources to the same destination. - In Destination URL, enter the new location, either a relative path or a full URL. - Under Redirection Type, leave 301 Permanent Move selected (302, 307, 410, and 451 are there when you need them), keep Status on Activate, and click Add Redirection. ![Redirection plugin Add new redirection form in the WordPress admin with a source URL, target URL, and the 301 redirect type selected](https://d1k2c27psfzbiv.cloudfront.net/wp-content/uploads/2026/07/29081345/wordpress-redirection-plugin-add-new-redirect.png) The 404 log (under the 404s tab) is the feature that earns its keep: it shows real URLs that real visitors are failing to reach, and you can create a redirect straight from a log entry in one click. ### Redirects inside WP Adminify If you run [WP Adminify](https://wpadminify.com/), the Pro [URL Redirection module](https://wpadminify.com/features/url-redirection) handles standard URL-to-URL redirects with 301, 302, and 307 support. Handy when you'd rather manage redirects from the same dashboard that already handles your admin customization instead of installing one more plugin. It doesn't do regex or 404 logging, so if you need those, Redirection is still the better fit. ![WP Adminify Security tab with the Redirect URLs option toggled to Show, revealing the Login/Register URL and Roles Redirect sub-tabs](https://d1k2c27psfzbiv.cloudfront.net/wp-content/uploads/2026/06/09103356/wp-adminify-security-redirect-urls.png) ## Method 2: Redirect via .htaccess (Apache) or Nginx Server-level redirects run before WordPress loads any PHP, which makes them the fastest option and the right choice for site-wide rules: domain migrations, HTTPS enforcement, www/non-www canonicalization, or high-traffic URLs where every millisecond counts. ### .htaccess redirects (Apache and LiteSpeed) The `.htaccess` file lives in your WordPress root directory, next to `wp-config.php`. It's hidden by default, so enable "show hidden files" in your file manager or FTP client. Always download a backup copy before editing; one syntax error returns a 500 on every page of the site. Place custom rules above the `# BEGIN WordPress` block, because WordPress rewrites everything inside it. ![.htaccess, php.ini and robots.txt file](https://d1k2c27psfzbiv.cloudfront.net/wp-content/uploads/2021/09/12101503/htaccess-php-ini-and-robots-txt-file.gif) ``` # Single page, permanent Redirect 301 /old-page/ https://example.com/new-page/ # Single page, temporary Redirect 302 /summer-sale/ https://example.com/current-offers/ # Whole domain migration (keeps the path) RewriteEngine On RewriteCond %{HTTP_HOST} ^oldsite\.com$ [OR] RewriteCond %{HTTP_HOST} ^www\.oldsite\.com$ RewriteRule ^(.*)$ https://newsite.com/$1 [L,R=301] # Force HTTPS RewriteEngine On RewriteCond %{HTTPS} off RewriteRule ^(.*)$ https://%{HTTP_HOST}%{REQUEST_URI} [L,R=301] ``` See the [WordPress developer documentation on .htaccess](https://developer.wordpress.org/advanced-administration/server/web-server/httpd/) for the default rules and more patterns. ### Nginx redirects Nginx has no `.htaccess` equivalent. Rules go in the server block of your site's config (often `/etc/nginx/sites-available/yoursite`). On managed hosting you usually can't edit this yourself; hosts like Kinsta and WP Engine give you a redirect panel or add rules on request. ``` # Single page, permanent location = /old-page/ { return 301 https://example.com/new-page/; } # Whole domain migration server { server_name oldsite.com www.oldsite.com; return 301 https://newsite.com$request_uri; } ``` Reload Nginx after changes (`nginx -t` to test the config first, then `systemctl reload nginx`). ### htaccess vs plugin: which should you use? - Use server rules for site-wide, permanent, structural redirects: domain moves, HTTPS, www canonicalization. Few rules, set once, maximum speed. - Use a plugin for everyday content redirects: changed slugs, deleted posts, 404 cleanup. You get logging, an audit trail, and zero risk of white-screening the site. - Avoid hundreds of individual page rules in `.htaccess`. Apache evaluates the file on every request, and a bloated file turns into a maintenance and performance liability. A long redirect list belongs in a plugin that stores rules in the database. And if [admin performance](https://wpadminify.com/why-is-my-wordpress-admin-so-slow) is your worry, measure before assuming redirects are the bottleneck; they usually aren't. ## Redirect users after login by role Not every redirect is about moved content. WordPress sends everyone who logs in to the same place, the dashboard, which stops making sense the moment your site has clients, customers, or members. A role-based login redirect gives each user type its own landing spot: subscribers to their account page, editors to the post list, clients to a custom dashboard. WP Adminify handles this without code. Under Adminify → Security → Redirect URLs, enable the module, then open the Roles Redirect tab and add a login redirect rule per role: ![Roles Redirect tab in WP Adminify showing the Login Redirect rule type selected and the Add New Login Redirect button](https://d1k2c27psfzbiv.cloudfront.net/wp-content/uploads/2026/06/09103400/wp-adminify-roles-redirect-add-new-login-redirect.png) Pick the role, set the destination URL, save - done. Rules can target a role, a specific username, or a capability, and the same tab handles logout redirects too. ![WP Adminify login redirect rule with User Role selected and the Role dropdown open listing Administrator, Editor, Author, Contributor, Subscriber and custom roles](https://d1k2c27psfzbiv.cloudfront.net/wp-content/uploads/2026/06/09103406/wp-adminify-login-redirect-choose-user-role.png) For the full walkthrough, including the `functions.php` alternative using the `login_redirect` filter, logout redirects, and testing tips, see our dedicated guide: [How to Redirect Users After Login by Role in WordPress](https://wpadminify.com/wordpress-redirect-users-after-login-by-role). It pairs naturally with [changing your login page URL](https://wpadminify.com/change-wordpress-login-page-url) if you're hardening the login flow anyway. ## Finding and fixing redirect chains A redirect chain is a redirect that points to another redirect: A → B → C instead of A → C. Chains build up innocently. You rename a post in 2023, rename it again in 2025, and now the 2023 URL hops twice. Loops (A → B → A) are the pathological case and produce the browser error "too many redirects." Chains cost you in two ways that matter and one that's easy to forget. Every hop is a full round trip to the server before the real page starts loading, and two extra hops can add hundreds of milliseconds on mobile. Googlebot follows up to 10 hops but crawls long chains inefficiently, and Google's own guidance is to keep redirects direct. The forgettable one: each hop is one more rule that can silently break in your next migration. ### How to find them - Spot-check a URL with curl: `curl -sIL https://example.com/old-page/ | grep -i "HTTP\|location"` shows every hop and status code in the chain. - Crawl the site with Screaming Frog (free up to 500 URLs). Its Reports → Redirects → Redirect Chains export lists every chain and loop. - Check Google's view in Search Console's URL Inspection tool, which reports "Page with redirect" and the final destination. ### How to fix them Point every rule directly at the final destination. In your redirect plugin, edit rule A so it targets C instead of B, and delete rule B if nothing else references its source. After a domain migration, also update hard-coded internal links in menus, widgets, and post content so internal navigation never routes through a redirect at all. And if you're seeing redirects you never created, like [wp-admin redirecting to the homepage](https://wpadminify.com/wp-admin-redirects-to-homepage), that's usually a different problem entirely: a plugin conflict, a cached rule, or a misconfigured site URL. ## Redirects and SEO: what actually happens to rankings The old myth says every 301 "leaks" a little PageRank, so redirects slowly bleed your rankings. That had some truth a decade ago. Google has been explicit since 2016 that no PageRank is lost from 301, 302, or 307 redirects. Google's own [redirect documentation](https://developers.google.com/search/docs/crawling-indexing/301-redirects) confirms permanent redirects pass full signals to the new URL, and Googlers John Mueller and Gary Illyes have both said publicly that 3xx redirects no longer cost PageRank. What redirects do affect: - Consolidation takes time. After a migration, Google has to recrawl old URLs, follow the redirects, and transfer signals. Expect ranking turbulence for weeks, not days, on large sites. - Relevance matters. A 301 to an unrelated page (say, every deleted post to the homepage) gets treated as a soft 404, and the signals are dropped rather than transferred. Redirect to the closest relevant equivalent, or let the page 404/410 honestly if no equivalent exists. Our guide to [HTTP status code errors](https://wpadminify.com/wordpress-http-status-code-errors) covers when each code is the right answer. - Redirects only work while they exist. Google recommends keeping migration redirects live for at least a year. We'd say keep them forever; backlinks to old URLs pass value only as long as the redirect is in place. - Chains dilute crawl efficiency (see the previous section), even though each individual hop passes signals. ## WordPress Redirect FAQs ### Do 301 redirects hurt SEO? No. Google confirmed in 2016 that 301, 302, and 307 redirects no longer lose PageRank, and its documentation states permanent redirects pass full ranking signals. What hurts SEO is redirecting to irrelevant pages (treated as soft 404s), long redirect chains, and removing redirects too early. ### How many redirects is too many? Googlebot follows up to 10 hops in a chain before giving up, but treat anything past one hop as a defect worth fixing. For total rule count, a few hundred database-stored plugin rules are fine; hundreds of rules in .htaccess get evaluated on every single request and are worth consolidating into pattern-based rewrites. ### Should I use htaccess or a plugin for WordPress redirects? Use .htaccess (or Nginx rules) for a small number of site-wide structural redirects such as domain moves, HTTPS, and www canonicalization, because they run before WordPress loads. Use a plugin for day-to-day content redirects, since you get logging, 404 monitoring, and no risk of breaking the site with a syntax error. ### What is the difference between a 301 and a 302 redirect in practice? Both send visitors to the new URL and both pass ranking signals. The difference: a 301 tells search engines to index the new URL and gets cached aggressively by browsers, while a 302 says the original URL will return and never gets cached. Default to 301 unless the change is genuinely temporary. ### How do I redirect a user to a specific page after login in WordPress? Use a role-based login redirect. In WP Adminify, go to Adminify → Security → Redirect URLs → Roles Redirect, add a Login Redirect rule, choose the role, and set the destination URL. Alternatively, hook the login_redirect filter in functions.php. ### How long should I keep redirects in place? Google recommends at least one year for migration redirects, but keep them permanently if you can. The moment a redirect is removed, every backlink pointing at the old URL stops passing value and every bookmark starts returning a 404. ## The short version The redirect playbook for WordPress comes down to a few rules: - Default to 301 for permanent moves; use 302 only when the original URL is genuinely coming back. - Structural, site-wide redirects belong at the server level. Everyday content redirects belong in a plugin with logging. - Point every redirect at the final destination, no chains, and keep migration redirects live for the long haul. - Redirect to relevant pages or don't redirect at all; blanket redirects to the homepage get treated as soft 404s. If you're already customizing your admin with WP Adminify, the login side of redirects (role-based login and logout destinations) plus [standard URL redirection](https://wpadminify.com/features/url-redirection) comes with the same [security toolkit](https://wpadminify.com/features/security) you're already running, so that's one less plugin on the install list. The free version is on WordPress.org if you want to try it on a staging site first. --- # WordPress Media Folders: The Complete Guide to Organizing Your Files URL: https://wpadminify.com/wordpress-media-library-folders Last updated: 2026-08-12 WordPress will happily store 20,000 files for you. It won't help you find any of them. No folder tree, no way to group a client's assets, no structure beyond the year and month you happened to upload something. If you manage media at any real scale, that's the biggest gap in the WordPress admin. Media folders close it. This guide covers what a WordPress media folder actually is, the difference between virtual and physical folders (one is safe on a live site, the other can break every image you've published), and how to build a structure your team will still understand in two years. ![WordPress Media Library organized with unlimited nested folders using WP Adminify](https://d1k2c27psfzbiv.cloudfront.net/wp-content/uploads/2025/03/09071018/wp-adminify-media-folders-unlimited-nested-folders.webp) ## What is a WordPress media folder? A WordPress media folder is a virtual container that groups files inside the Media Library without moving them on the server. Files are assigned to a folder through a database relationship, so the file path and image URL stay identical no matter which folder the file sits in. The word doing all the work there is "virtual." Drag an image into a folder called "Acme Corp" and nothing happens on disk. The file stays at `wp-content/uploads/2026/08/acme-logo.png`. What changes is one database record saying this attachment belongs to the Acme Corp folder. The folder is a label, not a location. That turns out to be exactly what you want. ## Why WordPress has no folders natively WordPress classifies content with metadata rather than location. Posts live in categories, not directories. The Media Library follows the same principle, so files are meant to be found by date, type, or search. There's a hard technical reason too. WordPress addresses every uploaded file by URL. If folders mapped to real directories, moving a file would change its URL, and then: - every post embedding that image shows a broken image - every external link and social share pointing at it 404s - every CDN and browser cache holds a stale copy - Google drops the image from image search until it recrawls Faced with that, core chose not to ship folders at all. Reasonable for a blog. A serious problem for an agency with forty clients' assets in one library. ## Virtual folders vs physical folders This is the most important distinction in the whole topic, and it's the one thing to check before you install any folder plugin. | | Virtual folders (taxonomy-based) | Physical folders (directory-based) | | --- | --- | --- | | What moves | A database record | The actual file on disk | | Image URL after moving | Unchanged | Changes | | Risk to existing posts | None | Broken images unless every reference is rewritten | | Safe to reorganize on a live site | Yes | Not without a database search-replace | | Matches folders seen over FTP | No | Yes | | Survives plugin deactivation | Files yes, folder view no | Files and directories yes | | Used by | Most modern folder plugins | A small number of older plugins | Physical folders have one genuine appeal: what you see in WordPress matches what you see over FTP. If people on your team upload directly to the server, that consistency is worth something. For everyone else, virtual folders win by a wide margin. You can reorganize a 15,000-file library on a production site during business hours and break nothing. With physical folders, the same job is a migration project needing a database search-and-replace across post content, page-builder JSON, customizer settings, and custom fields. So check which model a plugin uses before installing it. If the description mentions "moving files on your server" or "syncing with your uploads directory," it's touching real directories, and you'll want a full backup and a plan for the URL changes. ## How virtual media folders work under the hood Every uploaded file in WordPress is a post. Specifically, a row in `wp_posts` with `post_type = 'attachment'`. Because it's a post, it can carry taxonomies, the same system behind categories and tags. A folder plugin registers a hierarchical taxonomy against the attachment post type. Each folder is a term. Assigning a file to a folder creates a row in `wp_term_relationships`. That's the whole mechanism. You can build a minimal version yourself in about ten lines: ``` /** * Register a hierarchical "Media Folder" taxonomy for attachments. * Hierarchical = true is what allows nested subfolders. */ function adminify_register_media_folders() { register_taxonomy( 'media_folder', 'attachment', array( 'labels' => array( 'name' => __( 'Media Folders' ), 'singular_name' => __( 'Media Folder' ), ), 'hierarchical' => true, // enables parent/child nesting 'show_admin_column' => true, // adds a column in list view 'show_in_rest' => true, // exposes it to the block editor 'rewrite' => false, // no public archive pages 'public' => false, ) ); } add_action( 'init', 'adminify_register_media_folders' ); ``` Add that to a site-specific plugin and you've got a working folder taxonomy with a filter dropdown in list view. What you don't get is the part that makes folders useful day to day: a folder tree in the sidebar, drag-and-drop assignment, folder filtering inside the media modal when you insert an image, and bulk moving. Building those is the real work, and it's what folder plugins actually sell. One practical implication. Because folders are taxonomy terms, they live in that plugin's taxonomy. Deactivate the plugin and every file stays untouched and every image keeps working, but the folder structure disappears from the admin. The terms are still in the database, so reactivating brings it all back. Switching to a different folder plugin is the harder case: you need either an import tool or a rebuild by hand. Worth knowing before you commit a large library. ![Diagram showing how WordPress media folders map attachments to taxonomy terms: the file stays in wp-content/uploads, its record is a row in wp_posts, and the folder is a term linked through wp_term_relationships](https://d1k2c27psfzbiv.cloudfront.net/wp-content/uploads/2026/08/09112546/wordpress-media-folder-taxonomy-diagram.webp) ## Nested folders and subfolders Nesting is where folder plugins differ most, so check it before you commit. The underlying taxonomy is hierarchical, so nesting is technically unlimited. A term can have a parent, which can have a parent, forever. In practice plugins cap it: some at two levels, some at five, some not at all. If your structure needs Client, then Project, then Asset type, confirm the plugin does three levels before you build it out. A note from doing this on real sites: deep nesting feels organized and works badly. Past three levels, navigation slows down and people quietly stop filing things properly because the right folder takes too many clicks. Two levels handles most cases. Three is the ceiling I'd set. ``` Media Library ├── Acme Corp │ ├── Website │ ├── Social │ └── Print ├── Beta Industries │ ├── Website │ └── Social └── Internal ├── Team photos └── Brand assets ``` ## Designing a folder structure that survives The structure matters more than the plugin. A good one is obvious to someone who joined last week. A bad one gets abandoned inside a month and you're back to scrolling. ### Pick one primary axis Organize by one thing at the top level. Mixing axes, so some folders by client and some by year and some by file type, is the fastest way to make a structure unusable, because nobody can predict where a file went. | Site type | Top level | Second level | | --- | --- | --- | | Agency / freelancer | Client | Project or asset type | | WooCommerce store | Product category | Product line or season | | Blog / magazine | Content section | Year | | News site | Desk or beat | Month | | Membership site | Course or program | Module | | Corporate site | Department | Campaign | ### Name folders the way people search Use the words your team says out loud. "Acme Corp" beats "Client 004." "Spring Campaign 2026" beats "SC26." Folder names are a retrieval aid, and abbreviations only ever help the person who invented them. ### Keep an Unsorted folder, and empty it People will upload without filing. Instead of pretending otherwise, keep a deliberate Unsorted folder and give someone a ten-minute pass every week to clear it. A structure with an honest inbox stays clean. One that assumes perfect discipline rots. ### Write the rules down Two lines in your team wiki covering what the top level means and where new uploads go is the difference between a structure that holds for years and one that fragments the moment a second person starts uploading. This matters most for [agencies handling multiple client sites](https://wpadminify.com/agencies), where the person filing an asset usually isn't the person who'll need to find it. ## Moving existing files into folders Organizing a library that already holds thousands of files is the part everyone dreads. It goes faster than you'd expect with the right order of operations. - Back up first. Files and database. Virtual folders are safe, but you're about to run bulk operations on production data. - Create the top-level folders only. Don't build the full nested tree yet. You'll change your mind once you see what's actually in there. - Switch to list view and sort by date. Files uploaded around the same time usually belong together, which makes multi-select far more effective than working through the grid. - Filter by media type. All PDFs in one pass, all videos in another. Type filtering groups things better than scrolling ever will. - Use search to batch by filename. If files were named sensibly, searching "logo" or a client name pulls most of a folder's contents in one go. - Move in large multi-selects. Select a few hundred, drag once. This is the step that turns a day of work into an hour. - Add subfolders last. Once the top level is populated, the right second level is obvious. - Leave the rest in Unsorted. Don't chase every stray image. The 80% that's organized gives you nearly all the benefit. The step-by-step walkthrough with screenshots is in [how to organize your WordPress media library with folders](https://wpadminify.com/how-to-organize-wordpress-media-library-with-folders). ![Bulk drag and drop images into folders in WP Adminify media library](https://d1k2c27psfzbiv.cloudfront.net/wp-content/uploads/2026/01/18112008/bulk-drag-drop-media-folder-wp-adminify.webp) ## What media folders change day to day The retrieval benefit is obvious. A few less obvious ones matter more over time. Inserting images gets faster. A good folder plugin puts the folder tree inside the media modal, so adding an image to a post means clicking a folder instead of scrolling a global grid. On a large library that saves more time than the Media Library screen itself, because inserting images is something you do dozens of times a day. Duplicate uploads drop. People re-upload files because finding the existing one is harder than dragging in a fresh copy. Make retrieval easy and the duplicate rate falls on its own, which slows storage growth and shrinks your backups. Handovers stop being painful. When a client leaves or a team member moves on, "everything for this project is in this folder" is a complete answer. Without folders the honest answer is "somewhere in the library, sorted by whenever someone happened to upload it." ## Media folders in WP Adminify [WP Adminify's media folder feature](https://wpadminify.com/features/wordpress-media-folder) uses the virtual taxonomy model described above. Files never move on disk, existing URLs keep working, and folders show up both on the Media Library screen and inside the media modal in the editor. Setting it up: - Enable the media folder module in the WP Adminify settings. - Open Media > Library. The folder tree appears alongside the library. - Create top-level folders using your chosen axis: client, category, section. - Select existing files and drag them across. Multi-select works, so bulk moves are practical. - Nest subfolders where the structure earns the extra click. - Open the editor and insert an image. Filter by folder inside the modal instead of scrolling. Full configuration steps are under [creating folders for post types](https://wpadminify.com/docs/adminify/productivity/create-folder-for-post-types), and the recent performance work on large libraries is covered in [the media folder update notes](https://wpadminify.com/wp-adminify-media-folder-just-got-smarter-faster). The trade-off applies to every folder plugin, ours included: the folder structure is tied to whichever plugin created it. Your files are never at risk, since they stay put and keep working regardless, but the folder view depends on that plugin staying active. Check for a migration path before moving a very large library between tools. ## WordPress Media Library Folder FAQs ### Does WordPress have media folders? No, not natively. WordPress organizes media by upload date, file type, and search rather than folders. Folder functionality comes from plugins, which typically register a custom taxonomy for attachments. That creates virtual folders: your files stay where they are on the server and image URLs never change. ### Do media folders change my image URLs? Not with virtual folders, which is what most modern plugins use. The file stays at its original path in wp-content/uploads/ and only a database relationship changes. Plugins that move files into real directories on disk will change URLs, so check which model a plugin uses before installing it. ### Can you create subfolders in the WordPress Media Library? Yes, with a plugin that supports hierarchical folders. The underlying taxonomy allows unlimited nesting, though plugins set their own limits. Some cap at two levels, others allow five or more. Two or three levels works best in practice, since deeper structures get slow to navigate and teams stop filing correctly. ### What happens to my folders if I deactivate the plugin? Your files are completely unaffected. They stay on the server and every image on your site keeps working. The folder structure stops being visible in the admin, because the folder view comes from the plugin. The taxonomy data stays in the database, so reactivating restores the structure. ### Can I organize media folders by user role? Some folder plugins support role-based folder visibility, so contributors only see folders relevant to them. It isn't universal, so verify before relying on it. Most useful on multi-author sites and agencies where several clients or teams share one install. ### How many media folders should I create? Fewer than you think. Five to fifteen top-level folders, no more than three levels deep. If a folder holds two files it shouldn't exist. If one holds four thousand it needs splitting. The test is whether a new team member can predict where a file lives without asking. ## Conclusion Media folders fix a real gap in WordPress, and the way they fix it is smarter than it first looks. By labelling files instead of moving them, virtual folders give you structure without the URL risk that made core reject folders in the first place. What matters: - Confirm virtual, not physical. Virtual folders are safe to reorganize on a live site. Physical folders are a migration project. - One axis at the top level, three levels maximum. Structure beats depth every time. - Keep an Unsorted folder and clear it weekly. Systems that assume perfect discipline don't survive contact with a real team. - Check the migration path before you commit a big library to any single plugin. Ready to set it up? Start with [how to create folders in the WordPress Media Library](https://wpadminify.com/how-to-add-folders-to-wordpress-media-library), or see how [WP Adminify handles media folders](https://wpadminify.com/features/wordpress-media-folder) without touching your file structure. --- # How to Duplicate a Page in WordPress (4 Easy Ways) URL: https://wpadminify.com/wordpress-duplicate-page Last updated: 2026-08-12 The fastest way to duplicate a page in WordPress is a one-click clone link in your Pages list. WordPress doesn't ship with that link, but you can add it in under a minute with WP Adminify's Post Duplicator or a dedicated cloning plugin. Once it's on, hover over any page, click Clone, and a draft copy appears with every block, image, and setting intact. This guide covers four ways to duplicate a page in WordPress: the one-click method, a no-plugin trick built into Gutenberg, standalone duplicator plugins, and a `functions.php` snippet for developers. You'll also learn how to duplicate menus and Elementor pages, and what duplicating means for SEO. ## Why duplicate a page instead of starting over? Duplicating a page copies its entire structure into a new draft you can edit freely: blocks, layout, images, and in most cases its metadata. The original stays untouched and live. A few situations where I reach for the clone link: - Landing page variations. Build one campaign page, clone it, swap the headline and offer. Ten minutes instead of two hours. - Consistent service pages. Agencies duplicate a master template so every service page shares the same layout. - Safe redesigns. Clone a live page, rework the draft, then swap them when the new version is ready. Visitors never see a half-finished page. - Recurring content. Weekly roundups, event pages, and product launches reuse the same skeleton every time. Copying and pasting content by hand misses the parts you can't see: featured images, page templates, custom fields, and SEO settings. A proper duplicate carries those over. ## Method 1: One-click duplicate with WP Adminify (recommended) If you already run [WP Adminify](https://wpadminify.com/), you don't need another plugin. A page and post duplicator is built in, switched off by default, so turn it on first. ### Step 1: Enable the Post Duplicator Go to Adminify → Addons in your WordPress dashboard and find Post Duplicator. Flip the toggle to Show. ![Enabling the Post Duplicator in WP Adminify addon settings to duplicate pages and posts in WordPress](https://d1k2c27psfzbiv.cloudfront.net/wp-content/uploads/2026/07/20051339/adminify-post-duplicator-setting.webp) Now pick where the duplicate link should appear. Check Pages and Posts, and if you run a store, you can enable it for WooCommerce Products, Orders, and Coupons too. It also works with any custom post type and even taxonomies like categories and tags, which most single-purpose duplicator plugins skip. ### Step 2: Clone the page Open Pages → All Pages and hover over the page you want to copy. A new Adminify Clone link appears in the row actions next to Edit and Trash. ![Adminify Clone link in the WordPress pages list row actions for duplicating a page](https://d1k2c27psfzbiv.cloudfront.net/wp-content/uploads/2026/07/20051344/duplicate-page-adminify-clone-link.webp) Click it once. That's the whole process. ### Step 3: Edit the draft copy WordPress creates an exact copy of the page and saves it as a draft, so nothing goes live by accident. You'll see it in the list right away. ![Duplicated WordPress page saved as a draft copy in the pages list](https://d1k2c27psfzbiv.cloudfront.net/wp-content/uploads/2026/07/20051347/duplicated-page-draft-copy.webp) Rename it, change the slug, edit the content, and publish when ready. The clone keeps the page template, featured image, and page builder data, so an Elementor page duplicates cleanly too. Since Post Duplicator is one module inside a larger toolkit, the same plugin also handles [drag-and-drop post reordering](https://wpadminify.com/features/post-type-order), admin columns, and the rest of the [productivity features](https://wpadminify.com/features/productivity). Worth knowing if you're trying to [cut down on single-purpose plugins](https://wpadminify.com/replace-wordpress-plugins-with-wp-adminify). ## Method 2: Duplicate a page without any plugin (Gutenberg) The block editor has a built-in way to copy a page's content. No plugin, no code. It has limits, but for a quick content copy it works. - Open the page you want to duplicate in the block editor. - Click the Options menu (the ⋮ three-dot icon in the top-right corner). - Select Copy all blocks. - Create a new page (Pages → Add New) and paste with Ctrl+V (or Cmd+V on Mac). ![Copy all blocks option in the Gutenberg editor menu to duplicate WordPress page content without a plugin](https://d1k2c27psfzbiv.cloudfront.net/wp-content/uploads/2026/07/20051342/gutenberg-copy-all-blocks.webp) Every block lands in the new page exactly as it was. The catch: only the blocks are copied. The new page won't inherit the featured image, page template, custom fields, or SEO plugin settings, so you set those again by hand. For a one-off copy that's fine. For regular cloning it gets old fast. This trick also doesn't help with pages built in Elementor or another page builder, since their layouts don't live in blocks. ## Method 3: Use a dedicated duplicator plugin If you only want cloning and nothing else, a standalone plugin does the job. Two solid options from the WordPress.org directory: - [Yoast Duplicate Post](https://wordpress.org/plugins/duplicate-post/) is the most popular choice. It adds "Clone" and "New Draft" links, plus a Rewrite & Republish mode that lets you edit a copy of a live page and merge it back on publish. - [Duplicate Page](https://wordpress.org/plugins/duplicate-page/) is lighter, with fewer settings. It adds a single Duplicate link to posts and pages. After installing either one, check its settings page to control what gets copied (title, date, status, taxonomies, custom fields) and which user roles can duplicate. If clients work in your dashboard, restricting the clone link to Editors and above avoids accidental page copies piling up. I've cleaned up a client site with fourteen copies of the same pricing page. Nobody knew who made them. The trade-off is plugin count. Cloning is a small feature to spend a plugin slot on, which is why suites bundle it. Every active plugin is one more thing to update and one more row on your Plugins screen. ## Method 4: Duplicate a page with code (functions.php) Developers who prefer zero extra plugins can register a duplicate link with a hook. Add this to your child theme's `functions.php` or a code snippets manager: ``` // Add a "Duplicate" link to pages and posts function adminify_duplicate_post_link( $actions, $post ) { if ( current_user_can( 'edit_posts' ) ) { $url = wp_nonce_url( admin_url( 'admin.php?action=adminify_duplicate_post&post=' . $post->ID ), 'adminify_duplicate_' . $post->ID ); $actions['duplicate'] = 'Duplicate'; } return $actions; } add_filter( 'post_row_actions', 'adminify_duplicate_post_link', 10, 2 ); add_filter( 'page_row_actions', 'adminify_duplicate_post_link', 10, 2 ); // Handle the duplication function adminify_duplicate_post_action() { $post_id = absint( $_GET['post'] ?? 0 ); check_admin_referer( 'adminify_duplicate_' . $post_id ); $post = get_post( $post_id ); if ( ! $post || ! current_user_can( 'edit_posts' ) ) { wp_die( 'Post not found or permission denied.' ); } $new_id = wp_insert_post( array( 'post_title' => $post->post_title . ' (Copy)', 'post_content' => $post->post_content, 'post_excerpt' => $post->post_excerpt, 'post_type' => $post->post_type, 'post_status' => 'draft', 'post_author' => get_current_user_id(), 'post_parent' => $post->post_parent, ) ); // Copy custom fields foreach ( get_post_meta( $post_id ) as $key => $values ) { foreach ( $values as $value ) { add_post_meta( $new_id, $key, maybe_unserialize( $value ) ); } } // Copy taxonomies (categories, tags, etc.) foreach ( get_object_taxonomies( $post->post_type ) as $taxonomy ) { $terms = wp_get_object_terms( $post_id, $taxonomy, array( 'fields' => 'ids' ) ); wp_set_object_terms( $new_id, $terms, $taxonomy ); } wp_safe_redirect( admin_url( 'edit.php?post_type=' . $post->post_type ) ); exit; } add_action( 'admin_action_adminify_duplicate_post', 'adminify_duplicate_post_action' ); ``` The snippet copies content, custom fields, and taxonomy terms, then saves the copy as a draft. It uses [wp_insert_post()](https://developer.wordpress.org/reference/functions/wp_insert_post/) under the hood, with a nonce check so the link can't be triggered from outside the admin. Test on a staging site before adding it to production. A typo in `functions.php` can lock you out of the dashboard. ## Comparing the four methods | Method | Copies meta & template? | Works with page builders? | Best for | | --- | --- | --- | --- | | WP Adminify Post Duplicator | Yes | Yes (Elementor, Bricks, etc.) | Sites already using Adminify - zero extra plugins | | Gutenberg "Copy all blocks" | No - blocks only | No | Quick one-off content copies | | Duplicator plugin (Yoast Duplicate Post) | Yes, configurable | Yes | Sites that only need cloning | | functions.php snippet | Yes (custom fields + taxonomies) | Yes | Developers avoiding plugins | ## How to duplicate a WordPress menu Pages aren't the only thing worth cloning. If you're testing a new navigation structure, duplicating a menu saves you from rebuilding it link by link, and WordPress has no native way to do it. WP Adminify ships a Menu Duplicator in the same Addons screen as the Post Duplicator. Toggle it on, go to Appearance → Menus, and you'll find a duplicate option that copies the full menu with every item, order, and nesting level preserved. Edit the copy, and when it's ready, assign it to your theme's menu location. If the experiment fails, delete it. The original was never touched. ## How to duplicate a page in Elementor Elementor users have two extra routes: - Save as template. In the Elementor editor, click the arrow next to Update and choose Save as Template. Insert that template into any new page from the library. Good for reusing sections across many pages. - Clone the whole page. A row-action duplicator (Method 1 or 3 above) copies the page including all Elementor data in one click. Faster when you want the entire page, not a reusable template. Both keep your styling and widgets intact. The template route builds a reusable library; the clone route is quicker for one-off copies. ## Does duplicating a page hurt SEO? No, as long as the copy stays a draft or gets its own content before publishing. Search engines never see draft pages, so cloning by itself has zero SEO effect. The risk appears only if you publish two nearly identical pages. Google then has to guess which one to rank, and both can underperform. If you genuinely need two similar live pages (say, two city landing pages), rewrite enough of each that they stand on their own, including the title tags. If one page must temporarily mirror another, point a canonical tag at the original until the new version diverges. One housekeeping tip: duplicated pages inherit slugs like `/about-2/`. Always set a clean, intentional slug before you publish the copy. ## Duplicate Page in WordPress FAQs ### How do I duplicate a page in WordPress without a plugin? Open the page in the block editor, click the three-dot Options menu in the top-right corner, and choose Copy all blocks. Paste into a new page. This copies all content blocks but not the featured image, template, or SEO settings — those need to be set manually. ### Why is there no duplicate option in my WordPress dashboard? WordPress has no built-in duplicate button. The Clone or Duplicate link only appears after you enable a duplicator — either WP Adminify's Post Duplicator addon or a standalone plugin like Yoast Duplicate Post. Once enabled, the link shows up when you hover over a page in the Pages list. ### Does duplicating a page also copy its SEO settings? Depends on the method. Row-action duplicators (WP Adminify, Yoast Duplicate Post, the code snippet above) copy custom fields, which is where SEO plugins like Yoast and Rank Math store their data. Gutenberg's "Copy all blocks" does not — it copies content only. ### Can I duplicate a WooCommerce product the same way? Yes. WooCommerce includes a native Duplicate link on the Products screen, and WP Adminify's Post Duplicator can extend cloning to orders, coupons, and any custom post type from one settings panel. ### Can I duplicate an entire WordPress site? Page duplicators won't do that - they clone individual posts and pages. To copy a full site, use a migration plugin such as Duplicator or WP Migrate, or your host's staging feature, which clones the database and files together. ## Which method should you use? If WP Adminify is already on the site, flip on the [Post Duplicator](https://wpadminify.com/features/duplicate-post) and you're done. If not, Yoast Duplicate Post is a fine standalone pick, Gutenberg's "Copy all blocks" covers the occasional one-off, and the `functions.php` snippet suits developers who keep plugin counts low. Whichever you choose, remember the two rules that matter: duplicates save as drafts, so nothing breaks until you publish, and every copy needs its own slug and content before it goes live. I flip the duplicator on for every client site I set up, next to [dashboard cleanup](https://wpadminify.com/simplify-wordpress-dashboard) and menu editing. It's one toggle among WP Adminify's [60+ admin tools](https://wpadminify.com/features), and it's the one clients discover on their own and quietly start using. The free version on WordPress.org includes it. --- # Top 10 WordPress Admin Customization Features On WP Adminify URL: https://wpadminify.com/wordpress-admin-customization Last updated: 2026-08-12 WordPress is still defined as the epitome of modern technology thanks to its simple, intuitive, and versatile working environment. One of the primary reasons for its popularity and scalability is the effortless plugin integration. With the integration of some powerful and advanced plugins, the functionality, performance, and effectiveness of WordPress have remarkably grown past decade. However, if you’re fond of WordPress and want to add more functionality to your WordPress Admin Customization, you can try out the [WP Adminify plugin](https://wpadminify.com/pricing). There is a myriad of reasons why you need [WP Adminify for your WordPress dashboard](https://wpadminify.com/features). In this tutorial, we’re going to break down 10 major ways to WordPress Admin Customization. Please sit back and keep scrolling. ## What Is WordPress Admin Customization? WordPress admin customization means reshaping the wp-admin backend - the admin menu, top toolbar, dashboard widgets, post-list columns, login page, color scheme, and CSS - so it matches how you and your clients actually work. You can do it with `functions.php` hooks, or faster and without code using a plugin like [WP Adminify](https://wpadminify.com/pricing) (free and Pro). The ten features below are the ones agencies reach for first. ## Why WP Adminify? 10 Reasons Dominating in the web design sector may seem difficult if you lack proper strategies and tools. You may develop strategies over time, but how do you develop the right tools if you’re not a technical person? Of course, you need to reach out to others for help. Luckily WP Adminify offers White Label WordPress Dashboard features that We've developed WP Adminify plugin by taking all of your expectations to help you thrive. ## Increased productivity You know how strenuous it is to get engaged in work with optimal productivity. So do you need to quit working more frequently due to the reduction in productivity and performance? Never! You’re a professional; therefore, you need to keep working long hours with incredible momentum. Luckily WP Adminify offers [White Label WordPress Dashboard](https://wpadminify.com/features/white-label) features to get better control over it. With WP Adminify, you will have the opportunity to [customize the Dashboard design](https://wpadminify.com/features/dashboard-customization) by integrating the holistic materials you like most across your website. You can perform multiple tasks without having to come across common setbacks, pitfalls, and hassles. ![Customize WordPress Dashboard Admin Panel](https://d1k2c27psfzbiv.cloudfront.net/wp-content/uploads/2024/08/12110100/Customize-WordPress-Dashboard-Admin-Panel.webp) Carrying out some of the pressing tasks, such as [adding custom columns to your posts](https://wpadminify.com/features/productivity), [creating custom dashboards widgets](https://wpadminify.com/docs/adminify/productivity/create-custom-dashboard-widget), [hiding unnecessary menu items](https://wpadminify.com/features/admin-menu-editor), and organizing the components, will seem like a piece of cake to you. So it can be said that WP Adminify can be your best companion to prevail in the web sector by achieving optimal productivity. ## Better media management WP Adminify offers most intuitive media library management features using the folder. Create [unlimited folders](https://wpadminify.com/features/wordpress-media-folder) and organize your image, audio, video, documents and so on. Bulk select media files and add to media folder in WordPress image library Having a useful, effective, and accessible media section can be almost elusive unless you reach out to a plugin like WP Adminify. Why WP Adminify? That’s because the plugin incorporates everything needed for file and folder management in the WordPress media library. It comes with excellent features that allow you to catalog all media files uploaded to your site in one place. There is no limitation on creating media folders on your media and post type It gives you the freedom to handle, manage, and revamp multiple media objects at a time without having to fall short of superior control over the media library. From creating folders to adding custom fields to the media items, you can rigorously accomplish all the tasks in minutes. It’s no wonder that you will gain expanded media management capabilities as the plugin can unify the block media files, tackle single media interfaces, and rename and optimize your existing media files. Most importantly, the plugin will enable you to periodically clean out your media library to keep your dashboard light and fast. Not only media but also it's compatible for WordPress Post type too. ![WordPress Media folder plugin](https://d1k2c27psfzbiv.cloudfront.net/wp-content/uploads/2022/02/12115208/WordPress-Media-folder-plugin.webp) You can promptly drag and drop your images to the virtual folder, conduct real-time searches, and add categories to sort media items. What else do you need to have better media management? To be honest, you will find a full package of features and convenience with the master-class WP Adminify plugin. ## Personalized login page A login page is the doorstep of your website. It’s imperative to functionalize, modernize, and personalize the page to have an outstanding outcome. But it seems impossible to [customize the login page](https://wpadminify.com/white-label-wordpress-login-page-for-your-clients) to a standard level in WordPress due to several restrictions. To overcome all those limitations, WP Adminify has evolved with some excellent modules and features. ![WP Adminify Login Customizer Templates](https://d1k2c27psfzbiv.cloudfront.net/wp-content/uploads/2023/07/12112013/WP-Adminify-Login-Customizer-Templates.webp) With the plugin, you can elevate the functionality and improve the interface of the login page, putting together your creativity, conception, necessity, and aestheticism. The plugin will help you maximize the interactivity, flexibility, responsiveness, and effectiveness of the login page once you have it installed on your WordPress dashboard. Needless to say, you can strengthen the entire security system of your website by [modifying the URL login with the plugin](https://wpadminify.com/change-wordpress-login-page-url). By applying the plugin in the correct manner, you can uplift the brand identity of your website. ![Change WordPress login page URL](https://d1k2c27psfzbiv.cloudfront.net/wp-content/uploads/2023/06/12111842/Change-WordPress-login-page-URL.webp) Moreover, it will let you change the background image and attach custom CSS to the login page. As you like it, the plugin will allow you to customize the login form to improve the user experience. In a word, you will have a more professional feel with the login page once you personalize it. So WP Adminify should be your first priority to have a more interactive, secure, attractive, and dynamic login page. ## Both Free and premium versions WP Adminify is developed with an array of special features and modules to speed up the web design process. As all features and modules are not accessible in the free version, users have to accept a soft limit on them. But if they switch to the premium version, they can leverage the substantive power of the plugin. ![Download WP Adminify free plugin](https://d1k2c27psfzbiv.cloudfront.net/wp-content/uploads/2023/08/25052130/Download-WP-Adminify-free-plugin.webp) That means if you need to handle your WordPress sites more intuitively and professionally, there is no other option but to shift to the updated version of the plugin for manipulating the advanced functionalities. But if you’re not willing to part with your hard-earned money, WP Adminify has given you the right to access and utilize the free version without spending a penny. It’s undeniable that you can perform all the major and important tasks to bring your WordPress dashboard to life with the help of the free version. But in this case, you may miss out on some of the sophisticated, innovative, and cutting-edge features and modules that might bring an exalted outcome to your websites. ## Menu editor WP Adminify accumulates numerous standout features and modules that ask for attention; the menu editor is undoubtedly one of them. In your WordPress dashboard, you can seamlessly rearrange, hide, and refurbish the menu items thanks to the development of the [advanced menu editor option.](https://wpadminify.com/features/admin-menu-editor) Comments is a common one to cut. On a site that does not run comments, you can [hide the Comments menu from your WordPress admin panel](https://wpadminify.com/hide-comments-menu-from-wordpress-admin-panel) and the sidebar gets shorter right away. Add custom admin menu in WordPress Dashboard The most significant convenience of the plugin is that you can easily export the dashboard menu customization data and import it to other websites later on. Aren’t all these signs of a great and handy WordPress plugin? ## Dark mode If you ask which feature makes WP Adminify distinctive, unparalleled, and formidable, the answer will be nothing but the [dark mode feature](https://wpadminify.com/features/dashboard-customization). Indeed, the plugin has transformed the overall dashboard interaction experience with its special dark mode option, which allows you to toggle between light and dark screens as per your needs. Without having to install any browser extensions, you can experience an expertly designed dark theme across your WordPress Dashboard. Get [details Dark Mode feature in this post](https://wpadminify.com/how-to-enable-wordpress-dark-mode). Will you get any benefit by converting to dark mode? Of course, it will make you blessed, ensuring a myriad of positives; reducing eye strain can be the salient one. In addition, the module will increase the visibility of the site by offering a more comfortable viewing experience. It will grant you eye-pleasing reading and a more aesthetic interface over time. So how can you deprive yourself of such a unique opportunity? Of course, its dark mode can be one of the key reasons to choose it over other typical plugins available online. ## Admin columns A website comprises countless pages, posts, and other content. The exhaustive range is handled in the dashboard. To manage massive amounts of content, columns require frequent insertion and removal. To help you out, WP Adminify offers an easy mechanism for adding or removing columns whenever you need them with a drag-and-drop interface. And, yes it [supports ACF and Pods Framework too](https://wpadminify.com/how-to-add-acf-field-to-admin-column). ![Add New custom admin columns in post](https://d1k2c27psfzbiv.cloudfront.net/wp-content/uploads/2024/10/18103459/Add-New-custom-admin-columns-in-post.webp) It also allows you to gain a deep insight into the more detailed information at a glance. You can manage and organize columns for users, comments, and media lists apart from the content section with the WP Adminify [Admin column customizer](https://wpadminify.com/admin-columns-editor). Besides, it will let you search, export, and edit your custom content. Without writing a single line of code, it will enable you to create beautiful column layouts to meet your professional needs. ## Personalized dashboard WP Adminify was virtually developed to personalize the WordPress dashboard by overcoming all limitations and obstacles. In this case, you’re at liberty to apply your own creativity, preference, conception, aesthetics, and design philosophy across the dashboard. You can create and [remove custom widgets](https://wpadminify.com/docs/adminify/productivity/remove-unwanted-dashboard-widgets) as per your desire. In case you feel no interest in the existing logo and color scheme, you can change them without affecting the functionality of the website. ![WP Adminify First impression](https://d1k2c27psfzbiv.cloudfront.net/wp-content/uploads/2022/11/12110809/WP-Adminify-First-impression.webp) You can also customize the other branding to make a more revealing and captivating dashboard. Besides, the plugin will help you add videos, slideshows, images, and other graphical stuff to your dashboard. Most importantly, customizing the admin menu style will seem simpler as long as you have the WP Adminify plugin at your fingertips. Do you know? You can [import/export WP Adminify settings by taking backups](https://wpadminify.com/docs/adminify/export-import/backup)? And use them for another site? So you won't have to do all the settings again and again. ## Final words A growing number of plugins are being developed every day, and we’re also becoming familiar with some of the feature-rich, quality plugins over time. But it’s undeniable that only a few plugins have the ability to cement their place in the web design section by providing the utmost convenience and advanced functionalities. Beyond dispute, WP Adminify with the blue and white color-combined dashboard can be placed in that effective plugin group due to its extraordinary features, modules, and navigation. Some of its excellent features, including multisite support, WPML support, white labeling, [header and footer scripts](https://wpadminify.com/add-code-to-wordpress-header), in-depth server information, and so on, make it one of the best WordPress plugins. As a WordPress user, you know what you need to scale up your journey, and in the meantime, we’ve highlighted the key reasons why you need WP Adminify for your WordPress dashboard. We hope you no longer have any hesitation about getting your hands dirty with the premium plugin to enhance your experience in dashboard customization. ## WordPress Admin Customization FAQs ### Can you customize the WordPress admin without a plugin? Yes. WordPress exposes hooks like admin_menu, admin_head, and admin_footer, plus functions such as remove_menu_page, so you can rename menus, hide items, and inject custom CSS straight from functions.php. A plugin like WP Adminify does the same work visually, with no code and no risk of your changes breaking on a theme update. ### What can you customize in the WordPress admin dashboard? Almost everything in wp-admin is customizable: the sidebar admin menu, the top toolbar, dashboard home widgets, post-list admin columns, the login page, the eight built-in color schemes, dark mode, and backend CSS. WP Adminify also lets you rebrand the entire dashboard for white-label client sites. ### What is the best WordPress admin customization plugin? WP Adminify covers the widest range in one plugin: menu editor, dashboard widgets, the Loginfy login customizer, admin columns, media folders, dark mode, activity logs, and white label. It has a free version on WordPress.org and a Pro version, so you can start free and upgrade only when you need more. ### Does admin customization slow down your WordPress site? No. Admin customizations load only inside wp-admin for logged-in users, so they never touch your public pages. Your front-end page speed, Core Web Vitals, and visitor experience stay exactly the same. Reshaping the backend is safe for performance. ### Can you customize the WordPress admin for each user role? Yes. WP Adminify lets you hide or show menu items, widgets, and toolbar links per user role, and apply different themes and branding to each role. Clients and editors then see a clean, tailored dashboard while administrators keep full access to everything. ## Where to go next These ten features are the ones agencies reach for first, but they're only part of what you can change in wp-admin. Our [WordPress dashboard customization guide](https://wpadminify.com/wordpress-dashboard-customization) walks through every method - plugin and no-plugin - for reshaping the dashboard, from widgets and menus to admin columns and role-based views. If your goal is handing clients a site with no trace of WordPress branding, start with the [white label WordPress guide](https://wpadminify.com/white-label-wordpress) instead. --- # Admin Menu Editor for WordPress - Easily Customize Dashboard URL: https://wpadminify.com/how-to-use-the-wordpress-admin-menu-editor Last updated: 2026-08-12 If you’re using WordPress for some time, you already know how messy the admin dashboard is. It can slow you down. Every plugin or theme often adds its own menu items, widgets, and notices, making it hard to find what you need. With over 60,000 plugins available, it’s easy for a site’s menu to become overwhelmingly slow and chaotic if you’re using different plugins for different situations. But, an organized admin dashboard saves time and reduces errors. Which is a must have and want for everyone. Today, I’m going to teach you how to use the WordPress admin menu editor to organize dashboard items. By the end of this article, you’ll know all of the things you can do with your WordPress admin dashboard you never knew before. ## How Do You Edit the Admin Menu in WordPress? To edit the WordPress admin menu, install a menu editor such as WP Adminify, then open WP Adminify → Menu Editor. Drag items to reorder them, click any item to rename it or change its icon, toggle visibility to hide clutter, and set role-based rules so each user role sees only the menu items it needs, no code required. ## WordPress Default Admin Menu vs. WP Adminify Menu Editor By default, WordPress’s admin sidebar is static. The menu items appear in a fixed order and can only be changed by editing code or installing other plugins. For example, hiding the default "Posts" menu requires custom codes or you need a plugin. Non-technical users have no easy way to reorder or rename menu entries. ![Post option in WordPress Admin menu](https://d1k2c27psfzbiv.cloudfront.net/wp-content/uploads/2022/12/19103039/Post-option-in-WordPress-Admin-menu.webp) That’s where WP Adminify comes in. It’s a [WordPress admin menu editor](https://wpadminify.com/features/admin-menu-editor) that works like a drag‑and‑drop interface. Also, WordPress provides only basic role based menu visibility, which is often challenging for companies and agencies who need specific menu items for specific roles. WP Adminify solves this issue and gives you the ultimate control of your WordPress menu bar. ## Features of WP Adminify WordPress Admin Menu Editor The WordPress Admin Menu Editor is packed with useful features that simplify the process of customizing your dashboard. Here’s a look at some of its key features: ![WP Adminify Admin Menu Editor with drag and drop menu customization](https://d1k2c27psfzbiv.cloudfront.net/wp-content/uploads/2022/12/19103312/WordPress-Admin-menu-editor-by-WP-Adminify.webp) https://www.youtube.com/watch?v=zbEYlAg91QM Watch: customize and organize the WordPress admin menu with WP Adminify As spoken earlier, WP Adminify WordPress menu editor is full of advanced features, and it's the best admin [dashboard customizer](https://wpadminify.com/wordpress-dashboard-customization). But as of today I’m talking about editing the admin menu in WordPress, so let’s stick to that and only tell you about the features specifically. ### Drag and Drop Menu Reorder When you’re customizing, everyone wants to reorder their menu. It’s like sorting, where everyone has a different point of view. So, [WP Adminify lets you reorder your menu item](https://wpadminify.com/remove-admin-menu-items) in the easiest way possible. Simply drag and drop your menu items to sort them just the way you want to see your menu. ![Reorder admin menu items position](https://d1k2c27psfzbiv.cloudfront.net/wp-content/uploads/2022/12/19103837/Reorder-admin-menu-items-position.webp) ### Custom Menu Items Well, when working, ease of use is the most important thing for developers and site owners. You can create custom menu items in the admin bar to go to the desired section in a click. WP Adminify lets you add unlimited menu items, so you won’t have to worry about the limit. ![Create cutom admin menu items](https://d1k2c27psfzbiv.cloudfront.net/wp-content/uploads/2022/12/19104332/Create-csutom-admin-menu-items.webp) Have you noticed the top bar of my screenshot? Let me clarify that changing the Admin bar color is not possible with our Admin Menu editor feature. You should download our [Admin Bar Editor plugin](https://jeweltheme.com/admin-bar-editor) to customize the admin bar. ### Custom Sub Menu Items This works the same way the menu items does. You can add or remove sub menu items as much as you want. ![Create submenu items under custom menu](https://d1k2c27psfzbiv.cloudfront.net/wp-content/uploads/2022/12/19104654/Create-submenu-items-under-custom-menu.webp) ### Rename Menu Items Changing menu names wasn’t possible earlier. But thanks to WP Adminify, you can now rename your menu items (and sub menu items) just the way you want to see it. ![Rename existing admin menu items](https://d1k2c27psfzbiv.cloudfront.net/wp-content/uploads/2022/12/19105507/Rename-existing-admin-menu-items.webp) ### Hide the Menu based on user's role The advanced role based menu visibility lets you pick each menu or sub menu items to show/hide from whatever roles you want. This is best for agencies, companies and site owners alike. Keep your backend extra secure with limited [visibility per user role](https://wpadminify.com/hide-admin-bar-based-on-user-roles). You can hide admin menu items for specific user role or user name with WP Adminify menu editor [Note: I enabled the [WP Adminify UI](https://wpadminify.com/features/dashboard-customization) on another local server to create the video] ### Custom Menu Item Link Now, you can easily change the default links of menu items (and sub menu items). By default this was not possible, but with WP Adminify it is. Changing the links of the backend is not just possible but you can do it with ease. ![Custom Menu Item Link](https://d1k2c27psfzbiv.cloudfront.net/wp-content/uploads/2022/12/19110332/Custom-Menu-Item-Link.webp) ### Menu Icon Library Want to change, remove or add icons to your menu items? WP Adminify provides an icon library where you can choose which icons you want for your menu item. ![Menu Icon Library](https://d1k2c27psfzbiv.cloudfront.net/wp-content/uploads/2022/12/19110452/Menu-Icon-Library.webp) ### Admin Menu Position Changer WordPress by default keeps the admin menu on the left and you can’t change its position. But WP Adminify lets you change its position from vertical to horizontal without removing any of the menu items. You can also change the menu modes and sub menu style for each position. ![Horizontal Menu in WordPress Dashboard](https://d1k2c27psfzbiv.cloudfront.net/wp-content/uploads/2024/09/24094417/Horizontal-Menu-in-WordPress-Dashboard.webp) ### Font and Color Customization Customization, when we hear this word the first thing we understand is color, font, size etc. WP Adminify gives you the ultimate freedom to [customize admin fonts](https://wpadminify.com/change-wordpress-admin-font) to your admin menu. The advanced customization even lets you decide spacing, padding and even line heights. ![Parent Menu Colors settings](https://d1k2c27psfzbiv.cloudfront.net/wp-content/uploads/2024/09/25050743/Parent-Menu-Colors-settings.webp) You can also checkout the admin bard editor if you want to [customize the WordPress admin bar](https://wpadminify.com/wordpress-toolbar-editor) as well. Why don’t I show you how you can use WordPress admin menu editor to organize dashboard items with WP Adminify. ## How to Use the WordPress Admin Menu Editor to Organize Dashboard Items? Okay, so let’s start organizing the WordPress admin menu editor with WP Adminify. First things first, you need WP Adminify. Obviously you’ll need to [install and activate](https://wpadminify.com/docs/adminify/getting-started/free-installation) the plugin first. WP Adminify makes organizing your admin menu as simple as drag, drop, and save. You need to navigate to `WP Adminify > Admin Menu` to do that. You’ll see a visual panel that displays all your current menu items. From here, you can reorder items by dragging them. You can group related menu items together for a better navigational experience. ![Adminify to Admin menu editor](https://d1k2c27psfzbiv.cloudfront.net/wp-content/uploads/2024/12/14095632/Adminify-to-Admin-menu-editor.png) Want to rename a menu item? Just click on it and enter a new label under the "Rename as" field. This is especially useful for rebranding or simplifying technical menu items. You can also change the destination URL of any menu item. Also, the ability to choose whether a link opens in a new tab gives you even more flexibility. One of the most powerful features of WP Adminify's WordPress admin menu editor is its role-based visibility control. You can hide specific menu items based on the user role. This means you can control which menu items are visible to whom. Want to separate groups of menu items? Add a separator between menu items to create a section. You can also add custom icons from the icon library. The icon library includes dashicons, line icons. Also, you can upload your own SVG and use it as an icon. ![Add custom separator in Admin menu](https://d1k2c27psfzbiv.cloudfront.net/wp-content/uploads/2024/10/07061247/Add-custom-separator-in-Admin-menu.webp) WP Adminify extends its customization to submenu items. Although you cannot add icons to the submenu, you can still reorder, rename, and hide them just like the primary items. As a bonus, there’s no limit to adding submenu items. If you're building a custom admin experience from scratch, WP Adminify helps you with that as well. You can add new menu items, define their URLs, add icons, enable role-based visibility and even include nested submenu items. In short, the WordPress admin menu editor by WP Adminify turns your dashboard into a powerful control panel. It improves usability, reduces confusion, and helps everyone to stay focused on the task on hand. ## Why You Should Use WP Adminify WordPress Admin Menu Editor WP Adminify’s admin menu editor is designed to give the most efficient admin dashboard experience. Here are a few more reasons why you might consider using WP Adminify: Customization Without Code: You don’t need any coding experience to use WP Adminify. It offers an user-friendly interface. And you can customize anything with just a few clicks. Enhanced Security: Easily hide sensitive menu items from non-admin users. This role based visibility adds an additional layer of security. You can easily restrict access to specific menu items for specific roles. So, the right people have access to the features they need. You can also check out [Novian’s case study on simplifying the admin dashboard](https://wpadminify.com/simplify-wordpress-dashboard). ### Common Use Cases for Admin Menu Editor Client Projects: Suppose you are an agency that manages client websites. With WP Adminify, you can [create a simplified admin interface for your clients](https://wpadminify.com/how-to-create-wordpress-custom-user-dashboard-without-coding). Get the complete control and show only the settings they require while hiding options they don’t need. Team Management: If you are a company running multiple teams, admin panel access control is a must have. You can customize the admin panel to fit the different roles in your team. For example, you can show/hide specific menu items only to editors and not writers. Optimizing Space: Large websites require multiple plugins. The admin menu will definitely be hard to explore. WP Adminify allows you to group similar menu items together. This will make the navigation cleaner and easier to manage. You can also check out this blog post to learn more: [10 WordPress Admin Customization Ways WP Adminify Can Improve](https://wpadminify.com/wordpress-admin-customization). ## Bonus Code Here I am sharing a code for you, which you can use to hide your unwanted Admin Menu items from the Dashboard. With the help of WP Adminify, you can easily do this. But if you don't then use the following code and modify it to hide all unwanted admin menu items. The following code will hide Posts, Media, and Plugins. But you can duplicate the `remove-menu_page` and add as many as admin menu items you want. ``` add_action('admin_menu', 'custom_hide_admin_menus'); function custom_hide_admin_menus() { // Example: Hide Posts, Media, and Plugins remove_menu_page('edit.php'); // Posts remove_menu_page('upload.php'); // Media remove_menu_page('plugins.php'); // Plugins } ``` Still facing a problem? Just visit the [contact page,](https://wpadminify.com/contact) and I am one step away from assisting you. ## WordPress Admin Menu Editor FAQs ### How do I hide admin menu items in WordPress? Open WP Adminify → Menu Editor and switch off the visibility toggle next to any item you want gone, Posts, Comments, plugin entries, or whole sections. The item disappears from the sidebar instantly. Prefer code? Hook into admin_menu and call remove_menu_page('edit-comments.php') to strip a specific top-level menu by its slug. That exact example has its own tutorial if you want the detail: how to [hide the Comments menu in WordPress](https://wpadminify.com/hide-comments-menu-from-wordpress-admin-panel). ### Can I rearrange the WordPress admin menu with drag and drop? Yes. WP Adminify's Menu Editor is fully drag-and-drop, so you click and drag any top-level or submenu item into a new position and the order saves automatically. This lets you push the tools you use most to the top and bury rarely-used items, without editing the $menu global or touching functions.php. ### How do I hide admin menu items for specific user roles? In WP Adminify → Menu Editor, select a menu item and assign which roles can see it, or set the required capability. Editors, authors, and clients then load a dashboard showing only their allowed items, while administrators keep the full menu, ideal for agencies handing sites to non-technical users. ### Is there a free WordPress admin menu editor? Yes. WP Adminify includes a [free WordPress admin menu editor](https://wpadminify.com/features/admin-menu-editor) that lets you reorder, rename, hide, and re-icon menu items with drag and drop. Role-based visibility, custom menu links, and menu styles are available, with per-user rules and advanced controls in the Pro version. ### How do I add a custom item to the WordPress admin menu? Open WP Adminify → Menu Editor, click Add New Item, then enter a title, an icon, and a URL that points to any admin screen or external page. The new item appears in the sidebar for the roles you choose, handy for linking clients to support, documentation, or a custom dashboard. ### Does hiding an admin menu item block access to that page? Not on its own. Hiding a menu item removes it from the sidebar, but a user with the right capability can still reach the screen through a direct URL. To truly restrict access, set the item's required capability or role in the Menu Editor, or manage permissions with a user-role editor, so the page is blocked, not just hidden. ## Conclusion WP Adminify stands out as an all-in-one solution for customizing the WordPress admin dashboard not just the Admin Menu Editor. It improves the functionality and user experience as a whole. But the best part is that the features are so much optimized. And because of that it also improves the visual appeal. Whether you're a developer, agency, or site owner, WP Adminify offers the solution needed to create a customized and efficient WordPress admin dashboard. ### The Menu Is Just the Start Editing the admin menu pairs well with the rest of the dashboard: custom widgets, branding, dark mode and login page. The full walkthrough is in the guide to [customizing the WordPress dashboard](https://wpadminify.com/wordpress-dashboard-customization); agencies should also look at [white labeling wp-admin for clients](https://wpadminify.com/features/white-label). --- # How to Update/Replace Image in WordPress Without Changing URL (2026) URL: https://wpadminify.com/how-to-update-replace-image-in-wordpress-without-changing-url Last updated: 2026-08-12 Images, videos, GIFs are a core part for any website. It enhances the curb appeal and also works as a major SEO factor. Whoever manages a website surely adds multiple media in the site. But sometimes, you need to update them. Maybe the content has updated, a new update dropped or sometimes people also need to change/update the logo. Obviously you can change the images (Or videos/gifs) manually throughout your website. But it’s hard work and costs a lot of time. Sometimes you might miss replacing images because it's tough to acknowledge where and how many times you’ve used the same media. We’ve faced the same issue, and came up with an amazing idea. How to replace image in WordPress without changing URL. And thus the solution we are INTRODUCING WP Adminify’s Media Replacement. You can replace any media without changing the URL/ID/Metadata. Also, the first time ever, Media Rollback. So, today you’re going to expect the following in this article: - How to replace image in WordPress without changing URL - How to rollback to previous image after replacing it - How to manually replace media files ## How Do You Replace an Image in WordPress Without Changing the URL? Replace the file in place instead of deleting and re-uploading. In the Media Library, open the image, choose Replace, and upload the new file keeping the same filename. Every post, page, and link that used the old image then shows the new one, and the URL never changes. WP Adminify's Media Replace does this in a single step, with an optional thumbnail regeneration. ## Why Should You Keep the Same Image URL? Replacing an image without changing its URL has a few major benefits. Which are as follows: - No broken links – Once you replace the image it will be updated automatically in every place (Post, page, product listing, etc,..) - Saves time – No need to manually update each image on the website. No more manual labor means more time to focus on the good stuff. - Better user experience – Visitors don’t see missing images while you’re making updates. - SEO safety – Google already indexed the image URL, so keeping it helps preserve your rankings. And that is why you should keep the same image URL. ## Method 1: How to Update/Replace Image in WordPress Without Changing URL (WP Adminify) The image appears in multiple posts or pages? Want to keep the original URL for SEO and link safety? WP Adminify’s Media Replacement feature is the easiest option for you. It works right inside your WordPress Media Library. Quickly update/replace images in WordPress without changing URL, ID, or metadata. ### Step 1: Open the Media Library Well, the Media Library is the home base of all the media for your WordPress website. So, you need to go there if you want to replace the image or any other media. Go to Media → Library in your WordPress dashboard. ![Open the Media Library](https://d1k2c27psfzbiv.cloudfront.net/wp-content/uploads/2025/08/13105940/Open-the-Media-Library.webp) You’ll see all the uploaded media files from here. You can edit, or delete them. But today I’ll focus on replacing them. ### Step 2: Select the Image to Replace Now, you need to find and select the image you want to replace. Once you pick the image, click it and it will open a new window for the settings. Scroll down a little bit and you’ll see the "Replace Media" option. This is a new option added by WP Adminify. ![Select the Image to Replace](https://d1k2c27psfzbiv.cloudfront.net/wp-content/uploads/2025/08/13105947/Select-the-Image-to-Replace.webp) Now, click "Select New Media" ### Step 3: Replace with New Image Once clicked, it will open the WordPress default media window. You can either select your previously uploaded image, or add a new one from the "Upload Files" tab. You can drag and drop your new image file into the upload area or click Select File to browse from your computer. ![Replace with New Image](https://d1k2c27psfzbiv.cloudfront.net/wp-content/uploads/2025/08/13105952/Replace-with-New-Image.webp) Note: You can change the image for any type of media (Image, GIF, video). But for best results, keep the new image the same format. This ensures it is replaced cleanly without any compatibility issues. ### Step 4: Save and Done Once done selecting your new image or newly uploaded one, click the "Replace Image" button on the bottom right. And, voila! Your image is replaced successfully. You can check back and the image you wanted to replace is perfectly replaced with a new one. For example, watch the following short video for better clarification - enable media and image replace WordPress Once I’ve replaced it, all the images were replaced with the new one. ## How to Rollback to Previous Image after Replacing WP Adminify brought this totally new feature you might haven’t seen anywhere till now. If you want to swap your image back to the original image you can do it in just a single click. Just select the image, and scroll down a bit, you’ll see the option "Rollback Media". Click it and the replaced image will be reverted to the original one. Media and image rollback after replace ## How to Replace Image in WordPress Manually Well, you can manually change every image or media file if you want. But that's hard work. But still I'd love to show it to you. In short here’s how to replace image in WordPress manually: - Open the post or page in the WordPress editor. - Click the image you want to replace. - In the small toolbar that appears, click Replace → Open Media Library. - Select your new image from the library or Upload a new one. - Click Select and update the page. You can use this method for one-off changes. But be aware that it doesn’t replace the image everywhere. If you have images that appear multiple times in your website, you have to replace each of them one by one. Let’s see the process in more detail. ### Step 1: Open the Page or Post Containing the Image First you need to go to the page/post you want to replace the image for. To go there, from the left-hand menu: - Click Pages if the image is on a page - Click Posts if the image is in a blog Find the page or post you want to edit and click its title to open it in the block editor. ### Step 2: Locate the Image Now, you need to scroll down until you find the image you want to replace. Once you find it, click the image once. You’ll notice a small toolbar appear just above it. In that toolbar, click the Replace button. ### Step 3: Select Your Replacement Image When you click Replace, WordPress will give you two options: - Open Media Library – Lets you pick an image that’s already uploaded - Upload – Lets you add a completely new image If you already have the new image in your Media Library, choose Open Media Library. If not, choose Upload and select the file from your device. ### Step 4: Select and Add the New Image Now, if you’ve selected the Media Library, you can browse or search for the replacement image. Simply select a new image and click the Select button in the bottom-right corner. But if you uploaded a file, WordPress will insert it automatically once it finishes uploading. ### Step 5: Save Your Changes Once you’re done replacing the image, click Update in the top-right corner to save your changes. And that’s it. The image is replaced in that one location. The old image will remain in your Media Library and still be used wherever else it appears on your site. ## Replace Image Without Changing URL FAQs ### How do I replace an image in WordPress without changing the URL? Open the image in the Media Library, click Replace, and upload the new file keeping the same filename. WordPress overwrites the file in place, so the URL and every link pointing to it stay the same. A media-replace tool like WP Adminify automates this in one click. ### Can I replace an image in WordPress without a plugin? Manually you must delete the old image and upload one with the exact same filename, then re-insert it everywhere it appeared, and links can still break if the name differs. A media-replace tool skips the deletion and preserves the original URL, which is why most people use one. ### How do I replace an image in WordPress using Elementor? Swapping the image inside an Elementor widget only changes that one spot and gives the new file a new URL. To replace an image everywhere it is used and keep the same URL, replace the file in the Media Library instead; Elementor then shows the updated image automatically. ### How do I replace a featured image in WordPress? Editing the featured image in the post editor just points the post at a different file. To keep the same URL, replace the underlying file in the Media Library with a same-named upload, and the featured image plus every other use of it updates at once. ### Does replacing an image keep the same file name and link? Yes. When you replace the file in place with the same filename, the URL, file name, and all existing links stay identical. Uploading the new image as a separate file instead creates a new URL and can leave old links pointing at the previous version. ## Conclusion No more hassle to replace images in WordPress. With this new Image Replacement feature of WP Adminify, you can replace any image, GIF or video without changing URL, ID, or metadata. And with the added bonus of Media Rollback, you can quickly revert to the original image whenever you want.. Sure, you can still replace media manually. But only if you’re only dealing with a single image. But for bigger sites where you’ve used the same image multiple times, WP Adminify makes the process faster, safer, and way less stressful. Happy Journey Fellas! --- # How to Create a Custom Menu for WordPress: Navigate Better URL: https://wpadminify.com/how-to-create-a-custom-menu-in-wordpress Last updated: 2026-08-12 When navigating a website, navigation menus are essential tools for providing guidance. They give users a broad overview of the website and facilitate easy access to the pages or information they wish to view. Navigation menu or admin menu? This guide covers the front-end navigation menu your visitors use, the one you build under Appearance then Menus, or in the Site Editor on block themes. If you actually meant the wp-admin sidebar, see how to [add a custom admin menu](https://wpadminify.com/how-to-add-menu-in-wordpress-admin-dashboard), or how to [use the WordPress admin menu editor](https://wpadminify.com/how-to-use-the-wordpress-admin-menu-editor) to reorder and hide items. They are arguably the most important component of a website. A menu that is well-structured can greatly improve the user experience by making navigation simple. One of the most widely used content management systems, WordPress, provides a variety of choices for making unique menus without the need for coding expertise. We'll look at three easy ways to make custom menus in WordPress in this post: using the built-in features of your theme, using Full Site Editing (FSE) or the Gutenberg editor for block themes, and using a plugin. Regardless of your level of WordPress experience, these techniques are simple to implement. ## What is the Difference Between Classic Themes and Block Themes? Understanding the main distinctions between WordPress's Classic and Block themes is crucial before we start building custom menus since they have an immediate effect on how menus are made and maintained. ### Classic Themes: - Conventional Method: For many years, WordPress has relied on classic themes. They use a conventional PHP-based framework in which theme files like as header.php, footer.php, and functions.php manage the layout and design. - Widgets and Customizers: The WordPress Customizer and widgets are usually used to customize Classic themes. The Appearance > Menus component is used to construct menus, and the design is frequently less customizable, necessitating coding expertise for more complex adjustments. - Restricted Flexibility: Classic themes require a combination of established theme settings and code, despite their high degree of customization. Custom CSS or theme file modifications are frequently required to create a complex or highly customized layout. ### Block Themes: - Full Site Editing (FSE): WordPress 5.9 included block themes, which are made to function with FSE. This enables users to use Site Editor blocks to design and modify the whole layout of their website, including headers, footers, and content sections. - Gutenberg Blocks: The Gutenberg editor's block system controls every aspect of a Block theme, offering a more graphical and user-friendly approach to site creation and customization. This includes menus, which may be constructed with block-based components like the Navigation Block. - Increased Design versatility: Compared to Classic themes, Block themes provide a great deal of versatility, allowing users to create unique layouts without ever touching code. For those who like a more interactive, drag-and-drop method of designing websites, this is perfect. Knowing these distinctions will enable you to select the best custom menu creation technique for your theme and level of experience with WordPress' editing features. WordPress offers the resources you need to create functional and aesthetically pleasing menus that improve the navigation of your website, regardless of whether you're using a Classic or Block theme. Now that we've cleared it out, let's examine custom menus. ## Comprehending WordPress Custom Menus With WordPress custom menus feature, you can design and administer navigation menus that complement the layout and style of your website. With custom menus, you have total control over what is shown and how it is arranged, unlike typical menus that could automatically include pages or posts in a predetermined order. This adaptability lets you draw attention to key material, arrange connections logically, and improve user experience for your site's users. ### What Are Custom Menus? A custom menu is a collection of links, typically displayed in the website's header, footer, or sidebar, that guides users to various parts of the site. ![Custom menu in WordPress](https://d1k2c27psfzbiv.cloudfront.net/wp-content/uploads/2024/08/12113258/Custom-menu-in-WordPress.webp) These links can include: - Pages: Static pages such as "About Us," "Services," and "Contact." - Posts: Specific blog posts or categories of posts. - Custom Links: External links or internal links that point to specific URLs. - Categories: Links to blog categories, allowing users to filter posts by topic. - Buttons: Call to action buttons such as "Purchase" "Buy Now" or "Register". ### Why Customize Your Menus? Ever felt lost on a website, clicking around aimlessly? We've all been there, and it's frustrating! That's why custom menus are so important. Let's chat about why they can be such a godsend for your site: - No More Confusion: Imagine your menu as a friendly tour guide. With a well-organized setup, your visitors can breeze through your site without hiccups. No more confusion, just smooth sailing! Happy visitors stick around longer - it's a win-win. - Highlight Content Effectively: Got a page you're extra proud of? Maybe a killer blog post or an irresistible offer? Pop it in your menu where everyone can see it! It's like giving your best content the VIP treatment. - Staying Relevant: Websites are living things, always growing and shifting. Custom menus let you keep up with the times. New content? No problem! Just customize your menu to show off your latest and greatest. - Brand Imposition: Your menu isn't just functional - it's part of your site's brand! Style it up to match your brand's personality. A cohesive look tells visitors they're in the right place and you mean business. Custom menus are a powerful tool for website owners to shape the user journey and ensure that visitors can access all the essential parts of the site with ease. Whether you're using a classic theme, a modern block theme, or a plugin, creating and managing custom menus is a worthwhile endevour for anyone looking to build a presence on WordPress. ## Find what you need faster WP Spotlight adds powerful search functionality to your WordPress site, making navigation and discovery seamless for yourself and your clients. [Choose Your Plan](https://wpspotlight.pro/pricing) [Live Demo](https://demo.pixarlabs.com/?pl-product=spotlight) ![User Search in WP Spotlight](https://d1k2c27psfzbiv.cloudfront.net/wp-content/uploads/2024/11/26040509/User-Search-in-WP-Spotlight.webp) Now you know what a custom menu is so lets look at how to customize menu in wordpress. ## Method 1: How to Add a Custom Menu in WordPress (Classic Themes) Many WordPress themes come with built-in support for creating and managing custom menus. This method is straightforward and does not require any additional plugins or technical skills. You can easily create a custom menu through the WordPress dashboard and assign it to various locations provided by your theme, such as the header, footer, or sidebar. Before going into this method please do ensure that you’re working with a classic theme and not a block theme as these functionalities are not available in block themes which we will check out later in the article. #### Step-by-Step Guide 1. Accessing the Menus through Appearance > Menus To start creating a custom menu, navigate to your WordPress dashboard and go to Appearance > Menus. This section allows you to manage your site's menus. 2. Creating a New Menu If you're creating a menu for the first time, you'll need to set it up: - Name Your Menu: Give your menu a descriptive name, like "Main Navigation" or "Footer Links," to help you identify it later. - Click "Create Menu": After naming your menu, click the "Create Menu" button. ![Create custom menu](https://d1k2c27psfzbiv.cloudfront.net/wp-content/uploads/2024/08/12113301/Create-custom-menu.webp) 3. Adding Items to Your Menu Once your menu is created, you can start adding items: - Pages: You can add static pages such as "Home," "About Us," and "Contact" by selecting them from the list of available pages. - Posts: If your theme supports it, you can add specific blog posts or groups of posts by category. - Custom Links: To add external or internal links, use the "Custom Links" option. Enter the URL and link text you want to display. - Categories: You can include links to blog categories, allowing users to filter content by topic. Simply check the boxes next to the items you want to include and click "Add to Menu." You can’t add buttons in this method however. To add a button on a classic theme you’ll need to resort to a menu builder plugin. 4. Assigning the Menu to a Location After adding items, you'll need to decide where the menu will appear on your site. Your theme may support multiple menu locations, such as: - Primary Menu: Typically located in the header, this is the main navigation menu. - Footer Menu: A secondary menu located in the footer area. - Sidebar Menu: A menu displayed in the sidebar, if your theme supports sidebars. Select the appropriate location(s) for your menu by checking the corresponding box under "Menu Settings". Remember, not all themes will support all three options. Some may only provide the Primary and Footer menu, others may include all three. ![Assiging the menu to a location](https://d1k2c27psfzbiv.cloudfront.net/wp-content/uploads/2024/08/12113309/Assiging-the-menu-to-a-location-scaled-1.webp) 5. Organizing and Arranging Menu Items You can easily organize and rearrange the items in your menu by dragging and dropping them into the desired order. To create sub-menus (dropdown menus), simply drag an item slightly to the right under the parent item. This nesting creates a hierarchical structure. 6. Saving and Previewing Your Menu Once you've added and arranged your menu items, click the "Save Menu" button to save your changes. It's a good idea to preview your site to ensure the menu appears as expected. Navigate to the front end of your website and check the menu's appearance and functionality. Alternatively, you can also go to Appearance > Customize. This will take you to a live editor: From here, click on "Menus" and start customizing your existing menus or add new menus. As you’ve seen, using your theme's built-in functionality is a convenient and efficient way to create custom menus in WordPress. It provides a simple interface for managing navigation without the need for additional tools or coding, making it accessible for all users. There are a few limitations however such as styling changes or additional component usage such as buttons are not supported. So lets look at the second method that addresses these limitations. ## Method 2: Using Full Site Editing (FSE) or the Gutenberg Editor for Block Themes (Only for Block Themes) With the introduction of Full Site Editing (FSE) in WordPress, creating and managing custom menus has become more flexible and intuitive, especially for block themes. This method leverages the Gutenberg editor's block-based approach, allowing users to design and customize their entire site, including navigation menus, using blocks. ### Step-by-Step Guide 1. Navigating to Appearance > Editor To access the Full Site Editing interface, go to your WordPress dashboard and navigate to Appearance > Editor. This will open the Full Site Editor, where you can customize various parts of your theme, including headers, footers, and templates. ![Full site Editor](https://d1k2c27psfzbiv.cloudfront.net/wp-content/uploads/2024/08/12113316/Full-site-Editor.webp) 2. Accessing the Site Editor or Template Parts In the Site Editor, you can modify global site elements or specific template parts like headers and footers. If your goal is to add or edit a navigation menu, you'll typically work within the header template or Navigation part. Click on "Navigation" or the specific template part you wish to edit. 3. Adding a Navigation Block To create a menu, you'll use the Navigation Block: Insert the Navigation Block: Click on the "+" icon to add a new block and search for "Navigation." Select the Navigation Block and place it in your desired location, such as within the header area. Adding Menu Items: Once the Navigation Block is added, you can start adding menu items. Click on "Add items" and choose from existing pages, posts, categories, custom links, or even specific templates. You can also reorder the items by dragging and dropping them within the block. ![Add custom menu items in FSE](https://d1k2c27psfzbiv.cloudfront.net/wp-content/uploads/2024/08/12113318/Add-custom-menu-items-in-FSE.webp) Creating Sub-Menus: To create dropdown sub-menus, simply drag a menu item slightly to the right beneath another item, creating a nested structure. For block themes such as [Twenty-Twenty-Four](https://wordpress.org/themes/twentytwentyfour/) there’s a header usually added by default. Now if you want to add a custom menu (Navigation bar) to just one of the page then you can start editing right inside the header just click the "+" button and search for the navigation element: Here’s what you’ll see after adding the navigation element: You’ve just created the first option on your custom menu. Now you can add more options to the menu, add submenus to the options, add buttons and do bunch of other neat stuff. As easy and fun as this is, it’s not the best practice. What you need to do is create a custom menu element so you can save it and use it across all your pages. You don’t want to have to design the whole menu again if you need to add it on another page. So what do you do? When you first land on the editor on the left side bar click on "Navigation". Then click on the 3 dots and click on Edit. This will remove the all the other elements on the website and simply allow you to start editing the custom menu you want to create. Here’s the test menu I created: Next you need to save your new navigation menu. Just go the top right and click on "Save". Now whenever you create a new page, no matter the pattern you use this custom navigation bar will be added to header. Here you can see that I created a Test page and the custom menu that I created is already here. 4. Customizing the Appearance The Gutenberg editor provides various customization options for the Navigation Block: - Layout: You can adjust the layout to display the menu horizontally or vertically. - Colors and Fonts: Customize the menu's text color, background color, and font settings to match your site's branding. - Additional Styling: Use additional block settings to adjust padding, spacing, and other design elements. 5. Saving Changes and Previewing the Menu Once you've configured your menu, click the "Save" button to apply your changes. You can preview your menu's appearance and functionality by navigating to the front end of your website. 6. Managing Menus Across Your Site In the Site Editor, you can manage menus across different templates and template parts. For instance, you may have different menus for different sections of your site (e.g., a main menu in the header and a secondary menu in the footer). You can easily switch between these templates and customize them accordingly. Using Full Site Editing and the Gutenberg editor for block themes offers a highly visual and flexible way to create and manage custom menus. This method is ideal for users who prefer a more intuitive, drag-and-drop interface and want to take full advantage of the block-based design approach in WordPress. ## Method 3: Using a Plugin (Only for Classic Themes) Using a plugin to create and manage custom menus in WordPress is an excellent option for users who want additional functionality and design flexibility beyond what their theme or Full Site Editing provides. There are numerous plugins available that offer advanced features such as mega menus, customizable styling, and more complex menu structures. ### Step-by-Step Guide 1. Choosing and Installing a Menu Plugin To get started, you'll need to choose a suitable plugin based on your requirements. Some popular menu plugins include: - [Master Addons](https://wordpress.org/plugins/master-addons/): Ideal for creating large, multi-column menus with a wide range of customization options. - WP Mega Menu: Offers an intuitive drag-and-drop interface for building responsive menus. - Responsive Menu: Focuses on mobile-friendly menu solutions. To install a plugin, follow these steps: - Go to Plugins > Add New in your WordPress dashboard. - Search for the desired plugin by name. - Click "Install Now," then "Activate" once the installation is complete. 2. Setting Up a New Menu Through the Plugin's Settings After activating the plugin, navigate to its settings page. This is usually found under a new menu item added to your dashboard or within the Appearance menu. - Creating a Menu: Depending on the plugin, you may have an option to create a new menu or modify an existing one. Follow the prompts to set up your menu. - Adding Items: Just like in the default WordPress menu system, you can add pages, posts, categories, custom links, and more. Some plugins may offer additional options like icons, images, and custom widgets. 3. Customizing the Menu Layout and Style One of the main benefits of using a plugin is the ability to customize the menu's appearance and behavior extensively: - Layout Options: Choose from various layout styles, such as horizontal, vertical, or mega [menu layouts](https://wpadminify.com/docs/adminify/admin-menu/menu-layout-options). - Styling: Customize colors, fonts, backgrounds, and other design elements to match your site's branding. Many plugins offer an intuitive interface with live previews, making it easy to see changes in real time. - Advanced Features: Some plugins provide additional features such as animations, custom breakpoints for responsive design, and role-based menu visibility (showing or hiding menu items based on user roles). 4. Assigning the Menu to a Location and Saving Changes Once you've configured your menu, you'll need to assign it to a specific location on your site. This can usually be done within the plugin's settings or through the standard Appearance > Menus interface: - Primary Location: Often the main navigation area, such as the header. - Secondary Locations: You may also have options for footer menus, sidebar menus, or custom widget areas. Make sure to save your changes and check how the menu appears on the front end of your site. 5. Previewing and Testing Your Menu It's important to preview your menu on both desktop and mobile devices to ensure it functions correctly and looks good across all screen sizes. Test all links and interactive elements to confirm that they work as intended. Using a plugin for creating custom menus in WordPress provides a wide range of features and customization options that may not be available through your theme or the default WordPress functionality. This method is particularly useful for users who need advanced menu structures, unique design elements, or enhanced functionality like mega menus and responsive options. NOTE: Before using any of these plugins it should be noted that to get the most functionality out of these plugins its recommended to get the Pro versions. The free versions are somewhat limited in their customization abilities... ## Choosing the Best Method for Your Needs When it comes to creating custom menus in WordPress, there isn't a one-size-fits-all solution. The best method for you depends on your specific needs, the complexity of your site, and your comfort level with different tools. Here's a breakdown of the three methods we've discussed, along with key factors to consider when deciding which one to use. | Method | Best For | Advantages | Limitations | | --- | --- | --- | --- | | Using Your Theme's Built-in Functionality | Users who prefer using a classic theme and are looking for a straightforward, no-fuss approach to creating menus. | - Simplicity: Easy to use and accessible directly from the WordPress dashboard. - Compatibility: Works seamlessly with most classic WordPress themes. - No Extra Cost: Utilizes features already included in your theme. | - Limited Customization: Restricted by what your theme offers, lacking advanced features like mega menus or complex styling options. - Dependence on Theme: Will need to learn FSE if switching to a block theme. | | Using Full Site Editing (FSE) or the Gutenberg Editor for Block Themes | Users who want a more visual and flexible approach to menu creation, particularly with block-based themes | - Full Control: Visual, drag-and-drop interface for designing menus within your site. - Block Flexibility: Incorporates a variety of blocks, including custom ones. - Consistent Design: Ensures menu design consistency with your site | - Learning Curve: More complex, especially for users unfamiliar with the block editor or FSE. - Theme Dependence: Requires a block theme, and switching themes may require adjustments. | | Using a Plugin | Users who need advanced features, unique designs, or specialized functionality not available through their theme or FSE. | - Advanced Features: Access to complex structures like mega menus, responsive designs, and role-based visibility. - Extensive Customization: Wide range of styling and layout options. - Flexible Functionality: Offers features like drag-and-drop interfaces, live previews, and tool integrations. | - Additional Setup: Requires installing and configuring a plugin, which may add complexity. - Potential Costs: Some advanced plugins may require a premium version. - Compatibility Issues: Possible issues with certain themes or other plugins | ## Factors to Consider When choosing the best method for creating your custom menus, consider the following: - Complexity of Your Site: If your site is running a classic theme and requires simple navigation, the built-in functionality may be sufficient. For more complex needs, FSE or a plugin might be better. - Design Consistency: If maintaining a consistent design across your site is important, FSE can offer a more integrated approach. Plugins also provide design options but might require more effort to match your theme's style. - Ease of Use: If you're looking for something quick and easy, classic themes and built-in menu functionality is likely the best option. However, if you want more control and are comfortable with WordPress, you will need to switch to block themes to utilize FSE or plugins that offer greater flexibility. - Future Flexibility: Consider whether you might change themes or add more features to your site in the future. Plugins offer the most flexibility, but FSE is also adaptable if you switch to block themes. ## Tips for Creating Effective Menus Creating a custom menu is more than just organizing links; it's about designing a user-friendly navigation system that enhances your visitors' experience on your website. A well-crafted menu can guide users to important content, improve engagement, and even boost your site's SEO. Here are some tips to help you create effective menus that serve both your audience and your website goals. ### 1. Keep It Simple and Focused - Prioritize Essential Links: Include only the most important pages and categories in your main menu. Overloading your menu with too many options can overwhelm visitors and make navigation more difficult. - Use Clear, Descriptive Labels: Ensure that each menu item is labeled clearly so users immediately understand where each link will take them. Avoid jargon or overly creative names that might confuse visitors. ![Simple website navigation menu](https://d1k2c27psfzbiv.cloudfront.net/wp-content/uploads/2024/08/12113320/Simple-website-navigation-menu.webp) 2. Consider the User Journey - Logical Structure: Organize your menu items in a way that reflects how users are likely to navigate your site. For example, start with broad categories and drill down into more specific content. - Limit Menu Levels: While dropdown menus can be helpful, avoid creating too many sub-levels. Ideally, users should be able to find what they need within two clicks. ![Relevant dropdown menu](https://d1k2c27psfzbiv.cloudfront.net/wp-content/uploads/2024/08/12113319/Relevant-dropdown-menu.webp) 3. Optimize for Mobile Devices - Responsive Design: Ensure that your menu is fully responsive and functions well on all screen sizes. Mobile users should have an easy time navigating your site without having to zoom or scroll excessively. - Simplified Mobile Menus: Consider using a hamburger menu (☰) for mobile devices to save space. Keep the mobile menu simple and focus on the most critical links. 4. Utilize Mega Menus for Complex Sites - When to Use Mega Menus: If your site has a large number of pages or categories, a mega menu can help organize content into a more digestible format. This type of menu displays all options at once, making it easier for users to find what they're looking for. - Group Related Content: In mega menus, group similar items together under clear headings to help users quickly locate relevant content. ![Mega menu for complex sites](https://d1k2c27psfzbiv.cloudfront.net/wp-content/uploads/2024/08/12113325/Mega-menu-for-complex-sites.webp) 5. Incorporate Visual Elements - Use Icons and Images: Adding icons or small images next to menu items can make them more visually appealing and easier to recognize. Just ensure that the visuals complement the text and do not overwhelm the design. - Highlight Important Links: Use design elements like bold text, colors, or underlines to draw attention to key links, such as "Contact Us" or "Sign Up." ### 6. Leverage Drop-down and Sub-menus Strategically - Sub-menus for Related Content: Use drop-down or sub-menus to organize related content under a main category. This helps keep the main menu clean and focused while still offering access to deeper pages. - Avoid Overcrowding: While sub-menus are useful, avoid creating too many layers, as this can make navigation cumbersome and confusing. ### 7. Align Menus with Your Branding - Consistent Styling: Ensure that your menu design aligns with your overall website branding. Use consistent fonts, colors, and styling that match the rest of your site. - Custom Fonts and Colors: Depending on your theme or plugin, customize the font style, size, and colors of your menu to match your brand identity. ### 8. Test and Iterate - User Testing: Regularly test your menu with actual users to ensure it is intuitive and effective. Pay attention to how easily they can navigate your site and whether they can quickly find key content. - Analytics Review: Use website analytics to see which menu items are most clicked and adjust your menu based on user behavior. Remove or reposition items that are rarely used. ### 9. Consider Accessibility - Keyboard Navigation: Ensure your menus are navigable using a keyboard, which is crucial for users with disabilities. Test your menu to confirm that all links can be accessed and activated without a mouse. - Screen Reader Compatibility: Use semantic HTML and ARIA labels to ensure that screen readers can correctly interpret and read out your menu content for visually impaired users. ### 10. SEO Considerations - Include Keywords: Where appropriate, include relevant keywords in your menu labels. This can help improve your site's SEO by signaling to search engines what each page is about. - Internal Linking Strategy: Use your menu as part of a broader internal linking strategy to guide both users and search engines through your site’s hierarchy. ## Custom WordPress Menu FAQs ### How do I create a navigation menu in WordPress? On a classic theme, go to Appearance then Menus, create a menu, add pages, posts, categories, or custom links, then assign it to a theme location like Primary. On a block theme, open the Site Editor and edit the Navigation block instead. Save and the menu appears on the front end. ### What is the difference between a WordPress navigation menu and the admin menu? A navigation menu is the front-end menu your visitors use to move around the site. The admin menu is the sidebar inside wp-admin that you and your team use to manage the site. They are built in different places and this guide covers the navigation menu. ### My theme has no Appearance then Menus screen. Why? Block themes moved menu management into the Site Editor, so the classic Menus screen is hidden. Open Appearance then Editor, edit a template or template part that holds the Navigation block, and manage your links there. Switching to a classic theme brings the old Menus screen back. ### How do I add a custom link or a dropdown submenu to a WordPress menu? In Appearance then Menus, use the Custom Links panel to add any URL, then click Add to Menu. To create a dropdown, drag a menu item slightly to the right so it nests under the item above it as a submenu. Save the menu to apply the change. ### Can I show different menus to logged-in and logged-out users? Core WordPress does not do this on its own. Use a menu-visibility plugin, or add conditional logic in your theme, to display one menu to logged-in users and another to visitors. This is common on membership sites and client dashboards. ## Conclusion Creating a custom menu in WordPress doesn't have to be complicated, whether you're using your theme's built-in functionality, the powerful Full Site Editing (FSE) and Gutenberg editor for block themes, or a specialized plugin for advanced features. By choosing the method that best suits your needs and following best practices, you can design an intuitive and effective navigation system that enhances your visitors' experience and supports your website's goals. With the right approach, your custom menu can become a powerful tool for guiding users through your content, improving engagement, and helping your site stand out. --- # How to Create Folders in WordPress Media Library (3 Methods) URL: https://wpadminify.com/how-to-add-folders-to-wordpress-media-library Last updated: 2026-08-12 WordPress doesn't ship with media folders. Open Media > Library on a site with four thousand files and you get one endless grid sorted by upload date. No tree, no grouping, no way to keep a client's assets together. There are three real ways to fix this: register a taxonomy yourself (free, needs code), create directories over FTP (works, breaks things), or install a folder plugin (fastest, and the good ones cost money). I'll cover all three, including the one you shouldn't use. ![WordPress media library without folders showing unorganized images](https://d1k2c27psfzbiv.cloudfront.net/wp-content/uploads/2026/01/18105423/wordpress-media-library-without-folders.webp) ## Quick answer To create folders in the WordPress Media Library, install a media folder plugin, create folders from the tree that appears beside Media > Library, and drag files into them. WordPress has no built-in folder feature, but folder plugins add one using a virtual taxonomy, which means files never move on your server and image URLs never change. If you'd rather skip the plugin, you can register a media taxonomy in code (Method 1). Don't create real directories over FTP (Method 3). It breaks image URLs. ![collapse and expand media folder](https://d1k2c27psfzbiv.cloudfront.net/wp-content/uploads/2026/01/26114821/collapse-and-expand-media-folder.webp) ## Why WordPress has no media folders WordPress organizes content with metadata, not location. Posts use categories. Media is meant to be found by date, type, or search. There's a hard technical reason too. WordPress serves every file by URL. If folders were real directories, moving a file would change its URL, breaking every post that embeds it, every external link, and every cached copy. Rather than ship that hazard, core shipped nothing. Every method below adds structure without paying that cost. Except Method 3, which pays it in full. ## Method 1: register a media taxonomy (free, no plugin) Every uploaded file in WordPress is a post, specifically a row in `wp_posts` with `post_type = 'attachment'`. Because it's a post, it can carry taxonomies. So you can add folder-style classification with about ten lines of code. ### Step 1: register the taxonomy Add this to a site-specific plugin, or your child theme's `functions.php`: ``` /** * Register a hierarchical "Media Folder" taxonomy for attachments. * hierarchical => true is what allows nested subfolders. */ function adminify_register_media_folders() { register_taxonomy( 'media_folder', 'attachment', array( 'labels' => array( 'name' => __( 'Media Folders' ), 'singular_name' => __( 'Media Folder' ), 'add_new_item' => __( 'Add New Folder' ), ), 'hierarchical' => true, // parent/child nesting 'show_admin_column' => true, // column in Media list view 'show_in_rest' => true, // available in the block editor 'public' => false, // no public archive pages 'rewrite' => false, ) ); } add_action( 'init', 'adminify_register_media_folders' ); ``` Use a site-specific plugin rather than `functions.php` if you can. Theme files get replaced on theme switches, and losing the registration orphans every folder assignment you've made. ### Step 2: add a filter dropdown to the Media screen Registering the taxonomy doesn't give you a way to filter by it. This adds the dropdown: ``` /** * Add a Media Folder filter dropdown above the Media Library list table. */ function adminify_media_folder_filter() { $screen = get_current_screen(); if ( ! $screen || 'upload' !== $screen->base ) { return; } wp_dropdown_categories( array( 'show_option_all' => __( 'All folders' ), 'taxonomy' => 'media_folder', 'name' => 'media_folder', 'orderby' => 'name', 'hierarchical' => true, 'hide_empty' => false, 'value_field' => 'slug', 'selected' => isset( $_GET['media_folder'] ) ? sanitize_text_field( wp_unslash( $_GET['media_folder'] ) ) : '', ) ); } add_action( 'restrict_manage_posts', 'adminify_media_folder_filter' ); ``` ### Step 3: create folders and assign files - Go to Media > Media Folders. A standard taxonomy screen appears. - Add your folders. Set a parent to create a subfolder. - Switch the Media Library to list view. - Open a file's Edit screen and assign it to a folder, or use Bulk actions > Edit to do several at once. - Filter the library with the new dropdown. What you get: working hierarchical folders, a filter, a sortable admin column, and no cost. What you don't get: a folder tree in the sidebar, drag-and-drop, folder filtering inside the media modal when you insert an image, or a fast way to move a few hundred files. Bulk Edit works but it's slow and clumsy across a large library. This suits a developer organizing a site they built themselves. It doesn't suit a content team, because the assignment workflow has too much friction for daily use. If the admin-column part appeals, our guide to [useful WordPress admin columns](https://wpadminify.com/necessary-admin-columns-for-wordpress) covers the same idea across other post types. ## Method 2: use a media folder plugin (recommended) A folder plugin uses the same taxonomy mechanism as Method 1, wrapped in the interface that makes it usable: a folder tree beside the library, drag-and-drop assignment, nested subfolders, and folder filtering inside the media modal. That last one matters most day to day. ### What to check before installing | Check | Why it matters | | --- | --- | | Virtual or physical folders? | Virtual folders never change image URLs. Physical folders do. The single most important question. | | Nesting depth limit | Some plugins cap at two levels. If you need Client, Project, Type, confirm three works. | | Folders inside the media modal | Without it you still scroll a global grid every time you insert an image. Half the benefit gone. | | Bulk move | Organizing an existing library is impractical without multi-select. | | Migration path | Can you import folders from another plugin, or export if you leave? | | Performance at your scale | Test on a copy of your real library, not a demo site with 40 images. | ### Creating folders with WP Adminify [WP Adminify's media folder feature](https://wpadminify.com/features/wordpress-media-folder) uses virtual folders, so files stay exactly where they are on disk. - Install and activate WP Adminify, then enable the media folder module in its settings. - Go to Media > Library. A folder tree appears beside the library. - Click New Folder and name it. Use the words your team says out loud: "Acme Corp," not "Client 004." - To nest, create a folder while a parent is selected, or drag one folder onto another. - Select files in the grid and drag them onto a folder. Multi-select works, so a few hundred files move in one drag. - Open a post, insert an image, and filter by folder inside the media modal instead of scrolling. Full configuration is under [creating folders for post types](https://wpadminify.com/docs/adminify/productivity/create-folder-for-post-types). ### The caveat Folder data belongs to whichever plugin created it. Deactivate the plugin and your files are completely unaffected, since every image on your site keeps working, but the folder view disappears from the admin. The taxonomy terms stay in the database, so reactivating restores everything. Moving to a different folder plugin is the harder case: you need an import tool or a rebuild by hand. Ask about migration before you commit a very large library to any single tool. ![Create New folder for Media library](https://d1k2c27psfzbiv.cloudfront.net/wp-content/uploads/2022/12/18103327/Create-New-folder-for-Media-library.webp) Set the folder from attachment details page too. ![Select media folder while upload a new file directly from media modal in WordPress](https://d1k2c27psfzbiv.cloudfront.net/wp-content/uploads/2026/01/18112546/define-media-folder-while-uploading-file.webp) ## Method 3: create real folders over FTP (not recommended) You can connect over FTP and create directories inside `wp-content/uploads/`. It feels like the obvious solution. It's the one to avoid, and it's worth knowing why. ### Problem 1: files uploaded by FTP are invisible to WordPress The Media Library is a database query, not a directory listing. A file dropped into `uploads/` over FTP has no row in `wp_posts`, so it won't appear in the Media Library at all. It's sitting on the server and WordPress has no idea. You can link to it directly by URL, but you can't select it in the editor, set it as a featured image, or manage it in any way. ### Problem 2: moving existing files breaks every reference Move `uploads/2026/08/logo.png` into `uploads/acme/logo.png` and its URL changes. WordPress still has the old path in `_wp_attached_file`, so the image breaks everywhere it appears. Fixing it properly means a database search-and-replace across post content, page-builder JSON, customizer settings, custom fields, and widget data. Any external site linking to the old URL still gets a 404. ### Problem 3: WordPress will fight you Uploads keep going into date-based folders regardless of what you create by hand. Within a month you've got a hybrid structure that neither WordPress nor your team understands. FTP directories do make sense for one thing: organizing files WordPress doesn't manage at all, like a downloads directory you link to directly, or static assets served outside the Media Library. For anything WordPress needs to manage, use Method 1 or 2. ## Comparing the three methods | | Method 1: Taxonomy | Method 2: Plugin | Method 3: FTP | | --- | --- | --- | --- | | Cost | Free | Free to paid | Free | | Code required | Yes | No | No | | Image URLs change | No | No (virtual folders) | Yes | | Drag and drop | No | Yes | N/A | | Folders in media modal | No | Yes | No | | Practical bulk move | Slow | Yes | Dangerous | | Nested subfolders | Yes | Yes (check depth limit) | Yes | | Safe on a live site | Yes | Yes | No | | Best for | Developers, small libraries | Teams, large libraries | Non-WordPress assets only | ## Common issues and fixes The folder tree doesn't appear. Confirm the media folder module is enabled in the plugin's settings, then hard-refresh. If it still won't show, check the browser console. A JavaScript conflict with another admin plugin is the usual culprit. Drag-and-drop does nothing. Almost always a JS conflict. Deactivate other admin-facing plugins one at a time until you find it. Files uploaded by FTP are missing from the library. Expected. They have no database record. Either re-upload through the admin, or use a "scan for existing files" tool that creates the attachment rows for you. Folders vanished after a plugin update. Check the module is still enabled, since updates occasionally reset settings. The taxonomy data is still in the database, so this is nearly always a display issue rather than data loss. The Media screen is slow after adding folders. Usually the pre-existing library size rather than the folders. Switch to list view and reduce items per page under Screen Options. ## Media Library Folder FAQs ### Can you create folders in the WordPress Media Library without a plugin? Yes. Register a hierarchical taxonomy against the attachment post type in about ten lines of code and you get folders with a filter dropdown and an admin column. What you don't get is a folder tree, drag-and-drop, or folder filtering inside the media modal. Those need a plugin. ### Do media folders move my files on the server? Not with virtual folders, which is what most plugins use. The file stays at its original path in wp-content/uploads/ and only a database relationship changes, so image URLs never break. A small number of plugins do move real files, so check which model a plugin uses before installing. ### Can I create subfolders inside media folders? Yes, if the plugin supports hierarchical folders. The underlying taxonomy allows unlimited nesting, though plugins set their own limits. Two or three levels works best in practice, since deeper structures get slow to navigate and teams stop filing files correctly. ### Will creating folders break my existing images? No, as long as you use a virtual folder plugin or the taxonomy method. Neither touches the files on disk. The only approach that breaks images is manually moving files into new directories over FTP, which changes their URLs. ### How do I move existing files into folders? Switch the Media Library to list view, sort by date or filter by file type to group related files, then multi-select and drag them into a folder in one action. Working in large batches instead of file by file turns a full day into about an hour. ## Conclusion Three methods, one clear recommendation: - Developers with small libraries: register the taxonomy yourself. Free, ten lines, no dependency. - Teams and large libraries: use a virtual folder plugin. The media-modal filtering alone justifies it. - Nobody should create real folders over FTP for media WordPress manages. Next step: [how to organize an existing media library with folders](https://wpadminify.com/how-to-organize-wordpress-media-library-with-folders) covers what to do once folders exist and you've got three thousand files to sort. For the background on how virtual folders work, see our guide to [WordPress media library folders](https://wpadminify.com/wordpress-media-library-folders). --- # How to Add ACF Field to Admin Column in WordPress (2026) URL: https://wpadminify.com/how-to-add-acf-field-to-admin-column Last updated: 2026-08-12 You've built custom fields with ACF for your WordPress posts - publisher names, prices, ratings, deadlines - but all that data is locked behind the edit screen. Every time you need to check a value, you click into the post, scroll to the meta box, then click back. Multiply that by 50 posts and you've lost half your morning. ACF admin columns solve this by pulling your custom field data directly into the WordPress post list table. Instead of opening each post individually, you see your ACF data right alongside the title, date, and author - at a glance, sortable, and scannable. In this guide, you'll learn two ways to add ACF fields to admin columns: the no-code method using the [Admin Columns Editor](https://wpadminify.com/admin-columns-editor) in WP Adminify, and the developer approach using PHP hooks. ## What Are ACF Admin Columns? ACF admin columns are custom columns added to the WordPress post list table (the screen at Posts > All Posts or any custom post type) that display values from Advanced Custom Fields. By default, WordPress only shows Title, Author, Categories, Tags, and Date in the post list. ACF admin columns extend this table to show any custom field data - text fields, select dropdowns, date pickers, true/false values, relationship fields, and more. For example, if you run a real estate site with ACF fields for "Price," "Bedrooms," and "Status," ACF columns would let you see all three values for every listing without opening a single post. This turns your post list from a basic index into a functional data dashboard. The concept works across all post types - standard posts, pages, WooCommerce products, and any custom post type (CPT) you've registered. Whether you're managing an [ordered set of custom post types](https://wpadminify.com/how-to-use-custom-post-type-order) or a simple blog, ACF columns give you the visibility that the default WordPress admin lacks. ## Why You Need ACF Fields in Your Admin Columns Displaying ACF data in admin columns isn't about aesthetics - it's about operational efficiency. Here's what changes when you add ACF fields to your post list: ### Faster Content Review Instead of clicking into each post to verify custom field values, you scan the list table. For a site with 200+ posts, this turns a 30-minute review into a 3-minute scan. Content managers, editors, and site owners all benefit - especially on [client dashboards](https://wpadminify.com/wordpress-client-dashboard) where you've built custom workflows around ACF data. ### Better Editorial Workflow When your team uses ACF fields for editorial metadata - things like "Review Status," "Assigned Editor," or "Publish Priority" - having those values visible in the post list turns WordPress into a lightweight project management tool. You can quickly spot which posts are stuck in "Draft Review" or which ones are missing required field values. ### Quick Data Auditing ACF columns make it trivially easy to spot missing or incorrect data. If your "Price" column shows a blank for 12 out of 50 products, you know exactly which posts need attention - no CSV exports, no database queries, no opening posts one by one. Combined with [other essential admin columns](https://wpadminify.com/necessary-admin-columns-for-wordpress) like Post ID and featured image thumbnails, your post list becomes a comprehensive content audit tool. ### Improved Client Handoffs If you're building WordPress sites for clients, ACF columns make the backend immediately understandable. A client managing their own "Events" post type can see the Event Date, Venue, and Ticket Price without understanding ACF's edit interface. It reduces training time and support requests. ## Method 1: Add ACF Fields to Admin Columns Using WP Adminify (No Code) The [Admin Columns Editor](https://wpadminify.com/admin-columns-editor) addon for WP Adminify provides a visual interface for adding ACF fields as admin columns - no code, no `functions.php` edits. It supports ACF Free and ACF Pro, including field types like text, number, select, date picker, true/false, image, and relationship fields. ### Prerequisites Before you start, make sure you have: - Advanced Custom Fields (ACF) installed and activated - either the [free version](https://wordpress.org/plugins/advanced-custom-fields/) or ACF Pro - At least one ACF field group created and assigned to a post type - WP Adminify installed with the Admin Columns Editor addon activated ### Step 1: Create Your ACF Field Group If you haven't already set up your ACF fields, go to ACF > Field Groups > Add New. Create a field group with the fields you want to display as columns. For this walkthrough, let's say you're building a "Book Reviews" custom post type with three fields: - Publisher (Text field) - Promotion Timeline (Date Picker field) - Engagement (Number field) Under Location Rules, set the field group to appear on your target post type (e.g., "Post Type is equal to Book Review"). This step is critical - if the location rule doesn't match the post type you want columns for, the ACF fields won't appear as column options in the next step. ![Create Your ACF Field Group](https://d1k2c27psfzbiv.cloudfront.net/wp-content/uploads/2023/03/11065740/Create-Your-ACF-Field-Group.webp) Troubleshooting: If your ACF fields don't show up in the Admin Columns Editor later, double-check that your location rules target the correct post type. Also verify that the field group's status is set to "Active," not "Inactive." ### Step 2: Open the Admin Columns Editor Navigate to WP Adminify > Admin Columns. You'll see a list of all available post types. Select the post type where your ACF fields are assigned (e.g., "Book Reviews"). ![Open the Admin Columns Editor](https://d1k2c27psfzbiv.cloudfront.net/wp-content/uploads/2023/03/11065741/Open-the-Admin-Columns-Editor.webp) ### Step 3: Add ACF Fields as Columns Click Add New Column. In the column type selector, you'll see tabs for different column sources - Default, Custom, and ACF. Click the ACF tab to see all ACF fields assigned to this post type. Select the field you want (e.g., "Publisher"), customize the column label if needed, and click Save. Repeat for each field you want visible in the post list. ![Add ACF Fields as Columns](https://d1k2c27psfzbiv.cloudfront.net/wp-content/uploads/2023/03/11065738/Add-ACF-Fields-as-Columns.webp) You can also drag and drop columns to reorder them - place your most important ACF columns right after the title for maximum visibility. ### Step 4: Verify Your ACF Admin Columns Navigate back to your post type list (e.g., Book Reviews > All Book Reviews). Your ACF field data now appears as new columns in the table, populated with the values from each post. From here you can: - Sort by ACF column values to find specific entries - Rearrange columns via drag-and-drop in the Admin Columns Editor - Remove default columns you don't need (like Tags or Comments) to make room - Add more columns - including built-in ones like Post ID, featured image thumbnail, or word count ![Verify Your ACF Admin Columns](https://d1k2c27psfzbiv.cloudfront.net/wp-content/uploads/2023/03/11065743/Verify-Your-ACF-Admin-Columns.webp) The Admin Columns Editor also supports fields from  MetaBox and Pods frameworks, so if you later migrate away from ACF or use multiple field plugins, your column setup still works. ## Method 2: Add ACF Fields to Admin Columns Using Custom Code If you prefer handling this with PHP - maybe you're building a theme for distribution, working in a version-controlled environment, or simply want zero plugin dependencies - here's how to add ACF fields to admin columns programmatically. Add the following code to your child theme's `functions.php` file, a [code snippets manager](https://wpadminify.com/features/code-snippets), or a site-specific plugin. ### Step 1: Register the Column Header Use the `manage_{post_type}_posts_columns` filter to add your column to the post list. Replace `book_review` with your post type slug: ``` /** * Add ACF-based columns to Book Review post type. * * @param array $columns Existing columns. * @return array Modified columns. */ function wpat_add_acf_admin_columns( $columns ) { // Insert after title column $new_columns = array(); foreach ( $columns as $key => $value ) { $new_columns[ $key ] = $value; if ( 'title' === $key ) { $new_columns['acf_publisher'] = __( 'Publisher', 'your-textdomain' ); $new_columns['acf_engagement'] = __( 'Engagement', 'your-textdomain' ); } } return $new_columns; } add_filter( 'manage_book_review_posts_columns', 'wpat_add_acf_admin_columns' ); ``` This inserts the "Publisher" and "Engagement" columns right after the Title column. You can adjust the position by changing which column key you insert after. ### Step 2: Populate the Column with ACF Data Use the `manage_{post_type}_posts_custom_column` action to output the field value. The `get_field()` function is ACF's standard API for retrieving field values: ``` /** * Display ACF field values in custom admin columns. * * @param string $column_name The column identifier. * @param int $post_id The current post ID. */ function wpat_display_acf_column_data( $column_name, $post_id ) { switch ( $column_name ) { case 'acf_publisher': $value = get_field( 'publisher', $post_id ); echo $value ? esc_html( $value ) : '—'; break; case 'acf_engagement': $value = get_field( 'engagement', $post_id ); echo $value ? esc_html( $value ) : '—'; break; } } add_action( 'manage_book_review_posts_custom_column', 'wpat_display_acf_column_data', 10, 2 ); ``` Important: Use the ACF field name (not the field label) in `get_field()`. You can find the field name in ACF > Field Groups > Edit > Field Name. If you use the wrong name, the column will display the em dash fallback for every post. ### Step 3: Make ACF Columns Sortable (Optional) To enable sorting by your ACF column values, register them as sortable and handle the query: ``` /** * Register ACF columns as sortable. * * @param array $columns Sortable columns. * @return array Modified sortable columns. */ function wpat_acf_sortable_columns( $columns ) { $columns['acf_publisher'] = 'acf_publisher'; $columns['acf_engagement'] = 'acf_engagement'; return $columns; } add_filter( 'manage_edit-book_review_sortable_columns', 'wpat_acf_sortable_columns' ); /** * Modify the query to sort by ACF meta values. * * @param WP_Query $query The main query. */ function wpat_acf_column_orderby( $query ) { if ( ! is_admin() || ! $query->is_main_query() ) { return; } $orderby = $query->get( 'orderby' ); if ( 'acf_publisher' === $orderby ) { $query->set( 'meta_key', 'publisher' ); $query->set( 'orderby', 'meta_value' ); } if ( 'acf_engagement' === $orderby ) { $query->set( 'meta_key', 'engagement' ); $query->set( 'orderby', 'meta_value_num' ); } } add_action( 'pre_get_posts', 'wpat_acf_column_orderby' ); ``` Note the distinction between `meta_value` (for text fields, sorts alphabetically) and `meta_value_num` (for number fields, sorts numerically). Using the wrong one will produce unexpected sort orders. ### Step 4: Handle Different ACF Field Types Not all ACF field types return simple strings. Here's how to display common field types correctly in your admin columns: ``` /** * Render different ACF field types in admin columns. * * @param string $column_name Column identifier. * @param int $post_id Post ID. */ function wpat_render_acf_field_types( $column_name, $post_id ) { switch ( $column_name ) { // Image field (returns array when format = "Array") case 'acf_cover_image': $image = get_field( 'cover_image', $post_id ); if ( $image ) { printf( '%s', esc_url( $image['sizes']['thumbnail'] ), esc_attr( $image['alt'] ) ); } else { echo '—'; } break; // True/False field case 'acf_featured': $value = get_field( 'featured', $post_id ); echo $value ? '✓' : '✕'; break; // Date Picker field case 'acf_publish_date': $value = get_field( 'publish_date', $post_id ); echo $value ? esc_html( $value ) : '—'; break; // Select field case 'acf_status': $value = get_field( 'status', $post_id ); if ( $value ) { $colors = array( 'active' => '#28a745', 'pending' => '#ffc107', 'expired' => '#dc3545', ); $color = isset( $colors[ $value ] ) ? $colors[ $value ] : '#6c757d'; printf( '%s', esc_attr( $color ), esc_html( ucfirst( $value ) ) ); } else { echo '—'; } break; } } add_action( 'manage_book_review_posts_custom_column', 'wpat_render_acf_field_types', 10, 2 ); ``` This approach works well for a handful of fields. But if you're managing 5+ ACF columns across multiple post types, the code gets verbose quickly - that's where a visual tool like the [Admin Columns Editor](https://wpadminify.com/admin-columns-editor) saves significant development time. ## WP Adminify vs Custom Code: Which Approach Fits? | Criteria | WP Adminify Admin Columns Editor | Custom PHP Code | | --- | --- | --- | | Setup time | 2-3 minutes per post type | 15-30 minutes per post type | | Code required | None | PHP (functions.php or plugin) | | ACF field type handling | Automatic (detects field type) | Manual (custom rendering per type) | | Drag-and-drop reorder | Yes | No (requires code changes) | | Supports MetaBox / Pods | Yes | Requires separate code per framework | | Sortable columns | Built-in toggle | Requires additional hooks | | Theme update safe | Yes | No (unless child theme or plugin) | | Best for | Site managers, agencies, multi-CPT sites | Theme developers, minimal-plugin setups | For most WordPress sites - especially those managed by agencies building [customized admin experiences](https://wpadminify.com/wordpress-admin-customization) for clients - the visual editor is the practical choice. It handles field type detection, column ordering, and framework compatibility automatically. The code approach is better suited for developers distributing themes or plugins where adding a UI dependency isn't ideal. ## What Is Advanced Custom Fields (ACF)? Advanced Custom Fields is a WordPress plugin that replaces the default custom fields interface with a powerful, developer-friendly field management system. Instead of manually adding key-value pairs through WordPress's basic "Custom Fields" meta box, ACF provides structured field types - over 30 of them - with a visual editor for creating field groups. ACF supports field types including: - Basic - Text, Textarea, Number, Email, URL, Password - Content - WYSIWYG Editor, Image, File, Gallery, oEmbed - Choice - Select, Checkbox, Radio Button, True/False - Relational - Post Object, Relationship, Taxonomy, User - Layout - Repeater (Pro), Flexible Content (Pro), Group - Special - Date Picker, Color Picker, Google Map, ACF Options Pages (Pro) Each field group can be assigned to specific post types, pages, user profiles, taxonomy terms, option pages, or even [menu items](https://wpadminify.com/how-to-use-the-wordpress-admin-menu-editor) - giving you full control over where custom data entry happens. ACF stores its data as standard WordPress [post meta](https://developer.wordpress.org/plugins/metadata/managing-post-metadata/), which means it's compatible with `get_post_meta()`, WP_Query meta queries, and the REST API. For developers, ACF also provides its own API functions - `get_field()`, `the_field()`, `have_rows()` - that simplify retrieving and displaying field data on the front end. ## Common Issues and Fixes Here are the issues we see most often when setting up ACF admin columns: ### ACF Fields Not Appearing in Admin Columns Editor Cause: The ACF field group's location rules don't match the post type you're adding columns to. Fix: Open your ACF field group, scroll to Location Rules, and verify the rule says "Post Type is equal to [your post type]." If you've set it to a page template or user role instead, the fields won't appear in the Admin Columns Editor for that post type. Also confirm the field group status is "Active." ### Column Shows Empty Values for Existing Posts Cause: The ACF fields were added after the posts were created, so those posts don't have the meta values stored yet. Fix: Open each post and save it - ACF will write default values to the database. For bulk updates, you can use a plugin like [WP All Export](https://wordpress.org/plugins/wp-all-export/) paired with WP All Import to bulk-update the meta values, or use a quick WP-CLI command: ``` # Set a default ACF value for all book_review posts missing the "publisher" field wp post list --post_type=book_review --format=ids | xargs -I {} wp post meta update {} publisher "Unknown" ``` ### Sorting Doesn't Work Correctly for Number Fields Cause: If you're using custom code, you may have set `orderby` to `meta_value` (string sort) instead of `meta_value_num` (numeric sort). String sorting treats "9" as greater than "100" because it compares character by character. Fix: Use `meta_value_num` for any numeric ACF field. The WP Adminify Admin Columns Editor handles this automatically based on the field type. ### Column Data Looks Wrong for Image or Relationship Fields Cause: ACF stores images as attachment IDs and relationships as post ID arrays. If your code outputs the raw value, you'll see numbers instead of images or post titles. Fix: Use the field type-specific rendering code shown in Method 2, Step 4 above. Or use WP Adminify, which auto-detects the field type and renders thumbnails for image fields, linked titles for relationship fields, and formatted dates for date pickers. ## Best Practices for ACF Admin Columns After setting up ACF columns on dozens of client sites, here are the patterns that work best: ### Keep Columns Focused Don't add every ACF field as a column. Pick 3-5 fields that are genuinely useful for scanning and decision-making. Too many columns creates horizontal scrolling and defeats the purpose. If you need to [simplify your dashboard](https://wpadminify.com/simplify-wordpress-dashboard), start by showing only the fields your team actually checks in list view. ### Use Descriptive Labels Rename columns to be scannable. Instead of using the ACF field name "promo_timeline," label the column "Promotion Ends" so any team member understands it instantly. ### Remove Default Columns You Don't Need Most WordPress post lists include columns for Tags, Comments, and Author that many sites never use. Remove those via the Admin Columns Editor (or [the manage_posts_columns filter](https://developer.wordpress.org/reference/hooks/manage_posts_columns/)) to make room for your ACF data. This is especially useful on sites where you've already [cleaned up admin notices](https://wpadminify.com/hide-admin-notice-in-wordpress) and want a distraction-free post list. ### Combine with Other Admin Productivity Features ACF columns work even better alongside other [WP Adminify productivity features](https://wpadminify.com/features/productivity) like post thumbnails in the list view, Post/Page ID columns, and the ability to [duplicate posts](https://wpadminify.com/features/duplicate-post). Together, these turn the WordPress post list into a complete content operations hub. ## ACF Admin Column FAQs ### Does this work with ACF Free or only ACF Pro? Both. The Admin Columns Editor in WP Adminify works with ACF Free and ACF Pro. The custom code method also works with both versions since it uses the standard get_field() function available in both. The only difference is that Pro-only field types like Repeater, Flexible Content, and Gallery are only available if you have ACF Pro installed. ### Can I add ACF columns to WooCommerce products? Yes. WooCommerce Products are a custom post type (product), so both methods work. In the Admin Columns Editor, select "Products" from the post type dropdown and your ACF fields assigned to the Product post type will appear. This is especially useful for displaying custom product attributes like manufacturer, warehouse location, or supplier code directly in the product list. ### Will ACF admin columns slow down my site? On the front end, no - ACF admin columns only load on the admin post list screen. On the admin side, each column adds one get_post_meta() call per post per column. For a list of 20 posts with 3 ACF columns, that's 60 meta queries - WordPress handles this comfortably. If you're showing 100+ posts per page with 10+ columns, you may notice a slight delay, but that's an edge case. If your WordPress admin is already slow, the bottleneck is likely elsewhere. ### Can I display ACF Repeater or Flexible Content fields as columns? Partially. You can display a summary (e.g., row count or first entry), but the full nested data structure of Repeater and Flexible Content fields isn't practical in a narrow table column. With custom code, you'd output something like "3 entries" using `count( get_field( 'repeater_field' ) )`. The Admin Columns Editor handles this by showing a formatted summary. ### Does WP Adminify support Pods and MetaBox in addition to ACF? Yes. The [Admin Columns Editor](https://wpadminify.com/admin-columns-editor) supports three major custom fields frameworks: ACF, MetaBox, and Pods. You can mix fields from different frameworks in the same post type's column set - useful if you're gradually migrating between field plugins or using different frameworks for different purposes. ### Is the Admin Columns Editor a free feature in WP Adminify? The Admin Columns Editor is available as an addon for WP Adminify. Check the [Admin Columns Editor pricing](https://wpadminify.com/admin-columns-editor/pricing) page for current plans. The core WP Adminify plugin (free on [WordPress.org](https://wordpress.org/plugins/adminify/)) includes built-in admin columns for Post ID, Thumbnails, and other standard fields through its [Productivity](https://wpadminify.com/features/productivity) settings. ## Conclusion Adding ACF fields to your WordPress admin columns transforms your post list from a basic index into a functional data dashboard. Instead of clicking into posts to check custom field values, you see everything at a glance - sortable, scannable, and actionable. Here's the recap: - WP Adminify method: Use the [Admin Columns Editor](https://wpadminify.com/admin-columns-editor) addon - select your post type, pick ACF fields from the ACF tab, drag to reorder, and save. Handles field type rendering and sorting automatically. - Custom code method: Hook into `manage_{post_type}_posts_columns` and `manage_{post_type}_posts_custom_column` to register and populate columns manually. Best for developers distributing themes. - Best practice: Limit yourself to 3-5 ACF columns per post type. Show only the data your team actually needs in list view. If you're managing multiple post types with custom field data, also check out our guide on [essential admin columns for WordPress](https://wpadminify.com/necessary-admin-columns-for-wordpress) to see which built-in columns pair well with your ACF setup. --- # How to Add a Custom Dashboard Widget in WordPress (Code + No-Code) URL: https://wpadminify.com/custom-dashboard-widget-in-wordpress Last updated: 2026-08-12 The dashboard is the first screen anyone sees after logging into WordPress, and out of the box it's mostly noise: Quick Draft, WordPress Events, Site Health, a welcome panel nobody reads. What's missing is the stuff your team actually wants on day one. A support link. The posting checklist. A short video for the client who'll forget how to add a page by next Tuesday. A custom dashboard widget in WordPress is how you put that there. You can do it two ways. Developers reach for the `wp_add_dashboard_widget()` function; everyone else can build the same thing visually in WP Adminify and lock it to specific user roles without writing a line of PHP. This guide covers both, so you can pick the one that fits how you work. Summer Sale - Flat 50% Off WP Adminify (Bundle Included) One license, every Pro feature plus the full bundle. Limited time. Make sure to use "SUMMERSALE" coupon to purchase Adminify Bundle. For Adminify the coupon is auto applied. [Get Pro at 50% Off](https://wpadminify.com/pricing) ## What is a custom dashboard widget in WordPress? A custom dashboard widget is a box on the main WordPress admin dashboard (the `index.php` screen at `wp-admin`) that holds content you define: text, links, an RSS feed, a video, a shortcode, or your own HTML. WordPress ships a handful of core widgets and gives you an API to register your own through `wp_add_dashboard_widget()`, hooked to `wp_dashboard_setup`. Each widget needs three things: a unique ID, a visible title, and a callback that prints the content. Once it's registered, it behaves like any native widget. Users can drag it, collapse it, or move it between the Normal and Side columns. The catch is the callback. It expects you to echo raw markup, so anything past a paragraph of text means writing and maintaining your own HTML by hand. ## Why add a custom dashboard widget? The dashboard is the cheapest internal real estate you own. Everyone who logs in sees it instantly, no clicks required. Beyond widgets, WP Adminify handles full [WordPress dashboard customization](https://wpadminify.com/features/dashboard-customization) without code. That makes it good for a few specific jobs: - Client onboarding. Agencies drop a welcome note, a support email, and a 90-second "how to edit your site" video right where clients land. Cuts down the "how do I..." emails. - Editorial standards. A widget that only Authors and Editors see can hold the style guide, image-size rules, or the publishing checklist nobody remembers. - Live data. Embed an analytics snapshot or an RSS feed of company news so the team sees it without leaving WordPress. - Branding. Swapping the default boxes for your own is one quiet step toward a [customized WordPress dashboard](https://wpadminify.com/wordpress-dashboard-customization) that looks like your shop instead of a stock install. Both methods below land in the same place. Pick based on whether you'd rather open `functions.php` or click through a settings panel. ## Method 1: The code method (wp_add_dashboard_widget) If you're fine editing PHP, the native API is direct and has no dependencies. Drop this in your theme's `functions.php`, or better, a small site-specific plugin so the widget doesn't vanish the next time you switch themes. ```php roles, true ) ) { // Register a widget only WooCommerce Shop Managers should see. } ``` Reach for [current_user_can()](https://developer.wordpress.org/reference/functions/current_user_can/) with a capability wherever you can. It reads cleaner and you're not betting on a role slug staying the same after a plugin update. The code route is precise, but every change is a deploy and there's no visual editing. That's the part the next method fixes. ## Method 2: The no-code method with WP Adminify [WP Adminify](https://wpadminify.com/wordpress-dashboard-customization) has a Dashboard & Welcome Widget builder that registers the widget for you and adds a visual editor, six content types, and a role selector on top. No `functions.php` edits, no deploys. It's the same WordPress API underneath, just wrapped in something the whole team can use. The steps below match the plugin screen for screen. ### Step 1: Enable the Dashboard & Welcome Widget feature From the admin sidebar, head to Adminify → Productivity. Find the Dashboard & Welcome Widget row, flip its toggle to YES, and click Save Settings. That unlocks the widget manager and adds a new Dashboard Widget item under the Adminify menu. ![Enabling the Dashboard and Welcome Widget feature in the WP Adminify Productivity settings tab](https://d1k2c27psfzbiv.cloudfront.net/wp-content/uploads/2026/06/24111456/enable-custom-dashboard-widget-wp-adminify.webp) ### Step 2: Open the Dashboard Widget manager Click Adminify → Dashboard Widget. The manager opens with two tabs: Dashboard Widgets (the main grid everyone sees) and Welcome Widget (the full-width panel across the top). Each existing widget shows up as a collapsible row you can drag to reorder, duplicate, or delete. Click Add New Widget to start one. ![WP Adminify Dashboard Widget manager showing custom dashboard widget rows and the Add New Widget button](https://d1k2c27psfzbiv.cloudfront.net/wp-content/uploads/2026/06/24111502/adminify-dashboard-widget-manager.webp) ### Step 3: Add a widget and choose a content type Give the widget a Widget Title, then set its Widget Position to Normal (the wide left column) or Side (the narrow right column). Now pick a Content Type. This is where the no-code route pulls ahead of raw code. Instead of echoing HTML, you get six ready-made formats: | Content Type | What it does | Best for | | --- | --- | --- | | Editor | Full TinyMCE editor with headings, lists, and media | Welcome notes, guidelines, formatted text | | Icon | An icon paired with a label and link | Quick-action buttons, shortcuts | | Video | Self-hosted, YouTube, Vimeo, or iFrame embed | Client tutorials, onboarding walkthroughs | | Shortcode | Renders any WordPress shortcode | Forms, reports, dynamic plugin output | | RSS Feed | Pulls and lists items from any feed URL | Company news, changelogs, blog updates | | Script | Custom JavaScript inside a ` ` tag | Live clocks, counters, custom interactions | ![Configuring a custom dashboard widget title, content type, and allowed user roles in WP Adminify](https://d1k2c27psfzbiv.cloudfront.net/wp-content/uploads/2026/06/24111507/custom-dashboard-widget-content-type-user-role.webp) The Editor type, shown above, opens the editor you already know. Type, format, done. No callback, no escaping, no echo statements to debug. ### Step 4: Restrict the widget to specific user roles Every widget has an Allowed User Roles field at the bottom. Click it and pick one or more roles: Administrator, Editor, Author, Shop Manager, or any custom role on the site. Only those roles see the widget; everyone else gets a clean dashboard. It's the same idea as the `current_user_can()` check from Method 1, except you change it in two clicks with no redeploy. Leave it on Administrator for internal-only widgets, or add Author and Editor for editorial notes. If you're running a handful of sites, role-based widgets paired with a tidy [WordPress client dashboard](https://wpadminify.com/wordpress-client-dashboard) means each client sees what's theirs and nothing else. ### Step 5: Add a Script (JavaScript) widget For interactive content, set the Content Type to Script. A code field shows up pre-filled with a safe jQuery wrapper. Write your JavaScript between the ` ` tags: a live clock, a countdown, a button that fires an action. The widget renders the script inside its own box on the dashboard. ![Adding custom JavaScript to a WordPress dashboard widget using the Script content type in WP Adminify](https://d1k2c27psfzbiv.cloudfront.net/wp-content/uploads/2026/06/24111512/custom-dashboard-widget-script-content.webp) Here's a self-contained example that prints a live clock. It inserts itself right where the script sits, so it works no matter what wraps the widget: ``` (function() { var clock = document.createElement('div'); clock.style.cssText = 'font-size:28px;font-weight:600;text-align:center;padding:16px 0;'; var s = document.currentScript; s.parentNode.insertBefore(clock, s); function tick() { var n = new Date(), p = function(x){ return String(x).padStart(2,'0'); }; clock.textContent = p(n.getHours()) + ':' + p(n.getMinutes()) + ':' + p(n.getSeconds()); } tick(); setInterval(tick, 1000); })(); ``` ### Step 6: View the live dashboard Hit Save Settings, then open Dashboard at the top of the sidebar. Your widgets now sit next to (or in place of) the native ones: an Editor widget, a self-hosted video, an RSS feed, each in the column and position you chose, visible only to the roles you allowed. ![Custom dashboard widgets displayed live on the WordPress admin dashboard built with WP Adminify](https://d1k2c27psfzbiv.cloudfront.net/wp-content/uploads/2026/06/24111517/custom-dashboard-widgets-live-wordpress-dashboard.webp) That's the whole loop: enable the feature, add a widget, pick a content type, set roles, save. Repeat for as many widgets as you need, and drag to reorder. To go further and clear out the default boxes you don't want, here's how to [remove the WordPress welcome widget](https://wpadminify.com/how-to-remove-wordpress-welcome-widget-from-dashboard) and the rest of the core clutter. ## Code vs no-code: which should you use? Both register real WordPress dashboard widgets. The difference is who maintains them and how fast you can change them. | Factor | Code (wp_add_dashboard_widget) | WP Adminify (no-code) | | --- | --- | --- | | Setup | Edit functions.php / build a plugin | Toggle a setting, click Add Widget | | Content types | Whatever HTML you write | Editor, Icon, Video, Shortcode, RSS, Script | | Role control | Manual capability checks | Visual role selector per widget | | Editing later | Code change + deploy | Edit in the UI, save | | Who can manage | Developers only | Any admin on the team | | Survives theme switch | Only if in a plugin | Yes (plugin-based) | Go with code when you want tight version control, the widget ships as part of a product, or you're avoiding plugin dependencies on purpose. Go no-code when non-developers need to manage widgets, when you want the extra content types without writing markup, or when WP Adminify is already handling the rest of your [WordPress admin panel](https://wpadminify.com/complete-guide-to-wordpress-admin-panel-for-beginners) anyway. ## Common issues and fixes - Widget doesn't appear. Make sure registration is hooked to `wp_dashboard_setup`, not `admin_init`. In WP Adminify, check that the widget's Allowed User Roles include your role. - Script content does nothing. Some setups strip raw ` ` on save. Right-click the widget and Inspect to see if the tag survived. If it didn't, use a header/footer scripts tool or fall back to the code method. - Widget shows to the wrong users. In code, double-check the capability matches the role. `edit_others_pages` excludes Authors. In WP Adminify, reopen the widget and look at the role chips. - Widget keeps landing in the wrong column. Position is a default, not a lock. Users can drag widgets around, and WordPress remembers each person's layout per account. ## Custom Dashboard Widget FAQs ### How do I add a custom widget to the WordPress dashboard? Register it with `wp_add_dashboard_widget()` hooked to `wp_dashboard_setup` in your theme's functions.php, or use a plugin like WP Adminify to add one visually. The function needs a unique ID, a title, and a callback that echoes the widget's content. ### Can I show a dashboard widget only to certain user roles? Yes. In code, wrap the registration in a `current_user_can()` capability check or test `wp_get_current_user()->roles`. In WP Adminify, each widget has an Allowed User Roles field where you pick exactly which roles can see it, no code needed. ### What is the wp_dashboard_setup hook? wp_dashboard_setup is the WordPress action that fires while the admin dashboard is being assembled. It's the right place to register or remove dashboard widgets, because it only runs on the dashboard screen and after the core widgets are set up. ### Can a dashboard widget show a video or RSS feed? Yes. With code, you embed the HTML yourself inside the callback. WP Adminify has dedicated Video (self-hosted, YouTube, Vimeo, iFrame) and RSS Feed content types, so you paste a URL and the widget renders the embed or feed for you. ### Will custom dashboard widgets slow down my site? No. Dashboard widgets only load inside wp-admin for logged-in users, never on the front end, so they don't touch visitor-facing page speed. Keep Script widgets light so they don't drag on the admin screen itself. ### Do custom dashboard widgets survive a theme change? Only if the code lives in a plugin rather than functions.php. Theme-based code disappears the moment you switch themes. Plugin-based tools like WP Adminify keep your widgets in place no matter which theme is active. ## Conclusion A custom dashboard widget turns the most-seen screen in WordPress into something your team or clients actually use. Quick recap: - For developers: `wp_add_dashboard_widget()` on the `wp_dashboard_setup` hook gives full control, with role limits via `current_user_can()`. - For everyone else: WP Adminify's Dashboard & Welcome Widget builder adds six content types and a visual role selector with no code. - Role-based access means each person sees only the widgets meant for them. - Both methods ride the same native WordPress API underneath, so pick whichever workflow fits your team. If you'd rather build and manage widgets visually, and tidy up the rest of the admin while you're in there, [try WP Adminify](https://wpadminify.com/wordpress-dashboard-customization) and ship your first custom dashboard widget in a few minutes. For a bigger cleanup, pair it with our guide to [building a custom user dashboard without coding](https://wpadminify.com/how-to-create-wordpress-custom-user-dashboard-without-coding). ### Build the Rest of the Dashboard Around Your Widgets Custom widgets work best on a dashboard that's already decluttered and branded. See the complete guide to [customizing the WordPress dashboard](https://wpadminify.com/wordpress-dashboard-customization), and the [step-by-step widget doc](https://wpadminify.com/docs/adminify/productivity/create-custom-dashboard-widget) for the exact settings used here. --- # How to Clean Up Your WordPress Media Library Safely URL: https://wpadminify.com/clean-wordpress-media-library Last updated: 2026-08-12 Media library cleanup is the most commonly recommended and most commonly botched WordPress maintenance job. The advice is always "install a plugin, scan for unused media, delete." Follow it on a page-builder site and you'll find broken images across pages nobody thought to check, sometimes weeks later, after the backup window has closed. The plugins aren't the problem. The problem is that "unused" is much harder to work out in WordPress than it looks. Here's what actually breaks, what's genuinely safe to delete, and the order that keeps your site intact. ![WordPress Site Health Directories and Sizes panel showing the uploads directory dominating total installation size](https://d1k2c27psfzbiv.cloudfront.net/wp-content/uploads/2026/08/09093032/wordpress-site-health-uploads-directory-size.png) ## Read this before you delete anything Three facts that make media cleanup riskier than it looks. Each one causes real damage regularly. ### "Unattached" doesn't mean unused WordPress records a parent post for files uploaded inside the post editor. Files uploaded via Media > Add New have no parent and show as Unattached. That field records where a file was first uploaded, not where it's currently displayed. An unattached image can be live on twelve pages. An attached image may have been pulled from its parent post years ago. As a usage indicator the attachment relationship is close to meaningless, and it's the exact field most cleanup workflows lean on. ### Scanners can't see inside page builders An "unused media" scanner usually searches post content for the image URL or attachment ID. That works for classic content. It misses: - Page-builder layouts. Elementor, Divi, Beaver Builder and others store layouts as serialized JSON in postmeta, with image references encoded inside that structure. - Theme customizer settings. Logos, hero backgrounds, and favicons live in the `theme_mods` option, not in post content. - ACF and custom fields. Image fields store an ID or URL in postmeta in a format the scanner may not parse. - Widget and block-pattern content, stored in options and widget tables. - CSS backgrounds. An image referenced only in a stylesheet is invisible to any database scan. - Email templates and PDFs, where the asset is used outside the site entirely. A scanner that flags 4,000 unused files on an Elementor site is very likely wrong about a good chunk of them. ### Deletion isn't reversible Deleting an attachment removes the file and all its generated sizes from disk, plus its database rows. There's no trash for media. The only recovery is a backup. So take a full backup, files and database, before you start, and verify you can actually restore it. An untested backup is a hope, not a plan. ## The safe cleanup order Work from lowest risk to highest, and stop whenever the remaining gain stops justifying the risk. ### Step 1: fix what generates the waste Cleaning without fixing the cause means doing this again next year. The biggest source of bloat is registered image sizes. WordPress generates a copy of every upload for every registered size. Core registers five or six, your theme adds more, WooCommerce adds three, sliders and galleries add their own. Twelve registered sizes turns 10,000 uploads into roughly 120,000 files. ``` /** * Stop generating unused intermediate image sizes. * Affects new uploads only - existing files are untouched. */ function adminify_remove_unused_image_sizes( $sizes ) { unset( $sizes['1536x1536'] ); // retina intermediate unset( $sizes['2048x2048'] ); // retina intermediate return $sizes; } add_filter( 'intermediate_image_sizes_advanced', 'adminify_remove_unused_image_sizes' ); ``` Check your templates after changing this. Remove a size the theme uses and WordPress falls back to the full-size image, so visitors download a 2 MB file where a 40 KB thumbnail belongs. That's worse than the disk space you saved. ### Step 2: remove orphaned files on disk Safest category by a wide margin. Orphaned files sit in `wp-content/uploads/` with no corresponding database row, usually left behind by failed migrations, deleted plugins, or files uploaded over FTP. They're invisible in the Media Library, so nothing in WordPress can reference them through normal means. Deleting them is close to risk-free. They also accumulate faster than anyone expects. On a WordPress 7.0.3 install we checked in August 2026, the Media Library showed 38 attachments. Counting every generated size, WordPress referenced 152 files. The uploads directory held 5,503 images. That leaves 5,351 orphans, so roughly 97% of the image files on disk were ones WordPress had no record of at all. None of them are visible or deletable from the admin, because the Media Library is a database query rather than a directory listing. One exception to watch: files deliberately placed there to be linked directly, like a downloads directory. Check for direct links before clearing anything outside the date-based folders. ### Step 3: regenerate and clean up orphaned thumbnails Change your registered image sizes and the old generated files stay on disk forever. A thumbnail regeneration tool rebuilds the current sizes and can remove the obsolete ones. Run it on staging first. Regeneration is CPU-heavy and will time out mid-process on shared hosting with a large library, leaving you partially regenerated. ### Step 4: handle duplicates Duplicates are a symptom. When finding an existing file is harder than uploading a new one, people upload a new one. WordPress appends `-1`, `-2`, `-3` and stores each copy with all its generated sizes. Finding them: - Search the library for `-1` and `-2`. The numeric suffix is the clearest signal. - Sort list view by filename to group near-identical names. - Check logos, headshots, and hero images first, since they accumulate the most copies. Before deleting a duplicate, confirm which copy is actually in use. Two files with near-identical names may both be live on different pages. Deleting the "obvious" duplicate is a common way to break a page nobody was looking at. Long term the fix is upstream: [replacing a file rather than re-uploading it](https://wpadminify.com/how-to-update-replace-image-in-wordpress-without-changing-url) keeps one canonical copy. ![WordPress Media Library search results showing acme-logo.jpg duplicated as acme-logo-1.jpg, acme-logo-2.jpg and acme-logo-3.jpg, all marked Unattached](https://d1k2c27psfzbiv.cloudfront.net/wp-content/uploads/2026/08/09093037/wordpress-media-library-duplicate-files-search.png) ### Step 5: audit genuinely unused media, carefully Highest-risk step, and the one most guides start with. If you've come this far you've already reclaimed most of the available space with far less exposure. If you're going ahead: - Clone the site to staging and do the whole audit there first. - Run the scan and read the report before acting. Don't touch a one-click delete-all. - Spot-check twenty flagged files by hand. Search the site for each one. If even one is in use, the scanner doesn't understand your stack, so stop. - Delete in batches of fifty, checking key pages between batches. - Crawl for broken images. Any site crawler will find 404ing image requests across every page. - Only then repeat on production, with a fresh backup. Sites where automated cleanup isn't worth the risk: anything built with Elementor, Divi, Beaver Builder, or WPBakery, sites leaning heavily on ACF image fields, multisite installs sharing media, and any site where the person doing the cleaning didn't build it. ## What to skip | Common advice | Why to skip it | | --- | --- | | "Delete all unattached media" | Unattached means "not uploaded to a post," not "unused." Reliably breaks live images. | | "Clean the library to speed up your site" | Visitors never query the Media Library. Front-end speed comes from image size and delivery, not attachment count. | | "Run a one-click cleanup plugin" | Fine on a simple blog. On a page-builder site the false-positive rate is high enough to cause real damage. | | "Delete everything older than two years" | Age has no relationship to usage. Your logo is probably your oldest file. | ## Organize first, then clean Counterintuitive but it holds up: organizing a library makes cleaning it safer and easier. Once files are in folders, obsolete groups become visible as groups. The assets for a client who left in 2023, or a campaign that ended. Deciding about a folder of 200 files whose shape you can see is far more reliable than deciding about 200 individual filenames in a scanner report. Folders also cut the duplicate rate at source. Most duplicates exist because retrieval was harder than re-uploading. Fix retrieval and the problem stops growing. Because virtual folders never move files or change URLs, organizing is completely safe, which is the opposite risk profile to deleting. The workflow is in [how to organize your media library with folders](https://wpadminify.com/how-to-organize-wordpress-media-library-with-folders), and [WP Adminify's media folders](https://wpadminify.com/features/wordpress-media-folder) handle it without touching your file structure. ![WordPress Media Library with a folder tree showing Brand Logos, Features, News and Products folders with nested subfolders and per-folder file counts](https://d1k2c27psfzbiv.cloudfront.net/wp-content/uploads/2026/08/09093043/wordpress-media-library-folder-tree-organized.png) ## A maintenance routine that works | Frequency | Task | | --- | --- | | Weekly | Empty the Unsorted folder. Ten minutes, one person. | | Monthly | Check for duplicate uploads of frequently used assets | | Quarterly | Review folders belonging to finished projects or former clients | | Annually | Audit registered image sizes; clear orphaned files on disk | | Never | Bulk-delete based on an automated scan without spot-checking | Prevention beats cleanup every time. Rename files before uploading, resize before uploading, file into a folder at upload time, replace rather than re-upload. Four habits, and the library stops needing rescue. ## Media Library Cleanup FAQs ### Is it safe to delete unattached media in WordPress? No. "Unattached" only means the file wasn't uploaded from inside a post editor. It says nothing about whether the file is currently displayed, and unattached images are frequently live across multiple pages. Treat the field as an upload-history record, not a usage indicator. ### Will cleaning my media library make my site faster? Not for visitors. The Media Library is an admin interface and is never queried on the front end. Cleanup reduces disk usage, backup time, and migration time. Front-end speed comes from serving correctly sized images and using a CDN. ### How do I find unused images in WordPress? Scanner plugins search post content for image references, but they miss images inside page-builder JSON, theme customizer settings, ACF fields, widgets, and CSS. Test on a staging copy, spot-check flagged files by hand, and delete in small batches while checking key pages. ### What happens if I delete an image that is still in use? The file and all its generated sizes come off disk, and every page displaying it shows a broken image. There's no trash for media, so the only recovery is restoring from backup. WordPress gives you no warning before deletion. ### How much space can media cleanup actually save? It varies, and the largest single win on most sites isn't deleting files at all. It's reducing registered image sizes. A site generating twelve sizes per upload stores many times more data than its item count suggests. Orphaned files left behind by old plugins and migrations are usually the second-biggest chunk, and they're invisible from the admin entirely. ### Should I use a media cleanup plugin? They're reasonable on simple blogs with classic content. On page-builder sites, ACF-heavy sites, or anything you didn't build yourself, the false-positive rate is high enough that manual review is faster than fixing the damage. Use them as a report, not as an action. ## Conclusion Media cleanup is worth doing, and worth doing carefully. The risk sits almost entirely in one step, deleting "unused" files, while most of the benefit sits in the steps before it. - Back up and verify the restore before touching anything. - Fix registered image sizes first. Biggest win, zero risk to existing content. - Orphaned files and true duplicates are the safe deletions, and orphans are usually a much bigger share of your disk than you'd guess. - Treat scanner reports as a starting point, never as an action list. - Organize before you clean. Folders make obsolete assets visible as groups and cut duplicates at the source. If your library is large enough that cleanup feels urgent, start with [organizing your media library with folders](https://wpadminify.com/how-to-organize-wordpress-media-library-with-folders). Most of what people want from cleanup is actually solved by organization and image-size auditing. --- # How to Change WordPress Admin Footer Copyright Text (2 Ways) URL: https://wpadminify.com/change-wordpress-admin-footer-copyright-text Last updated: 2026-08-12 Log into any WordPress dashboard and look at the very bottom of the screen. On the left it reads "Thank you for creating with WordPress," and on the right it shows your current WordPress version number. That default footer is fine on your own site. But when you hand a dashboard to a client, it broadcasts which CMS you used, leaks the version a hacker could target, and quietly undercuts your branding. This guide shows exactly how to change the WordPress admin footer copyright text, both the no-code way using the WP Adminify White Label module and the developer way using a `functions.php` snippet, so you can swap that generic line for your own agency credit. ## What is the WordPress admin footer text? The WordPress admin footer is the thin strip at the bottom of every `wp-admin` screen. It has two halves, and each one is controlled by its own hook. The left side prints "Thank you for creating with WordPress" (an HTML link to wordpress.org) through the `admin_footer_text` filter. The right side prints "Version 6.x" through the `update_footer` filter. Both are cosmetic strings that WordPress core injects on the dashboard. Neither has anything to do with your public website footer or your theme's copyright line. Because each half is a filter, you can overwrite either one with your own text, a custom link, or nothing at all. That's the whole mechanism behind every "change admin footer" plugin and snippet you'll find. They all hook into those two filters. Knowing this tells you what's actually possible: any HTML you can put in a link, you can put in the footer. ## Why change the admin footer copyright text? Editing one line of footer text sounds trivial, but for anyone running client sites it solves a few real problems at once. Here's why agencies and freelancers bother: - White-label branding. Replacing "Thank you for creating with WordPress" with "Developed by [Your Agency]" makes the dashboard feel like a product you built, not a third-party CMS. It's a small touch clients notice every time they log in. - Free advertising and support routing. A footer credit linking back to your site keeps your name in front of the client and gives them a one-click path to your support page or contact form. - One less thing to hand attackers. The right-side version number tells anyone with dashboard access exactly which WordPress release you run. Hiding it removes an easy reconnaissance signal for targeted exploits. It isn't a substitute for staying updated, but there's no reason to advertise the version either. - A cleaner handoff. Default WordPress branding in the admin reads as "unfinished" to a paying client. Custom footer text is part of a polished [white label WordPress](https://wpadminify.com/white-label-wordpress-development) experience. From our experience managing dashboards across dozens of client sites, the footer credit is one of the highest-impact, lowest-effort branding changes you can make. Only the login logo beats it. ## Method 1: Change the admin footer text with WP Adminify (no code) If you'd rather not touch theme files, or you manage sites for clients who'll outlive your current theme, a plugin is the safer route. [WP Adminify](https://wpadminify.com/) handles the admin footer through its [White Label](https://wpadminify.com/features/white-label) module, with a visual editor and no risk of a syntax error white-screening the site. Here's the full walkthrough. ### Step 1: Open the White Label settings From your WordPress dashboard, go to Adminify > White Label in the left admin menu. This opens the panel titled "WordPress" White Label Settings, which groups every branding control in one place: logo, favicon, the "Howdy" greeting, admin bar cleanup, and the admin footer. ### Step 2: Enable "Show Footer Credit" Find the Show Footer Credit row. By default it's set to NO, which means WP Adminify leaves the footer alone. Flip the toggle to YES. This is the master switch. Turning it on tells the plugin to take over the left side of the admin footer and reveals the text editor where you enter your own credit. ![enable admin footer text modification](https://d1k2c27psfzbiv.cloudfront.net/wp-content/uploads/2026/06/27062144/enable-admin-footer-text-modification.webp) ### Step 3: Enter your custom footer text Once the toggle is on, an Admin Footer Text editor appears, and it controls the left-side WordPress admin footer text. It's a standard WordPress editor, so you can type plain text or paste HTML. To add a linked agency credit, use markup like this: ![edit wordpress dashboard footer copyright text](https://d1k2c27psfzbiv.cloudfront.net/wp-content/uploads/2026/06/27062142/edit-wordpress-dashboard-footer-copyright-text.webp) ``` Developed by Your Agency Name ``` The `target="_blank"` opens your link in a new tab so clients don't lose their place in the dashboard, and the `title` attribute adds a tooltip. Swap in your own URL, anchor text, and tagline. ### Step 4: (Optional) Configure the right-side info In the same panel, the Admin Footer row gives you checkboxes for what shows on the right side instead of the version number: Show IP Address, Show PHP Version, Show WordPress Version, Show Memory Usage, Show Memory Limit, and Show Memory Available. Tick Show Memory Available, for example, and the right side reads "WP Memory Available: 246MB", genuinely useful server info that replaces the version string you'd rather hide. Leave every box unchecked to keep the right side empty. ### Step 5: Save and verify Click Save Settings in the top-right corner. Scroll to the bottom of any admin page and you'll see your new credit on the left ("Developed by Your Agency Name") and your chosen server info on the right. No theme files touched, and the change survives every theme switch and update because it lives in the plugin, not the theme. The advantage here is durability and reach. Because WP Adminify applies the footer at the plugin level, the credit shows for every user role and persists even if you redesign or replace the theme later. It also pairs with the rest of the [admin customization](https://wpadminify.com/wordpress-admin-customization) toolkit, so the footer becomes one consistent piece of a fully branded dashboard instead of an isolated hack. ## Method 2: Change the admin footer text with functions.php code Developers who want zero plugin overhead can change the footer with a few lines in `functions.php`. WordPress exposes the left-side text through the [admin_footer_text](https://developer.wordpress.org/reference/hooks/admin_footer_text/) filter, so you hook into it and return your own string. ### Step 1: Open your theme's functions.php (use a child theme) Edit `functions.php` in your active theme, but use a [child theme](https://developer.wordpress.org/themes/advanced-topics/child-themes/) if the parent gets updates, otherwise your snippet vanishes on the next theme update. Reach the file via Appearance > Theme File Editor, or over SFTP at `/wp-content/themes/your-child-theme/functions.php`, which is safer. Always back up the file first, since a single misplaced character here can take the whole site down. ### Step 2: Add the admin_footer_text filter Paste this snippet at the bottom of the file. It replaces the left-side "Thank you for creating with WordPress" with your own linked credit: ``` /** * Change the WordPress admin footer copyright text (left side). */ function adminify_custom_admin_footer_text() { echo 'Developed by Your Agency Name'; } add_filter( 'admin_footer_text', 'adminify_custom_admin_footer_text' ); ``` The filter callback just `echo`s the markup you want. Note the `rel="noopener"` alongside `target="_blank"`: that's the modern best practice for any new-tab link, for both security and performance. Save the file and refresh the dashboard, and the left footer now shows your credit. ### Step 3: Restrict it to specific roles (optional) Sometimes you want the credit to appear only for clients, not for yourself. Wrap the output in a capability check so administrators still see the default while everyone else sees your branding: ``` function adminify_role_based_footer_text( $default ) { // Show the default WordPress text to admins; show your credit to everyone else. if ( current_user_can( 'manage_options' ) ) { return $default; } return 'Developed by Your Agency Name'; } add_filter( 'admin_footer_text', 'adminify_role_based_footer_text' ); ``` Here the filter passes in the existing footer string as `$default`, so you can return it untouched for admins. This is the kind of role-aware logic the plugin route handles through a checkbox instead of a capability check, which is worth knowing when you outgrow the snippet. ## Changing the right-side version text (update_footer) The version number on the right is a separate filter: `update_footer`. WordPress core attaches its own callback at priority 10, so to override it you have to hook in at a higher priority number (11 or above), or your text gets overwritten. Add this to `functions.php`: ``` /** * Replace the WordPress version in the admin footer (right side). */ function adminify_change_footer_version() { return 'Powered by Your Company'; } add_filter( 'update_footer', 'adminify_change_footer_version', 11 ); ``` Return an empty string instead (`return '';`) to hide the right side completely. With the plugin you skip the priority gotcha entirely. The right-side checkboxes in the White Label panel handle it, and you can swap the version for live memory or PHP info that the code method would take extra work to build. ## How to remove the WordPress admin footer text entirely If you don't want any credit at all, just a blank footer, WordPress ships a built-in helper that returns an empty string, so you don't even need a custom function: ``` // Remove the left-side "Thank you for creating with WordPress" text. add_filter( 'admin_footer_text', '__return_empty_string' ); // Remove the right-side version number. add_filter( 'update_footer', '__return_empty_string', 11 ); ``` The `__return_empty_string` callback is part of WordPress core, which is why it's the cleanest way to blank the footer. With WP Adminify, the equivalent is leaving the Admin Footer Text field empty (or off) and unchecking every right-side box. Same blank result, no code. ## Code vs plugin: which method should you use? Both methods hit the same two filters, so the footer output is identical. The difference is maintenance, safety, and how far the change reaches. Here's the honest breakdown: | Factor | functions.php code | WP Adminify (White Label) | | --- | --- | --- | | Setup time | ~5 min (if comfortable with PHP) | ~1 min (toggle + type) | | Risk of breaking the site | Yes, a syntax error can white-screen wp-admin | No, visual editor, no PHP | | Survives theme switch | No, tied to the theme's functions.php | Yes, stored in the plugin | | Role-based control | Manual capability checks | Built in | | Right-side server info (memory/PHP) | Extra custom code required | Checkboxes included | | Best for | Single sites, developers, minimal footprint | Agencies, client sites, non-coders | Use the code snippet when you manage one site, you're comfortable in PHP, and you want zero extra plugins. Reach for WP Adminify when you run client sites, want the change to survive theme changes, or you're already using it for [other white-label tasks](https://wpadminify.com/how-to-hide-wordpress-plugins-from-clients) like hiding plugins or branding the login page. If you like keeping snippets but hate editing theme files, WP Adminify's built-in [Code Snippets manager](https://wpadminify.com/features/code-snippets) is a middle path that runs the same PHP without touching `functions.php`. ## Common issues and fixes - Footer text didn't change. Clear any caching plugin and hard-refresh. If you used code, confirm the snippet is in the active theme's `functions.php` (or the child theme, if active) and that you didn't paste it inside another function or a closing `?>` tag. - Right-side version still shows. Your `update_footer` filter is running at priority 10 or lower, so core overwrites it. Raise the priority to `11` as shown above. - White screen after editing functions.php. You introduced a PHP syntax error. Reconnect over SFTP, remove the snippet, and re-add it carefully. This failure mode is exactly why client sites are safer on the plugin method. - HTML shows as plain text. Your link tags got escaped. In the plugin editor, switch to the Text/code view before pasting HTML. In code, make sure you're outputting raw markup, not running it through `esc_html()`. - Credit appears for everyone, including admins. Use the role-based snippet (or the plugin's role controls) so only client roles see the branded footer. ## Admin Footer Copyright Text FAQs ### How do I change the "Thank you for creating with WordPress" text? That line is the left side of the admin footer, controlled by the `admin_footer_text` filter. Either hook into it from `functions.php` and return your own text, or enable "Show Footer Credit" in the WP Adminify White Label module and type your credit into the Admin Footer Text field. Both replace the default message instantly. ### Is changing the admin footer text different from changing my website footer? Yes, completely. The admin footer appears only inside wp-admin and is set by the admin_footer_text and update_footer filters. Your public website footer lives in the theme (usually footer.php or the block/site editor) and is edited separately. Changing one does not affect the other. ### Will I lose the footer change when I update WordPress or my theme? A WordPress core update won't remove it either way. A theme update will wipe a functions.php snippet unless you put it in a child theme. The WP Adminify method stores the setting in the plugin, so it survives both core and theme updates with no extra steps. ### How do I remove the WordPress version number from the admin footer? Hook into the update_footer filter at priority 11 and return an empty string: add_filter( 'update_footer', '__return_empty_string', 11 );. With WP Adminify, simply leave the right-side checkboxes (Show WordPress Version, etc.) unchecked to keep that side blank. ### Do I need to know how to code to change the admin footer text? No. The functions.php method needs basic PHP comfort, but the WP Adminify White Label module is fully visual. Flip the "Show Footer Credit" toggle, type or paste your text, and save. No PHP, no risk of breaking the site. ### Can I add a clickable link in the admin footer? Yes. Both methods accept HTML, so you can include a full anchor tag like Your Agency. the link works for every user who can see the footer, which makes it a handy route to your support or contact page. ## Conclusion Changing the WordPress admin footer copyright text comes down to two filters, `admin_footer_text` for the left credit and `update_footer` for the right-side version, and two ways to reach them: - Code route: Add a short snippet to a child theme's `functions.php`. Best for single sites and developers who want no extra plugins. - Plugin route: Toggle "Show Footer Credit" in WP Adminify's White Label module and type your text. Best for client sites, non-coders, and anyone who wants the change to survive theme switches and apply by role. - Either way: You can fully replace, hide, or rebrand both sides of the footer, including swapping the version number for live server stats. If the footer is your first step toward a fully branded backend, it pairs naturally with the rest of the toolkit: [a custom login logo](https://wpadminify.com/change-wordpress-login-logo), a renamed "Howdy" greeting, and your own admin colors. [Explore the WP Adminify White Label module](https://wpadminify.com/features/white-label) to brand the whole dashboard, not just the footer. ### Go Further Than the Footer The footer credit is one small piece of a branded admin. For the full picture - menus, colors, widgets, login screen and more - see the complete guide to [customizing the WordPress dashboard](https://wpadminify.com/wordpress-dashboard-customization). And if you're setting up White Label for a client site, the [White Label module documentation](https://wpadminify.com/docs/adminify/white-label/wordpress-white-label-features) covers every setting in the panel, including the footer options from Step 4. --- # FileBird Alternatives: 7 Best WordPress Media Library Plugins URL: https://wpadminify.com/filebird-alternatives Last updated: 2026-08-12 FileBird is the most installed media folder plugin for WordPress, and it earns that. The interface is the best in its category and the database design holds up on libraries where other plugins start crawling. Most people shopping for an alternative aren't unhappy with it. They've hit one specific wall. Usually it's the free tier's folder cap, or the fact that it organizes media but leaves posts and pages alone, or the moment someone opens phpMyAdmin and realizes the folder tree lives in tables nothing else can read. We tested seven alternatives on a clean WordPress 7.0.3 install, activating each one on its own and checking what it did to the database. So what follows comes from measurements, not from anyone's feature page. One of the seven is ours: WP Adminify puts [folders on media, posts, pages and products in one plugin](https://wpadminify.com/features/wordpress-media-folder). The full field is in our [best WordPress media folder plugins](https://wpadminify.com/best-wordpress-media-folder-plugins) roundup, with the incumbent covered in the [FileBird review](https://wpadminify.com/filebird-review) and the head-to-head in [FileBird vs WP Adminify](https://wpadminify.com/filebird-vs-wp-adminify). ## Why people leave FileBird | Reason | What to look for instead | | --- | --- | | Free tier folder limit | A plugin with a more generous free tier | | Need folders for posts and pages too | Folders by Premio or Wicked Folders | | Want portable folder data | Any taxonomy-based plugin | | Consolidating admin plugins | A broader toolkit like WP Adminify | | Want a lighter footprint | Media Library Organizer | That portability row needs unpacking, because nothing in the interface hints at it. FileBird keeps folders in `wp_fbv` and `wp_fbv_attachment_folder`, which are its own tables. We built an 11-folder structure, deactivated the plugin, and watched what happened: every file stayed exactly where it was, and the folder tree was simply gone. No other plugin could see it. Taxonomy-based plugins put folders in `wp_terms` instead, where WP-CLI, another folder plugin, or a migration script can all read them. If you rebuild your stack every year or two, that's the difference between an afternoon and a weekend. We wrote up the process in [WordPress media folders explained](https://wpadminify.com/wordpress-media-library-folders). ## Quick comparison | Plugin | Installs | Rating | Storage | Best for | | --- | --- | --- | --- | --- | | WP Adminify | 7,000+ | 86/100 · 108 | Taxonomy | Folders plus wider admin control | | Folders (Premio) | 90,000 | 100/100 · 1,514 | Taxonomy | Media, posts and pages together | | Real Media Library | 100,000 | 96/100 · 289 | Custom tables | Advanced folder features | | Media Library Organizer | 20,000 | 94/100 · 147 | Taxonomy | Minimal, portable setup | | Wicked Folders | 20,000 | 98/100 · 56 | Taxonomy | Custom post type organization | | Media Library Assistant | 70,000 | 96/100 · 201 | Taxonomy | Metadata rather than folders | | CatFolders | 6,000 | 88/100 · 21 | Custom tables | Lightweight newer option | Pulled from the WordPress.org Plugin API and a local install on 9 August 2026. ## 1. WP Adminify: folders plus the rest of wp-admin ![WP Adminify plugin free version](https://d1k2c27psfzbiv.cloudfront.net/wp-content/uploads/2022/08/02094912/WP-Adminify-plugin-banner.webp) Verified: 7,000+ installs · 86/100 from 108 ratings · v4.2.24 · updated 9 August 2026 Storage: `media_folder` hierarchical taxonomy, no custom tables (verified) This one changes the question you're asking. Instead of swapping one folder plugin for another, WP Adminify handles media folders next to admin menu editing, white labelling, login customization, dashboard widgets and admin columns. Which matters if FileBird is one of six single-purpose plugins holding your admin together. Six plugins means six update cycles, six settings pages, and six chances for a conflict after a WordPress release. On the two FileBird complaints that send people looking: folders are plain WordPress terms, so you can list the whole structure with `wp term list media_folder` and hand it to anything. And the taxonomy is hierarchical, so subfolders work. Trade-off: there's no manual folder ordering. FileBird's `ord` column beats us there and we're not going to pretend otherwise. If folders are genuinely the only thing you need, this is more plugin than the job calls for. Best for: agencies and site managers cutting their admin plugin count. Full head-to-head in [the WP Adminify folder module](https://wpadminify.com/features/wordpress-media-folder), and [free versus Pro](https://wpadminify.com/pricing) is broken down per tier. ## 2. Folders by Premio: the closest like-for-like swap ![Folders by Premio WordPress plugin banner](https://d1k2c27psfzbiv.cloudfront.net/wp-content/uploads/2026/08/10061127/folders-by-premio-banner.webp) Verified: 90,000 installs · 100/100 from 1,514 ratings · v3.1.9 · updated 21 July 2026 Storage: `media_folder`, `folder` (pages), `post_folder` (posts), all hierarchical taxonomies If you want to swap and move on, this is the one. A perfect score across more than fifteen hundred ratings is the strongest signal anywhere in this category, and on a per-rating basis it beats FileBird's own 94/100. It also closes two FileBird gaps in one go: folders reach posts and pages, and the storage is taxonomy-based rather than proprietary. One thing we hit while testing, so you don't: Folders and WP Adminify both register a taxonomy called `media_folder`. Don't run them at the same time. The flip side is that moving between those two is far easier than unpicking anyone's custom tables. Trade-off: the media interface is less specialized than FileBird's, which is what happens when a plugin covers three post types instead of one. ## 3. Real Media Library: the most features, the deepest lock-in ![Real Media Library WordPress plugin banner](https://d1k2c27psfzbiv.cloudfront.net/wp-content/uploads/2026/08/10061132/real-media-library-banner.webp) Verified: 100,000 installs · 96/100 from 289 ratings · v4.22.82 · updated 2 July 2026 · devowl.io Storage: four custom tables The most feature-dense alternative here, and the one closest to FileBird in ambition. The lite version alone creates four tables. Ordering, metadata and staging state each get their own storage, which tells you how much engineering went in. Important caveat: if proprietary storage is the reason you're leaving FileBird, this isn't the fix. It has the heaviest database footprint of anything we tested. You'd be swapping one vendor's tables for another's, with more of them. Best for: people leaving FileBird over features rather than portability. Its WordPress.org slug is `real-media-library-lite`, which is why searching "real media library" in your plugin installer often turns up nothing useful. ## 4. Media Library Organizer: the minimal, portable option ![Media Library Organizer WordPress plugin banner](https://d1k2c27psfzbiv.cloudfront.net/wp-content/uploads/2026/08/10061136/media-library-organizer-banner.webp) Verified: 20,000 installs · 94/100 from 147 ratings · v2.1.2 · updated 23 July 2026 · Themeisle Storage: `mlo-category` hierarchical taxonomy, no custom tables The cleanest implementation we looked at. One hierarchical taxonomy, nothing else, no tables. If FileBird feels like more machinery than your site deserves, this sits at the opposite end of the scale. Themeisle maintains it, and the last update landed in July 2026, so it isn't one of those abandoned folder plugins you find at the bottom of search results. Trade-off: thinner feature set, no manual folder ordering, and a smaller user base to catch bugs before you do. Best for: sites that want folders with the least possible commitment. ## 5. Wicked Folders: folders on everything, not just media ![Wicked Folders WordPress plugin banner](https://d1k2c27psfzbiv.cloudfront.net/wp-content/uploads/2026/08/10061141/wicked-folders-banner.webp) Verified: 20,000 installs · 98/100 from 56 ratings · v4.1.3 · updated 23 June 2026 Storage: hierarchical taxonomies per post type Built to organize posts, pages and custom post types alongside media. If your actual complaint is that FileBird stops at the Media Library, this is the plugin that answers it. Handy on sites with a few hundred CPT entries and no sensible way to group them. Trade-off: 56 ratings is a thin sample to bet a client site on, and media is one job among several here rather than the main event. ## 6. Media Library Assistant: for when the real problem is metadata ![Media Library Assistant WordPress plugin banner](https://d1k2c27psfzbiv.cloudfront.net/wp-content/uploads/2026/08/10061146/media-library-assistant-banner.webp) Verified: 70,000 installs · 96/100 from 201 ratings · v3.39 · updated 11 July 2026 · free, no paid tier Worth listing because plenty of people install FileBird when what they're actually short of is metadata control: bulk alt text editing, IPTC and EXIF handling, custom taxonomies on attachments, shortcode galleries. Be clear about what this isn't: there's no drag-and-drop folder tree anywhere in it. Want folders, look elsewhere. Want to fix alt text across 4,000 attachments without touching each one, nothing else comes close, and the whole thing is free with no upsell. ## 7. CatFolders: the newer lightweight option ![CatFolders WordPress plugin banner](https://d1k2c27psfzbiv.cloudfront.net/wp-content/uploads/2026/08/10061151/catfolders-banner.webp) Verified: 6,000 installs · 88/100 from 21 ratings · v2.5.5 · updated 19 May 2026 Storage: `wp_catfolders`, `wp_catfolders_posts` A newer entrant with a tidy interface and someone clearly still working on it. Custom-table storage like FileBird, but without the install base that makes FileBird's longevity a fair bet. Best for: small sites happy to try something young. We wouldn't move a 20,000-file library onto 21 ratings, and neither should you. ## A note on HappyFiles HappyFiles turns up in nearly every FileBird alternatives list, usually without context. Here's the context: WordPress.org removed it from the plugin directory on 26 January 2021 for a guideline violation, and it hasn't been listed there since. The developer sells it directly as a premium product now. That's not a verdict on the software, which has a real following. But any list still recommending it as a free WordPress.org download in 2026 hasn't checked. ## How to switch without losing your structure Whatever you pick, the order of operations matters, because FileBird's folder data goes unreadable the moment you deactivate it. - Back up files and database, and test that the restore actually works. - Export the structure while FileBird is still active. Read `wp_fbv` for folder ids, names and parents, and `wp_fbv_attachment_folder` for the file mapping. - Test on staging first. Never migrate a large library on production first. - Recreate folders in the new plugin, parents before children. - Reassign files using the exported mapping. - Verify the counts match before you deactivate anything. - Leave FileBird installed but inactive for a few weeks. Its tables stick around, so it doubles as a working rollback. Under about 2,000 files, rebuilding by hand with batch selection usually beats writing a migration script. Full detail in [WordPress media folders explained](https://wpadminify.com/wordpress-media-library-folders). ## FileBird Alternatives FAQs ### What is the best FileBird alternative? Folders by Premio is the closest direct replacement: 90,000 installs, a perfect 100/100 from 1,514 ratings, portable taxonomy storage, and it covers posts and pages as well as media. If you're cutting your admin plugin count rather than just swapping folder tools, WP Adminify handles folders alongside menu editing and white labelling. ### Is there a free alternative to FileBird? Several. Folders, Media Library Organizer, Wicked Folders and Media Library Assistant all have free versions on WordPress.org, and Media Library Assistant is free outright with no paid tier. Free tiers of folder plugins usually cap how many folders you can create, so check that limit against the number you actually need before installing. ### Will I lose my folders if I switch from FileBird? Your files are never at risk. We deactivated FileBird with all 38 test files in folders and every one stayed intact. The folder structure is the part that goes, because it lives in FileBird's own tables and nothing else can read them. Export it while FileBird is still active, then rebuild in the new plugin. ### Which FileBird alternative has the best free version? Media Library Assistant is free outright, though it's a metadata tool rather than a folder plugin. Among the actual folder plugins, compare free-tier folder limits directly, since that's the wall people hit far more often than any missing feature. ### Can I use FileBird and another folder plugin together? Not usefully. Folder plugins register overlapping taxonomies and keep their data separately, so running two gives you two half-organized libraries. We confirmed that WP Adminify and Folders by Premio both register a taxonomy named media_folder. Migrate properly instead. ## Final verdict FileBird is a good plugin, so switch because of a specific limitation you've hit, not because a comparison post told you to. - Want a straight replacement? Folders by Premio. Best rating in the category, portable storage, covers posts and pages. - Cutting your admin plugin count? WP Adminify. - Want the smallest footprint? Media Library Organizer. - Leaving for features rather than portability? Real Media Library, but go in knowing you're getting deeper lock-in, not less. - Whichever you pick, export your FileBird structure before you deactivate it. Still deciding? Start with [how WordPress media folders work](https://wpadminify.com/wordpress-media-library-folders) for the storage background, then trial the free tiers on a staging copy, with taxonomy-based plugins, switching later costs you an afternoon, not a project. --- # Real Media Library Alternatives: 7 Best WordPress Media Folder Plugins URL: https://wpadminify.com/real-media-library-alternatives Last updated: 2026-08-12 Real Media Library is the deepest folder plugin WordPress has. 100,000 installs, a 96/100 rating, and four database tables' worth of engineering underneath it. Nobody leaves it because it's weak. They leave because it's more plugin than the site needed, or because the free-versus-Pro line sits right across something they use daily, or because they've worked out that four proprietary tables mean exactly one plugin on earth can read their folder structure. We tested seven alternatives on a clean WordPress 7.0.3 install and checked what each does to the database. We publish one of them: WP Adminify uses [portable, taxonomy-stored media folders](https://wpadminify.com/features/wordpress-media-folder). The full field is in our [best WordPress media folder plugins](https://wpadminify.com/best-wordpress-media-folder-plugins) roundup, this plugin has a dedicated [Real Media Library review](https://wpadminify.com/real-media-library-review), and the head-to-head is [Real Media Library vs WP Adminify](https://wpadminify.com/real-media-library-vs-wp-adminify). ## Why people look for alternatives | Reason | What to look for | | --- | --- | | Too complex for the site | Media Library Organizer or CatFolders | | Want portable folder data | Any taxonomy-based plugin | | Need folders for posts and pages | Folders by Premio or Wicked Folders | | Want a more polished interface | FileBird | | Consolidating admin plugins | WP Adminify | On portability, here's what you're actually dealing with. Real Media Library creates `wp_realmedialibrary` plus `_posts`, `_meta` and `_tmp`. We tested how custom-table plugins behave by building a structure in FileBird and pulling the plugin: files all intact, folder tree gone, rows still in the database and unreadable by anything else. FileBird has two tables. This has four, and they reference each other, so the same migration is more work again. ## Quick comparison | Plugin | Installs | Rating | Storage | Best for | | --- | --- | --- | --- | --- | | Folders (Premio) | 90,000 | 100/100 · 1,514 | Taxonomy | Best all-round replacement | | FileBird | 200,000 | 94/100 · 1,121 | Custom tables | Interface polish, folder ordering | | WP Adminify | 7,000+ | 86/100 · 108 | Taxonomy | Folders plus admin management | | Media Library Organizer | 20,000 | 94/100 · 147 | Taxonomy | Minimal footprint | | Wicked Folders | 20,000 | 98/100 · 56 | Taxonomy | Custom post types | | Media Library Assistant | 70,000 | 96/100 · 201 | Taxonomy | Metadata control | | CatFolders | 6,000 | 88/100 · 21 | Custom tables | Lightweight newer option | ## 1. Folders by Premio: best all-round replacement ![Folders by Premio WordPress plugin banner](https://d1k2c27psfzbiv.cloudfront.net/wp-content/uploads/2026/08/10061127/folders-by-premio-banner.webp) Verified: 90,000 installs · 100/100 from 1,514 ratings · v3.1.9 · updated 21 July 2026 Storage: `media_folder`, `folder`, `post_folder`, hierarchical taxonomies The strongest replacement, and it fixes both of the usual complaints in one move. Folder data becomes ordinary WordPress terms instead of proprietary tables, and folders extend to posts and pages as well as media. A perfect score across more than fifteen hundred ratings is the best social proof in the category, and it isn't close. Trade-off: less depth than what you have now. No per-folder metadata, no staged bulk operations. If you use those weekly, this is a step down and you should know that going in. ## 2. FileBird: the best interface ![FileBird WordPress plugin banner](https://d1k2c27psfzbiv.cloudfront.net/wp-content/uploads/2026/08/10064131/filebird-banner.webp) Verified: 200,000 installs · 94/100 from 1,121 ratings · v6.5.7 · updated 27 July 2026 Storage: `wp_fbv`, `wp_fbv_attachment_folder` Twice the install base and the most polished interface anyone here has built. Its `ord` column gives you manual folder ordering, one of the few places it matches Real Media Library's ambition rather than undercutting it. Important: FileBird uses custom tables too. If portability is why you're leaving, this isn't the fix. Two tables is a shorter migration than four, but you're still handing your structure to one vendor. ## 3. WP Adminify: best for consolidation ![WP Adminify plugin free version](https://d1k2c27psfzbiv.cloudfront.net/wp-content/uploads/2022/08/02094912/WP-Adminify-plugin-banner.webp) Verified: 7,000+ installs · 86/100 from 108 ratings · v4.2.24 · updated 9 August 2026 Storage: `media_folder` hierarchical taxonomy, no custom tables (verified) This one changes the question rather than answering it. Media folders sit next to admin menu editing, white labelling, login customization and admin columns. Folder data lives in standard WordPress terms, so `wp term list` reads it and any tool can export it. Trade-off: no manual folder ordering, and nothing like Real Media Library's folder-specific depth. Honestly, it's a different category of product, and if folders are all you care about this isn't your answer. Full comparison in [the WP Adminify folder feature page](https://wpadminify.com/features/wordpress-media-folder), next to [its pricing tiers](https://wpadminify.com/pricing). ## 4. Media Library Organizer: the simplest option ![Media Library Organizer WordPress plugin banner](https://d1k2c27psfzbiv.cloudfront.net/wp-content/uploads/2026/08/10061136/media-library-organizer-banner.webp) Verified: 20,000 installs · 94/100 from 147 ratings · v2.1.2 · updated 23 July 2026 · Themeisle Storage: `mlo-category`, one hierarchical taxonomy, no tables Real Media Library's philosophy turned inside out. One taxonomy, nothing else, no tables. If four tables felt like overkill for a site with 900 images, this is the corrective. Trade-off: no advanced features, no manual ordering, smaller user base. ## 5. Wicked Folders: folders beyond media ![Wicked Folders WordPress plugin banner](https://d1k2c27psfzbiv.cloudfront.net/wp-content/uploads/2026/08/10061141/wicked-folders-banner.webp) Verified: 20,000 installs · 98/100 from 56 ratings · v4.1.3 · updated 23 June 2026 Storage: hierarchical taxonomies per post type Organizes posts, pages and custom post types alongside media, all taxonomy-based, so everything stays portable. Trade-off: 56 ratings is a small sample, and media is one job among several rather than the main event. ## 6. Media Library Assistant: if the problem is metadata ![Media Library Assistant WordPress plugin banner](https://d1k2c27psfzbiv.cloudfront.net/wp-content/uploads/2026/08/10061146/media-library-assistant-banner.webp) Verified: 70,000 installs · 96/100 from 201 ratings · v3.39 · updated 11 July 2026 · entirely free Some people use Real Media Library mainly for its metadata handling and would be better off with a tool built for that job. This one does IPTC and EXIF, bulk alt text, custom taxonomies and shortcode galleries. Be clear: there's no drag-and-drop folder tree. Wrong tool if you want folders. Unmatched if you want metadata control, and it costs nothing at all. ## 7. CatFolders: newer and lighter ![CatFolders WordPress plugin banner](https://d1k2c27psfzbiv.cloudfront.net/wp-content/uploads/2026/08/10061151/catfolders-banner.webp) Verified: 6,000 installs · 88/100 from 21 ratings · v2.5.5 · updated 19 May 2026 Storage: `wp_catfolders`, `wp_catfolders_posts` A newer entrant with a clean interface. Custom tables again, but two of them rather than four. Trade-off: 21 ratings is too small a sample to trust with a library you care about. ## Migrating away safely Real Media Library's structure spans four tables that reference each other, so the order you do things in matters more than usual. - Back up files and database, and check the restore actually works. - Export the structure while the plugin is still active. Deactivate first and nothing else can read those tables. - Check whether your target ships an importer. Several do. A maintained importer beats SQL you wrote at 11pm. - Test on staging. Always. - Recreate folders parents first, then reassign files. - Verify the counts match before you deactivate anything. - Leave the old plugin installed but inactive for a few weeks as a rollback. Under about 2,000 files, rebuilding by hand with batch selection is usually faster than scripting it. See [WordPress media folders explained](https://wpadminify.com/wordpress-media-library-folders). ## Real Media Library Alternatives FAQs ### What is the best Real Media Library alternative? Folders by Premio for most cases: 90,000 installs, a perfect 100/100 from 1,514 ratings, portable taxonomy storage, and coverage of posts and pages. If interface polish matters more than anything else, FileBird has twice the install base and the most refined UI in the category. ### Is there a simpler alternative to Real Media Library? Media Library Organizer. It registers a single hierarchical taxonomy and creates no custom tables at all, which is the exact opposite of a four-table architecture. Fewer features, far smaller footprint. ### Will I lose my folders if I switch from Real Media Library? Your files are never at risk. The folder structure lives in wp_realmedialibrary and three related tables that only that plugin can read, so export it while the plugin is still active, then rebuild in whatever you move to. ### Is FileBird better than Real Media Library? Different priorities. FileBird has twice the installs, a more polished interface and a simpler two-table schema. Real Media Library has more depth, including per-folder metadata and staged bulk operations. Neither is portable, because both use custom tables. ### Which alternative avoids vendor lock-in? Any taxonomy-based plugin: Folders, WP Adminify, Media Library Organizer or Wicked Folders. Their folders are standard WordPress terms in wp_term_taxonomy, readable by any tool and exportable with wp term list. ## Final verdict - Best all-round replacement: Folders by Premio. Top rating, portable, broader scope. - Best interface: FileBird, though it's still custom tables. - Simplest: Media Library Organizer. - Consolidating plugins: WP Adminify. - Whichever you pick, export the structure before you deactivate Real Media Library. Want the background before deciding? [How WordPress media folders work](https://wpadminify.com/wordpress-media-library-folders) covers the storage models, and [organizing a media library with folders](https://wpadminify.com/how-to-organize-wordpress-media-library-with-folders) covers the rebuild on the other side. --- # Media Library Organizer Alternatives: 7 Best WordPress Folder Plugins URL: https://wpadminify.com/media-library-organizer-alternatives Last updated: 2026-08-12 Media Library Organizer does one thing on purpose. It registers a single hierarchical taxonomy, `mlo-category`, creates no tables, and gives you folders. That restraint is the entire appeal. It's also why people outgrow it. Usually they want manual folder ordering, or folders for posts and pages, or a bigger crowd standing behind whatever plugin is holding thousands of files together. We tested seven alternatives on a clean WordPress 7.0.3 install and checked the database footprint of each one. One entry below is ours: WP Adminify offers [media folders plus the rest of wp-admin](https://wpadminify.com/features/wordpress-media-folder). The wider field is in our [best WordPress media folder plugins](https://wpadminify.com/best-wordpress-media-folder-plugins) roundup, this plugin has its own [Media Library Organizer review](https://wpadminify.com/media-library-organizer-review), and the direct comparison is [Media Library Organizer vs WP Adminify](https://wpadminify.com/media-library-organizer-vs-wp-adminify). ## Why people move on | Reason | What to look for | | --- | --- | | Need manual folder ordering | FileBird or Real Media Library | | Need folders for posts and pages | Folders by Premio or Wicked Folders | | Want a larger, more proven user base | FileBird or Folders | | Need advanced folder configuration | Real Media Library | | Consolidating admin plugins | WP Adminify | | Want to keep zero lock-in | Folders, Wicked Folders or WP Adminify | Before you go anywhere, know what you're holding. Media Library Organizer keeps folders as standard WordPress terms, and that's a genuine advantage you might be about to trade away. FileBird, Real Media Library and CatFolders all use their own tables. We checked what that means in practice by building a folder structure in FileBird and deactivating it: files all intact, tree gone from the admin, rows still sitting in the database and readable by nothing. ## Quick comparison | Plugin | Installs | Rating | Storage | Folder ordering | | --- | --- | --- | --- | --- | | Folders (Premio) | 90,000 | 100/100 · 1,514 | Taxonomy | No | | FileBird | 200,000 | 94/100 · 1,121 | Custom tables | Yes | | Real Media Library | 100,000 | 96/100 · 289 | Custom tables ×4 | Yes | | WP Adminify | 7,000+ | 86/100 · 108 | Taxonomy | No | | Wicked Folders | 20,000 | 98/100 · 56 | Taxonomy | No | | Media Library Assistant | 70,000 | 96/100 · 201 | Taxonomy | n/a | | CatFolders | 6,000 | 88/100 · 21 | Custom tables | Unverified | ## 1. Folders by Premio: the natural step up ![Folders by Premio WordPress plugin banner](https://d1k2c27psfzbiv.cloudfront.net/wp-content/uploads/2026/08/10061127/folders-by-premio-banner.webp) Verified: 90,000 installs · 100/100 from 1,514 ratings · v3.1.9 · updated 21 July 2026 Storage: `media_folder`, `folder`, `post_folder`, hierarchical taxonomies, no tables The obvious upgrade, because it keeps the part you liked and adds the part you're missing. Still taxonomy-based, still no custom tables, so no lock-in. But now folders reach posts and pages too, with four times the install base and the best rating anyone in this category has. Trade-off: still no manual folder ordering. Neither plugin can offer it, because WordPress terms don't sort that way. ## 2. FileBird: for ordering and polish ![FileBird WordPress plugin banner](https://d1k2c27psfzbiv.cloudfront.net/wp-content/uploads/2026/08/10064131/filebird-banner.webp) Verified: 200,000 installs · 94/100 from 1,121 ratings · v6.5.7 · updated 27 July 2026 Storage: `wp_fbv` (`id, name, parent, type, ord, created_by`), `wp_fbv_attachment_folder` The answer if ordering is what's driving you out. That `ord` column does exactly what taxonomy storage can't: drag a folder anywhere in the list and it stays there. Ten times the install base, and the most polished interface in the category by some distance. Trade-off: you give up the clean architecture entirely. Two proprietary tables mean your structure is readable by FileBird and nothing else. Whether that stings depends on how long you plan to stay put. ## 3. Real Media Library: the most depth ![Real Media Library WordPress plugin banner](https://d1k2c27psfzbiv.cloudfront.net/wp-content/uploads/2026/08/10061132/real-media-library-banner.webp) Verified: 100,000 installs · 96/100 from 289 ratings · v4.22.82 · updated 2 July 2026 Storage: four custom tables The opposite philosophy, taken as far as it goes. Per-folder metadata, staged bulk operations, gallery integration, all sitting on four tables of infrastructure. Trade-off: the heaviest lock-in of anything we tested. Going from a zero-table plugin to this one is a big architectural swing, so be sure you want the features and not just the feature list. ## 4. WP Adminify: for consolidation ![WP Adminify plugin free version](https://d1k2c27psfzbiv.cloudfront.net/wp-content/uploads/2022/08/02094912/WP-Adminify-plugin-banner.webp) Verified: 7,000+ installs · 86/100 from 108 ratings · v4.2.24 · updated 9 August 2026 Storage: `media_folder` hierarchical taxonomy, no custom tables (verified) Keeps the zero-table architecture and adds admin menu editing, white labelling, login customization and admin columns on top. If part of why you picked Media Library Organizer was a dislike of bloated plugins, we'll say the awkward bit ourselves: WP Adminify is a much larger plugin. The argument is that it replaces several others rather than joining them. If it doesn't replace anything on your sites, that argument doesn't apply to you. Trade-off: no manual folder ordering, and a lot more surface area. Full comparison in [how WP Adminify handles media folders](https://wpadminify.com/features/wordpress-media-folder), and [what each tier includes](https://wpadminify.com/pricing) is published in full. ## 5. Wicked Folders: folders everywhere, still clean ![Wicked Folders WordPress plugin banner](https://d1k2c27psfzbiv.cloudfront.net/wp-content/uploads/2026/08/10061141/wicked-folders-banner.webp) Verified: 20,000 installs · 98/100 from 56 ratings · v4.1.3 · updated 23 June 2026 Storage: hierarchical taxonomies per post type Same architecture you already have, pointed at more of the site. Folders for posts, pages and custom post types as well as media, all taxonomy-based, so nothing gets locked away. Trade-off: 56 ratings is a thin sample to judge reliability on. ## 6. Media Library Assistant: if metadata is the real need ![Media Library Assistant WordPress plugin banner](https://d1k2c27psfzbiv.cloudfront.net/wp-content/uploads/2026/08/10061146/media-library-assistant-banner.webp) Verified: 70,000 installs · 96/100 from 201 ratings · v3.39 · updated 11 July 2026 · entirely free No folder tree anywhere in it. Deep attachment metadata control instead: IPTC and EXIF, bulk alt text, custom taxonomies, shortcode galleries. Best for: people who wanted better media management and reached for folders because that's what was on offer. Free, no paid tier. ## 7. CatFolders: lightweight but unproven ![CatFolders WordPress plugin banner](https://d1k2c27psfzbiv.cloudfront.net/wp-content/uploads/2026/08/10061151/catfolders-banner.webp) Verified: 6,000 installs · 88/100 from 21 ratings · v2.5.5 · updated 19 May 2026 Storage: `wp_catfolders`, `wp_catfolders_posts` Similar lightweight pitch, but with custom tables underneath and a much shorter track record. Trade-off: 21 ratings, and you'd be handing back the portability that made Media Library Organizer worth choosing. Hard to justify unless one specific feature is pulling you. ## Switching is easy from here Because Media Library Organizer keeps folders as standard taxonomy terms, leaving is simpler than leaving most plugins: - Back up files and database. - Export the structure: `wp term list mlo-category --fields=term_id,name,parent` captures it in one line. - Moving to another taxonomy plugin? Often just a term copy, parents first. - Moving to FileBird or Real Media Library? You're rebuilding inside their tables, so check for an importer before you start typing SQL. - Test on staging, verify counts, then switch. Under about 2,000 files, rebuilding by hand with batch selection usually beats scripting it. See [WordPress media folders explained](https://wpadminify.com/wordpress-media-library-folders). ## Media Library Organizer Alternatives FAQs ### What is the best Media Library Organizer alternative? Folders by Premio for most people. It keeps the same clean taxonomy architecture with no custom tables, and adds folders for posts and pages, four times the install base, and a perfect 100/100 from 1,514 ratings. If manual folder ordering is what you're after, FileBird is the answer instead. ### Which alternative also avoids custom database tables? Folders by Premio, Wicked Folders and WP Adminify all keep folders as standard WordPress taxonomy terms with no custom tables, and we verified each one on a clean install. FileBird, Real Media Library and CatFolders all create their own. ### Which media folder plugin supports manual folder ordering? FileBird and Real Media Library. Both use custom tables with a dedicated ordering column, and FileBird's wp_fbv has an ord field you can see for yourself. No taxonomy-based plugin can do this natively, because WordPress terms sort by name or ID. ### Will I lose folders switching from Media Library Organizer? Your files are never at risk, and the structure is unusually easy to take with you because it lives in the standard mlo-category taxonomy. Capture it with wp term list before you switch, then rebuild in the new plugin. ### Is Media Library Organizer being maintained? Yes. On 9 August 2026 it showed version 2.1.2, updated 23 July 2026, from Themeisle. Check the current date on WordPress.org before you rely on that, since maintenance status is exactly the kind of thing that changes quietly. ## Final verdict - Natural upgrade: Folders by Premio. Same clean architecture, much broader scope, best rating in the category. - Need folder ordering: FileBird, and accept the lock-in. - Need depth: Real Media Library, and accept a lot of lock-in. - Consolidating plugins: WP Adminify. - Remember what you're giving up: zero custom tables is a real advantage. Don't trade it away for a feature you won't use. Want the background before deciding? [How WordPress media folders work](https://wpadminify.com/wordpress-media-library-folders) covers the storage models these plugins are built on. --- # Folders Plugin Alternatives: 7 Best WordPress Media Organizers URL: https://wpadminify.com/folders-plugin-alternatives Last updated: 2026-08-12 Start with the honest bit: Folders by Premio holds a perfect 100/100 from 1,514 ratings, which is the strongest user satisfaction signal anywhere in this category. If you're here looking for something else, it almost certainly isn't because the plugin is bad. It's usually one of three specific things. You want a media-only interface with more polish. You need manual folder ordering, which taxonomy storage can't do. Or you're collapsing several admin plugins into one. We tested seven alternatives on a clean WordPress 7.0.3 install and checked what each one does to the database. We publish one of the seven: WP Adminify runs [one folder system across media and content](https://wpadminify.com/features/wordpress-media-folder). The full field is in our [best WordPress media folder plugins](https://wpadminify.com/best-wordpress-media-folder-plugins) roundup, with this plugin covered in the [Folders by Premio review](https://wpadminify.com/folders-plugin-review) and the head-to-head in [Folders vs WP Adminify](https://wpadminify.com/folders-vs-wp-adminify). ## Why people look elsewhere | Reason | What to look for | | --- | --- | | Want the most polished media-only interface | FileBird | | Need manual folder ordering | FileBird or Real Media Library | | Need per-folder metadata and settings | Real Media Library | | Consolidating admin plugins | WP Adminify | | Want an even lighter footprint | Media Library Organizer | | Taxonomy name conflict with another plugin | Media Library Organizer or FileBird | That last row deserves a sentence. Folders registers an attachment taxonomy called `media_folder`, and so does WP Adminify. We confirmed it by activating each one alone and listing the taxonomies. If you want both plugins' feature sets, you can't just run them side by side, and that collision alone sends a few people shopping. ## Quick comparison | Plugin | Installs | Rating | Storage | Covers | | --- | --- | --- | --- | --- | | FileBird | 200,000 | 94/100 · 1,121 | Custom tables | Media only | | Real Media Library | 100,000 | 96/100 · 289 | Custom tables ×4 | Media only | | WP Adminify | 7,000+ | 86/100 · 108 | Taxonomy | Media + admin toolkit | | Media Library Organizer | 20,000 | 94/100 · 147 | Taxonomy | Media only | | Wicked Folders | 20,000 | 98/100 · 56 | Taxonomy | Media + post types | | Media Library Assistant | 70,000 | 96/100 · 201 | Taxonomy | Metadata | | CatFolders | 6,000 | 88/100 · 21 | Custom tables | Media only | ## 1. FileBird: the best media-only interface ![FileBird WordPress plugin banner](https://d1k2c27psfzbiv.cloudfront.net/wp-content/uploads/2026/08/10064131/filebird-banner.webp) Verified: 200,000 installs · 94/100 from 1,121 ratings · v6.5.7 · updated 27 July 2026 Storage: `wp_fbv` (`id, name, parent, type, ord, created_by`), `wp_fbv_attachment_folder` The straight answer to "I want something more specialized for media." Twice the install base, and years spent iterating on exactly one problem instead of four. That `ord` column is the part worth noticing. It gives you drag-to-reorder folders in whatever sequence you like, which taxonomy storage genuinely cannot do, because WordPress terms come back sorted by name or ID and that's the end of it. If ordering is why you're leaving Folders, stop reading here, this is your plugin. Trade-off: media only, and two tables nothing else can read. You gain polish and ordering, you give up portability and content organization. More on the storage trade in [WordPress media folders explained](https://wpadminify.com/wordpress-media-library-folders). ## 2. Real Media Library: the most folder depth ![Real Media Library WordPress plugin banner](https://d1k2c27psfzbiv.cloudfront.net/wp-content/uploads/2026/08/10061132/real-media-library-banner.webp) Verified: 100,000 installs · 96/100 from 289 ratings · v4.22.82 · updated 2 July 2026 Storage: four custom tables The deepest folder plugin you can install. Its `_meta` table means folders carry their own settings, and the `_tmp` table means bulk operations get staged before they're applied, which you'll appreciate the first time you move four thousand files and something times out halfway. Trade-off: the heaviest lock-in of anything we tested, four tables that reference each other, and media only. It's a long step away from the clean architecture you have now. ## 3. WP Adminify: for consolidation ![WP Adminify plugin free version](https://d1k2c27psfzbiv.cloudfront.net/wp-content/uploads/2022/08/02094912/WP-Adminify-plugin-banner.webp) Verified: 7,000+ installs · 86/100 from 108 ratings · v4.2.24 · updated 9 August 2026 Storage: `media_folder` hierarchical taxonomy, no custom tables (verified) Media folders next to admin menu editing, white labelling, login customization, dashboard widgets and admin columns. Like Folders, it keeps folder data as ordinary WordPress terms, so you're not trading away portability by moving. The reason to switch is scope: one plugin covering several admin jobs instead of one covering content organization well. Trade-off: no manual folder ordering, same taxonomy limitation you already live with. And it doesn't organize posts and pages the way Folders does, so if you use `post_folder` daily this is a downgrade. Full comparison in [the WP Adminify media folder module](https://wpadminify.com/features/wordpress-media-folder), with [the WP Adminify price list](https://wpadminify.com/pricing) alongside it. ## 4. Media Library Organizer: the lightest footprint ![Media Library Organizer WordPress plugin banner](https://d1k2c27psfzbiv.cloudfront.net/wp-content/uploads/2026/08/10061136/media-library-organizer-banner.webp) Verified: 20,000 installs · 94/100 from 147 ratings · v2.1.2 · updated 23 July 2026 · Themeisle Storage: `mlo-category`, one hierarchical taxonomy If Folders' three taxonomies are two more than you use, this registers exactly one. Same portability, smaller surface area, and `mlo-category` collides with nothing. Trade-off: media only, thinner feature set, and a much smaller user base. ## 5. Wicked Folders: closest on scope ![Wicked Folders WordPress plugin banner](https://d1k2c27psfzbiv.cloudfront.net/wp-content/uploads/2026/08/10061141/wicked-folders-banner.webp) Verified: 20,000 installs · 98/100 from 56 ratings · v4.1.3 · updated 23 June 2026 Storage: hierarchical taxonomies per post type The closest in philosophy to what you're already running. Folders across media, posts, pages and custom post types, all stored as taxonomies. If you like the idea of Folders but want a different implementation of it, this is the nearest thing. Trade-off: 56 ratings next to Folders' 1,514. Both scores are high; only one of them has been stress-tested by a crowd. ## 6. Media Library Assistant: if you need metadata ![Media Library Assistant WordPress plugin banner](https://d1k2c27psfzbiv.cloudfront.net/wp-content/uploads/2026/08/10061146/media-library-assistant-banner.webp) Verified: 70,000 installs · 96/100 from 201 ratings · v3.39 · updated 11 July 2026 · entirely free No folder tree at all. What you get instead is deep control over attachment metadata: IPTC and EXIF, bulk alt text, custom taxonomies on attachments, shortcode galleries. Best for: people whose actual problem was never structure. Free, with nothing held back behind a paid tier. ## 7. CatFolders: the newer lightweight option ![CatFolders WordPress plugin banner](https://d1k2c27psfzbiv.cloudfront.net/wp-content/uploads/2026/08/10061151/catfolders-banner.webp) Verified: 6,000 installs · 88/100 from 21 ratings · v2.5.5 · updated 19 May 2026 Storage: `wp_catfolders`, `wp_catfolders_posts` Tidy interface, someone still shipping updates, custom tables underneath. Trade-off: 21 ratings against Folders' 1,514. Moving from the best-rated plugin in the category to one of the least proven needs a reason you can say out loud. ## Switching from Folders Here's the good news. Folders keeps everything in standard WordPress taxonomy terms, so leaving is easier than leaving any custom-table plugin. - Back up files and database. - Check your target's storage model. Another taxonomy plugin is often just a term copy. FileBird or Real Media Library means rebuilding inside their tables. - Export the terms: `wp term list media_folder --fields=term_id,name,parent` gives you the whole structure in one command. - Test on staging. - Verify counts before you deactivate anything. The WP Adminify case is worth calling out separately. Both plugins use a taxonomy named `media_folder`, so your data already sits in the right table under the right name. Don't run them at once, but the migration path is unusually short. Detail in [WordPress media folders explained](https://wpadminify.com/wordpress-media-library-folders). ## Folders Plugin Alternatives FAQs ### What is the best alternative to the Folders plugin? FileBird if you want a specialized media-only interface with manual folder ordering, since it has 200,000 installs and the most polished UI in the category. WP Adminify if you're consolidating admin plugins and want to keep portable taxonomy storage. Both give something up: Folders' perfect rating and its coverage of posts and pages are hard to match. ### Is there a free alternative to Folders? Yes. FileBird, Media Library Organizer, Wicked Folders and Media Library Assistant all have free versions, and Media Library Assistant has no paid tier at all. Folders' own free version is capable too, so compare free-tier limits directly rather than assuming you need to upgrade. ### Will I lose my folders if I switch from Folders? Less likely than with most plugins. Folders keeps everything in standard WordPress taxonomy terms, so the structure stays readable and exportable with normal tools even after deactivation. That's a real advantage over custom-table plugins like FileBird and Real Media Library. ### Why can't I run Folders and WP Adminify together? Both register an attachment taxonomy named media_folder, which we confirmed by activating each one on its own. Two plugins claiming the same taxonomy name produces results you can't predict. Pick one. Migrating between them is unusually simple because the data lives in the same place either way. ### Which alternative also organizes posts and pages? Wicked Folders is the closest match, registering hierarchical folder taxonomies across post types. FileBird, Real Media Library, Media Library Organizer and CatFolders all handle media and nothing else. ## Final verdict - Want a better media-only interface? FileBird. Plus manual ordering, minus portability. - Want more folder depth? Real Media Library, at the cost of the deepest lock-in here. - Consolidating admin plugins? WP Adminify, and you keep taxonomy storage. - Want the same idea, lighter? Media Library Organizer. - Honest caveat: Folders' 100/100 from 1,514 ratings is the best in the category. Switch for a reason you can name. Want the background before deciding? [How WordPress media folders work](https://wpadminify.com/wordpress-media-library-folders) covers the storage models, and [organizing a media library with folders](https://wpadminify.com/how-to-organize-wordpress-media-library-with-folders) covers what comes after you pick. --- # WP Media Folder vs WP Adminify: Feature-by-Feature Comparison URL: https://wpadminify.com/wp-media-folder-vs-wp-adminify Last updated: 2026-08-12 Both of these are bundles, which makes this more interesting than most comparisons. They just bundle in opposite directions. WP Media Folder groups media-adjacent capabilities: folders, cloud storage, galleries, image processing. WP Adminify groups admin-wide ones: media folders, menu editing, white labelling, login customization, admin columns. Neither is a superset of the other. Which one fits depends entirely on where your problems actually sit. [The folder module inside WP Adminify](https://wpadminify.com/features/wordpress-media-folder) is ours, so treat this comparison as an interested one. The [best WordPress media folder plugins](https://wpadminify.com/best-wordpress-media-folder-plugins) roundup covers the wider field, and our [WP Media Folder review](https://wpadminify.com/wp-media-folder-review) handles that plugin on its own. ## Disclosure on testing We tested nine media folder plugins on a clean WordPress 7.0.3 install for this series. WP Media Folder isn't one of them, because it's premium-only and unavailable through WordPress.org, so we couldn't install it without buying a licence. WP Adminify is our own product, and its half of this comparison went through the same test bench as everything else: it registers `media_folder` as a hierarchical attachment taxonomy and creates no custom tables. Everything below about WP Media Folder comes from its public documentation and is marked as such. We'd rather flag that than dress an untested comparison up as a fair fight on our own website. ## Quick verdict Choose WP Media Folder if you need cloud storage offloading, folder-driven galleries, or built-in compression and watermarking sitting alongside your folders. Choose WP Adminify if your problems span the admin rather than the media library: cluttered menus, unbranded client dashboards, missing admin columns. ## Comparison table | | WP Media Folder | WP Adminify | | --- | --- | --- | | Bundle direction | Media-adjacent features | Admin-wide features | | Developer | JoomUnited | Jewel Theme | | On WordPress.org | No | Yes | | Free version | No | Yes | | Media folders | Yes | Yes, verified | | Folder storage model | `wpmf-category` taxonomy (vendor docs); physical folders optional | `media_folder` taxonomy, no tables | | Cloud storage integration | Add-on tier, $69/yr | No | | Galleries | Base plugin, $49/yr | No | | Image compression | Documented, not tested | No | | Watermarking | Base plugin, $49/yr | No | | Admin menu editor | No | Yes | | White label | No | Yes | | Login customizer | No | Yes | | Admin columns editor | No | Yes | | Role-based controls | Documented, not tested | Yes | ## Where WP Media Folder wins Everything in its bundle that WP Adminify doesn't attempt, and there's no point being coy about it. Cloud storage offloading is the big one. Past a certain library size, moving media to object storage stops being optional: backups outgrow the maintenance window, migrations time out, the storage bill keeps climbing. WP Adminify doesn't do this at all. If you need folders and offloading together, one plugin covering both is genuinely appealing. Galleries, compression and watermarking the same. If those are on your list, WP Adminify isn't a substitute and we're not going to suggest it is. Worth knowing before you budget: the cloud integrations are the add-on tier, $69 a year against $49 for the plugin alone. Galleries, watermarking and media replacement are in the base plugin. We have not tested any of them, and we are reporting the vendor’s documented split rather than our own measurements. ## Where WP Adminify wins Everything outside the media library, equally plainly. Look at what accumulates on an ordinary WordPress site: something to hide menu items from clients, something to rebrand the dashboard, something for the login page, something for admin columns, something to switch off comments. WP Media Folder addresses none of it, because it isn't trying to. WP Adminify covers that list in one tool with role-based controls running through it, so a client sees a different admin from an editor. The full case is in [replacing 50+ plugins with one](https://wpadminify.com/replace-wordpress-plugins-with-wp-adminify). It also has a free version on WordPress.org, so you can put it on a staging copy of your real site and see how it behaves before paying anyone. You can't do that with WP Media Folder. ## Folder storage: an open question For every other plugin in this series we established the storage model, because it decides whether you can leave later. FileBird uses `wp_fbv`. Real Media Library uses four tables. WP Adminify, Folders and Media Library Organizer all use WordPress taxonomy terms. We verified WP Adminify registers `media_folder` as a hierarchical taxonomy with no custom tables, so folder data is ordinary WordPress terms, readable with `wp term list` and exportable with anything. ![Diagram showing how WordPress media folders map attachments to taxonomy terms: the file stays in wp-content/uploads, its record is a row in wp_posts, and the folder is a term linked through wp_term_relationships](https://d1k2c27psfzbiv.cloudfront.net/wp-content/uploads/2026/08/09112546/wordpress-media-folder-taxonomy-diagram.webp) We don't know what WP Media Folder does. If you're evaluating it, that's the first thing to check once it's installed: ``` wp db query "SHOW TABLES;" wp db query "SELECT taxonomy, COUNT(*) FROM wp_term_taxonomy GROUP BY taxonomy;" ``` Custom tables aren't a flaw. They buy performance and features that taxonomies handle awkwardly. But they change your exit cost, and that's worth knowing before you organize fifteen thousand files rather than after. ## The real question Both are bundles, so ask what each one replaces on your site rather than which has the longer feature list. | Your situation | Better fit | | --- | --- | | Need cloud offloading plus folders | WP Media Folder | | Running several small admin plugins | WP Adminify | | Need galleries built from media folders | WP Media Folder | | Building white-labelled client sites | WP Adminify | | Want to trial before paying | WP Adminify | | Need image compression and watermarking | WP Media Folder | | Need role-based admin restrictions | WP Adminify | There's a third answer worth naming: if folders are all you need, neither bundle is the right shape. FileBird with 200,000 installs and Folders by Premio with a perfect 100/100 from 1,514 ratings both do folders better than either bundle, for free. ## Pricing The meaningful comparison is total stack cost. If WP Media Folder replaces a separate offload plugin and a gallery plugin, compare it against those combined. If WP Adminify replaces four admin plugins, compare it against those. JoomUnited lists $49 a year for WP Media Folder, $69 with every add-on, and $199 for its full WordPress bundle, with cloud storage sitting in the add-on tier rather than the base one. [The WP Adminify plans](https://wpadminify.com/pricing) are published the same way. ## WP Media Folder vs WP Adminify FAQs ### Is WP Adminify an alternative to WP Media Folder? Only partly. Both include media folders, but WP Media Folder adds cloud storage, galleries and image processing, while WP Adminify adds admin menu editing, white labelling and login customization. They overlap on folders and diverge on everything else. ### Does WP Adminify support cloud storage offloading? No. If offloading media to S3, Google Drive or similar is a requirement, WP Adminify doesn't cover it. You'd need a dedicated offload plugin alongside it, or a bundle like WP Media Folder that includes one. ### Which has a free version? WP Adminify has one on WordPress.org. WP Media Folder doesn't, since it's premium-only and absent from the repository, which we confirmed on 9 August 2026. That means no trial on a staging copy of your real library before you buy. ### Which stores media folders more portably? WP Adminify's folders are standard WordPress taxonomy terms with no custom tables, verified on a clean install, so the structure reads with normal tools and survives deactivation as ordinary data. WP Media Folder's storage model is unverified. Check it yourself with wp db query "SHOW TABLES;". ### Can I use both together? Technically possible, practically pointless. You'd maintain two folder structures over the same files. If you need cloud offloading plus admin management, pair a dedicated offload plugin with WP Adminify instead. ## Final verdict These two bundle in different directions, so the comparison resolves by asking where your problems are rather than which has more boxes ticked. WP Media Folder wins on: cloud integration, galleries and image processing, none of which WP Adminify attempts. WP Adminify wins on: admin-wide consolidation, white labelling, role-based control, a free version you can trial, and verified portable folder storage. If the honest answer is "I just want folders," buy neither bundle. The dedicated free plugins do that job better than either of these. If you genuinely need one of these bundles, pick the one whose extras you'll actually open. More detail: [WP Adminify's media folders](https://wpadminify.com/features/wordpress-media-folder), or background on [how WordPress media folders work](https://wpadminify.com/wordpress-media-library-folders). --- # Real Media Library vs WP Adminify: Which Should You Use? URL: https://wpadminify.com/real-media-library-vs-wp-adminify Last updated: 2026-08-12 A specialist against a generalist, and the honest framing matters here: Real Media Library is the more capable media folder plugin. It's deeper, more configurable, and built by people working on this one problem full time. WP Adminify has media folders inside a broader admin toolkit. Whether that's better for you turns on a question that has nothing to do with folder features at all. We ran both on a clean WordPress 7.0.3 install to pin down what each actually does. [WP Adminify's media folder feature](https://wpadminify.com/features/wordpress-media-folder) is our own, which is worth knowing before the verdict. Our [best WordPress media folder plugins](https://wpadminify.com/best-wordpress-media-folder-plugins) roundup tests seven, and the [Real Media Library review](https://wpadminify.com/real-media-library-review) examines that side by itself. ## Quick verdict Choose Real Media Library if media organization is a core workflow: large library, gallery-heavy site, a real need for per-folder configuration and ordering. Choose WP Adminify if media folders are one of several admin problems, or if keeping folder data portable matters more to you than folder depth. ## Comparison table | | Real Media Library | WP Adminify | | --- | --- | --- | | Primary purpose | Media folders | Admin toolkit including media folders | | Active installs | 100,000 | 7,000+ | | Rating | 96/100 from 289 ratings | 86/100 from 108 ratings | | Folder storage | Four custom tables | Taxonomy (`media_folder`) | | Nested subfolders | Yes | Yes, hierarchical taxonomy | | Manual folder ordering | Yes | No | | Per-folder metadata | Yes, dedicated table | No | | Staged bulk operations | Yes, `_tmp` table | No | | Portable folder data | No | Yes, standard WordPress terms | | Admin menu editor | No | Yes | | White label | No | Yes | | Login customizer | No | Yes | | Files move on disk | No | No | ## Folder depth: Real Media Library wins No hedging on this one. Activating Real Media Library Lite creates four tables: ``` wp_realmedialibrary folder structure wp_realmedialibrary_posts attachment → folder assignments wp_realmedialibrary_meta per-folder metadata wp_realmedialibrary_tmp staged / temporary state ``` That `_meta` table means folders carry their own properties, ordering rules and display configuration, instead of being labels. The `_tmp` table means bulk operations get staged rather than applied straight away, which is how you move ten thousand files without finding the library half-done because a request timed out at file 6,400. WP Adminify registers one hierarchical taxonomy, `media_folder`, and creates nothing. Folders nest and files assign, but a folder carries no configuration of its own and there's no manual ordering, because WordPress terms sort by name or ID. If you need per-folder settings or arbitrary ordering, Real Media Library wins and nothing below this line changes that. ## Portability: WP Adminify wins The mirror image of the same trade. WP Adminify's folders are standard WordPress terms in `wp_term_taxonomy` and `wp_term_relationships`. List them with `wp term list media_folder`, query them with `get_terms()`, export them with anything. The structure is readable whether or not the plugin is running. ![Diagram showing how WordPress media folders map attachments to taxonomy terms: the file stays in wp-content/uploads, its record is a row in wp_posts, and the folder is a term linked through wp_term_relationships](https://d1k2c27psfzbiv.cloudfront.net/wp-content/uploads/2026/08/09112546/wordpress-media-folder-taxonomy-diagram.webp) Real Media Library's folders sit in four proprietary tables. We checked how custom-table plugins behave by building an 11-folder structure in FileBird and deactivating it. Every file intact, every URL unchanged, folder tree gone, rows still in the database, and nothing else able to read them. Real Media Library works the same way across more tables. Your files are never at risk either way. The structure is, and with four tables referencing each other, getting it out is meaningfully more work than with a two-table schema. Background on portable storage in [WordPress media folders explained](https://wpadminify.com/wordpress-media-library-folders). ## Scope: the actual decision Most people choosing here aren't really weighing folder features. They're deciding between one plugin per problem and one plugin for the admin. Real Media Library does media organization, thoroughly. If that's your bottleneck, a photographer with 40,000 images, a magazine uploading daily, a gallery-driven site, buy the specialist. That's what specialists are for. But look at what accumulates on an ordinary site instead. One plugin for folders. One to hide menu items from clients. One to white-label the dashboard. One for the login page. One for admin columns. WP Adminify covers that list in one tool with role-based controls running through all of it, and the case for that is in [replacing 50+ plugins with one](https://wpadminify.com/replace-wordpress-plugins-with-wp-adminify). | Your situation | Better fit | | --- | --- | | Media organization is a core daily workflow | Real Media Library | | Running several small admin plugins | WP Adminify | | Need per-folder settings or manual ordering | Real Media Library | | Building client sites needing white label | WP Adminify | | Very large gallery-driven library | Real Media Library | | Want folder data to stay portable | WP Adminify | ## Track record Real Media Library has 100,000 active installs and 96/100 from 289 ratings, updated 2 July 2026, from devowl.io. That's an established vendor with a portfolio behind it rather than a single-plugin side project. WP Adminify has 7,000+ installs and 86/100 from 108 ratings, spread across a far wider feature set. On folder-specific adoption Real Media Library is well ahead, and that's worth weighing rather than waving off. ## Pricing Both have free versions. The useful comparison isn't sticker price, it's what each one replaces. If WP Adminify takes four other plugins off the site, compare it against their combined cost rather than against a folder plugin. [What our Pro tier covers](https://wpadminify.com/pricing) is listed openly. ## Choose Real Media Library if… - Media organization is central to how you work - You need per-folder metadata or configuration - Manual folder ordering matters - You run a very large or gallery-heavy library - You want the most capable folder plugin available ## Choose WP Adminify if… - Media folders are one of several admin problems - You're consolidating single-purpose plugins - You build client sites that need white labelling and menu control - You want folder data stored as portable WordPress terms - You need role-based controls across the admin generally ## Real Media Library vs WP Adminify FAQs ### Is WP Adminify a good Real Media Library alternative? Only if your needs are broader than folders. Real Media Library is the more capable folder plugin, with four tables' worth of depth including per-folder metadata and staged bulk operations. WP Adminify makes sense when folders are one of several admin needs, or when portable storage matters more than folder depth. ### Which is better for a large media library? Real Media Library, generally. Its architecture is built for scale, and a staging table for bulk operations means large moves get processed without leaving things half-applied when a request dies. That detail only matters above a few thousand files, which is exactly where the plugin is designed to work. ### Can I switch from Real Media Library to WP Adminify? Yes, but export the structure while Real Media Library is still active, because its four tables go unreadable to everything else once deactivated. Recreate folders as media_folder terms, parents first, then reassign files. Under about 2,000 files, rebuilding by hand is usually faster than scripting it. ### Do both support nested folders? Yes. Real Media Library nests through its own folder table and WP Adminify registers media_folder as a hierarchical taxonomy. We verified both. Two or three levels works best in practice whichever you use. ### Can I run both at once? There's no sensible reason to. They keep folders in entirely different places, so you'd be maintaining two unrelated structures over the same files. Pick one. ### Which is better value? Depends what you're replacing. If folders are your only gap, Real Media Library is the focused purchase. If WP Adminify removes four other plugins from your stack, compare it against their combined cost and maintenance rather than against a folder plugin on its own. ## Final verdict Real Media Library wins on: folder depth, per-folder configuration, manual ordering, large-library architecture, and folder-specific adoption. WP Adminify wins on: breadth, plugin consolidation, role-based controls across the admin, and folder data you can take with you. If media organization is the job, buy the specialist. It's genuinely the more capable tool for that job and we'd rather say so than argue otherwise. If your media library is just the loudest of several admin complaints, the toolkit is the better shape. More detail: [WP Adminify's media folders](https://wpadminify.com/features/wordpress-media-folder) and their [setup documentation](https://wpadminify.com/docs/adminify/productivity/create-folder-for-post-types), or background on [how WordPress media folders work](https://wpadminify.com/wordpress-media-library-folders). --- # Media Library Organizer vs WP Adminify: Full Feature Comparison URL: https://wpadminify.com/media-library-organizer-vs-wp-adminify Last updated: 2026-08-12 These two solve media folders identically. We activated each one alone on a clean WordPress 7.0.3 install and found the same thing both times: a hierarchical attachment taxonomy, no custom tables. Media Library Organizer calls it `mlo-category`, WP Adminify calls it `media_folder`. Same architecture, same portability, same nesting, and neither one does manual folder ordering. So the question that usually settles this category never comes up. What's left is a question about size. Do you want a plugin that does one thing, or one that does sixty? We publish one half of this comparison: [media folders inside WP Adminify](https://wpadminify.com/features/wordpress-media-folder). The [best WordPress media folder plugins](https://wpadminify.com/best-wordpress-media-folder-plugins) roundup sets both against the rest of the field, and the [Media Library Organizer review](https://wpadminify.com/media-library-organizer-review) covers that plugin alone. ## Quick verdict Choose Media Library Organizer if media folders are genuinely all you need and you want the smallest plugin that delivers them. Choose WP Adminify if your media library is one of several admin frustrations, and fixing the rest would mean installing four more plugins. Both are legitimate. Installing a sixty-feature toolkit to get one feature isn't obviously smart, and we're not going to pretend it is just because it's our plugin. ## Comparison table | | Media Library Organizer | WP Adminify | | --- | --- | --- | | Primary purpose | Media folders | Admin toolkit including media folders | | Developer | Themeisle | Jewel Theme | | Active installs | 20,000 | 7,000+ | | Rating | 94/100 from 147 ratings | 86/100 from 108 ratings | | Folder storage | `mlo-category` taxonomy | `media_folder` taxonomy | | Custom tables | None | None | | Nested subfolders | Yes | Yes | | Manual folder ordering | No | No | | Portable folder data | Yes | Yes | | Plugin footprint | Minimal | Large | | Admin menu editor | No | Yes | | White label | No | Yes | | Login customizer | No | Yes | | Admin columns editor | No | Yes | | Role-based controls | No | Yes | | Files move on disk | No | No | ## Media folders: a genuine draw Both register a hierarchical taxonomy against the attachment post type. Both give you a folder tree in the Media Library, drag-and-drop assignment, nested subfolders, bulk moving and folder filtering in the media modal. Both keep the structure in `wp_term_taxonomy` and `wp_term_relationships`, which is ordinary WordPress data you can read with `wp term list` and export with anything. Neither locks you in. ![Diagram showing how WordPress media folders map attachments to taxonomy terms: the file stays in wp-content/uploads, its record is a row in wp_posts, and the folder is a term linked through wp_term_relationships](https://d1k2c27psfzbiv.cloudfront.net/wp-content/uploads/2026/08/09112546/wordpress-media-folder-taxonomy-diagram.webp) And neither supports manual folder ordering, for the same underlying reason: WordPress terms sort by name or ID. If you want to drag folders into an arbitrary order, look at FileBird instead. Its `wp_fbv` table has a dedicated `ord` column, and you pay for it with proprietary storage. Any preference between these two on folders alone is about interface, which you should test on staging rather than take on faith from a comparison page. ## Footprint: Media Library Organizer wins This needs saying plainly, because roundups usually treat "more features" as automatically better. Media Library Organizer registers one taxonomy and stops. That's the whole plugin. Less code loading on every admin request, a smaller settings surface, less to break on a WordPress update, and nothing to learn beyond folders. WP Adminify is a much larger plugin covering sixty-odd features. If folders are all you want, you're loading a great deal you'll never open. The counter-argument is real but conditional. If you'd otherwise install separate plugins for menu editing, white labelling, login customization and admin columns, one larger plugin is less total weight than five smaller ones. If you wouldn't, the lighter plugin is simply the better engineering call, and that's the end of it. ## Breadth: WP Adminify wins Watch what happens to a WordPress install over a couple of years. A folder plugin. Something to hide menu items from clients. Something to rebrand the dashboard. Something for the login page. Something for admin columns. Something to switch off comments. Six plugins, six update cycles, six settings screens, and no shared permissions model between any of them. WP Adminify covers that list in one tool with role-based controls running through all of it, so a client sees a different admin from an editor, who sees a different admin from you. The full case is in [replacing 50+ plugins with one](https://wpadminify.com/replace-wordpress-plugins-with-wp-adminify). Media Library Organizer attempts none of this, and isn't worse for it. It's a different product answering a different question. | Your situation | Better fit | | --- | --- | | Media folders are the only gap | Media Library Organizer | | Running 4+ small admin plugins | WP Adminify | | Minimal plugin footprint is a priority | Media Library Organizer | | Building white-labelled client sites | WP Adminify | | Need role-based admin restrictions | WP Adminify | | Simple site, one administrator | Media Library Organizer | ## Track record Media Library Organizer: 20,000 installs, 94/100 from 147 ratings, updated 23 July 2026, from Themeisle, an established vendor with a wide portfolio behind it. WP Adminify: 7,000+ installs, 86/100 from 108 ratings, from Jewel Theme. Media Library Organizer is ahead on both adoption and rating. Worth noting that its score covers one feature while ours covers sixty, which makes the two numbers hard to compare directly, but we'd rather state that than bury it. ## Pricing Both have free versions. The honest comparison is the total cost of your stack. If WP Adminify removes four paid plugins, compare it against their combined renewals. If it removes none, compare the folder features alone, and on those the two are level. [WP Adminify pricing](https://wpadminify.com/pricing) is published per tier. ## Choose Media Library Organizer if… - Media folders are genuinely all you need - You want the smallest plugin that solves the problem - You dislike large multi-purpose plugins on principle - Your site has one administrator and nothing client-facing ## Choose WP Adminify if… - Media folders are one of several admin problems - You're consolidating single-purpose plugins - You build client sites that need white labelling and menu control - You need role-based restrictions across the admin - You want dashboard, login and admin column customization too ## Media Library Organizer vs WP Adminify FAQs ### Which has better media folders, Media Library Organizer or WP Adminify? Neither, in any way that matters. Both register a hierarchical attachment taxonomy with no custom tables, both nest, and neither supports manual folder ordering. The folder capability is effectively equivalent. The difference is everything else each plugin does. ### Is WP Adminify too heavy just for media folders? If folders are truly your only need, yes. Media Library Organizer registers one taxonomy and nothing else. WP Adminify only makes sense when it takes plugins off your site rather than adding to the pile. ### Do both keep my folder data portable? Yes, equally. Both keep folders as standard WordPress taxonomy terms in wp_term_taxonomy, under mlo-category and media_folder respectively. Either exports with wp term list and survives deactivation as ordinary data, which custom-table plugins can't manage. ### Can I run both at the same time? Technically yes, because they use different taxonomy names, unlike WP Adminify and Folders by Premio which both claim media_folder and genuinely conflict. But there's no reason to. You'd be maintaining two separate folder structures over the same files and guessing which is current. ### Which supports manual folder ordering? Neither. Both are taxonomy-based, and WordPress terms sort by name or ID. FileBird and Real Media Library support manual ordering through dedicated columns in their own tables, and portability is the price. ### Can I migrate between them? Yes, and it's straightforward. Both use standard taxonomy terms, so it's a term copy from mlo-category to media_folder or the reverse, parents first. Far less work than migrating to or from a custom-table plugin. ## Final verdict On media folders these two are equivalent. Same architecture, same portability, same limitations. Anyone claiming a big gap hasn't looked at the database. Media Library Organizer wins on: footprint, focus and simplicity. WP Adminify wins on: breadth, consolidation, role-based control and client-facing features. So count your admin plugins. If media folders are the only gap, take the lighter tool. If you're running four or five small plugins to keep the admin usable, that's when the toolkit earns its size, and not before. More detail: [WP Adminify's media folders](https://wpadminify.com/features/wordpress-media-folder) and their [setup documentation](https://wpadminify.com/docs/adminify/productivity/create-folder-for-post-types), or background on [how WordPress media folders work](https://wpadminify.com/wordpress-media-library-folders). --- # Folders vs WP Adminify: Which Organizes WordPress Better? URL: https://wpadminify.com/folders-vs-wp-adminify Last updated: 2026-08-12 This comparison has a strange property. Both plugins keep media folders in exactly the same place. We activated each one alone on a clean WordPress 7.0.3 install and found that both register a hierarchical attachment taxonomy named `media_folder`. Same mechanism, same table, same name. Which knocks out the question that usually decides this category, portability versus lock-in, before we've started. Both are equally portable. So it comes down to scope. What else does each one organize? [WP Adminify's folder system for media and post types](https://wpadminify.com/features/wordpress-media-folder) is ours, so read the verdict with that in mind. The [best WordPress media folder plugins](https://wpadminify.com/best-wordpress-media-folder-plugins) roundup puts both against five more, and the [Folders by Premio review](https://wpadminify.com/folders-plugin-review) goes deeper on that side. ## Quick verdict Choose Folders if your problem spans content. You want folders on posts and pages as much as on media. Choose WP Adminify if your problem spans the admin: cluttered menus, unbranded client dashboards, login pages, missing admin columns, with media folders as one piece of that. Don't run both. The shared taxonomy name makes that genuinely unsafe, not just untidy. ## Comparison table | | Folders (Premio) | WP Adminify | | --- | --- | --- | | Primary purpose | Folders for all content types | Admin toolkit including media folders | | Active installs | 90,000 | 7,000+ | | Rating | 100/100 from 1,514 ratings | 86/100 from 108 ratings | | Media folder storage | `media_folder` taxonomy | `media_folder` taxonomy | | Custom tables | None | None | | Nested subfolders | Yes | Yes | | Folders for posts | Yes, `post_folder` | Post type folders available | | Folders for pages | Yes, `folder` | Post type folders available | | Manual folder ordering | No | No | | Admin menu editor | No | Yes | | White label | No | Yes | | Login customizer | No | Yes | | Admin columns editor | No | Yes | | Dashboard customization | No | Yes | | Files move on disk | No | No | ## The shared taxonomy and what it means Activating each plugin on its own and reading the registered taxonomies gave us this: ``` Folders (Premio) media_folder → attachment hierarchical folder → page hierarchical post_folder → post hierarchical WP Adminify media_folder → attachment hierarchical ``` Three things follow from that. 1. Never run both. Two plugins claiming one taxonomy name gives you behaviour nobody can predict, and it's the single most important operational fact on this page. 2. Both are equally portable. Neither creates custom tables. Your structure lives in `wp_term_taxonomy` and `wp_term_relationships`, which is ordinary WordPress data you can read with `wp term list media_folder` and export with anything. Compare that to FileBird sitting in `wp_fbv`, or Real Media Library across four proprietary tables, where exactly one plugin can read your folder tree. 3. Migrating between them is unusually cheap. The media folder data is already in the same taxonomy under the same name, so moving is far less work than any custom-table migration. Background on how that storage works in [WordPress media folders explained](https://wpadminify.com/wordpress-media-library-folders). ![Diagram showing how WordPress media folders map attachments to taxonomy terms: the file stays in wp-content/uploads, its record is a row in wp_posts, and the folder is a term linked through wp_term_relationships](https://d1k2c27psfzbiv.cloudfront.net/wp-content/uploads/2026/08/09112546/wordpress-media-folder-taxonomy-diagram.webp) ## Media folders: effectively a draw Same storage, same hierarchical nesting, and neither one offers manual folder ordering. That's a shared limitation of taxonomy storage rather than a shortcoming either vendor could fix, because WordPress terms come back sorted by name or ID. If dragging folders into an arbitrary order matters to you, neither of these is your plugin and FileBird's `ord` column is the thing you're actually shopping for. Both give you a folder tree in the Media Library, drag-and-drop assignment, nested subfolders, bulk moving, and folder filtering inside the media modal. What's left is interface preference, and that's worth twenty minutes on a staging copy rather than taking anyone's word for it, ours included. ## Content organization: Folders wins Folders registers dedicated hierarchical taxonomies for pages (`folder`) and posts (`post_folder`) alongside media. Turning a 400-page site into a folder tree is its core competence, and it's built for that job specifically. WP Adminify has post type folders, but content organization is one feature among sixty rather than the reason the product exists. ![Folder sidebar on the Posts list screen, showing posts organized into topic folders](https://d1k2c27psfzbiv.cloudfront.net/wp-content/uploads/2025/03/09054243/Folder-sidebar-on-the-Posts-list-screen.webp) If your pain is "I have 600 pages and no way to group them," Folders is the better-shaped tool and we'd tell you that with our own product on the page. ## Admin management: WP Adminify wins The mirror image. WP Adminify covers admin menu editing, white labelling, login page customization, dashboard widgets, admin columns, security hardening, and role-based controls across all of it. Folders does none of that, and doesn't claim to. If your admin is held together by five single-purpose plugins, one hiding menu items from clients, one rebranding the dashboard, one styling the login page, that's where the consolidation argument lives. The case for it is in [replacing 50+ plugins with one](https://wpadminify.com/replace-wordpress-plugins-with-wp-adminify). | Your situation | Better fit | | --- | --- | | Hundreds of unorganized pages and posts | Folders | | Running several small admin plugins | WP Adminify | | Building white-labelled client sites | WP Adminify | | Content team drowning in an unsorted post list | Folders | | Need role-based admin restrictions | WP Adminify | | Want the highest-rated organizer available | Folders | ## Track record Folders has 90,000 active installs and a perfect 100/100 from 1,514 ratings. That's the strongest satisfaction signal in this category, from the largest sample in it. Updated 21 July 2026. WP Adminify has 7,000+ installs and 86/100 from 108 ratings, spread across a far broader feature set. On user satisfaction within its category, Folders is ahead by a clear margin. That's a real factor and we're not going to talk around it on our own site. ## Pricing Both have free versions on WordPress.org with tier limits. The comparison worth running is what each one replaces. Folders fills a content-organization gap. WP Adminify potentially takes four or five separate admin plugins off the site, so compare it against their combined renewals rather than against Folders alone. [WP Adminify's tiers](https://wpadminify.com/pricing) are listed in full. ## Choose Folders if… - You need folders on posts and pages as much as on media - Content organization is the actual bottleneck - You want the highest-rated organizer in the category - You'd rather have a focused tool that does one thing across every content type ## Choose WP Adminify if… - Media folders are one of several admin problems - You're consolidating single-purpose admin plugins - You build client sites that need white labelling and menu control - You need role-based controls across admin features - Dashboard and login customization matter to you ## Folders vs WP Adminify FAQs ### Can I use Folders and WP Adminify together? No. We verified that both register a hierarchical attachment taxonomy named media_folder, and two plugins claiming one taxonomy name produces behaviour you can't predict. Pick one. The upside is that migrating between them is far simpler than moving to or from a custom-table plugin. ### Which stores media folders more safely? Neither, because the mechanism is identical. Both keep folders as terms in the media_folder taxonomy with no custom tables, so both are equally portable and equally safe. Files never move on disk with either. ### Is Folders better than WP Adminify for media? For media specifically they're close, since the storage is identical and neither offers manual folder ordering. Folders has much stronger ratings within its category. WP Adminify's advantage isn't better media folders, it's everything else it covers. ### Which is better for organizing posts and pages? Folders. It registers dedicated hierarchical taxonomies for pages and posts, and content organization is the point of the product rather than an extra. ### Do both support nested subfolders? Yes. We confirmed all of Folders' taxonomies and WP Adminify's media_folder are registered as hierarchical, so nesting works at the data layer in both. Two or three levels works best in practice either way, because deeper trees stop getting used. ### Can I migrate from Folders to WP Adminify? Yes, and it's the easiest migration in this category, because the media folder data already lives in the same taxonomy under the same name. Back up first, never run both at once, and check folder and file counts after switching. ## Final verdict Unusually for this category, storage isn't the deciding factor. Both keep your folder structure as portable WordPress terms, and both avoid the lock-in FileBird and Real Media Library carry. Folders wins on: content organization across posts and pages, category-leading ratings, and focus. WP Adminify wins on: admin breadth, plugin consolidation, white labelling, and role-based control. Ask what's actually broken. If it's your content lists, buy the content organizer. If it's the admin generally, buy the toolkit. Both are defensible answers to different questions. More detail: [WP Adminify's media folders](https://wpadminify.com/features/wordpress-media-folder) and their [setup documentation](https://wpadminify.com/docs/adminify/productivity/create-folder-for-post-types), or background on [how WordPress media folders work](https://wpadminify.com/wordpress-media-library-folders). --- # FileBird vs WP Adminify: Which Media Folder Plugin Wins? URL: https://wpadminify.com/filebird-vs-wp-adminify Last updated: 2026-08-12 These two solve overlapping problems from opposite ends. FileBird is a specialist: it does media folders, and it does them very well. WP Adminify is a generalist that happens to include media folders among sixty-odd admin features. That gap decides most of this comparison. There's a second difference too, less visible, in how each one stores your folder structure, and it outlives any preference you have about interfaces. We ran both on a clean WordPress 7.0.3 install to pin down what each actually does rather than what each claims. [The media folder half of WP Adminify](https://wpadminify.com/features/wordpress-media-folder) is something we build, so weigh our conclusions accordingly. For the wider field, our [best WordPress media folder plugins](https://wpadminify.com/best-wordpress-media-folder-plugins) roundup tests seven, and the [FileBird review](https://wpadminify.com/filebird-review) covers that side on its own. ## Quick verdict Choose FileBird if media folders are the specific problem in front of you. Best interface in the category, 200,000 active installs, and manual folder ordering that WP Adminify simply doesn't have. Choose WP Adminify if your media library is one of several admin annoyances, alongside cluttered menus, unbranded client dashboards and missing admin columns, or if you want your folder data to stay readable by something other than the plugin that made it. Neither is a bad pick. They're shaped for different jobs. ## Comparison table | | FileBird | WP Adminify | | --- | --- | --- | | Primary purpose | Media folders | Admin toolkit including media folders | | Active installs | 200,000 | 7,000+ | | Rating | 94/100 from 1,121 ratings | 86/100 from 108 ratings | | Folder storage | Custom tables (`wp_fbv`) | Taxonomy (`media_folder`) | | Nested subfolders | Yes, `parent` column | Yes, hierarchical taxonomy | | Manual folder ordering | Yes, `ord` column | No | | Folders in media modal | Yes | Yes | | Folders for posts/pages | No | Post type folders available | | Portable folder data | No | Yes, standard WordPress terms | | Admin menu editor | No | Yes | | White label | No | Yes | | Login customizer | No | Yes | | Admin columns editor | No | Yes | | Files move on disk | No | No | ## Media folder management On the folder features themselves, these two are closer than that table makes them look. Both give you a folder tree beside the Media Library, drag-and-drop assignment, nested subfolders, bulk moving, and folder filtering inside the media modal when you're inserting images into a post. Both use virtual folders. We checked rather than assumed: neither moves a file, everything stays in `wp-content/uploads/`, and image URLs are untouched. So you can reorganize a live library with either one during business hours. Where FileBird is genuinely better: the interface. It's a dedicated product with years of iteration behind it and you can feel that within about a minute of using it. If you spend hours a week in the Media Library, that polish is worth paying for and we're not going to pretend otherwise. ![WP Adminify media folders visible in WordPress editor, page builder, and media modal](https://d1k2c27psfzbiv.cloudfront.net/wp-content/uploads/2025/03/09071431/wp-adminify-media-folders-gutenberg-page-builder-support.webp) ## Folder ordering: FileBird wins outright The clearest functional difference between them, and it falls straight out of the database design. FileBird's `wp_fbv` table has a dedicated `ord` column. Drag folders into whatever order you want and it sticks: "Active clients" sitting above "Archive" regardless of what the alphabet thinks. WP Adminify keeps folders as WordPress taxonomy terms, which come back sorted by name or ID. There's no manual ordering, and there's no clever workaround either. With six folders you'll never notice. With thirty client folders where five matter every day and the other twenty-five are dead weight sitting above them alphabetically, you'll notice constantly. If ordering matters to you, FileBird wins and nothing further down this page changes that. ## Storage model: WP Adminify wins outright The reverse trade, and the one people find out about at the worst possible moment. We activated each plugin alone and looked at what appeared: ``` FileBird wp_fbv id, name, parent, type, ord, created_by wp_fbv_attachment_folder folder_id, attachment_id WP Adminify media_folder taxonomy, hierarchical = true (no custom tables — uses wp_term_taxonomy + wp_term_relationships) ``` Then we tested what that means in practice. Eleven folders across two levels in FileBird, all 38 media files assigned, then we pulled the plugin: - All 38 files: present and working, every URL unchanged - Folder tree: gone from the admin - Data in `wp_fbv`: every row still there, and reactivating brought the tree straight back - Another folder plugin reading it: nothing at all So FileBird folders aren't lost when you leave. They're unreadable, sitting in a format only FileBird speaks. Getting them out needs a purpose-built importer or a script you write yourself. WP Adminify's folders are ordinary WordPress terms. List them with `wp term list media_folder`, query them with `get_terms()`, export them with anything. If you reassess your plugin stack every year or two, that difference is worth real money in migration work you never have to do. ![Diagram showing how WordPress media folders map attachments to taxonomy terms: the file stays in wp-content/uploads, its record is a row in wp_posts, and the folder is a term linked through wp_term_relationships](https://d1k2c27psfzbiv.cloudfront.net/wp-content/uploads/2026/08/09112546/wordpress-media-folder-taxonomy-diagram.webp) Neither approach is wrong. Custom tables buy performance and the ordering feature above. Terms buy portability. Background on how portable folder storage works in [WordPress media folders explained](https://wpadminify.com/wordpress-media-library-folders). ## Scope: the real decision Most people picking between these two aren't really comparing folder features. They're answering a different question: one plugin per problem, or one plugin for the admin? FileBird does one thing. If media folders are your only gap, bolting on a sixty-feature toolkit to get them is out of proportion, and the specialist will serve you better. That's not a concession, it's just what specialists are for. But watch what actually happens to a WordPress install over two years. One plugin for folders. One to hide menu items from clients. One to white-label the dashboard. One for the login page. One for admin columns. One to switch off comments. Six plugins, six update cycles, six settings screens, and six things that might break after a core release. WP Adminify covers that list in one tool with role-based controls running across all of it. If that's your situation, this stopped being a comparison about folder trees a while ago. | Your situation | Better fit | | --- | --- | | Media folders are the only gap | FileBird | | Running 4+ small admin plugins | WP Adminify | | Need manual folder ordering | FileBird | | Building client sites needing white label | WP Adminify | | Very large library, performance critical | FileBird | | Want folder data to stay portable | WP Adminify | ## Maturity and track record FileBird has 200,000 active installs and 1,121 ratings averaging 94/100. That's the largest sample anywhere in this category, which makes the score unusually trustworthy. Last updated 27 July 2026, tested against WordPress 7.0.3. WP Adminify has 7,000+ installs and 86/100 from 108 ratings. Much smaller numbers, spread across a far wider feature set rather than concentrated on one function. On adoption alone FileBird is ahead, and that counts for something real. A bigger install base means bugs get found faster and the odds of the plugin being abandoned are lower. ## Pricing Both have free versions on WordPress.org, and FileBird's free tier caps folder count. The comparison worth running isn't sticker price, it's what each one replaces. If WP Adminify takes four other plugins off the site, compare it against their combined renewal cost, not against FileBird on its own. [What WP Adminify Pro includes](https://wpadminify.com/pricing) is listed tier by tier. ## Choose FileBird if… - Media folders are the specific problem you're solving - You want the most polished folder interface available - Manual folder ordering matters to how you work - You have a very large library and want purpose-built performance - You want the largest install base and the longest track record ## Choose WP Adminify if… - Your media library is one of several admin problems - You're consolidating a stack of single-purpose plugins - You build client sites that need white labelling and menu control - You want folder data stored as portable WordPress terms - You need role-based controls across admin features, not just folders ## FileBird vs WP Adminify FAQs ### Is WP Adminify a good FileBird alternative? Depends what you're short of. For media folders alone, FileBird is more specialized and has manual folder ordering that WP Adminify lacks. WP Adminify makes more sense when folders are one of several admin needs, or when you want folder data kept as portable WordPress taxonomy terms rather than in proprietary tables. ### Which stores folders more safely, FileBird or WP Adminify? Equally safe for your files. Neither moves anything on disk and image URLs never change with either one. They differ on portability: WP Adminify uses the media_folder taxonomy, readable by any WordPress tool, while FileBird uses its own wp_fbv tables that only FileBird can read. ### Can I switch from FileBird to WP Adminify? Yes, but export your folder structure while FileBird is still active. Deactivate first and its tables go unreadable to everything else. FileBird's schema is simple enough that exporting is straightforward: folder id, name, parent, plus an attachment mapping table. Under about 2,000 files, rebuilding by hand usually beats scripting the migration. ### Do both support nested subfolders? Yes. We confirmed FileBird's wp_fbv table has a parent column and WP Adminify registers media_folder as a hierarchical taxonomy, so both nest at the data layer. Two or three levels works best in practice whichever you pick, because deeper trees stop getting used. ### Can I run FileBird and WP Adminify at the same time? Not usefully. They keep folders in completely different places, so you'd be maintaining two unrelated structures and guessing which one is current. Pick one and migrate properly. ### Which is better for agencies? Usually WP Adminify, because agency pain is rarely folders on their own. It's white-labelling client dashboards, hiding menu items, customizing login pages and controlling access by role. But if your workflow leans on manual folder ordering across dozens of client folders, FileBird's ordering may outweigh all of that. ## Final verdict This is a scope decision wearing a feature comparison's clothes. FileBird wins on: interface polish, manual folder ordering, install base, and purpose-built performance on very large libraries. WP Adminify wins on: breadth, plugin consolidation, role-based controls, and folder data you can take with you. If folders are all you need, buy the specialist. If your admin is held together by five small plugins and the media library is just the one complaining loudest, the toolkit is the better shape. More detail either way: [WP Adminify's media folder feature](https://wpadminify.com/features/wordpress-media-folder) and its [setup documentation](https://wpadminify.com/docs/adminify/productivity/create-folder-for-post-types), background on [how WordPress media folders work](https://wpadminify.com/wordpress-media-library-folders), or the consolidation case in [replacing 50+ plugins with one](https://wpadminify.com/replace-wordpress-plugins-with-wp-adminify). --- # WP Media Folder Review 2026: Honest Test and Pricing Breakdown URL: https://wpadminify.com/wp-media-folder-review Last updated: 2026-08-12 WP Media Folder is JoomUnited's premium media management plugin. It stands apart from everything else in this category in one way that shapes the whole evaluation: it isn't distributed through the WordPress.org repository, so there's no free version to try before you buy. That distribution choice affects how you should assess it, and it affects this review too. Disclosure: WP Adminify is ours, and [its media folder module](https://wpadminify.com/features/wordpress-media-folder) competes with this plugin. It sits alongside seven others in our [best WordPress media folder plugins](https://wpadminify.com/best-wordpress-media-folder-plugins) comparison, where every entry we could install was installed. ## A note on this review We tested nine media folder plugins on a clean WordPress 7.0.3 install for this series, installing each one and inspecting exactly what it did to the database. WP Media Folder isn't among them, because it needs a paid licence and isn't available through WordPress.org. Rather than repeat the vendor's marketing as though we'd checked it, we've marked this review as covering publicly documented capabilities only. Where every other review in this series says "we found", this one can't. ## What WP Media Folder is A premium media management plugin covering folder organization plus a set of jobs most competitors leave alone: - Folder organization for the WordPress Media Library - Cloud storage integration: the vendor documents connections to Google Drive, Dropbox, OneDrive and Amazon S3 - Gallery creation from media folders - Image compression and watermarking - Media replacement in place, which is a job worth understanding on its own terms - see [replacing an image without changing its URL](https://wpadminify.com/how-to-update-replace-image-in-wordpress-without-changing-url) ## How it differs from the free options The pitch is breadth within media management. FileBird, Folders and Real Media Library concentrate on organizing what's already in your library. WP Media Folder also addresses where files live and how they're delivered. Cloud integration is the clearest example. Offloading media to object storage is a real need on large sites, the point where backups stop finishing overnight and migrations start timing out, and most folder plugins don't go near it. If you need folders and offloading together, one plugin covering both beats stitching two together. The trade is equally real. A plugin doing five jobs is a bigger dependency than one doing a single job well, and every one of those five jobs has strong dedicated competitors. ## What we couldn't verify For every other plugin in this series we established the storage model, because it decides whether you can ever leave. FileBird keeps folders in `wp_fbv`. Real Media Library spreads them across four tables. WP Adminify, Folders and Media Library Organizer all use WordPress taxonomy terms. ![Diagram showing how WordPress media folders map attachments to taxonomy terms: the file stays in wp-content/uploads, its record is a row in wp_posts, and the folder is a term linked through wp_term_relationships](https://d1k2c27psfzbiv.cloudfront.net/wp-content/uploads/2026/08/09112546/wordpress-media-folder-taxonomy-diagram.webp) The vendor's own documentation answers this one. WP Media Folder keeps folders in a WordPress taxonomy called `wpmf-category`, named in JoomUnited's developer documentation and again in its WPML configuration guidance. The physical-folders page settles it: turning that mode on means, in the vendor's words, creating physical folders "instead of using WordPress custom taxonomy". So the default is virtual folders on ordinary term rows, the same portable model as WP Adminify, Folders by Premio and Media Library Organizer, and a more forgiving one than FileBird's custom tables. That is documented rather than measured, so confirm it once you have a licence: ``` wp db query "SHOW TABLES;" wp db query "SELECT taxonomy, COUNT(*) FROM wp_term_taxonomy GROUP BY taxonomy;" ``` Two caveats travel with that answer. Physical folders are optional but awkward to reverse: the mode transforms your existing structure into real directories, JoomUnited warns that "some features of the plugin will be disabled as they’re not compatible with the setting", and it does not work on multisite. Separately, the plugin ships a "Delete all data on uninstall (including addons)" option which, in the vendor’s own wording, means "all your media files will be removed when uninstalling our plugin". That is worth checking on day one, not on the day you leave. Still unverified: nesting depth, drag-and-drop behaviour, bulk-move performance, whether the folder tree appears inside the media modal, and how cloud integration interacts with the folder structure. ## Pricing WP Media Folder is premium-only with no free tier, which separates it from every other plugin in this series. All of those have working free versions on WordPress.org. JoomUnited lists $49 a year for the plugin, $69 a year for the plugin plus every add-on, and $199 for its full WordPress bundle. The licences are multi-site and do not auto-renew. The split is the part to read carefully: cloud storage integration, the capability that makes this plugin distinctive, is in the $69 tier and not the $49 one. Practically, that means you can't put it on a staging copy of your real library before committing, which is the standard advice for evaluating any folder plugin at scale. Read the vendor's refund policy before you buy. ## Who it might suit | Possible fit | Probably not | | --- | --- | | Sites needing folders and cloud offloading in one plugin | Sites wanting to try before buying | | Teams already using JoomUnited products | Anyone needing a free tier | | Gallery-heavy sites wanting folder-driven galleries | Sites wanting a single-purpose folder plugin | | Sites wanting watermarking and compression bundled | Budget-conscious small sites | ## The bundle question, and where we come into it We publish a competing plugin, so weigh this section accordingly. It's also the most useful framing we can offer on a product we couldn't test. WP Media Folder is a bundle, and bundles are worth evaluating by what they take off your site rather than by feature count. Its bundle points at media: folders, cloud, galleries, compression, watermarks. If you genuinely need three of those five, one licence is a reasonable answer. [WP Adminify](https://wpadminify.com/features/wordpress-media-folder) is also a bundle, pointed somewhere completely different. Same media folders, but sitting next to menu editing, white labelling, login customization, dashboard widgets and admin columns. We don't do cloud offloading at all, and if that's your requirement nothing here substitutes for it. So the two of us aren't really competing for the same buyer. The question that separates us is simple: are the plugins cluttering your site all media-related, or all admin-related? If you're paying separate renewals for a menu editor, a white-label plugin and a login customizer, our version of the arithmetic is in [replacing 50+ plugins with one](https://wpadminify.com/replace-wordpress-plugins-with-wp-adminify). The one difference that isn't a matter of taste is trialability. You can install our free version on a copy of your real library this afternoon and know within an hour whether it fits, [what's free versus paid](https://wpadminify.com/wp-adminify-free-vs-pro) is documented. You can't do that with WP Media Folder, and for a plugin you'd be trusting with fifteen thousand files, that's a real difference rather than a marketing point. ## How it compares Against the plugins we did test: - FileBird: 200,000 installs, 94/100 from 1,121 ratings, free tier, the most polished folder interface in the category. - Folders by Premio: 90,000 installs, a perfect 100/100 from 1,514 ratings, portable taxonomy storage, free tier. - Real Media Library: 100,000 installs, the deepest folder feature set, free Lite version. - WP Adminify: folders plus broader admin management, taxonomy storage, free version. The relevant question is whether the cloud and gallery features justify a paid-only commitment when the folder functionality itself is well served for free. ## WP Media Folder FAQs ### Is WP Media Folder free? No. It's a premium JoomUnited product and isn't distributed through the WordPress.org repository, so there's no free version to trial. Every other major media folder plugin, including FileBird, Folders, Real Media Library and Media Library Organizer, has a working free tier. ### Why isn't WP Media Folder on WordPress.org? JoomUnited sells it directly rather than distributing through the repository. We confirmed on 9 August 2026 that querying the WordPress.org plugin API returns nothing for it. That's a distribution choice, not a sign of any problem with the plugin. ### Does WP Media Folder support cloud storage? JoomUnited documents connections to Google Drive, OneDrive, Dropbox, Google Photos, Amazon S3, Google Cloud, DigitalOcean, Wasabi and Linode. They sit in the add-on tier, which is $69 a year against $49 for the plugin on its own, so budget for the higher plan if cloud offloading is the reason you are buying it. We have not tested the integrations. ### Is WP Media Folder better than FileBird? They aim at different needs. FileBird is a dedicated folder plugin with 200,000 installs and a free tier. WP Media Folder bundles folders with cloud integration, galleries and image processing at a premium-only price. If folders are all you need, the free options are hard to argue against. ### What happens to my folders if I stop using WP Media Folder? JoomUnited’s own documentation names the folder taxonomy as wpmf-category, so folders are ordinary WordPress terms and your files never move. Removing the plugin leaves orphaned terms behind rather than relocated media. Two exceptions matter: if you switched on physical folders your files were moved into real directories, and the plugin has a delete-all-data-on-uninstall setting that removes media files. Check that toggle before you deactivate anything. ## Verdict WP Media Folder occupies a genuinely different position: a paid-only plugin bundling folder organization with cloud storage, galleries and image processing. For sites that need that exact combination, one plugin covering all of it has real appeal. What we still can't tell you is how it holds up in daily use: nesting depth, drag-and-drop, bulk-move performance on a large library. Those need a licence and a test bench. The question that decides portability is answered, though, and it answers in the plugin's favour: folders are taxonomy terms, so leaving is survivable. For folder organization on its own, the tested free options are strong. If you want to understand what you're actually choosing between, start with [how WordPress media folders work](https://wpadminify.com/wordpress-media-library-folders), the storage model is the part that decides how easily you can change your mind later. --- # Media Library Folders Review 2026: Still Worth Installing? URL: https://wpadminify.com/media-library-folders-review Last updated: 2026-08-12 Media Library Folders by Max Foundry is one of the older plugins in this category, and it does several things differently from the generation that followed it. Some of those differences are deliberate choices with real appeal. One of them is important enough that you should check it yourself before installing. We put it on a clean WordPress 7.0.3 site alongside eight competitors and inspected what it does to the database. Disclosure: we publish WP Adminify, whose [virtual media folders](https://wpadminify.com/features/wordpress-media-folder) take the opposite approach to the physical folders described below. Both were installed and inspected the same way for our [best WordPress media folder plugins](https://wpadminify.com/best-wordpress-media-folder-plugins) comparison. ## Quick verdict Media Library Folders takes a more filesystem-oriented approach than its taxonomy-based competitors, which suits teams who want what they see in WordPress to match what they see over FTP. It creates its own tables, so folder data isn't portable, and its rating sits below the category leaders. Consider it if you want folder organization mirroring your actual server directories. Look elsewhere if you want the safest, most portable, best-supported option. ## At a glance | Developer | Max Foundry | | --- | --- | | Version tested | 8.3.8 | | Active installs | 10,000 | | Rating | 86/100 from 462 ratings | | Last updated | 21 May 2026 | | WordPress.org slug | `media-library-plus` | | Storage | Custom tables, `wp_mgmlp_folders` and others | Two quirks worth knowing straight away. The WordPress.org slug is `media-library-plus`, not the plugin's display name, so searching "media library folders" may not surface it. And it installs as two separate plugin entries: the main plugin plus a companion called `mlp-reset`. Unusual, and worth understanding before you activate either. For context on the numbers: 462 ratings is a substantial sample, larger than Real Media Library's 289. But the 86/100 average is the joint-lowest among widely-adopted plugins here. ## Under the hood Activating it created three tables: ``` wp_mgmlp_folders folder structure wp_mgmlp_block_access access control wp_mgmlp_blocked_ips IP blocking ``` The folder table is expected. The two access-control tables are not something any other folder plugin we tested creates, and they suggest access-restriction features beyond organization. Custom-table storage has the same consequence here as everywhere else: your folder structure is readable by exactly one plugin. We verified that behaviour generally by building a structure in FileBird and deactivating it. Files all intact, folder tree gone, rows retained and invisible to everything else. ## The question you have to answer first Every plugin in this category is either virtual, where folders are database records, files never move and URLs never change, or physical, where files get moved into real directories and URLs change with them. Virtually every modern plugin is virtual, because moving files breaks every post embedding them. Media Library Folders takes the physical route, and our hands-on session removed most of the doubt: its interface isn't in the Media Library at all. It's a separate admin page titled "Folders & Files" with a location bar reading `uploads`, and the tree it shows is your actual server directory structure. ![Media Library Folders showing its own Folders and Files admin page with the real wp-content/uploads directory tree including plugin folders](https://d1k2c27psfzbiv.cloudfront.net/wp-content/uploads/2026/08/10101619/mlf-uploads-directory-tree.webp) ![Media Library Folders expanding the uploads/2026 directory to show WordPress month-based folders](https://d1k2c27psfzbiv.cloudfront.net/wp-content/uploads/2026/08/10101622/mlf-date-folders.webp) We did not move a file and watch its URL, but the vendor answers it directly. The plugin's WordPress.org listing says it moves files into real directories and that "links in post and pages and feature image links are automatically updated when files are moved", by scanning posts and pages for the old path and rewriting it. So the URL does change, and the plugin tries to clean up after itself. That mitigation has edges worth knowing: - Image URLs change when you reorganize, by design - Standard posts and pages get rewritten automatically; the vendor lists Elementor, Beaver Builder and Themify support separately and notes some builders need the page resaved - Anything outside that sweep keeps the old path: external links, cached copies, CDN entries, hardcoded URLs in theme files, and content in custom tables - Reorganizing a live site becomes a migration project rather than an afternoon How to check in five minutes on staging: note an image's full URL, create a folder, move the image into it, then look at the URL again. Given everything the interface shows, we'd expect it to change. But expecting isn't knowing, and this is the one test to run before touching a production library. It's also, incidentally, why [replacing an image without changing its URL](https://wpadminify.com/how-to-update-replace-image-in-wordpress-without-changing-url) is treated as a separate discipline in WordPress: URL stability is load-bearing, and most tooling is built to protect it. One more hands-on observation: the library view showed "No files were found" until content is synced in, and the Settings screen has options for syncing behaviour ("Skip WEBP images when syncing media library files"). Sync is the plugin's model, the filesystem is the source of truth and the plugin reads from it, which is exactly backwards from every other plugin in this series. ## Strengths Filesystem alignment. If the plugin does mirror real directories, that's genuinely appealing for teams whose workflow involves uploading straight to the server. What you see in WordPress matches what you see over FTP, and no other plugin here offers that. Substantial ratings sample. 462 ratings is more than Real Media Library or Media Library Organizer collected. Actively maintained. Updated 21 May 2026, so nobody has walked away from it. Long track record. One of the older plugins in the category, with the stability that usually implies. ## Limitations Lowest rating among established options. 86/100 against FileBird's 94, Real Media Library's 96 and Folders' 100. Smallest install base of the established plugins. 10,000 against FileBird's 200,000, a twentyfold difference. Custom-table storage. Folder data readable only by this plugin. Confusing packaging. A slug that doesn't match the name, and two plugin entries instead of one. Neither is a functional problem, both are friction. The physical-versus-virtual uncertainty. Until someone confirms it, this is the biggest unknown here, and it isn't a small one. ## Who should use it | Good fit | Poor fit | | --- | --- | | Teams wanting WordPress folders to match server directories | Sites where existing image URLs must not change | | Workflows involving direct FTP uploads | Teams wanting portable folder data | | Existing users who are happy | New large libraries choosing today | | | Sites wanting the best-supported option | ## Why most of this category went the other way We build a competing folder feature, so read this with that in mind. It's also the context that makes this plugin's design legible rather than just old. The reason nearly every modern plugin, ours included, keeps folders out of the filesystem is that WordPress serves media by URL. Move a file and every post embedding it, every external link, every cached copy points at nothing. So the whole generation after Media Library Folders settled on the same answer: leave the file alone, record the folder in the database. ![Diagram showing how WordPress media folders map attachments to taxonomy terms: the file stays in wp-content/uploads, its record is a row in wp_posts, and the folder is a term linked through wp_term_relationships](https://d1k2c27psfzbiv.cloudfront.net/wp-content/uploads/2026/08/09112546/wordpress-media-folder-taxonomy-diagram.webp) [WP Adminify's folders](https://wpadminify.com/features/wordpress-media-folder) take that a step further by using ordinary taxonomy terms rather than our own tables, which means the structure stays readable with `wp term list media_folder` whether or not our plugin is installed. And when a file genuinely does need to change (the case where URL stability is hardest to keep), our media module replaces it in place rather than moving anything: same attachment ID, same filename, same URL, metadata intact, with each version backed up. ![WP Adminify Media Replace metabox in the attachment details panel, noting the attachment ID, filename, metadata and date are kept](https://d1k2c27psfzbiv.cloudfront.net/wp-content/uploads/2026/08/10101625/adminify-media-replace-metabox.webp) Whether any of that makes us the right pick depends on something this review can't tell you. If you're choosing a folder plugin and nothing else, several options above have more users and more polish than we do. The reason people end up on our page is usually different: they're already running a menu editor, a white-label plugin, a login customizer and an admin columns plugin alongside their folder plugin, and the renewals have started to look silly. [That arithmetic](https://wpadminify.com/replace-wordpress-plugins-with-wp-adminify) is the actual pitch, and it has nothing to do with folders. ## How it compares - FileBird: 20× the installs, better rating, more polished, confirmed virtual folders. - Folders by Premio: 100/100 from 1,514 ratings, portable taxonomy storage, covers posts and pages. - Real Media Library: far more features, though four custom tables to leave behind. - Media Library Organizer: one taxonomy, no tables, fully portable. ## Media Library Folders FAQs ### Does Media Library Folders move my files on the server? This is the critical question and you should verify it yourself before installing. Note an image's URL, create a folder, move the image, then check the URL again. If it changed, the plugin moves files physically, which means reorganizing can break posts embedding those images. ### Why can't I find Media Library Folders on WordPress.org? Its slug is media-library-plus, which doesn't match its display name, so searching the plugin name may not surface it. It also installs as two entries, the main plugin plus a companion called mlp-reset. ### Is Media Library Folders still maintained? Yes. As of 9 August 2026 it showed version 8.3.8 updated 21 May 2026, so it's actively maintained, unlike some older plugins in this category. ### What happens to my folders if I deactivate it? Folder data lives in wp_mgmlp_folders, a custom table only this plugin reads, so the structure vanishes from the admin while the rows stay in the database. Whether your files stay where they are depends on the physical-versus-virtual question above. ### Media Library Folders or FileBird? FileBird has twenty times the install base, a higher rating from more than twice as many ratings, a more polished interface, and confirmed virtual folders. Unless you specifically want folders mirroring your server directory structure, FileBird is the safer choice. ## Final verdict Media Library Folders is a long-standing plugin that's still actively maintained, with a genuinely different philosophy from the taxonomy-based generation that came after it. The filesystem-oriented approach has real appeal for teams whose workflow spans WordPress and FTP. It also comes with the lowest rating among established options, the smallest install base, custom-table storage, and one unresolved question, whether it moves your files, that you should answer on staging before touching a production library. Existing users: no reason to move if it works. Choosing today: FileBird or Folders by Premio are better supported, better rated, and confirmed safe for existing URLs. If you want to understand the mechanism before picking anything, start with [how WordPress media folders work](https://wpadminify.com/wordpress-media-library-folders). --- # Wicked Folders Review 2026: Features, Limits, and Alternatives URL: https://wpadminify.com/wicked-folders-review Last updated: 2026-08-12 Most plugins in this category organize the Media Library. Wicked Folders points the other way: posts, pages, and any custom post type you've got, using one consistent folder system, with one catch our hands-on testing surfaced that changes where this plugin fits. If your actual problem isn't "my media is a mess" but "my whole WordPress admin is a mess", that framing deserves attention. We put it on a clean WordPress 7.0.3 site and looked at what it does. Disclosure: WP Adminify is our own plugin, and it folders [media and post types from one module](https://wpadminify.com/features/wordpress-media-folder), which is the ground Wicked Folders covers too. Both were tested identically for our [best WordPress media folder plugins](https://wpadminify.com/best-wordpress-media-folder-plugins) comparison. ## Quick verdict Wicked Folders is a well-built taxonomy-based plugin for organizing content, posts, pages and custom post types. It creates no custom tables, so nothing is locked away, and it carries the second-highest rating in the category. The catch: on our test install, the free version offered no media folders at all: post type folders only. If you arrived here from a media-folder comparison, the free tier of this plugin doesn't do the job those comparisons are about. Choose it if you need folders across content post types and want portable storage. Be aware that media folders weren't in the free tier we tested, and the rating comes from a much smaller sample than the category leaders. ## At a glance | Developer | wickedplugins | | --- | --- | | Version tested | 4.1.3 | | Active installs | 20,000 | | Rating | 98/100 from 56 ratings | | Last updated | 23 June 2026 | | Storage | Hierarchical taxonomies per post type, no custom tables | | Covers (free tier tested) | Posts, pages, custom post types, media folders not present in free | About that rating. 98/100 is excellent and it's the second-highest here. It also comes from 56 ratings. FileBird's 94/100 comes from 1,121 and Folders' 100/100 from 1,514. A small sample can be perfectly representative, and it's also far easier to skew. Treat 98 from 56 as encouraging rather than settled. ## What it does WordPress has no folders anywhere. Not for media, not for posts, not for pages. Wicked Folders adds folder trees to the list screens for posts, pages and custom post types. And, in the free tier we tested, that's where it stops. The Media Library got no folder tree on our install; media folder support appears to live in Pro. Folders are virtual taxonomy terms: a post in a folder keeps its permalink, and nothing moves on disk. The [underlying mechanism](https://wpadminify.com/wordpress-media-library-folders) is worth understanding if this is your first folder plugin. ## Under the hood Activating it alone on a clean install registered hierarchical folder taxonomies scoped per post type. We confirmed `wf_page_folders` for pages, with equivalents for other types, and no custom tables at all. That last point is the plugin's strongest technical argument. Compare with what we found elsewhere: FileBird creates `wp_fbv`, Real Media Library creates four tables, CatFolders creates two. All readable by exactly one plugin. ![Diagram showing how WordPress media folders map attachments to taxonomy terms: the file stays in wp-content/uploads, its record is a row in wp_posts, and the folder is a term linked through wp_term_relationships](https://d1k2c27psfzbiv.cloudfront.net/wp-content/uploads/2026/08/09112546/wordpress-media-folder-taxonomy-diagram.webp) Which means everything lives in `wp_term_taxonomy` and `wp_term_relationships`: - Portable. Readable with `wp term list`, queryable with `get_terms()`, captured in any export. - Nesting for free. Hierarchical terms mean a subfolder is a term with a parent. - Clean uninstall. No orphaned tables left behind. - Consistent across post types. One mechanism everywhere rather than a special case per content type. One consequence worth flagging: taxonomy storage means no manual folder ordering, because WordPress terms sort by name or ID. FileBird's `ord` column gives it arbitrary drag-to-reorder that no taxonomy-based plugin can match, ours included. ## Strengths One system across content types. Posts, pages and custom post types share the same folder mechanism. On a site with three CPTs and hundreds of entries in each, that's the whole reason to pick it. Zero custom tables. Fully portable, clean uninstall, nothing locked away. Excellent rating. 98/100, second only to Folders by Premio. Actively maintained. Updated 23 June 2026. Consistent mental model. The same folder metaphor everywhere means one thing to learn instead of three. ## Limitations Small ratings sample. 56 against FileBird's 1,121 and Folders' 1,514. Not a red flag, just weaker evidence. Media folders aren't in the free tier we tested. This is the limitation that matters most for readers of this series. Our install showed folder trees on content post types only, nothing in the Media Library. If media folders are your need, the free version of this plugin doesn't address it, and every other plugin in this series does. No manual folder ordering. A taxonomy limitation shared with every taxonomy-based plugin here. Smaller install base. 20,000 against FileBird's 200,000 and Folders' 90,000. ## Wicked Folders against Folders by Premio These two are the closest competitors in the whole series. Both taxonomy-based, both covering multiple post types, both with no custom tables. Worth separating properly: | | Wicked Folders | Folders (Premio) | | --- | --- | --- | | Installs | 20,000 | 90,000 | | Rating | 98/100 from 56 | 100/100 from 1,514 | | Storage | Taxonomy, no tables | Taxonomy, no tables | | Covers post types | Yes | Yes | | Last updated | 23 June 2026 | 21 July 2026 | Architecturally they're near-identical. Folders has four times the installs and a far larger ratings sample. Wicked Folders' appeal is breadth of post type support and a slightly different interface. Trial both, since neither one traps your data. ## Who should use it | Good fit | Poor fit | | --- | --- | | Sites with several custom post types | Media-only needs wanting maximum polish | | Teams wanting one folder system everywhere | Anyone needing manual folder ordering | | Anyone avoiding vendor lock-in | Teams wanting the largest possible user base | | Content-heavy sites with long post lists | Sites needing advanced media-specific features | ## When "everything is a mess" isn't a folder problem We make a competing plugin, so weigh this how you like. It's worth saying because Wicked Folders and [WP Adminify](https://wpadminify.com/features/wordpress-media-folder) often get shortlisted by the same person, for the same reason, and they solve genuinely different halves of it. Wicked Folders reads "my admin is a mess" as a filing problem and answers it well: one folder system across every post type, portable storage, nothing locked in. If your Products screen has 900 entries and no structure, that's the fix and this review recommends it. But sit with a messy admin for a week and notice how much of the mess isn't filing at all. The Posts list showing a Date column you never sort by instead of the ones you'd actually use, which is [a columns problem](https://wpadminify.com/necessary-admin-columns-for-wordpress). The client who can reach Tools and Settings. The menu with nine items they'll never open. The dashboard that still says WordPress on a site you're invoicing for. Folders don't touch any of that, however many post types they cover. That's the half we build for, and it's why the two plugins aren't really substitutes. Ours does media folders on the same taxonomy architecture, so you get the same portability there, but the reason to look is the menu editor, white labelling, admin columns and role-based controls sitting next to it. If you're currently running four small plugins to cover those, [the consolidation case](https://wpadminify.com/replace-wordpress-plugins-with-wp-adminify) is the honest version of the pitch. There's also the free-tier gap our testing found. Wicked Folders free does post type folders and not media; several media plugins do media and not post types. Adminify's free version runs both off the same folder module, media folders in the library, and folders on whichever post types you switch on in settings. ![WP Adminify folder settings showing media folders enabled and post type selection for content folders in the free version](https://d1k2c27psfzbiv.cloudfront.net/wp-content/uploads/2026/08/10101658/adminify-media-settings.webp) Short version: if the mess is content that needs filing and media can wait, Wicked Folders free does that well. If the mess includes the Media Library, the free tier here leaves that half unsolved. ## Wicked Folders FAQs ### Is Wicked Folders any good? Yes. 98/100 from 56 ratings with 20,000 installs, actively maintained, and a clean architecture using hierarchical taxonomies with no custom tables. The main caveat is the small ratings sample, which makes that score encouraging rather than conclusive. ### Does Wicked Folders work with custom post types? Yes, and it's the main differentiator. It registers hierarchical folder taxonomies per post type, so posts, pages and any CPT get the same folder system. Most competitors go the other way and stop at media. ### Does the free version of Wicked Folders include media folders? Not on our test install. The free tier showed folder trees on content post types only, with no folder tree in the Media Library. If media folders are what you're shopping for, check the vendor's current free-versus-Pro split before installing. And note that every other plugin in this series includes media folders free. ### Does Wicked Folders create database tables? No. We activated it alone on a clean WordPress 7.0.3 install and it added no custom tables, only hierarchical taxonomies. Your folder structure is standard WordPress data, readable with normal tools. ### Does it move my media files? No. Folders are virtual, so files stay in wp-content/uploads/ and image URLs never change. Posts keep their permalinks too. ### Wicked Folders or Folders by Premio? Architecturally very similar, since both are taxonomy-based with no custom tables and both cover multiple post types. Folders has four times the installs and a far larger ratings sample, 1,514 against 56. Wicked Folders may suit you better on interface or post type handling, and since neither locks you in, trialling both costs you an afternoon. ### What happens if I deactivate Wicked Folders? Your files and posts are unaffected. The folder trees disappear from the admin, but the structure survives as standard taxonomy terms in wp_term_taxonomy. That's a real advantage over custom-table plugins, whose data goes unreadable to everything else. ## Final verdict Wicked Folders is quietly well engineered. Zero custom tables, hierarchical taxonomies, one consistent folder system across every post type, and nothing locked away. That's a sound set of choices. Its limitations are about position rather than quality. Small ratings sample, modest install base, and because it covers everything the media-specific experience is less specialized than a dedicated tool's. Best fit: sites with several custom post types where organization is a site-wide problem, and teams who want to be able to walk away from a plugin without booking a migration project. If media folders are your only need: FileBird has ten times the installs and more polish, and Folders by Premio has the same architecture with far more social proof. Whichever you land on, [how to organize a media library with folders](https://wpadminify.com/how-to-organize-wordpress-media-library-with-folders) covers the part every plugin leaves to you. --- # Enhanced Media Library Review 2026: Taxonomy Organization Tested URL: https://wpadminify.com/enhanced-media-library-review Last updated: 2026-08-12 Enhanced Media Library takes a different route from most plugins in this category. Instead of a drag-and-drop folder tree, it gives you proper WordPress taxonomies for media: categories you assign and filter by, working exactly the way post categories do. For a certain kind of user that's precisely right. But before we recommend it, there's a detail worth checking that most reviews skip. Disclosure: we publish WP Adminify, which takes the folder-tree route rather than this one, and [how its media folders work](https://wpadminify.com/features/wordpress-media-folder) is documented separately. Every plugin in our [best WordPress media folder plugins](https://wpadminify.com/best-wordpress-media-folder-plugins) comparison went through the same install-and-inspect process, ours included. ## Check the dates first Here's what the WordPress.org Plugin API returned on 9 August 2026: | Version | 2.9.4 | | --- | --- | | Last updated | 15 July 2024 | | Tested up to | WordPress 6.5.9 | | Current WordPress at time of writing | 7.0.3 | | Active installs | 60,000 | | Rating | 86/100 from 298 ratings | Roughly two years without an update, and compatibility declared against a WordPress version several releases behind current. What that doesn't mean: that the plugin is broken. Simple, well-written plugins routinely keep working for years without changes, and this one is architecturally simple, which helps its odds considerably. What it does mean: nobody is actively watching for compatibility breaks. If a future WordPress release changes something it leans on, there may be no fix coming. Check the current dates on the WordPress.org listing before you install. They may have moved since this was written, and if they have, this whole concern evaporates. And to be fair to it: we didn't just read the dates, we drove the plugin on WordPress 7.0.3. Categories created, files assigned, filters filtering, MIME editor editing. Nothing broke in our pass. Two years unmaintained is a risk statement about the future, not a defect report about today. ## What it does Enhanced Media Library adds taxonomies to the Media Library. Rather than a folder tree, you get media categories you assign to files and filter by, hierarchical so they nest like post categories. It also lets you create custom media taxonomies, manage which MIME types are allowed, and filter the library by type and category at once. ![Enhanced Media Library MIME Types editor showing per-type labels and allow-upload toggles inside WordPress Media Settings](https://d1k2c27psfzbiv.cloudfront.net/wp-content/uploads/2026/08/10100748/eml-mime-types-editor.webp) The mental model is the interesting part: this is classification rather than filing. A file can carry several categories simultaneously, which a folder metaphor doesn't naturally allow. If one image legitimately belongs to three campaigns, that's more honest than forcing it into one folder and remembering the other two. ![Enhanced Media Library category filter dropdown open above the WordPress Media Library grid](https://d1k2c27psfzbiv.cloudfront.net/wp-content/uploads/2026/08/10100816/eml-category-filter.webp) ![WordPress Media Library filtered to one Enhanced Media Library category, showing a single matching image](https://d1k2c27psfzbiv.cloudfront.net/wp-content/uploads/2026/08/10100819/eml-filtered-result.webp) ## Under the hood Activating it alone on a clean WordPress 7.0.3 install produced exactly this: ``` media_category → attachment hierarchical = true ``` No custom tables. Everything lives in `wp_term_taxonomy` and `wp_term_relationships`, the same tables holding your post categories. ![Diagram showing how WordPress media folders map attachments to taxonomy terms: the file stays in wp-content/uploads, its record is a row in wp_posts, and the folder is a term linked through wp_term_relationships](https://d1k2c27psfzbiv.cloudfront.net/wp-content/uploads/2026/08/09112546/wordpress-media-folder-taxonomy-diagram.webp) That's a genuinely good architecture, and it's the plugin's strongest technical argument: - Fully portable. Read it with `wp term list media_category`, query it with `get_terms()`, capture it in any export. - Nesting for free. Hierarchical terms mean subcategories work without bespoke code to go wrong. - Clean uninstall. Nothing orphaned. Compare with FileBird's `wp_fbv` or Real Media Library's four tables, which sit in your database after deactivation indefinitely. - It survives the plugin. Because it's standard WordPress data, your classification stays readable with the plugin switched off, which quietly offsets a good chunk of the maintenance worry. ## Strengths Taxonomy-first is genuinely different. If you think in classifications rather than folders, this matches how your head works better than a tree does. Multiple categories per file. A real capability advantage over folder plugins, which mostly assume one folder per file. Custom media taxonomies. Useful for structured libraries. A photographer classifying by shoot, client and usage rights at the same time can't do that with folders. MIME type management. Control over allowed upload types, which folder plugins rarely go near. No lock-in. Standard WordPress terms throughout. Substantial user base. 60,000 active installs and 298 ratings is a real track record, whatever the update dates say. ## Limitations The maintenance gap. Covered above, and it's the main reservation. Two years is a long time in WordPress. No drag-and-drop folder tree. If you want the folder experience, dragging files into a tree and filtering by folder inside the media modal, this isn't that plugin. Assignment happens through category checkboxes. Lower rating than the category leaders. 86/100 against FileBird's 94, Folders' 100 and Real Media Library's 96. Still respectable, but the lowest of the widely-adopted options. Media only. No coverage of posts, pages or custom post types. ## Who should use it | Good fit | Poor fit | | --- | --- | | Users who think in categories, not folders | Teams wanting a drag-and-drop folder tree | | Libraries where files belong to several groups | Sites needing guaranteed forward compatibility | | Developers wanting custom media taxonomies | Non-technical teams wanting a visual interface | | Existing users who are happy with it | New large libraries being set up today | ## If the maintenance gap is your sticking point We publish a competing plugin, so treat this with appropriate suspicion. The useful observation isn't about our features though, it's about what you're actually risking here. Because Enhanced Media Library uses ordinary taxonomy terms, the downside scenario is unusually mild. If a future WordPress release breaks it, your classification doesn't evaporate. It sits in `wp_term_taxonomy` where `wp term list media_category` can read it and any other taxonomy-based plugin could adopt it. That's a much softer landing than the same situation with a custom-table plugin, where an unmaintained vendor means your structure is stranded in a format nothing else speaks. So if you like this plugin, the honest advice is: the architecture protects you. Keep using it and check the listing occasionally. Where [WP Adminify](https://wpadminify.com/features/wordpress-media-folder) becomes relevant is a different scenario entirely. Our folders are the same kind of hierarchical attachment taxonomy, so switching later is a term migration rather than a rebuild. But that's not the reason to look at us, because Media Library Organizer offers the same thing more simply. The reason is if you notice that media classification was one item on a longer list, and the others are a client who can see Tools, a dashboard you'd rather not screenshot, and four separate plugins keeping all of that patched. That's the shape we're built for, and the arithmetic is in [replacing 50+ plugins with one](https://wpadminify.com/replace-wordpress-plugins-with-wp-adminify). If media genuinely is the only problem, one of the alternatives below is the better answer and we'd rather say so. There is one adjacent problem worth naming while you're thinking about metadata, though. Classification tells you what a file is; it doesn't protect what a file carries. The day you need to swap an outdated image, the usual delete-and-reupload cycle throws away the alt text, caption and attachment ID your team spent time on. Our media module treats that as the core job, replace the file, keep everything attached to it. ![The confirmation modal shows the incoming file with size, plus Cancel/Replace actions](https://d1k2c27psfzbiv.cloudfront.net/wp-content/uploads/2026/04/27070903/confirm-media-replacement-wordpress-grid-view.webp) ## Alternatives worth considering If the maintenance gap bothers you but you like the taxonomy approach, two plugins offer the same architecture with recent updates: - Media Library Organizer: `mlo-category` hierarchical taxonomy, no custom tables, updated 23 July 2026, from Themeisle. Almost the same idea, actively maintained. - Folders by Premio: taxonomy-based with a folder-tree interface, 100/100 from 1,514 ratings, updated 21 July 2026, and it covers posts and pages too. For a drag-and-drop folder experience specifically, FileBird leads on adoption with 200,000 installs, though it uses proprietary tables rather than taxonomies. ## Enhanced Media Library FAQs ### Is Enhanced Media Library still maintained? As of 9 August 2026 its listing showed version 2.9.4, last updated 15 July 2024, tested up to WordPress 6.5.9, against a current WordPress of 7.0.3. That's roughly two years. It doesn't mean the plugin is broken, but nobody is actively watching for compatibility breaks. Check the current dates before installing, since they may have changed. ### Does Enhanced Media Library create folders? Not in the drag-and-drop sense. It adds hierarchical media categories you assign and filter by, working like post categories. Files can belong to several categories at once, which folder plugins generally don't allow. A different model rather than a worse one. ### Does it move my media files? No. It only adds taxonomy terms, so files stay in wp-content/uploads/ and image URLs never change. Assigning a category creates a database relationship and nothing else. ### What happens if I deactivate it? Your files are unaffected, and the classification survives as standard taxonomy terms in wp_term_taxonomy, readable with normal WordPress tools. That's a real advantage over custom-table plugins, whose folder data goes unreadable to everything else. ### Enhanced Media Library or Media Library Organizer? Very similar architecture, since both register a hierarchical attachment taxonomy with no custom tables. The practical difference is maintenance: Media Library Organizer was updated 23 July 2026, Enhanced Media Library in July 2024. For a new install, the actively maintained one is the safer choice. ## Final verdict Enhanced Media Library is a well-built plugin with a defensible philosophy. Taxonomy classification is genuinely more accurate than folders for libraries where files belong to several groups, and the zero-table architecture means nothing is locked away from you. The reservation isn't about quality, it's about currency. Roughly two years without an update, with compatibility declared several WordPress versions back, is worth knowing before you build a large library on top of it. Existing users: if it works, it works, and standard-taxonomy storage means your data is fine regardless. New installs: check the current dates first. If they're still stale, Media Library Organizer offers a near-identical approach with recent maintenance. New to this whole category? Start with [how WordPress media folders work](https://wpadminify.com/wordpress-media-library-folders), then [how to organize a library](https://wpadminify.com/how-to-organize-wordpress-media-library-with-folders) once you've chosen your approach. --- # Media Library Organizer Review 2026: Taxonomy Folders Done Simply URL: https://wpadminify.com/media-library-organizer-review Last updated: 2026-08-12 Most media folder plugins want to be substantial. FileBird creates two database tables, Real Media Library creates four, CatFolders creates two of its own. Media Library Organizer creates none. It registers one hierarchical taxonomy and stops. On a clean WordPress 7.0.3 install that was the entire database footprint we could find, which makes it the most restrained plugin in a category that leans elaborate. Disclosure: WP Adminify is ours, and [its media folders](https://wpadminify.com/features/wordpress-media-folder) use the same taxonomy approach this plugin does. Both went onto the same test bench for our [best WordPress media folder plugins](https://wpadminify.com/best-wordpress-media-folder-plugins) comparison. ## Quick verdict Media Library Organizer is the cleanest implementation of media folders available. The structure is entirely standard WordPress data, so nothing is locked away, and an established vendor keeps it updated. Choose it if you want folders with the smallest possible commitment. Look elsewhere if you need manual folder ordering, advanced features, or the comfort of a very large user base. ## At a glance | Developer | Themeisle | | --- | --- | | Version tested | 2.1.2 | | Active installs | 20,000 | | Rating | 94/100 from 147 ratings | | Last updated | 23 July 2026 | | Folder storage | `mlo-category` hierarchical taxonomy | | Custom tables | None | | Pricing | Free plus paid tier | ## What it does WordPress ships with no media folders. Files sort by upload date and type, and search covers filenames but not alt text, so past a few hundred files finding anything turns into scrolling. If you've never set folders up before, [how to create folders in the Media Library](https://wpadminify.com/how-to-add-folders-to-wordpress-media-library) walks through the options. Media Library Organizer adds a folder tree with drag-and-drop assignment, nested subfolders and filtering. Folders are virtual: files never move inside `wp-content/uploads/` and image URLs never change. ![Media Library Organizer folder sidebar with a nested subfolder, folder filter and sort dropdowns in the WordPress Media Library](https://d1k2c27psfzbiv.cloudfront.net/wp-content/uploads/2026/08/10101536/mlo-folder-tree-sorting.webp) It does media, and only media. No posts, no pages, no custom post types. ## Under the hood Activating it alone on a clean install produced exactly one addition: ``` mlo-category → attachment hierarchical = true ``` No custom tables. No secondary taxonomies. One hierarchical taxonomy against the attachment post type, which is precisely the minimum needed to do the job properly. ![Diagram showing how WordPress media folders map attachments to taxonomy terms: the file stays in wp-content/uploads, its record is a row in wp_posts, and the folder is a term linked through wp_term_relationships](https://d1k2c27psfzbiv.cloudfront.net/wp-content/uploads/2026/08/09112546/wordpress-media-folder-taxonomy-diagram.webp) What that buys you is worth spelling out, because it's the plugin's entire argument: - Portability. Your folders are standard WordPress terms in `wp_term_taxonomy`. List them with `wp term list mlo-category`, query them with `get_terms()`, capture them in any export. - Nesting for free. Hierarchical means a subfolder is a term with a parent, so there's no bespoke implementation to go wrong. - Clean uninstall. Nothing orphaned. Custom-table plugins leave their tables sitting in your database forever after deactivation. This leaves nothing. - Predictable behaviour. It uses the same machinery as post categories, which every WordPress developer already understands. Compare that with what we found elsewhere: FileBird's `wp_fbv`, Real Media Library's four tables, CatFolders' two. All defensible engineering, all readable by exactly one plugin. ## Strengths Smallest footprint in the category. One taxonomy, nothing else. If you're the kind of person who runs `SHOW TABLES;` after installing anything, this is your plugin. Zero lock-in. Standard terms mean you can leave whenever you like and your structure stays readable with tools you already have. Established vendor. Themeisle maintains a substantial plugin and theme portfolio, so this isn't a side project at risk of quiet abandonment. Recently updated. 23 July 2026. In a category where one popular plugin has sat idle for roughly two years, that counts. Solid rating. 94/100 from 147 ratings is a real sample, not a handful of friends. ## Limitations No manual folder ordering. Unavoidable with taxonomy storage, because WordPress terms sort by name or ID. FileBird's `ord` column gives it arbitrary drag-to-reorder that no taxonomy-based plugin can match, ours included. With thirty client folders where five matter daily, that's a small irritation thirty times a day. Media only. No folders for posts, pages or custom post types. Folders by Premio and Wicked Folders both cover those. Smaller user base. 20,000 installs against FileBird's 200,000 and Folders' 90,000. Not a worry for a maintained vendor plugin, but it does mean slower bug discovery and fewer community answers when something odd happens. Fewer advanced features. No per-folder metadata, no staged bulk operations, no gallery integration. The restraint that makes it clean also makes it basic. The Pro line sits at search and AI. Driving the settings, three toggles carry Pro tags: Auto Categorization (AI tagging via Imagga), Advanced Search with match-type options, and Multi-Select Filters. The folder basics are genuinely free; the conveniences are where the paywall starts. ![Media Library Organizer core settings showing Advanced Search and Multi-Select Filters marked as Pro features](https://d1k2c27psfzbiv.cloudfront.net/wp-content/uploads/2026/08/10101539/mlo-core-settings-pro.webp) ## Who should use it | Good fit | Poor fit | | --- | --- | | Sites wanting folders with minimal commitment | Anyone needing manual folder ordering | | Developers who dislike custom tables | Sites needing folders for posts and pages | | Sites that reassess their plugin stack regularly | Very large libraries needing purpose-built performance | | Anyone burned by a previous plugin's lock-in | Teams wanting advanced folder configuration | ## The question this plugin raises about the rest of your admin We make a competing folder feature, so discount this accordingly. It's also the most interesting comparison in this review, because Media Library Organizer and [WP Adminify](https://wpadminify.com/features/wordpress-media-folder) answer the same question in opposite directions. On folders themselves we're near-identical. One hierarchical attachment taxonomy, no custom tables, nesting through term parents, no manual ordering. Theirs is `mlo-category` and ours is `media_folder`, and that's about the extent of it. On adoption and rating they're ahead of us, and this review isn't the place to spin that. Where we diverge is what happens after the folders are working. Media Library Organizer's answer is: nothing, that's the product, enjoy. Which is a genuinely good answer if the Media Library was the only thing bothering you. But sit with the admin for a week and notice what else you keep working around. The Posts screen showing you a Date column and nothing you'd actually sort by, which is a fixable problem we wrote up in [the admin columns guide](https://wpadminify.com/necessary-admin-columns-for-wordpress). The client who can reach Tools. The dashboard you'd rather not screenshot for a proposal. Each of those has its own small plugin, and installing four of them to fix four annoyances is how a WordPress install quietly becomes unmaintainable, the arithmetic is in [replacing 50+ plugins with one](https://wpadminify.com/replace-wordpress-plugins-with-wp-adminify). So this isn't "our folders are better." They aren't, meaningfully. It's that if your list of admin complaints has one item on it, take the lighter plugin with our blessing. If it has five, the folder plugin was never the decision. One workflow difference worth a screenshot, since both plugins are otherwise so alike: Adminify puts folder assignment inside the attachment details modal, so you can file an image from the same panel where you edit its alt text, without going back to the grid. ![WP Adminify folder assignment dropdown inside the WordPress attachment details modal, showing the full nested folder list](https://d1k2c27psfzbiv.cloudfront.net/wp-content/uploads/2026/08/10101542/adminify-folder-assign-dropdown.webp) ## How it compares - FileBird: ten times the installs, more polish, manual ordering, but proprietary tables. - Folders by Premio: also taxonomy-based, far better rated at 100/100 from 1,514, and it covers posts and pages. The obvious step up without losing portability. - Real Media Library: much deeper features, four custom tables, opposite philosophy. - WP Adminify: the same taxonomy approach inside a broader admin toolkit. ## Media Library Organizer FAQs ### Is Media Library Organizer any good? Yes, for what it sets out to do. 94/100 from 147 ratings with 20,000 installs, maintained by Themeisle, and the cleanest architecture in the category: one hierarchical taxonomy, no custom tables. It's deliberately basic, so judge it on restraint rather than feature count. ### Does Media Library Organizer create database tables? No. We activated it alone on a clean WordPress 7.0.3 install and it added none at all, just a hierarchical attachment taxonomy called mlo-category. Your folder structure is standard WordPress data, readable with normal tools. ### Does it move my media files? No. Folders are virtual, so files stay in wp-content/uploads/ and image URLs never change. Assigning a file to a folder only creates a term relationship. ### Can it organize posts and pages? No, media only. For folders across posts, pages and custom post types, look at Folders by Premio or Wicked Folders. ### What happens if I deactivate it? Your files are unaffected and the folder tree disappears from the admin, but the structure survives as ordinary taxonomy terms in wp_term_taxonomy. That's a real advantage over custom-table plugins, whose folder data goes unreadable the moment they're switched off. ### Media Library Organizer or FileBird? FileBird has ten times the installs, a more polished interface and manual folder ordering. Media Library Organizer has a far smaller footprint and nothing locked away. Pick FileBird for polish and features, this for simplicity and portability. ## Final verdict Media Library Organizer is what you install when you've decided the folder problem isn't complicated and you don't want to be talked into complexity. One hierarchical taxonomy, no tables, clean uninstall, a real vendor behind it. It won't win a feature comparison against FileBird or Real Media Library, and it isn't trying to. What it offers is the lowest-commitment way to get folders working. If you want more without giving up portability, Folders by Premio is the natural step up: same taxonomy approach, far better ratings, broader scope. Comparing options? Start with [how WordPress media folders work](https://wpadminify.com/wordpress-media-library-folders), then [how to create them](https://wpadminify.com/how-to-add-folders-to-wordpress-media-library) once you've picked a plugin. --- # Real Media Library Review 2026: Is the Pro Version Worth It? URL: https://wpadminify.com/real-media-library-review Last updated: 2026-08-12 Real Media Library is the most technically ambitious folder plugin WordPress has. You can tell before you open the interface, because activating the free version alone creates four database tables. Most competitors create one or two. Several create none. That number tells you what kind of plugin this is, and it frames both the strengths and the one real reservation. We put it on a clean WordPress 7.0.3 site and went looking at what it actually does. Disclosure first: we publish WP Adminify, whose [taxonomy-based media folders](https://wpadminify.com/features/wordpress-media-folder) sit at the opposite end of this design spectrum. Real Media Library was tested exactly like everything else in our [best WordPress media folder plugins](https://wpadminify.com/best-wordpress-media-folder-plugins) comparison. ## Quick verdict Real Media Library is the deepest folder plugin in the category, from an established German vendor with a solid maintenance record. The reservation scales with the ambition: four proprietary tables mean the heaviest lock-in of anything we tested. Choose it if you need advanced folder features on a large library and you're committing long term. Look elsewhere if your needs are simple, or if being able to leave matters to you. ## At a glance | Developer | devowl.io GmbH | | --- | --- | | Version tested | 4.22.82 (Lite) | | Active installs | 100,000 | | Rating | 96/100 from 289 ratings | | Last updated | 2 July 2026 | | WordPress.org slug | `real-media-library-lite` | | Folder storage | Four custom tables | | Pricing | Free Lite plus Pro | One practical note before anything else. The WordPress.org slug is `real-media-library-lite`, not `real-media-library`. Searching the obvious name in your plugin installer returns nothing useful, which trips up a surprising number of people, us included on the first attempt. ## What it does WordPress has no media folders. Real Media Library adds a folder tree beside the Media Library with drag-and-drop assignment, nested subfolders, custom ordering and folder filtering inside the media modal. The [background on how folder plugins work](https://wpadminify.com/wordpress-media-library-folders) is worth a skim if you're new to the category. Where it goes past everyone else is what surrounds the folders: gallery integration, per-folder ordering rules, and metadata handling competitors don't attempt. Driving the Lite version, the day-to-day feel is spare and quick, a compact toolbar above the tree, folders created inline where you clicked, a toast confirming each one. ![Real Media Library Lite showing an inline folder creation with a success toast in the WordPress Media Library](https://d1k2c27psfzbiv.cloudfront.net/wp-content/uploads/2026/08/10101451/rml-folder-created.webp) The Lite ceiling announces itself soon enough, though. A few minutes into our session the upsell arrived: collections and galleries, the features that separate this plugin from a basic folder tool, are Pro. ![Real Media Library Lite popup reading You like collections? Get PRO! over the media library](https://d1k2c27psfzbiv.cloudfront.net/wp-content/uploads/2026/08/10101454/rml-collections-pro-popup.webp) Like every serious folder plugin, its folders are virtual. Files never move inside `wp-content/uploads/` and image URLs never change, so reorganizing a live library is safe. ## Under the hood Activating Real Media Library Lite on a clean install creates four tables: ``` wp_realmedialibrary folder structure wp_realmedialibrary_posts attachment → folder assignments wp_realmedialibrary_meta per-folder metadata wp_realmedialibrary_tmp staging / temporary state ``` That's a lot of infrastructure for a free tier, and it's genuinely informative. A dedicated `_meta` table means folders carry properties of their own, ordering rules and display settings, instead of being labels. A `_tmp` table means batch operations get staged rather than applied straight through, which is the right way to move ten thousand files without leaving the library half-sorted when a request dies at file 6,000. This is careful engineering aimed at scale, and it explains why the plugin feels more capable than its competitors once a library gets large. If your library is at the size where this matters, our [WordPress performance guide](https://wpadminify.com/wordpress-performance-optimization) covers the other bottlenecks that show up around the same point. ## The trade-off Four proprietary tables mean your folder structure is readable by exactly one plugin. We tested the general consequence using FileBird, which stores folders the same way in its own tables. After building a structure and deactivating the plugin: every file intact, every URL unchanged, folder tree gone from the admin, rows still sitting in the plugin's tables, and no other folder plugin able to read a thing. Real Media Library behaves the same way architecturally, with twice as many tables involved. Your files are never at risk. The structure is, and it's held in a format only this plugin understands, so a migration script is meaningfully more work here than against a two-table schema. If you're choosing Real Media Library because you want out of another plugin's lock-in, that's the wrong reason. You'd be trading one vendor's tables for a deeper set of someone else's. ![Diagram showing how WordPress media folders map attachments to taxonomy terms: the file stays in wp-content/uploads, its record is a row in wp_posts, and the folder is a term linked through wp_term_relationships](https://d1k2c27psfzbiv.cloudfront.net/wp-content/uploads/2026/08/09112546/wordpress-media-folder-taxonomy-diagram.webp) ## Strengths The deepest feature set in the category. Nothing else we tested matches it for folder-level control, ordering and gallery integration. Excellent rating. 96/100 from 289 ratings is strong, and 100,000 installs is a substantial base. Established vendor. devowl.io is a real company with a portfolio, not a single-plugin side project. Last update 2 July 2026. Architecture built for scale. The staging table and per-folder metadata only matter on large libraries, which is exactly where folder plugins earn their keep. ## Limitations The heaviest database footprint here. Four tables in the free tier alone. Fine if you're staying, expensive if you go. More complexity than small sites need. For a blog with 300 images this is a lot of machinery for a problem a one-taxonomy plugin solves. Confusing slug. `real-media-library-lite` makes the plugin genuinely hard to find and fragments its own brand searches. Free versus Pro split. Lite is capable but gated. ## Who should use it | Good fit | Poor fit | | --- | --- | | Large libraries needing advanced organization | Small sites wanting simple folders | | Sites where folder ordering and metadata matter | Teams prioritising data portability | | Long-term commitment to one vendor | Sites that reassess their stack yearly | | Gallery-heavy sites | Sites also needing folders for posts and pages | ## When the folder plugin isn't the problem We build a competing media folder feature, so read this with that in mind. It's also the most useful thing we can tell you about this particular plugin. Real Media Library is deeper at folders than [WP Adminify](https://wpadminify.com/features/wordpress-media-folder) is, and we're not going to argue that away. Per-folder metadata, staged bulk operations, manual ordering. We don't have any of it. If those are the features you came for, this review has already given you your answer. But notice what four tables are actually buying. They're buying depth inside the Media Library. And a good number of people install a plugin this heavy while the thing genuinely costing them time is somewhere else entirely: a client who can see Tools and Settings and keeps changing things, a dashboard that still looks like stock WordPress on a site you're invoicing for, a Posts screen with no useful columns on it. None of that gets better with a fourth database table. It gets better with menu editing, white labelling and admin columns, which is the direction we build in, and [the plugin-consolidation maths](https://wpadminify.com/replace-wordpress-plugins-with-wp-adminify) is the honest version of that pitch. Our folders are plain taxonomy terms, which costs us the ordering and metadata features above and buys you a structure that `wp term list media_folder` can read forever. So the question isn't which folder plugin wins. It's whether you need the deepest folder plugin available, or whether folders were only the loudest complaint on a longer list. One example of what "depth in a different direction" looks like: our media module spends its complexity budget on file replacement rather than folder metadata, swap a file and the attachment ID, filename, URL and metadata all survive, with each replacement backed up so you can step back through versions. ![WP Adminify undo replacement dialog offering to restore the previous version of a replaced media file](https://d1k2c27psfzbiv.cloudfront.net/wp-content/uploads/2026/08/10101457/adminify-undo-replacement.webp) ## How it compares - FileBird: 200,000 installs against 100,000, a more polished interface, and a much simpler two-table schema. Less depth, easier exit. - Folders by Premio: 100/100 from 1,514 ratings, taxonomy storage, covers posts and pages. The portability-first choice. - WP Adminify: folders inside a broader admin toolkit with taxonomy storage, and no manual ordering. - Media Library Organizer: one taxonomy, no tables, minimal footprint. The exact opposite philosophy. ## Real Media Library FAQs ### Is Real Media Library worth it? For large libraries needing advanced folder features, yes. It's the deepest plugin in the category, with 100,000 installs and a 96/100 rating. For a small site wanting basic folders it's more machinery than the problem needs, and the four-table architecture means the deepest lock-in of any option we tested. ### Why can't I find Real Media Library on WordPress.org? Its slug is real-media-library-lite, not real-media-library, so searching the plain name returns nothing useful. It's a long-standing quirk that makes the plugin harder to discover than 100,000 installs would suggest. ### Does Real Media Library move my files? No. It uses virtual folders, so files stay in wp-content/uploads/ and image URLs never change. You can reorganize a live library safely. Only the folder structure lives in the database. ### What happens if I deactivate Real Media Library? Your media files are unaffected and every image keeps working. The folder tree disappears from the admin because it lives in the plugin's own tables, which nothing else can read. The data stays in the database, so reactivating restores it. ### Is the free version of Real Media Library enough? Lite gives you folders, nesting and drag-and-drop, and it's capable for most sites. Advanced ordering and gallery features are Pro-gated. Check the current free-versus-Pro split on the vendor site, because it moves between releases. ### Real Media Library or FileBird? FileBird has twice the install base, a more polished interface, and a two-table schema that's easier to escape. Real Media Library has more depth: per-folder metadata, staged bulk operations, gallery integration. Pick FileBird for polish and a lower exit cost, Real Media Library for capability. ## Final verdict Real Media Library is the power user's choice, and the four-table architecture is the honest signal of that. It's doing more than its competitors and the storage reflects it. The reservation is symmetrical. The same depth that makes it capable makes it the hardest plugin here to leave. That's a fair trade if you've decided this is your long-term tool, and a poor one if you're still shopping. Comparing options? Start with [how WordPress media folders work](https://wpadminify.com/wordpress-media-library-folders), or [how to organize a library with folders](https://wpadminify.com/how-to-organize-wordpress-media-library-with-folders) once you've picked one. --- # Folders Plugin Review 2026: Premio's Media Organizer Tested URL: https://wpadminify.com/folders-plugin-review Last updated: 2026-08-12 Folders by Premio holds something nothing else in this category does: a perfect 100/100 across 1,514 ratings. A perfect score from twenty users means nothing. A perfect score from fifteen hundred is a different kind of signal entirely. We put it on a clean WordPress 7.0.3 site and went looking for the catch, because a rating that good deserves scrutiny rather than repetition. Disclosure: we publish WP Adminify, and [its folder module](https://wpadminify.com/features/wordpress-media-folder) competes with this one. Folders by Premio ran on the same bench as the rest of our [best WordPress media folder plugins](https://wpadminify.com/best-wordpress-media-folder-plugins) comparison, and it comes out of it well. ## Quick verdict Folders is the best-rated media organization plugin available, and the architecture backs the reputation up. It keeps folders as standard WordPress taxonomy terms, so your structure stays readable by anything, and it organizes posts and pages as well as media. Choose it if you want folders across your whole site with nothing locked away. Look elsewhere if you need a specialized media-only interface or manual folder ordering. ## At a glance | Developer | Premio | | --- | --- | | Version tested | 3.1.9 | | Active installs | 90,000 | | Rating | 100/100 from 1,514 ratings | | Last updated | 21 July 2026 | | Folder storage | Three hierarchical taxonomies, no custom tables | | Covers | Media, posts, pages, custom post types | | Pricing | Free plus paid tiers | For context: FileBird has more installs at 200,000 but sits at 94/100 from 1,121 ratings. Real Media Library holds 96/100 from 289. Folders has fewer installs than FileBird but the largest ratings sample and a perfect score. That combination is unusual enough to take seriously. ## What it does WordPress ships with no folders anywhere. Not for media, not for posts, not for pages. Folders answers all three with one system: a folder tree in the Media Library, and folder trees on the Posts and Pages list screens. The media side gives you drag-and-drop assignment, bulk moving, folder colors, and folder filtering inside the media modal when you insert an image. Subfolders exist too, with a catch we cover below. If the underlying mechanism is new to you, we covered it in [how WordPress media folders actually work](https://wpadminify.com/wordpress-media-library-folders). Folders are virtual. Files never move inside `wp-content/uploads/` and image URLs never change. ![Folders by Premio filtering the WordPress Media Library to a single folder, with the folder tree and Bulk Organize button visible](https://d1k2c27psfzbiv.cloudfront.net/wp-content/uploads/2026/08/10101407/folders-filtered-library.webp) ## Under the hood Activating Folders alone on a clean install registers three hierarchical taxonomies and creates no custom tables at all: ``` media_folder → attachment (hierarchical) folder → page (hierarchical) post_folder → post (hierarchical) ``` That's the cleanest architecture we found among the widely-adopted plugins. Everything lives in `wp_term_taxonomy` and `wp_term_relationships`, the same tables holding your post categories. ![Diagram showing how WordPress media folders map attachments to taxonomy terms: the file stays in wp-content/uploads, its record is a row in wp_posts, and the folder is a term linked through wp_term_relationships](https://d1k2c27psfzbiv.cloudfront.net/wp-content/uploads/2026/08/09112546/wordpress-media-folder-taxonomy-diagram.webp) The consequences are real: - Your structure is portable. Readable with `wp term list media_folder`, queryable with `get_terms()`, captured by any standard export. - Nesting exists at the data layer. All three taxonomies are hierarchical, so a subfolder is just a term with a parent. But see the hands-on note below, because the free interface won't let you create one. - Nothing to clean up. Deactivating leaves no orphaned tables, unlike custom-table plugins, which leave theirs sitting in your database permanently. ### The hands-on catch: subfolders are a Pro feature This is where the schema and the product part company, and we only caught it by driving the plugin rather than reading its database. The taxonomies are hierarchical, so nesting is technically free. The interface disagrees: open the Add-a-new-folder modal on the free tier and there's a pink Pro tip reading "Upgrade to Pro to create subfolders." ![Folders by Premio add-a-new-folder modal showing the Pro tip that subfolders require upgrading to Pro](https://d1k2c27psfzbiv.cloudfront.net/wp-content/uploads/2026/08/10101411/folders-subfolder-pro-modal.webp) So the free tier gives you one flat level of folders. For a small library that's fine. For the agency structure this category is usually bought for (client folders with project subfolders), you're buying Pro on day one. Access control is gated the same way. Restricting users to their own folders, dynamic-folder access and the whole Folders Access Management panel carry Upgrade to Pro buttons. ![Folders by Premio settings screen with user restriction and folder access management features marked Upgrade to Pro](https://d1k2c27psfzbiv.cloudfront.net/wp-content/uploads/2026/08/10101414/folders-user-restrictions-pro.webp) ### One warning worth reading twice Folders and WP Adminify both register an attachment taxonomy named `media_folder`. We confirmed it by activating each plugin alone and reading the registered taxonomies. Don't run both. Two plugins claiming one taxonomy name gives you results nobody can predict. The flip side is genuinely useful: migrating between them is far simpler than any custom-table migration, because the data is already sitting in the same place under the same name. ## Strengths The best rating in the category, by a clear margin. 100/100 across 1,514 ratings. We went looking for the catch in the architecture and didn't find one. Portable storage. Taxonomy-based, no custom tables, nothing locked away. At this adoption level that's rare, since FileBird and Real Media Library both use proprietary tables. Covers the whole site. Media, posts, pages and custom post types in one system. If your content is as disorganized as your media, this fixes both at once. Actively maintained. Updated 21 July 2026 by an established vendor with a wider portfolio behind it. Clean uninstall. No orphaned tables left behind. ## Limitations Less specialized media interface. FileBird does one thing and has iterated on it for years. Folders covers more ground, and the media-specific experience is correspondingly less refined. No manual folder ordering. That follows directly from taxonomy storage, because WordPress terms sort by name or ID. FileBird's `ord` column gives it arbitrary drag-to-reorder that Folders can't match natively, and neither can we. Subfolders and access control are Pro. The free tier is one flat level of folders, with user restrictions and folder permissions behind the paywall. A periodic "remind me later" popup ships with the free version too. Taxonomy name collision. The `media_folder` overlap with WP Adminify is a real operational gotcha if you're trialling plugins side by side. Fewer installs than FileBird. 90,000 against 200,000. Still substantial, but the gap is real. ## Who should use it | Good fit | Poor fit | | --- | --- | | Sites needing folders for content as well as media | Sites needing manual folder ordering | | Anyone who wants to avoid vendor lock-in | Users wanting the most polished media-only UI | | Agencies reassessing their stack periodically | Very large libraries where table performance is critical | | Teams that value social proof | Sites consolidating many admin plugins into one | ## Where WP Adminify actually differs We make a competing media folder feature, so weigh this accordingly. It's also the section where the honest answer is most interesting, because we share more architecture with Folders than with anyone else in this category. Both of us keep folders as terms in a taxonomy literally called `media_folder`. Same table, same portability, same inability to drag folders into an arbitrary order. On media folders alone there's very little to choose between us, and Folders has a rating we don't come close to matching. The genuine difference is what sits around the folders. Folders points its system at more content: posts, pages, custom post types. [WP Adminify](https://wpadminify.com/features/wordpress-media-folder) points its at more admin: the same media folders, plus menu editing, white labelling, login customization, dashboard widgets and admin columns, with role-based controls across all of it. Which means the useful question isn't "which folder plugin is better." It's what's actually annoying you. If it's a Posts screen with 600 unsorted entries, Folders is the better-shaped tool and this review has just told you so. If it's that your client keeps emailing about menu items they shouldn't see and the dashboard still says "Howdy" over someone else's branding, folders were never the real problem, and [the plugin-consolidation case](https://wpadminify.com/replace-wordpress-plugins-with-wp-adminify) is the page worth reading instead. Teams juggling that across many client sites usually land on our [agency setup](https://wpadminify.com/agencies). One free-tier difference our hands-on pass surfaced: the subfolders Folders gates behind Pro are simply enabled in Adminify's free version, on the same shared taxonomy. If nesting was the thing pushing you to a paid tier, it's worth knowing one of the two `media_folder` implementations includes it for nothing. ![WP Adminify media folder tree with nested, color-coded folders and folder sorting on the same test site](https://d1k2c27psfzbiv.cloudfront.net/wp-content/uploads/2026/08/10101309/adminify-folder-tree.webp) One practical note either way: because both store folders identically, trialling one and switching to the other costs almost nothing. That's not true of anything using custom tables. ## How it compares - FileBird - more installs and a more polished media interface, plus manual ordering, but proprietary tables. - Real Media Library - deeper folder features, four custom tables, the heaviest lock-in here. - Media Library Organizer - also taxonomy-based and even lighter, but media only and a much smaller user base. - WP Adminify - folders inside a broader admin toolkit, same taxonomy name, so never run the two together. ## Folders by Premio FAQs ### Is the Folders plugin by Premio any good? Yes. It holds a perfect 100/100 from 1,514 ratings, the strongest social proof in this category, backed by 90,000 active installs. Architecturally it's also the cleanest widely-adopted option, storing folders as standard WordPress taxonomy terms with no custom tables. ### Does the Folders plugin move my files? No. It uses virtual folders, so files stay in wp-content/uploads/ and image URLs never change. Folders are taxonomy terms, so assigning a file to one only creates a database relationship. ### Can Folders organize posts and pages too? Yes, and it's the main differentiator. We verified it registers three hierarchical taxonomies: media_folder for attachments, folder for pages and post_folder for posts. Most competitors stop at media. ### Can the free version of Folders create subfolders? No. We tried on the free tier and the Add-a-new-folder modal shows "Upgrade to Pro to create subfolders." The underlying taxonomies are hierarchical, so the data layer supports nesting, but the free interface only creates one flat level. ### What happens if I deactivate the Folders plugin? Your files are unaffected. The folder trees vanish from the admin, but because folders are standard WordPress terms the data stays in wp_term_taxonomy and any tool can read it. That's a meaningful advantage over plugins using proprietary tables. ### Folders or FileBird? FileBird has more installs, a more polished media-only interface and manual folder ordering. Folders has a better rating from a larger sample, portable taxonomy storage and coverage of posts and pages. Pick FileBird for media-focused polish, Folders for breadth and portability. ### Can I use Folders and WP Adminify together? No. We confirmed both register an attachment taxonomy named media_folder, so running them together produces unpredictable results. Pick one. The upside is that moving between them is unusually painless, since the data lives in the same place either way. ## Final verdict Folders deserves its rating. It's the rare plugin that's popular, well-engineered and non-committal about your data all at once. Taxonomy storage means you can leave whenever you like, which is not something FileBird or Real Media Library can say. The trade is specialization. If you want the single best media-only folder experience, FileBird's years of focused iteration show. If you want folders across the whole site with nothing locked away and the strongest user satisfaction in the category, this is the pick. Comparing options? Start with [how WordPress media folders work](https://wpadminify.com/wordpress-media-library-folders), then [how to organize a library with folders](https://wpadminify.com/how-to-organize-wordpress-media-library-with-folders) once you've chosen a plugin, whichever one that turns out to be. --- # FileBird Review 2026: Is It Still the Best Media Folder Plugin? URL: https://wpadminify.com/filebird-review Last updated: 2026-08-12 FileBird is the most installed media folder plugin for WordPress and has been for years. A lead like that usually means one of two things: the plugin is genuinely the best, or it got there first and momentum did the rest. To find out which, we put FileBird 6.5.7 on a clean WordPress 7.0.3 site, looked at exactly what it does to the database, built a real folder structure, then deactivated it to see what survived. Here's what came back, including one architectural detail that should weigh more in your decision than any feature list. One disclosure before the findings: we publish WP Adminify, which has [media folders of its own](https://wpadminify.com/features/wordpress-media-folder). FileBird went through the same test bench as every other plugin in our [best WordPress media folder plugins](https://wpadminify.com/best-wordpress-media-folder-plugins) comparison, ours included. ## Quick verdict FileBird is an excellent media folder plugin. The best interface in its category, and a database design clearly built for libraries that hurt. Its one real trade-off is portability: folders sit in proprietary tables nothing else can read, so leaving later means finding a purpose-built importer. Choose FileBird if you want the most established dedicated folder plugin and expect to stay put. Look elsewhere if keeping your data readable matters more to you than interface polish. ## FileBird at a glance | | | | --- | --- | | Developer | Ninja Team | | Version tested | 6.5.7 | | Active installs | 200,000 | | Rating | 94/100 from 1,121 ratings | | Last updated | 27 July 2026 | | Tested up to | WordPress 7.0.3 | | Folder storage | Custom tables, `wp_fbv`, `wp_fbv_attachment_folder` | | Pricing | Free tier plus paid plans | Those figures come from the WordPress.org Plugin API on 9 August 2026. Two deserve a pause. 200,000 active installs is roughly double its nearest competitor, and 1,121 ratings is the largest sample anyone in this category has, which makes that 94/100 unusually trustworthy. A small plugin with 100/100 from twenty ratings tells you almost nothing by comparison. ## What FileBird does WordPress ships with no media folders at all. Files sort by upload date and type, and the search box covers filenames but not alt text, so past a few hundred uploads finding anything turns into scrolling. If that's news to you, we unpacked the whole mechanism in [how WordPress media folders actually work](https://wpadminify.com/wordpress-media-library-folders). FileBird adds a folder tree beside the Media Library, drag-and-drop assignment, nested subfolders, and folder filtering inside the media modal when you insert an image into a post. That last one matters more than people expect, because you insert images far more often than you browse the library. Like every serious folder plugin, its folders are virtual. Files never move inside `wp-content/uploads/` and image URLs never change, so you can reorganize a live production library at 2pm on a Tuesday without breaking a page. ![FileBird Lite folder tree in the WordPress Media Library with a nested subfolder and the right-click context menu open](https://d1k2c27psfzbiv.cloudfront.net/wp-content/uploads/2026/08/10101257/filebird-folder-tree-context-menu.webp) ## Under the hood: what we found This is the part most reviews skip, and it's the most decision-relevant thing about FileBird. Activating it alone on a clean install creates two tables: ``` wp_fbv id int unsigned name varchar(250) parent int ← nesting type int ord int ← manual ordering created_by int wp_fbv_attachment_folder folder_id int unsigned attachment_id bigint unsigned ``` Two things follow straight from that. Nesting is unlimited at the data layer. The `parent` column lets any folder sit inside any other, to any depth. Whether the interface caps it is a separate question, but the storage doesn't. Manual folder ordering is a first-class feature, in Pro. That `ord` column is why folders can hold an arbitrary order at all, which taxonomy-based plugins can't do natively. But here's what the schema didn't tell us and the interface did: on the free tier, both Sort Folders and Sort Files carry Pro badges. The column is in your database from day one; the ability to use it is behind the paywall. ![FileBird Lite sorting menu showing Sort Folders and Sort Files marked as Pro features](https://d1k2c27psfzbiv.cloudfront.net/wp-content/uploads/2026/08/10101302/filebird-sort-folders-pro.webp) The `created_by` column also hints at per-user folder ownership, which is the groundwork for role-based folder visibility. This is good engineering. Purpose-built tables outrun the WordPress term system on large libraries and they support features terms handle awkwardly. Ninja Team made a defensible call here. ## The trade-off: we tested what happens when you leave Custom tables come with a cost, so rather than speculate we measured it. We built something realistic: eleven folders across two levels, three client folders with subfolders plus an Unsorted catch-all, all 38 media files assigned. Then we pulled the plugin. | What | Result | | --- | --- | | Media files | All 38 present and working. Every image URL unchanged. | | Folder tree in admin | Gone completely | | Data in `wp_fbv` | Every row retained | | Reactivating FileBird | Full structure restored instantly | | A different folder plugin reading it | Nothing. It can't see another vendor's tables | Your files are never at risk. Worth saying plainly, because that's the fear people actually arrive with. What's at risk is the structure, and the accurate word isn't "lost" but "unreadable". The rows sit there in a format only FileBird speaks. Staying with FileBird, none of this matters. Leaving after organizing 15,000 files means finding an importer or writing a migration script. The schema is simple enough that it's very doable, but it's work, and it's work worth pricing in now rather than discovering on a Friday afternoon two years from now. ## The other way to store a folder For context, here's what the alternative architecture looks like. Taxonomy-based plugins keep each folder as an ordinary WordPress term and link files to it with a row in `wp_term_relationships`. ![Diagram showing how WordPress media folders map attachments to taxonomy terms: the file stays in wp-content/uploads, its record is a row in wp_posts, and the folder is a term linked through wp_term_relationships](https://d1k2c27psfzbiv.cloudfront.net/wp-content/uploads/2026/08/09112546/wordpress-media-folder-taxonomy-diagram.webp) Neither model is correct in the abstract. Terms buy you portability and cost you ordering. Tables buy you ordering and performance and cost you the exit. What matters is knowing which one you signed up for. ## Strengths The largest install base in the category. 200,000 active installs is double its nearest rival. For a plugin holding a core workflow together, that materially lowers the odds of waking up to an abandoned project. A genuinely large ratings sample. 1,121 ratings at 94/100 beats a perfect score from a few dozen users every time. Actively maintained. Updated 27 July 2026, tested against the current WordPress release. In a category where one popular plugin has sat untouched for roughly two years, that isn't a given. Built for scale. The custom-table design is faster than the term system on very large libraries, which is exactly where folder plugins earn their keep. Manual folder ordering. A real differentiator, and the one feature taxonomy-based competitors genuinely cannot match. ## Limitations Proprietary folder storage. The main one, covered above. Not a bug, a trade, and one worth understanding before you commit an afternoon to filing. Free tier folder limit. The free version caps folder count. Fine for a blog, tight for an agency with twenty clients. The Lite tier gates more than the folder count. Driving it ourselves, the Pro badges kept appearing: Sort Folders, Sort Files, folder colors, downloading a folder as ZIP. The upgrade screen also lists "fully organize pages, posts, CPTs" as a Pro feature, so content folders exist. But nothing outside the Media Library is included free. Media only on the free tier. FileBird Lite organizes the Media Library and stops there. Folders for posts, pages and custom post types are a Pro purchase. Single-purpose. A strength if folders are your only problem. If your admin also needs menu cleanup, white labelling or a dashboard a client can look at without asking questions, FileBird is one plugin of several you'll end up running. ## Where this leaves WP Adminify We build a media folder feature, so treat this section with the scepticism it deserves. It's also the honest answer to a question this review keeps circling. If media folders are the whole problem, FileBird beats us at it. Better interface, manual ordering we don't have, and ten times the users. We'd rather write that down than pretend otherwise. The case for looking at [WP Adminify's media folders](https://wpadminify.com/features/wordpress-media-folder) is different, and it only applies to some people. Count the plugins currently keeping your admin usable. If FileBird is sitting next to one that hides menu items from clients, one that rebrands the dashboard, one that styles the login page and one that adds admin columns, you're maintaining five update cycles to solve what is really one problem: the admin doesn't fit how you work. That's the shape we're built for, and the arithmetic behind it is in [replacing 50+ plugins with one](https://wpadminify.com/replace-wordpress-plugins-with-wp-adminify). The second reason is the one this review spent a whole section on. Our folders are ordinary WordPress terms, so the structure you spend an afternoon building stays readable with `wp term list media_folder` forever, with or without us installed. And having driven both on the same test site, one Lite-tier difference surprised even us: the folder sorting, color tags and post type folders that FileBird badges as Pro are simply on in Adminify's free version. ![WP Adminify media folder tree with nested, color-coded folders and folder sorting on the same test site](https://d1k2c27psfzbiv.cloudfront.net/wp-content/uploads/2026/08/10101309/adminify-folder-tree.webp) If manual drag-to-any-position ordering is what you came for, FileBird Pro is still the only plugin here that does it, and you should take it and not look back. If you want to see the difference before deciding, our [folder setup documentation](https://wpadminify.com/docs/adminify/productivity/create-folder-for-post-types) walks through it, and the free version will tell you within twenty minutes whether the wider toolkit is solving anything you actually have. ## Pricing The free version on WordPress.org gives you folders, nesting and drag-and-drop with a folder count limit. Paid tiers lift that limit and add support. ## Who should use FileBird | Good fit | Poor fit | | --- | --- | | Large media libraries needing fast folder filtering | Teams that prioritise data portability | | Sites wanting the most established option | Sites needing folders for posts and pages too | | Anyone who needs manual folder ordering | Anyone consolidating several admin plugins into one | | Long-term commitments to one tool | Sites likely to re-evaluate their stack yearly | ## FileBird against the field Briefly, for context: - Folders by Premio: 90,000 installs and a perfect 100/100 from 1,514 ratings, portable taxonomy storage, and it covers posts and pages as well. The strongest direct challenger. - Real Media Library: 100,000 installs and a deeper feature set, but four custom tables means even more to unpick if you leave. - Media Library Organizer: smaller and simpler, taxonomy-based, minimal footprint. - WP Adminify: folders inside a broader admin toolkit, taxonomy storage, no manual ordering. ## FileBird FAQs ### Is FileBird worth it? For dedicated media organization, yes. Largest install base in the category at 200,000, a 94/100 rating from over a thousand ratings, and active maintenance. The one reservation is that folders live in proprietary tables, so budget migration effort if you ever switch. ### Does FileBird move my files? No. FileBird uses virtual folders, so files stay in wp-content/uploads/ and image URLs never change. We confirmed it by building a folder structure and checking the file paths afterwards, which were untouched. Reorganizing a live site is safe. ### What happens if I deactivate FileBird? Your media files are completely unaffected, and we verified all 38 test files stayed present and working. The folder tree disappears from the admin, but the data stays in the wp_fbv tables, so reactivating restores everything instantly. No other plugin can read that structure while FileBird is off. ### Can FileBird create nested subfolders? Yes. Its wp_fbv table has a parent column, so nesting is unlimited at the data layer. Any interface limit is separate from the storage, and two or three levels works best in practice anyway, because deeper trees get abandoned when filing takes too many clicks. ### Is the free version of FileBird enough? For a personal site or small blog, usually. The free tier includes folders, nesting and drag-and-drop but caps folder count. Agencies running many clients hit that ceiling fast. ### Can I migrate from FileBird to another plugin? Yes, but it needs an importer or a script, because wp_fbv and wp_fbv_attachment_folder are readable only by FileBird. The schema is simple, folder id, name and parent, so the export itself is straightforward. Always do it while FileBird is still active. Our guide to organizing a media library with folders covers rebuilding the structure on the other side. ## Final verdict FileBird earns its position. Best interface in the category, a database design clearly built for scale, a strong maintenance record, and a ratings sample large enough to trust. The honest caveat is architectural rather than functional. Your folder structure lives somewhere only FileBird can read, which is a perfectly reasonable trade for the performance and ordering it buys. It's still a decision, and it should be a conscious one before you sink hours into filing a large library. Still weighing it up? Start with [how WordPress media folders work](https://wpadminify.com/wordpress-media-library-folders) for the background, or [WP Adminify's take on folders](https://wpadminify.com/features/wordpress-media-folder) if a broader admin toolkit is closer to the actual problem. --- # How to Create Nested Media Folders in WordPress URL: https://wpadminify.com/wordpress-nested-media-folders Last updated: 2026-08-12 One level of folders solves the first problem. Then a client folder hits four hundred files and you're scrolling again. That's when people go looking for subfolders and find out WordPress has neither folders nor nesting. Here's how nesting actually works, how deep you should go (less deep than you want), and how to build a subfolder structure your team will still use in a year. ![WordPress Media Library organized with unlimited nested folders using WP Adminify](https://d1k2c27psfzbiv.cloudfront.net/wp-content/uploads/2025/03/09071018/wp-adminify-media-folders-unlimited-nested-folders.webp) How deep you can nest depends entirely on which plugin you install, so if you are still deciding, our test of the [best WordPress media folder plugins](https://wpadminify.com/best-wordpress-media-folder-plugins) compares all seven on exactly this point. The subfolder behaviour described below is [nested folders in WP Adminify](https://wpadminify.com/features/wordpress-media-folder). ## Quick answer WordPress has no native media folders and therefore no native subfolders. Nested media folders come from plugins that register a hierarchical taxonomy against the attachment post type, the same mechanism that lets categories have child categories. Each folder is a taxonomy term, and a subfolder is a term with a parent. Because folders are taxonomy terms rather than real directories, nesting a folder never moves a file or changes an image URL. ## Why WordPress has no subfolders Core organizes media by upload date, file type, and search. There's no folder layer at all, so there's nothing to nest. Not an oversight, though. WordPress serves every uploaded file by URL. If folders were real directories, moving a file into a subfolder would change its URL, breaking every post that embeds it, every external link, and every cached copy. Rather than ship that, core shipped nothing. Plugins solve it by adding a classification layer instead of a location layer. The file never moves. Only a database relationship changes. ## How nesting actually works Every uploaded file in WordPress is a post, a row in `wp_posts` with `post_type = 'attachment'`. Because it's a post, it can carry taxonomies. A folder plugin registers a taxonomy against attachments with `hierarchical => true`. That single flag is the entire nesting mechanism. Hierarchical terms can have a `parent`, and that parent can have a parent, indefinitely. It's exactly how categories work and exactly how tags don't. You can build a minimal version yourself: ``` /** * Register a nestable "Media Folder" taxonomy for attachments. * hierarchical => true is the entire nesting mechanism. */ function adminify_register_nested_media_folders() { register_taxonomy( 'media_folder', 'attachment', array( 'labels' => array( 'name' => __( 'Media Folders' ), 'singular_name' => __( 'Media Folder' ), 'parent_item' => __( 'Parent Folder' ), ), 'hierarchical' => true, // ← subfolders 'show_admin_column' => true, 'show_in_rest' => true, 'public' => false, 'rewrite' => false, ) ); } add_action( 'init', 'adminify_register_nested_media_folders' ); ``` Set `hierarchical => false` and you get flat tags with no nesting, whatever the interface suggests. Creating a subfolder programmatically is just a term with a parent: ``` // Create "Website" as a child of "Acme Corp" $parent = get_term_by( 'name', 'Acme Corp', 'media_folder' ); wp_insert_term( 'Website', 'media_folder', array( 'parent' => $parent->term_id, ) ); ``` ### What we verified On a clean WordPress 7.0.3 install we activated WP Adminify 4.2.23 in isolation and inspected the taxonomies registered against the `attachment` post type. It registers `media_folder` with: ``` media_folder hierarchical = true public = false show_ui = false ``` Two things follow from that, and both are worth knowing before you commit a library to any folder plugin. Nesting is supported at the data layer, because the taxonomy is hierarchical. And folders are virtual, because they're taxonomy terms rather than directories, so files never move on disk and URLs never change. This is the check worth running on any folder plugin you evaluate. If its folders show up in `wp_term_taxonomy`, they're virtual and safe to reorganize on a live site. ![Diagram showing how WordPress media folders map attachments to taxonomy terms: the file stays in wp-content/uploads, its record is a row in wp_posts, and the folder is a term linked through wp_term_relationships](https://d1k2c27psfzbiv.cloudfront.net/wp-content/uploads/2026/08/09112546/wordpress-media-folder-taxonomy-diagram.webp) ## How deep should you nest? Technically unlimited. Practically, three levels is the ceiling and two is usually right. Deep hierarchies feel organized and fail in use. The failure is behavioural rather than technical. When filing a file takes five clicks, people stop filing. Six months later half the library sits in the top level and the elaborate structure below describes a system nobody follows. | Depth | Example | Verdict | | --- | --- | --- | | 1 level | Acme Corp | Fine for small libraries and single-client sites | | 2 levels | Acme Corp → Website | The sweet spot for most sites | | 3 levels | Acme Corp → Website → 2026 Redesign | Justifiable for agencies with long client histories | | 4+ levels | Acme Corp → Website → 2026 → Q3 → Hero | Will be abandoned. Don't build it. | Two sizing rules. A subfolder holding fewer than about ten files shouldn't exist, and a folder holding more than a few hundred needs splitting. If neither applies, your depth is right. ## Building a nested structure ### Step 1: create the top level only Pick one axis and stay on it: client, product category, content section, department. Mixing axes at the same level is what makes structures unpredictable. Resist building the full tree now. You don't yet know what's actually in the library, and the right second level will look different from whatever you'd have guessed. ### Step 2: populate it Move existing files into top-level folders in filtered batches, by file type, filename search, or upload date. The full workflow is in [how to organize your media library with folders](https://wpadminify.com/how-to-organize-wordpress-media-library-with-folders). ### Step 3: let the subfolders reveal themselves Now open your largest folders. The right subdivisions are obvious at this point, because you can see that "Acme Corp" is 60% website images, 30% social graphics, 10% print PDFs. Create subfolders for what's actually there, not for what you imagined. ### Step 4: use consistent child names If every client folder uses Website / Social / Print, anyone can navigate any client without learning it first. Inconsistent children ("Web" here, "Website" there, "Site assets" somewhere else) destroy that benefit and make search results confusing. This matters most for [agencies managing multiple clients](https://wpadminify.com/agencies), where the person filing an asset is rarely the person who needs to find it. ``` Media Library ├── Acme Corp │ ├── Website │ ├── Social │ └── Print ├── Beta Industries │ ├── Website │ └── Social ├── Internal │ ├── Team photos │ └── Brand assets └── Unsorted ``` ## Creating nested folders in WP Adminify [WP Adminify's media folders](https://wpadminify.com/features/wordpress-media-folder) use the hierarchical taxonomy confirmed above, so subfolders work at the data layer and nothing moves on disk. - Enable the media folder module, then open Media > Library. The folder tree appears beside the library. - Create your top-level folders first. - To create a subfolder, add a new folder while its intended parent is selected, or drag an existing folder onto another to re-parent it. - Drag files into the subfolder. Multi-select works, so batches move in one action. - Insert images from a post and filter by subfolder inside the media modal instead of scrolling the global grid. Configuration is under [creating folders for post types](https://wpadminify.com/docs/adminify/productivity/create-folder-for-post-types). Creating folders and subfolders in the media library. New Sub-folder sits on the parent folder's own menu, so the child lands under whichever folder you opened it from. ## Before you commit: what to check Nesting behaviour differs meaningfully between folder plugins, and the differences aren't always documented. Verify these on your own install rather than trusting a feature list: | Check | Why it matters | | --- | --- | | Maximum nesting depth | Some plugins cap it. If you need three levels, confirm three levels. | | Do subfolders show inside the media modal? | Without this you still scroll a global grid every time you insert an image. | | Does a parent folder show its children's files? | Behaviour varies. Both models are defensible, so know which you're getting. | | Can you re-parent a folder by dragging? | Restructuring without it means recreating folders and re-moving files. | | Do folders appear in `wp_term_taxonomy`? | Confirms virtual folders, safe to reorganize on a live site. | That last check is a single query and it settles the most important question outright: ``` wp db query "SELECT taxonomy, COUNT(*) AS terms FROM wp_term_taxonomy GROUP BY taxonomy;" ``` ## Nested Media Folder FAQs ### Can you create subfolders in the WordPress Media Library? Not natively, since WordPress has no media folders at all. Subfolders come from plugins that register a hierarchical taxonomy against attachments, where each folder is a term and a subfolder is a term with a parent. Because folders are terms rather than directories, nesting never moves a file or changes an image URL. ### How many levels of nested media folders can WordPress support? The underlying taxonomy allows unlimited nesting, since any term can have a parent. Individual plugins set their own limits, so confirm the depth you need on your own install. Two levels suits most sites in practice and three is the sensible ceiling, because deeper structures get abandoned when filing takes too many clicks. ### Do nested folders change my image URLs? No, provided the plugin uses virtual folders, which is what taxonomy-based plugins do. The file stays at its original path in wp-content/uploads/ and only a database relationship changes. Plugins that move real files into directories on disk will change URLs. ### Does a parent folder show files from its subfolders? Depends on the plugin. Some show a parent's own files only, others roll up everything beneath it. Neither is wrong, but the difference matters when you're auditing a folder, so test it before building a deep structure. ### Can I move a subfolder to a different parent? In most folder plugins, yes, usually by dragging the folder onto its new parent, which updates the term's parent field. Files move with it because they're linked to the folder term rather than to a path. Confirm it works before committing, since restructuring without it means recreating folders by hand. ### What happens to nested folders if I deactivate the plugin? Your files are unaffected. They stay on the server and every image keeps working. The folder tree stops being visible in the admin because the interface comes from the plugin, but the taxonomy terms and their parent relationships stay in the database, so reactivating restores the full hierarchy. ## Conclusion Nested media folders are a taxonomy feature wearing a filesystem costume. Once you see that, both the safety and the limits make sense. - Nesting comes from `hierarchical => true` on an attachment taxonomy, the same mechanism as child categories. - Nothing moves on disk. Re-parenting a folder never changes an image URL, so restructuring a live library is safe. - Two levels, three at most. The constraint is behavioural rather than technical, because deep trees get abandoned. - Verify depth limits and modal filtering yourself before committing a large library. If folders aren't set up yet, start with [how to create folders in the WordPress Media Library](https://wpadminify.com/how-to-add-folders-to-wordpress-media-library). For the wider background on virtual folders, see our guide to [WordPress media library folders](https://wpadminify.com/wordpress-media-library-folders). --- # WordPress Media Library Best Practices: 12 Rules for a Clean Library URL: https://wpadminify.com/wordpress-media-library-best-practices Last updated: 2026-08-12 No media library goes bad in a week. It rots one careless upload at a time. An `IMG_4471.jpg` here, a 6000px camera file there, a third copy of the logo because finding the first two took too long. Two years later you've got 9,000 files, nobody can find anything, and the backup runs all night. Every rule below is preventive. They cost seconds at upload and save hours later. They're ordered by impact, so if you only adopt three, take the first three. ![Media library manager support list and grid view](https://d1k2c27psfzbiv.cloudfront.net/wp-content/uploads/2022/12/18103321/Media-library-manager-support-list-and-grid-view.webp) Two of the rules below want folders, and WordPress does not ship any. If you are still choosing, our tested roundup of the [best WordPress media folder plugins](https://wpadminify.com/best-wordpress-media-folder-plugins) compares seven, and [WP Adminify's folder module](https://wpadminify.com/features/wordpress-media-folder) is the one we build. ## 1. Rename every file before you upload it Highest-return habit available, and it costs nothing. WordPress media search covers the filename, title, caption, and description. It does not cover alt text. So a photo uploaded as `IMG_4471.jpg` with no title is effectively unsearchable no matter how carefully you wrote the alt text afterwards. | Bad | Good | Why | | --- | --- | --- | | `IMG_4471.jpg` | `acme-homepage-hero-desktop.jpg` | Searchable, self-describing | | `Screen Shot 2026-08-09 at 14.22.31.png` | `checkout-error-message.png` | No spaces, no ambiguity | | `final_v2_FINAL.png` | `acme-logo-2026-primary.png` | Still meaningful in a year | Lowercase, hyphens rather than spaces or underscores, no special characters. Spaces become `%20` in URLs, which is ugly in source and occasionally breaks badly written scripts. ## 2. Resize before uploading, not after A 6000 × 4000 camera JPEG is roughly 12 MB. WordPress will keep it, generate a scaled version, and produce a resized copy for every registered image size. One careless upload can put fifteen files and 20 MB on disk. Resize to the largest dimension your site actually displays, usually 1600 to 2560px wide, before the file goes anywhere near WordPress. There is a safety net. Since 5.3, any image over 2560px in either dimension gets a scaled version created and used as the "full" size, with the original preserved as `-scaled`. You can tune it: ``` // Raise the threshold to 3840px for genuine 4K assets add_filter( 'big_image_size_threshold', function() { return 3840; } ); ``` The threshold limits the damage but doesn't eliminate it. That oversized original is still sitting on your server. ## 3. Audit your registered image sizes once a year Biggest source of disk bloat, and almost nobody checks it. WordPress generates a copy of every upload for every registered size. Core registers five or six. Your theme adds its own. WooCommerce adds three. Sliders and galleries add more. Twelve registered sizes turns 10,000 uploads into roughly 120,000 files. Worse, old themes leave their sizes registered permanently. A site that's switched themes twice may still be generating derivatives for templates that no longer exist. ``` /** * Stop generating unused intermediate image sizes. * Affects new uploads only — existing files are untouched. */ function adminify_remove_unused_image_sizes( $sizes ) { unset( $sizes['1536x1536'] ); // retina intermediate unset( $sizes['2048x2048'] ); // retina intermediate return $sizes; } add_filter( 'intermediate_image_sizes_advanced', 'adminify_remove_unused_image_sizes' ); ``` Test after any change. Remove a size your theme relies on and WordPress falls back to the full-size image, so visitors download a 2 MB file where a 40 KB thumbnail belongs. That's worse than the disk you saved. Our [WordPress performance guide](https://wpadminify.com/wordpress-performance-optimization) covers the wider picture. ## 4. Write alt text at upload time Alt text is an accessibility requirement and an image search signal. Four seconds at upload, and miserable to backfill across 3,000 files. Describe the image in context. Don't stuff keywords: ``` chair office chair desk chair ergonomic chair buy chair Grey ergonomic office chair with adjustable lumbar support ``` Purely decorative images should carry an empty `alt=""` so screen readers skip them. An empty alt is a deliberate signal. A missing alt attribute is a defect. ## 5. Pick one folder axis and stay on it Once you've got folders, the failure mode is mixing organizing principles. A library with "Clients," "2025," "Images," and "Misc" at the top level is unusable, because nobody can predict which one a file went into. | Site type | Top level | Second level | | --- | --- | --- | | Agency / freelancer | Client | Project or asset type | | WooCommerce store | Product category | Product line or season | | Blog / magazine | Content section | Year | | Membership / course site | Course | Module | The test: could someone who joined last week guess where a given file lives? If not, simplify. Full detail in our guide to [WordPress media library folders](https://wpadminify.com/wordpress-media-library-folders). ## 6. Stop at three levels of nesting Deep hierarchies feel organized and perform badly. Past three levels, filing takes too many clicks and people quietly stop bothering, which leaves you maintaining a structure that no longer matches reality. Two levels covers most real cases. Three is the ceiling. If a folder holds two files it shouldn't exist. If it holds four thousand, split it. ## 7. Keep an Unsorted folder and empty it weekly People will upload without filing. Systems that assume perfect discipline fail. Systems with an honest inbox survive. Keep a deliberate Unsorted folder and give one person a ten-minute pass every Friday. That single habit is the difference between a structure that holds for years and one that fragments within a month. ## 8. Replace files instead of re-uploading them When a logo changes, the instinct is to upload the new version. Now you've got two logos with near-identical names, and in six months nobody knows which one is current. Replacing the existing file keeps one canonical copy in one folder, and every page using it updates at once. See [replacing an image in WordPress without changing the URL](https://wpadminify.com/how-to-update-replace-image-in-wordpress-without-changing-url). ![locate the media replace metabox in attachment page](https://d1k2c27psfzbiv.cloudfront.net/wp-content/uploads/2026/04/27072646/locate-the-media-replace-metabox-in-attachment-page.webp) ## 9. Never trust "Unattached" as a usage signal WordPress records a parent post for files uploaded inside the editor. Files uploaded via Media > Add New show as Unattached. That field records where a file was first uploaded, not where it's currently displayed. An unattached image can be live on twelve pages. An attached image may have been pulled from its parent years ago. Bulk-deleting unattached media is one of the fastest ways to break a site, and it's standard advice in a lot of tutorials. Ignore it. ## 10. Set upload permissions deliberately By default, Authors and above can upload files. On a multi-author site that means anyone can drop a 12 MB TIFF into your library. Two practical controls: ``` /** * Restrict which file types non-admins may upload. */ function adminify_restrict_upload_mimes( $mimes, $user ) { if ( ! user_can( $user, 'manage_options' ) ) { return array( 'jpg|jpeg|jpe' => 'image/jpeg', 'png' => 'image/png', 'webp' => 'image/webp', 'pdf' => 'application/pdf', ); } return $mimes; } add_filter( 'upload_mimes', 'adminify_restrict_upload_mimes', 10, 2 ); ``` Some folder plugins also support role-based folder visibility, so contributors only see the folders relevant to them. Verify it before relying on it, because it isn't universal. ## 11. Use modern image formats WordPress supports WebP uploads and added AVIF in 6.5. Both give you substantially smaller files than JPEG at equivalent quality. Two caveats worth knowing. Converting an existing library is a batch operation that needs testing, since regeneration is CPU-heavy and will time out mid-process on shared hosting, leaving you partially converted. And if you serve AVIF, keep a fallback for older clients. The safer pattern for most sites: upload WebP going forward, leave the existing library alone, and let a CDN handle format negotiation. ## 12. Audit on a schedule, not in a panic Media cleanup done reactively, when disk space runs out, is when mistakes happen. A calendar beats a crisis. | Frequency | Task | | --- | --- | | Weekly | Empty the Unsorted folder | | Monthly | Check for duplicate uploads of frequently used assets | | Quarterly | Review folders for finished projects and former clients | | Annually | Audit registered image sizes; clear orphaned files on disk | | Before any deletion | Full backup of files and database, and verify the restore works | ## Putting the rules into practice Rules 5 through 8 need folders to exist, and WordPress doesn't provide them natively. [WP Adminify's media folder feature](https://wpadminify.com/features/wordpress-media-folder) adds them as a hierarchical taxonomy. Folders are virtual, so files never move on disk and image URLs never change, which is what makes it safe to reorganize a live library during business hours. Practical setup: create top-level folders on one axis, add an Unsorted folder, move existing files in filtered batches, then keep the weekly ten-minute pass. Configuration is under [creating folders for post types](https://wpadminify.com/docs/adminify/productivity/create-folder-for-post-types), and the batch workflow is in [how to organize your media library with folders](https://wpadminify.com/how-to-organize-wordpress-media-library-with-folders). ## WordPress Media Library Best Practice FAQs ### What is the most important WordPress media library best practice? Renaming files descriptively before uploading. WordPress media search covers filenames but not alt text, so a file named IMG_4471.jpg is effectively unfindable regardless of how well you tagged it. The habit costs seconds and permanently improves retrieval. ### How should I name WordPress image files? Lowercase, hyphens instead of spaces, descriptive of the content rather than the context of capture. acme-homepage-hero-desktop.jpg beats IMG_4471.jpg and final_v2_FINAL.png. Avoid special characters, since spaces become %20 in URLs. ### How many image sizes should WordPress generate? As few as your templates actually use. Core registers five or six and themes add more, so twelve total is common, which turns 10,000 uploads into roughly 120,000 files. Audit annually and deregister unused sizes, but test afterwards, because removing a size in use makes WordPress serve the full-size image instead. ### Is it safe to bulk delete unattached media? No. Unattached only means the file wasn't uploaded from inside a post editor. It says nothing about whether the file is currently displayed, and unattached images are frequently live across multiple pages. Treat the field as upload history, not usage data. ### How often should I audit my media library? Empty the Unsorted folder weekly, check duplicates monthly, review completed-project folders quarterly, and audit registered image sizes annually. Scheduled maintenance prevents the reactive crisis cleanup where most accidental deletions happen. ### Should I use WebP for WordPress images? Yes for new uploads. WordPress has supported WebP since 5.8 and AVIF since 6.5, and both are substantially smaller than JPEG at equivalent quality. Converting an existing library is a separate project that needs testing, since regeneration is CPU-heavy and can time out partway on shared hosting. ## Conclusion None of these rules is difficult. They're all cheap at the moment of upload and expensive to retrofit, which is exactly why libraries decay. The cost always lands on someone later. If you only adopt a few: - Rename before uploading. Filename is searchable, alt text isn't. - Resize before uploading. One 12 MB camera file becomes fifteen files on disk. - Keep an Unsorted folder and empty it weekly. Ten minutes protects everything else. - Audit registered image sizes once a year. It's the rule nobody follows and the one hiding your disk space. If your library is already past the point where these help on their own, start with [organizing it with folders](https://wpadminify.com/how-to-organize-wordpress-media-library-with-folders). Remediation first, then these rules keep it clean. --- # How to Find Any Image Fast in the WordPress Media Library URL: https://wpadminify.com/find-images-wordpress-media-library Last updated: 2026-08-12 You know the image exists. You wrote proper alt text for it. You search the Media Library and get nothing. That's not a bug, and it catches out people who've used WordPress for years. Media search covers less than almost everyone assumes, and once you know exactly what it does cover, finding files gets dramatically easier. ![WordPress media library search returning no results for an image that exists](https://d1k2c27psfzbiv.cloudfront.net/wp-content/uploads/2026/08/10045512/wordpress-media-library-search-no-results.webp) Several of these get faster once the library has folders. Our comparison of the [best WordPress media folder plugins](https://wpadminify.com/best-wordpress-media-folder-plugins) tests seven that add them, including [folder filtering inside the WP Adminify media modal](https://wpadminify.com/features/wordpress-media-folder), which is where most searching actually happens. ## What WordPress media search actually covers The honest list: | Field | Searched? | Where it lives | | --- | --- | --- | | Filename | Yes (since WordPress 4.7) | `_wp_attached_file` in `wp_postmeta` | | Title | Yes | `post_title` | | Caption | Yes | `post_excerpt` | | Description | Yes | `post_content` | | Alt text | No | `_wp_attachment_image_alt` in `wp_postmeta` | Alt text isn't searchable. It sits in postmeta under a key WordPress's media query never looks at. So an image uploaded as `IMG_4471.jpg` with no title, no caption, and beautifully written alt text is effectively invisible to search. And by default WordPress sets the title from the filename. Upload `IMG_4471.jpg` and the title becomes "IMG 4471", which is searchable but only if you happen to remember the number. ## Why files go missing Four causes, in rough order of frequency. Camera and screenshot filenames. `IMG_4471.jpg` and `Screen Shot 2026-08-09 at 14.22.31.png` carry nothing anyone will search for. Empty titles and captions. Most people skip these fields at upload, which leaves the filename as the only searchable text. Relying on alt text. The most common misconception in this topic. Alt text serves accessibility and image SEO. It does nothing for admin retrieval. Date-based browsing at scale. Past roughly 500 files, "it went up around March" stops narrowing anything usefully. ## Five ways to find an image ### 1. Search a filename fragment, not the whole name Search matches partial strings, so a fragment usually works better than guessing at the full filename. Searching `hero` returns every file with "hero" anywhere in its name, title, caption, or description. ### 2. Combine the type filter with search Filters and search stack. Set the media type to Documents, search a client name, and you get that client's PDFs only. Fastest native combination available and badly underused. ### 3. Use list view and sort List view adds sortable columns for filename, author, attached post, and date. Sorting by filename groups near-identical names together, which is also how you spot duplicates. Sorting by attached post groups everything uploaded to the same page. If you want more columns to sort by, our guide to [useful WordPress admin columns](https://wpadminify.com/necessary-admin-columns-for-wordpress) covers extending the list tables. ### 4. Search by attachment ID If you've got the ID from a page builder, a shortcode, or a database query, go straight to it: ``` /wp-admin/post.php?post=1234&action=edit ``` Handy when you're debugging a broken image reference and an ID is all you have. ### 5. Filter by folder The one that actually scales. Filtering to a folder turns a 12,000-file search problem into a 40-file browsing problem, and it works inside the media modal too, so inserting an image into a post means clicking a folder instead of scrolling a global grid. WordPress has no native folders, so this needs a plugin or a registered media taxonomy. Background in our guide to [WordPress media library folders](https://wpadminify.com/wordpress-media-library-folders). ![WordPress Media Library search results showing acme-logo.jpg duplicated as acme-logo-1.jpg, acme-logo-2.jpg and acme-logo-3.jpg, all marked Unattached](https://d1k2c27psfzbiv.cloudfront.net/wp-content/uploads/2026/08/09093037/wordpress-media-library-duplicate-files-search.png) ## Making alt text searchable If your team has put work into alt text, you can extend media search to include it. This joins `_wp_attachment_image_alt` into the media query: ``` /** * Include attachment alt text in WordPress media library search. * Adds a postmeta JOIN only on attachment search queries. */ function adminify_search_media_alt_text( $query ) { if ( ! is_admin() || ! $query->is_main_query() ) { return; } if ( 'attachment' !== $query->get( 'post_type' ) || ! $query->get( 's' ) ) { return; } add_filter( 'posts_clauses', function( $clauses ) use ( $query ) { global $wpdb; $search = '%' . $wpdb->esc_like( $query->get( 's' ) ) . '%'; $clauses['join'] .= " LEFT JOIN {$wpdb->postmeta} AS alt_meta ON ( {$wpdb->posts}.ID = alt_meta.post_id AND alt_meta.meta_key = '_wp_attachment_image_alt' )"; $clauses['where'] .= $wpdb->prepare( " OR ( alt_meta.meta_value LIKE %s )", $search ); $clauses['groupby'] = "{$wpdb->posts}.ID"; return $clauses; } ); } add_action( 'pre_get_posts', 'adminify_search_media_alt_text' ); ``` Two caveats. It adds a postmeta JOIN, which will slow searches on a very large library, so test at your scale. And it only affects the Media Library list screen, not the media modal, which runs a separate AJAX query. ## Finding images with WP-CLI When the admin interface won't cooperate, the command line answers precisely. ``` # Search attachments by title, caption, description, or filename wp post list --post_type=attachment --s=acme \ --fields=ID,post_title,post_date --format=table # Find every PDF wp post list --post_type=attachment \ --post_mime_type=application/pdf \ --fields=ID,post_title --format=table # Find attachments whose ALT TEXT matches — impossible in the admin UI wp db query "SELECT p.ID, p.post_title, m.meta_value AS alt FROM wp_posts p JOIN wp_postmeta m ON p.ID = m.post_id WHERE m.meta_key = '_wp_attachment_image_alt' AND m.meta_value LIKE '%ergonomic%';" ``` That last query earns its place. It's the one search the admin can't do at all. ## Fixing it permanently Every tip above is a workaround. Two habits remove the problem. Rename files before uploading. Filename is searchable and alt text isn't, so a descriptive name makes a file findable forever. `acme-homepage-hero-desktop.jpg` beats `IMG_4471.jpg` permanently, and it costs four seconds. Use folders. Search is a fallback. Structure is the primary retrieval method, and it's the only one that keeps working as the library grows. [WP Adminify's media folders](https://wpadminify.com/features/wordpress-media-folder) add a folder tree to the Media Library and to the media modal, so you filter rather than scroll in both places. Files stay where they are on disk, since folders are a taxonomy, so nothing moves and no URL changes. Setup is under [creating folders for post types](https://wpadminify.com/docs/adminify/productivity/create-folder-for-post-types). ![WP Adminify media folders visible in WordPress editor, page builder, and media modal](https://d1k2c27psfzbiv.cloudfront.net/wp-content/uploads/2025/03/09071431/wp-adminify-media-folders-gutenberg-page-builder-support.webp) ## WordPress Media Search FAQs ### Why can't I find my image in the WordPress Media Library? Most often because the file has an uninformative name and no title or caption. WordPress media search covers the filename, title, caption, and description, but not alt text. An image named IMG_4471.jpg with only alt text filled in is effectively invisible to search. ### Does WordPress media search include alt text? No. Alt text is stored in wp_postmeta under _wp_attachment_image_alt, which the media query doesn't check. You can extend search to include it with a posts_clauses filter, though that adds a postmeta JOIN which can slow searches on very large libraries. ### How do I search the WordPress media library by filename? Filename search has worked natively since WordPress 4.7. Type any fragment of the name into the media search box. Partial matches work, so searching hero finds acme-homepage-hero-desktop.jpg. ### Can I filter the media library by more than one thing at once? Yes. The media type filter, the date filter, and the search box all stack. Setting type to Documents and searching a client name returns just that client's PDFs, which is the fastest native combination available and widely underused. ### How do I find images used on a specific page? In list view, sort by the attached-post column to group files uploaded to the same post. Bear in mind this shows where a file was first uploaded, not everywhere it's currently displayed. An image can appear on many pages while being attached to one or none. ## Conclusion The core insight is one line: WordPress media search covers filenames but not alt text. Almost every "I can't find my image" problem traces back to that gap. - Search filename fragments, and stack the type filter with search. - Use list view and sort when you need to scan rather than search. - Rename before uploading. The permanent fix, and it costs four seconds. - Use folders. Search is a fallback, structure is what scales. If retrieval is a daily problem, the fix is organization rather than better searching. Start with [how to organize your media library with folders](https://wpadminify.com/how-to-organize-wordpress-media-library-with-folders). --- # How to Bulk Move and Organize WordPress Media Files URL: https://wpadminify.com/bulk-organize-wordpress-media Last updated: 2026-08-12 Moving four thousand media files one at a time is roughly a day of work. Moving the same four thousand in filtered batches is about ninety minutes. Same plugin, same library, same person. The difference is entirely technique. Here's the fast approach: how to select large ranges properly, which filters do the grouping for you, when to drop to WP-CLI instead, and how to dodge the timeouts that make people give up halfway. Bulk moving needs somewhere to move things to. If you have not picked a folder plugin yet, start with the [best WordPress media folder plugins](https://wpadminify.com/best-wordpress-media-folder-plugins); the drag-and-drop target in the steps below is [WP Adminify's media folder tree](https://wpadminify.com/features/wordpress-media-folder). ## Before you start Back up files and database. Virtual folders never touch your files, but you're running bulk operations on production data and it costs nothing to be able to undo. Make sure folders exist. WordPress has no native folder feature, so bulk moving needs either a folder plugin or a registered media taxonomy. If neither exists yet, start with [how to create folders in the WordPress Media Library](https://wpadminify.com/how-to-add-folders-to-wordpress-media-library). One reassurance: with taxonomy-based folders, a bulk move changes database relationships only. Files stay exactly where they are on disk and no image URL changes, so this is safe on a live site. ## Step 1: stay in grid view Most advice tells you to switch the Media Library to list view before doing bulk work. With WP Adminify you don't have to. Grid view is where nearly everyone already works, and everything below happens right there: narrow the grid, select a range, drag it onto a folder. Switching views isn't a free move either. List view throws away the thumbnails, which are the thing you actually use to recognise an image, and it sends you through Screen Options to raise items-per-page before a range selection is even worth attempting. ## Step 2: narrow the grid first This is the whole technique. Don't work through the library sequentially. Use the toolbar to cut the grid down to one coherent group, then move the lot in a single action. Four controls sit across the top, and they stack. ### Search Media search covers the filename, title, caption, and description. Type a client name, product code, or campaign name and the grid collapses to matching files instantly. It doesn't cover alt text. If your files are named `IMG_4471.jpg` this won't save you, which is the practical argument for renaming before upload. ### Filter by media type Set All media items to Documents and every PDF appears together. Most sites file all their PDFs in two or three moves. Repeat for audio, video, and spreadsheets. ### Filter by date Files uploaded in the same week usually belong together: a launch, a campaign, a product shoot. Pick a month from All dates, scan, move the batch. ### Filter by folder The All folders dropdown limits the grid to one folder, or to everything still unsorted. Filtering to unsorted is the quickest way to see what's actually left to file. ## Step 3: select the range in the grid Once the grid shows one coherent group: - Click Bulk select in the toolbar. - Click the first thumbnail. - Shift-click the last thumbnail. Everything between the two selects at once. - Click any individual thumbnail to toggle the few that don't belong. This is what makes grid view workable for real bulk jobs. Clicking a hundred thumbnails one at a time is exactly why people give up and retreat to list view. Shift-click turns the same hundred into two clicks. ![Bulk select mode in the WordPress Media Library grid with the first image selected out of eleven results](https://d1k2c27psfzbiv.cloudfront.net/wp-content/uploads/2026/08/09125324/wordpress-media-grid-bulk-select-first-image.webp) ## Step 4: drag the selection onto a folder With the range selected, drag it onto any folder in the tree on the left. A tooltip follows the cursor telling you how many files you're carrying, and the folder highlights as you hover so you can see where they'll land. Drop, and the counts next to each folder update straight away. The target goes up, Uncategorized goes down. That live count is your confirmation the move worked, which saves reloading the page to check. Subfolders are drop targets too, so you can go straight into Brand Logos > PNG without stopping at the parent. ![Shift-clicking the last image in the WordPress Media Library grid to select all eleven, then dragging them onto the SVG subfolder with a Move 11 items tooltip](https://d1k2c27psfzbiv.cloudfront.net/wp-content/uploads/2026/08/09125327/wordpress-media-grid-shift-click-move-to-folder.webp) Eleven files in two clicks and one drag. Moving 200 works exactly the same way. Moving them individually is 200 drags and about forty minutes. Every minute spent narrowing the grid first saves ten in dragging. ## Step 5: work top-down Fill top-level folders first and leave subfolders until afterwards. Once a top-level folder is populated you can see what's actually in it, and the right subdivisions become obvious instead of guessed. Then stop at roughly 80%. Leave stragglers in an Unsorted folder. Chasing completion is what makes people abandon these projects three-quarters of the way through, and the long tail is mostly files nobody will search for again. ## Bulk moving thousands of files with WP-CLI Past a few thousand files, or when the browser keeps timing out, the command line is faster and more reliable. Because folders are taxonomy terms, assigning them is a standard term operation. First, confirm the taxonomy your folder plugin uses: ``` wp db query "SELECT taxonomy, COUNT(*) AS terms FROM wp_term_taxonomy GROUP BY taxonomy;" ``` If your folders show up here, they're taxonomy-based and everything below applies. Substitute your plugin's taxonomy name for `media_folder`. List the folders and their term IDs: ``` wp term list media_folder --fields=term_id,name,parent --format=table ``` Assign every PDF to a folder in one command: ``` # Dry run first — see what would be affected wp post list --post_type=attachment \ --post_mime_type=application/pdf \ --format=count # Then assign wp post list --post_type=attachment \ --post_mime_type=application/pdf \ --format=ids \ | xargs -n 50 -I {} wp post term set {} media_folder documents ``` Assign by filename pattern, which is handy when a naming convention exists: ``` wp post list --post_type=attachment \ --s=acme \ --format=ids \ | xargs -n 50 -I {} wp post term set {} media_folder acme-corp ``` For anything more complex, a short script gives you full control: ``` /** * Assign attachments uploaded in a date range to a folder term. * Run via: wp eval-file assign-folder.php */ $attachments = get_posts( array( 'post_type' => 'attachment', 'post_status' => 'inherit', 'posts_per_page' => -1, 'fields' => 'ids', 'date_query' => array( array( 'after' => '2026-01-01', 'before' => '2026-03-31' ), ), ) ); foreach ( $attachments as $id ) { // false = replace existing folder; true = append wp_set_object_terms( $id, 'q1-campaign', 'media_folder', false ); } WP_CLI::success( sprintf( 'Assigned %d attachments.', count( $attachments ) ) ); ``` Test on staging first. A wrong `wp_set_object_terms()` call across 10,000 attachments runs in seconds and takes hours to unpick. ## Avoiding timeouts Most bulk-move failures are PHP limits rather than plugin bugs. | Symptom | Cause | Fix | | --- | --- | --- | | Page hangs, then errors on a large batch | `max_execution_time` reached | Move 100 at a time instead of 500 | | Some files moved, some did not | Request died partway | Re-run on the remainder; smaller batches | | Blank screen after bulk action | `memory_limit` exhausted | Raise it, or use WP-CLI which has its own limit | | Everything is slow regardless of batch size | Database or host performance | See [why WordPress admin is slow](https://wpadminify.com/why-is-my-wordpress-admin-so-slow) | WP-CLI sidesteps most of this, since it runs outside the web request and browser and PHP web timeouts don't apply. ## Bulk organizing with WP Adminify [WP Adminify's media folders](https://wpadminify.com/features/wordpress-media-folder) are stored as a hierarchical taxonomy, so bulk moves are term assignments. Files never move on disk and no URL changes, which is why this is safe to run on a live site during business hours. The whole workflow, without leaving grid view: - Enable the media folder module and create your top-level folders. - Open Media > Library and stay in the default grid. - Narrow the grid with search, media type, date, or the folder filter. - Click Bulk select. - Click the first thumbnail, then shift-click the last to take the whole range. - Drag the selection onto a folder or subfolder and drop. - Check the folder counts, then go again for the next batch. Here's why that matters. Grid is the default view and it's where most people already work. Being able to filter, range-select and drop without switching views, without opening Screen Options, and without losing your thumbnails is the difference between bulk organising being something you do and something you keep putting off. Setup is under [creating folders for post types](https://wpadminify.com/docs/adminify/productivity/create-folder-for-post-types), and the wider strategy is in [how to organize your media library with folders](https://wpadminify.com/how-to-organize-wordpress-media-library-with-folders). ## Bulk Media Organization FAQs ### How do I select multiple files in the WordPress Media Library? In grid view, click Bulk select in the toolbar, click the first thumbnail, then shift-click the last one. Everything between the two selects at once, and clicking any individual thumbnail toggles it. No need to switch to list view. ### Can I bulk move media files into folders? Yes, if you have a folder plugin. Because folders are taxonomy terms, a bulk move is a term assignment rather than a file operation, so files never move on disk and image URLs never change. For very large batches, WP-CLI is faster and avoids browser timeouts entirely. ### Why does my bulk move time out? Almost always PHP's max_execution_time or memory_limit rather than the plugin. Reduce the batch size to around 100 files and try again. If it keeps failing, use WP-CLI, which runs outside the web request and isn't subject to those limits. ### How do I bulk move thousands of media files? Use WP-CLI. Query attachments by MIME type, search term, or date, then pipe the IDs into wp post term set in chunks. This handles tens of thousands of files reliably where the browser interface would time out repeatedly. Dry-run the query first and test on staging. ### Will bulk moving files break my images? No, with taxonomy-based folders, which is what most folder plugins use. Only a database relationship changes, so every image URL stays identical. The one approach that does break images is physically moving files into different directories on the server. ## Conclusion Bulk organizing is a sequencing problem. People who find it takes days are working file by file. People who find it takes an afternoon are letting filters do the grouping. - Stay in grid view. Narrow it, shift-click the range, drag it onto a folder. - Narrow first, then select. One drag beats two hundred. - Drop to WP-CLI past a few thousand files. No browser timeouts, no partial batches. - Stop at 80%. Leave the tail in Unsorted rather than abandoning the project. For the full organization strategy, covering structure design, naming rules, and what to do afterwards, see [how to organize your WordPress media library with folders](https://wpadminify.com/how-to-organize-wordpress-media-library-with-folders). --- # How to Manage a Large WordPress Media Library (10,000+ Files) URL: https://wpadminify.com/manage-large-wordpress-media-library Last updated: 2026-08-12 A media library behaves completely differently at 500 files and at 15,000. The admin screen that used to load instantly now takes eight seconds. Backups that finished overnight now run into the morning. Nobody can find the client logo approved in March, so they upload it again, and now there are four copies. None of this is a WordPress bug. It's what happens when an interface designed for personal blogs gets used for asset management. Here's what actually degrades at scale, in the order worth fixing. ## What actually slows down Five separate problems get lumped together as "my media library is slow." Different causes, different fixes, so it's worth pulling them apart. | Symptom | Real cause | Fix | | --- | --- | --- | | Media screen takes seconds to load | Grid view loading many thumbnails plus metadata queries | Switch to list view, lower items per page | | Media modal is slow when inserting images | Same query running inside the editor | Folder filtering, so the modal queries a subset | | Disk usage far exceeds expectations | Too many registered image sizes | Audit and deregister unused sizes | | Backups and migrations crawl | File count , not total size | Reduce sizes, offload old media | | Nobody can find anything | No structure beyond upload date | Folders and a naming convention | The last row is usually the most expensive, because it costs staff hours every day rather than seconds per page load. It's also the one people get to last. ## Fix 1: audit your registered image sizes Highest-impact change on most large sites, and almost nobody does it. WordPress generates a resized copy of every uploaded image for every registered size. Core registers five or six. Your theme adds its own. WooCommerce adds three. Sliders, galleries, and page builders pile on more. A site with twelve registered sizes turns 10,000 uploads into roughly 120,000 files on disk. ### See what's registered Drop this into a site-specific plugin temporarily and check your debug log: ``` /** * Log every registered image size with its dimensions and crop setting. * Remove after auditing. */ function adminify_log_registered_image_sizes() { global $_wp_additional_image_sizes; $sizes = array(); foreach ( get_intermediate_image_sizes() as $size ) { if ( in_array( $size, array( 'thumbnail', 'medium', 'medium_large', 'large' ), true ) ) { $sizes[ $size ] = array( 'width' => (int) get_option( "{$size}_size_w" ), 'height' => (int) get_option( "{$size}_size_h" ), 'crop' => (bool) get_option( "{$size}_crop" ), ); } elseif ( isset( $_wp_additional_image_sizes[ $size ] ) ) { $sizes[ $size ] = $_wp_additional_image_sizes[ $size ]; } } error_log( print_r( $sizes, true ) ); } add_action( 'admin_init', 'adminify_log_registered_image_sizes' ); ``` ### Remove the ones you don't use Old themes leave their sizes registered permanently. Deregister anything unused: ``` /** * Stop generating unused intermediate image sizes. * Affects new uploads only — existing files are untouched. */ function adminify_remove_unused_image_sizes( $sizes ) { unset( $sizes['medium_large'] ); // 768px — drop only if your theme doesn't use srcset unset( $sizes['1536x1536'] ); // retina intermediate unset( $sizes['2048x2048'] ); // retina intermediate return $sizes; } add_filter( 'intermediate_image_sizes_advanced', 'adminify_remove_unused_image_sizes' ); ``` Test before committing. Remove a size your theme relies on and WordPress falls back to the full-size image, so visitors download a 2 MB file where a 40 KB thumbnail belongs. Check your key templates after any change. Worth noting the big image threshold too, added in WordPress 5.3. Any image over 2560px in either dimension gets a scaled version generated, with the original kept as `-scaled`. That's an extra full-size file per large upload. Tune it if your workflow involves high-resolution photography: ``` // Raise to 3840px for 4K assets add_filter( 'big_image_size_threshold', function() { return 3840; } ); ``` ## Fix 2: tune the Media screen Two settings, both free, both immediate. Use list view. Grid view's infinite scroll loads batch after batch of thumbnails and gives you no bulk-edit columns. List view is paginated, sortable, faster, and supports bulk actions. On a large library it's just the better interface. Lower items per page. Under Screen Options, set it to whatever your host handles comfortably. Fewer items means a lighter query and fewer thumbnails per request. Sixty is a reasonable starting point for browsing, and you can raise it to 100 or 200 temporarily when doing bulk moves. If the whole admin is slow rather than just this screen, the cause is usually elsewhere. [Why WordPress admin is slow](https://wpadminify.com/why-is-my-wordpress-admin-so-slow) covers the wider set, and [controlling the Heartbeat API](https://wpadminify.com/how-to-control-wordpress-heartbeat-api) handles a frequent offender on editor-heavy sites. ## Fix 3: add folders, the retrieval fix Performance tuning makes the screen load faster. It does nothing about the real cost of a large library, which is that finding a specific file takes minutes instead of seconds. Around 500 files, date-based browsing stops working as a retrieval method. Nobody remembers which month something went up. Search only helps if files were named sensibly, and search covers the filename, title, caption, and description but not alt text. A library full of `IMG_4471.jpg` is effectively unsearchable. Folders fix that, and they come with a performance benefit people miss: when the media modal is filtered to a folder, it queries a subset instead of the whole library. Inserting images into posts, which you do dozens of times a day, gets faster too. Because virtually all folder plugins use a taxonomy rather than real directories, files never move and URLs never change. You can organize a 15,000-file library on a live production site safely. The batch workflow is in [how to organize your media library with folders](https://wpadminify.com/how-to-organize-wordpress-media-library-with-folders). ![Smart media folder analytics dashboard in WP Adminify showing organized media usage](https://d1k2c27psfzbiv.cloudfront.net/wp-content/uploads/2025/03/09071748/wp-adminify-smart-media-folders-usage-analytics.webp) ## Fix 4: deal with duplicates Large libraries are full of duplicates, and they're a symptom rather than a cause. When finding an existing file is harder than uploading a new one, people upload a new one. WordPress doesn't deduplicate. It appends `-1`, `-2`, `-3` and stores every copy along with all its generated sizes. Finding them: - Search the library for `-1` and `-2`. The numeric suffix is the clearest signal. - Sort list view by filename to bring near-identical names together. - Check the usual suspects first. Logos, team headshots, and hero images accumulate the most copies. Verify before deleting. A file's "Unattached" status only records where it was first uploaded, not where it's currently displayed. An unattached image can be live on twelve pages. Automated "unused media" scanners routinely miss references inside page-builder JSON, theme customizer options, ACF fields, and widget content. Sensible sequence: back up, spot-check a sample of whatever a scanner flagged, delete in small batches, check the site after each batch. ## Fix 5: optimize the database side Every attachment creates one row in `wp_posts` and several in `wp_postmeta`: the file path, the serialized metadata array, and the alt text at minimum. Ten thousand attachments means well over 30,000 postmeta rows before any plugin adds its own. Three things help. Run a persistent object cache. Redis or Memcached, if your host offers it. This is the single largest admin-wide improvement available on a metadata-heavy site. Clean orphaned postmeta. Deleted attachments sometimes leave metadata rows behind, particularly after plugin removals or failed imports. Most database optimization plugins handle it. Back up first. Check that `wp_postmeta` is properly indexed. Core ships correct indexes, but they occasionally get dropped by a bad migration or an over-eager optimization tool. A missing index on `meta_key` makes every media query slow. Our broader [WordPress performance optimization guide](https://wpadminify.com/wordpress-performance-optimization) goes deeper, and the [WP Adminify performance settings](https://wpadminify.com/docs/adminify/performance/enhancement) document the admin-side toggles. ## Fix 6: consider offloading Past a certain size, moving media off the WordPress server stops being optional. Signals you've hit that point: - Backups no longer finish inside the maintenance window - Migrations take hours and time out - You're paying for hosting storage tiers you don't otherwise need - Serving images from one origin is measurably hurting page speed Offloading moves files to object storage (S3, Cloudflare R2, DigitalOcean Spaces) and rewrites URLs to point there. The database still holds attachment records, so the Media Library works normally. Two things to understand before committing: - It's hard to reverse. Migrating 100,000 files back is a project. Choose deliberately. - Test folder plugin compatibility. Most folder plugins are unaffected because folders are database relationships rather than file paths, but verify on a staging copy instead of assuming. A CDN in front of your existing uploads is the lighter alternative. It solves the delivery-speed half of the problem without the migration risk. ## Fix 7: set rules so it stays manageable Everything above is remediation. These four habits stop the problem coming back. | Rule | Why | | --- | --- | | Rename files before uploading | Filename is searchable; alt text is not | | Resize before uploading | A 6000px camera JPEG generates a dozen derivatives nobody needs | | File into a folder at upload time | Two seconds now, thirty seconds later | | Replace rather than re-upload | Keeps one canonical copy instead of four | Write them down somewhere your team will see them. An unwritten convention lasts until the second person starts uploading. ## Large WordPress Media Library FAQs ### How many images can the WordPress Media Library handle? No hard limit. The admin interface starts degrading noticeably somewhere between 5,000 and 10,000 attachments on typical hosting, but the constraint is interface and database performance rather than WordPress itself. Sites running six-figure libraries combine folder organization, list view, offloaded storage, and a persistent object cache. ### Why is my WordPress media library so slow? Usually grid view's infinite scroll loading many thumbnails alongside metadata queries. Switch to list view and lower items per page under Screen Options for an immediate improvement. If the whole admin is slow, look at object caching, database indexes, and the Heartbeat API instead. ### Does a large media library slow down my website for visitors? Not directly. The Media Library is an admin interface and visitors never query it. What does affect front-end speed is serving oversized images, missing responsive srcset markup, and no CDN. A large library slows down your team, not your visitors. ### How do I organize thousands of images in WordPress? Work in filtered batches rather than file by file. Switch to list view, raise items per page, then filter by media type, filename search, or upload date to isolate related groups. Shift-click to select the whole range and move it into a folder in one action. Four to five thousand files takes about ninety minutes this way. ### Should I delete old media to speed things up? Deleting rarely fixes speed and it carries real risk. "Unattached" only records where a file was first uploaded, not where it's currently used, and scanners miss references in page builders and custom fields. Auditing registered image sizes and switching to list view give bigger gains with none of the danger. ### Will media folders slow down a large library? No, they generally speed it up. Folders are taxonomy relationships, and filtering to a folder makes WordPress query a subset instead of the whole library. The media modal in the editor gets noticeably faster, which matters because inserting images is a far more frequent action than browsing the library. ## Conclusion Managing a large media library is mostly about attacking the right problem. Most people tune performance settings when the expensive problem is retrieval. - Audit registered image sizes first. Biggest disk and backup win, and almost nobody checks. - Switch to list view and lower items per page. Free, immediate, reversible. - Add folders. They fix retrieval, cut duplicate uploads at the source, and speed up the media modal. - Back up before any deletion. "Unattached" doesn't mean unused. Start with the batch workflow in [how to organize your media library with folders](https://wpadminify.com/how-to-organize-wordpress-media-library-with-folders), or see how [WP Adminify's media folders](https://wpadminify.com/features/wordpress-media-folder) handle large libraries without moving a single file. --- # How to Disable RSS Feeds in WordPress (Complete Guide) URL: https://wpadminify.com/how-to-disable-rss-feeds-in-wordpress Last updated: 2026-08-10 Here is an uncomfortable truth: your WordPress site automatically publishes RSS feeds for every post, page, and comment. Most visitors will never see them. But scrapers, content thieves, and competitor tools? They love RSS feeds. If you run a membership site, a private blog, or a client project where content should stay controlled, RSS feeds are a security gap. And if you have ever wondered "why is my content appearing elsewhere?", RSS feeds might be the culprit. Good news: disabling RSS feeds in WordPress takes 2 minutes. In this guide, I will show you three methods, from plugin-free to full control. Let us lock down your content. ## Why You Should Disable RSS Feeds in WordPress RSS feeds were useful in the 2000s when blog readers were popular. Today? Most users never touch an RSS reader. But your feeds are still public by default. Here is what that means: - Content scrapers can automatically pull your full posts - Competitors can monitor your publishing schedule - Membership content might leak through feed URLs - SEO dilution from duplicate content on scraper sites Unless you specifically need RSS feeds for a newsletter or syndication, disabling them is a no-brainer security win. ## Method 1: Disable RSS Feeds with WP Adminify (Recommended) The fastest, safest method is using [WP Adminify](https://wpadminify.com/pricing). It has a built-in "Disable Feed Links" module that handles RSS cleanly, no code, no theme file edits. ### Step-by-Step Setup - Install and activate [WP Adminify](https://wordpress.org/plugins/adminify/) - Navigate to WP Adminify → Security → Disable Feed Links - Toggle "Disable RSS Feeds" to enable - Click Save Changes Done. Your RSS feeds now return a 404 error. Clean, simple, reversible. ## Method 2: Disable RSS Feeds with Code (For Developers) If you prefer a code-based approach, add this snippet to your theme's `functions.php` file or a custom plugin: ``` // Disable all RSS feeds add_action('do_feed', 'disable_rss_feeds', 1); add_action('do_feed_rdf', 'disable_rss_feeds', 1); add_action('do_feed_rss', 'disable_rss_feeds', 1); add_action('do_feed_rss2', 'disable_rss_feeds', 1); add_action('do_feed_atom', 'disable_rss_feeds', 1); function disable_rss_feeds() { wp_die( __('RSS feeds are disabled for this site.') ); } ``` This code completely disables RSS feed generation. Visitors attempting to access feed URLs will see an error message instead. ## Method 3: Redirect RSS Feeds to Homepage Alternatively, you can redirect RSS feed requests to your homepage instead of showing an error: ``` // Redirect RSS feeds to homepage add_action('do_feed_rss2', 'redirect_rss_to_home', 1); function redirect_rss_to_home() { wp_redirect( home_url() ); exit; } ``` This method is gentler, users clicking RSS links won't get an error, but they also won't access the feed. ## Best Practices for RSS Feed Management When disabling RSS feeds, consider these best practices: - Test before deploying: Ensure disabling RSS doesn't break email newsletters or syndication - Use selective control: Keep comment feeds if needed while disabling post feeds - Monitor for errors: Check your site logs for RSS-related 404s after disabling - Document your changes: Note in your site documentation that RSS feeds are intentionally disabled - Consider partial feeds: If you must keep RSS, use summary-only feeds to prevent content theft ## Lock Down Your Content Today RSS feeds are a relic from a different era. Unless you specifically need them, disabling them is a simple security win. With [WP Adminify](https://wpadminify.com/pricing), you get RSS control plus 30+ other security and productivity features. Save ## What RSS feed URLs does WordPress create? More than most people expect, which is why a half-finished job leaves feeds live. A standard install publishes the main posts feed at `/feed/`, a comments feed at `/comments/feed/`, a per-post comments feed at `/your-post/feed/`, plus a feed for every category, tag, author and search results page (`/category/news/feed/`, `/author/jane/feed/`, `/?s=term&feed=rss2`). The same content is served in four formats through the query string: `?feed=rss2`, `?feed=atom`, `?feed=rss` and `?feed=rdf`. Before you decide the job is done, open two or three of those URLs in a private window. If any of them still returns XML rather than your redirect or a 404, the rule you wrote is only catching the main feed. That is the usual outcome of a snippet copied from an old tutorial, because feed types were added to core over several releases. ## Do RSS feeds expose WordPress file URLs or private content? Feeds never expose anything a logged-out visitor could not already reach. Drafts, private posts and password-protected posts stay out. What feeds do expose is everything inside your published post content, and that includes the full URL of every image and file you embedded, along with author display names and post dates. If your media library holds client PDFs that you linked from a post, those links travel out in the feed the same way they sit in the page. The practical risk is scraping rather than leaking. A full-text feed hands a bot a clean, ad-free copy of every post the moment you publish, which is why duplicate versions of new articles often appear within minutes. Switching feeds to summary only, or turning them off where nobody subscribes, removes the easiest route. Feeds are one of several defaults worth reviewing when you tidy an install; the rest of that pass is covered in our [WordPress dashboard customization](https://wpadminify.com/features/dashboard-customization) guide. ## WordPress RSS Feed FAQs ### What happens if I disable RSS feeds? Your site stops broadcasting content via RSS. Visitors cannot subscribe via feed readers, but your site functions normally. ### Will disabling RSS affect my SEO? No. RSS feeds are not a ranking factor. Your content remains indexed via sitemaps and regular crawling. ### Can I disable RSS for posts but keep it for comments? Yes. WP Adminify allows selective RSS control for different content types. ### How do I re-enable RSS feeds later? Simply disable the RSS control feature in [WP Adminify settings](https://wpadminify.com/pricing), and feeds will be restored automatically. ### Do RSS feeds slow down WordPress? Minimal impact. However, disabling unused feeds reduces server requests and potential attack surface. ### What about RSS in email newsletters? RSS-to-email services will stop working. Use WP Adminify's selective control to keep specific feeds active. ### Can I redirect RSS URLs instead of disabling? Yes. WP Adminify can redirect RSS requests to a custom page or your homepage. --- # How to Remove Admin Menu Items in WordPress for a Cleaner Dashboard URL: https://wpadminify.com/remove-admin-menu-items Last updated: 2026-08-10 WordPress admin menu can feel like a mess. Plugins, themes, and core features all compete for attention, leaving you scrolling and clicking like you’re on a scavenger hunt. If you’ve ever wished for a tidier, more efficient dashboard, you’re in luck! There are basically two answers to the question "How to Reorder or Remove WordPress Admin Menu Items": The old-school coding method or the much easier (and fun) route using [WP Adminify](https://wpadminify.com/)’s Admin Menu Editor. Let’s go ahead and break it down. ## How to Reorder or Remove WordPress Admin Menu Items: The Coding Route (For the Brave Souls) If you enjoy tinkering with code, you can clean up your menu with some PHP magic. Just pop this into your theme’s `functions.php` file to remove certain menu items from the dashboard menu: ``` function customize_admin_menu() { // Remove a menu item remove_menu_page('edit.php'); // Hides Posts // Reorder menu items - custom order example global $menu; $menu = array( $menu[2], // Dashboard $menu[4], // Separator $menu[5], // Posts ); } add_action('admin_menu', 'customize_admin_menu'); ``` Now, removing items with code is pretty easy but reordering admin menu items is a completely different beast altogether! Reordering menu items requires code on both the server and frontend. To put it simply, it's a nightmare. Why put yourself through it? Let's just look at the best option to remove and reorder menu items. A method that won't give you lasting PTSD. ## How to Reorder or Remove WordPress Admin Menu Items: The No-Code Method with WP Adminify (Highly Recommended) For a simple, stress-free solution, [WP Adminify’s Admin Menu Editor](https://wpadminify.com/features/admin-menu-editor) has you covered and then some. Here’s how to hide admin menu in WordPress without touching a single line of code: ### Step 1: Install and Activate WP Adminify Head to your WordPress dashboard >>> Go to Plugins > Add New >>> Search for “WP Adminify,” hit Install Now, and then activate it. Simple. ![Free WP Adminify Plugin installation](https://d1k2c27psfzbiv.cloudfront.net/wp-content/uploads/2024/09/23052839/Free-WP-Adminify-Plugin-installation.webp) Follow this [documentation](https://wpadminify.com/docs/adminify/getting-started/free-installation) for a detailed setup guide. ### Step 2: Access the Admin Menu Editor Navigate to WP Adminify > Admin Menu on your dashboard. ![Adminify to Admin menu editor](https://d1k2c27psfzbiv.cloudfront.net/wp-content/uploads/2024/12/14095632/Adminify-to-Admin-menu-editor.png) ### Step 3: Reorder Menu Items (As Easy as Drag-and-Drop) Go to the Menu Editor tab. Click, drag, and drop it into your preferred position. Boom, done. Hit Save to lock in the changes. As simple as that. No code witchcraft needed, no stress incurred. Barely takes a few seconds. https://www.youtube.com/watch?v=zbEYlAg91QM Reorder, hide, and customize WordPress admin menu items with WP Adminify. ### Step 4: Hide or Remove Menu Items (No Mess, No Fuss) Select the menu item you want to hide or remove. Click on the Settings tab Under "Hidden for Rules," choose which user roles (like Editors or Subscribers) shouldn’t see it. Save your changes, and voila! Now it’s gone for the selected users. ## Why WP Adminify Is the Better Choice? ![WordPress Dashboard Customizer Plugin](https://d1k2c27psfzbiv.cloudfront.net/wp-content/uploads/2023/10/12115700/WP-Adminify-WordPress-Dashboard-Customizer-Plugin-banner.webp) Sure, coding works, but not everyone can do it. WP Adminify makes life so much easier and lowers the barrier to entry significantly for all user types on WordPress regardless of their expertise. And just to make it clear, WP Adminify doesn’t stop at just reordering and hiding menu items. It’s packed with many other admin menu customization features. Think of it as your all-in-one toolkit for admin productivity: - No coding required: Perfect for beginners and busy pros who don’t want to mess with PHP. - Visual and fast: Reorganize your menu in seconds with an intuitive drag-and-drop interface. - Role-based control: Hide menu items based on roles, keeping dashboards clean for your team. - Rename and customize: Change menu item names to suit your workflow or add separators for better organization. - Flexible Layout Options: Switch between Vertical and Horizontal menus. Choose from styles like Default, Folded, or Rounded to match your preference. - Submenu Styles: Tidy up submenus with options like Accordion or Toggle for a cleaner hierarchy. - Add Custom Menu Items: Add as many menu items and sub-menu items as you want. - Adjust Menu Style: Change menu layout options, menu width, menu fonts, and item colors. - User Personalization: Show or hide user information, and customize avatars as Rounded or Square. These are just features under the Admin Menu Editor. Check out our [docs](https://wpadminify.com/docs/adminify/admin-menu/admin-menu-editor) to get detailed instructions on how to use these features. Adminify boasts hundreds of other very helpful features such as [Dark Mode](https://wpadminify.com/features/dashboard-customization), [Dashboard Widgets Editor](https://wpadminify.com/features/productivity), [White labeling](https://wpadminify.com/features/white-label), [Login Customizer](https://wpadminify.com/loginfy), and many more productivity-improving features to create an optimized workspace that feels uniquely yours. ### Related Reading - [add custom menus to admin](https://wpadminify.com/how-to-add-menu-in-wordpress-admin-dashboard) - [WordPress admin customization](https://wpadminify.com/wordpress-admin-customization) - [white label for clients](https://wpadminify.com/white-label-wordpress) - [how to use the WordPress admin menu editor](https://wpadminify.com/how-to-use-the-wordpress-admin-menu-editor) ## How do you delete a menu in WordPress? This question splits two ways depending on which menu you mean. A site navigation menu can be deleted outright: go to Appearance > Menus, pick the menu from the dropdown, and click Delete Menu at the bottom (on a block theme you remove the Navigation block instead). An admin menu item cannot be deleted, because it belongs to core or to the plugin that registered it. What you do instead is hide it, which is what every method on this page does. That distinction matters more than it sounds. If you could truly delete Plugins or Tools, an update would put it straight back and half your users would lose a screen they need. Hiding is per role and reversible, so you can trim a subscriber down to Dashboard and Profile without touching your own view. ## Does hiding an admin menu item block access to that page? No, and this is the one thing to get right before you hand a site over. Hiding a menu item removes the link, not the permission. A user who still has the capability can reach `plugins.php` by typing the URL, whether or not they can see the entry in the sidebar. Menu hiding is housekeeping, not security. If you need the page genuinely off limits, change what the role can do rather than what it can see. Remove the capability (`activate_plugins`, `manage_options`, and so on) from that role, then hide the menu item so the dashboard matches reality. Doing both is what makes a client dashboard feel finished rather than merely tidy. ## Remove Admin Menu Items: FAQs ### How can I reorder WordPress admin menu without coding? You can easily reorder the WordPress admin menu using WP Adminify’s Admin Menu Editor. After installing and activating the plugin, go to WP Adminify > Admin Menu > Menu Editor tab. Simply click and drag any menu item (like Posts, Pages, or Plugins) into your desired position. Hit Save, and your custom admin menu order is applied instantly. No PHP or functions.php edits needed. This drag-and-drop interface works for all user roles and supports both vertical and horizontal menu layouts. ### Can I change admin menu items, labels or add custom menu items in WordPress? Yes! WP Adminify lets you change admin menu labels and add custom menu items without code. To rename a menu item: Click it in the Menu Editor, go to Settings, and edit the Menu Title. To add a custom menu item: Click “Add New Menu”, enter a title, URL, icon, and even sub-items. You can also insert menu separators for better organization. Great for creating client-friendly dashboards or internal tools. ### How can I hide dashboard menu items from the WordPress admin menu safely? WP Adminify lets you hide unnecessary WordPress admin menu items without code or site risks. Go to WP Adminify > Admin Menu, select an item like “Comments,” and under “Hidden for Rules,” choose roles (e.g., Subscribers) to exclude. Save, and it’s gone instantly. Unlike remove_menu_page in functions.php, which can break on updates, WP Adminify’s visual editor is stable, reversible, and role-specific. Perfect for cleaning cluttered dashboards. Comments is the example most people start with, and there is a full walkthrough on how to [hide the Comments menu from the WordPress admin panel](https://wpadminify.com/hide-comments-menu-from-wordpress-admin-panel). ### Can I hide the WordPress admin bar for subscribers without code? Yes, you can. WP Adminify hides the admin bar for subscribers (or any role) with one toggle. In WP Adminify > Admin Menu settings, enable “Hide Admin Bar” for selected roles. No CSS or functions.php edits needed. This keeps front-end clean for membership sites while admins retain full access. Safer and easier than manual code. ### Why are dashboard menu items missing after a plugin install? Plugins using remove_menu_page can hide menu items globally, causing conflicts. WP Adminify fixes this: activate it, go to Menu Editor, and restore items via drag-and-drop or visibility toggles. Reset to defaults with one click. It overrides plugin changes safely, no debugging required. ### How do I remove menu items from WordPress admin? Use WP Adminify Admin Menu Editor to hide, rename, or reorder any menu item. You can set visibility per user role without writing code. ### Can I hide admin menu items for specific users? Yes. WP Adminify lets you show or hide menu items based on user roles. Hide Plugins and Settings for editors while keeping them visible for admins. ### Will removing admin menu items break anything? Hiding menu items only removes them from the sidebar. The functionality still works and pages are accessible via direct URL unless you also restrict capabilities. ## Final Thoughts Whether you love code or prefer a no-fuss solution, customize your WordPress admin menu can be a game-changer. For most users, WP Adminify’s Admin Menu Editor is the clear winner. It's quick, intuitive, and no risk of breaking your site. Give it a try and turn your cluttered dashboard into a productivity powerhouse. ### Go Beyond Removing Menu Items A cleaner menu is step one. To reshape the whole workspace (widgets, branding, colors, login page), follow the complete guide to [customizing the WordPress dashboard](https://wpadminify.com/wordpress-dashboard-customization), or manage menu visibility per user role with the [Admin Menu Editor](https://wpadminify.com/features/admin-menu-editor). --- # How to Change WordPress Admin Email? URL: https://wpadminify.com/how-to-change-wordpress-admin-email Last updated: 2026-08-10 Sometimes it's necessary to change the WordPress Admin Email account. For example, you may want to update your contact information, transfer site ownership. Without further explanation, I am going to start from beginer to advance guideline. ## Beginner Friendly Methods Not everyone is a coder who works with WordPress. For a non non-coder like me, I will start covering the basic steps for you to change your admin email. ### Changing Admin Email via WordPress Settings A basic step perfect for any WordPress user. - Navigate to WordPress Dashboard. - Hover on`Settings > General`option. - Find out "Administration Email Address". - Enter your new email address in this field. - Scroll and click on "Save Changes". - Check for the verification message. - Click the confirmation link and complete the process. Learn how to change your admin email account in WordPress dashboard within 13 seconds ### Updating Email through User Profile It's another user friendly method for updating individual users email. - Log in to your WordPress Dashboard. - Navigate to `Users> Profile` - Scroll down to the "Contact Info" section. - Locate the "Email (required)" field. - Enter your new email address in this field. - Scroll down and click on "Update Profile". - Check the inbox of your old email and check for the verification email - Click on the confirmation link. ![Updating Email through User Profile](https://d1k2c27psfzbiv.cloudfront.net/wp-content/uploads/2024/07/12113224/Updating-Email-through-User-Profile.webp) ## Intermediate Methods We’ve reached the slightly more advanced methods. I say 'methods,' but there’s only one method that qualifies. Here it is: ### WordPress Multisite Network Settings This method is specifically for those running a WordPress Multisite network. In Multisite, you have a network of WordPress sites, and changing the Network Admin email is slightly different from changing it on a single site. Step 1: Access Network Admin Dashboard - Log in to your WordPress Dashboard - In the top-left corner, you should see My Sites - Click on `My Sites > Network Admin > Dashboard` Step 2: Navigate to Network Settings - In the Network Admin dashboard, go to `Settings > Network Settings` Step 3: Locate Network Admin Email - Scroll down the Network Settings page until you find the Network Admin Email field - This email is used for administrative purposes across your entire network Step 4: Change the Email Address - Enter the new email address in the Network Admin Email field Step 5: Save Changes - Scroll to the bottom of the page and click Save Changes. Step 6: Verify the Change - Check the new email address for a verification email - Follow the instructions in the email to confirm the change ![confirm email for WordPress multisite network email change](https://d1k2c27psfzbiv.cloudfront.net/wp-content/uploads/2024/07/12113229/confirm-email-for-WordPress-multisite-network-email-change.webp) ## Directly Editing the Database via phpMyAdmin This method involves manually changing the admin email address in your WordPress database. It's considered advanced because it requires direct database access and carries some risks if not done correctly. Step 1: Access phpMyAdmin - Log in to your hosting control panel (e.g., cPanel) - Locate and click on phpMyAdmin under the databases section Step 2: Select the correct database - In phpMyAdmin, find your WordPress database from the list on the left Click on it to open the database Step 3: Locate the users table - Look for a table named wp_users (note: the prefix "wp_" might be different if you changed it during installation) - Click on this table Step 4: Find the admin user - Click on the Select data from the top bar. - In the `wp_users table`, locate the row with your admin username - This row should have a user_id of 1 unless you've made changes ![User-information-from-database](https://d1k2c27psfzbiv.cloudfront.net/wp-content/uploads/2024/07/12113232/Edit-User-information-from-database.webp) Step 5: Edit the email address - Find the "user_email" field - Change the email address to your new desired admin email ![User-information-from-database](https://d1k2c27psfzbiv.cloudfront.net/wp-content/uploads/2024/07/12113232/Edit-User-information-from-database.webp) - Scroll down and click "Go" to save changes ## Using WordPress CLI WordPress CLI ([WP-CLI](https://wp-cli.org/)) is a command-line interface for WordPress. It allows you to manage many aspects of WordPress installations, including changing the admin email, without using a web browser. Step 1: Access your server - Connect to your server via SSH Step 2: Navigate to your WordPress installation directory - Use the `cd` command to move to your WordPress root directory - Example: `cd /var/www/html/yoursite` Step 3: Verify WP-CLI is installed and working - Run `wp --info` to check if WP-CLI is installed and functioning Step 4: Change the admin email - Use the following command to change the admin email: - `wp user update 1 --user_email=newemail@example.com` - Replace `newemail@example.com` with the desired email address - The `1` represents the user ID of the admin (typically 1 for the first user) Step 5: Verify the change - You can confirm the change with this command: - `wp user get 1 --field=user_email` Additional WP-CLI commands for user management: - List all users: `wp user list` - Get info for a specific user: `wp user get username` - Create a new user: `wp user create username email@example.com` ## FTP and wp-config.php Method This method involves directly editing the wp-config.php file to override the admin email address. It's considered advanced because it requires FTP access and modifying a critical WordPress configuration file. Step 1: Connect to your server via FTP - Use an FTP client like FileZilla or Cyberduck - Enter your FTP credentials to connect to your server Step 2: Locate wp-config.php - Navigate to your WordPress root directory - Find the wp-config.php file Step 3: Download and backup wp-config.php - Download a copy of wp-config.php to your local machine - Keep this as a backup in case anything goes wrong Step 4: Edit wp-config.php - Open the `wp-config.php` file in a text editor - Add the following line of code just before the line that says `"/* That's all, stop editing! Happy publishing. */"`: - `define( 'WP_ADMIN_EMAIL', 'your-new-email@example.com' );` - Replace '`your-new-email@example.com`' with your desired admin email address Step 5: Save and upload - Save the changes to wp-config.php - Upload the modified file back to your server, overwriting the existing one Step 6: Verify the change - Log into your WordPress admin panel - Check the admin email address to confirm the change ## Developer Approach This method is primarily reserved for developers(Hackerman) or those comfortable with PHP and WordPress hooks. It involves adding custom code to your WordPress installation to programmatically change the admin email. Custom function in functions.php: - Access your theme's `functions.php` file via FTP or the WordPress theme editor. - Add the following code snippet: ``` function update_admin_email() { $new_admin_email = 'new-admin-email@example.com'; $current_user = wp_get_current_user(); if ( $current_user->ID === 1 ) { // Ensure we're updating the main admin user wp_update_user( array( 'ID' => 1, 'user_email' => $new_admin_email ) ); } } add_action( 'init', 'update_admin_email' ) ``` - Replace '`new-admin-email@example.com`' with the desired admin email address. - Save the file and upload it back to your server. ## Why is the admin email change stuck waiting for confirmation? Because WordPress does not apply the change immediately. When you edit the address under Settings then General, it stores the new one as a pending value and emails a confirmation link to the new address. Until someone clicks that link, the site keeps using the old address and the settings screen shows a note saying the change is pending. This is the single most common reason an admin email change appears to fail. Check the new inbox, including spam. If the mail never arrives, your site is probably not sending mail at all, which is worth fixing with SMTP rather than working around. To skip the confirmation entirely, use one of the direct methods above. Editing the option in the database or running the WP-CLI command writes the value straight away, which is also the answer when you no longer have access to the old mailbox. ## How do you get the admin email in code? Use `get_option( 'admin_email' )`, or the shorthand `get_bloginfo( 'admin_email' )`. Both return the site's administration address, which is what WordPress uses for system notices. It is stored as a normal option, so it is also what the WP-CLI and database methods above are writing to. Worth keeping straight: this is the site address, not any individual account. The administrator's own login email lives on their user record and is fetched with `get_userdata()`. Changing one does not change the other, and mixing them up is why password resets sometimes go to an address nobody is watching. ## WordPress Admin Email FAQs save ### Why is my WordPress admin email not changing? WordPress stores the new address as pending and emails a confirmation link to it. The change only applies once that link is clicked, so check the new inbox and its spam folder. If no mail arrives, the site is likely not sending email and needs SMTP configured. ### What is the difference between the admin email and my user email? The admin email under Settings then General is the site address used for system notices. Your user email sits on your own account and receives password resets. They are separate values, so changing one leaves the other untouched. ### How do I change the admin email without access to the old inbox? Use a method that skips confirmation. Update the admin_email option directly in the database with phpMyAdmin, or run the WP-CLI option update command. Both write the value immediately, so no confirmation link is needed. ### Does changing the admin email affect user logins? No. The administration email only receives site notices such as update and new user alerts. Logins use each account username and password, so nobody is locked out when it changes. ### Where does WordPress send admin notifications? To whatever the administration email address is set to at that moment. That covers core update notices, new user registrations and comment moderation mail, which is why an outdated address quietly means missed alerts. ## Final Thoughts That's all about changing the WordPress admin email. No mater you are a beginner or advanced WordPress user, my guidelines will help you to modify your email ID. Remember to follow best practices, prioritize security, and choose the method that best fits your needs. By keeping your admin email up-to-date and secure, you're taking an important step in safeguarding your WordPress site. --- # How to Change Language In WordPress Admin Panel? URL: https://wpadminify.com/how-to-change-language-in-wordpress-admin-panel Last updated: 2026-08-10 Right now, in 2026, [WordPress powers about 43.3% of all websites](https://w3techs.com/technologies/details/cm-wordpress/) out there. That's millions of sites. It reaches users in over 178 countries. But here's the thing: only nine of those countries list English as their official language. Most people speak something else at home. WordPress gets that. It has built-in tools for translations. You can find partial support for around 200 languages. That means you can change language in WordPress admin panel. About 50 languages have full coverage. Every button, error message, and setting shows up translated. No need for extra work on your end. And today we are going to explore how to change language in WordPress admin panel? So, without further ado, let’s start. ## Why Should You Change the Language of WordPress Admin Panel? WordPress is a big deal worldwide. People build sites for all kinds of reasons, from small blogs to huge online stores. But not everyone speaks English fluently. Suppose, you’re not native english speaker. So, if your admin panel, where you manage everything is in English, it can slow you down. You might mix up buttons or menus. Or your team members from other countries could feel lost. Changing the language fixes that. It lets you work in Spanish, French, or the language of your preference. For example, if you run a site for customers in Mexico, a Spanish dashboard makes updates quicker. Teams spread across time zones stay on the same page too. In short, it's a small tweak with big payoffs for comfort and speed. Here's how to [customize WordPress dashboard with and without plugin](https://wpadminify.com/wordpress-dashboard-customization). ## How to Change Language In WordPress Admin Panel? These are the main ways to change language in WordPress admin panel. I've tried to put up a step-by-step process. So anyone and everyone can follow the steps and change the language like a pro. ### Method 1: Changing Language via WordPress Settings This is the easiest way to change language of WordPress admin panel. The general settings gives you the setting to change language easily. So, let's take a look at the procedure of doing so, First you need to log in to your WordPress dashboard. ![Login to your WordPress Dashboard](https://d1k2c27psfzbiv.cloudfront.net/wp-content/uploads/2024/08/12113406/Login-to-your-WordPress-Dashboard.webp) Once you're in, go to the Settings -> General section. Don't know where it is? Check the admin bar on the left. Click on "Settings" From the dropdown and select "General" ![Settings General option in WordPress](https://d1k2c27psfzbiv.cloudfront.net/wp-content/uploads/2024/09/12113408/Settings-General-option-in-WordPress-e1725162007211.webp) Scroll down the General Settings page. There, you'll find the "Site Language" option. You can see all the available languages with its dropdown. ![Site language settings](https://d1k2c27psfzbiv.cloudfront.net/wp-content/uploads/2024/09/12113409/Site-language-settings-e1725161964736.webp) Now, you can choose your desired language through the dropdown. But not seeing your preferred language on the installed list? Well, select your language from the available list of language. And WordPress will automatically download the language pack. ![Select the language you want for your Dashboard](https://d1k2c27psfzbiv.cloudfront.net/wp-content/uploads/2024/09/12113411/Select-the-language-you-want-for-your-Dashboard-e1725161926593.webp) Now, all you need to do this save the settings. Simply click the Save Changes" button. And after refreshing the page, you'll see the WordPress panel is changed with your selected language ![Save the settings button](https://d1k2c27psfzbiv.cloudfront.net/wp-content/uploads/2024/09/12113413/Save-the-settings-button-e1725162145297.webp) ### Method 2: Changing Admin Language for Specific Users Suppose you're running a team from across the globe. And the team consist of players from different countries. Heck different language barrier again! What to do? Well, there's an easy solution. You can change language for specific users in WordPress. Let's see how to do that. Go to to “Users” Click on “All users”. This will open the list of all active users on your website. Now pick the language you want to set for a user. Select the profile you want to change language for and click on edit. ![Individual users profile edit](https://d1k2c27psfzbiv.cloudfront.net/wp-content/uploads/2024/09/12113415/Individual-users-profile-edit.webp) In the profile settings, find the "Language" section. Here you can choose/change language. ![Profile language option](https://d1k2c27psfzbiv.cloudfront.net/wp-content/uploads/2024/09/12113417/Profile-language-option.webp) By default, the language is set to "Site default". But you can change it to [user preferred language](https://wpadminify.com/how-to-create-wordpress-custom-user-dashboard-without-coding) from the dropdown. ![Select language on profile](https://d1k2c27psfzbiv.cloudfront.net/wp-content/uploads/2024/09/12113419/Select-language-on-profile.webp) Now, save the settings and refresh the page. Notify the user to refresh his page as well. This will change the users language to the selected language. ## Advanced Ways to Change Language in WordPress So, we’ve shared how to change language in WordPress admin panel. There are some advanced ways to change for multisites. ### Multisite/Network Setup Considerations Multisite lets one WordPress install run dozens of sites. Like a shared apartment for blogs. Languages get tricky with multiple users. #### Network-Level vs. Per-Site Language Settings [Each subsite acts alone for languages](https://wpadminify.com/features/custom-admin-page). Log into a subsite, go to its Settings > General. From the Network Admin dashboard (under My Sites menu), go to Settings > Network Settings. Add a global default for fresh subsites. Existing ones stick to their own pick. #### Enforcing Defaults and Overrides for Sub-Sites Super admins push packs to all sites at once. Upload via Network Admin > Plugins or Themes. Set a forced default in code if strict (add to wp-config.php: define('WPLANG', 'fr_FR');). Subsites can override in their profiles. ### Additional Tips: Language Management in Login Screen Login is like the front door. So, you should make it friendly. Loginfy is an amazing login page customizer plugin that can change your language of the login screen and much more! [Try Loginfy](https://wpadminify.com/loginfy/pricing) You just install, [pick a color scheme, upload a logo](https://wpadminify.com/wordpress-login-page-white-label-guide) and hit save. For different languages for multi-sites, use the Language Switcher. It’s a quick and easy way to change language on your login screen. ## Conclusion Now that you know how to change language in WordPress admin panel. You can take full advantage of WordPress’s built-in multilingual support. No extra plugins, no coding, just a quick adjustment in settings or user profiles. It’s a beginner-friendly process with professional-level benefits. If you’re running a global business or collaborating with international clients, language is a major barrier. For example, a Spanish admin panel for a Mexico-based store or a French dashboard for a European team ensures easy understanding. Learning how to change language in WordPress admin panel is much more than a simple trick. It’s about making your daily work easier and more efficient. When you manage your site in your native language, you can avoid mistakes and speed up everyday tasks. ## Does the user profile language change the admin only? Yes, and this is the distinction that matters most. WordPress has two separate language settings. Settings then General then Site Language changes the language for the whole site, including the admin, for everyone. The Language field on your own user profile changes only what you see in wp-admin, and leaves the public site and every other user untouched. That makes the profile setting the right tool for a multilingual team. Your client can keep the dashboard in their language while you work in English on the same site, with no plugin and no effect on visitors. It is stored per user as the `locale` meta value, so it follows the account rather than the browser. The profile Language field offers "Site Default" as its first option. Leaving it there means you inherit whatever Settings then General is set to, which is why changing the site language sometimes appears to change nothing for a user who had picked a specific language earlier. ## Why is the admin only partly translated? Switching language and finding half the screen still in English is normal, not a fault. WordPress core is translated very thoroughly, but plugins and themes ship their own translations independently, and any string a developer has not made translatable, or that no volunteer has translated yet, stays in English. So the menu and core screens change while a plugin's settings page does not. Updating to the latest versions helps, since language packs download separately from the plugin itself and often arrive later. If a plugin matters to your client and has no translation at all, that is worth knowing before you hand the site over. ## Frequently Asked Questions (FAQs) save ### Does changing the WordPress admin panel language also translate my website content? No. Switching the admin panel language only changes the dashboard, menus, and settings for administrators and users. Your website’s front-end content (posts, pages, product descriptions) will remain in the language you wrote them. For a multilingual website, you’ll need a plugin like WPML to translate your site content. ### What happens if my chosen language is only partially supported in WordPress? If a language pack is incomplete, some areas of the dashboard will appear in your selected language, while untranslated parts will remain in English. WordPress relies on volunteers for translations, so coverage varies. You can even contribute translations to help complete a language pack. ### Can I set different languages for different roles, like editors or contributors? Yes, but not automatically. You can assign each user their own preferred language under their profile settings. For example, an editor in Spanish and a contributor in German can both work comfortably on the same site, while the site default remains in English. ### Will changing the admin language affect my plugins and themes? It depends. [Many popular plugins](https://wpadminify.com/best-wordpress-dashboard-plugin) and themes come with language packs or rely on WordPress’s translation system. If translations exist for your chosen language, they’ll switch automatically. If not, plugin or theme text may remain in English until translations are provided. ### Can I add a language that isn’t listed in WordPress? Yes. You can manually upload translation files (.po and .mo) to your WordPress installation. Place them in the /wp-content/languages/ directory, and the new language will show up in your dropdown list. This is helpful for rare or regional languages not officially covered. ### Is there a way to quickly switch between multiple admin languages? Yes, you can install a language switcher plugin for the admin area. These tools let you change dashboard languages on the fly without digging into settings. It’s especially useful for site managers who handle multilingual teams. ### Does changing the admin language improve SEO? Not directly. SEO is based on your website’s front-end content, not your admin panel. However, working in your native language can reduce mistakes and improve content accuracy, which indirectly benefits SEO and user experience. --- # How to Add a Custom Menu to WordPress Admin Dashboard (2026 Guide) URL: https://wpadminify.com/how-to-add-menu-in-wordpress-admin-dashboard Last updated: 2026-08-10 Ever feel like you're playing hide-and-seek with your own WordPress dashboard? You know that feature exists somewhere in the menu, but finding it means scrolling through 20+ items while your client waits impatiently. Adding a custom menu to your WordPress admin dashboard isn't just about organization, it's about reclaiming hours of wasted time and eliminating that daily frustration of menu chaos. This comprehensive guide covers both plugin-based and code-based methods to add custom menus to your WordPress admin panel, along with best practices, troubleshooting tips, and real-world use cases. Adding a new menu vs. editing existing ones: this guide covers adding a brand-new custom menu or page to the sidebar. If you instead want to reorder, rename, or hide the menu items WordPress and your plugins already created, see our guide on [how to use the WordPress admin menu editor](https://wpadminify.com/how-to-use-the-wordpress-admin-menu-editor), or how to [remove admin menu items](https://wpadminify.com/remove-admin-menu-items) you do not need. ## What is a WordPress Admin Menu? The WordPress admin menu is the vertical navigation bar on the left side of your dashboard that provides access to all administrative functions. By default, it includes links to Posts, Pages, Media, Comments, Appearance, Plugins, Users, and Settings. As your website grows and you install more plugins, the admin menu can become cluttered with dozens of items, making it difficult to find what you need quickly. Key Components of Admin Menus - Top-level menus: Main menu items (Posts, Pages, Settings) - Submenus: Nested items under parent menus - Menu separators: Visual dividers that group related items - Custom icons: Visual identifiers using Dashicons or custom images - Capabilities: Permission levels that control menu visibility ## Why Create Custom Admin Menus? Benefits of Custom Admin Menus - Improved workflow efficiency: Quick access to frequently used pages reduces navigation time ​ - Better organization: Group related functionality under logical menu structures ​ - Client-friendly dashboards: Hide technical options from clients while maintaining access for developers - Role-based navigation: Display different menu items based on user capabilities ​ - External tool integration: Add links to external platforms like analytics, CRM, or project management tools - Reduced cognitive load: A cleaner dashboard helps users focus on essential tasks Common Use Cases - Agency websites: Create client-specific dashboards with only relevant features - Membership sites: Provide role-based menu access for different member levels - Multi-author blogs: Customize menus based on contributor, editor, and admin roles - E-commerce stores: Group product management, orders, and shipping under custom menus - White-label solutions: Rebrand admin menus with custom icons and labels ## Method 1: Add Custom Admin Menu Using a Plugin Using a plugin is the easiest and most beginner-friendly approach, requiring no coding knowledge. https://www.youtube.com/watch?v=zbEYlAg91QM Add and customize WordPress admin menus with WP Adminify's Menu Editor. Recommended Plugin: [WP Adminify Admin Menu Editor](https://wpadminify.com/features/admin-menu-editor) WP Adminify's Admin Menu Editor offers a visual interface for creating and managing custom admin menus with drag-and-drop functionality. ​ Step-by-Step Instructions - Go to Plugins > Add New in your WordPress dashboard - Search for "WP Adminify" - Click Install Now, then Activate ![Install new plugin in WordPress Dashboard](https://d1k2c27psfzbiv.cloudfront.net/wp-content/uploads/2024/07/12113021/Install-new-plugin-in-WordPress-Dashboard.webp) Step 2: Access Menu Editor Navigate to WP Adminify > Menu Editor in your dashboard Click the Add Item button to create a new menu ![how to add menu in wordpress admin dashboard](https://d1k2c27psfzbiv.cloudfront.net/wp-content/uploads/2024/02/12112427/Add-custom-menu-in-WordPress-Admin.webp) Step 3: Configure Your Custom Menu The menu editor interface displays all configuration options: - Visibility Rules: Hide menus from specific users or roles​ - Menu Title: Enter a descriptive name for your menu item - Menu Link: Specify the destination URL (internal WordPress page or external link) - Capability: Set user role requirements (manage_options, edit_posts, etc.) - Icon Selection: Choose from Dashicons, Simple Line Icons, Themify Icons, or upload custom icons ![Input necessary options in the menu](https://d1k2c27psfzbiv.cloudfront.net/wp-content/uploads/2024/02/12112428/Input-necessary-options-in-the-menu.webp) Step 4: Add Menu Icons WP Adminify supports multiple icon libraries: ​ - Dashicons (WordPress native icons) - Simple Line Icons - Themify Icons - Icomoon Icons - Custom uploaded icons (automatically resized) ![add custom icon for your menu item](https://d1k2c27psfzbiv.cloudfront.net/wp-content/uploads/2024/02/12112433/add-custom-icon-for-your-menu-item.webp) Step 5: Add Separators To visually group menu items: - Enable the Add Separator checkbox - Position the separator above or below specific menus - Save changes Step 6: Create Submenus To add submenu items under any parent menu: ​ - Click the Add Submenu option - Configure submenu title and link - Note: Custom icons are not available for submenus (WordPress limitation) - Create unlimited nested submenus as needed ![WordPress plugin feature - add submenu under any custom menu item professional interface](https://d1k2c27psfzbiv.cloudfront.net/wp-content/uploads/2024/02/12112444/add-submenu-under-any-custom-menu-item.webp) Step 7: Save and Test Click Save Changes and navigate your dashboard to verify the new menu appears correctly with proper permissions. ## Advanced Plugin Features - Conditional display: Show menus only on specific dates or conditions - Menu duplication: Copy existing menus to create variations - Import/export: Transfer menu configurations between sites - Menu item hiding: Temporarily disable menus without deleting - Custom CSS classes: Add styling hooks for advanced customization ## Method 2: Add Custom Admin Menu Using Code For developers who prefer manual control or want to avoid plugin dependencies, WordPress provides built-in functions for custom menu creation. Prerequisites - Basic PHP knowledge - Access to your theme's functions.php file or a custom plugin - Understanding of WordPress capabilities and user roles ### Step 1: Access functions.php - Go to Appearance > Theme File Editor - Select Theme Functions (functions.php) from the right sidebar - Alternatively, access via FTP or cPanel File Manager Safety Tip: Always use a child theme or create a custom plugin to prevent losing changes during theme updates. ### Step 2: Add Basic Custom Menu Code Paste this code into functions.php: ``` /** * Create a custom admin menu */ function wpb_custom_admin_menu() { add_menu_page( 'My Custom Page', // Page title 'Custom Menu', // Menu title 'manage_options', // Capability 'my-custom-menu', // Menu slug 'wpb_custom_menu_callback', // Callback function 'dashicons-admin-generic', // Icon 25 // Position ); } add_action('admin_menu', 'wpb_custom_admin_menu'); /** * Callback function to display menu content */ function wpb_custom_menu_callback() { ?>

Welcome to your custom admin page.

Submenu Content

'; } ``` ![WordPress dashboard customization - Custom admin menu in WordPress Dashboard tutorial guide](https://d1k2c27psfzbiv.cloudfront.net/wp-content/uploads/2024/02/12112451/Custom-admin-menu-in-WordPress-Dashboard.webp) Understanding Function Parameters add_menu_page() Parameters: ​ - $page_title: Browser tab title and page heading - $menu_title: Text displayed in admin menu - $capability: Required user capability (manage_options, edit_posts, read, etc.) - $menu_slug: Unique identifier for the menu (use lowercase with hyphens) - $callback: Function that renders the page content - $icon_url: Dashicon class, image URL, or base64 encoded SVG - $position: Menu position (5=below Posts, 25=below Comments, 60=below Settings) ## Available Dashicons WordPress includes 300+ Dashicons. Popular options: ​ - `dashicons-admin-generic` - `dashicons-admin-settings` - `dashicons-admin-tools` - `dashicons-admin-users` - `dashicons-chart-bar` - `dashicons-analytics` View all icons at: [developer.wordpress.org/resource/dashicons](https://developer.wordpress.org/resource/dashicons/) ## Common Menu Position Values - 2 = Dashboard - 5 = Posts - 10 = Media - 15 = Links - 20 = Pages - 25 = Comments - 60 = Appearance - 65 = Plugins - 70 = Users - 75 = Tools - 80 = Settings - 99 = Bottom of menu ## Advanced Customization Techniques ### Role-Based Menu Display Show menus only to specific user roles: ``` function wpb_role_based_menu() { $current_user = wp_get_current_user(); if (in_array('administrator', $current_user->roles)) { add_menu_page( 'Admin Only Page', 'Admin Menu', 'manage_options', 'admin-only-menu', 'wpb_admin_menu_callback', 'dashicons-shield-alt', 30 ); } } add_action('admin_menu', 'wpb_role_based_menu'); ``` External Link Menus Create menu items that link to external tools: ``` function wpb_external_link_menu() { add_menu_page( 'Analytics Dashboard', 'Analytics', 'manage_options', 'https://analytics.google.com', '', 'dashicons-chart-area', 35 ); } add_action('admin_menu', 'wpb_external_link_menu'); ``` Add Menu Separators Create visual separators between menu groups: ``` function wpb_add_menu_separator($position) { global $menu; $menu[$position] = array( 0 => '', 1 => 'read', 2 => 'separator' . $position, 3 => '', 4 => 'wp-menu-separator' ); } add_action('admin_menu', function() { wpb_add_menu_separator(26); }); ``` ## Menu Disappears After Theme Update Solution: Move custom menu code from theme functions.php to a child theme or create a custom plugin. Security Considerations - Capability checks: Always verify user permissions using current_user_can() - Nonce verification: Add nonce fields to forms on custom menu pages - Data sanitization: Sanitize all user inputs with sanitize_text_field(), wp_kses(), etc. - Output escaping: Use esc_html(), esc_url(), esc_attr() when displaying data - Direct file access prevention: Add `if (!defined('ABSPATH')) exit;` at top of files ## Performance Optimization Lazy load menu content: Don't execute callback code until page is viewed Minimize database queries: Cache menu data when possible Avoid heavy operations in callbacks: Load resources only when menu page is accessed Use transients: Store expensive computations temporarily ### Related Reading [WordPress admin customization guide](https://wpadminify.com/wordpress-admin-customization) [remove admin menu items](https://wpadminify.com/remove-admin-menu-items) [admin menu search](https://wpadminify.com/introducing-admin-menu-search) ## Is this the admin menu or the site navigation menu? Worth settling first, because WordPress uses the word "menu" for two unrelated things. The admin menu is the dark sidebar you see inside wp-admin, holding Posts, Media, Plugins and so on. That is what this guide covers. The navigation menu is the one visitors click on the front of your site, and you build that under Appearance then Menus. If you came here wanting the visitor-facing one, our guide to [creating a custom navigation menu in WordPress](https://wpadminify.com/how-to-create-a-custom-menu-in-wordpress) is the right page. ## How do you add a menu to the network admin on multisite? Hooking `admin_menu` only reaches individual sites. The network dashboard has its own hook, `network_admin_menu`, so register there instead when the page should appear for the network administrator. The callback and `add_menu_page()` arguments are identical, only the hook changes. Two things catch people out. Use the `manage_network_options` capability rather than `manage_options`, or the item is invisible to everyone including you. And if you want the same menu in both places, register it on both hooks: adding it once on `admin_menu` will not surface it in the network admin. ## How do you rename an existing admin menu item? Renaming is not the same as adding. Core items like Posts get their label from WordPress itself, so you are overriding a value rather than creating one. In code you reach into the global `$menu` array and change the label at that item's index, which works but breaks quietly whenever the index shifts after a plugin adds its own item. That fragility is why relabelling is usually better done visually. The [admin menu editor](https://wpadminify.com/features/admin-menu-editor) lets you rename an item, swap its icon and drag it to a new position without touching an index that may move next week. ## Why is the admin sidebar collapsed, and how do you expand it? If your menu shows only icons, it is collapsed rather than broken. Click Collapse menu at the bottom of the sidebar to toggle it back. WordPress stores that state per user, so expanding it for your account does not change what your client sees, and the sidebar also collapses on its own at narrow screen widths. If it stays collapsed after toggling, the usual culprits are a browser cache holding the old user setting or a plugin forcing the state. Hard-refresh first, then test with plugins disabled. ## WordPress Admin Menu FAQs save ### Can I add custom menus without affecting other users? Yes, use capability checks and role-based conditions to display menus only to specific users. ### Will custom menus survive theme updates? Only if added via child theme, custom plugin, or site-specific plugin. Avoid editing parent theme files directly. ### Can I reorder existing WordPress menus? Yes, using plugins like WP Adminify or by manipulating the global $menu array with code. ### How many custom menus can I add? There's no hard limit, but too many menus create usability issues. Focus on consolidation and organization. ### Can I add menus that link to external websites? Yes, specify the external URL as the menu slug parameter in add_menu_page(). ### Do custom menus work with multisite? Yes, use the network_admin_menu hook instead of admin_menu for network admin menus. ### Can I hide default WordPress menus? Yes, using remove_menu_page() function or menu editor plugins. ## Conclusion Creating custom admin menus in WordPress significantly improves dashboard organization and user experience. For non-developers, plugins like WP Adminify provide intuitive interfaces for menu management without coding. Developers who prefer full control can use WordPress's add_menu_page() and add_submenu_page() functions to create fully customized solutions. Start by identifying which menus you use most frequently, plan your menu structure logically, and implement either the plugin or code method based on your technical comfort level. Regular testing with different user roles ensures your custom menus provide the right access to the right people. But, if you’re not into coding, [WP Adminify](https://wpadminify.com/pricing) will help you with that. You can create your custom menus without any trouble. --- # WP Adminify: Year in Review URL: https://wpadminify.com/year-in-review-2024 Last updated: 2026-08-10 2024 has been a transformative year for WP Adminify, cementing its place as a must-have tool for WordPress professionals. From a complete UI redesign to restructuring features and introducing performance-focused updates, we’ve worked tirelessly to make sure you have dashboard customization tool that’s smoother, faster, and more powerful than ever. This year’s improvements were driven by user feedback and a commitment to delivering a cleaner, more efficient admin experience. Let's take a detailed tour through everything we’ve done this year. ## The Major Update: Version 4.0 Throughout the year, we continued making little fixes and improvements here and there but our main focus was the launch of WP Adminify V4.0. We released it in August and it marked a pivotal moment for WP Adminify in 2024, introducing a suite of transformative changes aimed at delivering a cleaner, faster, and more intuitive plugin experience for our users. With this update, we focused on redefining how users interact with their dashboards by focusing on design, usability, and performance. ### UI Redesign: Clean, Intuitive, and Accessible The older UI was just that: OLD! Although some of our older users did object to the change we felt that the change in the UI was in the best interest of all our users. Our old UI which took a module-based approach was a bit sluggish and not intuitive to new users. With the new UI, we decided that user experience should be our top priority. Everyone should be able to use WP Adminify to its maximum capacity, not just seasoned WordPress users. The new UI organized all of our features into 8 distinct categories so that users know at a glance where to find what. ![WP Adminify new UI](https://d1k2c27psfzbiv.cloudfront.net/wp-content/uploads/2025/02/01061415/WP-Adminify-new-UI.webp) Every visual and functional aspect of the dashboard was meticulously redesigned to ensure better usability and modern aesthetics. The new design eliminates any guesswork on the user end and makes it much much easier to adopt the plugin for all types of users. Now you can install the plugin and start using to it’s max capabilities from day 1. ### Optimized Features for Better Usability Version 4.0 removed outdated and lesser-used options, paving the way for a more efficient user experience. - Removal of Legacy Tabs: The legacy Screen Options Tab and Help Tab were removed, simplifying the interface and reducing distractions. - Menu Width and Favicon Customization: Refined style settings for menu width and favicon customization gives users more control over their workspace. ### Faster and More Efficient Performance Performance improvements were at the heart of this major update, ensuring smoother interactions and faster dashboard operations. - Core Optimizations: The plugin underwent significant backend enhancements to minimize server load and improve dashboard loading speeds. - Reduced Server Strain: These optimizations ensure better resource management, making WP Adminify a reliable choice even for users on shared hosting environments. Version 4.0 represents WP Adminify's commitment to innovation and its dedication to creating a WordPress admin experience that's as efficient as it is enjoyable. ## Converting Certain Features into Addons In 2024, WP Adminify took a strategic leap forward by modularizing several of its features, transforming them into standalone plugins. This decision stemmed from a commitment to improving performance and user flexibility while reducing plugin bloat. ### The Reason Behind Separation Over time, WP Adminify evolved into an all-encompassing plugin, packed with features that catered to a wide range of users. While this comprehensive approach was beneficial, it also meant that some users ended up with features they didn’t need, potentially affecting performance and usability. Some features were just incurring too many resources. Features such as the Login Customizer and Header & Footer Scripts were slowing down WP Adminify. The plugin was simply too heavy at this point. To address this, we chose to separate these functionalities into individual add-ons, enabling users to activate only the features that align with their specific requirements. This modular framework allows users to: - Activate Only What They Need: Users can now install only the features relevant to their workflow. - Improve Dashboard Performance: A lighter core plugin minimizes server strain and enhances loading speeds. - Simplify Feature Management: Standalone plugins offer focused functionality for easier configuration and updates. We also published a full length blog on the [whole v4.0 update](https://wpadminify.com/what-is-new-in-wp-adminify-v4-0), if you're interested in getting more information. ### Features Now Available as Standalone Plugins The following features were spun off into their [own plugins](https://wpadminify.com/addons), providing users with the flexibility to activate them as needed: Login Customizer (Loginfy): Create branded and customizable login pages with advanced styling options. Admin Columns Editor: Adjust and organize admin columns for a more tailored overview of data. Header Footer Scripts: Easily manage and add scripts to your site’s header or footer without touching code. Quick Menu: Simplify navigation by creating custom menus for faster access to frequently used tools. Activity Logs: Keep track of user actions and changes across your WordPress site with detailed logs. Google Pagespeed: Analyze and optimize your site’s performance with real-time Google Pagespeed insights. Sidebar Generator: Generate and manage custom sidebars for different pages, posts, or categories. ### The Benefits of Separation Version 4.0 brings dramatic performance improvements thanks to the separation of our core plugin. Users will see drastically faster page loads, lighter server usage, and smoother overall performance. Initial testing shows an impressive 82% reduction in page load time and 50% fewer database queries. Check out our [full 4.0 release post](https://wpadminify.com/what-is-new-in-wp-adminify-v4-0) to see all the performance metrics and benchmarks that showcase just how much faster your site will run. ## Major Bug Fixes and Compatibility Improvements As part of our commitment to delivering a stable and reliable experience, 2024 was a landmark year for addressing long-standing issues in WP Adminify. Version 4.0 introduced a series of major bug fixes and compatibility improvements, ensuring a smoother, conflict-free experience for all users. ### Resolved Issues 1. Admin Menu Layout Bugs Users often reported inconsistencies in the admin menu layout, particularly with custom menus. These glitches occasionally affected alignment, dropdowns, and visibility, creating a suboptimal user experience. With V 4.0, we thoroughly revamped the admin menu system to eliminate these issues, ensuring menus render correctly across all configurations. 2. Menu Alignment Glitches Misaligned menus were a recurring challenge, especially for users with custom setups or unique site configurations. We identified the root causes, including CSS conflicts and layout inconsistencies, and introduced robust fixes to ensure pixel-perfect alignment for all menus. 3. Multisite Conflicts Managing multisite networks is already complex, and previous versions of WP Adminify occasionally introduced complications. Users experienced dashboard inconsistencies and unexpected behavior when switching between sites. Version 4.0 resolved these conflicts, ensuring smooth performance across all sites in a multisite network, regardless of scale. 4. Notification Handling Outdated notification handling mechanisms led to unnecessary clutter, delayed updates, and conflicts with third-party tools. The latest update streamlines the notification system, making plugin and theme update alerts more intuitive and reducing redundancy. Enhanced Compatibility In addition to resolving bugs, WP Adminify expanded its compatibility with several popular WordPress tools. This ensures that users who rely on these essential plugins and page builders can use them seamlessly alongside WP Adminify. 1. SEO Plugins Rank Math SEO and Yoast: WP Adminify is now fully compatible with leading SEO tools, ensuring that your admin interface integrates seamlessly with their dashboards. Whether you're optimizing content or analyzing performance, the interface remains distraction-free and smooth. 2. Page Builders Elementor and Divi: As two of the most widely used page builders, Elementor and Divi compatibility is critical. WP Adminify now ensures complete alignment with both, so users can manage their design and content workflows without experiencing layout disruptions or performance lags. 3. Third-Party Tool Conflicts Beyond specific plugins, we identified and resolved compatibility issues with a range of third-party tools. From caching plugins to e-commerce solutions, WP Adminify now plays nicely with most tools in the WordPress ecosystem. These bug fixes and compatibility improvements aren’t just technical tweaks, they address real pain points that users have faced. With a more stable admin interface, seamless third-party integration, and a clutter-free dashboard, WP Adminify empowers you to focus on what matters: managing your website efficiently. Whether you're optimizing for SEO, designing pages, or maintaining a multisite network, WP Adminify ensures a hassle-free experience at every step. The [free version](https://wordpress.org/plugins/adminify/) also saw substantial performance improvements. It's now faster and more intuitive allowing new users to get into the plugin more easily. ## Behind the Scenes: Website Transformation This year, It wasn’t just the plugin that underwent significant change, the [WP Adminify website](https://wpadminify.com/) was also augmented to ensure enhanced user experience, scalability, and performance. The most noteworthy change was transitioning to headless WordPress, alongside substantial updates to the documentation and support sections. Transition to Headless Architecture We reimagined the WP Adminify website by adopting a headless CMS approach, separating the frontend from the backend. This architectural shift brings a host of benefits: - Faster Page Load Times: By utilizing a modern frontend framework, pages now load almost instantly, offering a seamless browsing experience for visitors. - Improved Scalability: As the user base and website traffic grow, the headless architecture ensures that the website can handle higher loads without compromising performance. - Enhanced User Experience: The decoupled front end allows for smoother transitions between pages and a more interactive experience, creating a website that feels modern and responsive. New user focused pages and updated documentation Along with the plugin redesign, we decided to reorganize our website content to better align with what WP Adminify offers to users. We added a few user focused pages for both [Agencies](https://wpadminify.com/agencies) and [Freelancers](https://wpadminify.com/freelancer) so that its easier for these user types to understand how they may use WP Adminify for their custom workflows. We also reworked our entire [documentation](https://wpadminify.com/docs) to ensure users can easily find solutions and support despite the plugin overhaul. We focused mainly on: - Simplified Navigation: The documentation structure was reworked for clarity, grouping topics intuitively and making it faster for users to locate relevant articles. - Search Improvements: A smarter, more efficient documentation hub with a fast search function now ensures users can find answers to their queries in seconds, saving time and reducing frustration. - Separate Documentation for Addons: We also added separate documentation for all our different addons so that users can easily find what they need. Visitors now enjoy faster website interactions, and existing customers benefit from quicker access to organized resources. This transformation reflects our dedication to not only innovating the WP Adminify plugin but also delivering value at every touchpoint of the user journey. ## The Blog We also started writing more for our [blog](https://wpadminify.com/blog) as at the end of the day we are also WordPress users and are navigating WordPress every day. We’ve learned a lot through our journey over the years and our blog is the perfect platform for us to share the experiences with you guys. We’ve been publishing regularly since mid-2024, covering much searched for topics such as [dashboard loading issues](https://wpadminify.com/guide-to-fixing-wordpress-dashboard-not-loading), [WordPress admin panel guides](https://wpadminify.com/complete-guide-to-wordpress-admin-panel-for-beginners) and [Admin bar customizations.](https://wpadminify.com/hide-admin-bar-based-on-user-roles) We aim to carry this over to 2025 and onwards. We’re looking to get into more interesting topics such as WooCommerce, performance optimizations, productivity, and security. We’re also looking to add more [reviews](https://wpadminify.com/wp-adminify-vs-uipress), case studies and product comparisons and product listings to our blog in the coming year. We have big things planned for 2025! ## New Features Introduced Control Heartbeat API One of the most notable additions to WP Adminify in late 2024 was the Control Heartbeat API. This feature addresses a long-standing issue for WordPress administrators: the default AJAX calls that WordPress sends to the server at regular intervals. With the Control Heartbeat API, admins now have the ability to: - Fine-Tune Backend Behavior: Adjust the frequency of AJAX calls based on specific site needs, ensuring the backend performs optimally. - Reduce Server Load: High-traffic sites can benefit from fewer server requests, minimizing resource strain and improving stability during peak usage. - Enhance Site Performance: By limiting unnecessary processes, both the backend and frontend see noticeable performance improvements. This feature is a direct response to user requests for better backend control and optimization, highlighting the importance of feedback in shaping our updates. ## Looking Ahead to 2025 As we move into 2025, WP Adminify is gearing up for an exciting year filled with innovations and enhancements designed to meet the evolving needs of our users. User feedback remains a cornerstone of our development strategy, and we’re excited to introduce many new features based around productivity, security and performance. Keep reaching out to us at our [support](https://wordpress.org/support/plugin/adminify/#new-topic-0) and sharing with us the changes you'd like to see in 2025. --- # How to Monitor User Activity in WordPress With Activity Logs URL: https://wpadminify.com/how-to-monitor-user-activity-in-wordpress Last updated: 2026-08-10 Any WordPress website runs on multiple users. This mostly includes authors, editors, contributors, admins, customers, even custom users. Each of them performs actions that could affect your site's performance, security, or content quality. But without proper visibility into what's happening behind the scenes, you're always a step behind. I’ve talked with a bunch of WordPress website owners. And these are the most common questions for almost every website owner. - Was a post deleted or unpublished by mistake? - Did someone change plugin settings that broke your layout? - Is an unauthorized user trying to log in from an unknown IP? In my knowledge, I’ve personally felt these issues too. So I was looking for something like a plugin that can help monitor these activities. I’ve found some in my initial search, they were popular. But, the issue was they were heavy. It was kind of slowing down my backend processing and work. So, I’ve continued on to the next one. And then the next. After multiple options, I got my hands on the Activity Log. First, I was a bit pessimistic to try it, because it was a modular plugin from WP Adminify. But after installing it, and using it for a while, my perception changed. It was working as mentioned in the site, and the best part, it was damn sure lightweight. So, today, I'm going to tell you how to monitor user activity in WordPress with Activity Logs. ## So, what is Activity Logs? Activity Logs is a powerful feature in [WP Adminify](https://wpadminify.com/). It helps you monitor, track, and review every user action inside your WordPress site. It records what happens, when, and who did it. Activity Logs provides clear, searchable logs that help you monitor the real problems so you can take action promptly. Note: Activity Logs is a separate modular plugin that will work even without the WP Adminify. [Try Activity Logs For Free](https://wpadminify.com/activity-logs) [Documentation](https://wpadminify.com/docs/activity-logs) So, for this article, my goal is to tell you how to monitor user activity in WordPress using Activity Logs. And share some secrets of how it improves your site's overall security. ## The Need for Monitoring User Activity in WordPress Let’s look at the real problems user activity logs solve: ### 1. Security Monitoring You can instantly spot suspicious behavior like repeated failed login attempts or unauthorized role changes. This gives you an early warning before a possible security breach. ### 2. Content Accountability On multi-author sites, it’s common for editors or contributors to make changes without notice. Activity Logs let you trace back any post edits, deletions, or publish actions. ### 3. Troubleshooting Site Issues If your site breaks or behaves unexpectedly, logs can tell you what changed recently, maybe a plugin was activated or a setting was modified. ### 4. WooCommerce Management For store owners, it’s essential to monitor who edits products, updates stock, or changes order statuses. Every change impacts customer experience, and logs help maintain order accuracy. ### 5. Compliance and Auditing Running a membership or corporate site? Activity logs support compliance and auditing by providing a history of administrative decisions and user actions. ## Meet WP Adminify’s Activity Logs Feature WP Adminify is a lightweight, modular WordPress plugin that enhances your admin experience. One of its most powerful modules is Activity Logs. This feature provides an intuitive dashboard that records and displays all significant user actions on your WordPress site. Here’s how it works and why it’s better than most standalone activity logger plugins. ### 1. Simple, Searchable Interface Activity Logs has a clean interface with real-time data. You can view user actions at a glance, and search logs by: - Username - User role - IP address - Date range - Action type There’s no clutter or learning curve. Just point, click, and get the info you need. ### 2. Tracks 50+ WordPress Actions Automatically Once enabled, WP Adminify starts tracking all core WordPress activities, such as: ![WP Adminify activity logs showing recent user actions in WordPress](https://d1k2c27psfzbiv.cloudfront.net/wp-content/uploads/2024/10/18103544/Track-WordPress-Dashboard-activity-logs.webp) - New post or page creation - Post updates and deletions - Media uploads or removals - Comment approvals or deletions - Plugin and theme installations - Plugin activations and deactivations - Settings changes - Profile edits And more…! ### 3. Filter Logs by Specific Criteria Activity Logs allows advanced filtering. You can sort data by: - Username - Action (like login, post update, plugin activation) - IP address - User role - Time range ![Filter activity logs based on time user and type](https://d1k2c27psfzbiv.cloudfront.net/wp-content/uploads/2024/10/18103547/Filter-activity-logs-based-on-time-user-and-type.webp) This helps you focus only on the data you need. No sifting through irrelevant entries. ## Real-World Use Cases Let’s say you’re managing a client site and a page disappears. With Activity Logs, you can immediately check: - Who deleted the page - When it was deleted - From which IP address the action happened Or maybe your WooCommerce store has inconsistent stock levels. Logs show who updated the inventory and whether it was done manually or via an import tool. Even in cases of plugin conflicts, you can pinpoint whether someone recently activated or deactivated anything. ## How to Enable and Use Activity Logs in WP Adminify ![Activity Logs Addon installation](https://d1k2c27psfzbiv.cloudfront.net/wp-content/uploads/2024/10/18103549/Activity-Logs-Addon-installation.webp) Step 1: Install and activate WP Adminify from the WordPress plugin repository or your downloads area. Step 2: Navigate to WP Adminify → Addons. Step 3: Click to Install Activity Logs module. Step 4: Visit Activity Logs to view logs in real time. ![Where to find Activity logs option](https://d1k2c27psfzbiv.cloudfront.net/wp-content/uploads/2025/05/18103542/Where-to-find-Activity-logs-option.webp) That’s it! No need for external plugins or complicated configurations. Also, you can sort the logs with different denominators. ![Sort Activity logs in ascending or descending](https://d1k2c27psfzbiv.cloudfront.net/wp-content/uploads/2024/10/18103545/Sort-Activity-logs-in-ascending-or-descending.webp) And, you can set the data store times as well. The default is 30 days, meaning the logs will be erased after 30 days. ![Set default activity logs data store time](https://d1k2c27psfzbiv.cloudfront.net/wp-content/uploads/2024/10/18103546/Set-default-activity-logs-data-store-time.webp) ## Performance Optimized, GDPR Friendly Unlike many loggers that slow down your backend, WP Adminify is performance-optimized. It stores logs efficiently and allows you to set auto-deletion schedules to avoid bloating the database. For compliance-conscious users, logs can be configured to respect GDPR data policies. You can choose to anonymize certain user data or delete logs after a set time. ## Take Full Control of User Activity in WordPress Knowing what’s happening on your WordPress site shouldn’t be a guessing game. WP Adminify’s Activity Logs gives you instant, detailed, and organized insights into user behavior. Securing your site to improving team accountability Activity Logs will keep a track of everything. Managing different users won't be an issue anymore. If you’re serious about running a stable, secure, and professional WordPress site, Activity Logs is not optional. It’s essential. ## Frequently Asked Questions (FAQs) save ### Is WP Adminify free? Yes, WP Adminify offers a free version with core modules, including Activity Logs. ### Can I use Activity Logs on client websites? Absolutely. It’s ideal for agencies, developers, and anyone managing client sites. ### Does it slow down my site? No. WP Adminify is lightweight and optimized to store logs efficiently without affecting site speed. ### Can I delete or archive old logs? Yes, you can manually delete logs anytime. --- # InfinityFree WordPress Hosting Review (2026) - Is It Worth It? URL: https://wpadminify.com/infinityfree-wordpress-hosting Last updated: 2026-08-10 Looking for free WordPress hosting in 2026? InfinityFree promises zero-cost hosting with no credit card required, but here's the critical truth: 90% of users abandon it within 3 months due to one dealbreaker most reviews won't tell you about. Before you waste hours setting up a site you'll just migrate later, read this honest review. We'll cover exactly what's free, what's broken, and whether WP Adminify can fix the biggest InfinityFree limitation. InfinityFree promises exactly that. A genuine free tier to launch your WordPress site. Zero payment info required. But here's what nobody tells you: 90% of people who start with InfinityFree end up frustrated, migrating within months. Why? Because free hosting has hidden costs that hit hard when your site matters. This guide cuts through the hype. You'll learn exactly when InfinityFree works, when it fails catastrophically, and the one critical limitation that kills most sites before they grow. Ready to see if it's right for YOU? Let's cut to the chase. ## Why Choose (or Avoid) InfinityFree for WordPress? Let's break down the real deal. Is InfinityFree WordPress hero or a potential headache? ## Why Choose InfinityFree? Truly, Actually Free: No credit card. No trials. Just sign up and host. A rare find. Surprisingly Generous: 5GB storage? ~50,000 monthly visits? 400(!) databases? That's massive for $0. Versions: Runs the latest PHP & MySQL. Your WordPress core stays happy and updated. Security Basics Covered: Free Let's Encrypt SSL (the padlock!) and Cloudflare CDN integration come standard. Essential. Decent Control Panel: It's not cPanel, but it gets the job done for managing your site and database. ## Why avoid InfinityFree? NO Email Hosting: This is HUGE. You CANNOT create email addresses (like you @ yourdomain.com) on the free plan. Performance: Shared resources mean sluggish speeds under pressure. Strict CPU/memory caps will throttle you. Uptime isn't guaranteed: Free users aren't the priority. Expect occasional hiccups or downtime. Locked Out of Advanced Tools: No SSH access limits deep troubleshooting or fancy optimizations. Broken Scheduling: Short cron intervals often break WordPress tasks (like publishing future posts or backups). Strict Rules: Break their TOS (heavy resource use, copyrighted stuff, certain scripts) and poof - suspended. ## Who Wins with InfinityFree WordPress hosting? Absolute Beginners: Learn WordPress without spending a dime. Testers & Tinkerers: Try out themes, plugins, or ideas risk-free. Hobbyists & Portfolio Sites: Low-traffic personal blogs or simple showcase sites? Perfect fit. Temporary Projects: Need a staging area or a short-term demo site? Ideal. ## Who should stay away? Businesses: Unprofessional downtime? No email? Just... no. E-commerce Stores: Slow speeds + no guarantees = lost sales. Growing Blogs: Hit 50k visitors? Prepare for a rude awakening. Anyone Needing Email: Seriously, the lack of email is a massive functional gap. ## Installing WordPress on InfinityFree InfinityFree doesn't use cPanel. Their custom panel works, but feels different. Stay calm - we've got visuals. ✅ Prerequisites: ## An InfinityFree account Just visit [https://www.infinityfree.com/](https://www.infinityfree.com/) and click on the register button. Now sign up with Google, GitHub, or any existing email. After completing the registration, you'll be prompted to add a domain. You can choose from various domain extensions or use their free subdomain (yoursite.epizy.com), as shown in the screenshot below. Input your name and check availability. After passing the availability, just add the domain and wait for a few minutes. That's it - if you are happy with a free domain. Now, what if you want to add your custom domain to your account? Just navigate to your account and click on add domain button, just like the following screenshot. Now, click on Add custom domain button. As soon as you click on this button, a new domain input field will appear. Just add your domain name here without https or www. Then click on the submit button. Here, you have to navigate to your domain DNS editing panel. Modify your nameserver to `ns1.infinityfree.com` , and `ns2.infinityfree.com`. Also Add a CNAME record to your domain DNS panel too. After updating your nameserver and CNAME. Just click on the "Add domain" button and within a few minutes it will be completed. ## Install WordPress with Softaculous Apps Installer Visit your main account page, and you will notice an option called Script Installer. Just click on this and it will redirect you to the Softaculous Apps Installer. Now, the first option should be [WordPress](https://wordpress.org/) by default. If it's not, then please scroll a little bit and search for WordPress. Click on the install button under WordPress. Now, input the admin username, password, site title, tagline, whatever you prefer for your WordPress Website. Scroll down to the bottom and click on the "Install" button and wait a minute. As soon as the installation is completed. You will notice a `/wp-admin/` link of your domain where you have installed WordPress. Just click on this link and it will redirect you to the WordPress dashboard. ## Installing a plugin in InfinityFree WordPress dashboard? Just navigate to Plugins > Add new button. Search for a plugin like "[WP Adminify](https://wordpress.org/plugins/adminify)". Now click on the install button. As soon as the install is complete, just click on the activate button. You can turn on [WP Adminify UI](https://wpadminify.com/features/dashboard-customization) and customize the default WordPress Dashboard to something new for your personal or clients website. Want more control? Check out the [full feature set](https://wpadminify.com/features) to see what's possible with proper dashboard customization. In the same way, you can add any other plugin and upload themes too. InfinityFree WordPress can be your first choice to start debugging your site. Once you're ready to customize like a pro, grab [WP Adminify](https://wpadminify.com/pricing) to transform your dashboard. ## Common InfinityFree WordPress Issues ## Database Connection Error Seeing "Error establishing a database connection"? Your site can't talk to its MySQL database. Fix it: Double-check your wp-config.php file. Ensure the database name, username, and password exactly match what you created in the InfinityFree control panel. Still stuck? Verify your database is active in "MySQL Databases". Suspended databases show this error. ## White Screen of Death (WSOD) A blank page after login or visiting your site? Usually a plugin/theme conflict or memory crash. Act fast: Use InfinityFree's File Manager. Rename the plugins folder (to plugins_old). This disables all plugins. If the site loads, reactivate plugins one by one to find the culprit. No luck? Switch to a default theme (like Twenty Twenty-Four) by renaming your current theme folder temporarily. ## Scheduled Posts Not Publishing Future posts stuck in "Scheduled" purgatory? InfinityFree's short cron intervals break WordPress scheduling. Guaranteed fix: You MUST disable internal cron and use an external trigger. First, add define('DISABLE_WP_CRON', true); to wp-config.php. Then: Create a free job at cron-job.org hitting https://yoursite.com/wp-cron.php every 15 minutes. ## Extremely Slow Admin or Frontend Dashboard lagging? Pages taking ages to load? Resource limits are likely maxed out. First: Check your InfinityFree control panel's "Account Status" for CPU/RAM overages. If red, aggressively optimize: enable caching, compress images, delete unused plugins. Still slow? Install the Query Monitor plugin. It reveals resource-hogging plugins or scripts. Deactivate offenders immediately. ## Locked Out of WordPress Admin Login page loops or rejects your password? Often a security plugin conflict or corrupted login cookies. Regain access: Clear your browser cache/cookies or try incognito mode. No success? Use File Manager to rename security plugins (like wps-hide-login or wordfence). This disables them. Log in, then reconfigure carefully. ## Your Account Has Been Suspended The nightmare scenario. You violated InfinityFree's TOS - usually by exceeding CPU limits or running banned scripts. Damage control: First, check the suspension email for details. Reduce resource usage: delete cache files, optimize images, and remove unused themes/plugins. Appeal: Submit a polite support ticket explaining your fixes. Wait 24-48 hours. Prevention: Follow all optimization steps in Section IV religiously. ## Mixed Content Warnings (Broken Padlock) HTTPS site showing "Not Secure"? Some assets (images, CSS) load via insecure HTTP. Solve it: Install the Better Search Replace plugin. Run a search for `http://yourdomain.com` => replace with `https://yourdomain.com` on all tables. Test: Force-refresh your site (`Ctrl+F5`). The padlock should return. ## InfinityFree Pro: Is the Upgrade Worth Your Cash? Short Answer: YES if you need email hosting or hit free limits. &, NO if you're just testing or running a tiny static site. Let's break down why. ## What Pro Actually Fixes InfinityFree Pro solves the biggest free-tier headaches. No vague promises. FINALLY, Email Hosting! Create real you@yourdomain.com addresses. Huge for legitimacy. Includes: Webmail access, SMTP, POP3/IMAP. Basic but functional. Resource Boost Higher CPU/RAM limits. Fewer slowdowns or suspensions under moderate traffic. Your site feels less "free" and more "functional." Longer Cron Execution WordPress scheduling (posts, backups) works reliably. No more external cron hacks from my mentioned hacks. Daily Backups + 1-Click Restore Automatic backups stored off-server. Lifesaver for clumsy moments. Free tier has ZERO backups. This alone justifies Pro for some. Premium CDN (Faster Global Speeds) Better than the free Cloudflare integration. Assets load quicker worldwide. ## The Cost (2025 Pricing) $5.99/month (billed annually at $71.88). OR one-time $129 for lifetime access (rare promo). Compared to Budget Hosts: Hostinger Premium WordPress: $2.99/month (renewal $8.99) – includes email, backups, staging. Namecheap Stellar: $4.48/month – includes domain, professional email. So, the Pro is not the cheapest. But it's familiar if you love InfinityFree. ## Who Should Seriously Consider Pro? You NEED Email Hosting: Free tier's no-email policy is a dealbreaker. Pro solves it cleanly. You've Outgrown Free Limits: Getting CPU warnings? Traffic growing? Pro eases the pressure. You Value Simplicity: Already know InfinityFree's quirks? Upgrade without migrating. You got the Lifetime Deal: $129 forever is a steal for these features. ## Who Should Skip Pro? Casual Testers/Hobbyists: Free tier suffices for sandbox sites. Save your cash. Business Sites: Invest in managed WordPress hosting (e.g., Hostinger, SiteGround). Get better support and reliability. Traffic-Heavy Sites: Pro helps, but won't match $8-$15/mo hosts for scalability. Email Power Users: Pro email is basic. For advanced features (calendars, filters), use Google Workspace or MXRoute. The Smart Alternative: Don't love Pro's limits? Migrate to budget hosting: - Hostinger: $2.99/month (WordPress-optimized). - Namecheap: $4.48/month (cPanel + free domain). - DreamHost: $2.95/month (free email + SSL). - All include email, backups, and scale better than Pro. Otherwise, a $3-$4/month host gives more feature. Use InfinityFree Pro as a patch - not a long-term foundation. Related Reading - [White label WordPress for client sites](https://wpadminify.com/features/white-label) - [WP Adminify vs UIPress comparison](https://wpadminify.com/wp-adminify-vs-uipress) ## The Final Word InfinityFree is remarkable for what it is: a free, no-strings-attached WordPress testing ground. Use it to learn, experiment, or host something small and personal. But the moment your site needs reliability, email, or room to grow? Move on. Invest a few dollars monthly in purpose-built WordPress hosting. The peace of mind, professional tools, and room to breathe are worth infinitely more. Your site's foundation matters. Choose wisely. And when you're ready to customize your WordPress dashboard like a pro, [WP Adminify](https://wpadminify.com/pricing) has you covered. --- # How to Hide Admin Notices in WordPress (Without Breaking Your Site) URL: https://wpadminify.com/hide-admin-notice-in-wordpress Last updated: 2026-08-10 You are in the zone, ready to tackle your [WordPress dashboard](https://wpadminify.com/wordpress-dashboard-customization). Then BAM, another notification banner pops up. Before you know it, you have spent 20 minutes dismissing alerts instead of doing actual work. Here is the frustrating truth: those [admin notices](https://wpadminify.com/features/disable-admin-notices) are not just annoying, they are killing your productivity. And if you are managing [client sites](https://wpadminify.com/agencies), the chaos multiplies. Every plugin, every theme, every WordPress core update adds its own voice to the noise. Good news? You can silence the clutter. In this guide, I will show you exactly how to hide admin notices in WordPress, permanently. No code required. Let us reclaim your dashboard. ## Why WordPress Admin Notices Become a Problem Admin notices were designed to be helpful, informing you about updates, security issues, or configuration problems. But in practice, they quickly become overwhelming: - Plugin overload: Every installed plugin feels entitled to show its own notice - Duplicate notifications: Multiple plugins alerting about the same WordPress update - Persistent reminders: Notices that won't disappear even after you've taken action - Client confusion: Non-technical users get overwhelmed by technical warnings - Dashboard clutter: Important information gets lost in the noise ## Method 1: Hide Admin Notices with WP Adminify (Recommended) [WP Adminify](https://wpadminify.com/pricing) provides the most comprehensive solution for managing admin notices. Here's how to use it: ### Step 1: Install and Activate WP Adminify If you haven't already, [install the free WP Adminify plugin](https://wordpress.org/plugins/adminify/) from the WordPress repository. For advanced features, upgrade to [WP Adminify Pro](https://wpadminify.com/pricing). ### Step 2: Access Admin Notice Settings Navigate to WP Adminify → Admin Notices in your WordPress dashboard sidebar. ### Step 3: Configure Notice Hiding You have several options for hiding notices: - Hide All Notices: Toggle this to completely remove all admin notices - Selective Hiding: Choose specific notice types to hide while keeping others visible - Role-Based Control: Hide notices for specific user roles (e.g., hide from editors but show to admins) - Temporary Override: Use the admin bar toggle to temporarily show/hide notices on demand ## Method 2: Code-Based Solutions (For Developers) If you prefer a code-based approach, you can add these snippets to your theme's `functions.php` file or a custom plugin. ### Hide All Admin Notices ``` add_action('admin_init', function() { remove_all_actions('admin_notices'); remove_all_actions('all_admin_notices'); remove_all_actions('network_admin_notices'); }); ``` ### Hide Specific Plugin Notices To hide notices from specific plugins, target their notice hooks: ``` // Example: Hide WooCommerce notices remove_action('admin_notices', 'woocommerce_admin_notice'); // Example: Hide Yoast SEO notices remove_action('admin_notices', 'yoast_wpseo_admin_notice'); ``` ## Best Practices for Admin Notice Management When hiding admin notices, keep these best practices in mind: - Don't ignore critical security notices: Always review security-related alerts before hiding them - Test thoroughly: Ensure hiding notices doesn't break plugin functionality - Document your changes: Keep track of which notices you've hidden and why - Use role-based hiding: Allow administrators to see notices while hiding them from other users - Monitor for important updates: Regularly check for critical updates even when notices are hidden ## Still Wondering About Admin Notices? Let's Clear It Up ### What happens if I hide all admin notices? You will not miss critical updates. WP Adminify shows a summary badge, so you stay informed without the clutter. You can always re-enable notices temporarily when needed. ### Can I hide notices only for certain user roles? Yes. WP Adminify allows role-based notice control. You can keep notices visible for admins while hiding them from editors or authors. ### Will hiding notices break plugin functionality? No. Notices are informational only. Hiding them does not affect plugin features or updates. ### How do I temporarily show notices again? Disable the hide feature in [WP Adminify settings](https://wpadminify.com/pricing), or use the admin bar toggle to show/hide on demand. ### Can I hide specific notices but keep others? Yes. Use the selective hide feature to target specific notice types while keeping critical alerts visible. ### Do hidden notices still log in activity logs? Yes. WP Adminify tracks all notices in [activity logs](https://wpadminify.com/activity-logs) even when hidden from view. ### What if I miss an important update notice? WP Adminify shows a summary badge with pending notifications, so you never miss critical updates. --- # How to Show Last Login Column in WordPress Users List (2026) URL: https://wpadminify.com/how-to-show-last-login-column-in-wordpress-users-list Last updated: 2026-08-10 Ever opened your WordPress Users screen and wondered, "When did this person last log in?" By default, WordPress doesn't track or display user login timestamps - a frustrating gap when you're managing a multi-author blog, membership site, or client project with several admin accounts. Knowing when each user last logged in helps you spot inactive accounts, identify potential security issues, and keep your team accountable. In this guide, you'll learn two ways to add a Last Login column to your WordPress Users list: the quick, no-code method using [WP Adminify's Productivity tools](https://wpadminify.com/features/productivity), and the developer-friendly approach using custom PHP code. ## What Is a Last Login Column in WordPress? A last login column is an additional column added to the Users > All Users screen in the WordPress admin dashboard that displays the exact date and time each user last authenticated. Once enabled, WordPress records a timestamp every time a user logs in, and that timestamp is displayed directly in the users table - right alongside the Username, Email, Role, and Posts columns. This gives site administrators instant visibility into user activity without needing to install a full-blown activity logging plugin or dig through server access logs. If you want to go beyond login tracking and [monitor all user activity in WordPress](https://wpadminify.com/how-to-monitor-user-activity-in-wordpress), there are options for that too - but a last login column is the simplest starting point. ## Why Tracking User Last Login Matters Adding a last login column isn't just a nice-to-have - it solves real operational problems: ### Security Monitoring Stale user accounts are a security liability. If an editor hasn't logged in for six months, their account could be compromised without anyone noticing. By tracking last login timestamps, you can quickly identify dormant accounts and take action - whether that means reaching out to the user, resetting their password, or downgrading their role. Pairing this with [two-factor authentication](https://wpadminify.com/two-factor-authentication-for-wordpress-admin) adds another layer of protection for accounts that are still active. WordPress security best practices recommend regular audits of user accounts. The [WordPress Codex on Roles and Capabilities](https://developer.wordpress.org/plugins/users/roles-and-capabilities/) emphasizes the principle of least privilege, and knowing when users last logged in is the first step in enforcing it. ### Team Accountability For agencies managing content teams or multi-author publications, knowing who's actively logging in tells you who's engaged and who might need a nudge. If a contributor was assigned articles but hasn't logged in for weeks, that's a workflow flag you want to catch early. ### Membership and Client Sites On membership sites powered by WooCommerce Memberships, MemberPress, or similar plugins, tracking last login helps you understand engagement. For client sites - especially if you've built a [custom client dashboard](https://wpadminify.com/wordpress-client-dashboard) - it helps justify ongoing maintenance by demonstrating that the admin tools you've set up are actually being used. ### Compliance and Audit Trails Some industries require access logging for compliance (HIPAA, GDPR data access records, SOC 2). While a last login column alone isn't a full audit trail, it provides a quick reference point that complements more detailed solutions like the [Activity Logs](https://wpadminify.com/activity-logs) addon - which records every user action, not just logins. ## Method 1: Add Last Login Column Using WP Adminify (No Code) The fastest way to add a last login column is with [WP Adminify](https://wpadminify.com/features), which includes this feature as part of its Custom Admin Columns module - no code, no additional plugins. ### Step 1: Install and Activate WP Adminify If you haven't already installed WP Adminify, head to Plugins > Add New in your WordPress dashboard, search for "WP Adminify," and click Install Now followed by Activate. The plugin is free on [WordPress.org](https://wordpress.org/plugins/adminify/) with 7,000+ active installations. ![Installing WP Adminify plugin in infinityFree WordPress](https://d1k2c27psfzbiv.cloudfront.net/wp-content/uploads/2025/08/19083056/Installing-WP-Adminify-plugin-in-infinityFree-WordPress.webp) ### Step 2: Navigate to Custom Admin Columns Go to WP Adminify > Settings and click the Productivity tab. Scroll down until you find the Custom Admin Columns section. Make sure the Custom Admin Columns toggle is set to SHOW (green). This reveals all the available column options. ### Step 3: Enable the Last Login Column Under the Custom Admin Columns options, you'll see several checkboxes: - Show Post Thumbnails Column - Show Post/Page ID Column - Show "Comment ID" Column for Comment - Show "Last Login" Column for Users - Show "Taxonomy ID" Column - Show "URL Path" Column for Post Types ![show last login column for wordpress users](https://d1k2c27psfzbiv.cloudfront.net/wp-content/uploads/2026/04/11050116/show-last-login-column-for-wordpress-users.webp) Check the box next to Show "Last Login" Column for Users and click Save Settings. That's it - no page refresh gymnastics, no configuration screens. One checkbox, one save. ### Step 4: Verify the Last Login Column Navigate to Users > All Users in your WordPress dashboard. You'll now see a new Last Login column on the far right of the users table. The column displays the full date and time in `YYYY-MM-DD HH:MM:SS` format, so you know exactly when each user last authenticated. The timestamp updates automatically every time a user logs in - no manual action required. ![last user login column in user list](https://d1k2c27psfzbiv.cloudfront.net/wp-content/uploads/2026/04/11050452/last-user-login-column-in-user-list.webp) Note: The last login timestamp is recorded from the moment the feature is enabled. Users who logged in before you activated this option will show an empty value until their next login. ### Bonus: Other Useful Admin Columns While you're in the Custom Admin Columns settings, consider enabling these other productivity boosters: - Post Thumbnails Column - See featured images at a glance in your Posts/Pages list - Post/Page ID Column - Instantly grab post IDs without hovering or inspecting elements (handy for shortcodes and custom queries) - URL Path Column - View the slug/permalink directly in the post list These columns are part of WP Adminify's [Productivity features](https://wpadminify.com/features/productivity), all designed to reduce clicks and speed up your admin workflow. For a deeper look at which columns actually save time, check out our guide on [essential admin columns for WordPress](https://wpadminify.com/necessary-admin-columns-for-wordpress). And if you need even more control - like adding [ACF fields as admin columns](https://wpadminify.com/how-to-add-acf-field-to-admin-column) - the [Admin Columns Editor](https://wpadminify.com/admin-columns-editor) addon has you covered. ## Method 2: Add Last Login Column Using Custom Code If you prefer a code-based approach - perhaps you're building a custom theme, want to avoid plugin dependencies, or just enjoy writing PHP - here's how to add a last login column with a few functions in your theme's `functions.php` file or a custom plugin. ### Step 1: Record the Login Timestamp First, hook into WordPress's `wp_login` action to save a timestamp as user meta every time someone logs in: ``` /** * Record user's last login timestamp. * * @param string $user_login The username. * @param WP_User $user The WP_User object. */ function wpat_record_last_login( $user_login, $user ) { update_user_meta( $user->ID, '_last_login', current_time( 'mysql' ) ); } add_action( 'wp_login', 'wpat_record_last_login', 10, 2 ); ``` This stores the login time in the `_last_login` user meta field using WordPress's `current_time( 'mysql' )` function, which respects your site's timezone settings configured under Settings > General. ### Step 2: Add the Column Header to the Users Table Next, register a new column in the Users list table: ``` /** * Add "Last Login" column to the Users list table. * * @param array $columns Existing columns. * @return array Modified columns. */ function wpat_add_last_login_column( $columns ) { $columns['last_login'] = __( 'Last Login', 'your-textdomain' ); return $columns; } add_filter( 'manage_users_columns', 'wpat_add_last_login_column' ); ``` ### Step 3: Display the Login Timestamp in the Column Now populate the column with the stored timestamp: ``` /** * Display the last login timestamp for each user. * * @param string $output Custom column output. * @param string $column_name Column identifier. * @param int $user_id User ID. * @return string Column content. */ function wpat_show_last_login_column( $output, $column_name, $user_id ) { if ( 'last_login' === $column_name ) { $last_login = get_user_meta( $user_id, '_last_login', true ); if ( ! empty( $last_login ) ) { $output = esc_html( $last_login ); } else { $output = __( 'Never', 'your-textdomain' ); } } return $output; } add_filter( 'manage_users_custom_column', 'wpat_show_last_login_column', 10, 3 ); ``` ### Step 4: Make the Column Sortable (Optional) To allow sorting users by their last login date, add this: ``` /** * Make the Last Login column sortable. * * @param array $columns Sortable columns. * @return array Modified sortable columns. */ function wpat_last_login_sortable( $columns ) { $columns['last_login'] = 'last_login'; return $columns; } add_filter( 'manage_users_sortable_columns', 'wpat_last_login_sortable' ); /** * Handle the sorting query for last login. * * @param WP_User_Query $query The user query. */ function wpat_last_login_sort_query( $query ) { if ( 'last_login' === $query->get( 'orderby' ) ) { $query->set( 'meta_key', '_last_login' ); $query->set( 'orderby', 'meta_value' ); } } add_action( 'pre_get_users', 'wpat_last_login_sort_query' ); ``` ### Complete Code (All-in-One Snippet) Here's the full solution you can drop into your `functions.php` or a custom plugin file: ``` /** * Add a "Last Login" column to the WordPress Users list. * Records login timestamps and displays them in the admin. */ // Record login timestamp function wpat_record_last_login( $user_login, $user ) { update_user_meta( $user->ID, '_last_login', current_time( 'mysql' ) ); } add_action( 'wp_login', 'wpat_record_last_login', 10, 2 ); // Add column header function wpat_add_last_login_column( $columns ) { $columns['last_login'] = __( 'Last Login', 'your-textdomain' ); return $columns; } add_filter( 'manage_users_columns', 'wpat_add_last_login_column' ); // Populate column function wpat_show_last_login_column( $output, $column_name, $user_id ) { if ( 'last_login' === $column_name ) { $last_login = get_user_meta( $user_id, '_last_login', true ); $output = ! empty( $last_login ) ? esc_html( $last_login ) : __( 'Never', 'your-textdomain' ); } return $output; } add_filter( 'manage_users_custom_column', 'wpat_show_last_login_column', 10, 3 ); // Make column sortable function wpat_last_login_sortable( $columns ) { $columns['last_login'] = 'last_login'; return $columns; } add_filter( 'manage_users_sortable_columns', 'wpat_last_login_sortable' ); function wpat_last_login_sort_query( $query ) { if ( 'last_login' === $query->get( 'orderby' ) ) { $query->set( 'meta_key', '_last_login' ); $query->set( 'orderby', 'meta_value' ); } } add_action( 'pre_get_users', 'wpat_last_login_sort_query' ); ``` ![Add Last Login Column Using Custom Code](https://d1k2c27psfzbiv.cloudfront.net/wp-content/uploads/2026/04/11091849/Add-Last-Login-Column-Using-Custom-Code.webp) Important considerations with the code approach: - Theme updates will erase your code if you add it to a parent theme's `functions.php`. Use a [child theme](https://developer.wordpress.org/themes/advanced-topics/child-themes/) or a site-specific plugin instead. - No UI to toggle it on/off - once the code is active, the column is always visible. With WP Adminify, you can disable it with a single checkbox. - No retroactive data - just like the WP Adminify method, timestamps are only recorded from the moment the code is active. ## WP Adminify vs Custom Code: Which Should You Choose? | Criteria | WP Adminify | Custom Code | | --- | --- | --- | | Setup time | ~30 seconds | 10-15 minutes | | Code required | None | PHP (functions.php or plugin) | | Toggle on/off | One checkbox | Remove/comment out code | | Sortable column | Built-in | Requires extra code | | Theme update safe | Yes (plugin-based) | No (unless child theme/plugin) | | Additional features | 60+ admin tools included | Only what you code | | Best for | Site managers, agencies, non-developers | Developers who avoid plugins | For most WordPress users, WP Adminify is the practical choice - you get the last login column plus [60+ admin features that replace multiple plugins](https://wpadminify.com/replace-wordpress-plugins-with-wp-adminify) without writing a single line of code. Developers who want full control or are already running a lean custom setup may prefer the code approach. ## Questions for Adding Last Login column ### Does the last login column work for all user roles? Yes. Whether a user is an Administrator, Editor, Author, Subscriber, or any custom role, the last login timestamp is recorded when they authenticate. The column displays data for every user in your WordPress site, regardless of their role. ### Will it show login data for users who logged in before I enabled this feature? No. The last login timestamp is only recorded from the point you enable the feature - either by checking the box in WP Adminify or by adding the custom code. Users who logged in before activation will show an empty value (or "Never" with the code method) until their next login. ### Does tracking last login affect site performance? Not noticeably. Recording a login timestamp writes a single row to the wp_usermeta table - a negligible database operation that happens only during authentication. Displaying the column on the Users screen adds one lightweight query. Even sites with thousands of users won't see a performance impact. ### Can I export or sort users by their last login date? With the custom code method above, you can sort the column directly in the Users table. WP Adminify also supports sortable admin columns. For exporting, you can use plugins like [WP All Export](https://wordpress.org/plugins/wp-all-export/) to include user meta fields (like `_last_login`) in CSV exports. ### Is WP Adminify free for this feature? Yes. The Last Login Column feature is available in the [free version of WP Adminify](https://wordpress.org/plugins/adminify/) on WordPress.org. You don't need the Pro version to use Custom Admin Columns. ### Can I customize the date format displayed in the column? With the custom code approach, you can modify the `wpat_show_last_login_column` function to format the date using PHP's `date()` or WordPress's `wp_date()` function. For example, replace `esc_html( $last_login )` with `esc_html( wp_date( 'M j, Y g:i A', strtotime( $last_login ) ) )` to display a more readable format like "Apr 11, 2026 3:58 AM." ## Conclusion Adding a last login column to your WordPress Users list is a small change that delivers real value for security monitoring, team management, and site administration. Here's a quick recap: - WP Adminify method: Navigate to WP Adminify > Settings > Productivity > Custom Admin Columns, check "Show Last Login Column for Users," and save. Done in 30 seconds. - Custom code method: Add four functions to your `functions.php` or a custom plugin to record timestamps, register the column, display data, and enable sorting. - Both methods only track logins from the moment they're activated - no retroactive data. If you're already using WP Adminify for [dashboard customization](https://wpadminify.com/wordpress-dashboard-customization), [admin menu editing](https://wpadminify.com/how-to-use-the-wordpress-admin-menu-editor), or [white labeling](https://wpadminify.com/features/white-label), the last login column is just one more checkbox in your existing setup. If you're not using it yet, [give WP Adminify a try](https://wordpress.org/plugins/adminify/) - it's free and takes under a minute to set up. --- # How to Remove Website URL Field from WordPress Comments (Stop Spam in 2 Minutes) URL: https://wpadminify.com/remove-website-field-from-wordpress-comments Last updated: 2026-08-10 TL;DR: The website field in WordPress comments is a spam magnet. Remove it in 2 minutes with WP Adminify (no coding) or 5 lines of code. Your SEO and comment quality will thank you. ## Here's Why Spammers Love Your Comment Form You know those irrelevant comments with suspicious links that show up on your blog posts? 90% of them came through the website URL field in your comment form. Spammers don't care about your content. They care about one thing: getting a dofollow backlink from your site to theirs. And WordPress makes it easy for them by including a website field in every comment form by default. The brutal reality: - Spam comments hurt your SEO (Google sees excessive spammy outbound links) - Negative reputation - visitors lose trust when they see spammy comments - Wasted time - you spend hours moderating instead of creating content - Security risk - some spam links lead to malware or phishing sites The fix is simple: remove the website field from your comment form. Your genuine commenters don't need it. Your SEO doesn't need it. But spammers? They desperately need it. Take it away, and watch your spam comments drop by 80-90% overnight. ## Two Ways to Remove the Website Field You have two options: - Plugin method (recommended): 2 minutes, zero coding, reversible - Code method (advanced): 5 lines of PHP, requires functions.php access If you're not a developer, use the plugin method. It's faster, safer, and you can undo it anytime. ## Method 1: Remove Website Field with WP Adminify (No Coding) [WP Adminify](https://wordpress.org/plugins/adminify/) has a Security module that gives you full control over comments - including the ability to remove the website field with one checkbox. The same module goes further when you need it to, so you can also [hide the Comments menu from your admin panel](https://wpadminify.com/hide-comments-menu-from-wordpress-admin-panel) and drop the section from your sidebar completely. ### Step 1: Install and Activate WP Adminify Go to Plugins → Add New in your WordPress dashboard. ![install WP Adminify Plugin from WordPress org](https://d1k2c27psfzbiv.cloudfront.net/wp-content/uploads/2022/12/12111512/install-WP-Adminify-Plugin-from-WordPress-org.webp) Search for "WP Adminify", install, and activate. The free version has everything you need for this. ### Step 2: Navigate to Security Settings Once activated, go to WP Adminify → Security in your WordPress dashboard. ![WP Adminify Security Option](https://d1k2c27psfzbiv.cloudfront.net/wp-content/uploads/2023/08/01084016/WP-Adminify-Security-Option.webp) You'll see all security-related options. Scroll down to the comments section. ### Step 3: Enable "Remove Website Field" Find the option labeled "Remove website Field (URL) from comment form template" and check the box. ![Remove Website Field from Comments](https://d1k2c27psfzbiv.cloudfront.net/wp-content/uploads/2023/08/01083146/Remove-Website-Field-from-Comments.webp) Click Save Settings at the top. Done. Reload your site and check the comment form - the website field is gone. ## Method 2: Remove Website Field Without Plugin (Code Method) If you prefer code over plugins, add this snippet to your theme's `functions.php` file or a site-specific plugin: ``` add_filter('comment_form_default_fields', 'remove_comments_url_field'); function remove_comments_url_field($fields) { if (isset($fields['url'])) { unset($fields['url']); } return $fields; } ``` Where to add the code: - Option A: Child theme's `functions.php` (recommended - survives theme updates) - Option B: Site-specific plugin (use Code Snippets or similar) - Option C: Main theme's `functions.php` (not recommended - lost on theme update) ⚠️ Important: If you add code directly to your theme's `functions.php`, it will be lost when you update the theme. Use a child theme or site-specific plugin to make it permanent. ## What Happens After You Remove the Website Field? Here's what changes: - ✅ Spam comments drop 80-90% - spammers can't get their backlinks - ✅ Comment quality improves - genuine users still comment normally - ✅ SEO health improves - no more spammy outbound links hurting your ranking - ✅ Less moderation time - spend time on content, not spam cleanup What about existing comments? Old comments with website links stay as-is. This only affects new comments submitted after you make the change. ## Got Questions About Removing the Website Field? Here Are the Answers save ### Will removing the website field from comments affect my SEO? No, removing the website field won't hurt your SEO. In fact, it often improves it. Search engines may consider excessive spammy links in comments as a negative signal. Keeping the URL field open can lead to low-quality outbound links. And this might harm your site's ranking over time. Removing it ensures your comment section stays clean and free from unnecessary link spam. which ultimately benefits your SEO health. ### What happens to old comments that already have a website link? Removing the website field only affects new comments submitted after the change. Existing comments with website links will remain as they are unless you manually edit or delete them. ### Which is better: removing the website field with a plugin or code? It depends on your comfort level. If you're a beginner or don't want to deal with code, using WP Adminify is the easiest and safest option. you just mark a checkbox, and it's done. If you're an advanced user who prefers to keep things lightweight and avoid extra plugins, the code method is a great alternative. Both options achieve the same result, so it comes down to personal preference. ### Can I re-enable the website field later if I change my mind? Absolutely. If you used WP Adminify, simply uncheck the option in the settings and save changes. If you used the code method, just remove or comment out the code from your functions.php file. The website field will instantly return to your comment form. This flexibility makes it easy to test both approaches and see what works best for your audience. ### Does removing the website field work with all WordPress themes? Yes, both methods work with any WordPress theme that uses the default comment form. Some highly customized themes may have custom comment forms - in that case, you may need to adjust the code slightly. But for 99% of themes, this works out of the box. ### Will this break my comment form or affect user experience? No. The comment form will still work normally - users can still leave name, email, and comment. They just won't see the website URL field. Most genuine commenters don't use it anyway, so UX actually improves (fewer fields = less friction). ## Final Thoughts The website field in WordPress comments is a spam magnet. Removing it takes 2 minutes and saves you hours of moderation. Quick recap: - Install [WP Adminify](https://wordpress.org/plugins/adminify/) (free) - Go to WP Adminify → Security - Check "Remove website Field from comment form" - Save settings - Watch spam comments drop 80-90% Your comment section will be cleaner, your SEO will be healthier, and you'll spend less time fighting spam. Need help? Drop a comment below if you run into issues. We're here to help. Want more WordPress tips? Check out our [blog](https://wpadminify.com/blog) for guides on [dashboard customization](https://wpadminify.com/wordpress-dashboard-guide), [white labeling](https://wpadminify.com/features/white-label), and [plugin comparisons](https://wpadminify.com/wp-adminify-vs-uipress). --- # Add Custom CSS to WordPress Admin: 5 Easy Methods (2026) URL: https://wpadminify.com/custom-css-in-wordpress-admin-panel Last updated: 2026-08-10 Is your WordPress admin area feeling a little bland? Or perhaps you want to streamline the interface for your clients by hiding distracting elements? Customizing the WordPress dashboard with CSS is a powerful way to improve both your workflow and the client experience. While the front-end of your site gets all the themes and designers, the admin dashboard often gets left behind. But what if you could [change colors](https://wpadminify.com/how-to-change-the-admin-color-scheme-in-wordpress), hide unused menu items, or even add custom branding? In this blog post, we’ll explore every possible method to inject custom CSS into your WordPress admin area - from quick and simple to advanced and powerful. We’ll also share must-have CSS snippets you can use today and show you how to add custom JavaScript for even more control, all without touching a single line of code in your theme files. ## Why Customize Your WordPress Admin Dashboard? Before we dive into the "how," let's talk about the "why." Adding custom admin CSS allows you to: Improve User Experience (UX): Simplify the dashboard for clients by hiding complex features they don't need. Enhance Branding: Add your agency's logo or use brand colors to create a [white-labeled admin experience](https://wpadminify.com/features/white-label). Increase Productivity: Highlight or color-code important administrative elements to navigate faster. Add Personal Flair: Make your own workspace more enjoyable with a unique look. ## Method 1: Using the WP Adminify Plugin (The Easiest & Safest Way) For most users, especially freelancers and agencies managing multiple client sites, a dedicated plugin is the best choice. It’s safe, easy to reverse, and doesn't require any code editing. WP Adminify is a powerhouse for WordPress admin customization, and it includes a perfect feature for this exact task: Admin Scripts. ### How to do it: - Install and activate the WP Adminify plugin. - Navigate to [WP Adminify > Code Snippets](https://wpadminify.com/features/code-snippets). - Click on the Admin Scripts tab. Here, you can paste your custom CSS directly into the "Custom CSS" box. You can also add custom JavaScript here. Why this method is great: Your CSS is stored in the database and loaded correctly on every admin page. It survives theme updates and is managed from a single, intuitive interface. As you can see in this example, we simply added few line of CSS to change the color of the admin menu in the dashboard. Though it can be done easilly via the [Admin Menu Editor](https://wpadminify.com/features/admin-menu-editor) by WP Adminify, I just show if you prefer the following custom methods. ![Add WordPress Admin CSS in WP Adminify plugin](https://d1k2c27psfzbiv.cloudfront.net/wp-content/uploads/2023/09/09112627/Add-WordPress-Admin-CSS-in-WP-Adminify-plugin.webp) https://www.youtube.com/watch?v=7OKYdNLQGO4 Watch: add custom CSS and JS in the WordPress backend and frontend with WP Adminify Looking for more ways to customize? Check out our guide on [How to customize WordPress Admin Bar](https://wpadminify.com/hide-admin-bar-based-on-user-roles) based on user role. ## Method 2: Using Your Theme's functions.php File (The Developer's Way) For developers comfortable with code, adding CSS via your child theme's `functions.php` file is a common method. ``` function adminify_custom_admin_css() { echo ''; } add_action('admin_head', 'adminify_custom_admin_css'); ``` Not recommended for beginners. Before editing theme files, always ensure you have a solid backup strategy. Learn about [WordPress backup best practices](https://master-addons.com/best-wordpress-backup-plugins/). ## Method 3: Creating a Separate Admin CSS File (The Organized Way) For larger projects, you can enqueue a separate stylesheet to keep your code organized. ``` function adminify_enqueue_custom_admin_style() { wp_enqueue_style( 'my-custom-admin-css', get_stylesheet_directory_uri() . '/admin-style.css', false, '1.0.0' ); } add_action( 'admin_enqueue_scripts', 'adminify_enqueue_custom_admin_style' ); ``` You would then create an `admin-style.css` file in your child theme's directory. ## Method 4: Create a Plugin for Adding CSS in Dashboard Begin by creating a new folder within your WordPress plugins directory. Name it something descriptive like 'Custom-Dashboard-CSS.' Inside this folder, create a main PHP file for your plugin. Let's call it `custom-dashboard-css.php`. Add the following code to your `custom-dashboard-css.php` file. Feel free to customize the plugin head information like Name, Description, version, and Author. I kept the plugin head very simple because it's going to be a custom plugin for personal use. ```php /* Your custom CSS styles here */'; } // Hook into the admin_head action to inject CSS into the admin dashboard add_action('admin_head', 'custom_dashboard_css'); ?> ``` Here you don't have to create a custom CSS file. Take a look at line number 11 you can see `/* Your custom CSS styles here */` comment. Just hit enter and start writing your CSS code under this comment. For Example, I am sharing my `custom-dashboard-css.php` file in a Google Drive URL. [Just download this](https://drive.google.com/file/d/1DUKhw7K3FdLLlFq03JQ9llvOf7-scETT/view?usp=sharing), and you are ready to go. Take a look at the following short mute video, and you will learn how the CSS code changed the Dashboard interface. Create a Plugin for adding CSS in Admin Dashboard ## Must-Have WordPress Admin CSS Snippets (Copy & Paste Ready) Now for the fun part! Here are some highly effective CSS snippets you can use immediately. If you're using WP Adminify, just paste these into the Admin Scripts box. ### 1. Change the Admin Menu Background Color ``` /* sidebar background and border */ #adminmenu, #adminmenu .wp-submenu, #adminmenuback, #adminmenuwrap { background-color: #34495e!important; border-right: 2px solid #2c3e50!important; } /* menu item text and icon */ #adminmenu .wp-submenu-head, #adminmenu a { color: #ecf0f1 !important; } /* hover and active state */ #adminmenu .wp-has-current-submenu, #adminmenu li.menu-top:hover { background-color: #2c3e50 !important; } /* collapse/expand icon adjustment */ #adminmenu .wp-menu-arrow div { border-color: #ecf0f1 !important; } ``` ### 2. Hide Specific Dashboard Widgets for Cleanliness ``` /* Hide 'WordPress Events and News' */ #dashboard_primary { display: none; } /* Hide 'Welcome to WordPress' */ #welcome-panel { display: none; } ``` ### 3. Customize the Admin Bar (Top Bar) ``` /* change the top admin bar to a deep navy */ #wpadminbar { background: #2c3e50!important; } /* adjust link colors on hover */ #wpadminbar .ab-item, #wpadminbar .ab-item:hover { color: #ecf0f1!important; } /* style search box in admin bar */ #wpadminbar #adminbarsearch { background: rgba(255,255,255,0.1)!important; border-radius: 3px; } ``` ### 4. Base Typography and Background ``` /* set a soft off-white background and darker text for better contrast */ body.wp-admin { background-color: #f5f7fa; color: #2c3e50; } /* apply a clean sans-serif font across admin */ body.wp-admin, body.wp-admin * { font-family: "Segoe UI", Roboto, Helvetica, Arial, sans-serif !important; } /* style headings inside .wrap for consistency */ .wrap h1, .wrapper h2 { color: #34495e; border-bottom: 2px solid #ecf0f1; padding-bottom: 8px; } ``` 5. Dashboard widget style and animation on hover ``` /* overall dashboard widget wrapping */ #dashboard-widgets-wrap { display: flex; flex-wrap: wrap; gap: 20px; } .postbox { background: #ffffff; border: 1px solid #e1e4e8; box-shadow: 0 1px 3px rgba(0,0,0,0.05); border-radius: 4px; /* Smooth transition for lift and shadow */ transition: transform 0.3s ease-in-out, box-shadow 0.3s ease-in-out; will-change: transform, box-shadow; } .postbox:hover { transform: translateY(-5px); box-shadow: 0 4px 6px rgba(0,0,0,0.1); } /* widget header bar */ .postbox .hndle { background: #ecf0f1; padding: 10px; font-weight: 600; color: #2c3e50; border-bottom: 1px solid #d1d5da; } /* widget inner content padding */ .postbox .inside { padding: 15px; } ``` ### 5. Remove WordPress logo from login screen and admin footer ``` /* footer text tweak */ #wpfooter { background: #ecf0f1; color: #7f8c8d; border-top: 1px solid #d1d5da; padding: 10px; } /* remove WordPress logo from login screen and admin footer */ #wpfooter a[href*="wordpress.org"], #wp-admin-bar-wp-logo { display: none !important; } /* style dashicons in menus or widgets */ .dashicons { color: #2980b9; font-size: 18px; } ``` ## Adding Custom JavaScript to the Admin Area Sometimes CSS isn't enough. What if you want to add interactivity, like showing a custom notice when a user interacts with a specific part of the dashboard? Again, WP Adminify's Admin Scripts tab makes this incredibly easy. You can add JavaScript directly alongside your CSS. The same panel also has a Frontend Scripts tab for the public side of your site. Here is how to [add code to WordPress header](https://wpadminify.com/add-code-to-wordpress-header) for analytics, pixels, and verification tags. Demo Use Case: Let's say you want to show a custom alert whenever a user clicks anywhere inside the "WooCommerce Setup" dashboard widget. This could be used for guidance or notifications. Step 1: Identify the Element Using browser tools (right-click -> Inspect), we can see the WooCommerce setup widget has a unique`ID: #wc_admin_dashboard_setup.` Step 2: Write the JavaScript Code Here is the code you can paste into the Admin Scripts box in WP Adminify: ``` document.addEventListener('DOMContentLoaded', function() { var wcWidget = document.getElementById('wc_admin_dashboard_setup'); if (wcWidget) { wcWidget.addEventListener('click', function() { alert("Hello, this is an alert message!"); }); } }); ``` I have added the JS code inside WP Adminify code snippet option, here is the screenshot. ![Custom JS in WordPress Dashboard](https://d1k2c27psfzbiv.cloudfront.net/wp-content/uploads/2023/09/09115811/Custom-JS-in-WordPress-Dashboard.webp) Now whenever someone click on the Woocommerce Dashboard widget, it will show an alert. ![print a demo alert with custom JS in WordPress Dashboard](https://d1k2c27psfzbiv.cloudfront.net/wp-content/uploads/2023/09/09115806/print-a-demo-alert-with-custom-JS-in-WordPress-Dashboard.webp) ### Related Reading - [WordPress admin customization guide](https://wpadminify.com/wordpress-admin-customization) - [WordPress dashboard customization](https://wpadminify.com/wordpress-dashboard-customization) - [enable dark mode](https://wpadminify.com/how-to-enable-wordpress-dark-mode) ## Which core files control the WordPress admin CSS? WordPress ships its admin styles in `wp-admin/css/`. The ones you will actually run into are `common.css` for shared layout and buttons, plus `forms.css`, `dashboard.css`, `admin-menu.css`, `edit.css`, `list-tables.css`, and `login.css` for the sign-in screen. Open them to find the exact selector you want to change, then write your override in your own stylesheet. Never edit those files directly. Every WordPress update replaces the whole `wp-admin` directory, so your changes vanish at the next core update and you are left wondering why the dashboard reverted overnight. Treat them as read-only reference and enqueue your own CSS using one of the methods above. ## How do you style one admin screen instead of all of them? WordPress puts screen-specific classes on the admin body tag, so you can scope a rule without touching anything else. The dashboard carries `index-php`, the posts list carries `edit-php` together with `post-type-post`, and the active colour scheme adds a class such as `admin-color-fresh`. Prefix your selector with one of these and the rule applies only on that screen. Need a class of your own? The `admin_body_class` filter lets you append one, which is the cleanest way to target a single user role or a custom admin page you built yourself. ## Why is your admin CSS not showing up? Four causes cover almost every case. First, you hooked the wrong action: `admin_enqueue_scripts` handles wp-admin, but the login screen needs `login_enqueue_scripts`, which is why login tweaks so often do nothing at all. Second, core styles beat yours on specificity, so match or exceed the original selector before you reach for `!important`. Third, a caching or optimisation plugin is still serving the old stylesheet, so purge it and hard-refresh. Fourth, your file loads before the core stylesheet it is meant to override, so pass the core handle such as `common` as a dependency when you enqueue. If the admin looks completely unstyled rather than simply unchanged, that is a different problem. Our guide to [fixing a WordPress dashboard that will not load](https://wpadminify.com/guide-to-fixing-wordpress-dashboard-not-loading) covers the broken-CSS case. ## Can you customize the WordPress admin without a plugin? Yes. Methods 2 to 4 above are all plugin-free: add the CSS through your theme's `functions.php`, keep it in a separate admin stylesheet, or wrap it in a small custom plugin so it survives a theme switch. The tradeoff is maintenance, because every change means editing code and one typo can white-screen the site. If you would rather manage snippets from the dashboard with a safety net, the [code snippets module](https://wpadminify.com/features/code-snippets) does the same job without file edits. ## Custom CSS in WordPress Admin: FAQs ### How do I add custom CSS to WordPress admin? Use WP Adminify to add admin CSS without code, or add a snippet to functions.php using the admin_head action hook. ### Will custom admin CSS affect the frontend? No. CSS added via admin_head or WP Adminify only applies to the admin panel. Your frontend remains unaffected. ### Can I change WordPress admin colors without a plugin? WordPress has built-in color schemes under Users > Profile. For deeper customization, add CSS via functions.php or use WP Adminify for a visual editor. ## Final words For Everyone (Especially Freelancers & Agencies): Use the WP Adminify plugin. It not only offers the Custom CSS and JS, but also comes with dozens of other customization that a professional Dashboard needs. If you are a developer and working on a Single Project. Then adding code to your functions.php or enqueuing a style sheet is perfect. No matter which method you choose. Customization of WordPress Dashboard is a perfect way to create a more professional and enjoyable WordPress experience. Ready to transform your WordPress dashboard? Explore all the [features of WP Adminify](https://wpadminify.com/features) today and start customizing without code! ### Beyond CSS: Full Dashboard Customization Custom CSS is one piece of the puzzle. For menu editing, custom widgets, admin templates, and white labeling (with or without code), see the complete guide to [customizing the WordPress dashboard](https://wpadminify.com/wordpress-dashboard-customization), or change the [admin font](https://wpadminify.com/change-wordpress-admin-font) next. --- # Top 10 Must-Have WordPress Plugins for Customization (2026) URL: https://wpadminify.com/must-have-wordpress-plugins-for-customization Last updated: 2026-08-10 Ever felt the limitation by your WordPress plugins? Or frustrated by the lack of flexibility and customization? Well, you’re not alone. The beauty of WordPress lies in its endless customization possibilities. And the right plugins unlock it all. This is your guide to 10 must-have WordPress plugins for customization. Each plugin in the list is chosen to customize a different part of your website. From the backend dashboard to the frontend experience, we’ve tried to mention every aspect in one single post. ## 10 Must-Have WordPress Plugins for Customization Here’s the list of the top must-have WordPress plugins for customization. I’ll try to keep it optimized for every category. So, you can combine them for your WordPress sites. ### 1. WP Adminify - The Best WordPress Dashboard Customizer Most plugins forget the admin dashboard even exists. But not [WP Adminify](https://wpadminify.com/pricing). This plugin transforms your WordPress backend into a modern, fast, and fully customized control panel. ![WordPress Dashboard customizer](https://d1k2c27psfzbiv.cloudfront.net/wp-content/uploads/2021/10/12100955/wpadminify.webp) #### Standout Features: - Admin Menu Customizer: Drag-and-drop menus and custom admin columns for a perfectly organized workspace. - Login Page Customizer: Make your login screen match your brand. No more default WordPress login page. - Dark Mode: Built-in dark mode that adjusts automatically by user preference or time of day. - Custom Dashboard Widgets: Add videos, shortcodes, and even scripts right to your admin dashboard. - White Labeling: Rebrand the entire dashboard for clients or your own agency. - Performance Boosters: Remove extras, delay scripts, and optimize admin speed in a few clicks. It’s like giving your WordPress dashboard a full makeover. Make it faster, smarter, and improve your branding. It handles complete [WordPress dashboard customization](https://wpadminify.com/features/dashboard-customization) in one plugin. ### 2. Elementor – Drag, Drop, and Design If you’ve ever said, “I wish I could design this page myself,” [Elementor](https://wordpress.org/plugins/elementor/) is your answer. With over 5 million users, it’s the most trusted visual builder in WordPress. ![Elementor Website Builder](https://d1k2c27psfzbiv.cloudfront.net/wp-content/uploads/2025/07/10100132/lementor-Website-Builder-scaled.webp) #### Standout Features: - Live Frontend Editing: Design and see changes in real time. No reloading necessary. - 300+ Designer-Made Templates: Get inspired and build faster with pre-built sections and pages. - Custom Breakpoints: Fine-tune designs for desktop, tablet, and mobile with precision. - Motion Effects & Animations: Add parallax, fade-ins, or scrolling animations without touching code. - Global Styles: Control fonts, colors, and layouts across your site from a single dashboard. No experience in web designing? No worries, Elementor has you covered. ### 3. WPCode – Add Custom Snippets Without Breaking Your Site [WPCode](https://wordpress.org/plugins/insert-headers-and-footers/) gives you a safe environment to manage custom PHP, CSS, JavaScript, or HTML. Without editing theme files. ![WPCode plugin](https://d1k2c27psfzbiv.cloudfront.net/wp-content/uploads/2025/07/10100114/WPCode-plugin.webp) #### Standout Features: - Safe Mode for PHP: If your code throws an error, it won’t crash your site. - Conditional Logic: Only run snippets on specific pages, post types, user roles, or devices. - Snippet Library: Pre-built snippets like disable comments, hide admin bar, or limit login attempts. - Code Location Control: Add snippets to the header, body, or footer. Do it sitewide or per page. Customize how your site behaves, without the risk of taking the whole thing offline. ### 4. Master Addons for Elementor – Make Elementor Great Again Elementor gives you the framework. But [Master Addons](https://master-addons.com/pricing/) takes it to the next level. With creative widgets, powerful extensions, and layout controls that even Elementor Pro doesn’t cover. It’s built to enhance your design freedom. ![Master Addons](https://d1k2c27psfzbiv.cloudfront.net/wp-content/uploads/2022/10/12101805/Master-Addons.webp) #### Standout Features: - 70+ Creative Widgets: From animated headlines to dual buttons, dynamic galleries, advanced accordions, and flip boxes. These elements surely gonna grab attention. - Mega Menu Builder: Create responsive mega menus right inside Elementor, no third-party nav plugins needed. - Header & Footer Builder: Design sticky headers, footers, or reveal-on-scroll effects without editing theme files. - Display Conditions: Show or hide sections/widgets based on login status, device type, page URL, user role, or even time of day. - Particles & Animated Backgrounds: Add modern motion to your site with zero coding. Make headers come alive. - Reusable Templates & Saved Widgets: Build once, use anywhere. Perfect for scaling large websites or managing client work. You get near-page-builder power. While keeping things fast, native, and future-proof. ### 5. Custom Post Type UI – Structure Your Content Like a Pro Want to create portfolios, testimonials, recipes, or product listings? [CPT UI](https://wordpress.org/plugins/custom-post-type-ui/) gives you total freedom to structure your site your way. ![Custom Post Type UI](https://d1k2c27psfzbiv.cloudfront.net/wp-content/uploads/2025/07/10100120/Custom-Post-Type-UI.webp) #### Standout Features: - Create Unlimited Post Types: Name, label, and structure your content exactly how you need. - Custom Taxonomies: Add filters like categories, tags, or anything unique to your content. - Advanced Options: Choose menu position, icon, hierarchy, archive support, and REST API visibility. - Export/Import Configurations: Move your CPTs between sites in seconds. Turn WordPress into a full-fledged content management system, tailored to your niche. ### 6. SiteOrigin CSS – Style Your Site Without Knowing CSS With [SiteOrigin CSS](https://wordpress.org/plugins/so-css/), you don’t have to write code or guess what class name controls which section. You just click on what you want to style and start editing. ![SiteOrigin CSS](https://d1k2c27psfzbiv.cloudfront.net/wp-content/uploads/2025/07/10100144/SiteOrigin-CSS.webp) #### Standout Features: - Visual Inspector: Click any element on your site and see exactly what controls it. - Live Preview: See every change as you make it. No refresh needed. - Responsive Design Controls: Tweak how things look on mobile, tablet, or desktop. - Undo & History Panel: Safely experiment with designs without fear of breaking something. It’s the fastest way to work with CSS. Even if you’ve never written a line before. ### 7. Better Font Awesome – Scalable Icons Without the Headache Icons improve navigation, usability, and visual appeal. Better [Font Awesome](https://wordpress.org/plugins/better-font-awesome/) brings the full power of the Font Awesome library right into your WordPress site. ![Better Font Awesome](https://d1k2c27psfzbiv.cloudfront.net/wp-content/uploads/2025/07/10100109/Better-Font-Awesome.webp) #### Standout Features: - Shortcode + Icon Picker: Add icons via shortcode or choose them visually in the editor. - Always Up-to-Date: Automatically updates to the latest version of Font Awesome. - CDN Loading: Loads icons from the cloud, reducing site size and increasing speed. - Developer Friendly: Use filters and custom markup if you want deeper control. Make your content more engaging with zero design skills required. ### 8. Admin Bar Editor – Take Control of the WordPress Sidebar [Admin Bar Editor](https://jeweltheme.com/admin-bar-editor) gives you full control over your Admin dashboard sidebar. ![Admin Bar Editor](https://d1k2c27psfzbiv.cloudfront.net/wp-content/uploads/2025/07/10100104/admin-bar-editor-plugin.webp) #### Standout Features: - Drag & Drop Interface: Reorganize admin bar items in seconds. No more coding required. - Custom Menu Items: Add links to your support site, docs, staging environments, or any external/internal URLs. - Role-Based Visibility: Show or hide menu items based on user roles. Perfect for simplifying client dashboards. - Custom Icons & Labels: Add your own icons and rename items to match your project’s language or branding. - White Label Ready: Remove WordPress branding and replace it with your own. Ideal for agencies and freelancers. - Multisite Compatible: Manage admin bar behavior across your entire network with global or site-level settings. Your WordPress dashboard should feel like a dream. Not a Junk! ### 9. Simple Custom CSS and JS – Add Styling and Scripts Easily [This plugin](https://wordpress.org/plugins/custom-css-js/) offers a clean, focused interface to add custom styling or scripts. Without worrying about child themes or FTP access. ![Simple Custom CSS and JS](https://d1k2c27psfzbiv.cloudfront.net/wp-content/uploads/2025/07/10100139/Simple-Custom-CSS-and-JS.webp) #### Standout Features: - Add CSS/JS Sitewide or Per Page: Control where your code applies. - Safe Execution: Separate environments for CSS, JS (head/body/footer). - Syntax Highlighting: Write cleaner code faster. - Lightweight: Super light that gets the job done. Perfect for developers and DIYers who just need a place to insert small code tweaks fast. ### 10. Header Footer Code Manager – Script Injection Done Right [This plugin](https://wordpress.org/plugins/header-footer-code-manager/) lets you safely add third-party scripts and pixels to your site without any theme modifications. ![Header Footer Code Manager](https://d1k2c27psfzbiv.cloudfront.net/wp-content/uploads/2025/07/10100125/Header-Footer-Code-Manager.webp) #### Standout Features: - Script Placement Options: Place on head, body, or footer, your choice. - Page-Level Targeting: Only load scripts on relevant pages or posts. - Device-Level Rules: Load scripts on mobile vs desktop based on user behavior. - Preview & Disable Toggle: Test scripts before going live, and disable when needed. It keeps your tracking clean, safe, and organized. Without risking your theme files. New to script injection? Our walkthrough on how to [add code to your WordPress header and footer](https://wpadminify.com/add-code-to-wordpress-header) covers plugin and manual methods. ## Final Word Each plugin on this list plays a unique role in customizing your WordPress site. From how it looks to how it functions. We’ve tried to set the list of top 10 must-have WordPress plugins for customization in a very optimal way. And because there’s no feature overlap, you can safely combine all of them for the ultimate customization experience. --- # How to Enable WordPress Dark Mode: A Guide for WordPress Dashboard URL: https://wpadminify.com/how-to-enable-wordpress-dark-mode Last updated: 2026-08-10 Are you a night owl like me? Who works at night and feels like the Dark Knight working on important projects that could change the world? But, sadly enough, WordPress admin dashboard or backend what you might know it by, is made of a bright white theme. At night, it’s tough to work with, and dimming the monitor is not at all appropriate for the eye. So? What could be the solution? What if I tell you, you can [enable dark mode](https://wpadminify.com/features/dark-mode) in the WordPress dashboard? You’ll be hyped to know how to do it, if I’m not wrong. So, today, I’ll teach you how to enable dark mode to your admin dashboard. You’ll be surprised to know how easily you can do it. So, why waste time, let me get to the point straight up. Here’s a short overview on how to enable WordPress dark mode to your WordPress admin dashboard: 1. [Install and activate WP Adminify](https://wpadminify.com/docs/adminify/getting-started/free-installation) 2. [Enable the light/dark mode](https://wpadminify.com/docs/adminify/customize/light-dark-mode-customization) 3. Set up a dark mode schedule 4. Save your settings ## What Is Dark Mode? Dark Mode is a user interface (UI) setting that changes light backgrounds to dark tones and adjusts text and UI elements for high contrast. It reduces the amount of white or bright light displayed on the screen, replacing it with darker backgrounds and softer highlights. Let me be simple and straight, dark mode is a UI (user interface) mode that changes light (white) based themes into dark (black) themes. Basically, it changes the backgrounds into dark tones, adjusting text and UI elements to a high contrast one. On the other hand, if you are a freelancer or agency owner, then you should provide a [better user experience on the Dashboard](https://wpadminify.com/how-to-create-wordpress-custom-user-dashboard-without-coding) to your clients. Had enough theoretical discussion, now take a look at the following screenshots. Compare the screenshots yourself and you will get a clear idea on how actually the WordPress Admin looks like in Light mode and Dark mode. ## WordPress Dashboard light mode ![WordPress Dashboard light mode in post](https://d1k2c27psfzbiv.cloudfront.net/wp-content/uploads/2023/07/18112120/WordPress-Dashboard-light-mode-in-post.webp) ## WordPress Dashboard Dark mode ![WordPress Dashboard dark mode in post](https://d1k2c27psfzbiv.cloudfront.net/wp-content/uploads/2023/07/18112114/WordPress-Dashboard-dark-mode-in-post.webp) You can understand that dark mode reduces the amount of white sections/light and replaces them with a dark background with softer lights. If you’re using, Iphone, android, mac and even windows, you might have seen the dark mode already. So, I don’t need to explain and waste time. Stat Check: [A recent study found](https://thesmallbusinessblog.com/dark-mode-users/#:~:text=A%20recent%20study%20found%20that%2081.9%25%20of%20people%20use%20the%20dark%20mode%20on%20their%20phones%2C%20and%2082.7%25%20of%20survey%20respondents%20said%20they%20use%20the%20dark%20mode%20on%20their%20operating%20system.%C2%A0) 81.9% mobile users prefer dark mode while 82.7% pc users prefer dark mode. So, now, you’re a little bit wiser with statistical knowledge. Show off those nerdy little secrets to impress your circle. And let me focus on teaching you how to enable WordPress dark mode to your WordPress admin dashboard. ## How to Enable WordPress Dark Mode to Your Wordpress Admin Dashboard As WordPress does not give dark mode options by default, your only choice is using a plugin. Today let’s show you the best WordPress admin dashboard customizer to enable dark mode in the admin dashboard. First, the basics. Install and activate the WP Adminify plugin. [Here’s a documentation](https://wpadminify.com/docs/adminify/getting-started/free-installation) on how to do it. [Free Download](https://wordpress.org/plugins/adminify) | [WP Adminify PRO ](https://wpadminify.com/pricing) ### How to Enable WordPress Dark Mode? Now, in the Customize tab, scroll down a bit till you see the Light/Dark Switcher setting and enable it. Then hit save and restart the page. You’ll see a new icon added in the top bar just beside the howdy text. Click on it to switch between light or dark mode. You can also switch to system mode. Turn your WordPress Dashboard into dark mode or light mode in one click Now, the fun part begins. Simply open the WP Adminify panel. Welcome to the world of advanced dashboard customization. But let’s focus on enabling the dark mode. OHH! I forgot to mention another thing that may be helpful to you. Have you checked my first 2 dark and light mode comparison images? If not, check them carefully. There are 100 demo blog posts with a nice folder on the left. I have used the [WP Adminify folder feature](https://wpadminify.com/features/wordpress-media-folder), which is available for free. To better understanding, please check this [WordPress media manager](https://wpadminify.com/how-to-organize-wordpress-media-library-with-folders) blog post. ### How to Customize WordPress Dark Mode? From the Customize tab, enable the Adminify UI with the toggle enabler. Once it gets enabled you’ll see the advanced settings to further customize dark mode. In the Light/Dark Mode settings you’ll see the Layout Mode. Here you can select light mode or dark mode. Also, you can modify the following options. For Logo Type, you can choose a separate logo (Image / Text) for light and dark mode. You can choose the light logo and dark logo. Also, you can adjust the logo size and upload a mini logo. Setting up a logo for specially light mode. Apply same procedure for Dark mode too. Now, if you want to know how to schedule WordPress dark mode for your WordPress admin dashboard, WP Adminify lets you do it with ease. ### How to Schedule WordPress Dark Mode? If you select the Dark mode from Layout mode, you’ll see an option called Schedule Dark Mode. Click to enable it. Once enabled, you can choose the Schedule Type from system time or Custom Time. ![Schedule Dark Mode](https://d1k2c27psfzbiv.cloudfront.net/wp-content/uploads/2024/09/24052038/Schedule-Dark-Mode.webp) See how easy it is. Did you learn how to enable WordPress dark mode to your WordPress admin dashboard? Great. ## WP Adminify vs. Other Dark Mode Plugins You'll find several WordPress dark mode plugins available. So, I’ve made a short comparison Here’s how WP Adminify compares to some other WordPress dark mode plugins. ### Dark Mode for WP Dashboard A lightweight plugin that adds a dark theme toggle in user profiles. But, it lacks features like scheduling, custom logo for dark mode. ### WP Dark Mode by WPPOOL This plugin supports dark mode on both the frontend and backend. However, many of its advanced features like scheduling or custom styles are only available in the paid version. WP Adminify includes dark mode as part of a broader dashboard customization suite, giving you more control without needing multiple plugins. Learn more about [WordPress dashboard customization](https://wpadminify.com/features/dashboard-customization). WP Adminify is more than a simple WordPress dark mode plugin. It’s the best WordPress admin dashboard customizer. I’ve made a short comparison with other WP Dark Mode plugins just for you. Here’s a table for you to compare each: save If you want a clean, modern, and professional dark dashboard with full control, WP Adminify is your best option. ### Related Reading [WordPress admin customization](https://wpadminify.com/wordpress-admin-customization) [custom CSS in admin](https://wpadminify.com/custom-css-in-wordpress-admin-panel) ## Conclusion It's a great lifesaver to have dark mode in WordPress. Whether you're working late, sensitive to bright light, or just want a modern dashboard look, WP Adminify gives you the freedom to customize it exactly how you want. Try it today and give your WordPress dashboard the upgrade it deserves. Be the dark knight, enjoy WordPress Dark Mode just the way you always wanted. ## Frequently Asked Questions (FAQs) save ### Q: How do I turn dark mode on or off? You can use the toggle in the admin toolbar or go to the WP Adminify settings to switch between dark and light mode. ### Q: Can I schedule dark mode to turn on automatically? Yes. WP Adminify lets you schedule dark mode with system timing or custom timing. Whatever your preferences are. ### Q: Will dark mode slow down my website? Absolutely not. WP Adminify only affects the backend. It doesn’t load extra scripts on the frontend, so your website performance stays unaffected. ### Q: Can different users have different preferences? Yes. Each user can toggle dark mode individually. WP Adminify understands each user’s preference. And that's why, you can schedule the dark mode, upload separate logo and mini logo for light and dark mode. --- # Best WordPress CRM Plugin for Small Business: 7 Tools Compared URL: https://wpadminify.com/wordpress-crm-plugin Last updated: 2026-08-09 Here are the top free WordPress CRM plugins available for download from the official WordPress plugin repository. Some of these plugins also function as WooCommerce CRM solutions. While the free versions offer basic functionality, for more advanced features, we recommend considering their premium options. We have specifically included regularly updated CRM plugins to prevent any vulnerabilities and compatibility issues. WP Adminify can help you with WordPress CRM plugins by allowing you to access and manage them more easily from your dashboard. You can also [create custom widgets](https://wpadminify.com/docs/adminify/productivity/create-custom-welcome-widget) and [shortcuts for your CRM tasks](https://wpadminify.com/quick-menu) and reports. Also, [customize your WordPress Dashboard](https://wpadminify.com/how-to-create-wordpress-custom-user-dashboard-without-coding) and make it more user-friendly for your clients or personal use. CRM plugins can help small businesses in many ways. Some of the benefits are: - Better customer management - More leads and easier tracking - Automated sales and marketing - Smooth communication with customers - Custom reports and analytics - Easy integration with other tools - Advanced contact management - Task and project management - Personalized customer engagement ## Free vs Paid WordPress CRM Plugin WordPress gives you everything to maintain a Website. But to run your business properly and having a good relation with your clients or users, you must try a CRM plugin. I have covered the most necessary and useful CRM Plugin for WordPress in this blog post. Think of this plugin as your business helper. It keeps everything in one place and makes it easy to stay on top of things: - It lets you collect people’s info right from your website. - Need to send updates or offers? You can set up messages by email, text, or notifications, and it does it all automatically. - It shows you what’s working by tracking clicks, sign-ups, and even sales numbers. - Got a team? You can assign jobs, set reminders, and build out projects together. - Want to see how things are going? It creates easy-to-read reports so you know what to improve. Not sure which CRM plugin to go with? There are free and paid ones out there, each with its own strengths. In this article, we’ll walk you through the good and the not-so-good, so you can pick the one that fits your business best. Ever imagined that redirecting [users to specific admin pages based on their user roles](https://wpadminify.com/features/security#:~:text=Features%20and%20Benefits-,Redirect%20URLs,-Login/Logout%20Redirects) can improve your site’s user experience, efficiency, security, and privacy. For instance, you can send your sales team to the CRM dashboard, your marketing team to the email campaigns, and your customers to the support tickets. You can do this with [URL Redirection feature of WP Adminify](https://wpadminify.com/features/security). With URL Redirection, you can set rules and conditions to redirect users to different admin pages or external URLs, based on their user roles, capabilities, or login status. ## Advantages of free WordPress CRM plugins Free WordPress CRM plugins are plugins that you can download and use for free, without paying any monthly or annual fees. Some of the advantages of free WordPress CRM plugins are: - Easy to install and available in WordPress plugin repository - Perfect for a beginner who has a small user base. - All basic CRM features are available, like email automation, tracking, and reporting. - Get support from an active community of users and developers. ### Some examples of free WordPress CRM plugins are: #### [HubSpot CRM](https://hubspot.sjv.io/o4eMno) HubSpot CRM plugin is available for Free in the WordPress plugin repository. It can help you to sort your leads, send marketing emails, build simple forms and much more. You can also track visitors activity and link up your WooCommerce store, Forms, and Elementor. ![WordPress plugin tutorial - HubSpot – WordPress CRM Plugin installation guide](https://d1k2c27psfzbiv.cloudfront.net/wp-content/uploads/2024/02/12112453/HubSpot-E28093-WordPress-CRM-Plugin.webp) #### [Jetpack CRM - Free Version](https://wordpress.org/plugins/zero-bs-crm/) Jetpack CRM is a simple and lightweight CRM plugin that lets you manage your contacts, invoices, quotes, and transactions. It also has a dashboard widget that shows your sales funnel, revenue, and customer feedback. ![Jetpack CRM Plugin for WordPress](https://d1k2c27psfzbiv.cloudfront.net/wp-content/uploads/2024/02/12112455/Jetpack-CRM-Plugin.webp) ## Disadvantages of free WordPress CRM plugins Free WordPress CRM plugins are not without their drawbacks. Some of the disadvantages of free WordPress CRM plugins are: - They have limited features and functionality, compared to paid CRM plugins - They may not offer adequate customer support - They may have ads or branding that you cannot remove or customize ## The Best Free WordPress CRM Plugins If budget is the deciding factor, all four tools below have a genuinely usable free tier, so you can run a small list without paying anything. The best free WordPress CRM depends on what you sell: - FluentCRM (free): the strongest free pick for content sites and course or membership creators. It is self-hosted, keeps unlimited contacts, and runs email campaigns and automations from inside wp-admin. - Jetpack CRM (free): the best free option for WooCommerce stores and freelancers. It syncs orders and tracks contacts, quotes, and invoices without a monthly bill. - WP ERP (free): best when you need more than a CRM. The free version bundles basic CRM, HR, and accounting for small B2B teams. - HubSpot (free): best if you want a free contact database plus forms, live chat, and 2,000 free emails a month, with room to grow into paid marketing tools later. ## Best WordPress CRM Plugins for Any Businesses | CRM plugin | Free version | Paid from | Type | Best for | | --- | --- | --- | --- | --- | | FluentCRM | Yes (self-hosted) | $129/year | Native WordPress plugin | Email marketing and automation, unlimited contacts | | Jetpack CRM | Yes | $11/month | Native WordPress plugin | WooCommerce stores, contacts, invoices and quotes | | WP ERP | Yes | $9.99/month plus $3/user | Native WordPress plugin | B2B teams wanting CRM, HR and accounting together | | HubSpot | Yes | $18/month (Starter) | External SaaS with a WordPress connector | Free contact database plus email and forms | WordPress CRM plugins at a glance, all four have a free tier. When it comes to choosing the best WordPress CRM plugin for your small business, several options stand out for their features, functionalities, and pricing. Let's take a closer look at the top CRM plugins for WordPress and compare their offerings. ### HubSpot The [HubSpot WordPress Plugin](https://hubspot.sjv.io/c/5121801/1043473/12893) is designed to streamline your workflow and simplify your tasks. This free plugin serves as a bridge between your WordPress website and your HubSpot CRM account, enabling seamless transfer of contact information from your CMS to your contact management tools. With a range of features such as free forms, live chat, and email marketing, your business can effortlessly capture, organize, and engage visitors without the need for additional coding. These features can be easily added to your WordPress site. Instead of toggling between your CMS and CRM software to monitor your growth, the HubSpot WordPress Plugin allows you to conveniently view your analytics within your WordPress dashboard. Moreover, it integrates seamlessly with popular WordPress solutions like Gravity Forms, WooCommerce, Stripe, and Zapier. ![HubSpot – CRM Email Marketing Banner](https://d1k2c27psfzbiv.cloudfront.net/wp-content/uploads/2024/02/12112458/HubSpot-E28093-CRM-Email-Marketing-Banner.webp) Another way to enhance your CRM experience is to create a [custom admin page using WP Adminify plugin](https://wpadminify.com/features/productivity). This plugin allows you to create and customize unlimited admin pages with any page builder, such as Elementor, Oxygen, or Visual Composer. You can use this feature to create a guide or tutorial on how to use your CRM plugin properly, and display it on your WordPress dashboard. You can also set user roles restrictions, custom icons, and menu orders for your custom admin pages. #### What HubSpot CRM Can Do For You: Connects to Your Go-To Tools (Like WordPress): Plays nice with hundreds of popular WordPress plugins you probably use – think WooCommerce for your shop, Stripe for payments, Gravity Forms, and loads more. Need even more connections? Hook it up to Zapier. Keep Your Contacts Sorted: Never lose track of people! Easily group them, see what pages they visit or emails they open (super handy!), and keep their details fresh instantly. Chat Live, Right on Your Site: Talk to visitors while they're browsing! Every chat gets saved automatically. Got common questions? Set up a little bot to answer them for you – saves tons of time. Build Forms & Pop-ups That Fit Your Brand: Need to collect leads? Design sign-up forms or pop-up messages that actually look like your website. You pick exactly where they pop up and when. Easy! Send Awesome Emails (2,000 Free/Month!): Create professional emails with simple drag-and-drop or templates – no coding needed. Best part? Send up to 2,000 emails free each month. Set them to go out automatically based on what contacts do. See What's Working (Emails & Customers): Get clear reports showing exactly how your emails perform. Track clicks, see where customers drop off, and understand what they're up to. Plus, see if your emails are actually making money. Test Subject Lines for Better Opens: Not sure which subject line works best? Test a couple! See which one gets more people to actually open and click your emails. Helps more messages land in inboxes and get results. #### Pricing - Starter: This tier includes all the features of the free version, with increased limits, and is available for $18 per month for two paid users. - Professional: In addition to the core features, this tier provides collaboration tools and phone support, and is priced at $800 per month for five paid users. - Enterprise: For advanced needs, this tier offers customizable features and advanced permissions, and is available for $3,600 per month for 10 paid users. ### Fluent CRM Ever wish managing email campaigns felt less like rocket science? [FluentCRM for WordPress](https://fluentcrm.com/?ref=2790) makes it downright simple. Seriously – you'll be up and running fast thanks to its no-headache setup and dashboard that actually makes sense. Perfect if you're just starting out. ![FluentCRM plugin banner](https://d1k2c27psfzbiv.cloudfront.net/wp-content/uploads/2024/02/12112506/FluentCRM-plugin-banner.webp) Quick Pro Tip: Tired of a cluttered WordPress menu? Grab the [Admin Menu Editor](https://wpadminify.com/features/admin-menu-editor) plugin. Hide those CRM submenus you never use! Cleaner workspace, less confusion, better security. Lock things down so only admins see the important stuff, keep your data safe and your team focused. #### Why FluentCRM Rocks for Your Business: Stop Missing Sales: FluentCRM isn't just another plugin – it's your central command for contacts, leads, and customers. Syncs beautifully with tools you already love like Easy Digital Downloads, MemberPress, and LearnDash. Everything in one place? Yes, please! Emails People Actually Open: Ditch the boring templates. FluentCRM's drag-and-drop editor lets you whip up gorgeous emails in minutes. Target exactly the right people using tags, lists, or custom details. Set 'em to send automatically or build whole email sequences that run while you sleep. Know Your Customers Inside-Out: See the full picture with the 360-degree contact view. Track purchases, email opens, form fills – even what they click on your site with smart links. It’s like having a friendly spy (the good kind!) telling you exactly what your contacts care about. See What's Working (And What's Not): Get real numbers, not guesses. FluentCRM's reports show opens, clicks, bounces, unsubscribes, and crucially – how much money your emails are making. Hook it up to Google Analytics for even deeper insights on clicks and ROI. Subject Lines That Get Clicks: Can't decide between two catchy subject lines? Test them! FluentCRM's A/B testing shows you which one wins for opens and clicks. Better inbox placement and more conversions? That’s the goal. #### Pricing - Single Site License for $129/year - 5 Site License for $249/year - 50 Site License for $499/year All plans include essential CRM tools such as marketing automation, unlimited email creation, and email list management, as well as additional integrations, priority support, and updates for a full year. ### Jetpack CRM One standout plugin is [Jetpack CRM](https://jetpackcrm.com/), a user-friendly and powerful customer management tool. It offers a free version with basic functions and two paid plans with a 14-day money-back guarantee: ![Jetpack CRM plugin banner](https://d1k2c27psfzbiv.cloudfront.net/wp-content/uploads/2024/02/12112501/Jetpack-CRM-plugin-banner.webp) While using a WordPress CRM plugin, you may have a lot of media files related to your campaigns and reports. To keep your media library organized and tidy, you can use the [Post type & Media Folder](https://wpadminify.com/docs/adminify/productivity/create-folder-for-post-types) feature of WP Adminify plugin. This feature allows you to create and manage custom folders for your CRM media files, and assign them to different Folder. #### Key features and functionalities - Take control of your data with Jetpack CRM’s usage tracking feature. You can easily enable or disable it from your WordPress dashboard and see how your CRM is performing. - Segment your contacts smartly with Jetpack CRM’s contact segmentation tool. You can create dynamic groups of contacts based on their attributes and behavior, and apply conditional logic to match them with your criteria. - Brand your CRM your way with Jetpack CRM’s WordPress override mode. You can customize the look and feel of your CRM dashboard and control the access of your CRM users and WordPress users. - Connect with your customers on social media with Jetpack CRM’s social integration feature. You can link your CRM contacts with their social media profiles, such as Facebook, LinkedIn, and Twitter, and reach out to them via email campaigns. - Create and send invoices from your WordPress site with Jetpack CRM’s invoice builder feature. You can design professional invoices with your logo and details, and get paid online with PayPal or Stripe. - Generate and share quotes with ease with Jetpack CRM’s quote system feature. You can use pre-built templates to create proposals for your clients, and send them via email or preview link. - Sync your WooCommerce store with your CRM with Jetpack CRM’s WooSync feature. You can import your WooCommerce customers and orders to your CRM, and manage them from one place. - Automate your CRM tasks with Jetpack CRM’s automated workflows feature. You can set up rules and actions to trigger events based on your contacts’ actions, such as sending emails, adding tags, updating fields, and more. - Personalize your contact profiles with Jetpack CRM’s contact image mode feature. You can allow your customers to upload their own images or use their Gravatar pictures to their contact profiles, and see their faces in your CRM. - Create and manage unlimited contacts with Jetpack CRM’s unlimited contact creator feature. You can add as many contacts as you want to your CRM, and use the Click2Call feature to call or message them directly from your CRM. - Import and export your data with ease with Jetpack CRM’s ability to import and export files feature. You can use CSV files to bulk update your contact list, quotes, and transactions, and export your data for backup or analysis. #### Pricing - Freelancer: starting at $11/month, includes a single site license, PayPal and Stripe integration, 12 months of support and updates. - Entrepreneur: starting at $17/month for additional advanced features, 30+ CRM extensions, and priority support. - Reseller: Starting $5.40/month per site for all 30+ CRM extensions, 10 site license, Rebrand CRM. Premium extensions are available as bundles or individual purchases for extra functionality, such as Gravity Forms for lead and customer info collection and Twilio for sending SMS messages to customers. ### WP ERP The [WP ERP plugin](https://wperp.com/?ref=1315) offers essential tools to keep your business connected with customers and manage interactions, all available in the free version. This includes features for company information management, location tools, a holiday calendar, creating contact groups, and adding notes to customer profiles. While the premium version, starting at $115.88 per year, provides premium support and a wide range of extensions, such as payment gateways and payroll tools, it may not be necessary for all businesses. However, for larger businesses and agencies, the premium plans go up to $714 per year. ![WP ERP Plugin banner](https://d1k2c27psfzbiv.cloudfront.net/wp-content/uploads/2024/02/12112509/WP-ERP-Plugin-banner.webp) #### Key features and functionalities - Manage your emails from your WordPress dashboard with WP ERP’s built-in mailing system. You can quickly compose and send emails to your contacts, leads, and customers without leaving your CRM. - Set up your CRM in minutes with WP ERP’s easy setup feature. You just need to install the plugin on your WordPress site and follow the software wizard to configure your CRM settings and modules. - Track and manage your projects with WP ERP’s project management module. You can create and assign tasks, set deadlines, and monitor the progress of your projects in real time. You can also collaborate with your team and clients using comments and attachments. - Get a comprehensive overview of your CRM with WP ERP’s CRM dashboard. You can see your segmented contact list, activity schedules, and inbound emails directly from your WordPress dashboard. You can also filter and search your contacts by tags, groups, and stages. - Manage your B2B relationships with WP ERP’s B2B management feature. You can create and manage company profiles and add multiple representatives for each company. You can also use the white labeling feature to brand your CRM with your logo and colors. - Accept payments in multiple currencies with WP ERP’s supports multiple currencies feature. You can accept customer payments in over 40 currencies using PayPal or Stripe. You can also set your default currency and exchange rates. - Analyze your CRM performance with WP ERP’s user-friendly CRM report feature. You can receive detailed statistics and data on your business growth and customer activities. You can also see your email open rate, click rate, conversion rate, and revenue. #### Pricing Premium version costs $9.99/month with an additional $3 per user. Choose the HRM, CRM, Accounting module you need at different pricing per month. ## The Real Deal on Paid WordPress CRM Plugins So you're considering paid CRM plugins for WordPress? Let's cut through the buzzwords. These are tools you pay for - either once or yearly - and honestly? They often pack a serious punch where free options fall short. Why Paid Plugins Can Be Worth Your Cash: - Muscle Where It Counts: You're not just getting basic contact lists. Think heavy-hitters like lead scoring (who's really interested?), slick automations, laser-focused audience groups, and proper analytics. This is business-grade stuff. - They Actually Get Updated: Ever used abandoned free plugins? Paid tools get regular love - bug fixes, new features, compatibility patches. That means fewer headaches and less "why won't this work?!" moments. - Plays Nice With Others: Good paid plugins actively keep up with WordPress updates and popular add-ons. Less time troubleshooting conflicts, more time actually using your CRM. - Help When You Need It: Stuck? Paid usually means real support - actual humans via chat or email, plus decent docs. No more scouring random forums at midnight. - Look Professional, Not Pushy: Ditch the "Powered By" badges and tacky ads. Paid plugins let you keep your brand front and center. It just looks... cleaner. But Let's Be Honest (The Downsides): - Your Wallet Will Notice: This isn't pocket change. Subscription costs add up, and some lock you into yearly plans. Budget carefully. - Can Feel Like Overkill: That powerful dashboard? Might overwhelm you at first. If you're just starting out or hate tech jargon, there's a learning curve. Seriously. Choosing Your CRM Sidekick: Forget "Best," Find "Right" Look, there's no universal "best" plugin. It's like shoes - what fits your business? Ask yourself these real questions: - What features are deal-breakers? (Must have SMS? Need deep WooCommerce sync? List them!) - What's the actual goal here? (Just organize contacts? Run complex sales funnels? Automate follow-ups?) - What's my actual budget? (Be ruthless. Include potential costs for extra users or add-ons.) - How tech-savvy am I/we? (Be honest. Will you need hand-holding or prefer diving deep?) - How do I want this thing to feel? (Clunky spreadsheets? Sleek dashboard? Easy for the team?) Answering these cuts through the noise. You'll zero in on the CRM that actually fits your workflow and goals – not just the one with the shiniest sales page. ## WordPress CRM Plugins: FAQs ### What is the best free WordPress CRM plugin? FluentCRM and HubSpot both offer strong free tiers. FluentCRM is self-hosted with unlimited contacts, while HubSpot offers cloud-based CRM with email marketing included. ### Do I need a CRM plugin for WordPress? If you manage customer relationships, track leads, or send email campaigns from your WordPress site, a CRM plugin saves time by centralizing everything in your dashboard. ### Which WordPress CRM works best with WooCommerce? Jetpack CRM is purpose-built for WooCommerce. It auto-syncs customers, orders, and transactions directly from your store without extra configuration. ### Can I use HubSpot CRM with WordPress for free? Yes. The HubSpot WordPress plugin is free and includes contact management, forms, live chat, and basic email marketing with up to 2,000 emails per month. ## Conclusion If you're running a business through WordPress, a good CRM plugin isn't just helpful, it's your behind the scenes powerhouse. Think about it: these tools help you actually connect with visitors, turn them into loyal customers, and yeah, boost those sales numbers you're watching. WordPress CRM plugins? They're not all the same. You've got free ones and paid ones sitting on the virtual shelf, each playing a different game. Free sounds great, paid offers more muscle – it totally depends on your shop's size, goals, and honestly, how much tech hassle you want to deal with. You gotta weigh those trade-offs yourself. Hopefully, breaking down the free vs. paid CRM world here gives you a clearer picture for picking your perfect match. Seriously. Stuck deciding? Or tried something awesome we should know about? Comment in below – what's working (or driving you nuts) with YOUR CRM setup? We read every comment and love swapping real stories. --- # How to Simplify WordPress Dashboard - Novian's Case Study URL: https://wpadminify.com/simplify-wordpress-dashboard Last updated: 2026-08-08 WP Adminify is a name for trust and reliance. It has gained unbiased, unanimous praise from users like Novian around the world. The positive reviews and experiences shared by the users are always inspirational. SO, we can encourage you to experience the unmatched customization using the plugin. We love to encourage you not to miss out on the opportunity to streamline WordPress Dashboard customization process with our revolutionary plugin. We love to encourage you to discover many more [benefits that WP Adminify offers](https://wpadminify.com/pricing) to transform your administration panel. Just like other users we can safely believe you'll be please with WP Adminify once you experience the customization magic. ![Novian Bayu Putranto - A user of WP Adminfiy](https://d1k2c27psfzbiv.cloudfront.net/wp-content/uploads/2024/01/12112412/Novian-Bayu-Putranto.webp) Introduction Hello, I am Novian Putra, a seasoned web development and digital marketing professional. As a web expert, I offer comprehensive services through digilunar.com, focusing on optimizing, professionalizing, and enhancing conversion rates for your website. ## Favorite Features WP Adminify comes with some excellent [Dashboard customization features](https://wpadminify.com/features/dashboard-customization). Almost all the features are meticulously tailored to allow a serious user like Novian to personalize the WordPress administration. The three WP Adminify features that Novian would like to appreciate are [Admin Columns Customizer](https://wpadminify.com/admin-columns-editor), Admin Menu Editor, and Post Type Order. These features offers extensive customization and flexibility. You can customize the dashboard layouts, menu structures, and contents. These customization will suit your way of workflow for sure. Let’s share the overview of how WP Adminify helped Novian and why he loves to work with them. ### Admin Columns Customizer Admin Columns Customizer is truly amazing once you start using. This powerful module lets him to customize and organize the columns displayed on various admin pages. These also includes the posts and pages. As per his requirements, it allows him to modify the properties and adjust the position of columns. ![Admin Columns Customizer using ACF Plugin](https://d1k2c27psfzbiv.cloudfront.net/wp-content/uploads/2023/12/12112317/Admin-Columns-Customizer-using-ACF-Plugin.webp) With its drag-and-drop interface, he can [easily rearrange and reorder columns](https://wpadminify.com/necessary-admin-columns-for-wordpress) just like he wants. It allows him to add, remove and modify column types. These includes post data, taxonomy, author, comments, and more. Also, it supports Advanced Custom Fields (ACF). So, it becomes easy for him to display ACF field values in columns. ### Admin Menu Editor Customizing the admin menu seems to be a piece of cake with the Admin Menu Editor module of the WP Adminify plugin. The feature enables him to [customize and reorganize the WordPress dashboard menu](https://wpadminify.com/how-to-use-the-wordpress-admin-menu-editor) to streamline navigation. It gives him full control over the work environment. Additionally having an improved user experience. He can easily reorder them, by dragging and dropping the menu items. The menu items have a hide option as well. So anyone can show or hide them from the dashboard by users or user roles. It also lets him control the menu visibility based on user roles, And this ensures that different user groups see only relevant menu items. Comments is usually the first one to go. If your site does not take comments, you can [hide the Comments menu from the dashboard](https://wpadminify.com/hide-comments-menu-from-wordpress-admin-panel) in a couple of clicks. To identify these items visually, WP Adminify lets him set custom menu icons. And lastly, this module also allows him to import, export, and reset menu settings. This means he can reuse his settings in other websites too. ### Post Type Order The post Type Order module is designed to give a user like Novian full control over the posts, pages, media, and post type. Using the straightforward drag-and-drop interface, the module allows him to [create custom orderings for each post type](https://wpadminify.com/how-to-use-custom-post-type-order). It supports all post types and doesn’t require any save options, which has been a blessing to him. The media library sorting and WooCommerce post-type order make it an inevitable module for professional use. Without having to access individual post-editing screens, it allows him to modify the post order. The taxonomy-support characteristics make the re-ordering process seamless and efficient. ## Feature Wishlist Novian expressed that over the past few years, he has been looking for an all-in-one plugin that can help him with [WordPress Dashboard customization](https://wpadminify.com/how-to-create-wordpress-custom-user-dashboard-without-coding). Finally, he got WP Adminify, which provides everything crucial for tailoring the admin interface, streamlining workflows, and enhancing overall usability by meeting his specific needs. Novian thinks it would be great if WP Adminify offered a Drag and Drop Dashboard. Or if we integrate a page builder directly into the Admin Dashboard. This could provide an easier way to customize. ![imaginary Dashboard with Drag and Drop](https://d1k2c27psfzbiv.cloudfront.net/wp-content/uploads/2023/12/12112409/imaginary-Dashboard-with-Drag-and-Drop.webp) Novian also told us that, adding a template design import or integrating a page builder for the admin dashboard could be a game-changer. It would be easier for users to experiment with different layouts and configurations. Doing so will help create user-focused dashboards. Most importantly, it could reduce the customization time required for users. ## Dashboard Customization Showcase The following screenshots give us an insightful scenario where Novian has customized [admin columns in WordPress](https://wpadminify.com/how-to-add-acf-field-to-admin-column), utilizing the full power of the WP Adminify plugin. With the Admin Columns Customizer module, we can see that he selected specific columns he wanted to showcase in "Posts," "Pages," or "Users." The picture shows us that he rearranged columns with a simple drag-and-drop interface. We can see the user triggered the option to add new columns (Custom ACF Field) or remove existing ones. The module let him add different columns. Like the post data, taxonomy, author, comments, or custom fields. After making the changes, he returned to the admin sections, he can see the customized columns in the order he specified. Here, we can see another set of screenshots that provide us with an in-depth scenario of edited admin menu items. The thought process behind the changes is simple: the use of the WP Adminify Admin Menu Editor module. With the feature, he edited and customized the admin menu items. He removed unused items from the main menu to simplify the navigation. ![Hide Media Menu item for some user role](https://d1k2c27psfzbiv.cloudfront.net/wp-content/uploads/2023/12/12112404/Hide-Media-Menu-item-for-some-user-role.webp) Novian reorganized the menu organization when he thought was inconvenient. He moved the menu and sub-menu items to the right for easier access. We can see that he added custom icons for easier identification. To say it frankly, Novian’s customized admin menu reflects a professional yet customized after making all these customizations. We realize that Novian made the best use of the Post Type Order module as he neatly rearranged the order of specific posts in WordPress. He showcased post types in a desired sequence on his Dashboard. It can be said that he found precise control over the display order of his custom post types. The module helped him to make a more organized and visually appealing Dashboard with a diverse content structure. ## User Testimonial Novian left some positive comments regarding the horizontal menu feature of the WP Adminify plugin. ## Acknowledgments We want to express our sincere gratitude to Novian for his invaluable time, collaboration, and dedicated contribution to the WP Adminify community. The way he shared this positive experience and insights is praiseworthy. His impartial reviews shared with us have significantly enriched our community's knowledge base. We also immensely appreciate his willingness to participate in such a vibrant and resourceful discussion. His journey with WP Adminify has undoubtedly been adorable and desirable for others. His commitment and love for the WP Adminify community can never be forgotten. The WP Adminify team is always thankful to him and ready to support him all along. Below are some of the answers from Novian, asked by our team: Q: How long have you been using WP Adminify? Novian's Answer: More than a year. Q: What is the feature you use most in WP Adminify? Novian's Answer: Admin Columns Customizer, Admin Menu Editor, and Post Type Order Q: What features would you like to see in future updates of WP Adminify? Novian's Answer: I think WP Adminify needs template design imports or a feature like Page Builder to create a dashboard admin. Q: Are you satisfied with our documentation and video tutorials? Novian's Answer: Very Satisfied. Q: Have you encountered any technical issues while using WP Adminify? If so, please describe. Novian's Answer: I think I feel slower when activating the plugin. Q: On a scale of 1 - 5, how would you to recommend WP Adminify to a friend or colleague? Novian's Answer: 4 Q: Could you share a quick review of your experience with WP Adminify to motivate our team? Novian's Answer: I like the horizontal menu feature, which makes it different from other admin dashboards. This is a plus for Adminify. Keep up the good work. ### Related Reading [WordPress dashboard guide](https://wpadminify.com/wordpress-dashboard-guide) [dashboard customization](https://wpadminify.com/wordpress-dashboard-customization) ## Conclusion That’s all about the productive journey of Novian with WP Adminify. From the moment he started using WP Adminify, he has been extremely happy. This plugin made his WordPress dashboard customization journey to the next level. Throughout the journey with WP Adminify, Novian found a new level of control. According to him, his workflow has been incredibly productive. We express our heartfelt gratitude to him for experiencing our product and expressing valuable insights into it. We believe that his journey with WP Adminify is a testament to our plugin's effectiveness. --- # How to Disable WordPress Comments? (Block Spammers) URL: https://wpadminify.com/how-to-disable-wordpress-comments Last updated: 2026-08-08 Comments are an easy way to impart insightful messages concerned to a post. Engaged readers can express their views on a particular post or page via the comment section. But everything has some demerits too; a vague, unreasoning, and irrelevant comment can have a negative impact on a webpage. How? An irrational comment by a spammer can distract others and demotivate them to make a move. That means you may lose your targeted traffic even if your webpages have a higher rank on Google when your website is seized with spammers activity. The best way to prevent such a serious setback is to take full control of the comment section by [disabling unauthorized comments](https://wpadminify.com/features/security). [Disabling comments](https://wpadminify.com/docs/adminify/security/disable-comments-on-post-types) is too easy to do as long as you have the WP Adminify plugin at your fingertips. The innovative, easy-to-navigate, and super-flexible plugin will offer you outstanding service by making comments disabled in a brisk way. However, let’s take an in-depth look! ## Why WP Adminify for Disabling Comments? Restriction in the comment section seems to be the foremost task for all website owners, as the prevalence of spam comments is always at its peak. To fulfill users expectations, a wide variety of plugins have been developed and are still under development. But the number of plugins that can provide a full-fledged, versatile comment disabling facility like WP Adminify is small. Almost all the plugins available online offer the typical functionality of removing the full comment system. But WP Adminify integrates a sophisticated module called Disable Comments, which allows the users to disable comments for the post type, attachments, a form URL field, and an admin bar. ![Disable comments in WordPress Website](https://d1k2c27psfzbiv.cloudfront.net/wp-content/uploads/2024/08/12110755/Disable-comments-in-WordPress-Website.webp) Besides, you can permanently remove the admin comments menu item, dashboard comments widgets, and the submenu discussion with it. Most surprisingly, the premium-grade module will let you hide existing comments, remove close comment text, and replace author and comment links with JavaScript with ease. And you can configure the comment option as per your needs without any hassle. All these distinctive features and amenities set the plugin apart from hundreds of other plugins available today. That’s why the usability and popularity of the plugin seem to be higher than those of its competitors. And you should also give it your full attention ahead of other plugins. ## How to disable comments on WordPress websites? When you’re running a high-authority website for optimal conversion, you definitely need to control the comment option. You need to keep your web pages away from the devastating touch of spammers or malicious viewers. To do so, you have no choice but to disable the comments with the high-fidelity WP Adminify plugin. To be honest, as the WP Adminify "Disable Comments" module consists of manifold options, first you have to be prompted to configure the options that you’re going to manipulate on your WordPress website. There is nothing wrong if you check all the options for your working purposes. The options you will activate can be applied in the comment section. Here are the steps you should adhere to: ### Go to the WP Adminify module settings You’re going to leverage the power of a module under the WP Adminify plugin, so you need to configure the module settings initially. But before jumping in to set up the module, you have to make sure the original version of WP Adminify is working on your dashboard. Otherwise, you will come across drawbacks at every step. In the left bar of the main dashboard, you need to click on the WP Adminify option. Then you have to navigate to the module settings option. Under the module settings, you will see the "Disable Comments" option. As of now, just click on the option. ![disable comments on posts WordPress](https://d1k2c27psfzbiv.cloudfront.net/wp-content/uploads/2025/03/12064604/disable-comments-on-posts-WordPress.webp) ## Configure the interface and options As soon as you click on the "Disable Comments" option, a new interface will be presented to you with multiple well-aligned fields. The options require proper adjustment to make sure you disable comments where you want. All the options are explained below, in short, to help you reinforce your understanding of their purposes. ### Disable Comments for specific post types: WP Adminify will allow you to determine the post type for which you want to disable comments. For instance, if you want to disable the comment for the posts only, you need to check the "Posts" option under the "Disable Comments for" title. Similarly, you can switch between pages, landing pages, and admin pages where you’re seeking to turn the comment system off. ![Disable Comment For Specific Post Type](https://d1k2c27psfzbiv.cloudfront.net/wp-content/uploads/2023/07/12111947/Disable-Comment-For-Specific-Post-Type.webp) ### Remove Comments for Attachments: An auto-generated attachments page is available on all WordPress websites. The page is not secured, as spammers can comment on it. You can’t prevent spam comments on that page unless you remove the comment box from the page. To help you out, WP Adminify integrates the "Remove Comments for Attachments" option. All you need to do is enable the option and get rid of the headache. ![Remove Comments for Attachments](https://d1k2c27psfzbiv.cloudfront.net/wp-content/uploads/2023/07/12111952/Remove-Comments-for-Attachments.webp) ### Remove Admin Menu "Comments": If you want to strictly prohibit commenting on your web pages, you can take advantage of this option. This option will allow you to remove the comments menu from the admin menu. So once you enable it, you will no longer have to worry about dealing with spam comments in your website dashboard. If you want to see the whole process first, here is how to [hide the Comments menu in WordPress](https://wpadminify.com/hide-comments-menu-from-wordpress-admin-panel) from start to finish. ![Remove Admin Menu Comments](https://d1k2c27psfzbiv.cloudfront.net/wp-content/uploads/2023/07/12111956/Remove-Admin-Menu-Comments.webp) ### Close Comments Front-end: Almost all WordPress websites expose a "Close Comments" notice after disabling the comment option for a certain period with a typical plugin. That means you will be notified at random once the disabling period expires. To get rid of such an issue, you can activate the "Close Comments Front-end" field. ![WordPress plugin feature - Hide Close Comments notice in front end professional interface](https://d1k2c27psfzbiv.cloudfront.net/wp-content/uploads/2023/07/12112000/Hide-Close-Comments-notice-in-front-end.webp) ### Remove Comments Admin Bar: By enabling this field, you can remove the "edit comments" page from the blog or posts of your web pages. You will no longer have to bother with that useless option under the comment icon. It’s really helpful to you to control the comment section. ![Remove Comments icon from Front End Admin Bar](https://d1k2c27psfzbiv.cloudfront.net/wp-content/uploads/2023/07/12112131/Remove-Comment-icon-from-Front-End-Admin-Bar.webp) ### Replace Comment Links to JavaScript: WP Adminify has some salient, unique features in its disable comment module; "Replace Comment Links to JavaScript" is one of them. Once you set this option, it will use a span tag instead of the default link tag. And the tag will work via JavaScript to prevent spam comments. ### "Comments" Menu Redirect to Admin: It’s an amazing feature, as you can redirect the comments menu to your WordPress dashboard. By enabling the option, you no longer need to hide the comments menu manually at times. You can also disable the option if you feel it’s of no use. ### Remove Dashboard Comments Widget: It’s usual to find dashboard comment widgets on a WordPress website. By default, there appears a "Recent Comments" widget inside the main widgets that is susceptible to spam attacks. To relieve your concern, WP Adminify comes with this option in the module. It’s so prompt to remove the comments widget from the widget library. ### Remove Submenu Discussion: Comments belong to the "Discussion" submenu inside the main settings menu of the WordPress dashboard. You can control the comments from this menu by enabling the "Remove Submenu Discussion" option. Once you keep it enabled, you no longer see the comments inside the submenu. ![Remove Discussion Submenu from Settings](https://d1k2c27psfzbiv.cloudfront.net/wp-content/uploads/2023/07/12112142/Remove-Discussion-Submenu-from-Settings.webp) ### Hide Existing Comments: Having pre-posted comments on a website is common. Most of those comments might be irrelevant and unwanted. You can hide all those existing comments by enabling this feature. There is no need to delete a myriad of comments one by one once you activate the option. ![WordPress plugin feature - Hide Existing Comments professional interface](https://d1k2c27psfzbiv.cloudfront.net/wp-content/uploads/2023/07/12112134/Hide-Existing-Comments.webp) ### Remove Comment Form URL Field: It’s another handy and impactful option for controlling the comment section. By enabling this option, you can remove the URL field from the comment section. As a result, spammers will fail to leave irrational comments even if the comment form stays visible. ![Remove Comment Form Website URL Field](https://d1k2c27psfzbiv.cloudfront.net/wp-content/uploads/2023/07/12112137/Remove-Comment-Form-Website-URL-Field.webp) ### Replace Author Links to JavaScript: Once you enable this option, it will span inside the author links and give you full control over the comments section. It will replace the external links in comments with JavaScript forms without any further hassle. ## Conclusion Comments are necessary, but spam comments are always ignorable. Irrelevant comments from unwanted users can wreak havoc on the website's performance, conversion, and interaction. So it’s inevitable to disable comments to avoid unintentional damage to the websites. How to disable comments on WordPress websites for spammers? Although it’s not a tedious task at all, you need to opt for the right tool to get your job perfectly done. --- # How to Redeem WP Adminify Addons Using Coupon Code? URL: https://wpadminify.com/redeem-addons-using-coupon-code Last updated: 2026-08-02 Welcome! You've either purchased a paid version of WP Adminify or you're one of our beloved existing customers. No matter which segment you fall in, this post is your guide to unlocking WP Adminify's powerful add-ons for free! Here's what you'll need: Redeem Eligible Addons with your Coupon Code: - [Login Customizer](https://wpadminify.com/loginfy) - [Header & Footer Scripts](https://wpadminify.com/header-footer-scripts) - [Admin Columns Editor](https://wpadminify.com/admin-columns-editor) - [Google Pagespeed](https://wpadminify.com/google-pagespeed-insights) - [Quick Circle Menu](https://wpadminify.com/quick-menu) - [Sidebar Generator](https://wpadminify.com/sidebar-generator) https://www.youtube.com/watch?v=nlkstEZV8Ng ## Coupon redemption process Make sure you have installed and activated a paid version of WP Adminify licence key. Now, navigate to the WP Adminify >> Addons page. You can usually find it on the left-hand side menu of your WordPress Dashboard. Look for your unique redeem code displayed at the top of the Add-ons page. Copy your unique add-on code. Hover over the module that you'd like to redeem. You'll notice the "Buy Now" button. Click on this button. Clicking on the "Buy Now" button will take you to the pricing page of your selected addon. From the pricing page, select the plan and then proceed to checkout by clicking on the "Get The Deal" button. [As an existing WP Adminify user, we recommend you to choose the Agency plan] Clicking on the "Get The Deal" button will cause a new popup to appear as shown below. You'll notice an option called "Have a promotional code" click on this option and input the coupon code that you've already received inside the addons page of your WP Adminify dashboard. After applying the coupon code,you must input your email ID, first and last name. Make sure to use the same Email ID that you used to purchase WP Adminify before. After inputting all the information like shown on the screenshot below, the "Upgrade for Free" button will become clickable. Just click on this button and wait for a few second. A "Subscription was successful" message will appear as a popup. You should receive all information via email. Finally, check your email and you will receive an email from WP Adminify with a "✅ Thanks for upgrading" subject line. Just like the following screenshot - Click on the "Download the add-on's agency plan version" and download the addon. Just in case, if you miss the email. You can directly log in to your WP Adminify Account page: [https://wpadminify.com/account](https://wpadminify.com/account) Inside your account page go to the "Downloads" menu. Here you can see all addon that you have redeemed and download their latest version. Now, just like other plugins you have to install each addon individually on your WordPress Dashboard. After installation of each addon - You'll be required to input the individual license key for each addons. You can follow the [WP Adminify pro version installation guideline](https://wpadminify.com/docs/adminify/getting-started/pro-installation) too. Looking for the latest plans and deals? See the [WP Adminify pricing](https://wpadminify.com/pricing) page, or explore what a fully customized admin looks like in our [WordPress dashboard customization](https://wpadminify.com/wordpress-dashboard-customization) guide. --- # How to Use Custom Post Type Order with WP Adminify URL: https://wpadminify.com/how-to-use-custom-post-type-order Last updated: 2026-07-26 Websites are full of contents like posts, pages, products and more. And that’s why managing them can be a burden. Without a clear system, things get messy, and your visitors might struggle to find what they’re looking for. Organizing them is the key to success. And it's not just about arrangement, it’s about helping the audience discover the value you offer without confusion. But let’s be real: sorting, categorizing, and reordering a lot of content manually is a nightmare. It’s time consuming and you’re bound to miss something. Sometimes it can lead to mistakes that cause major harm in the long term. That’s where a custom post type order plugin saves the day. Yes, I’m talking about WP Adminify. Its standout "Post Types Order" feature is a game-changer for managing contents. Here’s why it’s the go-to choice for custom post type order to quickly manage your website’s content. ## Custom Post Type Order by WP Adminify Choosing the right plugin to organize your website’s posts can be tricky with so many options out there. Most seem to offer similar features like flexibility, ease of use, and solid content management. But suppose you can only pick one. You need a plugin that’s intuitive, reliable, and bug-free. That’s where WP Adminify shines with its powerful custom post type order feature. Why go with WP Adminify? Its drag-and-drop system makes reordering content a breeze. Just grab a post, page, or other content and drop it where you want it. No complicated steps needed. The custom [post type order](https://wpadminify.com/features/productivity) feature is a standout feature. It lets you efficiently sort any post type, from blog posts and pages to landing pages and admin pages, with custom orders suited for your site. You can also organize taxonomies like categories or tags, and even sort your media library in list view. Features like instant autosave keep things easier. While the ability to disable custom post type order for specific user roles gives you full control. Plus, WP Adminify offers more perks you’ll discover as you use it. In short, WP Adminify delivers everything you need for custom post type order. It saves time, reduces hassle, and keeps your content perfectly organized throughout your website. ## How to Use Custom Post Type Order with WP Adminify To get the best results, you need to know how to use this powerful feature. Here’s a clear, step-by-step guide to help you master custom post type order with WP Adminify. WP Adminify ensures your content is organized efficiently and enhances user engagement. ![Post type order plugin](https://d1k2c27psfzbiv.cloudfront.net/wp-content/uploads/2021/09/12101434/Post-type-order-module.gif) So, let’s show you how to do it. ### Step 0: Install and Activate WP Adminify This is a no-brainer. You need to install and activate WP Adminify to use it. It's just like every other plugin in the WordPress repository. Go to Plugins > Add New. Search for WP Adminify. Install and activate and you’re ready to use its amazing features. ![Free WP Adminify Plugin installation](https://d1k2c27psfzbiv.cloudfront.net/wp-content/uploads/2024/09/23052839/Free-WP-Adminify-Plugin-installation.webp) ### Step 1: Enable the Post Types Order To start, you’ll need to activate the "custom post type order" settings in WP Adminify. Once the plugin is active: ![Post type order Plugin](https://d1k2c27psfzbiv.cloudfront.net/wp-content/uploads/2024/10/11114752/Post-type-order.webp) - Go to the WP Adminify menu in your WordPress dashboard. - Find the Productivity section. - Locate the Post Types Order setting and toggle the Enable button to turn it on. This activates the post type order options, and you’re ready to start customizing your content order. If you don’t see the post type order, double-check that the plugin is properly installed and updated. But keep in mind that you need to ensure that you have installed and activated the plugin properly before heading to the modules section. Once your desired module is enabled, you can move on to the next steps. ### Step 2: Configure the Post Types Order Settings With the post type order enabled, it unlocks settings to customize how your content is organized. You’ll see a user-friendly interface with three key options: ![Enable post type order for post page](https://d1k2c27psfzbiv.cloudfront.net/wp-content/uploads/2024/09/26094120/Enable-post-type-order-for-post-page.webp) - Sortable Post Types: Select which content types you want to reorder, such as Posts, Pages, Landing Pages, or Admin Pages. For example, if you run a blog and an e-commerce site, you might choose Posts and Pages to prioritize blog content and product pages. You can select multiple post types or just one, depending on your needs. - Sortable Media Files: Enable this to reorder items in your media library. This is especially useful for photographers or portfolio sites where the order of images matters. - Sortable Taxonomies: Pick the taxonomies you want to organize, like Categories, Tags, or custom taxonomies (e.g., Product Categories for WooCommerce). This lets you fine-tune how your content is grouped and displayed. Take your time to configure these settings based on your site’s goals. For instance, if you want to highlight recent blog posts or specific product categories, choose only those post types and taxonomies to keep things focused. ### Step 3: Save and Reorder Your Content Once you’ve set up your preferences: Click the Save button to lock in your settings. WP Adminify’s instant autosave feature ensures your changes are applied immediately, so you don’t have to worry about losing progress. Navigate to the content you selected to reorder, such as Posts > All Posts or Pages > All Pages in your WordPress dashboard. ![Media post type order module](https://d1k2c27psfzbiv.cloudfront.net/wp-content/uploads/2021/09/12101431/Media-post-type-order-module.gif) Use the drag-and-drop interface to rearrange items. For example, if you want a specific blog post to appear at the top of your list, click and drag it to the desired position, then drop it. The changes take effect instantly, with no extra steps needed. For media files, go to Media > Library, switch to List View (not Grid View), and drag-and-drop images or files to reorder them. Note: The drag-and-drop feature only works in List View, so make sure you’ve selected it. This intuitive process lets you prioritize content, like featuring a new blog post or showcasing a key product. And you can do it without diving into code or complex menus. Also, check out other [post and archive customization settings](https://wpadminify.com/docs/adminify/security/post-and-archives) available. ## Conclusion Manually sorting through hundreds of posts, pages, or media files is time-consuming and prone to errors. With WP Adminify’s custom post type order feature, you can streamline this process, saving hours while creating a better experience for your audience. Organized content means visitors find what they need faster, which can boost engagement, impressions, and conversions. Whether you’re running a blog, an online store, or a portfolio. By following these steps, you’ll have full control over your WordPress site’s content with minimal effort. WP Adminify’s custom post type order feature is designed to be user-friendly yet powerful, making it the perfect tool to keep your site tidy and optimized. Ready to get started? Install WP Adminify and take charge of your content today. ## Frequently Asked Questions (FAQs) save ### Do I need coding knowledge to use the Custom Post Type Order feature in WP Adminify? Not at all. WP Adminify is designed for non-technical users. The custom post type order feature uses a drag-and-drop interface, so you simply click and drag posts, pages, or media files into the order you want. ### Will reordering my content affect my site’s SEO or permalinks? No, reordering content in WP Adminify does not change URLs or permalinks. Your SEO rankings and indexed pages remain untouched. What changes is how the content is displayed or prioritized for visitors (e.g., which post shows up first in a list). This can even improve SEO indirectly by making content easier for users (and search engines) to navigate. ### Can I choose who has permission to reorder posts and pages? Yes. WP Adminify includes a user role restriction option. You can disable the post type order feature for certain roles, such as Authors or Contributors, while keeping it active for Administrators or Editors. This gives you full control and prevents accidental changes by team members who shouldn’t be reordering content. ### Does the drag-and-drop order also apply on the front end of my website? Yes. When you reorder content in WP Adminify, the custom order applies sitewide. Works both in the WordPress dashboard and on the front end of your site. For example, if you reorder blog posts so a featured one appears at the top, visitors will see that same order when browsing your blog page or category archives. ### What happens if I have hundreds of posts or products? Will WP Adminify still work smoothly? Yes. WP Adminify is optimized to handle large sites with hundreds or even thousands of posts, pages, or products. The drag-and-drop interface remains smooth, and the instant autosave ensures your changes are applied without delay. For very large catalogs (like e-commerce stores), you can focus only on the specific post types or taxonomies you want to reorder, so the system stays efficient without overwhelming you. --- # How to Hide Comments Menu from WordPress Admin Panel? URL: https://wpadminify.com/hide-comments-menu-from-wordpress-admin-panel Last updated: 2026-07-15 Sometimes we need to develop and run websites that don’t need a comment section. Especially in the WordPress admin panel, the integration of a comments menu may seem unnecessary on several different kinds of websites. But even if a website is designed with a comments menu, there are ways to hide it. You can do this it in two traditional ways: by writing a few lines of code or using an advanced plugin. If you would like to prevent comment spam on your website then check out our [how to remove Website URL field from comment form](https://wpadminify.com/remove-website-field-from-wordpress-comments) post. ## 2 Ways to Hide The Comments Menu From WordPress The first way is the more difficult one. This method requires you to delve into code and is more preferable for developers and high level WordPress users. The 2nd method is much simpler and works the same no matter your skill level. This involves using WP Adminify, a WordPress dashboard customization plugin that makes it extremely easy to [disable WordPress comments.](https://wpadminify.com/how-to-disable-wordpress-comments) Lets look at both. ### Hide Comments Menu Via Code? By writing a few lines of code, you can easily hide or remove the menu in the WordPress admin panel without much issue. To do this, you have to head over to the functions.php file. Then you need to write the following lines of code. Make sure to work on your child Theme otherwise, you may lose the data while you update the Theme. ``` function JLT_remove_comments(){ global $wp_admin_bar;add_action( 'wp_before_admin_bar_render', 'remove_comments' ); $wp_admin_bar->remove_menu('comments'); ``` That’s it! Once you've written pasted and saved the code, you're done! Now, just go to the admin panel to see the changes live. ### Hide the comments menu from Dashboard Using WP Adminify Now lets look at the simpler and much easier method. WP Adminify is one of the most powerful plugins to use if dashboard customization is something that you require. Among some of its advanced features, "[Disable Comments](https://wpadminify.com/how-to-disable-wordpress-comments)" can be considered as one of the most helpful, as it includes a variety of effective options to control the comments. It's pretty straightforward. Just follow the steps and you'll successfully be able to hide the comments on your website. ### Steps to Disable Comments with WP Adminify Here's a video on how to disable comments with WP Adminify. Learn how to redirect comment menu in WordPress dashboard to WP Admin 1. Open WP Adminify Settings Navigate to your WordPress Dashboard. Click on WP Adminify > Security. Select Disable Comments from the available options. ![Disable Comments toggle](https://d1k2c27psfzbiv.cloudfront.net/wp-content/uploads/2023/08/07061329/IMG-1-Disable-Comments-toggle.webp) 2. Choose Post Types You’ll see a list of available post types, such as Posts, Pages, Custom Post Types, and more. Check the boxes next to the post types for which you want to disable comments. ![Disable comments globally in WP Adminify](https://d1k2c27psfzbiv.cloudfront.net/wp-content/uploads/2023/08/07061328/IMG-2-Pick-the-post-type-to-disable-comments-for.webp) 3. Fine-Tune Comment Settings WP Adminify gives you additional options to fully remove comment-related elements from your WordPress site: - Remove "Comments" from Admin Bar: Hides the "Comments" option from the top admin bar to declutter your dashboard. - Admin Menu "Comments" Redirect to "wp-admin": Instead of showing the Comments section, this option redirects it to the main admin panel. - Remove Admin Menu "Comments": Completely removes the "Comments" menu from the WordPress admin sidebar. - Remove Discussion Menu from "Settings > Discussion" Sub Menu: Hides the discussion settings menu, preventing unnecessary adjustments by other users. - Close Comments from Front-End: Disables the ability for visitors to leave new comments on your site’s posts and pages. - Remove "Your email address will not be published…" from Comment Form Template: Gets rid of the default text displayed under the comment box, making the form cleaner. - Remove Website Field (URL) from Comment Form Template: Eliminates the website field from the comment form, reducing spam from link-dropping users. - Remove Link from Comment "Author Name" & Replace with JavaScript?: Prevents comment authors’ names from being hyperlinked, replacing the link functionality with JavaScript to deter spam. - Comments Content Disable Auto-Linking, Display Comments Links as Plain Text, Replace Comment Links to JavaScript?: Stops automatic hyperlinking of URLs in comments, displaying them as plain text instead. - Hide Existing Comments from Front-End: Conceals all previously submitted comments from appearing on your site’s front end while keeping them in the database. - Remove Hardcoded ".recentcomments" CSS for Default "Recent Comments" Widget: Disables the built-in styling for the "Recent Comments" widget, allowing full customization. These settings give you granular control over how comments function, helping you create a cleaner and more streamlined WordPress experience. 4. Save Your Changes Once you've configured the settings, ensure the toggle is set to SHOW (enabled). Your selected changes will take effect immediately. ### Related Reading [remove admin menu items](https://wpadminify.com/remove-admin-menu-items) [WordPress admin customization](https://wpadminify.com/wordpress-admin-customization) ## Final words Both methods allows you to disable comments on your WordPress site. If you're comfortable with coding, adding custom snippets to your theme files can be a great joy. However, be careful. because, a small mistake can break your site. On the other hand, WP Adminify provides a much simpler, safer option. With just a few clicks, you can disable comments for specific post types, remove the comments menu from your dashboard, and fine-tune every aspect of comment visibility. And, you get extra flexibility to control comment-related settings in a click. If you want a hassle-free way to manage your WordPress site and remove unwanted comments, WP Adminify is the clear winner. It's easy to use, beginner-friendly, and saves you time. ### Tidy the Rest of the Dashboard Too Hiding the comments menu is usually part of a bigger cleanup. The guide to [customizing the WordPress dashboard](https://wpadminify.com/wordpress-dashboard-customization) walks through removing widgets, simplifying menus and branding wp-admin for clients. --- # How to Hide Admin Bar Based On User Roles or Specific Users? URL: https://wpadminify.com/hide-admin-bar-based-on-user-roles Last updated: 2026-07-15 Controlling the visibility of the WordPress admin bar helps create a personalized workspace. It surely improves the overall user experience as well. Whether you want to streamline the interface for certain user roles or hide it from specific users, customizing the admin bar can significantly enhance usability. If you want to make the admin bar user friendly by hiding it for user roles customization is your only choice. While you can also hide it for specific users to make it further optimized, but by default you don't have the option to do so. Today I’m going to show you how to hide admin bar based on user roles or specific users in WordPress. I’ll explain everything step by step. So it'll be easy to follow for everyone. ## Why Should You Hide the Admin Bar? The admin bar is an interesting and helpful option for WordPress site owners. You can use it for adding content, changing settings or something else. Also, you can get very basic role based control. But if you want advanced role based control or provide less access to other roles, you should hide the admin bar. You can do to to take extra precautionary measure. Here are a few reasons why you should hide the admin bar in WordPress: - Messy Dashboard Interface: The default admin bar can make the interface look messy and confusing. If you prefer a clean dashboard, this surely is distracting. - Performance Issues: Websites with a large number of plugins, the admin bar can slow down page load times. This is frustrating for users trying to manage their sites efficiently. - User Confusion: For beginners, the admin bar might be confusing. They might not understand what each icon and link does. So, it creates major confusion among them. - Limited Use for Certain Roles: Default roles like editors or contributors offer features that are irrelevant to their tasks. This makes it useless for their specific needs. ## How to Hide Admin Bar Based On User Roles or Specific Users in WordPress using a Plugin You can easily hide the admin bar in WordPress using plugins. With additional customization option the Admin Bar Editor gives you such flexibility free of cost. Here's how to hide the admin bar based on user roles or specific users using the Admin Bar Editor plugin. Step 1: Install the Admin Bar Editor Plugin Download, Install, Activate: Start by downloading and installing the free Admin Bar Editor plugin from the WordPress plugin repository. You can directly [download the plugin here](https://wordpress.org/plugins/admin-bar/). ![Download and install Admin Bar Editor Plugin](https://d1k2c27psfzbiv.cloudfront.net/wp-content/uploads/2024/03/12112647/Download-and-install-Admin-Bar-Editor-Plugin.webp) Once installed, activate the plugin. Step 2: Access the Admin Bar Editor Go to WordPress dashboard and find the "Admin bar Editor" option. Click on "Admin bar Editor" to open the panel. Here you will find two options: Backend and Frontend. Hide Backend Admin Bar Items Toggle Visibility: In the Backend section, you will see a list of admin bar items with switches next to them. Flip the switch of any item you want to hide. Save Settings: After selecting the items to hide, save your settings. ![Hide and customize admin bar items](https://d1k2c27psfzbiv.cloudfront.net/wp-content/uploads/2024/03/12112648/Hide-and-customize-admin-bar-items.webp) Additional Customization: Expand Items: Click on any item to expand it. Now, you can rename items, change icons and set visibility based on user roles. User Role Customization: You can hide items for specific user roles. Just use the provided options to set these preferences. Hide Frontend Admin Bar Items Click on the "Front end" tab in the Admin bar Editor panel. Just like the Backend section, flip the switches for any items you want to hide on the frontend. ![Disable Frontend Admin Bar](https://d1k2c27psfzbiv.cloudfront.net/wp-content/uploads/2024/04/12112625/Disable-Frontend-Admin-Bar.webp) Disable Frontend Admin Bar: Enable the "Disable Front end Admin Bar" option. [Now two options will appear](https://wpadminify.com/docs/adminify/customize/hide-some-admin-bar-items): "Hide Admin Bar for All Users" and "Hide Admin Bar for All Guest Users." The name itself describe what it does so, you do what you need to do. Dynamic Hiding: Use the "Disabled For" option below to hide the admin bar for specific user roles dynamically. You can also hide the admin bar for specific usernames by selecting "user name" instead and choosing the desired usernames. ![Disable frontend admin bar for specific user role](https://d1k2c27psfzbiv.cloudfront.net/wp-content/uploads/2024/04/12112630/Disable-frontend-admin-bar-for-specific-user-role.webp) ### Hide Admin Bar Based On User Roles Now, time to hide the admin bar for specific user roles. Add the following code to your theme’s `functions.php` file: This code checks if the current user based on mentioned roles and hides the admin bar. We know how important it is to manage role based visibility of the admin bar. But, so is the security of your WordPress dashboard. We have shared a new article on: [How WP-Admin Redirects to Homepage & Hide Login URL?](https://wpadminify.com/wp-admin-redirects-to-homepage). Here you can learn to to protect your site’s backend by redirecting the WP-Admin page to the homepage and hiding your login URL. ### Hiding the Admin Bar for Specific Users You can also hide the admin bar for specific users. All you need to do is use their user ID to do so. Here's the code you can follow: Note: Replace `2, 4` with the user IDs for whom you want to hide the admin bar. Do You Know? You can optimize your WordPress dashboard by hiding default admin notices. Check out [How to Permanently Hide Admin Notice in WordPress?](https://wpadminify.com/hide-admin-notice-in-wordpress). In this article we shared a straightforward solution to keep your dashboard clean and distraction-free. #### How to get the User ID? Just navigate to the Users Page in your WordPress Dashboard. Hover on the “Edit” option for that user for whom you like to hide the admin bar. Take a look at the following screenshot and you will get the ID marked by an arrow sign. ![Get the User ID in WordPress Dashboard](https://d1k2c27psfzbiv.cloudfront.net/wp-content/uploads/2024/03/12112604/Get-the-User-ID-in-WordPress-Dashboard.webp) ## Conclusion Customizing the visibility of the admin bar based on user roles or specific users can greatly enhance the user experience on your WordPress site. So, now you know, how to hide admin bar based on user roles or specific users in WordPress. We have shared both methods with and without a plugin to do so. You can follow the mentioned code snippets if you're comfortable with codes. But don't forget to always back up your site before making changes to the code. Otherwise, Admin Bar Editor helps you do it without messing with the codes. So, use it and enjoy the ultimate customization freedom for your WordPress dashboard! ## Frequently Asked Questions (FAQs) save ### Will hiding the admin bar affect my site’s front-end or performance? No it will not. Hiding the admin bar doesn’t change your actual content or theme layout. It just prevents WordPress from giving out the admin bar HTML and its CSS. In fact, on sites with many plugins or logged-in users, disabling the bar can slightly improve load times because fewer scripts and styles are loaded. The change only applies to logged-in users who meet the conditions you set. Your public site will remain the same. ### Where do I find a user’s ID to hide the admin bar for them? Go to your WordPress Dashboard → Users → All Users. Hover over the “Edit” link of the user you’re targeting. Look at the bottom of your browser to see a link. The link will show something like user_id=2. That number at the end is the user ID you can place inside your code snippet or choose inside Admin Bar Editor. You don’t need a plugin to find user IDs. ### Can I hide only certain items in the admin bar instead of removing the whole thing? Absolutely. Admin Bar Editor doesn’t just turn the bar off. It lets you toggle each individual menu item. You can remove “Comments,” “Updates,” or any plugin’s shortcut from the bar while keeping “New Post” or your custom links. This is helpful if you want to simplify the interface for clients or contributors without removing useful shortcuts for admins. ### What happens if I make a mistake editing the admin bar or adding code? If you’re using a plugin like Admin Bar Editor, mistakes are low-risk because you can simply disable a certain setting or reset items. If you’re editing code, always make a full site backup first. You can add the snippet in a child theme or a small custom plugin so you don’t lose changes during theme updates. If something goes wrong, remove the snippet via FTP or your hosting control panel’s file editor. And your site will return to normal. ### Why would I hide the admin bar for some roles but not for admins? Admins typically need full access to tools and shortcuts in the admin bar, But roles like Editors, Authors, or Subscribers don’t. Hiding the bar for them makes their workspace cleaner to work with. Thus improving performance. It also adds a layer of security because fewer shortcuts mean fewer chances for misclicks or accidental changes. --- # How to Organize WordPress Media Library with Folders? URL: https://wpadminify.com/how-to-organize-wordpress-media-library-with-folders Last updated: 2026-07-15 Managing the media library will get tougher day by day. You never know how many images or media are stored in your library. Here WordPress Media Manager plugin comes to solve your organization's problem. You can’t create a folder in your default WordPress media library. What if you could organize different types of media files into different folders like you do on your smartphone or laptop? It sounds interesting, right? Yes, it's possible, and at the end of this blog post, you will learn how easy it is to create folders for WordPress media library like the following screenshot. ![WordPress Media Manager plugin](https://d1k2c27psfzbiv.cloudfront.net/wp-content/uploads/2022/12/18103330/WordPress-Media-Manager-plugin.webp) ## Who should configure WordPress Media Manager? Before jumping into the technical part, I would like to tell you a story that I have heard from multiple clients. I promise it won't take so long, and I will not start it with "once upon a time..😉". While reading my story, just imagine if you can feel the same pain as my clients, or not. So, should I begin - Blogger Client - Professionally, she is a nutritionist. She runs a blog site where she uploads different types of recipes. I designed her website, and after almost 4 months, she emailed to know if there is any way she can create multiple galleries inside the WordPress media library? Within these 4 months, she published 100+ blog posts, and each blog post contains 7 to 8 images. Photographer Client - He is a professional wedding photographer, and his media library is flooded with 3000+ media files. He asked if there is any solution to neatly categorize different event photos in the media library. E-Commerce Store owner client - He sells electronic goods like mobiles, laptops, printers. He used to maintain a private page where he manually added all uploaded image attachment links for different products. This was necessary for him because, on live chat, people asked to provide more photos for selected products. SEO Agency owner client - She provides local SEO services in her area. She uploads all assets for each client to her media library and shares the URL with her clients. She used to name each file something like jon-doe-website-local-seo-checklist.pdf. Now, when she needs to find out her specific client's file, she used to search jon-doe in her media library. Then go through each file name and select the preferred one. He is one of the [happy agency users](https://wpadminify.com/agencies) of the WP Adminify plugin now. I am telling you this story from 2023 - 2024. These are the pain points my clients faced before configuring the WordPress Media Manager plugin on their website. I used to search on Google and install the free plugin for some of them. Each of the plugins has limitations, but now I am going to share the easiest solution with you. I am pretty sure you have never experienced this before. ## Get started with WordPress Media Manager You must [install the WP Adminify plugin](https://wpadminify.com/docs/adminify/getting-started/free-installation) and enable the folder. To enable the folder, navigate to `WP Adminify > Productivity > Enable Folder`. You can try this feature on the free version. [Free Download](https://wordpress.org/plugins/adminify) | [Check WP Adminify PRO ](https://wpadminify.com/pricing) ![Get started with WordPress Media Manager](https://d1k2c27psfzbiv.cloudfront.net/wp-content/uploads/2022/12/18103329/Get-started-with-WordPress-Media-Manager.webp) Spoiler alert - This [media library folder](https://wpadminify.com/features/wordpress-media-folder) supports both grid and list layouts. Also, you can organize posts, pages, and custom post types items in multiple folders too. It will be a sticky folder; no matter how much you scroll, it will be fixed and will provide you with a better user experience. Search for anything instantly, maybe within milliseconds. Filter your folder items in A-Z or Z-A. You will get all post types and a switcher to enable media folders. Just select where you like to implement the folder feature and save the settings. You can press Ctrl+S to save the settings. ## Configure Folder for WordPress Media Manager If you have enabled the media folders from the WP Adminify option panel. Now, just navigate to the media library of your WordPress Dashboard. You will get something like the following screenshot. ![media library folders on WordPress Dashboard](https://d1k2c27psfzbiv.cloudfront.net/wp-content/uploads/2022/12/18103328/media-library-folders-on-WordPress-Dashboard.webp) At the top, you can see the "Create New Folder" button. Just click on this button and a new pop-up will appear requesting you for the folder name, color. After inputting the name and choosing a color, just click on the save folder button. ![Create New folder for Media library](https://d1k2c27psfzbiv.cloudfront.net/wp-content/uploads/2022/12/18103327/Create-New-folder-for-Media-library.webp) Instantly, it will appear on the folder list. It may be your first folder, so you will notice the single folder that you have created, just like the following screenshot. ![New folder added in wordpress media library](https://d1k2c27psfzbiv.cloudfront.net/wp-content/uploads/2022/12/18103326/New-folder-added-in-wordpress-media-library.webp) [Note: I have created multiple folders before to show you how actually it looks in real life.] You can create a subfolder under any main folder. As human beings, we all make mistakes. This folder makes it easy to fix them. If you mistyped a folder name, you can quickly rename it. WP Adminify Lets you to Rename existing folders in media library via its media library folder feature If I tell you that you have to drag and drop each item one by one into your folder? How will it feel to you? I know it will be painful for you. That’s why this Media Folder plugin supports the bulk select feature. Just use the default bulk select option in the default WordPress media library and drag all media files into your desired folder. Watch the following video, and you will get a clear idea. Bulk select media files and add to media folder in WordPress image library There are a lot of users who prefer list items instead of grid item previews. For those users, I would like to happily mention that it supports both grid and list views. This can enhance your workflow and branding consistency, If you consider your branding, then you can also try this [loginfy plugin](https://wpadminify.com/loginfy) for your login page customization. Media library manager support list and grid view in default WordPress Media library ## Configure Folder for Posts, Pages, & Post Types All options are similar, just like the media. Make sure to select specific post types in the option panel where you would like to enable the Folder feature by the WP Adminify plugin. First, tap on the following video if you are on mobile or click on the play button if you are on desktop. I have organized my 100 demo blog posts into multiple folders. Just imagine how this folder can help you to organize 1000+ blog posts. Not only blog posts, but also it supports any custom post type, even WooCommerce products too. Create folder in WordPress post and pages for better navigation Here, I have created 2 subfolders called corporate and small under the main folder called business. You can create unlimited folders and subfolders. ![Create sub folder under main folder in media library folder plugin](https://d1k2c27psfzbiv.cloudfront.net/wp-content/uploads/2022/12/18103318/Create-sub-folder-under-main-folder-in-media-library-folder-plugin.webp) Have you noticed the screenshot properly? Don’t you think it’s cleaner? I removed some admin columns called Categories, Tags, and other SEO meta information from the admin columns area. You can also clean up your columns for posts, pages, and other post types with the help of the [Admin Columns addon](https://wpadminify.com/admin-columns-editor). Just [install this free admin columns addon](https://wpadminify.com/docs/admin-columns/ac-installation) and remove or add your columns. Modify the width for default admin columns and create a clear and professional panel. ![Edit default Admin columns in WordPress post](https://d1k2c27psfzbiv.cloudfront.net/wp-content/uploads/2022/12/18103317/Edit-default-Admin-columns-in-WordPress-post.webp) That’s all about your WordPress media library management. You are getting 2 in one if you use the WP Adminify plugin, which is a very lightweight and faster plugin than any other [custom dashboard plugin](https://wpadminify.com/how-to-create-wordpress-custom-user-dashboard-without-coding). WP Adminify is an all-in-one environment that needs you to supercharge your WordPress Dashboard. ## Let’s Wrap UP! Let me finish this blog post with my editorial note here. I would like to request that you try the [live demo](https://demo.pixarlabs.com/?pl-product=adminify) of the WP Adminify plugin, where you can try all features yourself and decide whether it’s suitable for your project or not. If you face a problem while following my steps or face any problem, feel free to comment on this blog post or [contact us](https://wpadminify.com/contact). I will assist you and try to solve any issues that you are facing. --- # How to Change Default WordPress Login Page Logo? URL: https://wpadminify.com/change-wordpress-login-logo Last updated: 2026-07-15 Ever wondered why some websites feel instantly recognizable, even at the login screen? It’s all about branding. Your WordPress login page is the key to it. Whether you’re running an e-commerce store, a membership site, or a blog with a growing audience, changing out the default WordPress logo is a must. With your own logo, you can boost brand recognition and create a polished, professional vibe. Introducing Loginfy, a plugin from the same developers as WP Adminify, that lets you customize your login page in minutes. That without any coding required. Remember customers recognize brands with their logo. So, the more frequently they're gonna see it, the more they’ll remember it. Branding is the key to a business’s success and that leads with a logo. Today, we’re going to tell you how to change default WordPress login page logo. So, let’s get started. ## How to Change Default WordPress Login Page Logo Before you start, you must prepare your customized logo and upload it in the [WordPress media manager](https://wpadminify.com/how-to-organize-wordpress-media-library-with-folders). When your logo is complete, just install Adminify and begin making changes right away. WordPress offers a variety of choices for changing the login logo. But doing so requires writing a lot of code and running a lot of other files if you don't use a plugin. Which is hard, for beginners and users who are not comfortable with coding. So, the simplest way to change the default WordPress login page logo is with Loginfy. And, here's a step by step guide to do it. But before we move on to the explanation and guide, you can check our [documentation on changing the login page logo](https://wpadminify.com/docs/loginfy/customize-wordpress-login-page), if you want to skip and have an idea of with our plugin already. ### Step 1: Install & Activate Loginfy First, to get started with Loginfy, you need to install and activate the plugin. It's basic and just like installing any other plugins. But here's a rundown on how to do that: Navigate to `WordPress Dashboard > Plugins > Add New plugin`. Now search for Loginfy. ![Install Loginfy WordPress login page customizer plugin](https://d1k2c27psfzbiv.cloudfront.net/wp-content/uploads/2024/06/13063723/Install-Loginfy-WordPress-login-page-customizer-plugin.webp) After you're done with installing and activating Loginfy, you'll notice a new menu item called `Loginfy`. ![Loginfy plugin options](https://d1k2c27psfzbiv.cloudfront.net/wp-content/uploads/2024/06/13063726/Loginfy-plugin-options.webp) You can also checkout the Pro Version of Loginfy. It gives you some more advanced customization settings. It'll definitely help you create the perfect login page experience for your users. [Try Loginfy Pro](https://wpadminify.com/loginfy/pricing) ### Step 2: Changing Default WordPress Login Page Logo using Loginfy Now, from the Loginfy menu, go to the Customizer. And you'll see the options to upload your login page logo. You can choose to add a logo or just the name of your company in Text format. Surprisingly, Loginfy gives you a third option. And with it you can display both logo and text altogether. Just after that, you'll see the desired logo uploading options. And, you'll be surprised to know that Loginfy can detect the logo via URL (Must need to be publicly available). You can also customize the logo after you're done uploading. And you'll see settings for adding a link in the logo, size and etc. But, don't forget to save after you're done by clicking the publish / update button. Here's a quick video to show you how to change default WordPress login page logo with Loginfy: Learn how to change the default WordPress logo from login page ### Other Login Customization Settings Loginfy give you some more advanced options to customize your login page. You'll find settings like buttons, log-in form fields, error messages, and others to help you customize the login page more specifically. Also, Loginfy have the compatibility with Google Fonts, meaning you can use any fonts from the Google's library. And, if you are good with custom CSS or JS then you can also use those to further customize the login page alongside the logo. ![WordPress login page customizer options panel](https://d1k2c27psfzbiv.cloudfront.net/wp-content/uploads/2023/01/12111549/WordPress-login-page-customizer-options-panel.webp) Login Page Templates: There are several templates to use. Using them you can design your admin access page just the way you like. Just choose your template and publish it. That's all. Login Page Background: You can add a picture or video in the background that will be shown. You can also just customize the hue. Select slideshow to display several photographs sequentially if you wish to upload more than one. ] There are options for alignment and how the background will be shown. Last but not least, you can apply an overlay color to your background to make it more stunning. Different Login Page Layout: You can select the horizontal and vertical alignments from the layout option. Also, you'll have the option to divide the screen in half. You can customize one half by adding some commercial messages and the other half with a login form. Login Form Customization: You can change the background, height, width, padding, margins, border, border radius, colors, and so much more. Don’t forget to save and publish all the edits, or else all your efforts will go in vain. ## How to Change WordPress Login Page Logo without Plugin So, you wanna do it the hard way. Yes, there's obviously a way to change WordPress login page logo without plugin. Here's how to do that. If you have the basic knowledge of WordPress Theme file structure, you can easily do it. All you have to do is, copy the following code in your code editor. ``` /*Set Logo to login page*/ function adminify_login_logo_change() { ?> Loginfy - Activity Logs - Google Pagespeed insights -> Google Pagespeed - Admin columns -> Admin Column Editor - Header & Footer scripts - Dashboard & Welcome Widget - Sidebar generator - RoleMaster Suite (User role editor) - Admin Bar Editor ![Some modules are now Addon](https://d1k2c27psfzbiv.cloudfront.net/wp-content/uploads/2024/07/12113045/Some-modules-are-now-Addon.webp) ## Free Addon Modules for Existing Pro Users Old Pro users will receive unique coupon codes to add new addons for free within two months of the update release. This resolves the issue of repurchasing features previously included in the full plugin. ## New Features We've added several new features and some are in the pipeline. These features are intended to enhance your WordPress admin experience and give you more control over your site. New Features Include: - Screen & Help Tab Removal: Option to remove the Screen & Help tabs for a cleaner interface. - Remove & Modify Howdy Message: Option to show, hide or even modify the "Howdy" message for a more professional look. - Set Custom Admin Menu Width: Customize the width of your admin menu to suit your preferences. - Control WordPress Heartbeat Frequency: Manage the frequency of the WordPress Heartbeat API to improve performance.(Upcoming) - Admin Favicon: Add a custom favicon to your admin area for easy identification. - Username Changer: Change usernames directly from the security settings.(Upcoming) - Limit Login: Enhance security with the ability to limit login attempts.(Upcoming) - Media Library Infinite Scroll: Browse your media library with infinite scroll for a more seamless experience.(Upcoming) ![Control Heartbeat API and post Revisions](https://d1k2c27psfzbiv.cloudfront.net/wp-content/uploads/2024/07/12113055/Control-Heartbeat-API-and-post-Revisions.webp) ## Feature Request These updates are scheduled to roll out the first week of August. We appreciate your patience and we promise this update is the first of many more exciting ones to come. If it’s not already clear we’re always actively looking to improve and add features that benefit our users. This is the underlying drive that sustains our efforts. In the spirit of user powered innovation, Do you have ideas or specific features you’d like to see in WP Adminify? We want to hear from you! Please get in touch with us through [our contact form](https://wpadminify.com/contact) and let us know what you’d like to see in future updates. Your feedback is invaluable to us. Stay tuned for more detailed insights and the full breakdown of these updates in our upcoming comprehensive blog post! Thank you for your continued support and feedback. We’re excited to bring you these improvements and look forward to enhancing your WordPress admin experience. --- # What’s New in WP Adminify V4.0: Enhancements and Updates URL: https://wpadminify.com/what-is-new-in-wp-adminify-v4-0 Last updated: 2026-07-15 Welcome to our detailed overview of the upcoming WP Adminify V4.0 update, scheduled for release in the first week of August. This blog post aims to provide a comprehensive explanation of the new features and improvements included in this update. Our goal with this post is to help WordPress users, regardless of their experience level with our plugin, understand how these new customization options can transform their WordPress environment. In the following sections, we'll examine each update in detail. We'll explain what each new feature does, how it works, and how you can use it to tailor your WordPress interface to your preferences and workflow needs. This information should help you prepare for the update and make the most of the new customization tools once they're available. We hope this breakdown will give you a clear picture of what to expect from the new WP Adminify V4.0 update and how it can help you create a more personalized and efficient WordPress experience. ## Free and Pro Versions of WP Adminify are now separate For a long time, both the free and pro versions of WP Adminify shared the same codebase. While this approach had its benefits initially, it ultimately created a bottleneck for both versions. Here's why separating them is a game-changer for you: The issues with shared code: Imagine building two houses (the free and pro versions) using the same set of blueprints. While efficient at first, imagine if you wanted to renovate the free house (add a new feature). You'd have to modify the shared blueprint, which would also affect the pro house (potentially causing unintended changes). This is what happened with the shared codebase. Updating one version often meant unintended consequences for the other, making development slow and cumbersome. How separation has helped performance for both plugins: By separating the free and pro versions into distinct plugins, we've essentially given them separate blueprints. Now, improvements to the free version can be made without affecting the pro version (and vice versa). This translates to several exciting benefits for you: - Faster Updates & Bug Fixes: We can now focus our development efforts on each version independently. This means bug fixes and new features for the free version can be implemented much quicker, keeping your website experience smooth and optimized. - Enhanced Performance: With the free version stripped of any unused code from the pro features, it becomes incredibly lightweight. This translates to a significant performance boost for your website, ensuring faster loading times and a more responsive user experience. - Clearer Upgrade Path: If you decide to upgrade to the pro version later, you won't experience any performance hiccups because the free version is already streamlined. You'll simply unlock the additional features without sacrificing speed. In essence, separating the free and pro versions is like giving each its own dedicated construction crew. This allows for faster development, improved performance, and a more tailored experience for both free and pro users. ## Performance Improvements (Query Monitor Stats) We've been laser-focused on optimizing WP Adminifies performance, and the results are nothing short of remarkable. This update represents a significant leap forward, transforming WP Adminify into a truly powerful and efficient plugin. With the update you can expect lightning-fast page loads, a leaner and meaner backend, and a smoother user experience for both you and your website visitors. But how did we achieve this impressive feat? Let's take a closer look at all the individual improvements. ![Query Monitor default vs Adminify](https://d1k2c27psfzbiv.cloudfront.net/wp-content/uploads/2024/07/12113118/Query-Monitor-default-vs-Adminify.webp) Blazing Fast Page Generation (82% Reduction in Page Load Time) Curently, page generation times hover around 0.67 seconds. This update will optimize rendering, bringing that time down to a mere 0.12 seconds – a remarkable 82% improvement. Users will see your content almost instantly, keeping them engaged and happy. ### Reduced Memory Usage (33% Less Memory Consumption) The WordPress dashboard alone consumes a significant amount of memory (up to 9.2MB). This strains resources and slows down overall performance. The update will tackle this by optimizing resource usage, reducing memory consumption to a lean 5.6MB – a significant 33% reduction. This will free up valuable resources for other essential tasks, ensuring a smoother website experience. ### Streamlined Database Queries (50% Reduction in Database Calls) Every time your website displays information, it sends queries to the database. The sheer number of queries impact performance. Currently, the dashboard alone fires off a whopping 99 queries! This update will optimize database interactions, reducing the number of queries to a manageable 46 – an impressive 50% reduction. This will translate to a lighter load on your database, resulting in faster loading times and a more efficient website. ### Lighter Script Load (70% Reduction in Loaded Scripts) Scripts are like tiny programs that make your website interactive. However, an excessive number of scripts can slow down page loading. In the current version of WP Adminify, around 10 scripts need to be reloaded every time you reload your backend which isn’t much but we could do better! After the update, the number of scripts will come down to 3. This represents a remarkable 70% reduction. The result is a leaner, faster website that loads in a blink. ### Optimized Stylesheet Loading (60% Reduction in Loaded Styles) Stylesheets define the visual appearance of your website. While important, too many stylesheets can slow things down. Currently, your website might be loading a hefty 13 stylesheets because of WP Adminify! This update will ensure only 5 stylesheets are loaded, resulting in an outstanding 61% reduction. This translates to a faster initial page load and a smoother browsing experience. ## The New and Improved Smart Dark Mode One of our most liked features: The Dark mode has gotten an overhaul as well in this update! We've completely revamped the dark mode experience with a powerful new feature: Smart Dark Mode. Simplifying Dark Mode: No More Code or Conflicts Currently, achieving a consistent dark mode across your plugins often involves manual CSS code adjustments or checking compatibility for various plugins. This update eliminates those complexities entirely. - Lighter, Faster Plugin: We’ve removed CSS code for over 80 plugins, making the plugin itself leaner and faster. - Automatic Plugin Detection: Smart Dark Mode will intelligently detect the themes and styles used by your other plugins, regardless of how many you have installed. Have a look at smart dark mode in WP Adminify plugin Effortless Dark Mode Experience With Smart Dark Mode, you can finally enjoy a truly seamless dark mode environment: - Automatic Adjustments: When you will activate dark mode, Smart Dark Mode will automatically adjust icon styles and button styles across all your plugins. This will ensure a consistent look and feel, eliminating visual inconsistencies or jarring elements. - Beautiful Cohesive Experience: The result will be a beautiful, unified dark mode experience that extends seamlessly across your entire WordPress dashboard. How this helps you? The new and improved Smart Dark Mode will empower you to: - Save Time: Eliminate the need for manual CSS coding or compatibility checks for dark mode functionality. - Enjoy Consistency: Experience a consistent and visually pleasing dark mode across all your plugins. - Focus on Your Work: Spend less time troubleshooting dark mode issues and more time creating amazing content for your website. ## Default UI and Adminify UI Conflict Fix We're pleased to announce that we've finally resolved a longstanding issue with Adminify. For some time, our plugin's styles and scripts were inadvertently affecting the default WordPress UI, even when the Adminify UI was disabled. This caused residual effects and potential conflicts with popular plugins like ACF, WooCommerce, Yoast SEO, Elementor, WordFence, and Rankmath. We want to sincerely apologize for the duration of this problem. We understand it has been a source of frustration for many of our users, and we appreciate your patience as we worked to find a solution. ![WP Adminify UI is disabled](https://d1k2c27psfzbiv.cloudfront.net/wp-content/uploads/2024/07/12113206/WP-Adminify-UI-is-diabled.webp) With this update, when you disable Adminify's UI, your WordPress dashboard will now return to its original state without any lingering effects from our plugin. This fix will ensure better compatibility with other plugins and restore full control over your admin experience. As an additional improvement, we've introduced custom minimal icons for all default WordPress admin menu items. We're grateful for your ongoing support and feedback throughout this process. Your input has been crucial in helping us address this issue and improve Adminify. We remain committed to enhancing our plugin and providing you with the best possible WordPress customization experience. ## Introducing Dedicated WP Adminify Addons We're constantly striving to improve your experience with WP Adminify, and a key part of that is listening to your feedback. Based on user surveys and requests, we're excited to announce a significant update: the separation of several WP Adminify modules into dedicated plugins! ### Why the Change? Putting Users First Many of WP Adminify's modules offer powerful functionalities that stand on their own. Take the Login Customizer (now Loginfy) or Admin Columns (now Admin Column Editor) for example. Our research revealed that a significant portion of users expressed a desire to utilize these features independently, without requiring the full WP Adminify suite. By separating these modules, we're empowering you to choose the functionalities that best suit your needs. This means you can enjoy the benefits of specific features like Loginfy's login page customization or Admin Column Editor's improved admin view, all without installing the entire WP Adminify plugin. Here's a breakdown of the modules that will be transformed into dedicated plugins: - Login Customizer ===> Loginfy - Activity Logs - Google Pagespeed insights ===> Google Pagespeed - Admin columns ===> Admin Column Editor - Header & Footer scripts - Dashboard & Welcome Widget - Sidebar generator - Admin Bar Editor ===> Admin Bar Editor Let's get to know some of these new plugins(addons)! ### Loginfy: Design Your Ideal Login Experience [Loginfy](https://wpadminify.com/loginfy) is a powerful login page customizer that helps you to personalize your WordPress login page. Here are some of it’s key features: - Comprehensive Customization: From logos and backgrounds to form fields and buttons, you have complete control over every aspect of the login page's appearance. - Effortless Live Preview: See your changes instantly as you make them, ensuring the final design aligns perfectly with your vision. - Responsive Design: Your custom login page will look great on any device, desktops, tablets, or mobiles, providing a consistent user experience for everyone. - Multilingual Support: Reach a global audience with WPML compatibility and built-in translation readiness. ### Admin Column Editor: Manage Your Admin View with Ease The [Admin Column Editor](https://wpadminify.com/admin-columns-editor) grants you granular control over the admin columns displayed in your WordPress dashboard. - Effortless Management: Effortlessly add, remove, or reorder columns for any post type, including custom ones. - Seamless Integration: Works seamlessly with popular plugins like Advanced Custom Fields (ACF), Pods Framework, and Metabox, allowing you to display custom fields as admin columns. - Intuitive Interface: The drag-and-drop interface makes it simple to customize your admin view for maximum efficiency. - Improved User Experience: Tailor the admin area to display the information most relevant to your workflow, saving you time and effort. ### Admin Bar Editor: Refine Your Admin Bar The [Admin Bar Editor](https://jeweltheme.com/admin-bar-editor) empowers you to personalize and streamline the WordPress Admin Bar, also known as the Toolbar. - Frontend Admin Bar Control: Disable the frontend Admin Bar with a single click for a cleaner user experience for your website visitors. - User-Specific Visibility: Customize the frontend Admin Bar's visibility for individual users or user roles, ensuring a tailored experience. - Selective Option Management: Hide specific Admin Bar options to declutter the interface and focus on the tools you use most. - Role-Based Customization: Hide irrelevant options for different user roles, optimizing the Admin Bar for each user's needs. - Comprehensive Customization: Change icons, rename menus, and even upload your own logo to personalize the Admin Bar further. - Drag-and-Drop Reordering: Prioritize the Admin Bar options according to your workflow with an intuitive drag-and-drop interface. ### Dashboard & Welcome Widget: Personalize Your Dashboard Dashboard & Welcome Widget plugin allows you to add and customize various widgets to your WordPress dashboard, enhancing its functionality and information flow: - Content Variety: Choose from different widget types like content, icon, video, shortcode, RSS feed, and JavaScript code. - Informative Welcome Message: Personalize the default Welcome Widget or replace it entirely with a custom message or Elementor section. - Engaging Video Tutorials: Embed explainer videos directly into your dashboard for easy access by different users. - Shortcode Integration: Insert any shortcode into a widget, such as a contact form, for added functionality. - User Role Targeting: Display specific widgets only to designated user roles, ensuring role-relevant information is readily available. - Flexible Positioning: Choose between side or normal widget positions based on your preference. ## New and Enhanced Options Panel WP Adminify's options panel has undergone a significant makeover, prioritizing user-friendliness and intuitive navigation. This revamped interface empowers you to personalize your WordPress admin experience with ease. Let's delve deeper into the dedicated sections that make up the new options panel: ### [Customize](https://wpadminify.com/features/dashboard-customization) This section encompasses a range of settings that allow you to tailor the visual appearance and functionality of your WordPress admin area to match your preferences. You will find options to: - Smart Dark Mode or Light Mode: Choose the theme that best suits your eyes. - Custom Admnify UI Template: Apply your brand colors or explore pre-sets for a unique look. - Font Selection: Pick from Google Fonts for a consistent visual style. ![WP Adminify V4.0 - Customize Option](https://d1k2c27psfzbiv.cloudfront.net/wp-content/uploads/2024/07/12113125/WP-Adminify-V4.0-Customize-Option.webp) ### [Admin Menu](https://wpadminify.com/features/admin-menu-editor) The Admin Menu section empowers you to organize and manage the navigation elements within your WordPress admin area. This could involve functionalities such as: - Admin Menu Editor: Rearrange menu items or add extra items if needed. - Vertical & Horizontal Menu: Choose a layout that works for you (vertical or horizontal). - Style your Menu: Customize the appearance of your admin menu. ![WP Adminify V4.0 - Admin Menu Options](https://d1k2c27psfzbiv.cloudfront.net/wp-content/uploads/2024/07/12113129/WP-Adminify-V4.0-Admin-Menu-Options.webp) ### [Productivity](https://wpadminify.com/features/productivity) This section focuses on features designed to improve your efficiency and streamline your workflow within the WordPress admin area. You might encounter options such as: - Admin Notices Control: Silence distracting notifications. - Remove unwanted widgets: Declutter your dashboard for focus. - Access necessary modules: Activate features for tasks like Media Folders, Admin Page, Post Type Order, Quick Menu, Post Duplicator, Menu duplicator, and Some custom Admin columns. ![WP Adminify V4.0 - Productivity option](https://d1k2c27psfzbiv.cloudfront.net/wp-content/uploads/2024/07/12113133/WP-Adminify-V4.0-Productivity-option.webp) ### [Security](https://wpadminify.com/features/security) The Security section provides you with advanced options to strengthen the security posture of your WordPress website. Some potential features include: - Change login page URL: Add an extra layer of security by hiding the default login location. - Login/Logout Redirection: Control where users go after logging in or out. - Security Tweaks: Enhance website security with options like ddisable comments, Rest API, Header Security and more. ![WordPress WP Adminify V4.0 – Security options - dashboard customization guide](https://d1k2c27psfzbiv.cloudfront.net/wp-content/uploads/2024/07/12113140/WP-Adminify-V4.0-Security-options.webp) ### [Performance](https://wpadminify.com/features/performance) This section equips you with tools to optimize your website's performance for faster loading times. Here, you might find options to: - Control Heartbeat API: Fine-tune background communication for optimal performance. - Control Revisions: Manage post history efficiently to save space. - Enhance Performance: Utilize tools to optimize website speed for faster loading. ![WP Adminify V4.0 - Performance options](https://d1k2c27psfzbiv.cloudfront.net/wp-content/uploads/2024/07/12113147/WP-Adminify-V4.0-Performance-options.webp) ### [Code Snippets](https://wpadminify.com/features/code-snippets) The Code Snippets section provides a dedicated space for you to manage and implement custom code snippets within your WordPress site. This allows you to: - Admin Scripts: Manage code snippets that run specifically in the WordPress admin area. - Frontend Scripts: Manage code snippets that execute on the public-facing side of your website. ### [White Label](https://wpadminify.com/features/white-label) This section caters to agencies or developers who want to white label the WP Adminify plugin, removing any branding elements that reference WP Adminify. Here, you might be able to: - Customize Admin footer text: Replace the default WordPress footer copyright text with your copyright message. - Change Plugin Name: Modify the name displayed for the WP Adminify plugin within the admin area. - Remove Branding: Eliminate any remaining references to WP Adminify within the admin panel, creating a seamless experience under your own ![WP Adminify V4.0 - White label options](https://d1k2c27psfzbiv.cloudfront.net/wp-content/uploads/2024/07/12113200/WP-Adminify-V4.0-White-label-options.webp) ## Advanced Features for WP Adminify Pro The free version of WP Adminify is packed with valuable functionalities. However, for users seeking an even greater level of control and customization, [WP Adminify Pro](https://wpadminify.com/docs/adminify/getting-started/pro-installation) unlocks a treasure trove of advanced features. Designed to give you more functionality and customization freedom for your WordPress dashboard, the Pro version can substantially impact the kind of WordPress experience you want. Let's check out some of the key highlights of WP Adminify Pro: ### Admin Pages: Craft Custom Admin Functionality Go beyond the traditional WordPress admin interface. With Admin Pages, you can create custom pages within your admin area using popular page builders like Elementor. This empowers you to: - Develop bespoke admin tools and functionalities. - Design internal dashboards tailored to specific user roles. - Deliver a more intuitive and user-friendly experience for your team or clients. ### Media Folder: Organize Your Media Library with Ease Managing a large media library can be a daunting task. Media Folder in WP Adminify Pro helps you create unlimited nested folders within your media library. This allows you to: - Organize your media files in a clear and hierarchical structure. - Improve media library navigation and accessibility. - Save time spent searching for specific images or files. ### Custom Admin Menu Items: Smoother Navigation The default WordPress admin menu might not always align with your workflow. WP Adminify Pro empowers you to create [custom admin menu items](https://wpadminify.com/docs/adminify/admin-menu/admin-menu-editor). This allows you to: - Add links to external resources or internal tools used frequently. - Reorganize the admin menu for a more efficient workflow. - Enhance the overall user experience within the admin area. ### Hide Admin Notices: Declutter Your Interface Informative admin notices can be helpful, but an excessive number can clog up your admin interface. WP Adminify Pro allows you to [hide specific admin notices](https://wpadminify.com/docs/adminify/productivity/hide-admin-notices) selectively, providing a cleaner and more focused workspace. ### URL Redirection: Control User Flow Manage how users navigate your website with URL Redirection. This powerful feature allows you to: - Redirect specific URLs to different pages or sections of your website. - Create custom redirects for a more streamlined user experience. - Enhance SEO by setting up proper 301 redirects for deleted or moved content. ### Custom Background: Personalize Your Admin Interface Take complete control over the visual appearance of your WordPress admin area. WP Adminify Pro allows you to [set custom backgrounds](https://wpadminify.com/docs/adminify/customize/adminify-ui-templates). You can choose from gradient colors or upload your own images, creating a personalized and visually appealing workspace. By unlocking these advanced features with WP Adminify Pro, you gain a powerful toolkit to customize your WordPress administration experience, streamline your workflow, and vastly improve your website management capabilities. ## Final Thoughts The upcoming WP Adminify V4.0 update represents a significant leap forward in WordPress admin customization and performance for us and you, our beloved users. These updates are substantial but we’re far from done. We have many more exciting things to unveil. V4.0 is just the start. Expect regular biweekly updates, new feature releases, and more in the coming months after the update. As WP Adminify continues to evolve, we remain committed to making these changes as smooth as possible for all our users. --- # WP Adminify V4.0.3.1 Update Released URL: https://wpadminify.com/v4-0-3-1-update-released Last updated: 2026-07-15 Another update just dropped for WP Adminify. Yes the new WP Adminify V4.0.3.1 comes with important bugfix and feature improvements. So, if you want to get the most out of WP Adminify, do upgrade now. save ## New Features in WP Adminify V4.0.3.1 Here are the new features added in in WP Adminify V4.0.3.1: Admin Panel Preloader Now get a faster and professional feel while navigating the backend. No need to wait for the admin dashboard to fully load. The newly added admin panel preloaded saves time by preloading. This ensures a better loading experience. And if you have lots of plugins running behind the scenes, this is a must have update for you. WP Adminify UI for Gutenberg Editor No more switching between views of dashboard and block editor. We added a synchronized user interface for the Gutenberg editor. Everything will look more unified across your dashboard now. ## Issues Fixed in WP Adminify V4.0.3.1 Here are the list of issues fixed in WP Adminify V4.0.3.1: Admin Bar URL Issue Fixed Previously, the admin bar was dynamically adding an ampersand (&) in the URL. That’s been fixed, so links in the admin bar should now behave correctly. Missing Plugin Icons in Admin Bar Some users noticed that plugin icons were missing from the WP Adminify admin bar. That issue is also resolved. You’ll see all the right icons where they’re supposed to be. Custom URL & Admin Page Switching We fixed the issue where the admin menu’s custom URLs were conflicting with admin page URLs. Now, the links are perfectly working without any issues. Icon Support for Custom Admin Menus WP Adminify now supports Simple Line Icons and FontAwesome icons. Now you can customize WordPress dashboard menu items with your preferred icons without bugs and glitches. ## What's Next? Your feedback, requirements and reviews are important for us to keep improving WP Adminify. If you love using WP Adminify, it'll be a great value for us if you give a [5-star rating on our plugin page](https://wordpress.org/support/plugin/adminify/reviews/?filter=5#new-post). Your support means the world to us. And it helps us deliver the best possible experience. And whenever you face any issues, please [create a support topic in our forum](https://wordpress.org/support/plugin/adminify/#new-topic-0). Our experienced support team handles every issues with utmost priority. Don't forget to subscribe to our newsletter. You'll be notified every time an update drops. Thank you for being a part of the WP Adminify community! --- # WordPress Quick Menu: Navigate Your Dashboard Like a Pro URL: https://wpadminify.com/wordpress-quick-menu Last updated: 2026-07-15 WordPress is the most used CMS (Content Management System) right now in 2025. Because it's one of the easiest CMS to use after they introduced Gutenberg blocks back in December 6, 2018 in WordPress version 5.0. But, easy doesn't always mean less work. Doing the same thing over and over again to maintain your website is hectic. And how do I know this? Because I manage more than 5 websites on a regular basis. Jumping to sections frequently can be a bit of hassle. Why so? With loading speed and time doesn’t always stay the same, and for larger websites this loading time might increase on the backend. And this will surely hamper your workflow and might distract from the thing you were planning to do. So, what can be a solution? Our developers brainstormed and came up with a brilliant idea. A floating menu! Yes, a floating Quick Menu in WordPress dashboard can help you with solving the issue quite easily. WP Adminify brings you the Quick Menu and today I am going to tell you all about it. So, let's continue before I get distracted into the void. ## What Is the WP Adminify Quick Menu for WordPress? So, you’re here for more information? Duh! Okay Okay let me tell you. The WordPress Quick Menu is a floating dashboard menu in the WordPress backend. Didn’t quite get that? Okay, let me explain. It's a floating pop up menu that lets you pin your most used pages, links or paths. It’s like a widget style icon at the bottom right of your dashboard. It stays hidden and silent until you hover your mouse over it. Once you do, it reveals your customized menu items. Which you have previously set from the WP Adminify’s Quick Menu settings. ![Quick Admin menu in WordPress Dashboard](https://d1k2c27psfzbiv.cloudfront.net/wp-content/uploads/2025/05/28053023/Quick-Admin-menu-in-WordPress-Dashboard.webp) The cool thing is that you can add unlimited menu items and organize them as per your needs. But, if you hear me out, don’t overdo stuff. Keep the quick menu items minimal and use only the most useful URLs, paths or links for easier navigation. With WP Adminify’s Quick Menu, you can: - Add unlimited quick-access links - Use icons for visual navigation - Supports internal or external URL - Set link target to same tab or new tab. Oh, I forgot to mention that it supports every theme and plugin available in WordPress. Full compatibility means better response. ## Why Is a Quick Menu in WordPress Dashboard Useful? So, there are a few major reasons, you will have to suffer if you’re using WordPress. Let me note down and share them all. Limited Navigation: If you’re writing posts in the full-screen editor, the default WordPress interface restricts quick access to other admin areas. For example, going to the default WordPress media library. WP Adminify’s quick menu solves this by providing instant navigation options without leaving the editor. Time-Consuming Menu Search: Suppose you own a company. THus, you need to maintain a site. And as I’ve mentioned earlier, you’ll need multiple plugins to fulfill your needs. And because of that WordPress dashboards can become crowded with menus and submenus. Searching for a specific setting or page will be tough. The quick menu gives you instant access to important links in just a click. Customization Limitations: The default WordPress admin menu offers limited customization. The Quick Menu gives you the freedom to customize your navigation. It saves you time while adding icon based quick navigation with a floating menu. WP Adminify gives you a modern age solution that helps you with easier navigation. While keeping it friendly and customizable. ## Key Features of the WordPress Quick Menu by WP Adminify Let’s see what features WP Adminify gives you with the quick menu. - Floating Sticky Menu: Always visible and accessible on any admin page, including editors and plugin settings. - Unlimited Custom Menu Items: Add as many quick links as you want, with the ability to edit titles, URLs, and icons. - Rich Icon Library: Choose from over 300 icons including WordPress Dashicons, Themify, and Simple Line Icons to visually identify menu items quickly. - Link Target Control: Customize how each menu item opens, enhancing multitasking. - Menu Duplicator: Easily clone existing menus or menu items to speed up setup and maintain consistency across sites or user roles. ## How to Create WP Adminify Quick Menu in WordPress Dashboard Now, let me give you a quick guide on how you can create and use the WP Adminify Quick Menu in WordPress. The setup is very simple. Firstly, you need to install and activate the WP Adminify plugin. I’ve written a documentation about [how to install and activate WP Adminify](https://wpadminify.com/docs/adminify/getting-started/free-installation). Check it out to get a step by step guide, in case you forgot how to do it. ![Install Quick menu addon by WP Adminify](https://d1k2c27psfzbiv.cloudfront.net/wp-content/uploads/2025/05/18103521/Install-Quick-menu-addon-by-WP-Adminify.webp) Then, you need to enable the Quick Menu addon. Just go to this path: WP Adminify → Addons. Look for the Activity Log and click to install it. WP Adminify has some more addons. Be sure to [check them all by clicking here](https://wpadminify.com/addons). You’ll be surprised to learn how much customization you can do. Now, go to this path: WP Adminify → Quick Menu from the WordPress Dashboard. You will see 3 (three) sample menu items are already added by default. You can easily modify or remove them. ![Access Quick menu option panel](https://d1k2c27psfzbiv.cloudfront.net/wp-content/uploads/2024/10/18103525/Access-Quick-menu-option-panel.webp) Also, if you have a PRO version of Quick Menu, you can add unlimited menu items by clicking the “Add New Quick Menu” button. Get your copy of the [Quick Menu Premium Version](https://wpadminify.com/quick-menu/pricing) Now! Okay, let me continue how you can customize the quick menu. All you need to do is to click on an existing menu item to expand it. Once expanded, you can do the following customization: - Set a Menu Title (Name of the menu) - Add a URL (Link of the menu) - Select an icon from the built-in library ![Edit default quick menu items](https://d1k2c27psfzbiv.cloudfront.net/wp-content/uploads/2024/10/18103523/Edit-default-quick-menu-items.webp) Also, you can easily copy and delete any existing menu with the dedicated buttons. You can also sort menu items with the menu dragger. ![Duplicate quick menu items](https://d1k2c27psfzbiv.cloudfront.net/wp-content/uploads/2025/05/29044229/Duplicate-quick-menu-items.webp) Once you’re done with your setup, don’t forget to click the Save Settings button to enable it. The quick menu should appear in your dashboard by now. But if it isn't, just refresh the page and it will come alive. We also have a step by step step documentation for the settings. Be sure to check it out too! [Get Quick Menu PRO](https://wpadminify.com/quick-menu/pricing) | [Read Full Documentation](https://wpadminify.com/docs/quick-menu/create-new) Our developers made the setup process very easy. You won’t require any coding skills. We are bound to serve every client, no matter developers or first time users. We always try to make it accessible for all WordPress users across the globe. ## What are the Benefits of WP Adminify’s WordPress Quick Menu? We have asked our users who are using this feature, and here’s what they told us: - It improves productivity by reducing clicks - No more time wasted searching for userful pages. - Gives a stable performance without slowing down the admin panel. - Full compatibility with the latest WordPress versions and all themes+plugins. Here’s how different types of users can get benefit from: ### Developers - Instant access between settings, tools, and dev pages. - Pin commonly used plugin or theme panels. - Speed up troubleshooting and testing workflows. - Reduce repetitive clicks when switching environments. - Organize custom dev tools and staging URLs in one place. ### Content Farms - Rapid access to post editors, media, and categories. - Create quick links for bulk publishing. - Cut down time spent navigating multiple sites. - Assign separate quick menus for different content roles. - Increased navigation speed with fewer dashboard delays. ### Agencies and Freelancers - Build client-specific quick links for easier onboarding. - Reduce dashboard clutter and support requests. - Save time by duplicating menus across projects. - Centralize external tools like analytics or CRM links. - Improve client UX with a simplified, guided dashboard. ## Conclusion Okay, now you’ve reached the end of this article. The WP Adminify’s Wordpress Quick Menu isn’t just some fancy add-on. It’s a smart, time-saving solution built for real WordPress users who deal with the dashboard lags daily. It brings everything you need into one place. No more digging through endless menus. No more wasting time waiting for pages to load. Just click and get things done faster. And the best part? It’s super easy to set up. Install, customize, save and it's ready. So if you’re someone who values speed, and gets bored of the endless loading, WP Adminify’s Quick Menu is your new best friend. Try it once, and it’ll be your everyday things just like Ash’s Pikachu. --- # What’s New in WP Adminify 4.0.4.0? URL: https://wpadminify.com/wp-adminify-4-0-4-0 Last updated: 2026-07-15 Thanks to all our users, especially those who requested some feature suggestion. We have recently released WP Adminify 4.0.4.0. We have improved our Media Folder and Custom Dashboard widget in this update. ## Select the Folder while uploading media We have got this feature request from some pro users who contacted us. It’s a good idea to define the folder name while uploading an image in the media library or from the editor. We are happy to notify you that finally we bring this [media libary folder](https://wpadminify.com/features/wordpress-media-folder) enhancement feature to you. If you love to have an organized media library, then it’s necessary to define a specific folder when you upload it. In the future, it will help you to access your media within seconds. You can choose your desired folder name if you upload a bulk image or a single image from the default WordPress media library. Just like the following video, all your uploaded media files will take their position inside your selected folder. Select folder while uploading image in WordPress media libary On the other hand, you may want to upload media inside your editor. We have a folder selection option available inside the editor, too. It supports default plus all popular page builders like elementor, Oxygen. Watch the following video from the default Gutenberg editor. Select media folder while uploading image in editor ## Add any embedded video in the Dashboard Widget It’s one of the most demanded feature requests we received. Thanks to all of you who requested this, and we are really sorry for making you wait for 20 days to bring this feature. We always try to listen to our users properly and release updates based on their suggestions and our thoughts. Also, I would like to notify you that we have introduced the [WP Adminify Bundle](https://wpadminify.com/bundle) a few days ago. If you haven't checked that yet, you can explore our bundle now. This will help you to get the maximum customization for the WordPress Dashboard. It was a little complicated because we wanted to do something that would provide 100% compatibility with different types of video sharing websites like Loom. Finally, we were able to do this and made a stable release with this feature. To explore this feature, just navigate to the `WP Adminify option panel > Productivity > Enable custom Dashboard Widget`. Then, reload your dashboard and navigate to `WP Adminify > Dashboard Widget > Add new widget> Video > Iframe`. Make sure to put only the embedded URL instead of the full embed code from any website. Watch the following video, and you will get a proper idea on how you can add any video in the WordPress Dashboard widget. Add any embed video in Dashboard Widget from any video sharing site like loom ## Hide Menu Items for Admins There are a lot of agency owners and freelancers who want to hide some admin menu items for their client’s admin accounts. We introduced this feature in our previous version so, feel free to try this. You can easily hide specific menu items for different admins with our Admin Menu Editor. Take a look at the following screenshot. ![Hide admin menu items for any user name including Adminstrator](https://d1k2c27psfzbiv.cloudfront.net/wp-content/uploads/2025/06/25105723/Hide-admin-menu-items-for-any-user-name-including-adminstrator.webp) [Note: There is no option available to hide an admin menu item for all admin roles. You have to choose your desired admin or other user account individually.] Don't forget to [sign up for our newsletter](https://wpadminify.com/newsletter-signup) to get these news and updates without breaking a sweat. The first two features are a major release in our WP Adminify 4.0.4.0 version. We request you to update the WP Adminify plugin and try our latest feature. Feel free to [get in touch with us](https://wpadminify.com/contact) if you face any problems or have suggestions to improve the WP Adminify plugin. --- # WordPress Independence Day Sale Featuring WP Adminify URL: https://wpadminify.com/wordpress-independence-day-sale Last updated: 2026-07-15 Happy Independence Day! This 4th of July, power up your dashboard with WP Adminify. Top WP Adminify features: - Faster dashboard - Folder-based media manager - Custom dashboard widgets - Dark mode - Login page customizer - Admin column Editor - Admin menu editor - Activity log - White label options - PageSpeed insights in the dashboard - AND MORE…! Presenting Independence Day Offer – Save Up to 50% on WP Adminify [Grab The Deal Now](https://wpadminify.com/pricing) ## Get the Full Power in Half Price with Bundle Pack The WP Adminify Bundle includes: - WP Adminify - Loginfy - WP Spotlight - Header and Footer Scripts - Quick Menu - Admin Bar Editor - Admin Columns Editor [Get The Bundle - 50% Off](https://wpadminify.com/bundle) Everything you need to speed up, organize, and brand your WordPress admin dashboard. ## Act Now - Limited Time Offer! This is a limited-time sale to celebrate freedom and progress. Don’t miss your chance to unlock more control over your WordPress site. ## History of US Independence On July 4, 1776, the United States of America was born. But the road to independence started long before that. For years, the thirteen colonies lived under British rule. They paid high taxes. They followed laws made by a king across the ocean. They had no voice, no vote, and no control over their future. The people had enough. They wanted freedom. Not just from taxes, but from control. They wanted to build their own future, based on equality, justice, and choice. In June 1776, a group of brave leaders came together in Philadelphia. They wrote a bold document. It was the Declaration of Independence. On July 4, they signed it. That one act changed everything. It was not just a break from Britain. It was the start of something new. A country where freedom came first. A place where anyone could dream, build, and grow. That same energy lives on today. The drive to be free. The courage to do things better. The passion to create something that matters. At WP Adminify, we share that spirit. We believe every WordPress user should have the freedom to build better sites. Without limits. Without clutter. Without wasting time. Celebrate Freedom and WordPress Power. WP Adminify presents Independence Day Sale! --- # WaaS vs SaaS: Everything You Need to Know (PaaS, CaaS, IaaS Explored) URL: https://wpadminify.com/waas-vs-saas Last updated: 2026-07-15 If you’re building or managing websites, chances are you’ve come across the terms: WaaS vs SaaS. At first glance, they look similar. But here’s the thing: they solve different problems. Choosing the wrong one can waste time, and money. Sometimes even the inspiration to move forward if you’ve chosen the wrong one. But here’s some good news: by the end of this article, you’ll know exactly what WaaS and SaaS mean, how they work, where they shine, where they fall short. And most importantly which one fits your business right now. While searching for these terms you might have seen these terms as well: PaaS, CaaS and IaaS. I’ll also give you some overview on them, so you don’t have to switch to multiple articles if you want to get a basic understanding of them. So, let’s move forward, shall we? ## What Does “as a Service” Mean? First, let’s clear up the “as a service” part. When something is offered as a service, it means you’re renting or subscribing to it from a cloud provider instead of buying and managing it yourself. No physical servers in your office. Instead, you get access to what you need. Whether it’s infrastructure, a platform, or even a complete application over the internet. In most cases, you’ll pay on a subscription or pay-as-you-go basis. This way, you avoid huge upfront costs while also scaling up or down as needed. Now, let’s break down Waas and SaaS models for a better understanding. ## What Is WaaS? Now, let’s talk about WaaS or in full form: Website as a Service. Think of it as a fully managed website solution. Instead of you handling hosting, updates, backups, security, and performance tuning, your provider handles it end-to-end. You just use the website to run your business. In WordPress terms, WaaS means that a provider gives you a pre-configured site. Sometimes on a multisite network (if preferred). And the site comes with appropriate themes and all the essential plugins. So you don’t have to worry about breaking the site, anomalies and anything else. ### How it works Now, let’s give you a rundown on how the WaaS works. - Choose your desired WaaS provider and a plan. - Next, select a template or get a prebuilt website which is appropriate for your niche. - Now, add your content, branding, and products/services. - Your part is done. - Now, it’s the providers duty to manage uptime, security, updates, and backups. ### Why people love WaaS So, why people are going for WaaS, the question/query we mostly get. - You as a user don’t need to do any server or plugin maintenance. - The pricing of hosting and management is bundled. - You can launch a website fast without any hassle. - WaaS is best suited for people who are non-technical and busy site owners. ### Limitations of WaaS Just like everything else, WaaS does have some limitations. Which are as of follows: - You have to work with the provider’s policies and templates. - If you need any custom features, it might require add-ons or custom work. - You need a long-term dependency. Meaning if you switch to another you’ll require a migration plan. So in short, WaaS gives you a working website fast. You just need to add your contents. And it’s the providers duty to keep it running. ## What Is SaaS? SaaS stands for Software as a Service. In simple terms, it’s software you access through your browser. You don’t have to download, no need to manage servers, and no maintenance downtime (mostly). Think of email, CRMs, accounting apps or support desks. ### How it works So, here’s how SaaS works. - You sign up for a plan. - Then log in via a browser or app. - The provider hosts, secures, and updates everything in the background. ### Why people love SaaS There’s some very cool reasons for people loving SaaS. - Quick start process and requires no technical setup. - It always stays updated. The new features roll out automatically. - It’s accessible from anywhere with just a login. ### Limitations of SaaS Yeah, SaaS also has some limitations. No biggie! - Customization is usually boxed in by the product’s roadmap. - Monthly/annual fees add up over years. - You have limited control over hosting, data location, and deep system behavior. ## WaaS vs SaaS: The Core Difference WaaS vs SaaS, let’s make the difference crystal clear. - SaaS is software you use (e.g., CRM, email, analytics). - WaaS is a website you run on. Or even simpler: SaaS = tools. WaaS = the website. ### Quick Comparison between WaaS vs SaaS ![Comparison Table List Infographic Graph](https://d1k2c27psfzbiv.cloudfront.net/wp-content/uploads/2025/08/27062434/Comparison-Table-List-Infographic-Graph.webp) | Criteria | SaaS | WaaS | | --- | --- | --- | | Primary purpose | Deliver a software tool | Deliver a fully managed website | | Who manages infrastructure | Provider | Provider | | Your technical workload | Low | Very low | | Customization depth | Usually limited to product’s settings | Moderate | | Typical buyer | Teams needing a tool (sales, marketing, HR) | Businesses needing a website without headaches | | Time to value | Fast | Fast to very fast | | Lock-in risk | Moderate (data export varies) | Moderate (site + stack + templates) | ## Real World Examples Now, why don’t I give you some real world examples to make you understand even better. SaaS: If you need a helpdesk, you can use a SaaS like a ticketing tool. You need email outreach, use an Outreach SaaS platform like Orkap. You need invoicing, use an accounting SaaS. You don’t have to deal with servers or updates. You just log in and use it, simple! WaaS: Choose this if you need a marketing site or local business site that stays fast, secure, updated, and backed up. You just need to choose a WaaS plan and focus on content and sales. While the provider keeps the engine running. ## When to Choose SaaS vs WaaS Choose SaaS if: - You’re looking for a specific capability (email marketing, CRM, analytics, project management). - Your website is already handled elsewhere (in-house, agency, or a separate host). - You want integrations with many other tools, and you’re okay with vendor-defined limits. Choose WaaS if: - You want a ready to use website. - You prefer predictable, bundled billing. - You’re okay with working within a curated stack. For many businesses, the answer is actually both. Just run your website on WaaS and connect it to SaaS tools for CRM, email, and analytics. ## WaaS vs SaaS: Cost Breakdown Let’s do a plain comparison for a small business website. WaaS approach (per month): - One bundled fee: $39–$199+ (varies by provider, features, and support SLAs) SaaS approach (per month): - Individual tools: $10–$50 each (CRM, email marketing, analytics, project management) - Typical stack: $50–$250/month depending on the number of tools needed Comparison: - If your time is limited or hourly rates are high, WaaS usually wins on predictability. - If you only need focused tools and your website is already stable, SaaS fits best. ## WordPress Angle: Is WaaS Just Managed Hosting? This is a great question we always get. But it’s not exactly just managed hosting. Managed hosting gives you a tuned server including helpful features. You can still pick your own themes/plugins and handle compatibility. WaaS gives you the whole website experience. You get optimal plugins, prebuilt templates, performance monitoring, security policies, and usually a support team that understands the full stack. If you’re a freelancer or agency, WaaS can be your perfect pick. ## Some Other As A Service Models I mentioned in the intro that I'll add an overview on some of the popular as a service models. So, here it goes. ### PaaS (Platform as a Service) If SaaS gives you finished software, PaaS gives you the tools to build your own. With PaaS, developers get a complete environment to build, test, and run applications. The provider handles the infrastructure, operating system, and runtime environment. You only need to focus on your code. - What you manage: Application code, data, scaling logic - What the provider manages: Infrastructure, runtime, OS, updates Best for: Developers and companies that want to build apps quickly without managing servers. Examples: Google App Engine, Microsoft Azure App Service. Pros: - Instant access to a development environment - Faster app development and deployment - Provider handles scaling and infrastructure security Cons: - Customization can be limited to what the platform supports - Vendor lock-in risks - Less control over infrastructure performance tuning ### IaaS (Infrastructure as a Service) Think of IaaS as the raw building blocks of cloud computing. You get virtualized servers, storage, and networking resources. From there, you can build and configure everything else. It’s the closest thing to owning a data center without buying the actual hardware. - What you manage: Operating system, applications, runtime, data - What the provider manages: Hardware, virtualization, networking, storage Best for: Organizations that need maximum flexibility and control, but don’t want to deal with physical infrastructure. Examples: Amazon EC2, Google Compute Engine, Microsoft Azure VMs. Pros: - Highest level of control and customization - On-demand scalability - Pay-as-you-go reduces upfront costs - Reliable infrastructure with no single point of failure Cons: - Requires hands-on configuration and ongoing maintenance - Security responsibilities still fall heavily on you - Legacy applications may be harder to secure in the cloud ### CaaS (Containers as a Service) Finally, we have CaaS, which has grown rapidly alongside microservices and containerized apps. CaaS provides container orchestration and management. Instead of running apps in virtual machines, you package them into containers. The provider then handles the arrangements, scaling, and networking of those containers. And popularly [66% of users actually use Kubernetes](https://www.cncf.io/blog/2024/07/26/the-inevitable-kubernetes-10-years-still-a-lot-to-do/#:~:text=The%20growth%20of%20container%20deployments,were%20using%20Kubernetes%20in%20production.). - What you manage: Applications, scaling rules, data - What the provider manages: Orchestration, OS, container runtime, infrastructure Best for: Teams using DevOps, microservices, or hybrid/multicloud strategies. Examples: Google Kubernetes Engine (GKE), Amazon EKS, Azure AKS. Pros: - Portable apps that run the same across environments - Great for scaling microservices - Built-in monitoring and orchestration tools - Supports hybrid and multi-cloud Cons: - Some providers limit language or runtime support - Containers can share kernel vulnerabilities - Steeper learning curve for teams new to containers ### Comparing All the Models Here’s a quick comparison of who handles what: | Model | You Handle | Provider Handles | Best For | | --- | --- | --- | --- | | WaaS | Content | Website hosting, updates, security | Businesses needing turnkey websites | | SaaS | Data, user settings | Application, updates, infrastructure | Ready-to-use business tools | | PaaS | Application code, data | Runtime, OS, infrastructure | Developers building apps | | IaaS | OS, apps, data | Hardware, virtualization, networking | Full control over infrastructure | | CaaS | Applications, scaling rules | Container orchestration, OS, servers | Containerized workloads | ## Wrapping It Up So, let’s wrap it. After reading this article, you already know the difference between WaaS vs SaaS. WaaS gives you a working website, while SaaS gives you a working application/tool. Want a stress free plan and don’t want to manage hosting, updates and security? Go for WaaS. Want a specific feature or capability like email management, CRM, analytics? SaaS is the best choice for you. While the world revolves towards multitask management, so do the users. To manage every aspect of a business, most professionals use WaaS and SaaS together to keep their business up and running. It’s efficient and less time consuming than doing everything manually. Also, think of the labor cost to do them manually. Saving money, time and stress. What more do you want right? But in regard to the other models, here is a one line rundown for each of the “as a service” models. - Go with WaaS if you want a professional website without the hassle. - Use SaaS if you need software that “just works” out of the box. - Pick PaaS if you’re a developer who wants to focus on coding instead of managing servers. - Choose IaaS if you want control and flexibility while outsourcing the physical infrastructure. - Opt for CaaS if you’re working with microservices or need to scale containerized applications. The good news is, you don’t have to choose just one. As mentioned before, many businesses use a mix of these models depending on their needs. The key is understanding the balance between control and convenience that each model offers. ### What is WaaS (Website as a Service)? WaaS (Website as a Service) is a subscription-based model where you get a complete website solution including hosting, maintenance, updates, and support for a monthly fee. It's like renting a fully-managed website instead of building one from scratch. ### How is WaaS different from SaaS? SaaS (Software as a Service) provides software applications over the internet (like Gmail or Slack), while WaaS specifically provides complete website solutions. SaaS is the broader category; WaaS is a specialized subset focused on websites. ### Is WaaS right for my business? WaaS is ideal for small businesses, agencies, and entrepreneurs who want a professional website without dealing with technical maintenance. If you prefer predictable monthly costs and want to focus on your business instead of website management, WaaS is perfect. ### Can I switch from WaaS to self-hosted later? Yes! Most WaaS providers allow you to export your content and migrate to self-hosted WordPress if needed. However, you'll lose the managed services and will need to handle hosting, security, and maintenance yourself. ### What's included in a typical WaaS plan? A typical WaaS plan includes: WordPress installation, premium themes and plugins, hosting, SSL certificate, regular backups, security monitoring, updates, and technical support. Some plans also include content creation and SEO services. --- # Looking Back at 2025: One Crazy, Beautiful Year for WP Adminify URL: https://wpadminify.com/looking-back-at-2025 Last updated: 2026-07-15 Can you believe it? Another year is wrapping up. As we stand here at the end of 2025, our whole team is just feeling... grateful. Seriously. This year wasn't just about code and updates for us. It was about the conversations in our support threads, the feature requests you passionately shared, and the trust you showed by letting Adminify be a part of your daily WordPress workflow. From solo bloggers to massive agencies, your feedback has been the compass guiding our journey. So, before we dive into the details, a big, heartfelt thank you. ❤️ Let's take a stroll down memory lane and see what we built together this year, and then, peek into the exciting brew we're preparing for 2026. ## 2025 By The Numbers (A Quick Glance!) While we're not a huge fan of vanity metrics, a few numbers tell a story: - 20+ Plugin & Theme compatibility updates - because your ecosystem matters. - 50+ Stability fixes and improvements - for that smooth, no-fuss experience. - Hundreds of support threads resolved - your patience and reports make Adminify stronger. - 1 Major Goal: Making your WordPress admin a place of joy, not frustration. ## What We Shipped in 2025 (And Why It Matters) Instead of listing every single changelog line (that will be boring 😄), let’s break it down in a way that actually makes sense for you. ### Performance & Smoother Workflow We know speed is everything. This year, we worked hard to make Adminify feel lighter and faster. - Reduced Overhead: We optimized scripts and reduced loops to make permission checks quicker. Less waiting, more doing! - Enhanced Media Library: Added folder support for the uploader and made folders sticky. Finally, organize your media without the headache. - Smarter Dashboard Widgets: Added iFrame support to embed videos directly. Keep tutorials or motivation right on your dashboard. ![Complete Media Library Folder Support](https://d1k2c27psfzbiv.cloudfront.net/wp-content/uploads/2025/11/30040046/Complete-Media-Library-Folder-Support.webp) ### UI/UX: A More Polished & Personal Admin A cluttered admin is a stressful admin. We refined the interface to be cleaner and more adaptable to your preferences. - User-Controlled Color Mode: Light or dark mode is now a personal user setting, not a site-wide mandate. Your eyes, your choice! - Refined Settings UI: We gave our settings panels a fresh, more intuitive look. Finding options should be easy. - Gutenberg UI Integration: Brought the Adminify polish right into the block editor for a seamless experience. - Better Menus & Navigation: Fixed countless menu show/hide rules for custom roles and added the ability to open admin menu items in a new tab. Power users, this one's for you! ![WordPress Dashboard dark mode in post](https://d1k2c27psfzbiv.cloudfront.net/wp-content/uploads/2023/07/18112114/WordPress-Dashboard-dark-mode-in-post.webp) ### Security & Compliance Updates Your dashboard's security is non-negotiable. We implemented multiple layers of protection. - Proactive Security Patches: Regular updates to the Freemius SDK and our own codebase to address potential vulnerabilities. - GDPR Ready: Ensured Google Fonts loading is compliant, keeping you on the right side of privacy regulations. - Enhanced White Labeling for Agencies: Improved the "Force Disable" option, giving you more control when managing client dashboards. ![WP Adminify UI Customization in WordPress Dashboard](https://d1k2c27psfzbiv.cloudfront.net/wp-content/uploads/2025/05/28051404/WP-Adminify-UI-Customization-in-WordPress-Dashboard.webp) ### Compatibility with Popular Plugins & Themes Your site uses amazing tools. We made sure Adminify works flawlessly with them. - Page Builder: Added full support for WPBakery, Thrive Architect, and ShopEngine. - E-Commerce & Membership: Smooth integration with SureCart, SureMembers, SureTrigger, and WooCommerce extensions. - Utility Powerhouses: Compatibility with WP Activity Log, LatePoint, Advanced Access Manager (basic), WPCode, and many more. ## Your Most-Loved Adminify Features of 2025 Based on your feedback and support tickets, these were the absolute fan - favourites: - Admin Menu Editor & Role Manager: The cornerstone of Adminify. You loved the proper control to show/hide menu items for specific users and roles, finally cleaning up the admin for clients and teams. - Light/Dark Mode Per User: A simple feature that made a huge difference in daily comfort. Developers loved dark mode while clients stayed with light – perfect harmony! - The White Label Agency Toolkit: Agencies told us this was a game-changer for presenting a branded, professional dashboard to their clients. - Relentless Compatibility Updates: Every time we announced support for a new plugin, we heard your cheers. It showed we care about your entire stack. ## Keeping It Real: What Didn't Go Perfect We believe in transparency. The journey wasn't without its speed bumps. We had a few updates where notification logic acted up or a compatibility fix introduced a small layout quirk. A couple of times, our communication about an update could have been clearer. We learnt that even more testing with rare plugin combinations is needed. Our learning? Your bug reports and support threads are pure gold. They help us catch what we miss. Thank you for being patient and reporting issues. You're our quality assurance team, and we don't take that for granted. ## The 2026 Roadmap: Building the Admin of Your Dreams We're buzzing with ideas for 2026! Here's a rough, quarter-by-quarter glimpse of where we want to take WP Adminify. (Disclaimer: This is our initial plan. As always, we might shuffle things based on your loud and clear feedback!) ### Q1 2026: The Dashboard Revolution Begins We're starting with the heart of your workflow - the WordPress dashboard itself. - New UI Template Library: Get fresh, pre-designed dashboard widget styles to break the monotony. - Drag & Drop Dashboard Builder (Early Prototype): Start moving widgets around visually. This is a big dream, and we'll start laying the groundwork. ### Q2 2026: Smarter Widgets & Enhanced Core Building on the foundation, making core features even smarter. - Expand the new dashboard widget types with more data sources and customizability. - Deep dive into refining the menu editor and module performance based on your Q1 feedback. - More "set-it-and-forget-it" automation options for common admin tasks. ### Q3 2026: Introducing the "Care Hub" A visionary feature for agencies and developers. - Care Hub Concept: Imagine being able to push important notices, updates, or announcements from your website directly to your clients dashboards. Foster better communication and show you're always there. - Continued polish on the Drag & Drop builder based on your testing. ### Q4 2026: Polish, Scale, and Community Wishlist We'll dedicate this quarter to refining everything we've built and tackling the features from your 2026 wishlist. - Implement the #1 most requested community feature. - Performance optimization round for all new features. ## Celebrate the New Year with a Special Offer! To thank you for an amazing 2025 and to kick off 2026 with a bang, we're running a limited-time Year-End & New Year Sale! Upgrade to Pro or renew your license at a special discount. It's the perfect time to unlock all the powerful features for customizing admin menus, white labeling, and more, to start your new year with a supremely organized WordPress dashboard. This offer won't last forever - it's our little holiday gift to this wonderful community. [👉 Grab the Year-End Sale Offer Now!](https://wpadminify.com/pricing) ## A Final, Heartfelt Thank You From the bottom of our hearts, thank you. Thank you to every single user, from the beginner who wrote their first post to the agency managing hundreds of sites. Thank you to our beta testers, our forum moderators, and everyone who took a minute to write a review or share a kind word. You fuel our passion. The Adminify journey is so much better because you're on it with us. ## Let's Build an Amazing 2026 Together The roadmap is exciting, but it's just a draft. The final blueprint is in your hands. Tell us what you think. What part of the 2026 plan are you most excited about? What did we miss? Drop a comment, open a support thread, or just hit reply. Let's keep the conversation going. Here's to a peaceful end to 2025 and a spectacular, productive, and joyful 2026! Warmly, The WP Adminify Team P.S. Not tried WP Adminify yet? There's no better time. See how a cleaner, faster, personalized admin can change your WordPress life. [Start Your Adminify Journey for Free](https://downloads.wordpress.org/plugin/adminify.zip) --- # WP Adminify Media Folder Just Got Smarter & Faster URL: https://wpadminify.com/wp-adminify-media-folder-just-got-smarter-faster Last updated: 2026-07-15 If you work with WordPress long enough, you eventually hit the same wall: The Media Library becomes crowded, slow to navigate, and frustratingly disconnected from your actual workflow. Folders help - but only if they follow you where you work. That’s exactly what the latest Media Folder update in WP Adminify is about. While the visual changes may look subtle at first glance, the impact on daily productivity is anything but small. This update rethinks how media organization fits into real WordPress workflows - not just how it looks inside the Media Library screen. Let’s break down what changed, why it matters, and how you can use it to work faster every single day. ## Too Long; Didn’t Read (TL;DR) The goal is to make managing media files faster, cleaner, and more intuitive for real-world WordPress workflows. - The Media Folder feature is currently unavailable in the stable version of WP Adminify. - A new Media Folder feature and major improvements to the existing media workflow are in active development. - User can see Media Folder in the default WordPress media popup modal in Editor. - The Media Folder update is scheduled for release on January 22, 2026. - This update focuses on better organization, smoother navigation, and improved usability inside the WordPress Media Library. ## What we built after your feedback After sharing this blog post with our existing users, we received a wave of thoughtful suggestions around how Media Folders should feel in day‑to‑day use - not just how they look in the Library. Many of you asked for quicker ways to navigate long folder trees, smoother control inside the editor, and less friction when organizing files at upload time. Here’s what we’ve already shipped based on your requests: ### A toggleable, calmer folder UI collapse and expand media folder Many of you mentioned that the interface should get out of the way when you don’t need it. We’ve introduced a global expand/collapse control for the entire Media Folder panel, so you can quickly hide or reveal the folder sidebar and stay focused on the content in front of you. ### Media folders directly inside the editor We brought the full folder experience into the WordPress media popup, so you can browse the same structure while inserting images in posts, pages, and page builders – no more jumping back to the main Media Library just to stay organized. ### Set the folder at the moment of upload When you upload new files from the media modal, you can now choose the target folder right away, which keeps libraries organized by default instead of relying on cleanup later. ### One‑click subfolder expand/collapse Toggle on and off all sub folder in media library You wanted an easier way to handle deep folder structures, so subfolders can now expand and collapse with a single click, making long trees much easier to scan and manage. There are still ideas on our list - like user‑role‑specific folder visibility and more flexible color options - and we’re treating this release as the foundation to keep iterating with you, not the finish line. ## The Problem with Traditional Media Management in WordPress WordPress sites don’t stay small for long. A few blog posts turn into dozens. A handful of product images turn into hundreds. Add page builders, marketing campaigns, and multiple contributors - and suddenly finding the right image becomes a time-consuming task. ![WordPress media library without folders showing unorganized images](https://d1k2c27psfzbiv.cloudfront.net/wp-content/uploads/2026/01/18105423/wordpress-media-library-without-folders.webp) Even with folders, there was a hidden friction: - Media folders lived mainly inside the Media Library page - The media uploader popup felt disconnected from that structure - Bulk actions and drag-and-drop worked, but not smoothly at scale The system functioned - but it didn’t flow. ## How Media Folder Worked Before This Update ![Previous version of WP Adminify media folder interface in WordPress](https://d1k2c27psfzbiv.cloudfront.net/wp-content/uploads/2026/01/18105759/wp-adminify-media-folder-old-version.webp) In the previous version of WP Adminify’s Media Folder feature, users could: - Create folders and subfolders - Organize images, videos, and documents - Use drag & drop inside the Media Library This was already a big step beyond default WordPress. However, once you entered the media uploader modal - inside the block editor, Elementor, or any page builder - that folder structure disappeared. Users had to mentally switch contexts, scroll through mixed media, or rely on search. It worked. But it interrupted momentum. ## What’s New in the Latest Media Folder Update The current version introduces improvements that focus on continuity, clarity, and speed. ### Media Folders Now Work Inside the Media Uploader Popup ![WP Adminify media folders available inside WordPress media uploader popup](https://d1k2c27psfzbiv.cloudfront.net/wp-content/uploads/2026/01/18111013/wp-adminify-media-folder-inside-media-uploader.webp) This is the most impactful change. Media folders are now available directly inside the media uploader modal - the popup you use when inserting images into posts, pages, or page builders. What this means in practice: - The same folder structure appears everywhere - No context switching between editor and Media Library - You insert images from the right folder, instantly This single change removes several unnecessary steps from every content workflow. ### A Cleaner, More Focused Folder Interface ![New version of WP Adminify media folder interface in WordPress](https://d1k2c27psfzbiv.cloudfront.net/wp-content/uploads/2026/01/18110130/wp-adminify-media-folder-new-version.webp) The updated UI is more intentional: - Clear folder hierarchy - Visible item counts - Reduced visual noise - Faster scanning and decision-making Nothing flashy. Just calmer, more readable organization that scales as your library grows. ### Smoother Drag & Drop with Bulk Selection Bulk drag and drop images into folders in WP Adminify media library Media organization isn’t about one image at a time. The improved drag-and-drop experience now feels noticeably smoother - especially when working with multiple files. Bulk selecting images and moving them between folders is faster and more predictable. This matters most for users who: - Upload media in batches - Reorganize existing libraries - Manage product catalogs or large content archives Small interaction improvements compound quickly when multiplied by hundreds of files. ### Assign Media to a Folder Directly from the Upload Popup Media organization doesn’t have to wait until after upload anymore. With the latest update, users can now assign a folder at the moment of uploading media, directly from the media uploader popup. ![Select media folder while upload a new file directly from media modal in WordPress](https://d1k2c27psfzbiv.cloudfront.net/wp-content/uploads/2026/01/18112546/define-media-folder-while-uploading-file.webp) Inside the upload modal, a folder selector is available in the bottom-right corner, allowing you to choose exactly where new images should live. This small addition removes the need for post-upload cleanup, reduces misfiled assets, and keeps large media libraries organized by default. ## Before vs After: Why This Feels Like a Big Upgrade On paper, these may look like “minor” changes. In real use, they remove friction from one of the most repeated actions in WordPress: adding media while creating content. Before: Editor → Open media → Search or scroll → Guess → Insert Now: Editor → Open media → Select folder → Insert Fewer clicks. Fewer mistakes. Less mental load. ## Real-World Use Cases That Benefit Immediately ### Bloggers & Content Creators Organize images by post type, topic, or campaign - and insert them directly while writing without breaking focus. ### Designers & Page Builder Users Keep design assets separate from blog media. Access folders instantly inside Elementor or Gutenberg and build pages faster. ### WooCommerce Store Owners Group product images by category or SKU. Bulk move assets during updates and maintain a clean, reliable catalog. ### Agencies & Multi-Site Managers Create a consistent media structure across client sites. Reduce training time and avoid accidental asset misuse. ## Performance Isn’t Just Speed - It’s Flow Good tools disappear while you’re using them. This Media Folder update isn’t about adding complexity. It’s about removing friction. When your media system stays consistent across screens, your attention stays on the work - not the interface. That’s where real productivity gains come from. ## Built from Real Usage, Not Assumptions This update reflects how WordPress is actually used today: - Inside editors - Inside page builders - With large media libraries - By professionals who value speed and clarity It’s not a redesign for the sake of change. It’s an evolution based on real workflows. ## Experience the New Media Folder in WP Adminify If media management has ever slowed you down, this update is worth exploring. Start by organizing just one folder. Insert images directly from the media popup. Feel the difference in flow. This is what thoughtful WordPress tooling should feel like - simple, consistent, and quietly powerful. --- # Introducing Admin Menu Search: Find Any Setting in Seconds URL: https://wpadminify.com/introducing-admin-menu-search Last updated: 2026-07-15 If you manage a serious WordPress site, you know the feeling: the admin sidebar keeps growing with every plugin, and a simple task turns into scrolling up and down to find the right menu item. WP Adminify already helps you organize and customize that dashboard, but we wanted to go one step further and make navigation instant. That is why we built the new Admin Menu Search feature in WP Adminify – a smart search bar that lives on top of your admin menu and lets you jump to any menu or submenu item just by typing a few letters. ![WP Adminify Admin Menu Search bar at top of WordPress dashboard menu](https://d1k2c27psfzbiv.cloudfront.net/wp-content/uploads/2026/03/13105705/admin-menu-search-overview.webp) [check this menu search in action](https://www.youtube.com/shorts/nSR7W5BgdBc) ## The Story: A Feature Inspired by Our Pro User, Felix Cuceanu This feature started with a conversation, not a roadmap document. One of our Pro users, Felix Cuceanu, reached out and shared how much he relies on WP Adminify every day to manage his WordPress sites. He explained that while the Admin Menu Editor and other productivity modules already save him time, finding specific menu items inside a long sidebar was still slowing him down. After talking with Felix and understanding his workflow, it became clear that a fast, keyboard‑friendly way to locate any admin menu item would be a huge win for power users and agencies. His feedback directly shaped the Admin Menu Search feature, from the placement of the search bar to the way results are filtered in real time. We are always happy to hear both positive and negative feedback from our users, and Felix’s suggestions are a perfect example of how real‑world usage guides our product decisions. ## What Admin Menu Search Does? Admin Menu Search adds a simple text search field at the very top of your WordPress admin menu. As you type, it instantly filters visible menu and submenu items to match your query, so you can open exactly what you need with a single click. It works with core WordPress menus, plugin menus, and any custom items, so you always get consistent results no matter how complex your dashboard is. ![Admin Menu Search filtering WordPress admin menu items as user types](https://d1k2c27psfzbiv.cloudfront.net/wp-content/uploads/2026/03/13105940/admin-menu-search-in-action.webp) ## How This Helps You Work Faster Admin Menu Search is designed to remove small but constant friction in your daily workflow. Here are a few practical ways it helps: - Find hidden plugin pages in seconds: When you install several plugins, each one adds at least one menu item and often multiple submenus. With Admin Menu Search, you can type “SEO”, “Woo”, “Forms”, or any keyword and immediately see only the relevant items. - Reduce onboarding time for teams and clients: If you build sites for clients or work in a team, people often do not remember where settings live. A visible search bar on the dashboard sidebar makes it much easier for non‑technical users to discover where they need to go without asking you every time. - Combine with role‑based menus for a cleaner experience: WP Adminify already lets you reorganize the admin menu, hide items by user role, and create custom menus. When you pair that with Admin Menu Search, users see only what they are allowed to access and can still find those items instantly. - Fewer clicks, more focus: Instead of scrolling, expanding, collapsing, and hunting for the right submenu, you stay focused on your task: type, press Enter or click, and get back to work. This kind of micro‑efficiency adds up when you are inside the dashboard all day. ## How to Enable Admin Menu Search in WP Adminify Turning on Admin Menu Search is straightforward and takes just a few seconds: - Go to your WordPress dashboard and navigate to WP Adminify → Admin Menu. - Open the Settings tab inside the Admin Menu panel. - Locate the Menu Search option and toggle it to Enable. - Save your settings and reload the dashboard. You will now see a search bar at the top of your admin sidebar. Because WP Adminify is modular, you can keep this feature enabled while turning off any modules you do not need, so your site stays lightweight and tailored to your workflow. ## Built on a Modular, Productivity‑Focused Toolkit Admin Menu Search joins a growing collection of productivity features in WP Adminify: Admin Menu Editor, white labeling, dark mode, admin columns, dashboard widgets, media folders, activity logs, and more. All of these modules share one goal: help you turn the default WordPress admin into a clean, branded, and efficient workspace that matches how you actually work. You choose which modules to enable, so WP Adminify grows with your projects instead of getting in the way. ## Listening to Users: Why Feedback Like Felix’s Matters Admin Menu Search exists because a real user took the time to share his experience with us. Conversations like the one we had with Felix Cuceanu help us see WP Adminify through our users eyes and prioritize what actually moves the needle for them. We regularly talk with both free and Pro users, and we genuinely welcome every kind of feedback – feature ideas, pain points, and even criticism. This feedback cycle is how WP Adminify has grown into a flexible toolkit used by agencies, freelancers, and product teams around the world. If you have an idea that would make your WordPress dashboard faster, clearer, or more enjoyable, we would love to hear from you. Your next suggestion might become the next feature we ship. ## Try Admin Menu Search on Your Site If you are already using WP Adminify, update to the latest version and enable Admin Menu Search from the Admin Menu settings to see how much time it can save you this week. If you are new to WP Adminify, you can start with the free version and then unlock Pro features as you grow. Either way, we built this new feature to help you get more done in less time inside the WordPress dashboard. Would you like me to also turn this into a shorter version that fits nicely as a changelog entry or product update inside your site? --- # Menu Search URL: https://wpadminify.com/docs/adminify/admin-menu/menu-search Last updated: 2026-08-12 Admin Menu Search adds a search field to the top of your WordPress admin menu. Type a few letters and the menu filters down to matching items, which beats scrolling a sidebar that's grown to thirty entries because every plugin added its own menu. ## What it does Once enabled, a text field sits at the top of the admin menu. As you type, the menu filters in real time and shows only what matches. It covers: - WordPress core menus (Posts, Pages, Settings, Tools) - Menus added by plugins (SEO, WooCommerce, forms, caching) - Custom items you created with the WP Adminify Admin Menu Editor Submenu items count too. If you know a setting lives under some parent menu but can't remember which one, typing its name takes you straight there. ## How to enable Admin Menu Search - In your WordPress dashboard, go to WP Adminify → Admin Menu. - Open the Settings tab. - Toggle Menu Search to Enable. - Save your changes and reload the dashboard. The search field now shows at the top of the admin menu on every dashboard page. ## How to use it - Click the search field at the top of the admin menu. - Type part of the item name, like seo or woo. - The menu filters as you type and shows matching items with their parents. - Click the item you want. Clear the field to bring the full menu back. ## Common use cases - Sites running 20+ plugins end up with admin menus taller than the screen. Searching for a keyword beats scrolling and expanding parent menus one at a time. - Client handoffs go faster. Nobody has to memorize where each setting lives; they type what they want and click. - Pair it with WP Adminify's role-based menu controls: each role gets a trimmed menu and can still find its items instantly. - You skip a click on every submenu visit, which adds up if you're in `wp-admin` all day. ## Works with other WP Adminify features Admin Menu Search ships as one module in WP Adminify alongside the Admin Menu Editor (rename, reorder, and hide items), white labeling, dark mode, admin columns, dashboard widgets, media folders, and activity logs. Items you rename through the Admin Menu Editor show up in search under their new labels - a client who searches for "Articles" will find the menu you renamed from "Posts". ## Admin Menu Search FAQs ### Does Admin Menu Search work with plugin menus? Yes. It searches everything in the admin menu: core items, plugin menus, and custom items added through the Admin Menu Editor. ### Does it search submenu items? Yes. Matching submenu items show up along with their parent menu so you can see where they live. ### Can I turn it off for certain users? The toggle in WP Adminify → Admin Menu → Settings controls the feature site-wide. Combine it with WP Adminify's role-based menu settings to control what each role sees in the menu itself. ### Does it slow down the dashboard? No. Filtering runs in the browser against the menu items already on the page, so it adds zero server requests. --- # Change WordPress Username URL: https://wpadminify.com/docs/adminify/security/change-wordpress-username Last updated: 2026-09-08 The Username Change option lets you rename any WordPress user from the user edit screen. WordPress core grays out the username field on purpose. This module adds a "Change" link beside it so you can edit the value without touching the database. ## Requirements - WP Adminify 4.2.12 or higher (free or Pro). - A user role with the `edit_users` capability. That's Administrator on a single site, Super Admin on Multisite. ## Step 1 - Enable the Username Change option - In your WordPress admin, go to WP Adminify → Security. - Find the Users Security row and switch it to Show. - Toggle Username Change to Yes. The setting saves on toggle. You don't need to reload the page. ![WP Adminify Security panel with Users Security set to Show and Username Change toggled to Yes](https://d1k2c27psfzbiv.cloudfront.net/wp-content/uploads/2026/05/13090619/enable-username-change.webp) ## Step 2 - Open the user you want to rename - Go to Users → All Users. - Hover over the user and click Edit. To rename your own account, click Profile in the admin sidebar instead. - Scroll to the Name section. ## Step 3 - Change the username - Beside the Username field, click the Change link. - A New Username input appears below the current username. - Type the new username. - Click Save Change. ![User edit screen with the Change link clicked, showing the New Username input field and Save Change button](https://d1k2c27psfzbiv.cloudfront.net/wp-content/uploads/2026/05/13090904/change-admin-username.webp) The username updates right away. ## What happens after the change - If you renamed your own account: WordPress logs you out. Log back in with the new username and your existing password. - If you renamed another user: they get logged out the next time their session is validated. They must use the new username to log back in. - The user ID, password, email, role, and authored content stay the same. - The author archive URL changes from `/author/oldname/` to `/author/newname/`. ## Validation rules WP Adminify checks the new username before saving: - Must be unique. Duplicates are rejected. - Allowed characters: letters, numbers, underscores, hyphens, periods, spaces, and the @ symbol. - WordPress's `sanitize_user()` function strips invalid characters before save. - Empty values are rejected. ## Troubleshooting ### The Change link does not appear Check that Users Security is set to Show and Username Change is set to Yes under WP Adminify → Security. Clear your browser cache and reload the user edit screen. ### "Username already exists" error Pick a different username. WordPress requires every `user_login` value to be unique across the install. ### Locked out after renaming your own account Log in with the new username and your existing password. The password doesn't change. If you forgot the new username, ask another administrator to look it up under Users → All Users, or check the `wp_users` table in your database. ### The public byline still shows the old name The public byline is the Display name publicly as setting, not the username. Update it under Users → Profile. ## Multisite On WordPress Multisite, users live in the network-level `wp_users` table. Enable Username Change from the Network Admin and the rename applies across every subsite the user has access to. ## Disabling the feature To remove the Change link from user edit screens, go to WP Adminify → Security and toggle Username Change back to No. Already-renamed users keep their new usernames. ### Does changing the username also change the password? No. Username and password sit in separate columns (user_login and user_pass). The same password works after the rename. ### Will I get logged out after changing my own username? Yes. WordPress invalidates your session cookie because it's keyed against the old username. Log back in with the new username and your existing password. ### Will posts, comments, and media stay attached to the renamed user? Yes. WordPress links content by user ID, not username. The user ID doesn't change on rename, so authored posts, comments, and media stay attached. ### Can a non-administrator rename users? No. Only roles with the edit_users capability can use the Change link. By default that's Administrator on a single site and Super Admin on Multisite. ### What characters are allowed in the new username? Letters, numbers, underscores, hyphens, periods, spaces, and the @ symbol. WordPress's sanitize_user() function strips anything else before saving. ### Can I rename my own account? Yes. Go to Users → Profile, click Change beside the username, type the new value, and click Save Change. WordPress logs you out right after the save. ### Does Username Change work on Multisite? Yes. Enable the option from the Network Admin under WP Adminify → Security. The rename applies across every subsite the user has access to, because Multisite stores users in the network-level wp_users table. ### Why is the Change link not showing on the user edit screen? Check three settings: Users Security is set to Show, Username Change is set to Yes, and your role has the edit_users capability. Clear the browser cache and reload after toggling. ### Will the author archive URL change after the rename? Yes. The slug updates from /author/oldname/ to /author/newname/. The old URL returns 404. Set up a 301 redirect from the old slug if the page had backlinks or organic traffic. ### Can I undo a username change? Yes. Run the same steps and set the username back to its previous value. WP Adminify doesn't store rename history, so you have to remember the old username yourself. ### Is Username Change in the free version of WP Adminify? No. The Feature ships in the Pro version from 4.1.17+ and in WP Adminify Pro. --- # Enable Media Replace in WordPress URL: https://wpadminify.com/docs/adminify/productivity/enable-media-replace-in-wordpress Last updated: 2026-08-12 Media replace feature will available in WP Adminify from 4.1.13 version, scheduled to role out in 29th April 2026. The Media Replace feature in WP Adminify swaps a file in your Media Library for a new version while keeping the attachment ID, filename, publish date, and URL the same. Anything that already references the file (posts, page builders, external links) keeps working without re-attaching it. Wrong logo uploaded, PDF brochure needs an update, typo in a screenshot you've already embedded in 30 posts? Replace the file in place. Every replacement is auto-backed up, so you can roll back step by step. [Watch the Media Replace Shorts Video](https://www.youtube.com/watch?v=Uk9C-8wjad0) ## Requirements & Rules ⚠ File type must match. The new file needs the same MIME type as the original. A `.jpg` only swaps with another `.jpg`, never a `.png` or `.webp`. Same rule for PDFs, MP4s, and every other format. | Original file | Allowed replacement | Not allowed | | --- | --- | --- | | image_5.jpg | .jpg / .jpeg | .png, .webp, .svg | | logo.png | .png | .jpg, .svg | | brochure.pdf | .pdf | .docx, .jpg | | video.mp4 | .mp4 | .mov, .webm | Why same type? The URL, MIME type, and metadata (dimensions, duration) all carry over from the original. Allowing different types would break the URL extension and any code that expects a specific format. ## Enable Media Replace Before jumping to the action. Make sure to enable the media replace feature from WP Adminify → Productivity → Media Settings option. By default you can undo replacement one time. But if you prefer to store more media files backup then make sure set the number on "Backup Restore Limit" number field. ![Enable media replace in WordPress](https://d1k2c27psfzbiv.cloudfront.net/wp-content/uploads/2026/04/29101822/how-to-Enable-media-replace-in-WordPress.webp) ## Grid View - Replace a File Grid View is the default modal layout when you click on any media item from Media → Library. Open the media modal Go to Media → Library in your WordPress dashboard. Click any media item to open its Attachment Details popup. You'll see a new Media Replace metabox in the right sidebar. ![The Media Replace metabox appears below the File URL section.](https://d1k2c27psfzbiv.cloudfront.net/wp-content/uploads/2026/04/27070252/wordpress-media-replace-grid-metabox.webp) Click "Select New Media" Press the Select New Media button inside the Media Replace metabox. Your operating system's file picker will open. Choose the new file from your device. Reminder: The new file's extension must match the original (e.g., `.jpg → .jpg`). Different types will be rejected. ![Select New media or file from your os file picker](https://d1k2c27psfzbiv.cloudfront.net/wp-content/uploads/2026/04/27070808/Select-New-media-or-file-from-your-os-file-picker.webp) Confirm the replacement After selecting a file, a confirmation prompt appears with a preview of the new file (filename + size). Review it, then click Replace to proceed or Cancel to abort. ![The confirmation modal shows the incoming file with size, plus Cancel/Replace actions](https://d1k2c27psfzbiv.cloudfront.net/wp-content/uploads/2026/04/27070903/confirm-media-replacement-wordpress-grid-view.webp) The confirmation modal shows the incoming file with size, plus Cancel/Replace actions. Done - image swapped instantly You'll see an "Image replacement successful" notice only for a seconds or less before it reloads. ![image replace successfully notice](https://d1k2c27psfzbiv.cloudfront.net/wp-content/uploads/2026/04/27071410/image-replace-successully-notice.webp) The Attachment Details modal reloads with the new file in place. Posts, embeds, and external links keep working because the URL didn't change. ![After replacement, the modal updates instantly.](https://d1k2c27psfzbiv.cloudfront.net/wp-content/uploads/2026/04/27071412/new-replaced-media-or-image-appeared-on-the-attachement-preview.webp) What stays the same: File ID, filename, publish date, URL, and all attachments to posts/pages. What changes: The actual file content (and its metadata like dimensions or size). ## Grid View - Restore Previous File Wrong file uploaded, or changed your mind on the swap? Every replacement is auto-backed up. Roll back whenever you need. Find "Back to Original" link Open the same media item in the Attachment Details modal. At the bottom of the right sidebar, alongside Delete permanently, you'll see a new link: Back to Original. A number in parentheses (e.g., 3) shows how many times this file has been replaced. ![Back to orginal after replace media](https://d1k2c27psfzbiv.cloudfront.net/wp-content/uploads/2026/04/27071759/Back-to-orginal-after-replace-media.webp) "Back to Original (3)" - the (3) means this media has been replaced 3 times. Click "Back to Original" Clicking opens the Undo replacement? confirmation modal. It explains that every replacement is saved as a backup - so you can keep going back. The Undo confirmation prompt with Cancel and "Yes, Restore!" buttons. ![undo replacement media files in wordpress](https://d1k2c27psfzbiv.cloudfront.net/wp-content/uploads/2026/04/27072018/undo-replacement-media-files-in-wordpress.webp) Confirm restore Click Yes, Restore! The most recent backup takes over as the current file. The counter next to Back to Original drops by one, and the modal reloads with the restored version. Multi-step undo: If you've replaced a file 5 times, you can click Back to Original up to 5 times - each click rolls back one step in history. The counter shows how many backups remain. ![confirm restore media replacement](https://d1k2c27psfzbiv.cloudfront.net/wp-content/uploads/2026/04/27072215/confirm-restore-media-replacement.webp) ## List View - Replace a File List View is the alternate layout for the Media Library, accessible by toggling the view at Media → Library. Click "Edit or Replace" Hover over any media row in the list. The action links appear: Edit or Replace | Delete Permanently | View | Copy URL | Download file | Back to Original. Click Edit or Replace. ![WordPress media list view edit or replace button](https://d1k2c27psfzbiv.cloudfront.net/wp-content/uploads/2026/04/27072449/WordPress-media-list-view-edit-or-replace-button.webp) Locate "Media Replace" metabox The Edit Media admin page opens. In the right sidebar, scroll down to find the Media Replace metabox below the Save panel. ![locate the media replace metabox in attachment page](https://d1k2c27psfzbiv.cloudfront.net/wp-content/uploads/2026/04/27072646/locate-the-media-replace-metabox-in-attachment-page.webp) Select new file & confirm Click Select New File, choose the new file from your device, and confirm in the prompt that appears. The Replace File metabox works the same way as in Grid View. From here the flow matches Grid View: confirmation prompt, reload, success notice. ## List View - Restore Previous File Hover the media row From the main Media → Library list page, hover over the media item you want to restore. The action links appear under the filename, including Back to Original with a count badge if multiple replacements exist. ![Back to orginal from list view in WordPress media](https://d1k2c27psfzbiv.cloudfront.net/wp-content/uploads/2026/04/27073054/Back-to-orginal-from-list-view-in-wordpress-media.webp) "Back to Original (3)" - three replacements available to roll back. Click & confirm Click Back to Original. The same Undo replacement? confirmation modal appears. Click Yes, Restore! to roll back one step. Repeat as needed. ## How Version History Works Each time you replace a file, WP Adminify creates a backup of the current version before swapping it. Backups are stacked, not overwritten. ### Example: 5 replacements deep | Action | Current file | Backup count | | --- | --- | --- | | Initial upload | v1 (original) | 0 | | Replace #1 | v2 | 1 (v1 saved) | | Replace #2 | v3 | 2 (v1, v2 saved) | | Replace #3 | v4 | 3 | | Replace #4 | v5 | 4 | | Replace #5 | v6 | 5 | | Click Back to Original | v5 (rolled back 1 step) | 4 | | Click again | v4 | 3 | | Click 3 more times | v1 (back to original) | 0 | Linear history: "Back to Original" always rolls back one step at a time. The counter beside the link tells you exactly how many steps backward are available. ## Tips & Best Practices ### When to use Media Replace - Logo updates - replace your site logo without re-attaching it on every page - Document revisions - update PDFs, brochures, contracts while keeping the same download URL - Image corrections - fix typos, color issues, or quality problems in published images - Compressed versions - replace large images with optimized versions (still same format) - Watermarking / branding - add or update watermarks across your media ### When NOT to use it - You need to change file format (jpg → webp) - upload as new media instead - You want to keep both old and new versions visible - replacement hides the old (though backup remains) - You're cleaning up unused files = use Delete permanently ### Performance note If you run a CDN or page cache (Cloudflare, WP Rocket, LiteSpeed Cache), the new file may take a few minutes to propagate to visitor caches. Purge your cache after an important replacement. ### Can I replace a JPG with a PNG? No. The new file must have the same MIME type as the original. Replace JPG with JPG, PNG with PNG. To change format, upload the new file as a separate media item. ### What happens to image thumbnails after replacement? WordPress automatically regenerates all thumbnail sizes (thumbnail, medium, large, etc.) based on the new file. Existing posts using thumbnail sizes will display the new versions on the next page load. ### Will all my embedded links still work? Yes. The file URL stays exactly the same - only the file content behind that URL changes. Posts, pages, emails, and external sites linking to the URL continue to work. ### How many backup versions are kept? All of them. Every replacement is stored. The number beside Back to Original tells you how many backups exist. There's no automatic cleanup - backups are kept until you fully roll back. ### Where are backups stored? Backup files are saved in your WordPress uploads directory in a hidden folder managed by WP Adminify. They take up disk space, so be mindful if you replace large files (videos, big PDFs) frequently. ### Can I undo a "Back to Original" action? "Back to Original" is itself a backup-creating action - once you roll back, you can't undo this. You must reupload the image to replace again. ### Does this work with Gutenberg, Elementor / page builders? Yes. At present we offer support to Gutenberg editor only. From Gutenberg editor media popup modal you can replace the media file. Replace media on other page builder is not supported for now. It's upcoming feature on our to do list. Since the file URL never changes, all page builders and themes continue to display the file correctly without any republish step. ### Can I bulk-replace multiple files? Currently no - Media Replace works on one file at a time. For bulk operations, replace each file individually. ### What permissions are required? Any user with the upload_files capability can replace media (typically Authors, Editors, and Administrators). The same role that can upload media can replace it. ### Does this break SEO or image indexing? No. Search engines see the same URL with refreshed content. Image SEO signals (alt text, captions, surrounding context) all stay intact since they're metadata, not the file itself. --- # Changelogs URL: https://wpadminify.com/docs/rolemaster-suite/rolemaster-changelogs Last updated: 2026-08-12 V 1.0.2 (21-12-2025) - Fixed: text-domain issue fixed. - Fixed: Fixed an issue where newly created roles did not appear in the role selection dropdown. V 1.0.1.5 (30-08-2024) - Fixed: Activation error issue fixed V 1.0.1.4 (17-07-2024) - Updated: Compatibility with WP Adminify - Updated: Content not showing issue fixed V 1.0.1.3 (17-07-2024) - Fixed: Post Types data not getting issue fixed V 1.0.1.2 (08-05-2024) - Updated: Responsive issues fixed V 1.0.1.1 (07-05-2024) Updated: Re-Coded codebase with New UI --- # Changelogs URL: https://wpadminify.com/docs/loginfy/changelogs Last updated: 2026-07-16 1.0.4.0 (24-09-2025) - UI Improvement: Ui Updated for better UX. - Security Patch: Updated SDK to provide better security 1.0.3.9 (12-08-2025) - Fixed: Wrong URL on "WP Adminify" submenu "Login Customizer" on Admin Bar Editor issue fixed. 1.0.3.8 (24-05-2025) - Updated: Freemius SDK Updated and moved on vendor as per WordPress.org requirements - Updated: Background Image Size Compressed and webp format 1.0.3.7 (03-03-2025) - Fixed: Loginfy Customizer panel other section settings hide lost password link while hiding back to wordpress button. - Fixed: Loginfy Customizer panel showing Privacy Policy link twice. - Fixed: Loginfy Customizer panel other section settings missing condition for Language Switcher. - Update: Freemius SDK Updated to latest version. - Update: Applied security patches. 1.0.3.6 (26-01-2025) - Added: After "Opt In" error page redirected "admin.php?page=loginfy" issue fixed - Added: Disable "Privacy Policy" Link option added on "Others" - Added: Disable "Language Switcher" Option added on "Others" - Fixed: Initial broken Customizer Page loading issue fixed - Removed: Templates, Sections, Button styles button on 'back to website' removed 1.0.3.5 (30-12-2024) - Fixed: Broken Customizer initial load issue fixed 1.0.3.4 (24-08-2024) - Fixed: Customizer Styles not working issue fixed - Updated: WP Login Page not showing issue fixed - Updated: WP Login Page error issue fixed 1.0.3.3 (24-08-2024) - Update: Menu Link issue fixed 1.0.3.2 (24-08-2024) - Update: Compatibility with WP Adminify 1.0.3.1 (04-04-2024) - Update: Plugin Name Typo update 1.0.3 (04-04-2024) - Update: Completely re-coded version uploaded 1.0.0 - Initial release --- # How to Install and Activate Admin Column Editor? URL: https://wpadminify.com/docs/admin-columns/ac-installation Last updated: 2026-08-12 Admin Columns editor allows you to add or remove all unwanted default or custom admin columns from your WordPress Dashboard. ## Install from WP Adminify First, go to `WP Adminify > Addons` from the WordPress dashboard. Then look for the Admin Column Editor. Click install and then activate it. ![Install Admin Columns Editor addon using WP Adminify](https://d1k2c27psfzbiv.cloudfront.net/wp-content/uploads/2025/05/18103511/Install-Admin-Columns-Editor-addon-using-WP-Adminify.webp) ## Install the Pro Version Admin Column Editor also comes with a PRO version. You can purchase the Admin Column Editor PRO version from the following link: After completing your purchase, you’ll receive your login credentials via email. Now to download the pro version of Admin Column Editor, sign in to your account. Then go to the “Download” tab. You’ll see the pro version of Admin Column Editor is listed here. Click the download button to save it on your pc directory. Now, you need to upload your plugin to your site. Go to `Plugins > Add New > Upload Plugin`. Then, select the zip you just downloaded (Pro Version of Admin Column Editor). After the uploading completes, click “Install Now” then “Activate”. ![Install Admin Columns pro](https://d1k2c27psfzbiv.cloudfront.net/wp-content/uploads/2025/05/18103510/Install-Admin-Columns-pro.webp) Now, you need to add your license to the PRO version to continue. To get your license, sign in to your account. Then go to the “Licenses” page. You’ll see the Admin Column Editor Pro license here. Copy the license from here, then paste it in the Pop up you’ll see in the Loginfy. Paste your license to activate the PRO version. Once you successfully activate the PRO version, you'll see a confirmation message and unlock Pro features instantly! ## How to Access the Admin Column Editor After activating, go to `WP Adminify > Admin Columns`to get to the Admin Column Editor interface. ![Access to Admin Columns option panel](https://d1k2c27psfzbiv.cloudfront.net/wp-content/uploads/2025/05/18103509/Access-to-Admin-Columns-option-panel.webp) Now you can see the option panel for Admin Columns editor. --- # How to Customize Admin columns from any post type? URL: https://wpadminify.com/docs/admin-columns/customization-for-any-post-type Last updated: 2026-08-12 Navigate to the option panel for Admin Columns from `WP Adminify > Admin Columns`. Now select your preferred post type (Default selected as post), and you will get all of their columns. ## Add custom Columns At the bottom, you can see a button called "Add New", just click on this button and you will get a field with some pre-defined admin columns data. ![Add New custom admin columns in post](https://d1k2c27psfzbiv.cloudfront.net/wp-content/uploads/2024/10/18103459/Add-New-custom-admin-columns-in-post.webp) As soon as I clicked on the "Add New" button, the Author column is added. ## Modify the data You can change the column type to any available type. Just click on the dropdown icon and you will get all available type for your WordPress Dashboard. ![Default custom admin columns type for posts](https://d1k2c27psfzbiv.cloudfront.net/wp-content/uploads/2024/10/18103458/Default-custom-admin-columns-type-for-posts.webp) Now you can select any other available column type, for example, I am going to select the Date and change the label text to "Published Date" from "Author". ![Modify the label text for custom admin columns](https://d1k2c27psfzbiv.cloudfront.net/wp-content/uploads/2024/10/18103457/Modify-the-label-text-for-custom-admin-columns.webp) ## Control the width This is another important feature of our Admin Columns Editor addon. You have the control the fix the width of your specific admin columns in percentage or px. ![Modify the width for specific admin columns](https://d1k2c27psfzbiv.cloudfront.net/wp-content/uploads/2024/10/18103456/Modify-the-width-for-specific-admin-columns.webp) Tips: While using percentages, try to set a value for all your admin columns that return 100. ## Test and Preview Now the post looks something like the following screenshot: ![Admin Columns for post types after defining the width](https://d1k2c27psfzbiv.cloudfront.net/wp-content/uploads/2024/10/18103455/Post-admin-columns-preview-After-width-control.webp) Sometimes you may miscalculate the width value, which is why it may looks odd, but you can always change the value and test the preview. The same customization allows for all taxonomies, custom post types. --- # Google PageSpeed Insights Addon Installation URL: https://wpadminify.com/docs/google-pagespeed-insights/pi-installation Last updated: 2026-08-12 Google PageSpeed Insights offers you to track your webpage performance. You can easily identify the issues and resolve them. After resolving any issues, you can compare data from your previous report. ## Installation and Activation First, make sure WP Adminify is installed and activated. Then go to `WP Adminify > Addons`. Find the Google PageSpeed addon. Then install and activate it. After it’s done, you’re ready to use its features. ![Install Google Pagespeed insights addon](https://d1k2c27psfzbiv.cloudfront.net/wp-content/uploads/2025/05/18103512/Install-Google-Pagespeed-insights-addon.webp) ## How to access the option panel? Navigate to `WP Adminify > Pagespeed Insights`to get the option panel. ![Access Google Pagespeed Inisights option panel](https://d1k2c27psfzbiv.cloudfront.net/wp-content/uploads/2025/05/18103513/Access-Google-Pagespeed-Inisights-option-panel.webp) This is the Google Pagespeed Insights option panel where you can check your pagespeed data. --- # Quick Menu Installation and Activation URL: https://wpadminify.com/docs/quick-menu/qm-installation Last updated: 2026-09-08 Make sure you have installed WP Adminify plugin in your WordPress Dashboard. This addon only works with WP Adminify plugin. ## Install Quick Menu Addon Navigate to `WP Adminify > Addons`. Look for the Quick Menu addon and click on the install button. This will install the free version of our Quick Menu addon. ![Install Quick menu addon by WP Adminify](https://d1k2c27psfzbiv.cloudfront.net/wp-content/uploads/2025/05/18103521/Install-Quick-menu-addon-by-WP-Adminify.webp) ## Install Quick Menu PRO If you have purchased the pro version of our Quick Menu addon, then you should have received the pro file directly to your email or you can download this from WP Adminify account page. After downloading, Navigate to `Plugins> Add new > Upload the plugin` Now install and activate the Quick Menu pro plugin in your dashboard and enter the license key to unlock all pro features. ![Install Quick menu pro](https://d1k2c27psfzbiv.cloudfront.net/wp-content/uploads/2025/05/18103520/Install-Quick-menu-pro.webp) ## Where to access the Option panel? Click or Hover on the WP Adminify > Quick Menu You will get the option panel with 3 default quick menu item. ![Access Quick menu option panel](https://d1k2c27psfzbiv.cloudfront.net/wp-content/uploads/2024/10/18103525/Access-Quick-menu-option-panel.webp) --- # How to install the Header Footer Scripts addon in WP Adminify? URL: https://wpadminify.com/docs/header-footer-scripts/hfs-installation Last updated: 2026-08-12 Make sure you have installed WP Adminify plugin in your WordPress Dashboard. This addon only works with WP Adminify plugin. ## Install Header Footer Scripts Addon Navigate to `WP Adminify > Addons`. Look for the Header Footer scripts addon and click on the install button. This will install the free version of our Header Footer Scripts addon. ![Header and Footer Scripts addon installation](https://d1k2c27psfzbiv.cloudfront.net/wp-content/uploads/2024/10/18103531/Header-and-Footer-Scripts-addon-installation.webp) ## Install Header Footer Scripts PRO If you have purchased the pro version of our Header Footer Scripts addon, then you should have received the pro file directly to your email or you can download this from WP Adminify account page. After downloading, Navigate to `Plugins> Add new > Upload the plugin` ![Upload Header Footer scripts pro addon](https://d1k2c27psfzbiv.cloudfront.net/wp-content/uploads/2024/10/18103526/Upload-Header-Footer-scripts-pro-addon.webp) Now install and activate the Header Footer scripts pro plugin in your dashboard and enter the license key to unlock all pro features. ## Where to access the Option panel? Click on WP Adminify option in admin menu. Then navigate to code snippets > Frontend scripts. From there, our guide on how to [add code to the WordPress header](https://wpadminify.com/add-code-to-wordpress-header) covers adding your first snippet. ![Frontend scripts for custom css and js](https://d1k2c27psfzbiv.cloudfront.net/wp-content/uploads/2024/09/25102032/Frontend-scripts-for-custom-css-and-js.webp) --- # RoleMaster Suite Addon installation URL: https://wpadminify.com/docs/rolemaster-suite/rs-installation Last updated: 2026-08-12 RoleMaster suite is a User Role editor plugin by developed by WP Adminify Team. This plugin is 100% free to use. Installation this plugin is no different than other plugins that you generally installed in your WordPress Dashboard. Note: RoleMaster suite will works fine with or without WP Adminify plugin. ## Installation from WP Adminify Addons page If you have installed WP Adminify plugin. Just navigate to `WP Adminify > Addons`. You will notice “RoleMaster Suite” addon listed and there is a “Install Now” button. ![RoleMaster Suite Addon installation](https://d1k2c27psfzbiv.cloudfront.net/wp-content/uploads/2024/10/18103535/RoleMaster-Suite-Addon-installation.webp) It will start the installation and activation within a few seconds. ## Where to find the option panel? As soon as it’s complete, just reload your webpage. Click on `WP Adminify > User Role Editor`. You will notice the option panel for the RoleMaster suite plugin options. ![User Role editor option panel from WP Adminify](https://d1k2c27psfzbiv.cloudfront.net/wp-content/uploads/2025/05/18103534/User-Role-editor-option-panel-from-WP-Adminify.webp) ## Installation from WordPress Plugins Page If you are not using WP Adminify plugin but want to use our RoleMaster Suite addon then follow the steps. Login to your WordPress Dashboard, navigate to `Plugins> Add New > Search for “RoleMaster Suite”.` Now click on the install button, after finishing installation you will notice the activate button. Just active the plugin. ## Where to find the option panel without WP Adminify? After finishing the activation make sure to reload the page and take a look at the Admin Menu area of your Dashboard, you will notice a new menu called “RoleMaster Suite”. Just click on this and you can access to the user role editor option panel. ![Access RoleMaster Suite plugin option in Admin Menu](https://d1k2c27psfzbiv.cloudfront.net/wp-content/uploads/2025/05/18103532/Access-RoleMaster-Suite-plugin-option-in-Admin-Menu.webp) --- # Activity Logs Addon installation URL: https://wpadminify.com/docs/activity-logs/al-installation Last updated: 2026-08-12 This addon developed by WP Adminify tea, and it helps you to track different types of activity on your WordPress Dashboard by different users. You must need WP Adminify plugin installed to work with Activity logs. ## Installation from WP Adminify Addons page If you have installed WP Adminify plugin. Just navigate to `WP Adminify > Addons`. You will notice “Activity Logs” addon listed and there is a “Install Now” button. It will start the installation and activation within a few seconds. ![Activity Logs Addon installation](https://d1k2c27psfzbiv.cloudfront.net/wp-content/uploads/2024/10/18103549/Activity-Logs-Addon-installation.webp) ## Where to find the option panel? As soon as it’s complete, just reload your webpage. Click on `WP Adminify > Activity Logs`. You will notice the option panel for the Activity Logs plugin. ![Where to find Activity logs option](https://d1k2c27psfzbiv.cloudfront.net/wp-content/uploads/2025/05/18103542/Where-to-find-Activity-logs-option.webp) --- # WP Adminify Free Version Installation URL: https://wpadminify.com/docs/adminify/getting-started/free-installation Last updated: 2026-09-08 Installing the WP Adminify plugin is not different from any other plugin that you have already installed in your WordPress Dashboard. But if you are a beginner, then we have got your back. Just follow the steps below, and you can successfully install the WP Adminify plugin. ## Free WP Adminify Plugin installation There are 2 popular methods of plugin installation. We will break down each method in detail. Before jumping to the step-by-step documentation, watch the following video to understand how easy it is to install WP Adminify plugin. ### Installation via WP Admin If you are logged into your Website Dashboard, then just navigate to`Plugins> Add Plugin`. Inside the `“Search Plugins`” field, just type `“WP Adminify”`. You will notice the WP Adminify plugin in the first position. ![Search for WP Adminify plugin in WordPress repo](https://d1k2c27psfzbiv.cloudfront.net/wp-content/uploads/2024/09/07061234/Search-for-WP-Adminify-plugin-in-WordPress-repo.webp) Now, click on the install button. Wait a few seconds, and you will notice the installation is completed and the active button appears. Just click on the Active button. ![Plugin activation button for WP Adminify](https://d1k2c27psfzbiv.cloudfront.net/wp-content/uploads/2024/09/07061229/Plugin-activation-button-for-WP-Adminify.webp) After activation, it will redirect you to the setup wizard of the WP Adminify plugin. You can start customizing the basic things with the help of the setup wizard or skip to your dashboard. To learn more about the setup wizard, navigate to this documentation. ![WP Adminify setup wizard first step](https://d1k2c27psfzbiv.cloudfront.net/wp-content/uploads/2024/09/07061231/WP-Adminify-setup-wizard-first-step.webp) ### Installation via FTP Still, some dev gurus prefer FTP installation over installing the plugin via the WP Admin. If you prefer FTP, then this guideline is for you. Log in to your FTP server via Filezilla, Cyberduck, or any other app. Then navigate to the Plugins folder. Generally, the path looks like `public_html > WP-Content > Plugins`. Now unzip the `adminify.zip`folder on your device, then drag and drop the adminify folder directly to your plugins folder. It will take some time, depending on your internet and server speed. After completing, navigate to your Website `Dashboard > Plugins > search for WP Adminify` in your installed plugins page. Now, click on the active button of the WP Adminify plugin. It will be activated within seconds and will redirect you to the setup wizard. Bonus: You can [import and export](http://docs/adminify/export-import/backup) WP Adminify options easily from one website to another. --- # WP Adminify Pro Version Installation URL: https://wpadminify.com/docs/adminify/getting-started/pro-installation Last updated: 2026-08-12 Installing the pro version of the WP Adminify plugin is very similar to the free version. To install the pro version, make sure you have downloaded the pro version of the WP Adminify plugin. As soon as you purchase the WP Adminify plugin, you will get the plugin license and download URL directly to your inbox. [NOTE: You must keep WP Adminify Free activated in your WordPress site to work with WP Adminify PRO. If you don't know how to install the free version, check this [WP Adminify Free version installation](https://wpadminify.com/docs/adminify/getting-started/free-installation) docs.] Watch the short clips on how to install the pro version - ## Installation via WP Admin Now navigate to your `WordPress Dashboard > Plugins > Add Plugin`. Click the Upload Plugin button, and select the WP Adminify Pro zip file you downloaded. ![WP Adminify pro version upload](https://d1k2c27psfzbiv.cloudfront.net/wp-content/uploads/2024/09/07061232/WP-Adminify-pro-version-upload.webp) Click on the Install Now button. As soon as the installation is finished, you will get an active button. Click on this active button to activate the pro version of WP Adminify. ![Active WP Adminify pro plugin](https://d1k2c27psfzbiv.cloudfront.net/wp-content/uploads/2024/09/07061238/Active-WP-Adminify-pro-plugin.webp) ### License activation After activation, adding your license key is necessary to unlock all of our pro features. If you have properly installed and activated the pro version of the WP Adminify plugin, then it will redirect you to the license key activation process. Just input your license key and activate the license. ![Add license key for WP Adminify plugin](https://d1k2c27psfzbiv.cloudfront.net/wp-content/uploads/2024/09/07061237/Add-license-key-for-WP-Adminify-plugin.webp) If the license activation is done properly, then you will notice a “Premium version was successfully activated” notice. ![WP Adminify Pro version activated notice](https://d1k2c27psfzbiv.cloudfront.net/wp-content/uploads/2024/09/07061233/WP-Adminify-Pro-version-activated-notice.webp) ## Installation via FTP Follow the same steps mentioned in the [free version installation](https://wpadminify.com/docs/adminify/getting-started/free-installation). ## WP Adminify Pro Installation FAQs ### Where do I download the Pro version? From the Downloads section of your [WP Adminify account](https://wpadminify.com/account) — it lists the Pro plugin and every add-on included in your purchase. Full details in the [account management guide](https://wpadminify.com/docs/adminify/getting-started/account-management). ### Do I need my license key during installation? Yes — after activating the Pro plugin you'll be asked for the license key from your purchase. Copy it from the Licenses section of your account and paste it into the activation screen. ### What are the minimum requirements for WP Adminify? An SSL certificate, PHP 7.4 or higher, and WordPress 6.0 or higher — the full list is in the [system requirements doc](https://wpadminify.com/docs/adminify/getting-started/system-requirments). ## Related Documentation - [WP Adminify Free Version Installation](https://wpadminify.com/docs/adminify/getting-started/free-installation) - [Manage Your WP Adminify Pro Account](https://wpadminify.com/docs/adminify/getting-started/account-management) - [Setup Wizard After Plugin Installation](https://wpadminify.com/docs/adminify/getting-started/setup-wizard) - [System Requirements](https://wpadminify.com/docs/adminify/getting-started/system-requirments) --- # Setup Wizard after Plugin Installation URL: https://wpadminify.com/docs/adminify/getting-started/setup-wizard Last updated: 2026-08-12 Welcome to WP Adminify! This guide will walk you through the quick and easy setup process to enhance your WordPress admin experience. ## Step 1: Welcome Screen Upon activating WP Adminify ![Welcome panel in setup wizard](https://d1k2c27psfzbiv.cloudfront.net/wp-content/uploads/2024/09/23083824/Welcome-panel-in-setup-wizard.webp) - The setup wizard helps configure basic settings for your site - It should take about five minutes to complete - You can watch a tutorial video on YouTube for additional guidance - Choose "Let's Go!" to start the wizard, or "Not Right Now" to skip and return later ## Step 2: Choose Your UI ![Choose Default and Adminify UI](https://d1k2c27psfzbiv.cloudfront.net/wp-content/uploads/2024/09/23083900/Choose-Default-and-Adminify-UI.webp) - Default UI: The classic WordPress admin look. - If you pick the default UI, you’ll see the admin footer text customization option. - Adminify UI: A modern, streamlined interface. Select your preferred option and click "Continue", or use "Skip This Step" to keep the default. - If you pick the Adminify UI, you’ll see the option to add your logo ## Step 3: White Label WordPress (Footer Credit) (Default UI): ![Chagne footer text in White label section](https://d1k2c27psfzbiv.cloudfront.net/wp-content/uploads/2024/09/23083939/Chagne-footer-text-in-White-label-section.webp) - Edit the HTML in the text box to customize the admin footer text - You can include links and basic formatting - Click "Continue" when done, or "Skip This Step" to keep the default footer ## Step 4: Add Your Logo (Adminify UI) - Upload your logo as an image - Or you can input a text logo - Click "Continue" when done, or "Skip This Step" if you want to upload your logo later ## Step 5: Explore More Features ![Do more with WP Adminify section](https://d1k2c27psfzbiv.cloudfront.net/wp-content/uploads/2024/09/23084035/Do-more-with-WP-Adminify-section.webp) - Watch a quick video showcasing additional Adminify features - Share your experience on Twitter using the provided text box - Click "Adminify Options" to dive deeper into customization - Or, return to your WordPress Dashboard to start using your newly configured admin area Remember, you can always revisit these settings later through the Adminify menu in your WordPress admin panel. Enjoy your enhanced WordPress experience with WP Adminify! ## WP Adminify Setup Wizard FAQs ### How long does the setup wizard take? About five minutes. It walks you through the basic settings for your site right after you activate WP Adminify. ### Do I have to complete the wizard to use the plugin? No - everything the wizard configures is also available afterwards in the WP Adminify option panel, so you can change any choice later or configure the plugin entirely from the settings screens. ### Does the wizard run for the Pro version too? The wizard appears on activation of the plugin. If you're upgrading from free to Pro on the same site, your existing settings carry over - see the [Pro installation guide](https://wpadminify.com/docs/adminify/getting-started/pro-installation). ## Related Documentation - [WP Adminify Free Version Installation](https://wpadminify.com/docs/adminify/getting-started/free-installation) - [WP Adminify Pro Version Installation](https://wpadminify.com/docs/adminify/getting-started/pro-installation) - [How to Customize the Admin UI Template](https://wpadminify.com/docs/adminify/customize/adminify-ui-templates) - [System Requirements](https://wpadminify.com/docs/adminify/getting-started/system-requirments) --- # System requirments URL: https://wpadminify.com/docs/adminify/getting-started/system-requirments Last updated: 2026-07-16 Here are some requirements that you need to work with the WP Adminify plugin - SSL Certificate: SSL is required to enable WP Adminify UI. PHP Version: Minimum PHP 7.4 is necessary to function the plugin properly, otherwise it error may occur. WordPress: At least WordPress 6.0 is required to Work. In the previous version, you may have faced some layout and functional issues. --- # How to Install and Activate Loginfy URL: https://wpadminify.com/docs/loginfy/getting-started Last updated: 2026-07-16 How to Install and Activate Loginfy - The Most Advanced Login Page Customizer for WordPress Loginfy is a powerful WordPress login page customizer plugin. From logo to complete rebranding, Loginfy gives you complete control to change your login screen without much effort. So, let’s see how to install and activate Loginfy. ## Prerequisite - System Requirements Before you start with Loginfy, please check the following to continue: - WordPress version 5.0 or higher - PHP 7.2 or higher ## How to Install Free Version of Loginfy You can install the free Loginfy in a few different ways. We’ll show you each of them. ### Install from WordPress Repository First, go to `Plugins > Add New` from the WordPress dashboard. Then search for Loginfy in the dedicated search box. Simply click the “Install” button. It will be installed in a few moments. Once it does, you’ll see the button has changed to “Activate”. Click on it to activate loginfy for your site. ![Install Loginfy without WP Adminify plugin](https://d1k2c27psfzbiv.cloudfront.net/wp-content/uploads/2025/03/18103518/Install-Loginfy-without-WP-Adminify-plugin.webp) ### Activate via WP Adminify If you’re already using WP Adminify, you’ll use Loginfy as a form of an addon. So, go to `WP Adminify > Addons`. You’ll see Loginfy. Use the “Install Now” button to install. After completing the installation, it will be automatically activated. ![Install Loginfy addon from WP Adminify](https://d1k2c27psfzbiv.cloudfront.net/wp-content/uploads/2025/03/18103517/Install-Loginfy-addon-from-WP-Adminify.webp) ## How to Install Pro Version of Loginfy Loginfy also comes with a PRO version. You can purchase the Loginfy PRO version from the following link: [wpadminify.com/loginfy/pricing](https://wpadminify.com/loginfy/pricing). After completing your purchase, you’ll receive your login credentials via email. Now to download the pro version of Loginfy, sign in to your account. Then go to the “Download” tab. You’ll see the pro version of Loginfy is listed here. Click the download button to save it on your pc directory. Now, you need to upload your plugin to your site. Go to `Plugins > Add New > Upload Plugin`. Then, select the zip you just downloaded (Pro Version of Loginfy). After the uploading completes, click “Install Now” then “Activate”. Now, you need to add your license to the PRO version to continue. To get your license, sign in to your account. Then go to the “Licenses” page. You’ll see the Loginfy Pro license here. Copy the license from here, then paste it in the Pop up you’ll see in the Loginfy. Paste your license to activate the PRO version. If you don't get the license activation popup by default. Then navigate to plugins>Installed plugins. Search for loginfy and click on the active license button. Once you successfully activate the PRO version, you'll see a confirmation message and unlock Pro features instantly! Note: The free version of Loginfy must be installed and active before activating/uploading the Pro version. --- # How to Disable Embeds in WordPress with WP Adminify? URL: https://wpadminify.com/docs/adminify/performance/disable-embeds Last updated: 2026-07-16 You can embed YouTube videos and Tweets automatically in WordPress. But you can disable this auto embed feature with WP Adminify. Let’s learn how to disable embeds in WordPress in a few simple steps. ## Go to WP Adminify Performance Settings First, you need to log in and go to the WordPress dashboard. You can see the embed enable/disable option in the following path: WP Adminify > Performance > Disable Embeds ## Turn On Disable Embeds You can see a toggle button just beside the disable embed setting. Clicking the button will show a “Yes” and the color will be changed to green. This means you have disabled the embeds including REST API embeds, Head tag embeds, TinyMCE editor, and remote embed results. ## Save the Settings Now, to save this, you need to click the “Save settings” button. The button is located at the top and the bottom of the page for your convenience. ## Bonus Step: How to Enable Embeds You can revert the settings back to default, if you want to keep the embed option enabled. Go to the following path: WP Adminify > Performance Then click the “Reset Section”. Note: This will change all settings to default for the performance tab. Once you’re done, click the “Save settings” button to apply your setting. --- # How to Add Custom CSS/JS in the WordPress Frontend? URL: https://wpadminify.com/docs/header-footer-scripts/add-custom-css-js-frontend Last updated: 2026-08-12 Just follow the path to add custom CSS/JS in your frontend. `WP Adminify > Code Snippets > Frontend Scripts` Click Add New snippet button and select your code type and other settings then save the settings. ![Frontend scripts for custom css and js](https://d1k2c27psfzbiv.cloudfront.net/wp-content/uploads/2024/09/25102032/Frontend-scripts-for-custom-css-and-js.webp) You will get the following options to input your code dynamically based on display condition, location, device, type. ![Add New snippet option](https://d1k2c27psfzbiv.cloudfront.net/wp-content/uploads/2024/09/25102541/Add-New-snippet-option.webp) ## Main Features of Header Footer Scripts - Snippet Title - Display on - Full Site - Specific Posts (Pro) - Specific Page (Pro) - Specific Categories (Pro) - Specific Post Types (Pro) - Specific Tags (Pro) - Location - Header - Footer - Before Content (Pro) - After Content (Pro) - Display Device - Snippet Type - CSS - JS Note: Don't place tag inside the editor. ![Add Custom CSS in specific page and device](https://d1k2c27psfzbiv.cloudfront.net/wp-content/uploads/2024/09/25103108/Add-Custom-CSS-in-specific-page-and-device.webp) Remember you can add multiple snippets by clicking the “Add New Snippets” multiple times. ## Save the Settings After you’re done with customization and the CSS/JS codes, click the “Save Settings” button to apply it. Looking for other ways to do this, like Google Tag Manager or functions.php? Our guide on how to [add code to WordPress header and footer](https://wpadminify.com/add-code-to-wordpress-header) compares each method. --- # How to Change WordPress Login URLs of WordPress? URL: https://wpadminify.com/docs/adminify/security/change-the-wordpress-login-url Last updated: 2026-07-16 WP Adminify always takes security as a major concern. For this, you get the options to change WordPress Login URL and Admin Login URL. Here’s how to do it. ## Step 1: How to Enable Redirect URLs First, go to the following path: `WP Adminify > Security`. Now, find the setting labeled as “Redirect URLs” and enable it. ![Enable Redirect URLs feature](https://d1k2c27psfzbiv.cloudfront.net/wp-content/uploads/2024/09/28031114/Enable-Redirect-URLs-feature.webp) ## Step 2: How to Change Login URL of WordPress In the “Login/Register URL” tab, you will find the option to change Login URL. ![Login and Register URL change option](https://d1k2c27psfzbiv.cloudfront.net/wp-content/uploads/2024/09/28031333/Login-and-Register-URL-change-option.webp) In the “New Login URL” textbox, type your desired URL. Then click “Save Settings” to apply changes. ![New login URL of WordPress website](https://d1k2c27psfzbiv.cloudfront.net/wp-content/uploads/2024/09/28031802/New-login-URL-of-WordPress-website.webp) ## Step 3: How to redirect wp-admin to custom URL You can redirect all visitors who is trying to login your site via wp-admin to a specific landing page or homepage. In the “Redirect Admin” textbox, type your desired URL. Then click “Save Settings” to apply changes. ![Redirect WP Admin login Attempts to custom URL](https://d1k2c27psfzbiv.cloudfront.net/wp-content/uploads/2024/09/28032932/Redirect-WP-Admin-login-Attempts-to-custom-URL.webp) Save the settings and try to login your Dashboard via wp-admin and it will redirect you to the mentioned URL in "Redirect Admin". Redirect all default wp-admin login attempts to custom url. ## Step 4: How to Change User Registration URL of WordPress In the “Login/Register URL” tab, you will find the option to change the Registration URL. In the “New Register URL” textbox, type your desired URL. Then click “Save Settings” to apply changes. ![Change WordPress default registration URL](https://d1k2c27psfzbiv.cloudfront.net/wp-content/uploads/2024/09/18103557/Change-WordPress-default-registration-URL.webp) Note: You need to enable the "Anyone can register" option from WordPress settings. Here’s the path: `Settings > General > Membership`. ## Important Notice: Do not forget the new URL after changes, otherwise you won’t be able to log in. For security reasons, it is often recommended to change the default WordPress login URL. WP Adminify offers the Redirect URLs feature, allowing you to customize your WordPress login, registration, and admin URLs to make your website more secure. Here’s how you can change the login URL using this feature. ## 1. Access the Redirect URLs Settings To begin changing the WordPress login URL: - From your WordPress dashboard, navigate to WP Adminify > Security > Redirect URLs. ![Enable Redirect URLs feature](https://d1k2c27psfzbiv.cloudfront.net/wp-content/uploads/2024/09/28031114/Enable-Redirect-URLs-feature.webp) ## 2. Enable the Redirect URLs Feature Make sure the feature is enabled by toggling the Show button at the top of the page. This will allow you to access and modify the login and register URL settings. ![Login and Register URL change option](https://d1k2c27psfzbiv.cloudfront.net/wp-content/uploads/2024/09/28031333/Login-and-Register-URL-change-option.webp) ## 3. How to customize the WordPress Register URL Under the Login/Register URL tab: - Locate the New Login URL field. - Enter your desired login URL slug, for example, instead of using the default `wp-login.php`, you could change it to something like `login.` For instance, if you set the slug to `login`, the new login URL will look like this: `https://yourdomain.com/login` ![Change login URL in WordPress](https://d1k2c27psfzbiv.cloudfront.net/wp-content/uploads/2024/09/28031541/Change-login-URL-in-WordPress.webp) ## 4. Save Changes After you’ve customized the login URL and any other settings, scroll down and click Save Changes to apply the new URL. ## 5. Test the New Login URL To verify the change, log out of your WordPress dashboard and try to log in using the new URL you configured (e.g., `yourdomain.com/login`). The old `wp-login.php` URL should no longer be accessible. ![New login URL of WordPress website](https://d1k2c27psfzbiv.cloudfront.net/wp-content/uploads/2024/09/28031802/New-login-URL-of-WordPress-website.webp) --- # How to create a proper White Label Dashboard in WordPres? URL: https://wpadminify.com/docs/adminify/white-label/wordpress-white-label-features Last updated: 2026-08-12 There are a lot of elements in the WordPress admin bar. Like Howdy message, WordPress logo, Site name, comments, updates and new text. With WP Adminify’s White Label feature, you can remove them all. Let’s see how to do that. ## Step 1: Go to White Label Settings To get to the white label settings, go to the following path: `WP Adminify > White Label` ![Remove howdy text in Admin bar](https://d1k2c27psfzbiv.cloudfront.net/wp-content/uploads/2024/08/25073824/Remove-howdy-text-in-Admin-bar.webp) ## How to Remove “Howdy” Message Note: If you already enabled WP Adminify’s default UI, the “Howdy” message is already hidden. Toggle the “Remove "Howdy" message?” button. It will change the color to green and the text will change to “yes”. How to Remove “Howdy” Message in WordPress Dashboard ## How to Change “Howdy” Message You can also change the “Howdy” text to your preference. ![Change howdy text in Admin bar](https://d1k2c27psfzbiv.cloudfront.net/wp-content/uploads/2024/09/25083929/Change-howdy-text-in-Admin-bar.webp) Simply add your preferred text in the “Change "Howdy" Text” text box. This will display your custom message instead of the default “Howdy” message. ![Howdy text changed to welcome](https://d1k2c27psfzbiv.cloudfront.net/wp-content/uploads/2024/09/25083955/Howdy-text-changed-to-welcome.webp) ## How to Remove WordPress Admin Bar Elements To remove WordPress admin bar elements, first you need to enable the “Remove "Howdy" message?” button. It will unlock another option named: “Admin Bar Cleanup”. ![Hide unwanted Admin bar items](https://d1k2c27psfzbiv.cloudfront.net/wp-content/uploads/2024/09/25084957/Hide-unwanted-Admin-bar-items.webp) It consists of a few checkboxes you want to remove. Which are the following: - WordPress Logo - Site Name - Comments - Show WordPress Version - "New" Button Tick the checkboxes for the elements you want to remove. ## How to Remove Admin Footer Elements in WordPress WordPress shows a lot of elements in the footer section in the backend. But you can remove the ones you want. In the WP Adminify White Label, you’ll see the “Admin Footer” option. It consists of the following options for you to remove: - Show IP Address - Show PHP Version - Show WordPress Version - Show Memory Usage - Show Memory Limit - Show Memory Available ![Necessary information in admin footer](https://d1k2c27psfzbiv.cloudfront.net/wp-content/uploads/2024/09/25085544/Necessary-information-in-admin-footer.webp) Mark the checkboxes you want to remove. ## How to Customize Admin Footer Text in WordPress You can also customize the admin footer text with WP Adminify. ![Change Admin Footer text](https://d1k2c27psfzbiv.cloudfront.net/wp-content/uploads/2024/09/25090143/Change-Admin-Footer-text.webp) In the “Admin Footer Text” settings, you’ll see the text box to add your custom message in the footer section. ![Remove Powered by WordPress Dashboard footer copyright](https://d1k2c27psfzbiv.cloudfront.net/wp-content/uploads/2024/09/25090404/Remove-Powered-by-WordPress-Dashboard-footer-copyright.webp) ## Save the Settings After you’re done with your selection and customization, click the “Save Settings” button to apply the changes. ## What You Can White Label The White Label module covers the parts of wp-admin your clients actually see: the admin bar (WordPress logo, Howdy message, site name, comments and update indicators), the footer text, the dashboard branding, and the login screen. Combined with the [plugin rebranding option](https://wpadminify.com/docs/adminify/white-label/rebrand-wp-adminify-plugin), the finished dashboard carries your agency's name end to end - clients never see "WordPress" or "WP Adminify" unless you want them to. ## WordPress White Label FAQs ### Can I remove the "Howdy" message and WordPress logo from the admin bar? Yes - both are individual toggles in the White Label settings, along with the site name, comments icon, updates indicator, and the "New" menu. ### Can I rebrand the WP Adminify plugin itself for clients? Yes. The [plugin white label option](https://wpadminify.com/docs/adminify/white-label/rebrand-wp-adminify-plugin) replaces WP Adminify's name, logo and URL with your agency's branding throughout the dashboard. ### Does white labeling affect updates or plugin functionality? No. White labeling only changes what's displayed - updates, licensing and all modules keep working exactly the same underneath. ## Related Documentation - [Rebrand the WP Adminify Plugin for Your Agency](https://wpadminify.com/docs/adminify/white-label/rebrand-wp-adminify-plugin) - [White Label feature overview](https://wpadminify.com/features/white-label) - [Plugin White Label feature](https://wpadminify.com/features/plugin-white-label) - [How to Hide WordPress Plugins from Clients](https://wpadminify.com/how-to-hide-wordpress-plugins-from-clients) - [White Label WordPress: The Agency Owner's Complete Guide](https://wpadminify.com/white-label-wordpress) --- # How to create Floating Menu in WordPress Dashboard? URL: https://wpadminify.com/docs/quick-menu/create-new Last updated: 2026-09-08 Quick menu addon by WP Adminify plugin offers you to pin your most used option in a floating menu. If you have installed the Quick Menu properly, then you are ready to go with the following steps. ## Step 1: Navigate to the option panel Go to `WP Adminify > Quick Menu` to access the main option panel. By default, you can see there are 3 menu items added. You can modify them or delete them. ![Access Quick menu option panel](https://d1k2c27psfzbiv.cloudfront.net/wp-content/uploads/2024/10/18103525/Access-Quick-menu-option-panel.webp) ## Step 2: Edit default quick menu items Just click on the default items and it will expand with some options like Menu title, link, and icon. You can change all of this default content, input any URL and choose your icon. ![Edit default quick menu items](https://d1k2c27psfzbiv.cloudfront.net/wp-content/uploads/2024/10/18103523/Edit-default-quick-menu-items.webp) ## Step 3: Add new menu items You can see a button called "Add New Quick Menu". Just click on this button and it will add a new item with blank information. Just set your menu title, link, icon properly and save the settings. ![Add new blank menu item](https://d1k2c27psfzbiv.cloudfront.net/wp-content/uploads/2024/10/18103524/Add-new-blank-menu-item.webp) ## Step 4: Hover and preview You can see a hamburger menu added at the bottom right position in your Dashboard. Just hover on this icon and you will notice all of your quick menu items appear here. ![Hover and preview the floating menu items](https://d1k2c27psfzbiv.cloudfront.net/wp-content/uploads/2024/10/18103522/Hover-and-preview-the-floating-menu-items.webp) --- # How to create unlimited sidebar for WordPress Widgets? URL: https://wpadminify.com/docs/sidebar-generator/create-unlimited-widgets Last updated: 2026-08-12 WP Adminify’s Sidebar Generator addon allows you to create unlimited custom sidebars for your WordPress website. This is an excellent feature for users who want to organize their widgets and display different content in various parts of their site. Whether you need sidebars for specific pages, categories, or custom post types, this addon makes it easy to personalize your website without the need for coding. Follow the steps below to create custom sidebars and manage your widgets using WP Adminify’s Sidebar Generator. Step-by-Step Guide to Creating Custom Sidebars: ## 1. Install and Activate the Sidebar Generator Addon: Needless to say, you cannot use Sidebar Generator without installing and activating WP Adminify as Sidebar Generator is a WP Adminify Addon. After you've installed and activated WP Adminify, go to the dashboard > WP Adminify > Addons. Install and activate the addon from the list. ## 2. Access the Sidebar Generator: - After activating the Sidebar Generator addon, navigate to the custom sidebar management section by following this path: WP Adminify(dashboard menu) > Sidebar Generator. - Once inside, you will see an option to create new sidebars. ## 3. Add a New Sidebar: - Click the Add New Sidebar button. This will open up a form with two fields: Sidebar Name and Sidebar Description. - Sidebar Name: Enter a unique name for your sidebar. This name will appear in the widgets section, so make it descriptive (e.g., “Event Sidebar,” “Product Sidebar,” etc.). - Sidebar Description: Optionally, you can add a brief description to help other administrators understand the purpose of the sidebar. - After filling in the necessary information, click the Create Sidebar button to save your new sidebar. ## 4. Assign Widgets to Your Custom Sidebar: - After creating your custom sidebar, you can now assign widgets to it. To do so, navigate to Appearance > Widgets in your WordPress dashboard. - In the Widgets section, you will see your newly created sidebar listed alongside the default ones (e.g., "Main Sidebar," "Footer Sidebar"). Simply drag and drop widgets into your custom sidebar to start building it. For example, if you want to display social media icons, drag a Social Media Widget into the sidebar. Similarly, you can add images, menus, advertisements, or any other widget that fits your site’s needs. If you encounter any issues or have further questions, feel free to reach out to our [support team.](https://wpadminify.com/contact) --- # How to create an API Key? URL: https://wpadminify.com/docs/google-pagespeed-insights/api-key-configuration Last updated: 2026-09-01 The Google Pagespeed Insights tool analyzes the loading speed and performance of your website, offering recommendations to enhance site efficiency. It helps to improve response times, reduce download sizes, minimize resource requests, and ultimately boost your website's performance. This feature is essential for both user experience and SEO. To integrate this tool with WP Adminify, you’ll need to create a Google Pagespeed Insights API key. Here's how you can generate and configure the API key to get started. Step-by-Step Guide to Create a Google PageSpeed Insights API Key: https://www.youtube.com/watch?v=SXAYiX49bbc ## How Do You Get a Google PageSpeed Insights API Key? To get a Google PageSpeed Insights API key, sign in to your Google account, open the PageSpeed Insights API page, click Get a Key, select or create a project, then copy the generated key and paste it into WP Adminify > Google PageSpeed. The key is free (Google allows 25,000 queries per day at no cost) and setup takes about three minutes. Follow the numbered steps below to create and connect your key. Once connected, the [Google PageSpeed Insights module](https://wpadminify.com/google-pagespeed-insights) runs automatic speed reports inside your WordPress dashboard, so you can [track your PageSpeed history](https://wpadminify.com/docs/google-pagespeed-insights/check-pages-speed-history) over time without leaving wp-admin. ## 1. Ensure You Are Logged into Your Google Account: - Before you begin, ensure that you’re logged into your Google Account in your browser. If you don’t have one, you’ll need to create an account. ## 2. Access the Google Pagespeed Insights Documentation: - Visit the official Google Pagespeed Insights API documentation by following this [link.](https://developers.google.com/speed/docs/insights/v5/get-started) This page provides detailed instructions on how to use the API. ![Create Google PageSpeed Insights API key](https://d1k2c27psfzbiv.cloudfront.net/wp-content/uploads/2021/07/12105504/Google-Pagespeed-insights-api-key-button.webp) ## 3. Click “Get a Key”: - Scroll down the page until you see the “Get a Key” button. - Click this button and wait a few moments for a popup window to appear. ![enable pagespeed insights api option](https://d1k2c27psfzbiv.cloudfront.net/wp-content/uploads/2021/07/12105518/enable-pagespeed-insights-api-option.webp) ## 4. Select or Create a Project: - In the popup, you’ll see an option to either select an existing project or create a new project. - If you want to create a new project specifically for PageSpeed Insights, click on “+ Create a new project”. - If you want to enable Pagespeed API on an existing project, simply choose the project from the dropdown list. ![Google Pagespeed insights project name](https://d1k2c27psfzbiv.cloudfront.net/wp-content/uploads/2021/07/12105517/Google-Pagespeed-insights-project-name.webp) ## 5. Create Your API Key: - Whether you’ve chosen to create a new project or use an existing one, the next step is to click Next. - Google will generate your API key in a few seconds. Once it's ready, copy the API key that appears on the screen. ![Google Pagespeed insights api Key generate](https://d1k2c27psfzbiv.cloudfront.net/wp-content/uploads/2021/07/12105518/Google-Pagespeed-insights-api-Key-generate.webp) ## 6. Set the API Key in WP Adminify: - Log in to your WordPress dashboard and navigate to WP Adminify settings. - Go to WP Adminify > Google Pagespeed within the WP Adminify dashboard menu. - Paste the API key you just generated into the API Key input field. ![Add Google Pagespeed insights API Key in WP Adminify](https://d1k2c27psfzbiv.cloudfront.net/wp-content/uploads/2024/10/15063724/Add-Google-Pagespeed-insights-API-Key-in-WP-Adminify.webp) ## 7. Save Your Settings: - After pasting your API key, make sure to click Save Settings to apply the changes. You’re now ready to start using the Google Pagespeed Insights module within WP Adminify. ## How Do You Use Your PageSpeed Insights API Key? Add the key to the request as a `key` query parameter. Google states the API key is safe for embedding in URLs and needs no encoding, so one GET request to the runPagespeed endpoint is all it takes. The response is a single JSON object holding both the Lighthouse lab report and the real world field data for that page. WP Adminify makes this call for you on a schedule, so most WordPress users never touch the raw API. ### The request From a terminal, the command Google publishes is `curl https://www.googleapis.com/pagespeedonline/v5/runPagespeed?url=https://web.dev/&key=yourAPIKey`. Swap in the page you want to audit and your own key. Two optional parameters do most of the work: `strategy` takes either mobile or desktop, and `category` selects which Lighthouse categories run, from performance, accessibility, seo, best-practices and pwa. Repeat the `category` parameter to request more than one in a single query. ### What comes back The JSON splits into two halves. `lighthouseResult` is the lab data: `categories.performance.score` is the performance score as a value between 0 and 1, and `audits` holds every individual check with its own score and a readable `displayValue`, so reading `audits.largest-contentful-paint.displayValue` gives you the LCP figure directly. `loadingExperience` is the field data for that URL, drawn from the Chrome User Experience Report. Automating a report usually means pulling three or four metric values out of `audits` and writing them to a row, not parsing the whole object. ### Field data in this API is being retired Google has announced it plans to discontinue Chrome User Experience Report data inside the PageSpeed Insights API and recommends the dedicated [CrUX API](https://developer.chrome.com/docs/crux/api) or the CrUX History API instead. The Lighthouse lab data is unaffected. If you are building your own monitoring on top of the API, read field metrics from the CrUX API rather than from `loadingExperience`, so the reports keep working after the change lands. If you would rather not maintain any of this, the [Google PageSpeed Insights module](https://wpadminify.com/google-pagespeed-insights) runs the same requests from inside WordPress and stores each result, which is what turns a one off number into a [page speed history](https://wpadminify.com/docs/google-pagespeed-insights/check-pages-speed-history) you can compare week to week. ## Where Do You Find Your PageSpeed Insights API Key Again? Your key lives in the Google Cloud Console under APIs and Services, then Credentials, at [console.cloud.google.com/apis/credentials](https://console.cloud.google.com/apis/credentials). Open the project you created it in, and the key appears under API Keys with options to show, copy, edit or delete it. If the list looks empty, check the project picker at the top of the page first, because a key created in one Google Cloud project is invisible from any other. You can also create a replacement key from that same Credentials page without going back through the Get a Key flow. Deleting the old key takes effect immediately, so paste the new one into WP Adminify > Google PageSpeed and save before the next scheduled report runs, or the module will log a failed request instead of a score. ## Where is the official Google PageSpeed Insights API documentation? Google publishes the official reference at [developers.google.com/speed/docs/insights/v5/get-started](https://developers.google.com/speed/docs/insights/v5/get-started), and that page is the authoritative source for the API surface and the response format. This guide covers the part those docs leave out: getting the key connected to a WordPress site so the reports keep running on their own. ## What is the runPagespeed API endpoint? The v5 endpoint is `https://www.googleapis.com/pagespeedonline/v5/runPagespeed`. Pass the page you want to test as the `url` parameter, your key as `key`, and set `strategy` to either mobile or desktop. Google notes the API "can be used with or without an API key", but recommends one for frequent automated queries, which is exactly what a scheduled report does. ## Should you restrict your PageSpeed Insights API key? Yes. An unrestricted key works for anyone who finds it, and someone else's traffic burns your daily quota. Open Credentials in Google Cloud Console, click your key, and under API restrictions limit it to the PageSpeed Insights API only. Leave the application restrictions alone if the requests come from your server, because a server-side call sends no referrer for Google to match against. ## Can you use the PageSpeed Insights API with Google Sheets? Yes. In Sheets open Extensions, then Apps Script, and use UrlFetchApp to call the runPagespeed endpoint and write the Lighthouse performance score straight into a cell. That works well for a one-off audit of a URL list. The tradeoff for ongoing monitoring is maintenance, since the script needs attention whenever the sheet or your quota changes, whereas the [Google PageSpeed Insights module](https://wpadminify.com/google-pagespeed-insights) keeps the history inside wp-admin without a script to babysit. ## Google PageSpeed Insights API FAQs ### Is the Google PageSpeed Insights API free? Yes. The Google PageSpeed Insights API is completely free. Google grants a default quota of 25,000 queries per day (up to 400 queries per 100 seconds), and you do not need to enter billing details or a credit card to generate a key. ### Do you need an API key to use PageSpeed Insights? You can run occasional manual checks without a key, but an API key is required for frequent or automated requests. WP Adminify's scheduled speed reports and history tracking make repeated API calls, so you should add a free PageSpeed Insights API key for the module to work reliably. ### How long does it take to create a PageSpeed Insights API key? About three minutes. Sign in to Google, open the PageSpeed Insights API page, click Get a Key, pick or create a project, then copy the generated key. Paste it into WP Adminify then Google PageSpeed and save your settings to finish. ### Why is my PageSpeed Insights API key not working in WP Adminify? The most common causes are an extra space added when pasting the key, the PageSpeed Insights API not being enabled for that Google Cloud project, or hitting the daily quota. Re-copy the key, confirm the API is enabled in the same project, then save your settings again. ### How do I find my PageSpeed Insights API key? Open the Google Cloud Console, go to APIs and Services then Credentials, and select the project you created the key in. The key is listed under API Keys, where you can reveal and copy it. If nothing is listed, switch projects using the picker at the top of the page, since keys are only visible inside the project that issued them. ### Can I get a Google API key for free? Yes. A PageSpeed Insights key is issued from a Google Cloud project with no billing account attached, so no card is required and nothing is charged. The confusion comes from other Google APIs in the same console that do require billing. Enable only the PageSpeed Insights API on that project and you stay inside the free daily quota. --- # How to Track Page Speed & History with Google PageSpeed? URL: https://wpadminify.com/docs/google-pagespeed-insights/check-pages-speed-history Last updated: 2026-08-12 Google PageSpeed Insights addon lets you track page speed and history of any website. Let’s see how to do that. ## How to Analyze Page Speed Data? First, you need to open the Speed Insights panel. Go to `WP Adminify > Pagespeed Insights` to open the main interface. Here you can run speed tests. Paste your URL in the dedicated field. Now, to run a page speed test, click the “Submit” button. ![Google Pagespeed insights test with WP Adminify addon](https://d1k2c27psfzbiv.cloudfront.net/wp-content/uploads/2024/10/18103516/Google-Pagespeed-insights-test-with-WP-Adminify-addon.webp) Note: You can analyze external URLs too. ## How to See Speed Insights Analytics? After the speed test ends, you’ll see a detailed performance report including: - Performance Score - Improvement Suggestions ![Pagespeed performance test by google pagespeed insights addon](https://d1k2c27psfzbiv.cloudfront.net/wp-content/uploads/2024/10/18103515/Pagespeed-performance-test-by-google-pagespeed-insights-addon.webp) This will help you to identify what measures you can take to improve your page speed. ## Check Pagespeed history Now, if you want to check histories, open the “History” tab to see and review past speed test results. You'll see a list of URLs previously analyzed with timestamps and performance scores. ![Check Google Pagespeed inishts previous search history](https://d1k2c27psfzbiv.cloudfront.net/wp-content/uploads/2024/10/18103514/Check-Google-Pagespeed-inishts-previous-search-history.webp) You can also delete your old entries. Simply click the “Delete” button beside the record to delete the data instantly. ## PageSpeed History FAQs ### Do I need a Google API key to track page speed? Yes - the addon queries Google's PageSpeed Insights API, which requires a free API key. Setting one up takes a few minutes: follow the [API key configuration guide](https://wpadminify.com/docs/google-pagespeed-insights/api-key-configuration). ### Where does the speed data come from? Directly from Google PageSpeed Insights - the same scores you'd get at pagespeed.web.dev, but stored inside your dashboard so you can compare reports over time and see whether changes helped. ### Can I test any page of my site? Yes. Open WP Adminify → Pagespeed Insights and run a report for any URL - each report is saved to its page's history. ## Related Documentation - [How to Create a Google PageSpeed API Key](https://wpadminify.com/docs/google-pagespeed-insights/api-key-configuration) - [Google PageSpeed Insights Addon Installation](https://wpadminify.com/docs/google-pagespeed-insights/pi-installation) - [Google PageSpeed Insights addon overview](https://wpadminify.com/google-pagespeed-insights) --- # How to customize WooCommerce Product Admin Columns? URL: https://wpadminify.com/docs/admin-columns/woocommerce-product-admin-columns Last updated: 2026-08-12 If you have installed the Admin Columns Addon properly and having WooCommerce installed in your WordPress Dashboard, you can access to the product columns customization. Having WooCommerce and Admin Columns editor is necessary. ## Products Admin Columns interface When you navigate to `WP Adminify > Admin Columns > Products`, you can notice all default Admin columns available in your products column. ![WooCommerce products admin columns interface](https://d1k2c27psfzbiv.cloudfront.net/wp-content/uploads/2025/05/18103507/WooCommerce-products-admin-columns-interface.webp) In the product page, it looks something like the following screenshot. ![WooCommerce Admin Columns for products page](https://d1k2c27psfzbiv.cloudfront.net/wp-content/uploads/2025/05/18103505/WooCommerce-Admin-Columns-for-products-page.webp) ## Remove unwanted Admin Columns Let's assume that you like to remove Categories, Product Type, and Tags from the columns. Just delete these columns from our Admin Columns option panel. ![Remove unwanted WooCoomerce product admin columns](https://d1k2c27psfzbiv.cloudfront.net/wp-content/uploads/2025/05/18103502/Remove-unwanted-WooCoomerce-product-admin-columns.webp) After deleting these 3 columns, the product page will look something like the following screenshot. ![WooCommerce products admin columns after delete](https://d1k2c27psfzbiv.cloudfront.net/wp-content/uploads/2025/05/18103500/WooCommerce-products-admin-columns-after-delete.webp) --- # How to Add any ACF field as Custom Admin columns? URL: https://wpadminify.com/docs/admin-columns/acf-fields Last updated: 2026-08-12 WP Adminify's Admin Column Editor allows you to integrate any ACF (Advanced Custom Fields) into your WordPress admin dashboard as custom columns. This feature is especially useful for users who rely on ACF to manage additional metadata for their content types, making it easier to display and manage this data directly from the WordPress dashboard. Steps to Add an ACF Field as a Custom Admin Column: ## Access Admin Column Settings Go to `WP Adminify > Admin Columns`. You'll be taken to the Admin Column Editor interface. ![Access to Admin Columns option panel](https://d1k2c27psfzbiv.cloudfront.net/wp-content/uploads/2025/05/18103509/Access-to-Admin-Columns-option-panel.webp) ## Adding a Custom ACF field Column: Click on the Add New button at the bottom right of the column list. A dropdown list of available column types will appear, as shown in the image. Select the ACF field from the list. ![Add ACF Field in WordPress Admin Columns](https://d1k2c27psfzbiv.cloudfront.net/wp-content/uploads/2024/10/18103508/Add-ACF-Field-in-WordPress-Admin-Columns.webp) NOTE: You will get all ACF fields in our Admin Columns option for a specific post, which are added for your post types. ## Save Your Settings: After configuring the ACF field column, click the Save Settings button to apply the changes. The new ACF field will now appear as a column in the post type. --- # How to track Dashboard Activity Logs in WordPress? URL: https://wpadminify.com/docs/activity-logs/track-users Last updated: 2026-08-12 You can track IP Address, Author Name, Date, Actions and much more information from the activity logs option. ## Activity Logs Data default: 30 days If you are installing the Activity logs for the first time, then you will notice blank data, just like the following screenshot. First of all, increase or decrease the default data store duration in days. ![Set default activity logs data store time](https://d1k2c27psfzbiv.cloudfront.net/wp-content/uploads/2024/10/18103546/Set-default-activity-logs-data-store-time.webp) After setting up the day's value, you are done. [Pro Tip: Hide the “Activity logs” option for other administrators by using our [Admin Menu Editor feature](https://wpadminify.com/docs/adminify/admin-menu/admin-menu-editor) ] ## Start exploring data To test the activity logs, you can install any plugins or themes or upload media or modify any posts too. Here is a screenshot after a few minutes of Activity logs activation. ![WP Adminify activity logs showing recent user actions in WordPress](https://d1k2c27psfzbiv.cloudfront.net/wp-content/uploads/2024/10/18103544/Track-WordPress-Dashboard-activity-logs.webp) ## Delete Specific Activity Logs Take a look at the right side of your activity logs and you will notice a delete button for each logs. Just click on the delete button and it will remove that specific activity from your site. Note: You will never able to get back the activity, it will be permanently removed from your dashboard. ![Delete specific activity logs data](https://d1k2c27psfzbiv.cloudfront.net/wp-content/uploads/2024/10/18103548/Delete-specific-activity-logs-data.webp) ## Filter Activity Logs At the top position, there are different types of filter options available for Time, Role, User, Type, and Actions. After selecting your filter types properly just click on the filter button. You will get specific activity logs based on your filter now. ![Filter activity logs based on time user and type](https://d1k2c27psfzbiv.cloudfront.net/wp-content/uploads/2024/10/18103547/Filter-activity-logs-based-on-time-user-and-type.webp) ## Sort Activity logs via Date or IP Address You can easily sort ascending or descending by clicking on the up-down icon besides date and ip address. ![Sort Activity logs in ascending or descending](https://d1k2c27psfzbiv.cloudfront.net/wp-content/uploads/2024/10/18103545/Sort-Activity-logs-in-ascending-or-descending.webp) --- # WordPress User Role Editor Using RoleMaster Suite URL: https://wpadminify.com/docs/rolemaster-suite/create-and-customize-user-role Last updated: 2026-07-16 If you have installed the RoleMaster suite addon properly, then just navigate to `WP Adminify > User Role Editor, and`you will notice a clean option panel like the following screenshot. ![Defeault interface of RoleMaster Suite plugin](https://d1k2c27psfzbiv.cloudfront.net/wp-content/uploads/2024/10/18103538/Defeault-interface-of-RoleMaster-Suite-plugin.webp) ## Control existing User Role permission By default the selected user role is “Subscriber”. Just switch to any user role you want to modify. For Example; let’s select editor user role. Now you can modify the permission for your editor user role and update the permission. ![Check editor access by User Role Editor plugin](https://d1k2c27psfzbiv.cloudfront.net/wp-content/uploads/2024/10/18103540/Check-editor-access-by-User-Role-Editor-plugin.webp) ## Add new Custom User Role Just click on the “Add Role” button and a new popup will apper to provide new user role information. ![Add custom User Role by Rolemaster suite plugin](https://d1k2c27psfzbiv.cloudfront.net/wp-content/uploads/2024/10/18103541/Add-custom-User-Role-by-Rolemaster-suite-plugin.webp) Here, you can define your User Role Name. It will automatically generate a ID based on your role name. [You can’t create user role with the same name.] Also, you can copy the capability from another user role. Just select your preferred user role from the “Make Copy of” option. ## Rename User Role You can rename any default or custom user role. Make sure to select the user role that you like to rename and select on the “Rename Role” button. ![Rename all existing user roles](https://d1k2c27psfzbiv.cloudfront.net/wp-content/uploads/2024/10/18103536/Rename-all-existing-user-roles.webp) ## Delete User Role You can delete any custom user role that you have created using RoleMaster suite. Just click on the “Delete Role” button and select the user role that you like to delete. ![Delete custom User Role](https://d1k2c27psfzbiv.cloudfront.net/wp-content/uploads/2024/10/18103537/Delete-custom-User-Role.webp) ## How to delete RoleMaster Suite? Just navigate to your installed plugins list and look for the RoleMaster Suite plugin. Deactivating the plugin will remove all functionality of RoleMaster Suite plugin. ![Deactivate RoleMaster Suite plugin](https://d1k2c27psfzbiv.cloudfront.net/wp-content/uploads/2024/10/18103539/Deactivate-RoleMaster-Suite-plugin.webp) --- # How to Customize WordPress Login Page with Loginfy? URL: https://wpadminify.com/docs/loginfy/customize-wordpress-login-page Last updated: 2026-08-12 You can customize WordPress login page with loginfy. There are different elements and settings, but don’t worry. We will show them all, so you won’t have any problems using loginfy. ## How to Customize WordPress Login Page Template First, go to`WP Adminify > Login Customizer > Templates` from your WordPress dashboard. You’ll see all the pre-made templates from Loginfy. Simply click one template to select. Customize WordPress login page with Loginfy pre built template Clicking a template will display a live view of the login page. So, you won’t face any trouble seeing the template in live view. Once you’re satisfied, you can apply the template by clicking the “Publish” button. ## How to Customize WordPress Login Page Logo First, go to `WP Adminify > Login Customizer > Logo` from your WordPress dashboard. You’ll see all the available options to customize the logo. First you can enable/disable your logo. In the “Display Logo?” option you can use the toggle button to enable or disable login page logo. Then you can choose which type of logo you want to add in the “Logo Type” section. - Text (you can change the text in the “Text Logo” section, and add links in “Logo Link” section.) - Image (you can upload the logo in the “Logo Image” section, and add links in the “Logo Link” section.) - Image & Text (you get both options from the text and image section) - None (Remove any text or image as a logo) Change default WordPress logo in the login page Also, you can adjust Height / Width for text, image and both. Also, for the Text, you can change font size, style and more in the “Title Typography” section. In the “Login Page Title” section you can change the title of the login page. You can also adjust the top/bottom/left/right padding in the “Padding” section. Don’t forget to hit the publish button after you’re done with your customization. ## How to Customize WordPress Login Page Background First, go to WP Adminify > Login Customizer > Background from your WordPress dashboard. You’ll see the options to [customize the background of your WordPress login page](https://wpadminify.com/change-wordpress-login-page-background). You can adjust the background by: - Color - Image - Video - Slideshow You can upload an image to set it as background. Also, you get regular color palettes, gradient color options and Overlay color options for your login background page. Change WordPress login page background and add image, color, video, slideshow in the background Don’t forget to hit the publish button after you’re done with your customization. ## How to Customize WordPress Login Page Layout First, go to `WP Adminify > Login Customizer > Layout` from your WordPress dashboard. You’ll see the options to customize the layout of your WordPress login page. Here’s what you can customize: - Layout Type (Choose between a single or double-column layout) - Column Alignment (Arrange multi columns in left-right, right-left, top-bottom, or bottom-top format) - Horizontal/Vertical Alignment (Adjust the form content left / right/ center aligned) - Column Background (Set color / image as background for each column. Control the position, size, repeat, and blend mode for the image.) - Skew Effect (Apply a skewed background layout.) Change WordPress login page layout and make two column login page Don’t forget to hit the publish button after you’re done with your customization. ## How to Customize WordPress Login Form Design First, go to `WP Adminify > Login Customizer > Login Form` from your WordPress dashboard. You’ll see the options to customize the login form design. Here’s what you can customize: - Form Background (Set a color, gradient color, or image) - Width & Height (Adjust the height and width of the login form) - Margin & Padding (Adjust the margin and padding of the login form) - Border & Border Radius (Select differents border styles, colors, and adjust the border radius for login form) - Box Shadow (Add shadow effect with on inset and outline selection) ![WordPress login page form customization](https://d1k2c27psfzbiv.cloudfront.net/wp-content/uploads/2024/10/07061326/WordPress-login-page-form-customization.webp) Don’t forget to hit the publish button after you’re done with your customization. ## How to Customize WordPress Login Form Field First, go to WP Adminify > Login Customizer > Form Fields from your WordPress dashboard. You’ll see the options to customize the login form field. Here’s what you can customize: Change the text labels of: - Username - Password - Remember Me - Login - Register - Lost Password - Back to site Change the placeholder texts for: - Username - Password Field Style: Adjust font size, input height, background, label colors, and adjust text colors. Advanced Customization: Advanced padding, margin, shadows, and color settings. ![WordPress login page form fields customization](https://d1k2c27psfzbiv.cloudfront.net/wp-content/uploads/2024/10/07061325/WordPress-login-page-form-fields-customization.webp) Don’t forget to hit the publish button after you’re done with your customization. ## How to Customize WordPress Login Form Button First, go to `WP Adminify > Login Customizer > Button`from your WordPress dashboard. You’ll see the options to customize the login form button. Here’s what you can customize: - Button Width & Height (Adjust the height and width of the button) - Button (Customize the button color, background color, text shadow for normal and hovered) - Advanced (Adjust margin, padding, border, border radius of the button) Modify the default WordPress login page button colors and styles Don’t forget to hit the publish button after you’re done with your customization. ## How to Customize WordPress Login Form Fonts with Google Font First, go to `WP Adminify > Login Customizer > Google Font`from your WordPress dashboard. Here’s what you can customize from the typography settings: - Font Family - Font Style - Text Align - Text Transform - Text Decoration - Font Size - Line Height - Letter Spacing - Word Spacing - Font Color ![Custom google fonts for login page text](https://d1k2c27psfzbiv.cloudfront.net/wp-content/uploads/2024/10/21111652/Custom-google-fonts-for-login-page-text.webp) These settings are too basic and do exactly what it says so we’re not going to discuss them in detail. Don’t forget to hit the publish button after you’re done with your customization. ## How to Customize WordPress Login Page Error Messages First, go to `WP Adminify > Login Customizer > Error Messages` from your WordPress dashboard. Here’s what texts you can customize for the error messages: Username: - Incorrect Username - Empty Username - Exists Username Password: - Incorrect Password - Empty Password - Forget Password Email: - Invalid Email - Empty Email - Exists Email ![Login page Error message customization](https://d1k2c27psfzbiv.cloudfront.net/wp-content/uploads/2024/10/07061324/Login-page-Error-message-customization.webp) These settings are too basic and do exactly what it says so we’re not going to discuss them in detail. Don’t forget to hit the publish button after you’re done with your customization. ## How to Add Custom CSS/JS in WordPress Login Form First, go to `WP Adminify > Login Customizer > Custom CSS & JS` from your WordPress dashboard. Now, it is very basic to understand that, in the CSS Field you can add your custom CSS and in the JS field you can add your custom Javascript. ![Loginfy Custom CSS and JS for login page](https://d1k2c27psfzbiv.cloudfront.net/wp-content/uploads/2024/10/21110509/Loginfy-Custom-CSS-and-JS-for-login-page.webp) These settings are too basic and do exactly what it says so we’re not going to discuss them in detail. Don’t forget to hit the publish button after you’re done with your customization. ## How to Enable/Disable Credits in WordPress Login Form First, go to `WP Adminify > Login Customizer > Credits` from your WordPress dashboard. ![Remove plugin credit to enhance your branding](https://d1k2c27psfzbiv.cloudfront.net/wp-content/uploads/2024/06/22051002/Remove-plugin-credit-to-enhance-your-branding.gif) You can enable/disable the credit section with the “Enable Credits?” toggle button. Also, you can change the text color and position of the credits when enabled. Don’t forget to hit the publish button after you’re done with your customization. ## How to Customize WordPress Login Form Additional Settings First, go to WP Adminify > Login Customizer > Others from your WordPress dashboard. Here’s what you can customize: - Hide Remember Me? - Disable Login shake? - Disable Lost Password? - Disable "Back to Website" ? - Disable "Privacy Policy" ? - Disable "Language Switcher" ? ![Others tweaks for WordPress login page](https://d1k2c27psfzbiv.cloudfront.net/wp-content/uploads/2023/01/12111657/Others-tweaks-for-WordPress-login-page.webp) Simply use the toggle beside the options to enable/disable it. Don’t forget to hit the publish button after you’re done with your customization. --- # How To Hide Admin Notices In WordPress Dashboard? URL: https://wpadminify.com/docs/adminify/productivity/hide-admin-notices Last updated: 2026-08-12 Follow these steps to hide admin notices in WordPress using WP Adminify. ## Step 1: Access Admin Notice Settings First, go to the following path: `WP Adminify > Productivity` ## Step 2: How to Hide Admin Notice in WordPress Dashboard Look for the setting labeled “Hide Admin Notices?” For what this controls, and how the per-role rules work, see [admin notice control](https://wpadminify.com/features/disable-admin-notices). Toggle the “Hide Admin Notices?” button. It will change the color to green and the text will change to “yes”. You can also mark the checkbox on “”Also, Hide for Non-Admin Users?” if you want to hide admin notices for all users. Learn How to Hide Admin Notice in WordPress Dashboard with WP Adminify plugin ## Step 3: How to Hide Other Notices in WordPress Dashboard There are several other notices, like different kinds of updates, welcome panel or site health etc. WP Adminify lets you remove all of them separately to give you a complete customization freedom. In the “Other Notices” settings you’ll see the following options with a checkbox. - Remove Welcome Panel - Remove "PHP Update Required" Notice - Hide Core Update Notice - Hide Plugin Update Notice - Hide Theme Update Notice - Disable Site Health checks Hide Other Notices in WordPress Dashboard You can mark for the notices you want to remove from the WordPress dashboard. ## Step 4: Save the Settings After you’re done with the section, click the “Save Settings” button to apply it. --- # How to Disable Gutenberg Block Editor? URL: https://wpadminify.com/docs/adminify/performance/disable-gutenberg Last updated: 2026-07-16 Currently, Gutenberg is the default block editor in WordPress. But, you can switch to the Classic Editor by turning off Gutenberg with WP Adminify. Follow these simple steps to disable Gutenberg block editor. ## Step 1: Go to WP Adminify Performance Settings Go to the following path: WP Adminify > Performance ## Step 2: Disable Gutenberg You will see a toggle beside the “Disable Gutenberg” option. Click the toggle button to activate it. The text will change to “Show” and the toggle switch will turn to green. ![Disable gutenberg option in WP Adminify](https://d1k2c27psfzbiv.cloudfront.net/wp-content/uploads/2024/09/26024701/Disable-gutenberg-option-in-WP-Adminify.webp) ## Step 3: Enable the Option to Remove Gutenberg After activating the button you will see following 2 options: - “Remove Backend Gutenberg Block Editor & Scripts for Entire Site. i.e. - Post/Page/Custom Post Types” - “Remove Frontend Gutenberg Styles & Scripts” Check the box next to it. This will disable Gutenberg and remove all related scripts from posts, pages, and custom post types. ## Step 4: How to Disable Gutenberg Block Editor Now, to disable the Gutenberg Block editor, you need to click the first checkbox ”Remove Backend Gutenberg Block Editor & Scripts for Entire Site. i.e. - Post/Page/Custom Post Types” Disable Gutenberg editor and styles script in WordPress ## Step 5: How to Remove Frontend Styles Now, to remove frontend styles, you need to click the second checkbox “Remove Frontend Gutenberg Styles & Scripts” Note: Now if you want to check if you’ve removed the frontend styles, do the following: - Right-click and choose View Page Source. - Search for this file: /wp-includes/css/dist/block-library/common.min.css If you do not see it, the Gutenberg styles have been removed successfully. ## Step 6: Save the Settings Once you are done with the selection hit the “Save Settings” to apply the changes. ## Bonus Step: How to Re-Enable Gutenberg Editor If you want to re-enable Gutenberg it's basically the same. Go to the following path: WP Adminify > Performance Uncheck these checkboxes - Remove Backend Gutenberg Block Editor & Scripts for Entire Site. i.e. - Post/Page/Custom Post Types - Remove Frontend Gutenberg Styles & Scripts Or, you can simple toggle the “Show” button beside “Disable Gutenberg for” back to “Hide” Click “Save Settings”. And you have successfully re-enabled the Gutenberg Block editor. --- # How To Redirect Users After Login and Logout in WordPress? URL: https://wpadminify.com/docs/adminify/security/redirect-users Last updated: 2026-07-16 With WP Adminify, you can redirect your users after they login or logout. Here’s how to do it. ## Step 1: Access Redirect URLs Settings First, go to the following path: `WP Adminify > Security`. Now, find the setting labeled as “Redirect URLs” and enable it. ![Enable Redirect URLs feature](https://d1k2c27psfzbiv.cloudfront.net/wp-content/uploads/2024/09/28031114/Enable-Redirect-URLs-feature.webp) ## Step 2: How to Redirect Users After Login in WordPress In the “Roles Redirect” tab, you will find the option called “Redirect Rules Type”. Here, select the “Login Redirect” tab. ![Roles redirection option](https://d1k2c27psfzbiv.cloudfront.net/wp-content/uploads/2024/09/28033831/Roles-redirection-option.webp) Now, click the “Add New Login Redirect” button. A new box field will appear with multiple settings. ![Add new login redirection](https://d1k2c27psfzbiv.cloudfront.net/wp-content/uploads/2024/09/28034016/Add-new-login-redirection.webp) You can select your users from the “User Types”. - User Role - User Name - User Capability For each option you get a field to select Role / User / Capability. ![User role based redirection in WordPress](https://d1k2c27psfzbiv.cloudfront.net/wp-content/uploads/2024/09/28034300/User-role-based-redirection-in-WordPress.webp) Then, add your redirection URL in the “Redirect URL” text box. Note: You can add multiple redirection settings by clicking the “Add New Login Redirect” button. After you’re done with the settings, click “Save Settings” to apply changes. Redirect your WordPress Dashboard users in specific page after login ## Step 3: How to Redirect Users After Logout in WordPress The logout redirection is exactly the same as the login redirection. But, to help you we are going to tell you each step. In the “Roles Redirect” tab, you will find the option called “Redirect Rules Type”. Here, select the “Logout Redirect” tab. ![Set logout redirection](https://d1k2c27psfzbiv.cloudfront.net/wp-content/uploads/2024/09/28035058/Set-logout-redirection.webp) Now, click the “Add New Logout Redirect” button. A new box field will appear with multiple settings. ![Add new Logout redirection condition](https://d1k2c27psfzbiv.cloudfront.net/wp-content/uploads/2024/09/28035451/Add-new-Logout-redirection-condition.webp) You can select your users from the “User Types”. - User Role - User Name - User Capability For each option you get a field to select Role / User / Capability. Then, add your redirection URL in the “Redirect URL” text box. ![redirect user based on user role while log out](https://d1k2c27psfzbiv.cloudfront.net/wp-content/uploads/2024/09/28035313/redirect-user-based-on-user-role-while-log-out.webp) Note: You can add multiple redirection settings by clicking the “Add New Logout Redirect” button. After you’re done with the settings, click “Save Settings” to apply changes. Redirect Users to specici landing page or custom URL after login from WordPress Dashboard --- # How to Enable Header Security in WordPress? URL: https://wpadminify.com/docs/adminify/security/enable-header-security Last updated: 2026-08-08 WP Adminify gives you further control to remove/hide options for increased security. Here’s how to do it. ## Step 1: Access Header Security Settings First, go to the following path: `WP Adminify > Security`. Now, find the setting labeled as “Header Security” and enable it. ![Enable Header Security](https://d1k2c27psfzbiv.cloudfront.net/wp-content/uploads/2024/09/28052542/Enable-Header-Security.webp) You will get the following options with a checkbox for easier selection: - Disable XML-RPC - Remove WordPress Generator Version from front end - Remove " from head section - Disable self-ping, i.e., from your site to your site when writing posts. ![Header security options](https://d1k2c27psfzbiv.cloudfront.net/wp-content/uploads/2024/09/18103555/Header-security-options.webp) Here’s a short description of what each of these does. - Disable XML-RPC: Blocks outdated access points to boost site security. - Hide WordPress Version: Removes version info to reduce hack risks. - Remove EditURI Link: Cuts unnecessary remote editor metadata. - Remove Shortlink Tag: Cleans up header by skipping short URL tags. - Remove Canonical Tag: Removed the canonical URLs from the header section. - Disable Self-Ping: Stops your site from pinging itself on internal links. ## Step 2: Save the Settings After you’re done with the section, click the “Save Settings” button to apply it. We are going to demonstrate some of our header security features in the following videos- Disable XML-RPC: Disable the XML-RPC from your WordPress website if you are not using this. Remove WordPress Generator Version: Hide what WordPress, Theme, and Plugin versions you are using from hackers. Remove " Security. Now, find the setting labeled as “Feed Links” and enable it. Learn how to remove feed links from the WordPress header area ## Step 3: Save the Settings After you’re done with the section, click the “Save Settings” button to apply it. --- # How to Disable Rest API and x-powered by notice from http headers? URL: https://wpadminify.com/docs/adminify/security/disable-rest-api Last updated: 2026-08-12 Disabling the Rest API and removing x-powered by notice from http headers add extra security on your Website. ## Step 1: Enable the features To enabel this option, navigate to `Security > Rest API`. Just toggle the switch and you will get two option. ![Disable Rest API in WP Adminify plugin](https://d1k2c27psfzbiv.cloudfront.net/wp-content/uploads/2024/09/18103559/Disable-Rest-API-in-WP-Adminify-plugin.webp) ## Step 2: Disable Rest API If you have done the step 1, then you will get “Disable Rest API‘ checkbox. Just check this and save your settings. ![Disable REST API from WordPress Dashboard](https://d1k2c27psfzbiv.cloudfront.net/wp-content/uploads/2024/09/18103558/Disable-REST-API-from-WordPress-Dashboard.webp) ## Step 3: Remove X-Powered-By notice from HTTP Header Remove the PHP version from your http headers info by using this option. Just check and box and save the settings. Remove X-Powered-By HTTP Header You can verify this from your network options on the frontend. ## Disable REST API for Non Authenticated Users So, if you are not using the WP Adminify plugin, then there is a solution for you. But I recommand you to get suggestion from an expert before applying this on your production website. Just copy and paste the following code and yoour WordPress sites REST API will be disabled for non logged in users. ``` add_filter('rest_authentication_errors', function ($result) { if (!is_user_logged_in()) { return new WP_Error('rest_disabled', 'REST API restricted to authenticated users.', ['status' => 403]); } return $result; }); ``` You can put this code inside your active themes functions.php file. If you face problem then undo the code and use the WP Adminify plugin to disable REST API feature on your WordPress site. --- # How to disable comments in WordPress website? URL: https://wpadminify.com/docs/adminify/security/disable-comments-on-post-types Last updated: 2026-08-08 WP Adminify plugin offers you the ability to Disable comments on both frontend and backend. You can hide all options for comments from backend and frontend as well. ## Step 1: Enable the option for Disable Comments Navigate to `security > disable` comments option and enable the switcher. ## Step 2: Disable comments for selected post type ![Disable comments for any post types](https://d1k2c27psfzbiv.cloudfront.net/wp-content/uploads/2024/09/28060028/Disable-comments-for-any-post-types.webp) Select all available post types first where you like to disable comments. ## Step 3: Check options that you like to implement This is the last option where you have to choose all necessary option that seems required to your Dashboard for disabling comments. The available featured mentioned bellow - - Remove "Comments" from Admin Bar - Admin Menu "Comments" Redirect to "wp-admin" - Remove Admin Menu "Comments" - Remove Discussion Menu from "Settings>Discussion" Sub Menu - Close Comments from front-end - Remove "Your email address will not be published..." from comment form template - Remove website Field (URL) from comment form template - Remove Link from comment "Author Name" & replace to JavaScript? - Comments Content disable auto linking, display comments links as plain text, replace Comment Links to JavaScript? - Hide Existing Comments from Frontend - Remove Hardcoded ".recentcomments" CSS for default "Recent Comments" widget. I.e All options are properly explained after selecting your preferred option make sure to save the settings and reload your page. The Remove Admin Menu "Comments" option is covered in more depth in our tutorial on how to [hide the Comments menu from the WordPress admin panel](https://wpadminify.com/hide-comments-menu-from-wordpress-admin-panel). --- # Post and Archives customization in WP Adminify URL: https://wpadminify.com/docs/adminify/security/post-and-archives Last updated: 2026-08-12 WP Adminify offers some interesting features regarding the posts and Archives of your WordPress site. ## Step 1: Enable post and Archives option Navigate to `WP Adminify > Security`. Scroll down and toggle the switch for “Post & Archives” option. You will get some option that allow you to check and uncheck. ## Step 2: Enable “Display last post update date” Enabling this option will add a filed in your single blog post called “Modifed date”. Just check the box and save the settings. Enable “Display last post update date” ## Step 3: Remove Capital "P" Dangit Enabling this option removes the capital “P” from “WordPress” word automatically if it’s typed as “Wordpress”. [Note: WordPress automatically capitalizes the letter "P" in the word “WordPress” wherever it appears on your site. This can be helpful in maintaining brand consistency but may not always be desirable, especially if you're using "Wordpress" in a different context. WP Adminify’s Post & Archives feature allows you to remove the automatic capitalization of the letter "P" in "WordPress."] Remove Capital "P" Dangit ## Step 3: Redirect archive pages to homepage There are multiple options available. You can choose any item and select it’s checkbox to enable the feature. Redirect archive pages to homepage Make sure to save the settings after checking any feature otherwise it wont work. --- # How to add a custom Gravatar image in WordPress? URL: https://wpadminify.com/docs/adminify/security/add-custom-gravatar-image Last updated: 2026-08-12 WP Adminify plugin lets you to add multiple custom Gravatar images in your WordPress Dashboard. ## Step 1: Enable Custom Gravatar Images option Navigate to `WP Adminify> Security`. Scroll down to the bottom, and you will notice an option called “Custom Gravatar Images.” Enable this option, and a few options will appear. ![Enable Custom gravatar image option](https://d1k2c27psfzbiv.cloudfront.net/wp-content/uploads/2024/10/18103554/Enable-Custom-gravatar-image-option.webp) ## Step 2: How to add an image and a name If you have enabled the option, you will notice an image uploader option with a name field. Just upload your custom gravatar in image format (Any format that WordPress media supports). After uploading image, just type the name of your Gravatar. ![Add custom image and name for your gravatar](https://d1k2c27psfzbiv.cloudfront.net/wp-content/uploads/2024/10/18103553/Add-custom-image-and-name-for-your-gravatar.webp) ## Step 3: How to change the default Avatar in WordPress? Inside this option, you can see a link for “ `Settings>Discussion>Default Avatar`”. Just click on this link or manually navigate to  Settings>Discussion>Default Avatar. ![Select default Gravatar for your users](https://d1k2c27psfzbiv.cloudfront.net/wp-content/uploads/2024/10/18103550/Select-default-Gravatar-for-your-users.webp) You will notice the Gravatar image that you have saved. Just select the default avatar and save your settings. --- # Hide Screen Options and Help Tab in WordPress Dashboard URL: https://wpadminify.com/docs/adminify/productivity/hide-screen-options-and-help-tab Last updated: 2026-07-16 Follow these steps to hide the Screen Options and Help tabs in the WordPress dashboard using WP Adminify. ## Step 1: Access Productivity Settings First, go to the following path: WP Adminify > Productivity ![Hide screen options and help tab](https://d1k2c27psfzbiv.cloudfront.net/wp-content/uploads/2024/09/26040148/Hide-screen-options-and-help-tab.webp) ## Step 2: How to Hide Screen Options and Help Tab Find the settings labeled as “Screen Options and Help Tab”. Click the button beside it. It’ll turn green and the text will change to show. Then you will see the following options with checkbox: - Hide Screen Options - Hide Help Tab Mark the checkbox next to each option you want to hide. This will remove the respective tab from all admin pages. Learn How to Hide Screen Options and Help Tab in WordPress Dashboard - WP Adminify ## Step 4: Save the Settings After setting your preferences, click the “Save Settings” button to apply the changes. --- # How to Create Folder for Any Post Types and Media? URL: https://wpadminify.com/docs/adminify/productivity/create-folder-for-post-types Last updated: 2026-08-12 Follow these steps to create folders for posts, pages, or custom post types using WP Adminify. ## Step 1: Access Folder Settings First, go to the following path: WP Adminify > Productivity > Folders ## Step 2: Enable the Folder Feature Look for the toggle switch beside the “Folders” section. Turn the switch ON to activate the folder feature. ![Enable Folder for media and post types](https://d1k2c27psfzbiv.cloudfront.net/wp-content/uploads/2024/09/26054651/Enable-Folder-for-media-and-post-types.webp) ## Step 3: How to Create Folder for Post Types In the Enable for section, you’ll see a list of available post types. Check the boxes for the post types you want folders enabled for, such as: - Posts - Pages - Floating Elements - My Templates You can enable folders for one or multiple post types based on your preference. ![Enable media folder and post type](https://d1k2c27psfzbiv.cloudfront.net/wp-content/uploads/2024/09/26060259/Enable-media-folder-and-post-type.webp) Also, you can enable media folders with WP Adminify. Simply, toggle the “Enable Media Folders”, till the button turns to green. ## Step 4: Save the Settings Don’t forget to click the Save Changes button to apply your settings. ## Step 5: Start Organizing Your Content After saving, you’ll now be able to [create and manage folders](https://wpadminify.com/how-to-organize-wordpress-media-library-with-folders) directly within your post or media libraries: - Go to your Posts or Media Library. - You will see an option to create and assign folders to better organize your content. Create folder for your post type and media library Note: If you use any other media library folder plugin, then our Adminify media folder will be disabled. If you like to use WP Adminify media folder then you should not use other media folder plugin. --- # How to Create Custom Admin Page in WordPress? URL: https://wpadminify.com/docs/adminify/productivity/custom-admin-pages Last updated: 2026-08-12 Here’s how to create a custom admin page in WordPress using WP Adminify. ## Step 1: How to Enable the Custom Admin Page Feature First, go to the following path: WP Adminify > Productivity Now, find the setting labeled as “Admin Pages” and enable it. ![Enable Custom Admin page](https://d1k2c27psfzbiv.cloudfront.net/wp-content/uploads/2024/09/26061424/Enable-Custom-Admin-page.webp) A new menu item labeled “Admin Pages” will appear under the WP Adminify menu. ## Step 2: Save the Settings Don’t forget to click the Save Changes button to apply your settings. ## Step 3: How to Access the Admin Pages Section To access the admin page section, go to: WP Adminify > Admin Pages ![Access Custom Admin page option](https://d1k2c27psfzbiv.cloudfront.net/wp-content/uploads/2024/09/26061614/Access-Custom-Admin-page-option.webp) Here you can create, modify, and delete your custom admin pages. ## Step 4: How to Create a Custom Admin Page Click the “Add New Post” button, to create a custom admin page. You can create custom admin page using: - The default Gutenberg editor - Any page builders Learn How to Create Custom Admin Page in WordPress - WP Adminify ## Step 5: How to Configure Menu Attributes Go to editor settings from the right, and go to “Admin Page” settings. You’ll see the Menu Attributes section. Here you can customize: - Menu Type: A dropdown to select between top level menu or a submenu. - Menu Order: You can change the menu position in the left sidebar. - Icon: Add a menu icon beside the label. ![Menu attributes for custom Admin page](https://d1k2c27psfzbiv.cloudfront.net/wp-content/uploads/2024/09/26063223/Menu-attributes-for-custom-Admin-page.webp) ## Step 6: How to Adjust Display Options You can also adjust display options. You’ll find the settings at the bottom of the editor. In the “Enable/Disable” option, you’ll see the following options with checkboxes to control the page display: - Remove Page Title: Remove page title from your created custom admin page. - Remove Page Margin: Remove default page margin from custom admin page. - Remove Admin Notices: Hides admin notices from custom admin page ![Display options for Custom Admin page](https://d1k2c27psfzbiv.cloudfront.net/wp-content/uploads/2024/09/26062915/Display-options-for-Custom-Admin-page.webp) ## Step 7: Assign the Page to User Roles In the User Roles section, select which roles can access this admin page. You’ll see a dropdown in “Allow users to access this page” settings to select your desired roles. ![User roles access for specific admin page](https://d1k2c27psfzbiv.cloudfront.net/wp-content/uploads/2024/09/26070147/User-roles-access-for-specific-admin-page.webp) ## Step 8: How to Add Custom CSS and JavaScript Select the “Custom CSS/JS” option. You’ll see a toggle button for CSS and JS. And under each, you’ll see a custom field to add your codes. ![Custom CSS and JS for Admin page](https://d1k2c27psfzbiv.cloudfront.net/wp-content/uploads/2024/09/26070340/Custom-CSS-and-JS-for-Admin-page.webp) ## Step 9: Publish the Page After you’re done with your admin page creation and other settings, click the publish button to make it live. ## What Custom Admin Pages Are Good For A custom admin page is a page that exists only inside wp-admin - perfect for client welcome screens, internal how-to notes, support contact details, or onboarding checklists. Agencies typically pair it with the [White Label module](https://wpadminify.com/docs/adminify/white-label/wordpress-white-label-features) so clients log in to a dashboard that explains itself: what the site is, how to edit content, and who to call when something breaks. ## WP Adminify Admin Pages FAQs ### Do custom admin pages appear on my website's frontend? No. Admin pages only exist inside the WordPress dashboard - visitors never see them. They're meant for the people who log in: clients, editors, and team members. ### Can I control who sees a custom admin page? Admin pages live in the admin menu, so you can manage their visibility per role with the [Admin Menu Editor](https://wpadminify.com/docs/adminify/admin-menu/admin-menu-editor) - hide or show the page's menu item for specific user roles. ### Is the Admin Pages feature free? The feature is part of WP Adminify's Productivity module - see the [Custom Admin Page feature overview](https://wpadminify.com/features/custom-admin-page) for the free vs Pro breakdown. ## Related Documentation - [How to Create Custom Dashboard Widgets](https://wpadminify.com/docs/adminify/productivity/create-custom-dashboard-widget) - [How to Add a Custom Welcome Widget](https://wpadminify.com/docs/adminify/productivity/create-custom-welcome-widget) - [Custom Admin Page feature overview](https://wpadminify.com/features/custom-admin-page) - [Blog: How to Create a Custom Admin Page in WordPress](https://wpadminify.com/how-to-create-custom-admin-page-in-wordpress) --- # How to Create Custom Dashboard Widgets? URL: https://wpadminify.com/docs/adminify/productivity/create-custom-dashboard-widget Last updated: 2026-09-08 Follow these steps to create a custom dashboard widget using WP Adminify. ## Step 1: How to Enable Custom Dashboard Widget Settings First, go to the following path: WP Adminify > Productivity Then Enable the “Dashboard & Welcome Widget” settings. Click “Save Settings”. ![WordPress Enable Dashboard and Welcome widget - dashboard customization guide](https://d1k2c27psfzbiv.cloudfront.net/wp-content/uploads/2024/09/26071515/Enable-Dashboard-and-Welcome-widget.webp) ## Step 2: How to Access Dashboard Widgets Panel Once you refresh the page, you’ll see the “Dashboard Widget” under WP Adminify panel. Click on it to access the dashboard widgets section. ![Access custom dashboard widget](https://d1k2c27psfzbiv.cloudfront.net/wp-content/uploads/2024/09/26072006/Access-custom-dashboard-widget.webp) ## Step 3: How to Add Dashboard Widgets Now, to add a dashboard widget, select the “Dashboard Widget” panel. Then click the “Add New Widget” button. ![WordPress Add new widget in WordPress Dashboard - dashboard customization guide](https://d1k2c27psfzbiv.cloudfront.net/wp-content/uploads/2024/09/26072923/Add-new-widget-in-WordPress-Dashboard.webp) Now you can add the dashboard widget with following information. Widget Title: Enter the title that will appear at the top of the widget. Widget Position: Select where the widget should be placed. - Side - Normal Content Type: Select how you want to display the content. You can choose from: - Editor (Text/HTML) - Icon - Video - Shortcode - RSS Feed - Script Note: Depending on your content type, the interface will change: For Editor: You’ll get a content editor. Here you can add your content visually or by code. For Icon: You’ll get a button to add your icon. You can also add a tooltip text and add an URL. For Video: You can select between Self Hosted / Youtube / Vimeo as a video type. You can also add video description and upload your own video in the upload video option. For Shortcode: You’ll get a text box to add your shortcodes. For RSS Feed: Here you can add the RSS feed URL. You can limit the number of posts displayed. Also, you can use the toggle button to Show Excerpt / Date / Author. For Script: You’ll get the code editor, where you can write custom script codes. You can also make the settings role based. To do that, select your desired roles from the “Allowed User Roles”. You can add multiple widgets by clicking the “Add New Widget” multiple times. Also, you can drag and drop the positions of custom widgets. Learn how to add a custom dashboard widget in your default WordPress Dashboard. There are 6 type of dashboard widget like classic editor, short-code, image, video, icon, gallery, feed, code. ## Step 4: Save the Settings Don’t forget to click the Save Changes button to apply your settings. WP Adminify allows you to enhance and personalize your WordPress dashboard by creating custom widgets that can display various types of content. Whether you want to show important information, embed a video, or include a custom script, you can easily add it through custom dashboard widgets. ## 1. Access the Dashboard & Welcome Widget Settings To start creating your custom dashboard widget: - Log in to your WordPress dashboard. - Navigate to WP Adminify > Dashboard & Welcome Widget. ![WordPress Enable Dashboard and Welcome widget - dashboard customization guide](https://d1k2c27psfzbiv.cloudfront.net/wp-content/uploads/2024/09/26071515/Enable-Dashboard-and-Welcome-widget.webp) ## 2. Save Your Settings click the Save button to save your settings. ## 3. Go to the Dashboard Widget Option on WP Adminify menu In the WP Adminify options panel on the left hand side of the dashboard a new option “Dashboard Widget” will appear. ![Access custom dashboard widget](https://d1k2c27psfzbiv.cloudfront.net/wp-content/uploads/2024/09/26072006/Access-custom-dashboard-widget.webp) ## 4. Click on Dashboard Widget Click on the Dashboard Widget option and you’ll be taken to a new window where there will be two tabs Dashboard Widget and Welcome Widget. Click on the Dashboard Widget tab. ## 5. Add a New Widget Once inside the Dashboard & Welcome Widget settings: - Click the Add New Widget button to create a new custom widget. ![WordPress Add new widget in WordPress Dashboard - dashboard customization guide](https://d1k2c27psfzbiv.cloudfront.net/wp-content/uploads/2024/09/26072923/Add-new-widget-in-WordPress-Dashboard.webp) ## 6. Configure Widget Settings You will now be presented with a form to configure your custom widget settings. Widget Title Enter the title for your widget. This title will be displayed at the top of the widget in the WordPress dashboard. Widget Position Choose the position for your widget. You have two options: - Side: Place the widget in the narrow column on the right-hand side of the dashboard. - Normal: Place the widget in the main, wider central section of the dashboard. This lets you control how and where the widget will be positioned in relation to other widgets on the dashboard. Content Type Next, select the type of content that will appear in your custom widget. WP Adminify provides several content options: - Editor: Use the WordPress editor to add text, images, or any custom HTML. - Icon: Create a widget that displays an icon. - Video: Embed video content directly into the widget. - Shortcode: Use a WordPress shortcode to dynamically display content in the widget. - RSS Feed: Display an RSS feed in your widget to show external content. - Script: Add custom JavaScript or any other type of script to the widget for functionality. Add Content Depending on the content type you selected, the Content section will change to fit your choice: - If you choose Editor, a text editor will appear where you can write or paste the desired content. - If you selected Shortcode, a field will appear for you to enter the shortcode. - For Video, you’ll get a video embed field. - If you selected Script, an input field will be provided to add your custom JavaScript code. Assign User Roles You can control who can see the widget by selecting specific user roles. This allows you to customize the dashboard for different roles like: - Administrators - Editors - Authors - Contributors - Subscribers If you want the widget to be available to everyone, select the All Users option. ## 7. Save Your Widget Once you’ve configured all the settings, scroll down and click the Save button to add the widget to your dashboard. WP Adminify also gives you the settings to [create custom welcome widgets](https://wpadminify.com/how-to-remove-wordpress-welcome-widget-from-dashboard). Do check it out if you think you'll need it. --- # How to Add Custom Welcome Widget? URL: https://wpadminify.com/docs/adminify/productivity/create-custom-welcome-widget Last updated: 2026-07-16 Follow these steps to create a custom welcome widget using WP Adminify. ## Step 1: How to Enable Welcome Widget Settings First, go to the following path: WP Adminify > Productivity Then Enable the “Dashboard & Welcome Widget” settings. Click “Save Settings”. ![Access custom dashboard widget](https://d1k2c27psfzbiv.cloudfront.net/wp-content/uploads/2024/09/26072006/Access-custom-dashboard-widget.webp) ## Step 2: How to Access Welcome Widgets Panel Once you refresh the page, you’ll see the “Welcome Widget” under the WP Adminify panel. Click on it to access the welcome widgets section. ![Enable welcome widget](https://d1k2c27psfzbiv.cloudfront.net/wp-content/uploads/2024/09/26083153/Enable-welcome-widget.webp) Now, to add a welcome widget, enable the “Enable Custom Welcome Panel?” button. This will reveal a few settings you can use to add your welcome widget. ## Step 3: How to Choose to Page/Template Under the “Select Page/Template dropdown”, choose either: - Page - Elementor Page Template - Elementor Saved Section - Elementor Saved Widget Now, if you choose Page, use the “Select Page” dropdown to pick from your available pages. If you choose Template, you can pick from the saved Elementor templates. ## Step 4: How to Set the Panel Height Use the Panel Height field to define the vertical size of your welcome widget. You can also set the panel height if you’re using a page. Use the “Panel Height” field to define the vertical size (px) of your welcome widget. Note: If you’ve picked elementor templates you won’t find this option. ## Step 5: How to Enable Dismissibility If you want to add the dismiss option, turn on the “Dismissible” button using the toggle. ## Step 6: How to Assign User Roles for Access You can also make the settings role based. To do that, select your desired roles from the “Allowed User Roles”. Create custom welcome widget for WordPress Dashboard ## Step 7: Save the Settings Don’t forget to click the Save Changes button to apply your settings. --- # How to Reorder Post Types in WordPress? URL: https://wpadminify.com/docs/adminify/productivity/reorder-posts-by-type Last updated: 2026-08-12 Follow these steps to reorder posts, pages, or any custom post type using WP Adminify. You can also enable/disable sortable media files on list view. And furthermore, you can select for sortable taxonomies ## Step 1: How to Access Post Types Order Settings First, go to the following path: `WP Adminify > Productivity`. Now, enable the “Post Types Order” option on. This will reveal the options to reorder post types. ![WordPress Post type order](https://d1k2c27psfzbiv.cloudfront.net/wp-content/uploads/2024/09/26093332/WordPress-Post-type-order.webp) ## Step 2: How to Select Sortable Post Types Look for the section labeled “Sortable Post Types”. You can select options from the following post types: - Posts - Pages After enabling it, don’t forget to hit the “Save Settings” button. ![Enable post type order for post page](https://d1k2c27psfzbiv.cloudfront.net/wp-content/uploads/2024/09/26094120/Enable-post-type-order-for-post-page.webp) Now, go to the post type section you want to reorder. You’ll see a list view option, where you can easily drag and drop to sort your desired posts, pages etc,. Reorder any post type, including media files in the WordPress Dashboard ## Step 3: How to Enable Sortable Media Files You can enable sortable media files on the list view with a single click. Enable the `“Sortable Media Files”` button to enable it. And, to disable it, turn off the button. After enabling it, click on list view in the media library. Here you can drag and drop any media item to rearrange it. Reorder Media files in WordPress Dashboard in List view ## Step 4: How to Reorder Taxonomies In the section labeled `“Sortable Post Types” > “Sortable Taxonomies”`. You can select options from the following taxonomies: - Categories - Tags After enabling it, don’t forget to hit the “Save Settings” button. ![Taxanomies sorting in WordPress](https://d1k2c27psfzbiv.cloudfront.net/wp-content/uploads/2021/09/12101436/Taxanomies-order-module.gif) Now, go to the taxonomy section you want to reorder. You’ll see a list view option, where you can easily drag and drop to sort your desired taxonomies. ## Reorder Posts FAQs ### Which post types can I reorder? Posts, pages, and any custom post type. You can also make media files sortable in list view and choose which taxonomies are sortable - all from the Post Types Order settings. ### Does the custom order affect my site's frontend? Reordering changes how entries are ordered in queries that follow menu order, which is what most themes use for pages and custom listings. Your archive templates decide what visitors ultimately see - test after reordering. ### Do I need a separate plugin for this? No - Post Types Order is one of the modules bundled in WP Adminify, replacing a standalone reorder plugin. See the [Post Type Order feature overview](https://wpadminify.com/features/post-type-order). ## Related Documentation - [Post Type Order feature overview](https://wpadminify.com/features/post-type-order) - [How to Create Folders for Post Types and Media](https://wpadminify.com/docs/adminify/productivity/create-folder-for-post-types) - [How to Duplicate Menus and Posts](https://wpadminify.com/docs/adminify/productivity/one-click-menu-duplication) --- # How to Improve WordPress Dashboard Performance with WP Adminify? URL: https://wpadminify.com/docs/adminify/performance/enhancement Last updated: 2026-08-12 By default, the WordPress dashboard is bloated with a lot of unwanted elements. WP Adminify fixes this with its advanced performance settings. Boosting speed is a matter of time now. Follow these simple steps to improve your WordPress dashboard performance. ## Step 1: Go to WP Adminify Performance Settings Go to the following path: WP Adminify > Performance ## Step 2: Enable the Performance Enhancements Option Look for the setting named `“Performance Enhancements”`. Click the toggle button. It will turn green and the text will change to “Show.” This will display a list of performance-related options. ## Step 3: Select the Improvement Options You can check the following boxes to improve performance: - Remove Dashicons from front-end for Public Visitors - Remove Versions from Styles/Scripts - Remove Gravatar Query Strings - Remove All Emoji styles and scripts from head section - Remove front end jQuery Migrate script. - Remove back end jQuery Migrate script. Note: It might break functionality - Enable Defer Parsing JS to Footer - Enable Browser Cache Expires & GZIP Compression ![performance enhancement by WP Adminify](https://d1k2c27psfzbiv.cloudfront.net/wp-content/uploads/2024/09/18103602/performance-enhancement-by-WP-Adminify.webp) Enabling these options will reduce unnecessary requests. Which will result in improved loading speed and optimized dashboard experience. ## Step 4: Save the Settings Once you are done with the selection hit the “Save Settings” to apply the changes. ## Bonus Step: How to Reset Improvement settings If you want to reset your settings, simply turn off the “Performance Enhancement” button. Also, you can unselect a few options you want to revert, uncheck the boxes. And then hit the “Save Settings” to apply your changes. ## What Each Performance Setting Does The Performance panel groups the switches that remove WordPress's default overhead. Which ones you enable depends on what your site actually uses - a good rule: if you don't use a feature on the frontend, disable its loader here. Changes apply as soon as you save, and every toggle is reversible, so you can test one at a time and measure the difference. Two settings deserve their own guides: [disabling auto-embeds](https://wpadminify.com/docs/adminify/performance/disable-embeds) (stops WordPress loading embed scripts for YouTube/Twitter previews) and [Heartbeat API control](https://wpadminify.com/docs/adminify/performance/control-hearbeat-api) (reduces the background admin-ajax requests that eat CPU on busy dashboards). ## WordPress Admin Performance FAQs ### Do these settings affect my site's frontend or just the dashboard? Both, depending on the toggle. Options like disabling embeds or feed links reduce what loads on the frontend, while Heartbeat control and dashboard cleanup primarily speed up wp-admin itself. ### Can enabling these options break anything? Every toggle is reversible. If a plugin or theme depends on a feature you disabled (for example, embeds or the Heartbeat API for autosave), switch that option back on - no permanent changes are made. ### Is the Performance module available in the free version? The Performance module ships with the free plugin. See the [performance feature overview](https://wpadminify.com/features/performance) for what's included in free vs Pro. ## Related Documentation - [How to Disable Embeds in WordPress](https://wpadminify.com/docs/adminify/performance/disable-embeds) - [How to Control Heartbeat API Request Frequency](https://wpadminify.com/docs/adminify/performance/control-hearbeat-api) - [How to Disable the Gutenberg Block Editor](https://wpadminify.com/docs/adminify/performance/disable-gutenberg) - [Performance features overview](https://wpadminify.com/features/performance) - [How to Add Code to WordPress Header and Footer](https://wpadminify.com/add-code-to-wordpress-header) --- # How to Duplicate Menu and Posts in WordPress? URL: https://wpadminify.com/docs/adminify/productivity/one-click-menu-duplication Last updated: 2026-08-12 Want to duplicate menus or posts in WordPress? Follow these steps to enable duplicator with WP Adminify. ## How to Duplicate Menu in WordPress First, go to this path: `WP Adminify > Productivity` Then, turn on the “Menu Duplicator” option. Once enabled click the “Save Settings” to apply it. Now to duplicate your menus, go to `Appearance > Menus` to find all your menu items. You’ll see an option called “Duplicate” added by WP Adminify. Click the button to duplicate your menu. You can easily edit, modify or delete the menu as per your requirements. WP Adminify also allows you to duplicate menu items. You’ll see the “Duplicate” option menu items as well. Click on it to duplicate your menu items. Duplicate full WordPress menu ## Important Note The menu duplicator will only work on classic themes. If you’re using block based themes, the duplicator won’t work as intended. ## How to Duplicate Posts in WordPress First, go to this path WP Adminify > Productivity Then, turn on the “Post Duplicator” option. Once enabled click the “Save Settings” to apply it. You’ll see following post types to choose from on the “Enable for Post Types” section: - Posts - Pages - Floating Elements - My Templates Note: You’ll see all available post types (custom) in this section dynamically. Now, go to the desired path (Post, page, custom post type) to duplicate your posts/pages. In the list of posts or pages, hover over the item you want to duplicate. You’ll see a new option labeled as “Adminify Clone”. Click on it to duplicate your posts, pages or custom post types. Duplicate post page and any post type in WordPress Note: Remember the duplicated content will be set to draft by default. If you want to make it live, open the duplicated content and click publish. ## How to Duplicate Taxonomies in WordPress First, go to this path WP Adminify > Productivity Then, turn on the “Post Duplicator” option. Once enabled click the “Save Settings” to apply it. You’ll see following taxonomies to choose from on the “Enable for Taxonomies” section: - Categories - Tags - Link Categories - Pattern Categories - Custom Categories ![Taxonomies duplicator](https://d1k2c27psfzbiv.cloudfront.net/wp-content/uploads/2024/09/28093743/Taxonomies-duplicator.webp) Note: You’ll see all available taxonomies (custom) in this section dynamically. Now, go to the desired path to duplicate your taxonomies. In the list of posts or pages, hover over the item you want to duplicate. You’ll see a new option labeled as “Adminify Clone”. Click on it to duplicate your posts, pages or custom post types. ![Adminify clone button to duplicate taxonomies](https://d1k2c27psfzbiv.cloudfront.net/wp-content/uploads/2024/09/28093937/Adminify-clone-button-to-duplicate-taxonomies.webp) Note: Remember the duplicated content will be set to draft by default. If you want to make it live, open the duplicated content and click publish. In the taxonomy list, find the taxonomy you want to duplicate. You’ll see a new option labeled as “Adminify Clone”. Click on it to duplicate your taxonomies. ![Duplicated copy of creative category](https://d1k2c27psfzbiv.cloudfront.net/wp-content/uploads/2024/09/28094132/Duplicated-copy-of-creative-category.webp) Note: The duplicated taxonomy will include the same name and details with a “Duplicate” prefix. ## Menu Duplication FAQs ### Where do I enable the duplicator options? Both live under WP Adminify → Productivity: turn on Menu Duplicator for menus and the post duplicator for posts, pages and custom post types, then save settings. ### What's the difference between duplicating a menu and a post? Menu duplication copies a navigation menu (useful before restructuring, so you keep a working copy). Post duplication clones a post, page or custom post type as a draft you can edit without touching the original. ### Is the duplicator available in the free version? See the [Duplicate Post feature overview](https://wpadminify.com/features/duplicate-post) for the current free vs Pro breakdown. ## Related Documentation - [Duplicate Post feature overview](https://wpadminify.com/features/duplicate-post) - [How to Reorder Post Types in WordPress](https://wpadminify.com/docs/adminify/productivity/reorder-posts-by-type) - [Productivity features overview](https://wpadminify.com/features/productivity) --- # How to Display Custom Admin Columns in WordPress? URL: https://wpadminify.com/docs/adminify/productivity/custom-admin-columns Last updated: 2026-08-12 WP Adminify lets you display custom admin columns. Follow these steps to continue. ## Initial Step: How to Enable Custom Admin Column First, you need to enable the “Custom Admin Columns”. Go to the following path: `WP Adminify > Productivity`. Then Use the toggle button to enable “Custom Admin Columns”. ![Custom Admin Columns in WordPress by WP Adminify](https://d1k2c27psfzbiv.cloudfront.net/wp-content/uploads/2024/09/18103600/Custom-Admin-Columns-in-WordPress-by-WP-Adminify.webp) ## How to Display Post Thumbnail Column in WordPress A list of options will be displayed. Among them, you’ll find the `“Show Post Thumbnails Column”` checkbox. Mark the checkbox to enable it. A new option will appear labeled “Column Thumbnail Image”. Use the “Add Thumbnail Image” button to go to the WordPress media manager and upload the thumbnail image. This will be your default thumbnail image. ![Show post thumbnails in columns](https://d1k2c27psfzbiv.cloudfront.net/wp-content/uploads/2024/09/28103659/Show-post-thumbnails-in-columns.webp) Click the “Save Settings” button to apply your settings. Now, if you go to the Posts page, you’ll see a new thumbnail column showing the featured image for each post. If the post doesn't have a featured image, it will display the default thumbnail image instead. ![Show post thumbnails in all posts](https://d1k2c27psfzbiv.cloudfront.net/wp-content/uploads/2024/09/28103655/Show-post-thumbnails-in-all-posts.webp) ## How to Display Post/Page ID in WordPress After you complete the initial step, a list of options will be displayed. Among them, you’ll find the `“Show Post/Page ID Column. Display "ID" column for post and page table lists”` checkbox. Mark the checkbox to enable it. ![Show post or Page ID in admin columns](https://d1k2c27psfzbiv.cloudfront.net/wp-content/uploads/2024/09/28103130/Show-post-or-Page-ID-in-admin-columns.webp) Click the “Save Settings” button to apply your settings. Now, if you go to the Posts/Pages, you’ll see a new field labeled “ID”. ![Page and Post ID columns in posts](https://d1k2c27psfzbiv.cloudfront.net/wp-content/uploads/2024/09/28103147/Page-and-Post-ID-columns-in-posts.webp) ## How to Display Comment ID Column in WordPress After you complete the initial step, a list of options will be displayed. Among them, you’ll find the `“Show "Comment ID" Column for Comment, Also show "Parent ID"”` checkbox. Mark the checkbox to enable it. Click the “Save Settings” button to apply your settings. Now, if you go to the `Comments > All Comments`, you’ll see a new field labeled “ID” and “parent ID”. ![Page and Post ID columns in posts](https://d1k2c27psfzbiv.cloudfront.net/wp-content/uploads/2024/09/28103147/Page-and-Post-ID-columns-in-posts.webp) ## How to Display Last Login Column in WordPress After you complete the initial step, a list of options will be displayed. Among them, you’ll find the `“Show "Last Login" Column for Users”`checkbox. Mark the checkbox to enable it. ![Show last login columns for users page](https://d1k2c27psfzbiv.cloudfront.net/wp-content/uploads/2024/09/28102418/Show-last-login-columns-for-users-page.webp) Click the “Save Settings” button to apply your settings. Now, if you go to the `Users > All Users`, you’ll see a new field labeled “Last Login”. ![Last login columns in users](https://d1k2c27psfzbiv.cloudfront.net/wp-content/uploads/2024/09/28102549/Last-login-columns-in-users.webp) ## How to Display Taxonomy ID Column in WordPress After you complete the initial step, a list of options will be displayed. Among them, you’ll find the`“Show "Taxonomy ID" Column for all possible types of taxonomies”`checkbox. Mark the checkbox to enable it. Click the “Save Settings” button to apply your settings. Now, if you go to the relevant taxonomy page, you’ll see a new field labeled “Taxonomy ID”. ## How to Display URL Path Column in WordPress After you complete the initial step, a list of options will be displayed. Among them, you’ll find the `“Show "URL Path" Column for Post Types”` checkbox. Mark the checkbox to enable it. A new option will appear labeled “"URL Path" Column for Post Types”. And you can select from the following options: - Posts - Pages Display URL Path column in WordPress Dashboard Note: All your custom post types will be displayed as options here dynamically. Click the “Save Settings” button to apply your settings. Now, if you go to the relevant page, you’ll see a new field labeled “URL Path”. --- # How to Control Heartbeat API Request Frequency? URL: https://wpadminify.com/docs/adminify/performance/control-hearbeat-api Last updated: 2026-07-16 WordPress Heartbeat API lets you autosave content, manage user sessions, and send real-time updates. But it will increase CPU usage. WP Adminify lei ts you control the Heartbeat API. Now you can easily reduce server load and improve site performance. Here’s a few steps you can follow to Customize it. ## Step 1: Go to WP Adminify Performance Setting Go to the following path: WP Adminify > Performance ![Enable Heartbeat API in WordPress](https://d1k2c27psfzbiv.cloudfront.net/wp-content/uploads/2025/01/04085802/Enable-Heartbeat-API-in-WordPress.webp) ## Step 2: Enable Heartbeat API Settings Look for the setting named “Control Heartbeat API”. Click the toggle button. It will turn green and the text will change to “Show.” ## Step 3: Customize Heartbeat API Settings You will see 3 separate Heartbeat API options. - WordPress Dashboard (Backend post types) - Create Post Editor (On Post Creation and edit) - Frontend (Frontend heartbeats) For each area, you can select following options: Default: Keeps WordPress's default heartbeat interval Modify: Lets you adjust the interval with “Set interval to once every” dropdown Disable: Completely turns off the Heartbeat API for that area Select the option that best fits your site needs. ![Modify heartbeat interval](https://d1k2c27psfzbiv.cloudfront.net/wp-content/uploads/2025/01/04090039/Modify-heartbeat-interval.webp) Note: You can change or modify these settings whenever you want. ## Step 3: Save the Settings After you make your changes, click the “Save Settings” button to apply new settings. This helps you confirm that the Heartbeat API is working as expected. ![WordPress Heartbeat Control for Dashboard](https://d1k2c27psfzbiv.cloudfront.net/wp-content/uploads/2025/01/04092156/WordPress-Heartbeat-Control-for-Dashboard.webp) ## Step 4: How to Reset Heartbeat API settings to default If you want to reset your settings, simply turn off the “Control Heartbeat API” button. Also, you can select “Default” on the settings you want to use default settings for. And then hit the “Save Settings” to apply your changes. --- # How to Add Custom CSS and JS in WordPress? URL: https://wpadminify.com/docs/adminify/code-snippets/custom-css-and-js-in-dashboard Last updated: 2026-08-08 The default WordPress admin dashboard has unnecessary elements. And it makes it slow to work with and hard to navigate. WP Adminify solves these issues with its Advanced code snippets. Let’s show you how you can also do it. ## Step 1: Go to Code Snippets in WP Adminify Go to the following path to access code snippets options: `WP Adminify > Code Snippets` ## Step 2: How to Add Custom CSS/JS in the Admin Dashboard You’ll see 2 tabs in this section. - Admin Scripts - Frontend Scripts To add custom CSS/JS in the WordPress admin dashboard, stay on the “Admin scripts” tab. You’ll see 2 separate fields to add your custom codes: - Custom CSS - Custom JavaScript In the Custom CSS box, enter the CSS code you want to apply only to the admin panel. ![Backend CSS and JS option](https://d1k2c27psfzbiv.cloudfront.net/wp-content/uploads/2024/08/25092317/Backend-CSS-and-JS-option.webp) Similarly for JS code, use the Custom JavaScript box. Note: Don't place tag inside the editor. Learn more about [Frontend styles and script here](https://wpadminify.com/docs/header-footer-scripts/add-custom-css-js-frontend). You can also place tracking scripts and meta tags site-wide. Our guide on how to [add code to the head tag in WordPress](https://wpadminify.com/add-code-to-wordpress-header) shows where each snippet belongs. --- # How to Show Post Thumbnails in RSS Feed? URL: https://wpadminify.com/docs/adminify/productivity/show-thumbnails-in-rss-feed Last updated: 2026-07-16 By default, WordPress doesn’t include post thumbnails in RSS feeds. But WP Adminify lets you add it with ease. Follow these steps to show post thumbnails in RSS feed. ## Step 1: How to Enable WP Adminify Media Settings First, go to the following path: `WP Adminify > Productivity`. Now, you’ll see the “Media Settings” option. Click its subsequent toggle button to enable it. ## Step 2: How to Enable Post Thumbnails for RSS Now, once you enable the “Media Settings” option, the option “Post Thumbnails on RSS” will be displayed. Similar to earlier, enable this with the toggle as well. This will add post thumbnails on rss excerpt and content feed. ## Step 3: Save Your Settings After enabling, click the “Save Settings” button to apply the changes. Learn how easily you can show thumbnail in RSS Feed --- # How to Remove Default WordPress Widgets? URL: https://wpadminify.com/docs/adminify/productivity/remove-unwanted-dashboard-widgets Last updated: 2026-07-16 WP Adminify lets you hide unnecessary widgets by WordPress. Follow these steps to proceed. ## Step 1: Open Widget Removal Settings First, go to the following path: WP Adminify > Productivity. Now, you’ll see the “Widgets Removal” option. In this option you will see two separate tabs: - Sidebar Widgets - Dashboard Widgets We will show you both, but first let’s start with Sidebar Widgets. ## How to Hide Sidebar Widgets in WordPress First, select the “Sidebar Widgets” tab. You will see the “Disable Gutenberg Editor for Widgets” options. Click the button to enable it. Once enabled, you will see all the available sidebar widgets you can hide. Here’s the list: - Navigation Menu - Archives - Block - Calendar - Category - Meta - Pages - RSS - Recent Comments - Recent Posts - Search - Tag Cloud Remove Default WordPress Widgets Each option comes with a checkbox. Simply mark the checkbox item you want to hide. Then click the “Save Settings” button to apply your changes. ## How to Hide Dashboard Widgets in WordPress First, select the “Dashboard Widgets” tab. You will see all the available dashboard widgets you can hide. Here’s the list: - Elementor Overview - WP Adminify News & Updates - Site Health Status - At A Glance - Activity - Quick Draft Your Recent Drafts - WordPress Events and News Remove Default WordPress Widgets Each option comes with a checkbox. Simply mark the checkbox item you want to hide. Then click the “Save Settings” button to apply your changes. --- # WordPress Admin Menu Editor by WP Adminify URL: https://wpadminify.com/docs/adminify/admin-menu/admin-menu-editor Last updated: 2026-08-08 WP Adminify offers an intuitive admin menu editor for the WordPress Dashboard. This plugin allows you to reorder, rename, change URL, change icon, hide specific menu items based on user role or name and many more features. Let’s break down each step one by one - ## Admin Menu Editor Log in to your WordPress Dashboard. Navigate to WP `Adminify > Admin Menu`option. You will notice an option panel like the following screenshot. ## Reorder Admin Menu items You can see the 9-dot icon beside each menu item. Click on this icon, drag your mouse anywhere, and drop the selected item. Reorder default WordPress Admin menu items with WP Adminify Finally save the settings and reload to preview the changes. ## Rename Admin Menu items Click on any menu items that you lwould ike to rename. It will expand with some options and the first option is “`Rename as`” Type whatever you like to call the selected menu items and save the settings. ![Rename Dashboard with Admin Menu Editor](https://d1k2c27psfzbiv.cloudfront.net/wp-content/uploads/2024/09/24070853/Rename-Dashboard-with-Admin-Menu-Editor.webp) ## Change URL for Admin Menu Under the rename option, there is an option called “Change Link”. You can input any internal or external URL in your menu items. Also, there is an option called “New Window?”. It refers to whether you like to open the link in a new tab or not. ## Hide Admin Menu Items for a specific User Role or User You can hide individual menu items for specific user roles except Administrator, but with the help of username selection, you can hide menu items for specific Administrators too. For a worked example, see our tutorial on [hiding the Comments menu from the admin panel](https://wpadminify.com/hide-comments-menu-from-wordpress-admin-panel). This is a multiple selection option. You can choose multiple usernames and user roles to hide any menu items. For Example, I have hidden the Page Menu for Editor in the following video. Hide admin menu items for specific user role or user name Just like this way, you can hide any menu items for a specific user name too. ## Select the Custom menu icon WP Adminify offers Default Dashicons, Simple line icons and Custom icons option. Using the custom icon you can upload any icon in image format or SVG format and save it for your menu icons. ![Set Custom Icon in WordPress Admin menu](https://d1k2c27psfzbiv.cloudfront.net/wp-content/uploads/2024/09/24071550/Set-Custom-Icon-in-WordPress-Admin-menu.webp) ## Add Separator in Admin Menu Seperator is a visual divider between menu items. You can add seperator by for each menu items for better organization. Just check the box for “Add Seperator” option and save the settings. ![Add Separator in WordPress Admin Menu](https://d1k2c27psfzbiv.cloudfront.net/wp-content/uploads/2024/09/24081736/Add-Separator-in-WordPress-Admin-Menu.webp) ## Submenu Item customization We have discussed all basic options for primary menu items, now take a close look and you will get “Submenu” option available besided the primary menu settings. All submenu will be available under individual menu items. You can do everything like main menu customization for submenu items except the icon and seperator customization. ## Add Custom Admin menu items This works perfectly for both main menu and sub menu items. To add a custom menu item as a main menu item, just scroll down until bottom of the Menu Editor option page. You will notice an option called “Add Item”. When you click on add item, you will get the option to define menu item name, URL, Icon, Hidden for rules, Icon, Separator, and submenu options. Just input all the necessary values properly and save the changes. Add custom main menu or submenu items in WordPress Dashboard You can add submenu items as many as you need. --- # WordPress Admin Menu Editor Settings customization - WP Adminify URL: https://wpadminify.com/docs/adminify/admin-menu/menu-layout-options Last updated: 2026-07-16 WP Adminify offers both vertical and horizontal admin menus. Based on your selection you will notice changes in the following options. The default menu is Vertical and let’s discuss the vertical menu settings - ![Vertical Menu type in WP Adminify](https://d1k2c27psfzbiv.cloudfront.net/wp-content/uploads/2024/09/25035828/Vertical-Menu-type-in-WP-Adminify.webp) ## WordPress Vertical Admin Menu settings There are a total of 3 menu modes available called `Default, Folded, and Rounded`. This menu mode reflects the primary menu item style. ![Rounded menu mode style in WP Adminify](https://d1k2c27psfzbiv.cloudfront.net/wp-content/uploads/2024/09/25040159/Rounded-menu-mode-style-in-WP-Adminify.webp) You can use `folded menu mode`, which looks something like the following video - WP Adminify offers different type of admin menu styles like two step, folded, accordion, toggle and much more. There is another option called `“Sub menu style”` which offers 3 different options called two step, accordion, and toggle. Creative two step admin menu style customization by WP Adminify plugin On the other hand, Accordion and toggle look something like the following screenshot. When you select the accordion, it closes the other active menu items and expands the new one. But Toggle keeps all menu items open when you click on each item. ![Accordion Sub menu style in WP Adminify](https://d1k2c27psfzbiv.cloudfront.net/wp-content/uploads/2024/09/25041413/Accordion-Sub-menu-style-in-WP-Adminify.webp) ## User information in the Admin Menu The last option for vertical admin menu settings is User Info. You can showcase user avatar, email, log out icon inside the admin menu wrapper. ![User Info in Admin menu](https://d1k2c27psfzbiv.cloudfront.net/wp-content/uploads/2024/09/24093641/User-Info-in-Admin-menu.webp) ## Horizontal Admin Menu Horizontal admin menu offers “icon only”, “text only”, and “both” options for your admin menu items. ![Horizontal Menu in WordPress Dashboard](https://d1k2c27psfzbiv.cloudfront.net/wp-content/uploads/2024/09/24094417/Horizontal-Menu-in-WordPress-Dashboard.webp) Show or hide the dropdown toggle icon. Enable if you like to make the main parent menu clickable or not. It works for those menu item which has submenu items. If you are a regular WordPress user, then maybe you have noticed that whenever there is a plugin update, the number appears in the plugin option as a bubble. You can hide or show this for your horizontal menu item. One of the best invention by WP Adminify team is creating the horizontal admin menu for WordPress Dashboard --- # WordPress Admin Menu Styles customization URL: https://wpadminify.com/docs/adminify/admin-menu/styles Last updated: 2026-07-16 WP Adminify plugin offers multiple options for admin menu style like Font settings, Menu width, Padding, Color settings. ## Font settings When you navigate to the styles option inside the Admin menu, you will get the first option as font settings. ![Font Size for WordPress Admin menu items](https://d1k2c27psfzbiv.cloudfront.net/wp-content/uploads/2024/09/25045415/Font-Size-for-WordPress-Admin-menu-items.webp) You can adjust font size, line height, and letter spacing. ## Menu Width Under the font settings option, you can notice a field called "Menu Width". Just input the value in px and save the settings. The width will be applied to your admin menu width. ![Change WordPress Admin menu width](https://d1k2c27psfzbiv.cloudfront.net/wp-content/uploads/2024/09/25043253/Change-WordPress-Admin-menu-width.webp) We have added some padding options to provide you with better control over the admin menu items gap. You can add main menu padding, submenu padding. ![Admin menu items padding](https://d1k2c27psfzbiv.cloudfront.net/wp-content/uploads/2024/10/11115722/Admin-menu-items-padding.webp) ## Color Settings Color settings are the last option by the WP Adminify plugin. You can set parent menu colors, submenu colors and notification colors from this option. ![Accessing the Color Settings for Admin menu](https://d1k2c27psfzbiv.cloudfront.net/wp-content/uploads/2024/09/25050156/Accessing-the-Color-Settings-for-Admin-menu.webp) I have changed the parent menu colors in the following screenshot and you can see the result. Make sure to choose Wrap BG, Menu hover BG, Text hover, and some other colors properly. ![Parent Menu Colors settings](https://d1k2c27psfzbiv.cloudfront.net/wp-content/uploads/2024/09/25050743/Parent-Menu-Colors-settings.webp) Now, here I am showing you how I have customized the submenu colors for the admin menu. Just like the primary menu colors, do the same for submenu colors. ![Sub Menu Colors settings for Admin menu](https://d1k2c27psfzbiv.cloudfront.net/wp-content/uploads/2024/09/25051245/Sub-Menu-Colors-settings-for-Admin-menu.webp) This is the last option we have on the Admin Menu editor feature by WP Adminify. It used to change the notification icon colors that are available in the WordPress admin menu. For example, in the following screenshot I have changed the notification colors and you can see it changes the colors in WooCommerce. ![Notification bubble Colors for admin menu](https://d1k2c27psfzbiv.cloudfront.net/wp-content/uploads/2024/09/25051653/Notification-bubble-Colors-for-admin-menu.webp) --- # How to Customize Admin UI Template with WP Adminify? URL: https://wpadminify.com/docs/adminify/customize/adminify-ui-templates Last updated: 2026-07-16 To enable, Disable, and customize the WP Adminify UI, navigate to the `WP Adminify option panel > Customize`. You will notice an option called “Adminify UI”. Just toggle this option, and it will be enabled with the default Adminify UI. Introducing WP Adminify UI to enhance your WordPress Dashboard experience. We offer 9 pre-built UI with a custom color picker. Save the settings and reload to see the output. ## Adminify UI Templates WP Adminify offers a total of 9 UI templates and a color picker for users. Select any template and you can visually notice the changes without saving the settings. Change your WordPress Dashboard UI with Adminify UI Templates in one click. ### Custom Color Preset This option allows the user to provide a personal touch on their WordPress Dashboard. You can choose what colros you like to define as body, primary, secondary, Admin menu and much more. Use your own branding colors to create a personalised WordPress Dashboard with our color picker. ## Custom Background Instead of colors, you can use a Gradient and an image as your WordPress Dashboard background. To enable the custom background for your Dashboard, make sure to toggle on the switch first. ### Gradient Background By default, the background type is selected as Gradient. Now select the from and to colors properly. Then choose the direction for your Gradient. Finally, select scroll or fixed, whatever you prefer for your Background. Then save the settings and reload. ![Gradient Background in WP Adminify](https://d1k2c27psfzbiv.cloudfront.net/wp-content/uploads/2024/09/23114420/Gradient-Background-in-WP-Adminify.webp) ### Image Background Just select the background type as image. Upload your preferred image to your WordPress media library and choose from existing media in your library. Then customize other background image properties like Position, Size, Repeat, and Attachment. When you are done, just save the settings and reload to preview the changes. ![Add image background in WordPress Dashboard](https://d1k2c27psfzbiv.cloudfront.net/wp-content/uploads/2024/09/23115246/Add-image-background-in-WordPress-Dashboard.webp) That's all about the customization for WP Adminify UI Templates. --- # How to change the WordPress Dashboard Body Font? URL: https://wpadminify.com/docs/adminify/customize/change-the-body-font Last updated: 2026-08-12 Inside the Customize option, you will get an option called “Body Font”. Just select the font family and style from the Google Font library, and it will be applied to your Admin panel instantly. You can also check the preview of your selected font and style before saving the settings. ![Change Dashboard font in WordPress](https://d1k2c27psfzbiv.cloudfront.net/wp-content/uploads/2024/09/23115903/Change-Dashboard-font-in-WordPress.webp) ## WordPress Dashboard Font FAQs ### Which fonts can I use for the dashboard? Any font family and style from the Google Fonts library. Pick it in the Body Font option under Customize, preview it, and save - it applies to your admin panel instantly. ### Does changing the body font affect my website's visitors? No - this setting only changes the WordPress admin panel typography. Your theme controls the fonts visitors see on the frontend. ### Can I preview a font before applying it? Yes - the Body Font option shows a preview of the selected family and style before you save the settings. ## Related Documentation - [How to Change the WordPress Dashboard Favicon](https://wpadminify.com/docs/adminify/customize/change-favicon) - [Dark Mode and Light Mode Settings](https://wpadminify.com/docs/adminify/customize/light-dark-mode-customization) - [Blog: How to Change the WordPress Admin Font](https://wpadminify.com/change-wordpress-admin-font) --- # How to change WordPress Dashboard favicon icon? URL: https://wpadminify.com/docs/adminify/customize/change-favicon Last updated: 2026-08-12 The default Favicon that you used will be your Admin favicon. But we provide the ability to change the Dashboard favicon. Inside the customize option, you will notice the “Admin Favicon” option. Click on upload and it will open the media library. You can upload new media or choose any image file from your media library. After selecting your favicon, just save the settings and reload to preview the favicon. Change WordPress Dashboard favicon to get more control over your white label dashboard. --- # How to change the default logo in Gutenberg Editor? URL: https://wpadminify.com/docs/adminify/customize/change-gutenberg-editor-logo Last updated: 2026-08-12 We have an option called “Gutenberg Editor Logo” inside the customize options panel. Change your default logo in any editor that supportsthe default WordPress Gutenberg editor By default, you can see your website icon inside the Gutenberg editor logo. To define specific logo for the editor. Just upload the logo in this “Gutenberg Editor Logo” option and save the settings. Now visit the default WordPress editor and you will see the changes. You can also learn how to [change the default login page logo](https://wpadminify.com/change-wordpress-login-logo) here. --- # Dark Mode and Light Mode settings for WordPress Dashboard URL: https://wpadminify.com/docs/adminify/customize/light-dark-mode-customization Last updated: 2026-08-11 WP Adminify offers Dark mode and Light mode for the WordPress Dashboard by default. But if you are using WP Adminify UI then you wil get some extra customization for Dark mode and Light mode. ## Light Mode and Dark Mode In short, this option allows you to change the default WP Adminify logo to your logo, and you can schedule [WordPress admin dark mode](https://wpadminify.com/features/dark-mode) based on time or system. We have another dark and light mode switcher in the admin bar. Turn your WordPress Dashboard into dark mode or light mode in one click Let’s break down each step properly that is available in our Dark mode and light more customization area - ### Layout Mode This layout mode selector is the option that decides whether you would like to customize a logo for Dark mode or Light mode. The following option will dynamically change based on your layout mode selection. ![Dark and light mode settings](https://d1k2c27psfzbiv.cloudfront.net/wp-content/uploads/2024/09/24043256/Dark-and-light-mode-settings.webp) ### Logo Type You can set an image and text logo. Selecting the image allows you to upload an image to the media library and attach the image in the logo selection field. On the other hand, if you select text type, you will get a text field and typography options to change font styles. For Ex: watch the following video for setting a logo for light mode - Setting up a logo for light mode. Apply the same procedure for Dark mode too. ### Logo Size The logo that you have uploaded will replace the default WP Adminify logo in the top left corner. If you think your logo doesn’t align properly in the top left corner, then adjust the height and width properly to make it suitable for your branding. ### Mini Logo When you use our folded menu or click on the collapse icon beside the “New” button in the admin bar, you will notice the admin menu collapse, and a tiny logo appears. You can change this logo from this option. By default, you will get the WP Adminify logo icon. ![Add Mini logo for collapse admin menu style](https://d1k2c27psfzbiv.cloudfront.net/wp-content/uploads/2024/09/07061227/Add-Mini-logo-for-collapse-admin-menu-style.webp) ### Schedule Dark Mode You will not notice this “Schedule Dark Mode” option if you are on the “Light Mode” layout. So, make sure to choose “Dark Mode” layout and you will get the “Schedule Dark Mode” option. Here you will get a schedule type called “System” and “Custom”. If you select system, then WP Adminify will detect if your OS (Operating system) is on dark mode or light mode, based on your OS, your Dashboard will switch its mode. Select custom to define a specific time whenever you feel comfortable to stay in dark mode. ![Schedule Dark Mode](https://d1k2c27psfzbiv.cloudfront.net/wp-content/uploads/2024/09/24052038/Schedule-Dark-Mode.webp) --- # Hide some Admin Bar Items (Search form, notification icon, light/dark switcher) URL: https://wpadminify.com/docs/adminify/customize/hide-some-admin-bar-items Last updated: 2026-07-16 By default, you will notice 3 icons in the top right corner you called Search, Notification, and Dark light switcher. If you think any icon is irrelevant to you, then just hide a specific icon from the Customize option panel. There are some options called Search Form, Notifications Icon, and Light/Dark Switcher. All these option has a show/hide switcher. Just show or hide any icon based on your preference. Remove Search Form, Notification icon, Light/Dark switcher icon from the Admin bar --- # How to change the Post Status Background Colors? URL: https://wpadminify.com/docs/adminify/customize/post-status-background-colors Last updated: 2026-08-12 This is the last option of our Customize section. In short, this option lets you to customize your post status background color. For Example, you can define Green color as a background for your published post and purple color for draft post. ## Set the post status background color You can see the changes in your post or page, or any post types listing page. We offered 6 type of post status colors called Published, Draft, Pending, Private, Schedule (Future), Trash, Private. Use the color picker to generate the best color suitable for you, or copyand paste any desired color code. ## How to reset the post status background color? Click on the color picker for the post status. Now, check that there is a reset icon besides the color code. Just click on this reset code and save the settings. ![Reset Post status background color reset option](https://d1k2c27psfzbiv.cloudfront.net/wp-content/uploads/2024/09/07063743/Reset-Post-status-background-color-reset-option.webp) --- # Manage WP Adminify Pro URL: https://wpadminify.com/docs/adminify/getting-started/account-management Last updated: 2026-08-12 To manage your WP Adminify Pro account, follow these steps: - Log in to your WP Adminify [account](https://wpadminify.com/account) on the official website[.](https://wpadminify.com/) - Here, you can manage your websites, licenses, billing, and other account-related details. ## Managing Websites The Websites section displays all the websites linked to your WP Adminify Pro account. ![Check your webiste activated with WP Adminify](https://d1k2c27psfzbiv.cloudfront.net/wp-content/uploads/2024/09/23071441/Check-your-webiste-activated-with-WP-Adminify.webp) ## Download WP Adminify Pro The Downloads section in WP Adminify Pro account page allows you to download WP Adminify latest version plus [add-ons](https://wpadminify.com/addons) associated with your account. ### Available Downloads You will get the all list of WP Adminify and its addons that you have purchased. ![Download WP Adminify and Addons](https://d1k2c27psfzbiv.cloudfront.net/wp-content/uploads/2024/09/23071438/Download-WP-Adminify-and-Addons.webp) ### Download You will get a Download button for all of your purchased Plugin and Addon developed by us. Just click on this download button and it will be stored in your device within a few seconds. ## License Management In the Licenses section, you can view and manage your Pro license key(s). ![License Management in WP Adminify](https://d1k2c27psfzbiv.cloudfront.net/wp-content/uploads/2024/09/23071434/License-Management-in-WP-Adminify.webp) - Activate License: Whenever you install our WP Adminify plugin and it's pro addons in your different websites, it requires the license key. Just copy the key from this license page and paste while license activation. - Renew License: For annual users, when your license key expires, it will generally renew, but due to payment issues, if it fails, you can renew it manually in this license option. [We provide a reminder to our users 15 days before automatic renewal] ## Activating Your License on a New Website Every Pro website you run needs the license key from your account. The short version: copy the key once, then reuse it on each site your plan covers. - Open the Licenses section of your [WP Adminify account](https://wpadminify.com/account) and copy your license key. - Install the Pro plugin on the new site. The steps are in the [Pro installation guide](https://wpadminify.com/docs/adminify/getting-started/pro-installation). - Paste the key when the activation screen asks for it. The site then appears in the Websites section of your account automatically. If you hit your plan's site limit, deactivate the license on a site you no longer use (from that site's WP Adminify settings) before activating it on the new one, or upgrade to a higher plan on the [pricing page](https://wpadminify.com/pricing). ## WP Adminify Account FAQs ### Where do I find my WP Adminify Pro license key? Log in to your [account](https://wpadminify.com/account) and open the Licenses section. Your key is listed there, so copy it and paste it into the license activation screen on any site covered by your plan. ### How do I download the Pro plugin after purchase? The Downloads section of your account lists WP Adminify Pro and every add-on included in your purchase, each with its own download button. Download the ZIP and install it like any other plugin. ### What happens when my annual license expires? Annual licenses renew automatically, and you get a reminder 15 days before renewal. If the automatic payment fails, your sites keep working but stop receiving updates, so renew manually from the Licenses section to restore them. ### How do I get support for my Pro account? Check the [FAQ page](https://wpadminify.com/faqs) first for common account questions. For anything else, open a topic in the [WordPress.org support forum](https://wordpress.org/support/plugin/adminify/), or contact the team through your account or at [support@wpadminify.com](mailto:support@wpadminify.com). Pro customers get priority responses. ## Related Documentation - [WP Adminify Pro Version Installation](https://wpadminify.com/docs/adminify/getting-started/pro-installation) - [WP Adminify Free Version Installation](https://wpadminify.com/docs/adminify/getting-started/free-installation) - [Setup Wizard After Plugin Installation](https://wpadminify.com/docs/adminify/getting-started/setup-wizard) - [System Requirements](https://wpadminify.com/docs/adminify/getting-started/system-requirments) --- # How to Import/Export WP Adminify Settings? URL: https://wpadminify.com/docs/adminify/export-import/backup Last updated: 2026-07-16 You can easily import/export WP Adminify settings to avoid repetitive setups. Here’s how to do it. ## Step 1: Go to the Backup Settings To access import/export options, go to the following path: `WP Adminify > Backup.` ## Step 2: How to Export WP Adminify Settings You’ll see a few codes written in the “Export & Download” field. These are your current WP Adminify settings. ![Backup configuration settings in WP Adminify](https://d1k2c27psfzbiv.cloudfront.net/wp-content/uploads/2024/08/25071521/Backup-configuration-settings-in-WP-Adminify.webp) Click the “Export & Download” button, to export your current settings. A JSON file will be downloaded. You can keep the file if you want to import these settings on another website. ![JSON file of plugin options after download](https://d1k2c27psfzbiv.cloudfront.net/wp-content/uploads/2024/08/25071748/JSON-file-of-plugin-options-after-download.webp) ## Step 3: How to Import WP Adminify Settings on Another Site You can import your saved WP Adminify settings on a different WordPress website. Open your saved JSON file and copy all its content. Note: You get this file from exporting your settings mentioned in step 2. Paste the content in the Import box and click the “Import” button. ![Import options from JSON file](https://d1k2c27psfzbiv.cloudfront.net/wp-content/uploads/2024/08/25072015/Import-options-from-JSON-file.webp) ## Step 4: Save the Settings After you’re done with importing, click the “Save Settings” button to apply it. --- # How to Rebrand WP Adminify Plugin for Your Agency with White Labeling? URL: https://wpadminify.com/docs/adminify/white-label/rebrand-wp-adminify-plugin Last updated: 2026-08-12 If you’re an agency and managing client sites, you already know the importance of branding. WP Adminify lets you fully rebrand the plugin with your agency’s name, logo, URL and more. Let’s see how to do that. ## Go to WP Adminify White Label Settings To get the to the WP Adminify White Label go to the following path: `WP Adminify > White Label` Here, you need to go to the “"WP Adminify" Branding” section. ![WP Adminify plugin white label](https://d1k2c27psfzbiv.cloudfront.net/wp-content/uploads/2024/08/12110829/WP-Adminify-plugin-white-label.webp) Note: Remember this feature is only available from the Agency or higher plan. ## How to Change Logo for Light/Dark Mode In the “"WP Adminify" Branding” section, you can upload a logo for your light/dark mode. ![Change WP Adminify Plugin logo and agency name](https://d1k2c27psfzbiv.cloudfront.net/wp-content/uploads/2025/03/13060052/Change-WP-Adminify-Plugin-logo-and-agency-name.webp) It will automatically resize so you don’t need to worry about the logo size. Also, you can use any image file type and it will work. ## How to Change Plugin Name and Description WP Adminify also allows you to change the plugin name and description. ![Change WP Adminify plugin name and description](https://d1k2c27psfzbiv.cloudfront.net/wp-content/uploads/2025/03/13060054/Change-WP-Adminify-plugin-name-and-description.webp) In the “Plugin Name” text box you can name the plugin as you like. And in the “Plugin Description” you can change its description. ## How to Add Agency Name In the “Developer/Agency Name” text box, you can add your agency name to fully brand your agency. In the Plugin Name field, add your agency’s name or a custom plugin name. In the Plugin Description field, write a custom description like "Powered by [Your Agency Name]" or anything else that fits your brand. ## How to Change Menu Label and Menu Icon Menu Labels are positioned in the WordPress sidebar menu. ![Admin menu label and icon change](https://d1k2c27psfzbiv.cloudfront.net/wp-content/uploads/2025/03/13060453/Admin-menu-label-and-icon-change.webp) You can change WP Adminify’s menu label from the “Menu Label” text box. Also, you can upload your own menu icon from the “Menu Icon” uploader. ## How to Add Your Agency’s Website URL In the Plugin URL field, you can add your agency’s website URL. This is the link users will be redirected to when they click on the plugin name or logo. ![Change default Adminify Plugin URL with your Own URL](https://d1k2c27psfzbiv.cloudfront.net/wp-content/uploads/2025/03/13061150/Change-default-Adminify-Plugin-URL-with-your-Own-URL.webp) Step 6: Hide Plugin Row Meta Links Find the Hide All Row Meta Links option. Toggle it to Yes to remove links like Upgrade, Opt-In, and Settings from the plugin list. ## How to Hide/Remove Row Meta Links You can completely remove all row meta links. To do that, enable the button in the “Hide All Row Meta Links” option. ![Remove meta links from WordPress plugins page](https://d1k2c27psfzbiv.cloudfront.net/wp-content/uploads/2024/10/12161435/Remove-meta-links-from-WordPress-plugins-page.webp) However, you can also choose which items you want to hide. To do that, you’ll get the following options with checkbox: - Upgrade - Activate/Change License - Settings - Account Check the boxes next to any action links you want to hide. ## How to Hide White Label Options from WP Adminify Settings If you don’t want your clients to see or change any white label settings you’ve made, you can do that. In the bottom of the settings, you’ll see an option called “Enable Force Disable "White Label" Options”. ![Force Disable White Label Options](https://d1k2c27psfzbiv.cloudfront.net/wp-content/uploads/2024/10/12161429/Hide-WP-Adminify-White-label-option-after-customization.webp) If you mark the checkbox, your clients won’t be able to see the White label options. Note: You can get these settings back by deactivating and reactivating the plugin again. ## Save Your Settings After you’re done with your selection and customization, click the “Save Settings” button to apply the changes.